Picking olives for oil – how to produce enough oil for a year when you don’t own any olive trees

Ah, the annual olive oil harvest. For the last several years, I’ve dedicated a weekend to picking olives and sending them to an olive press to extract the oil. This gives me enough olive oil to last me for a year.

And I don’t own any olive tress.

Every year I’ll post about it on social media, and there are always lots of questions. Questions like:

Where do I find all the olives?

Are there particular types?

How much oil do you get from a kilo of olives?

Where is there an olive press?

And how do I join in?!

After all, there are abundant olive tress in the area where I live, most people use olive oil to some extent in cooking, and everybody likes the idea of getting fresh, local food for free.

(Except it’s not quite free, and I’ll come to that later.)

I just love the olive oil harvest – it ticks all my boxes. Reducing food waste and making use of a “waste” product, local produce with almost no food miles, community (I’ll come to that later too), and the fun and resourcefulness that comes from tracking down all the olives.

Here’s how I go about it.
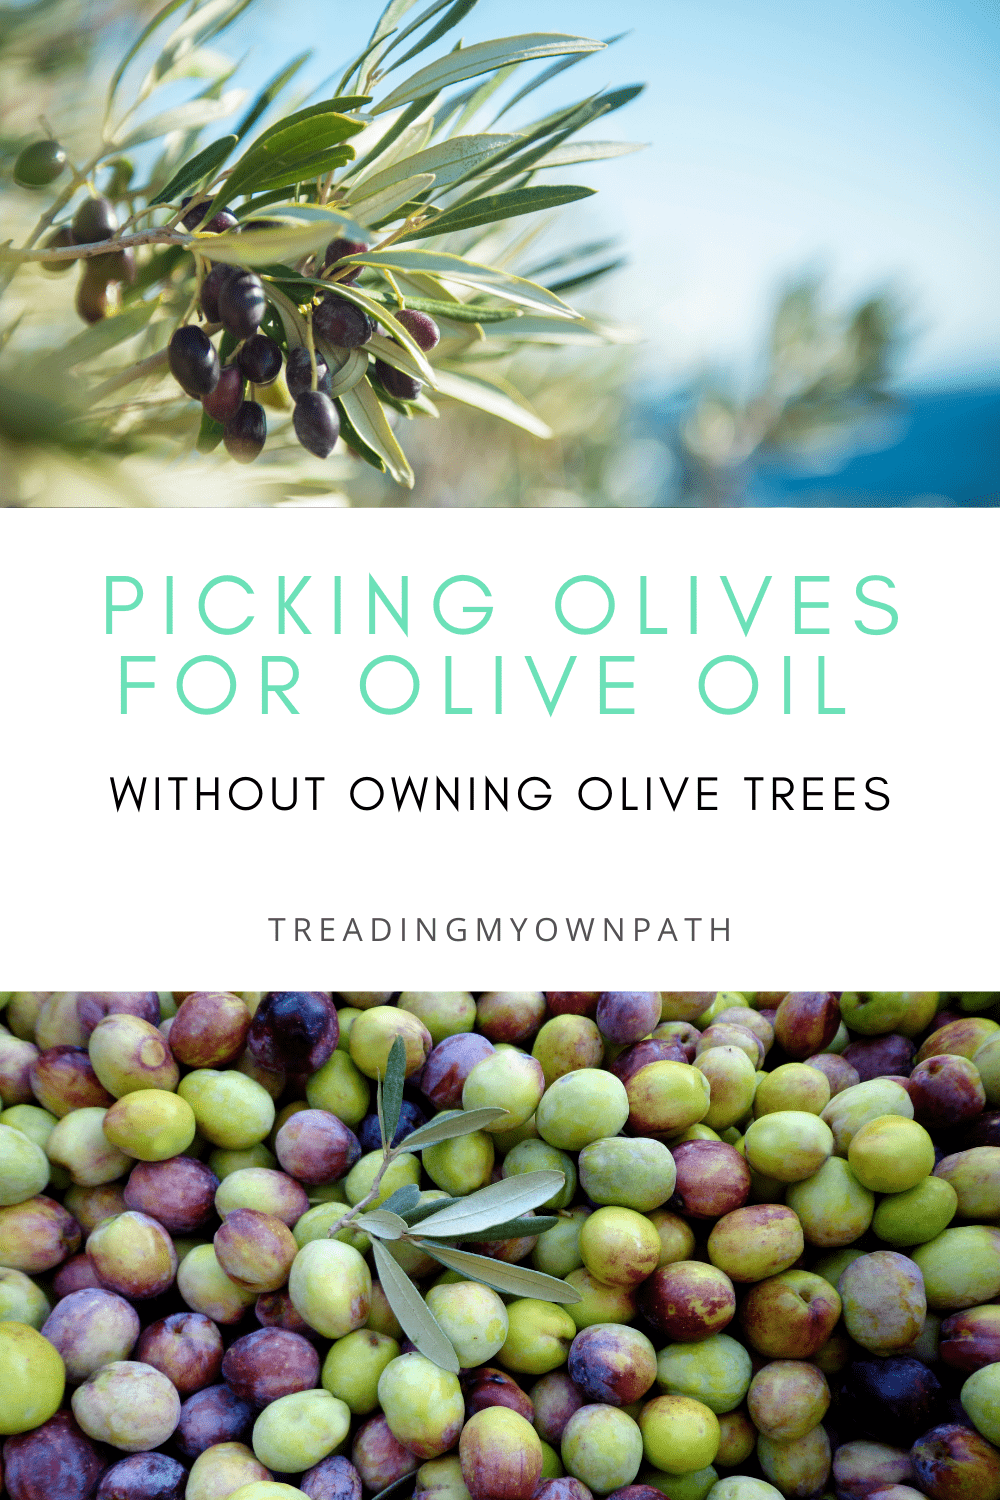
Step 1: Find your people

Olive harvesting (for oil) is something that’s much better to do as a group or community activity than as an individual activity. There are many reasons (including, because doing things as a community is fun!) but the most expensive part is the pressing, and combining olives makes for cheaper olive oil.

The more olives you have, the cheaper it is to press them per kilo.

There might not be a minimum quantity to press your olives, but there will probably be a minimum charge.

At the Jumanga olive press (one of the local Perth presses I’ve used), the processing costs are $26 plus 0.58/kg for quantities up to 55kg and a fixed rate of $58 for 55kg – 100kg. There is a per kilo price above 100kg, their rate drops above 200kg, and drops again above 400kg.

At the York olive oil press (another press local to Perth that the community garden use) there is no minimum quantity of olives, but there is a minimum charge of $190. The York press is better for medium to large batches (their rates drop after 1 tonne, after 2 tonnes, and after 4 tonnes).

Bring anything under 350kg, and you’ll pay $190 (even if you just have 35kg).

And if you need to find 350kg or more of olives, you’ll probably need to find some friends.

Finding friends: there are two options here, either get together with some friends and do it yourself, or find an existing group to join.

I’ve done both, and there are pros and cons to each.

Doing it yourself with a group of friends is the cheapest option, and if you all go picking together can be super fun. But there will be a few logistics you’ll have to sort out.

You’ll need suitable containers to transport the olives, as well as actual transport (and 350kg isn’t light or a car boot job). Is there someone who can deliver the oil to the press on a weekday, and then drive back on another day to collect it? You’ll need a vessel for the pressed oil, and a way to share it with everyone.

Joining an existing group is the easier, but more expensive option. Often participation is limited to members, and so you’ll probably need to pay a membership fee to join. Some community groups will also take a portion of your oil to use for fundraising or other purposes.

So you’ll pay more and get less oil, although you’ll probably benefit from a lower press rate, and someone else will sort all the logistics and transport out for you.
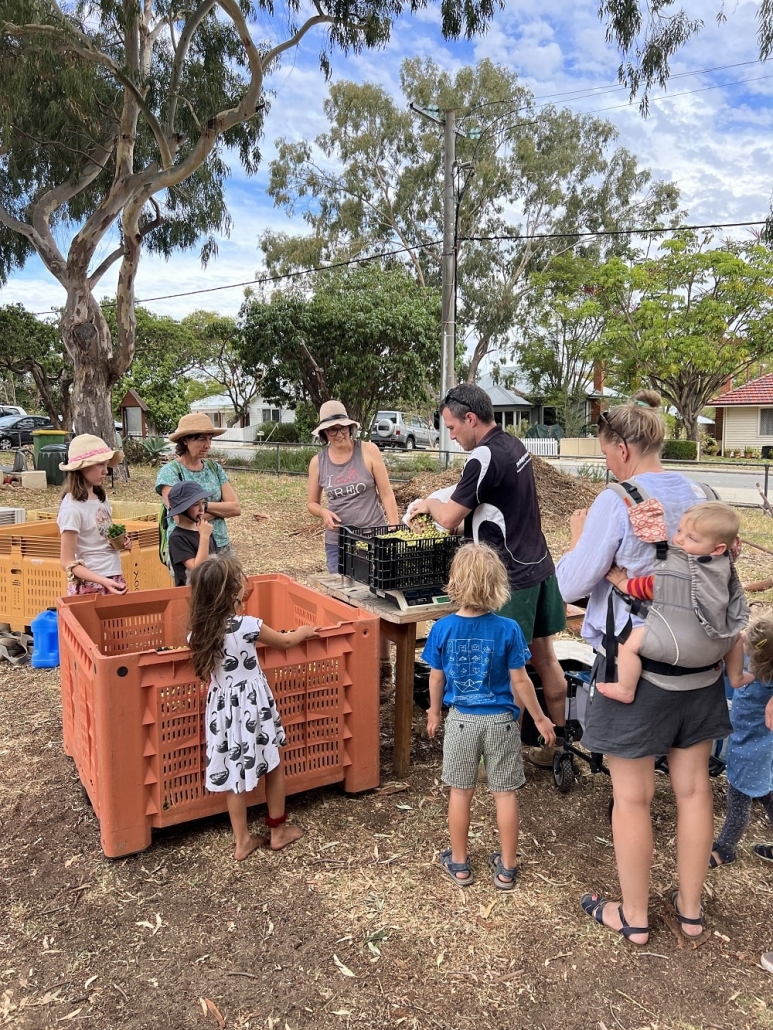
Olive oil harvest 2022 at Hilton Harvest Community Garden

Step 2: figure out how many olives you need

You need a lot of olives to make oil. Typically the yield of oil from olives is 9 – 15%. That means 10kg olives might give you one litre of oil.

There are lots of factors that determine yield. These include:

  • variety – there are 50 -100 types of olives in Australia alone (and several thousand worldwide), with some being better for oil and some being better for eating (these are called table olives);
  • Rainfall/water – large ‘swollen’ olives saturated with water don’t have more oil than small ones, and shrivelled olives might be better for oil;
  • Time of year, or how far into the season it is, which varies according to the weather each year (a late spring means a later harvest);
  • The press used – a commercial press will do a better job than trying to make olive oil at home with a blender.

So when you’re thinking about picking olives, ask yourself how much oil you’d like, and work backwards. 2 litres of oil is 20kg olives (roughly). If you want one litre a month for the year, that’s 12 litres, or 120kg of olives.

Step 3: Book the press

The thing you need last is the thing you need to do first. You can’t just rock up to an olive press with 350kg olives and hope they’ve got space for you! Picked raw olives don’t store for long. You need to know before you head to the press that your spot is booked.

And in olive season, everyone wants their olives pressed at the same time, so it’s busy. (In Perth that’s mid-March to early June.)

We’ve even booked a press a year in advance to guarantee a spot. I’d recommend booking as early as you can.

When you book, you’ll also have to commit to the amount. Whilst there’s a bit of flexibility there, it’s unhelpful for the press operators when people commit to 2 tonnes and then deliver 300kg. Some presses will charge you if you bring more than you pledge.

Once you know the date, you can start planning the harvest. In all the years I’ve been doing it, we’ve always booked the press on a Monday so that all the picking can happen at the weekend.

Step 4: find olives!

Prior to the picking weekend, it’s a good idea to suss out the options. This means finding olive trees on public land, or finding olive trees in people’s yards.

(I count verge trees as people’s yards, even though they are technically public land, as often the residents look after the trees with the intention of picking the olives. Always ask the resident before picking olives from the verge.)

Because olives are a lot of work to process, many people don’t have time to use them. Lots of people hate the mess and staining that black olives make, and you taking them away is also doing them a favour.

Finding olives could mean cycling or driving around the neighbourhood looking for laden olive trees, and then knocking on the door or posting a note in the letterbox.

Or it could mean asking on social media – on community pages, for example – whether anyone has an olives they won’t be using.

(This is what I do, although there’s a bit more risk here as one person’s “heaps” might only be a yoghurt tub full. Or there might be heaps… five metres up from the ground.)

Then again, you might get lucky and they’ll prune the tree for you!
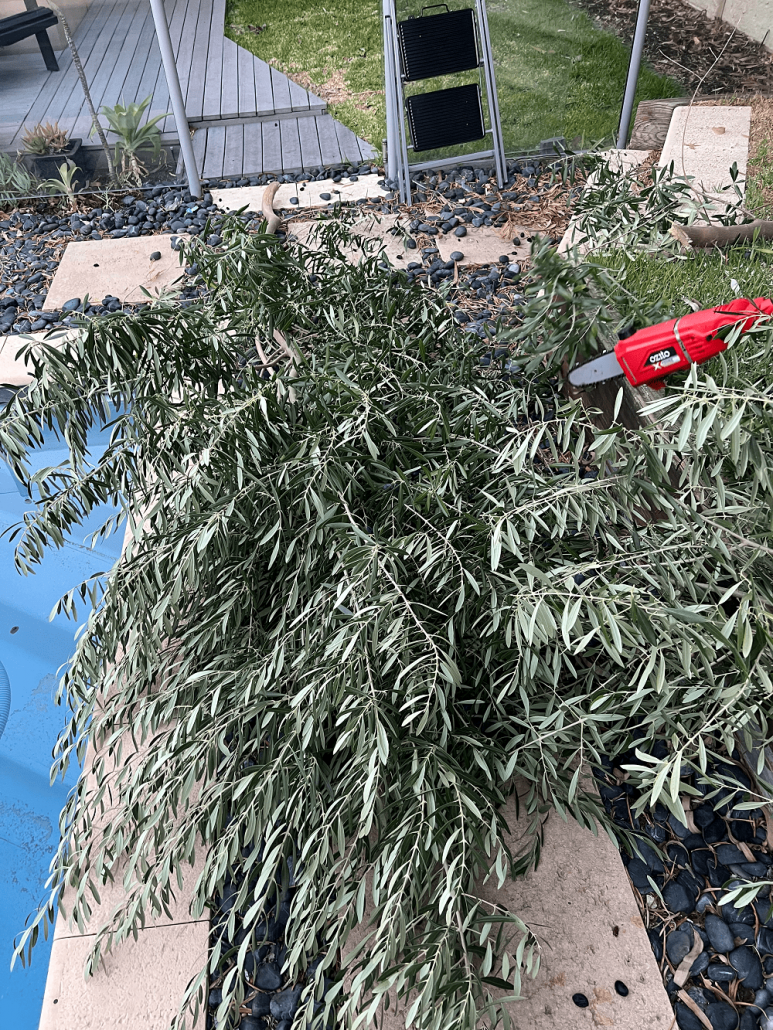
Try to avoid trees on busy roads as they will have bonus exhaust fumes included.

Olive trees tend to fruit well every two years, so one year’s bumper tree might be slim pickings the following year. Meaning, you can’t rely on last year’s winners.

Step 5: picking olives

Once picked, olives have a short shelf life (no more than three days). So the couple of days before the press is when ALL the picking needs to happen.

If you’ve committed to a reasonable amount of olives, it’s best to clear your calendar.

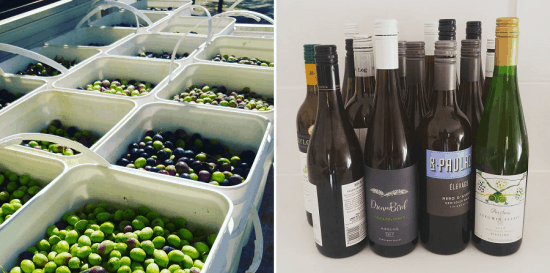
I usually commit to 84 – 96kg. The buckets I use hold roughly 12kg each, so I always commit to a multiple of 12 so I can think of it in buckets. 96kg, which is what I committed to this year = 8 buckets. Although the weight will vary slightly.

This year I’m picking with a community garden, and I need to give 15% of my olives to them as part of the agreement.

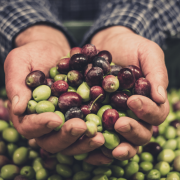
I ended up picking 107kg of olives, so 91kg will be pressed into olive oil for me. I should get 9 litres of oil to last for the year. From all of these olives:
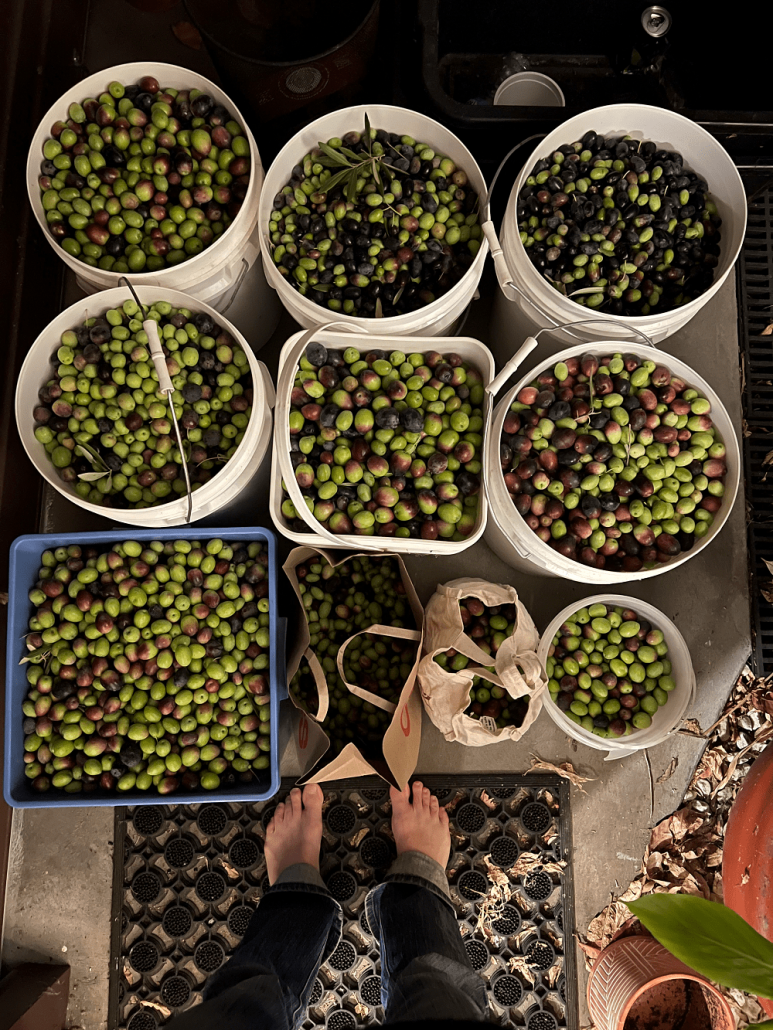
Olive oil harvest 2022

Which olives to pick:

Olives change from green to black as they ripen.

Ideally, you’d pick olives that are green and purple (either 50/50 or 33/66) as they taste best and have a better yield.

Fully green olives can still be picked. They are stronger flavoured and peppery, and have a lower yield. They are also the hardest to pick (they won’t dislodge by shaking the tree)/

Fully purple/black olives are very mild, but often lower in oil than the mixed colour olives. They are very easy to pick, and fine when mixed with green olives.

Wrinkly olives are also fine if the wrinkles are from lack of water and not from being overripe, and aren’t completely shrivelled.

When it comes to picking olives, especially in a community setting, quantity is EVERYTHING. Everyone picks everything they can get their hands on. Except bad, mushy, mouldy olives, of course.

(Commercial olive oil producers would be a lot more discerning.)

Picking everything results for a lower yield than if only oil olives were picked at the perfect time, but the oil tends to have a good flavour as the green, black and mixed colour olives, and all the different varieties, blend together to even one another out.

How to pick:

I’m not going to tell you how to pick as everybody has their system. My friend uses rakes and thinks it”s the only option, and wouldn’t do it any other way. (She picked 180kg this last harvest, so it’s clearly working for her.) You rake the oolives literally and they fall onto a tarp, and you gather them up.

I don’t like the rake option, and I’ve tried it more than once.

I attach a large yoghurt tub with a handle over my wrist, and strip the branches of olives with one hand so they fall into the tub on the other, then decant them into the big bucket. It works for me, and it’s faster than anything else I’ve tried.
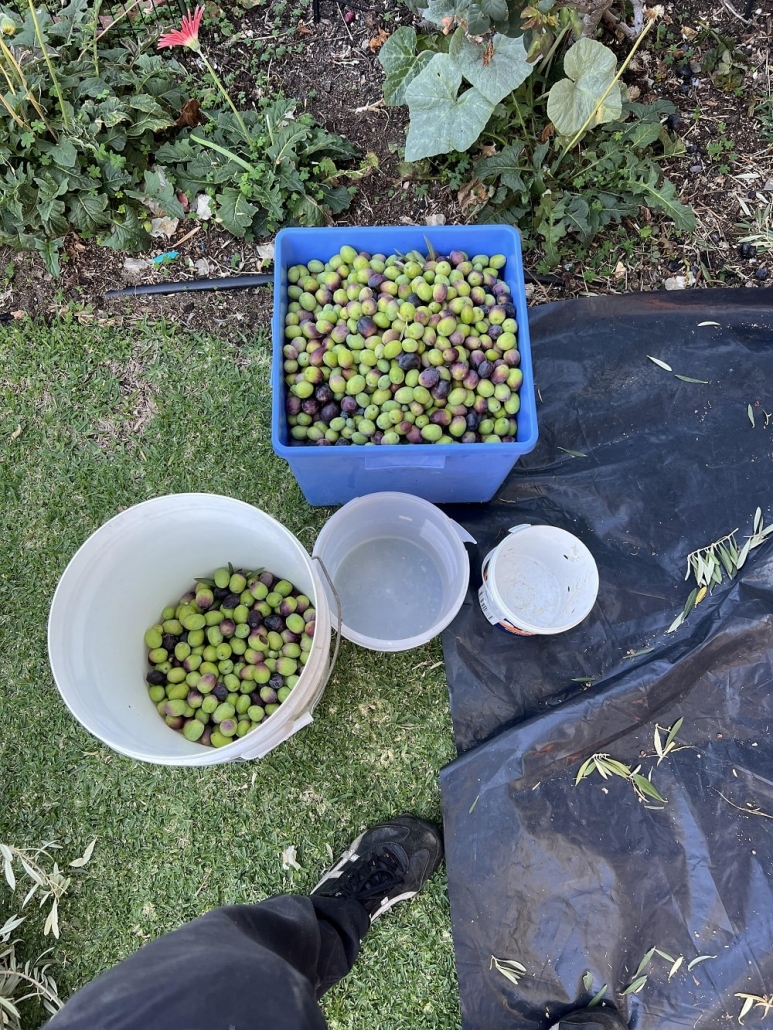
Olive oil harvest 2022

A tarp is useful to collect fallen olives.

A ladder tends to be helpful.

Step 6: take to press

I have to confess, in the 7+ years of doing this I’ve never actually been to the press myself. I do know that in some years the driver has been able to wait and then bring back the oil the same day, and in other years they’d have to return later in the week to collect. I think it just depends how busy they are.

You do need to provide large containers for the press to put the olive oil into.

Step 7: bottling

The oil from the press is unfiltered, which means it contains sediment – just natural fruit waxes and nothing unsafe. Ideally, let the oil sit for 4 – 6 weeks in a cool, dark place to settle before decanting.

Most people use wine bottles to store the olive oil. They are a good size, easy to come by and to clean, and a useful size to use in the kitchen. Dark glass is preferable to clear glass.

Other common questions

I’ve tried to answer some of the other questions I’m asked about olive picking and oil pressing below.

How much does it cost per litre?

The cost of the press is the biggest cost, but isn’t the only cost. There many be vehicle hire and fuel costs (both the presses I mentioned are quite far from the centre of Perth), and the cost of bottles or containers required by the press.

If you need to pay a membership fee to be able to participate, that’s a cost to factor.

The yield obviously makes a difference too – am 18% yield will mean more oil and a lower per litre cost than a 9% yield.

When I used to pick with friends, I’d pay $3.50 – $4 per litre.

Now I pick with a community garden I need to pay membership for, my costs are higher. Last year the cost of oil was $4.92 per litre, but combined with the membership fee worked out more like $7.26 per litre.

Do I give any oil to the people who gave their olives?

Generally, no, although if someone has a particularly fruitful tree, and helps me pick the olives, then I try to drop a small bottle of olive oil round to say thank you. But the whole process is a lot of work (and time), and then there’s a cost, and if I pick a bucket from a tree that only equals 500ml of oil, so there’s not really an excess.

I guess in that way olive oil is quite different to picking other fruits, where your yield is literally what you pick (minus some peels or core, perhaps).

How do I join in?

There are a few community groups in Perth that I know of that do an olive pick/press and are open to new members (if you know any others, please let me know and I’ll add them to the list).

Hilton Harvest Community Garden

North Fremantle Social Farm

Is it worth the effort?

It can be a little stressful when it gets to the weekend of picking and you realise you’re going to be way under your quota if you don’t find more trees, fast. Sometimes the weather can suck, but it’s not possible to postpone. By the end of the day, your whole body aches.
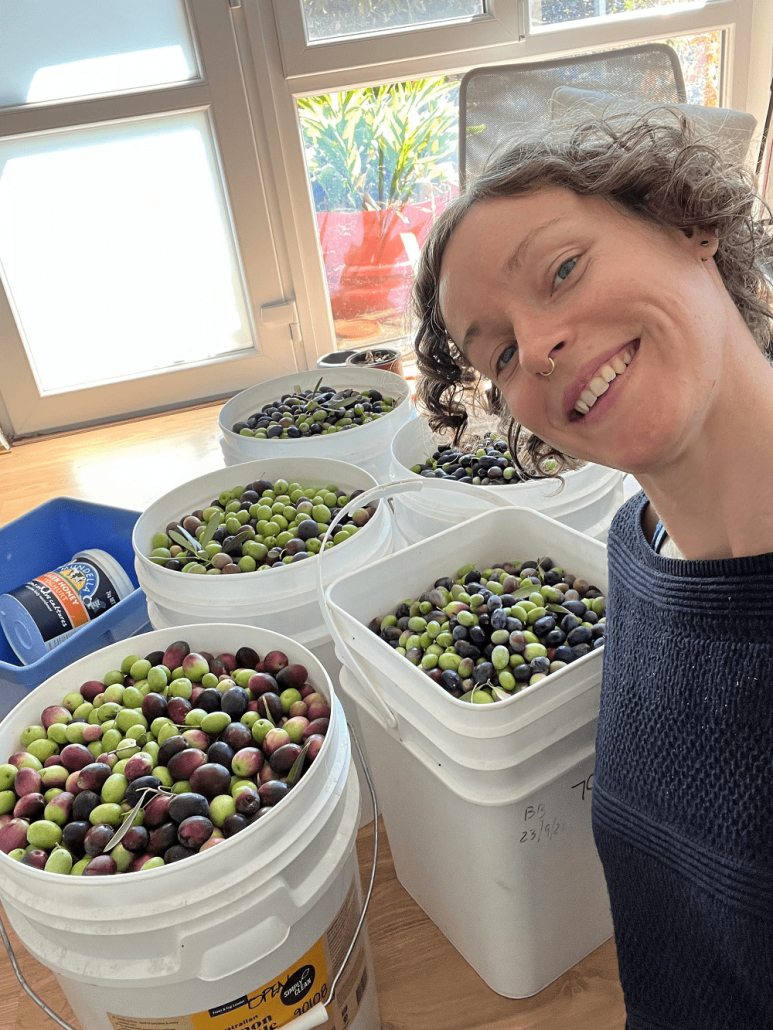
Olive oil harvest 2022

But the satisfaction, to me, of seeing all those buckets of olives that would probably have been wasted – it’s priceless. Most definitely worth it.

Maybe you’ll give it a go yourself next year?!

Now I’d love to hear from you! Any other questions I didn’t answer? Any tips for good public olive trees, or community picking groups to join? Any other presses you recommend (or not)? Anything else to add? Please leave your thoughts in the comments below!
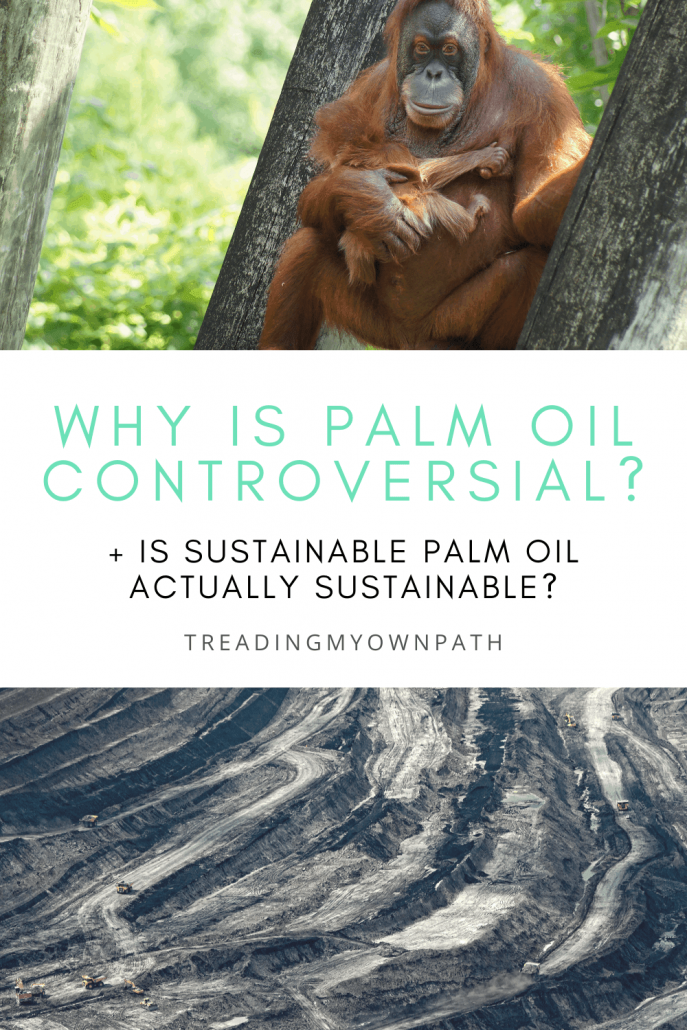
What’s the Controversy with Palm Oil (and is Sustainable Palm Oil Actually Sustainable)?

I’m guessing you’ve heard of palm oil. And I’m guessing that you’ve heard that it’s bad, or at least, you heard it’s bad for the orangutans. But if it’s so bad, you’re probably also wondering why all the companies that use it think it’s so good, seeing as it’s in around half of all packaged goods in the supermarket.

There’s got to be a reason for that, right? Otherwise wouldn’t they just swap it out for something else?

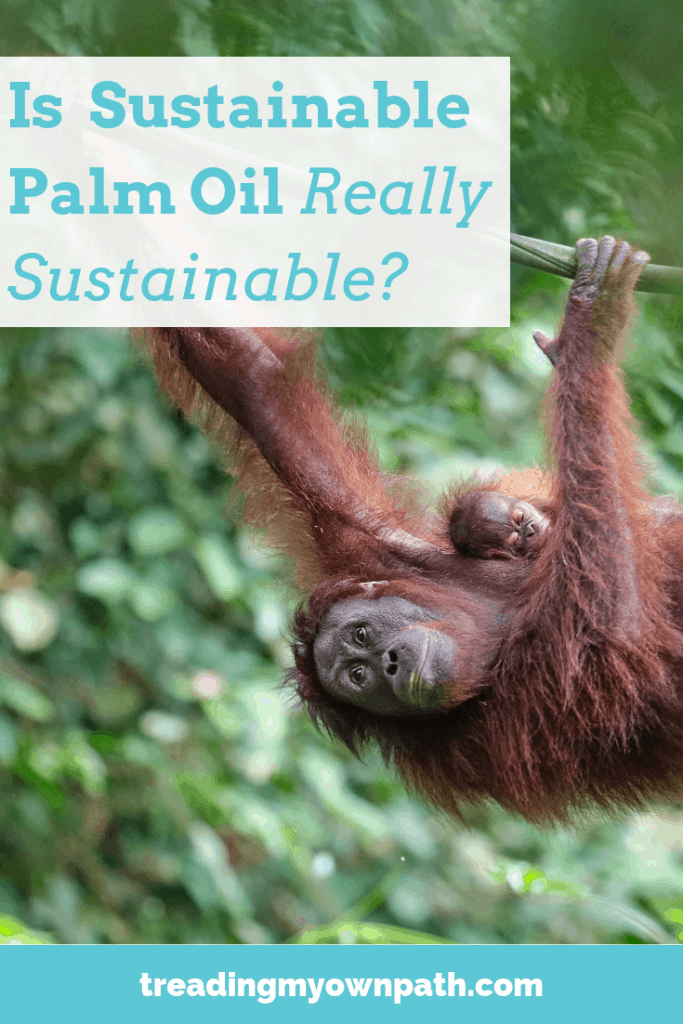
And what about certified sustainable palm oil? That sounds good, yes? So why do many environmental groups call for a boycott or ban on all palm oil, including certified sustainable palm oil?

Palm oil gets talked about a lot, but sometimes it can be hard to separate fact from fiction. Here’s the lowdown: what’s so good about palm oil, what’s so bad about palm oil, and what certified sustainable palm oil really means.

What Is Palm Oil?

Palm oil is an edible vegetable oil, and it is produced from the fruit of the oil palms (a type of palm tree): primarily the African oil palm Elaeis guineensis, but to a lesser extent the American oil palm Elaeis oleifera and the maripa palm Attalea maripa. Palm kernel oil is a different oil, but it comes from the same plant – this oil is produced from the seed, not the fruit.

Oil palms are tropical rainforest plants, requiring high rainfall, humid conditions and warm temperatures. It grows best when planted 10° north or south of the equator. Oil palms are more productive when grown in plantations, fruiting after 2-3 years until 25-30 years, when they need to be replaced.

What’s So Good About Palm Oil?

Oil palm trees produce more oil from less land than any other oil crop (5x the second-highest oil crop, rapeseed, 6x more than groundnut and sunflower oils, and more than 10x crops like soy bean or coconut oil). The trees also fruit continuously, making them a reliable crop to grow and accessible for smallholders.

The fruits and kernels also have lower production costs than other oil crops, which makes palm oil an efficient and profitable crop to grow.

Because of this, palm oil is the cheapest plant oil to produce (whilst still being profitable for the growers), which makes it popular for use in foods and toiletries. 10% of palm oil is currently grown to produce biofuel.

Palm oil is tasteless, and has a long shelf life compared to other plant oils. Another advantage of palm oil is that it is semi-solid at room temperature, and can be easily refined into liquid and solid oils. The solid fraction has a melting point of 35°C (95°F). Solid palm oil is used in baked goods and pastry as a cheaper (and dairy-free) alternative to butter, in chocolate and desserts as a much cheaper alternative to cocoa butter, and in dairy-free spreads.

In cosmetics it’s a good foaming agent and considered preferable to using animal tallow (animal fat). It’s often used in soap to create bars that are harder and last longer.

In the 1960s, with concerns around the high saturated fat content of animal products like lard and butter, manufacturers began making alternatives by hydrogenating vegetable oils low in saturated fat to make them solid. Partly this was driven by health concerns, but it was also cheaper to produce. These trans-fats was later discovered to be even less healthy than saturated fats and many countries are now legislating to remove trans-fats from food (there are bans in Europe and Canada).

This left manufacturers looking for an alternative, which they found in palm oil.

Very few plant oils are solid at room temperature: the main alternative is coconut oil which has a lower melting point of 24°C (75°F). Cocoa butter is very expensive, and shea butter is rarely used in food products. With the rise in demand for vegetarian and vegan products, palm oil is a good alternative for products that traditionally would use butter or animal fat.

‘Good’, of course, depends on your perspective.

What’s So Bad About Palm Oil?

One of the biggest concerns with oil palms is that this demand for palm oil has meant a significant amount of deforestation, because forests are what grow on the land that is prime for palm oil plantations.

Deforestation means displacement of indigenous people and wildlife habitat loss as old growth rainforest is cleared to make way for new plantations. Animals that have lost their homes enter plantations looking for food: they are seen as a threat to the oil palm crops and considered pests, and often shot.

84% of all the palm oil produced worldwide comes from Indonesia and Malaysia. This also happens to be the only place in the world where orangutans live (on the islands of Borneo – which has both Indonesian and Malaysian territory – and Sumatra, which is Indonesian).

The WWF estimates there were over 230,000 orangutans in the wild a century ago, but their population has halved over the last 100 years, and the Sumatran orangutan is now critically endangered.

Orangutans might be the most famous victims of palm oil, but they aren’t the only species at risk. The Sumatran elephant, tiger and rhino and the Bornean pygmy elephant are also threatened.

Land clearing isn’t the only threat to wildlife – poaching and logging are also issues – although in Indonesia it can be easier to get a land clearing permit than a logging permit, so land is often cleared for logging under an oil palm permit, but no oil palms are subsequently planted.

Palm oil isn’t just a threat for wildlife: it’s a threat for the climate. Another concern with palm oil is that many areas used for oil palm plantations are natural peatlands. Clearing of peatlands and planting of oil palms in these ares increase risk of fire, and the UN suggests peatland fires contribute around 5% of human-caused carbon emissions.

Palm oil is also the 6th most heavily fertilised food crop in the world per hectare. Chemical nitrogen fertilisers are made using natural gas, which can react with nitrogen gas in the air during an exchange that takes place at 400-500°C. This requires fossil fuels not only for the reaction but also to get to these temperatures.

It is estimated that the nitrogen fertiliser industry accounts for 3-5% of all natural gas used and causes more than 1% of all greenhouses gas emissions produced worldwide.

What Is Certified Sustainable Palm Oil – and Is It Sustainable?

The Roundtable for Sustainable Palm Oil (RSPO) was established in 2004 by a collective of industry representatives, environmental groups and social advocacy groups to promote the growth and use of sustainable palm oil products. It now has over 4,000 members worldwide, who have all committed to produce, source and/or use sustainable palm oil certified by the RSPO.

To support this, the RSPO have developed a set of environmental and social criteria which companies must comply with in order to produce Certified Sustainable Palm Oil (CSPO). The RSPO trademark was launched in 2011, and RSPO currently certify about 20% of global palm oil production.

The RSPO is not without criticism. When the certification began in 2005 it was found to be complicated, costly and hard to implement. Many consider the standards to be weak, enforcement is limited and there is little retribution for non-compliance.

Certification can be given to palm oil plantations planted on land cleared of tropical forest, which begin as non-certified palm oil and later apply for the sustainable palm oil accreditation: this hides the reality that this certified plantation was recently tropical forest.

Studies have repeatedly shown that certified sustainable palm oil does not stop deforestation (although it may slow it down), it does not reduce the threat of fire or halt the decline in orangutan populations, and there are questions around whether it actually lifts people out of poverty.

Is ‘Certified Sustainable Palm Oil’ Greenwashing?

Many critics of the RSPO call it little more than greenwashing; a way for corporate palm oil stakeholders to look good to the public whilst continuing business as usual.

Some call for a full ban on palm oil, and many shoppers choose to boycott palm oil altogether.

Others critics argue that despite its flaws, a certification scheme for sustainable palm oil is still better than nothing at all, and it provides a way for organisations and companies to transition to more sustainable practices.

Supporters of the scheme, which include the WWF, argue that palm oil is necessary because it is cheap, more efficient than other oil crops, and provides economic benefits to the countries that produce it.

But production has roughly doubled every year since the 1970s, from around 2.5 million tonnes in 1970 to 75 million tonnes today (it’s estimated to reach 240 million tonnes by 2050). It is hard to imagine that such rapid growth can happen in a way that is truly sustainable.

This continued demand means the threat to natural tropical rainforest areas remains as great as ever, as does the threat to wildlife.

What Can We Do About the Palm Oil Problem?

Start With an Audit of Your Pantry and Bathroom Cupboard.

If palm oil is something you’re concerned about, the first thing to do is find out whether any products you’re using actually contain palm oil.

If you live in Europe, an EU law on food information that came into force in 2014 requires that palm oil must be clearly labelled as palm oil: it cannot be called vegetable oil. The US FDA also requires that oils be declared by their common or usual name in food products.

However, in Australia there is no such requirement and palm oil can be labelled as vegetable oil. Most companies will have information about whether they use palm oil on their websites, or will answer requests for information, so you may have to contact them directly to find out.

With non-food products, palm oil may be labelled as Elaeis guineensis, which is the name given to palm oil by the International Nomenclature Cosmetic Ingredients (INCI).

So far, so simple. However there are actually over 200 ingredients in food and cosmetics that can be derived from palm oil (you can find the list here). If you come across an ingredient in a product, ask the manufacturer for clarification of its origins.

If a Company Uses Palm Oil, is it Certified Sustainable Palm Oil? Switch Out Non-Sustainable Palm Oil First.

Most companies who use Certified Sustainable Palm Oil (CSPO) don’t use the logo on their packaging, but they will be keen to tell you their sustainability credentials on their website or if you ask.

If your audit reveals a lot of products containing palm oil, a next step would be to find out which ones use CSPO and which ones do not.

This gives you a priority list of products to swap out first. Better to support a company at least trying to do better over one that is not.

As well as swapping products, it is worth telling both the company whose product you’re no longer buying and the company whose product you’re switching to why you’re making the swap. Send a quick email, letting them know. This makes them aware that their customers are concerned about palm oil in products.

Slowly Switch Out Products that contain Palm Oil for Those That Don’t.

One by one, as the things you buy run out, start looking for a palm-oil free version.

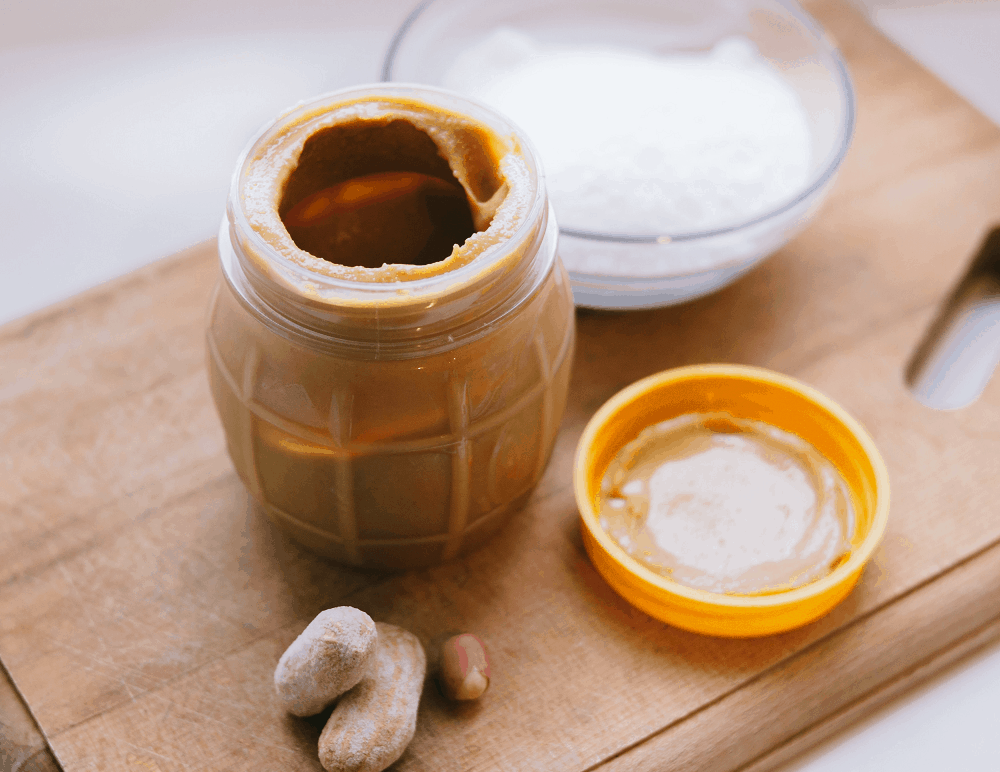
Some products are easy switches. Palm oil doesn’t need to be in things like peanut butter, it’s added in because it’s a cheap filler. The same goes for chocolate bars: palm oil is simply cheaper than cocoa butter.

Some products are trickier. It may mean switching to a slightly different product (muesli over processed cereal) or it may mean deciding to make our own (and learning how to make our own).

The more processed a product is, the more likely it is to contain palm oil. Switch to less processed foods and less packaging and you’ll reduce your palm oil consumption, naturally.

Ultimately, the problem isn’t oil palms, it’s the way we’re using palm oil. Supporters of palm oil love it because its cheap. But do we really need to make more cheap fast food and processed snacks with empty calories?

Everything comes with a price. Cheap palm oil that results in deforestation, habitat loss, displacement of indigenous people, wildlife extinction and greenhouse gas emissions actually seems like a very high price to pay for low-cost shampoo and snacks.

Now I’d love to hear from you! Is palm oil something you’re concerned about or not? Have you ever audited the products you buy to find out how many contain palm oil? Do you have any ideas for anyone wanting to reduce their palm oil? Anything else you’d like to add? Please share in the comments below!

All links to facts and figures can be found here.

Where I Find My Zero Waste Consumables (Groceries and Food)

This week I headed off on my six-monthly journey up to the Swan Valley, which is the other side of Perth, to stock up on some bulk products that I simply can’t get anywhere else.

It made me think: there’s plenty of places I talk about often, because I use them often (such as my local bulk store, or my local veg box delivery).

But there are other places where I source zero waste items that I talk about less often.

If I’m going to paint a complete picture, I thought it might be helpful to explain where I source ALL the things I use.

Of course, if you live in Perth, these lists will probably be extra useful! If you’re not in Perth, hopefully it will give you some ideas about the kinds of places you might be able to source products in your own area.

At the very least, it might open your mind to new alternatives.

There’s a lot to say, so rather than overwhelm you, I’ve divided it up into sections. Today I’m talking about zero waste consumables (food and grocery items).

I’ll follow up next week with a post about consumable personal and cleaning products, and then with non-consumables (the buy-me-once type items) in the coming weeks, so stay tuned.

Where I Source Zero Waste Consumables

By consumables, I mean things that run out, get used up and need replacing. Things like food, personal care products, and cleaning products.

Whilst I source things from a number of different places, I’m not going to all the places all of the time. Some places I only visit twice a year. Others I visit weekly. Over time I’ve established a routine that works for me.

Zero Waste Grocery Shopping: Dry Goods

This is the one that gets talked about all the time, because food runs out more quickly than anything else (well, it does in my household)!

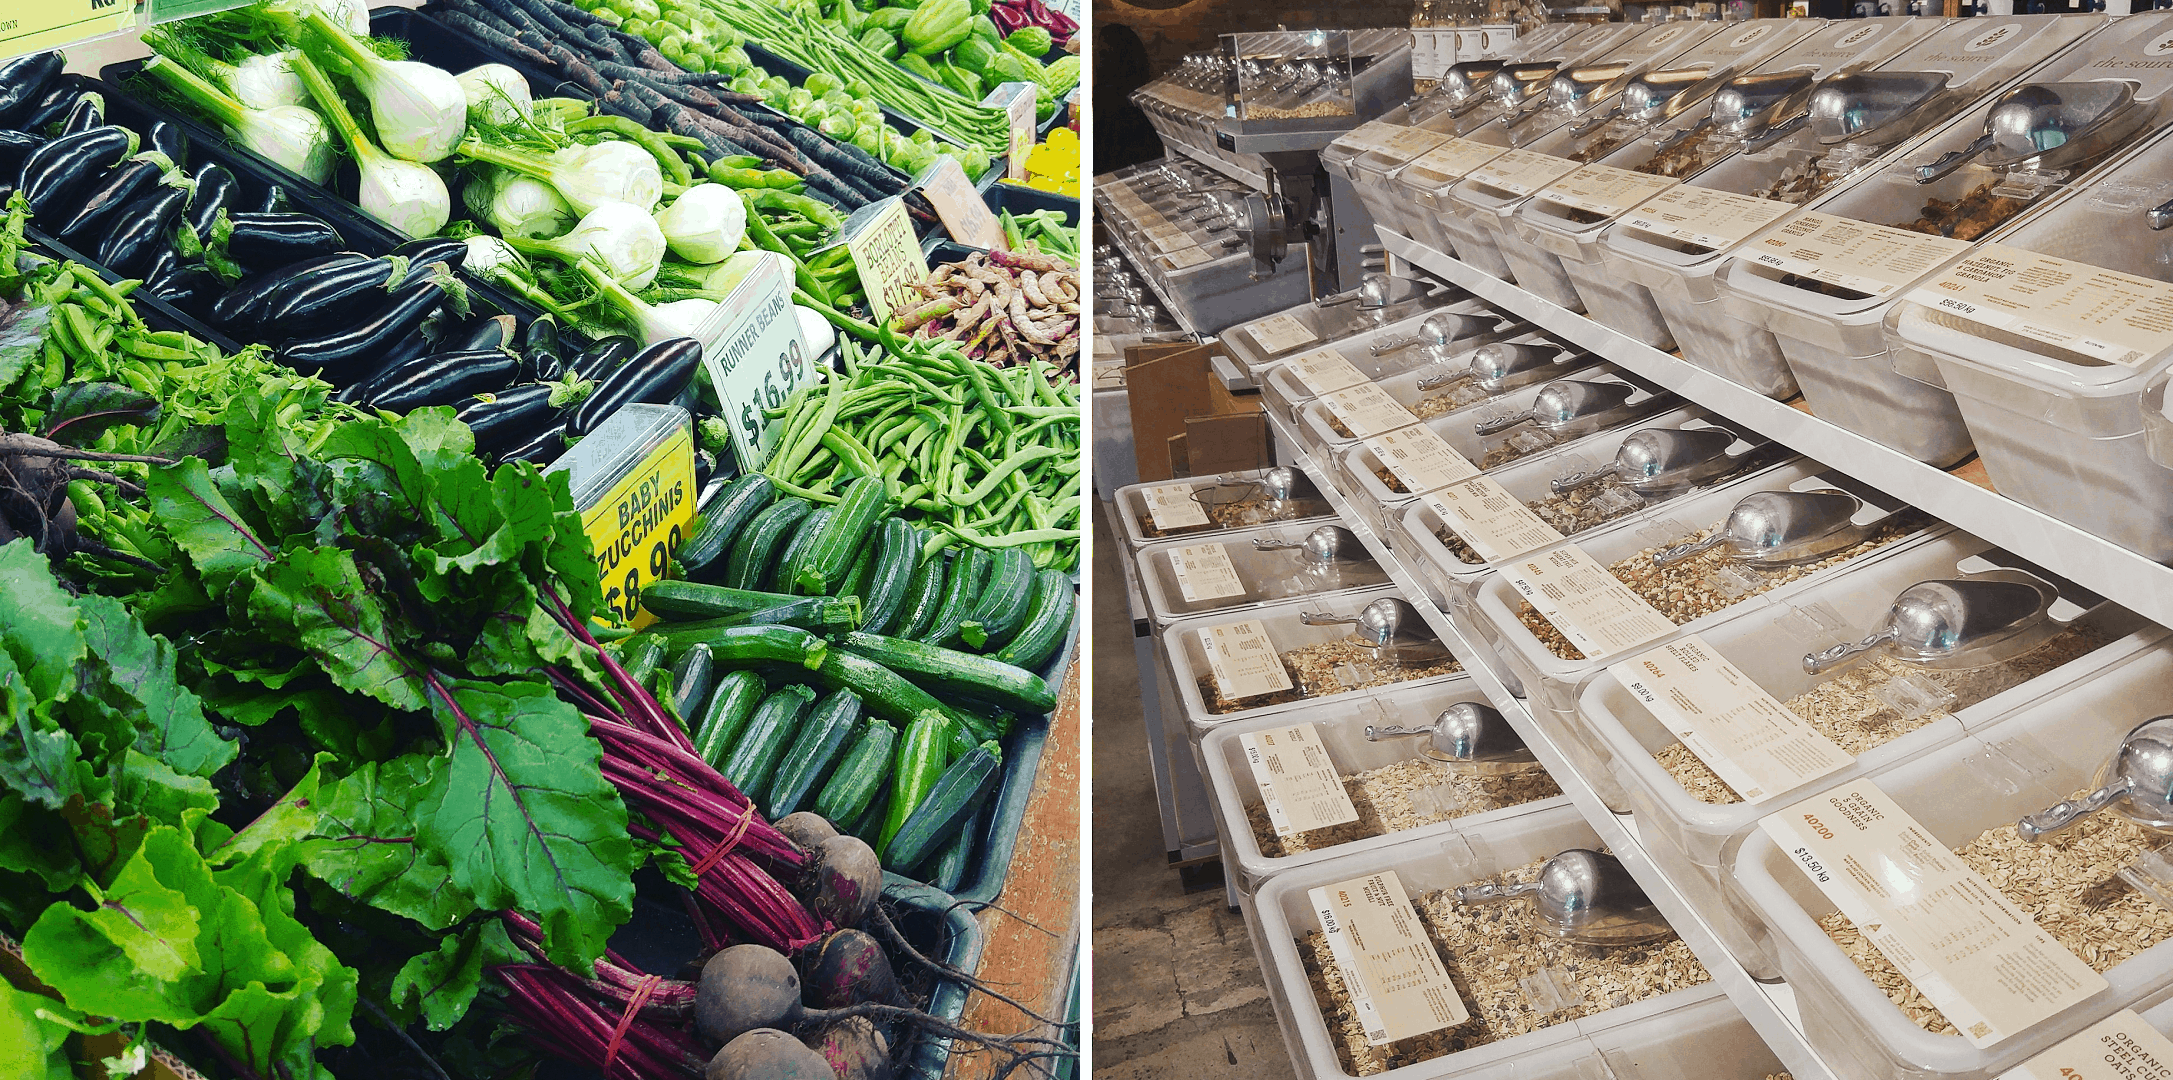
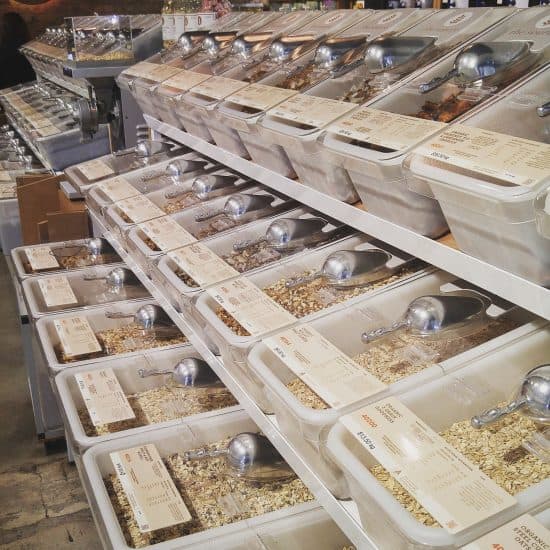
Bulk food stores are where I source all of my dry goods (pantry staples like rice, flour, lentils, pulses) and my liquid products (tahini, soy sauce, macadamia oil).

Specifically, I purchase about 95% of my bulk goods from The Source Bulk Foods (my local store is in Victoria Park, about 5 minutes from my house). They have a great range, the store is spotless and they stock a lot of local produce (I particularly like the Australian-grown nuts and quinoa, but plenty of their products are also home grown).

There are a few groceries I don’t buy from the Source Whole Foods:

I buy vermicelli pasta nests from Swansea Street Markets in East Victoria Park (The Source Bulk Foods don’t stock regular pasta, only the gluten-free kind).

I buy wakame seaweed (a bit of an obscure ingredient) and white vinegar for pickling from Manna Whole Foods in South Fremantle (the only place I’ve ever seen them both).

I occasionally have a moment of weakness and buy a bar of good quality dark chocolate wrapped in foil and paper from a local grocer, or even (if I’m desperate! It happens!) from the supermarket.

I buy coffee from local coffee place Antz Inya Pantz in East Victoria Park, who roast their own beans.

I source honey from my neighbour, who keeps bees.

I collect olives from public trees with a group of friends every April, and press them locally to get a year’s supply of olive oil.

Zero Waste Grocery Shopping: Fresh Produce

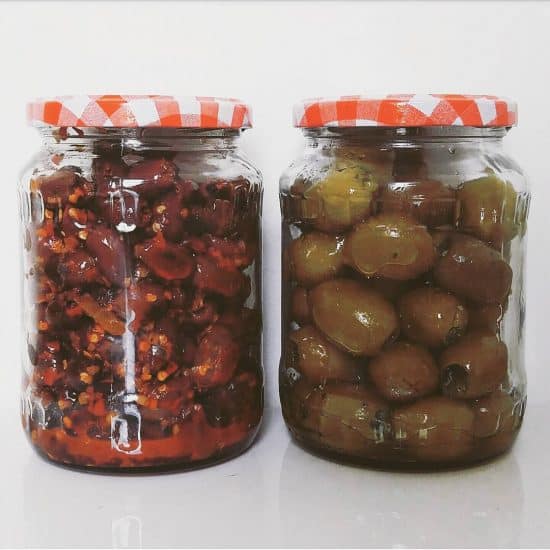
The fresh produce that buy is fruit and vegetables, bread, and deli items like olives.

I no longer buy fish, meat or dairy products for my personal consumption. I do buy pet mince, chicken necks and chicken frames for my greyhound from The Butcher Shop in the Park Centre, East Victoria Park. This butcher (like many independently owned businesses) is happy to accept and fill my own containers. I use old yoghurt tubs I sourced from my local Buy Nothing group as I don’t mind if these get lost. I usually drop the containers off and they will call me once they have been able to fill them for me to collect.

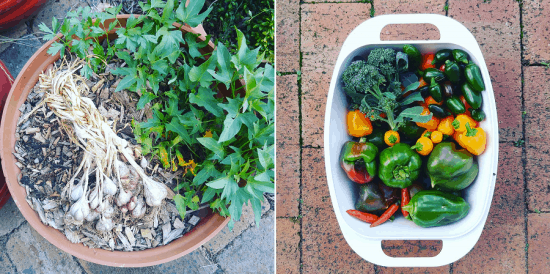
I have a homegrown veggie patch, which provides some of my fruit and veg – dependent on how much time I have and how much I can put into it. I’ve always got herbs (mint, parsley, oregano, thyme, coriander in winter and basil in summer), there’s always some kind of greens, capsicums, chillis and sweet potato.

There’s also a few fruit trees. Lemons are available almost all year round, there’s a passion fruit vine and at the moment, guavas and kumquats.

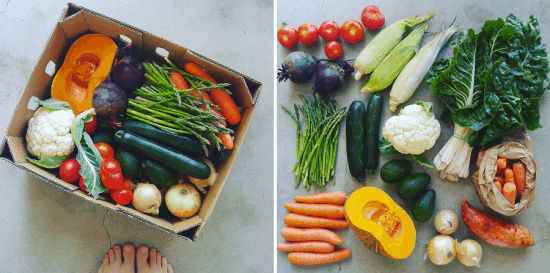
I order a veg box once a fortnight from The Organic Collective, based in Hamilton Hill, which is delivered direct to my doorstep.

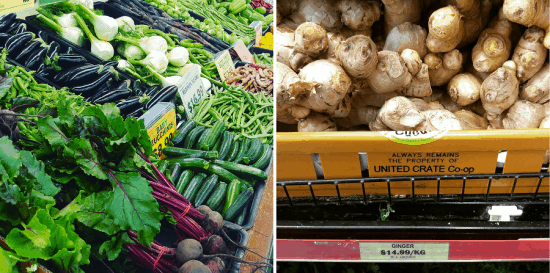
I top my veg box up with fruit and veg shopping at Swansea Street Markets in East Victoria Park, who have an excellent range of loose produce (including fresh herbs, peas and beans, salad leaves and other harder-to-find items).

They also stock a lot of West Australian and Australian produce, and label their Country of Origins properly.

My friends have a market garden and fruit orchard, and run the Guildford Food Hub (in Guildford) on Saturday mornings. I sometimes get fruit from them.

I occasionally pop into the supermarket to top up things like onions, avocados and mushrooms.

Swansea Street Markets also has a great deli counter. I occasionally buy olives and other antipasto type things from here, using my own jars (which they happily weigh before they fill). They also sell cheese and cold cut meats.

If I’m in Fremantle, Kakulas Sister has an excellent deli counter also, and are happy to tare and fill containers.

I don’t go to the Farmers Market regularly, but when I do I look out for what’s in season: boxes of strawberries, boxes of tomatoes, loose cherry tomatoes and other hard-to-find-without-packaging items.

My two favourite markets are the Subiaco Farmers Market (open on Saturday mornings) and the Growers Green Farmers Market in Beaconsfield/South Fremantle (open on Sunday mornings.

If I’m at the Farmers Market, I always buy bread. My favourite Wild Bakery has a stall at both Subiaco and Growers Green. Otherwise their actual bakery is located in South Fremantle. I pop in when I’m in the area, or ask my friend who lives around the corner to pick up a loaf for me if we are planning to meet.

I also buy bread from my other favourite bakery Bread in Common (in Pakenham Street, Fremantle).

As neither are local to me, I tend to buy two loaves at a time and freeze one. If I run out, I don’t eat bread until I stock up again. There are other bakeries close to me, but I really like good bread, and the others just don’t compare.

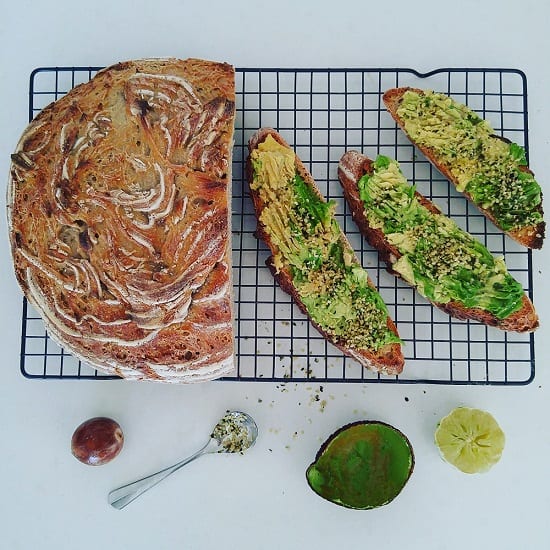
I also make my own bread, but that tends to be a little seasonal.

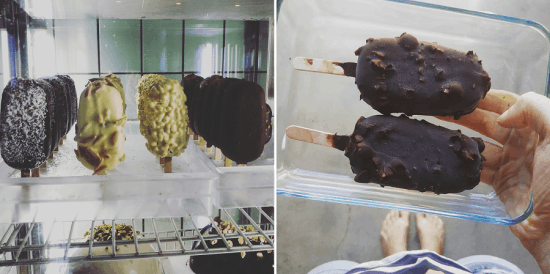
Something that I buy as a treat occasionally is ice-cream. There’s an amazing ice-cream shop in Victoria Park called Pietro Gelateria, with a small-but-mighty vegan ice cream selection (most of their offering is traditional dairy ice cream).

One of my favourite things is the plastic-free ice creams on sticks, mostly for the novelty. I take a Pyrex to the store, they pop two in, and I bring them home for later.

 Zero Waste Groceries: Things I Make

I tend to make things if they are easy, far more delicious when made from scratch, and/or unavailable without plastic or excessive packaging.

Some of the simplest things I make are apple cider/apple scraps vinegar (literally an apple core, some water, a bit of sugar and some stirring), refrigerator pickles (a 10-minute job), pesto and hummus.

Back when I ate dairy, I’d make my own yoghurt (another ridiculously simple thing to make).

Things that take a little longer (but are oh-so worth it) are sourdough crackers and chickpea falafels. With falafels, I make a huge batch and freeze at least three-quarters. This also stops me eating the entire lot in one day.

Zero Waste Food: Takeaway

I rarely get takeaway. I prefer to eat in, and use real plates and metal reusable cutlery. I’m more likely to take home leftovers than actually order takeaway, and I always pack a reusable container when I head out, just in case.

I hope that’s given you some insight into the kinds of things I buy, and where from, and maybe some ideas for things you could incorporate into your own life. If you’re in Perth you might like to visit some of the places I’ve listed. If you’re not, maybe there’s something similar close to you.

In my experience, when it comes to plastic-free and zero waste living, there’s always a lot more options than we first expect.

Now I’d love to hear from you! Is there anything you’re trying to source that I haven’t covered? Anything you’ve had success with that you’d like to share? Anything that needs more explanation, or any tips you can add? Any other questions? Please share your thoughts in the comments below!
How We Started an Urban Food Tree Project

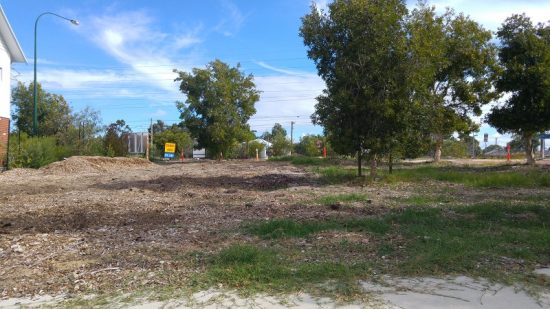
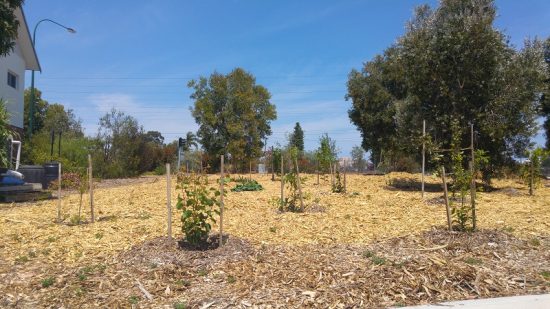
Ever since we first moved to our suburb 18 months ago, I had my eye on the rather sad looking patch of land at the corner of the street.  Despite the weeds and bare nothingness (excluding the few surviving melaleuca trees around the edge), all I could see was the epic potential.

Wouldn’t it be great if we could turn this barren, weedy patch of land into a thriving community orchard?

My neighbours, and one in particular, shared my enthusiasm and vision. Almost as soon as we moved in, the conversation began. At the start of this year, the actual work began, to turn the conversation into reality.

The Initial Idea: Creating a Food Tree Project

Rather than planting an orchard where the goal is to maximise production, we wanted a balance. Growing fruit trees alongside natives and groundcovers creates a more aesthetically pleasing, biodiverse and dynamic ecosystem that will be more interesting to walk through, creates more learning opportunities and is more resilient to pests.

The name “Food Tree Project” rather than an “Urban Orchard” reflects that our goals were broader than simply planting fruit-bearing trees and producing food. The permaculture concept of “Food Forest” didn’t really fit either, because although I followed permaculture principles in the designing, there are too many human inputs to be a true permaculture food forest.

Food Tree Project felt best.

Our Vision:

Community: to provide a space for collaboration, learning, volunteering and sharing; to encourage residents to learn more about growing food and have access to locally grown fruit; and create an attractive and sheltered resting spot close to the train station.

Environment: to increase tree coverage, canopy cover and greenery; to improve the streetscape close to the train station; and to increase biodiversity and provide habitat for birds.

The Plan:

The plan was to plant around 40 fruit trees of varying species on the unused space on the corner of two streets in our suburb, with wide pathways between the trees to allow and encourage public access for community members to see the trees and learn about them.

We also planned to plant native species on the border to encourage biodiversity, and interplant nitrogen-fixing acacias and other ground covers to create a green space between the trees.

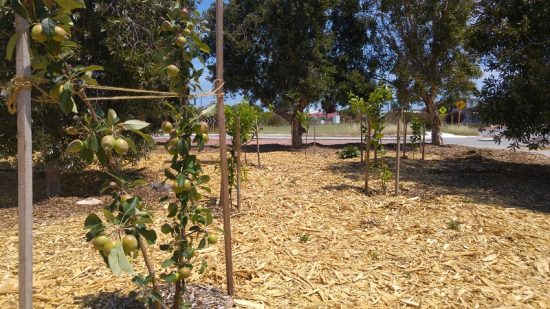
The property next to the block has a bore, we are extending the reticulation so that the site will have water access in summer (this is essential in Perth – no water means no trees).

Goals of the Food Tree Project:

There are a number of goals we hope to achieve with this project.

  • Create a welcoming and shady community space by planting trees, and to provide access for residents to locally grown fruit.
  • Provide learning opportunities for interested residents on growing their own food and looking after fruit trees, and to provide volunteering opportunities.
  • To provide a demonstration project and framework that other volunteer groups can take to their local council to plant more trees on underutilised spaces in their urban environment.

The First Step: Getting Council Approval

The scariest step is probably asking for permission. Have you ever heard the expression “ask for forgiveness, not permission?” If we asked the council for permission and they said no, it would be hard to go ahead and do it anyway.

Should we ask for permission, or just do it and hope they didn’t mind?

However, we want this project to be an example of what can be done, a demonstration project to encourage others to approach their councils to plant on underutilized spaces. That meant going through the official channels. So we put together our vision and arranged to meet a council member on the site to discuss our plans.

We met on the site and talked through our ideas. We asked what restrictions they had (for example, banned or unwanted species) and were willing to listen to any needs that they had. I’d recommend meeting in person rather than chatting via email. It’s so much easier to connect with someone when you are face-to-face.

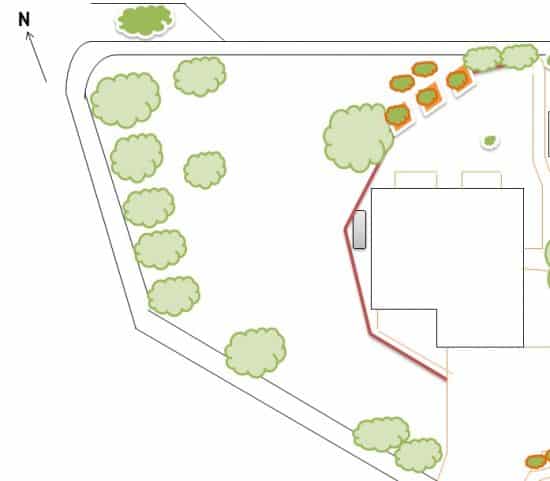
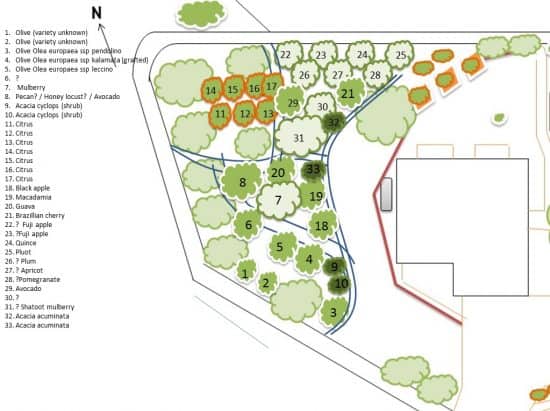
We agreed to put together a plan of the site detailing the trees to formalise the project. I took a screenshot of the Google arial view of the block, then pasted that into Powerpoint. I drew lines over the roads, paths and boundaries, and put cloud shapes over the trees, then deleted the photograph to keep the outline.

The initial outline drawn using Google Arial View and Powerpoint…

…and one of the working drafts (of which there were several!)

On one hand, we were lucky that the council were so supportive. But on the other hand, it wasn’t really luck. My co-conspirator neighbour had been working with the council on a community sump revegetation project for a couple of years prior to this, and had been able to build the relationship with the people there. He had demonstrated his ability to listen, to work together with them to resolve disputes, and show responsibility.

Although it felt like we got approval very quickly, my neighbour joked that the work actually began in 2012. In truth, it probably did.

Step 2: Formalising The Project

As well as submitting a plan for the tree planting, we also had to submit a pest control plan detailing how we would manage the site and deal with pest issues. For this, I referred to the council website and Department of Agriculture website to find out current recommended procedures.

Initially, the plan was to lease the site from the council. This would have required insurance, which we were planning to get through the local community garden (of which both my neighbour and I are members). There would have been a small annual cost for this.

In the end, the plans changed and there is no lease: the land remains under responsibility of the council. Whilst this may seem less secure, there are advantages. The site actually had a road running through it prior to 1990 before the road layouts were changed, and there was road base right through the land. The council came with a bobcat to dig out the road base, which might not have happened had there been a lease in place.

Funding Opportunities

Needing funds to purchase the trees and the reticulation, we approached the local football team (the West Coast Eagles). They have just moved to our suburb and are constructing a new training ground and stadium, and in the process angered the community greatly by chopping down 100 mature native trees.

As they emphasize their commitment to community in their media releases we thought it might be a project they would like to support.

Initially they seemed keen to sponsor our trees, but over time it became apparent that they had ulterior motives. The council had stipulated that all trees removed whilst building the training grounds must be replaced and maintained, and the Eagles were hoping that they could fund our trees as a cost cutting measure. (Funding a few $30 fruit trees would have saved them the cost of sourcing, planting and maintaining mature native trees.)

Without going into details, the Eagles were not transparent with us about this. When we realised (several months later) that, rather than supporting our project because they saw the value in investing in community, they were trying to get out of their responsibilities (clearly a small citrus tree is no replacement for a large gum tree), we decided not to pursue this further.

All the messing around meant time was ticking. It was now the start of winter and we urgently needed to plant the trees if they were to survive the summer.

Preparing the Site, Tree Purchasing and Getting the Community On Board

In short, we didn’t receive funding, and decided we would have to buy the trees, reticulation and soil amendments ourselves. We’d decided that the upcoming weekend would be perfect tree planting weather, and we began sourcing trees. My neighbour purchased seven citrus trees and I purchased another six trees, and we began setting the foundations for the project.

We planted the first few trees ourselves to get an idea of time and how best to do it all.

Next we put it out on the Buy Nothing Group that we were beginning a Food Tree Project in the area, and would anyone like to come and help us weed and plant?

And something wonderful happened.

People said yes, but many also asked us if they could donate a tree, or provide funding to purchase a tree. We hadn’t asked for money, but it was so humbling (and immensely appreciated) that our neighbours wanted to contribute financially.

One tree is not expensive (the costs varied from $20 to $70 depending on the species) but 40 trees adds up. Not to mention the reticulation costs, which my neighbour funded himself. When there’s a whole community on board, that changes things considerably. After our initial tree purchases, the others were paid for by the community.

It also showed us that people valued what we were doing, and wanted to be a part of it. (Thanks to Jayne, Deb, Miranda, Kath, Marisa, Lindi, Kate, Lana and Toni for your contributions.)

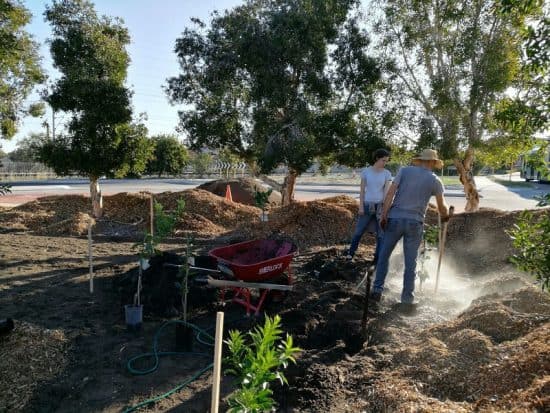
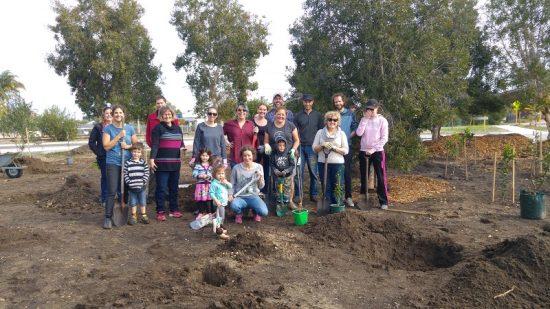
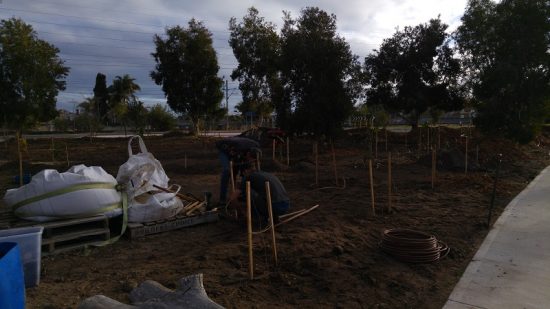
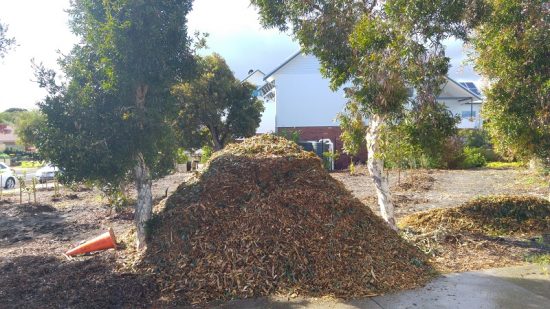
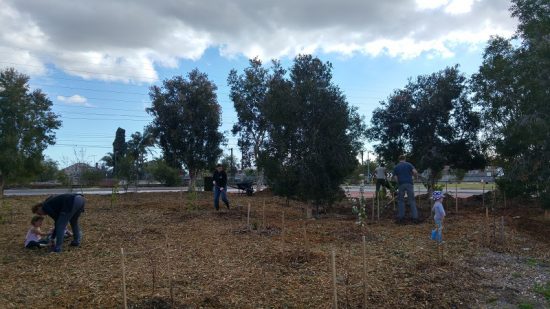
Just as importantly, people came to our busy bees. We weeded the rest of the site, dug holes, spread clay and compost and planted trees. Then we installed reticulation, and mulched the entire site. What could have taken us months was finished in a three weekends.

We now have most of the trees planted.

(If you’d like to know more about the project, I recorded a 20 minute video with some details of how we got the project going, and also a walk through of the site and the different trees that we have planted. You’ll find it on my Patreon page.)

What’s Next for the Urban Food Tree Project

Our biggest job is to ensure that the trees survive their first year in the hot Perth summer. With the reticulation in place, this shouldn’t be a big job, but it is a job nonetheless.

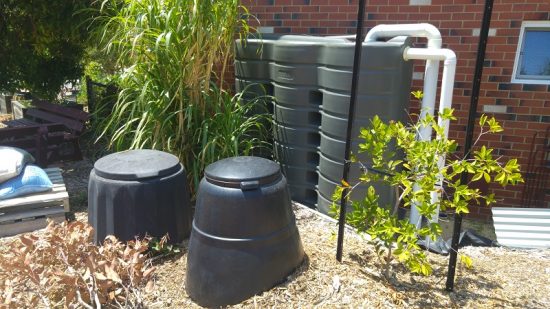
One thing we are doing now is establishing a community composting bank. We’ve put two huge compost bins on the site and plan to add to this as we find more suitable bins on Gumtree. If we can get all of our neighbours dropping good scraps off, we will have a rich supply of compost to feed the trees with. Plus it is another way to involve our neighbours with the project.

When autumn comes round I’m keen to work on the shrub layer and groundcover. Having sunk a lot into the project this year, we didn’t have the funds or the time to do this before now, and summer is not the time to start. We are keen to plant herbs and natives, and as the canopy layer grows these plants will have more chance of success.

At the moment the site looks a little barren, but by next year it should be completely transformed.

Now I’d love to hear from you! There’s so much more I could share about the project, so do you have any questions? Is there anything you’d like me to explain in more detail? Do you have any tips or suggestions for me, or experience with projects of your own? Please tell me your thoughts in the comments below :)

3 Zero Waste Recipes: DIY Cashew Milk, Homemade Almond Milk + Almond Pulp Brownies

Nut milk. The name sounds kind of ridiculous. But it looks like milk, has a similar shelf life, can be used in similar ways, and in many cases the nuts do actually have to be “milked”, so it’s easy to see why the name took hold!

milking-almonds-to-make-nut-milk-treading-my-own-path

When I started out on my plastic-free journey, I bought cow’s milk that came in returnable glass bottles. But it wasn’t stocked in many places, so finding it was hard – and a bit of effort. Gathering those glass bottles together to return them meant a heap of clutter and a journey across town with them all (there was no deposit return either, only goodwill). Plus what to do with all those lids?!

I began making nut milk alongside dairy milk, because it was a lot easier to find nuts in bulk, and they have a long shelf life (they will last for months in a jar in the pantry, or even better, the freezer). I found nut milk worked just as well in baking, in porridge and in coffee, and I began to use it more and more.

Eventually I thought more about the impact of the dairy industry on the planet. Cows need a lot of water and land to produce milk, they produce huge amounts of methane, cause soil erosion, and the product has to be transported fresh, meaning a higher carbon footprint. Nuts use less water, the trees are beneficial for the environment, and the products have a long shelf life.

Nut milk seemed like the greener option. I decided to stop buying dairy milk altogether (my husband stopped too, but later).

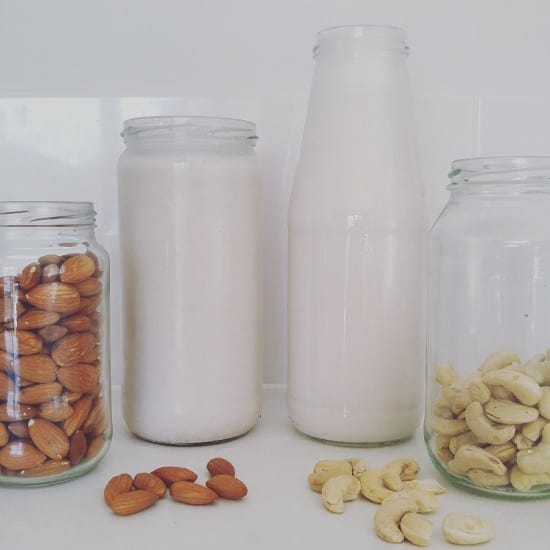
almond-milk-and-cashew-milk-treading-my-own-path

But of course, I don’t buy nut milk. Some commercial brands of nut milk are little more than bottled water! Alpro’s nut milk contains only 2% almonds, and the second biggest ingredient is sugar. Unnecessary packaging aside, shipping all that water across the globe seems like such a waste when we can ship dry nuts (or even better, use local ones) and make our own.

And I have to tell you, making your own is super easy. It requires no specialised equipment, and takes very little time. You’ll need a blender, but it doesn’t have to be a fancy one.

How To Make Cashew Milk

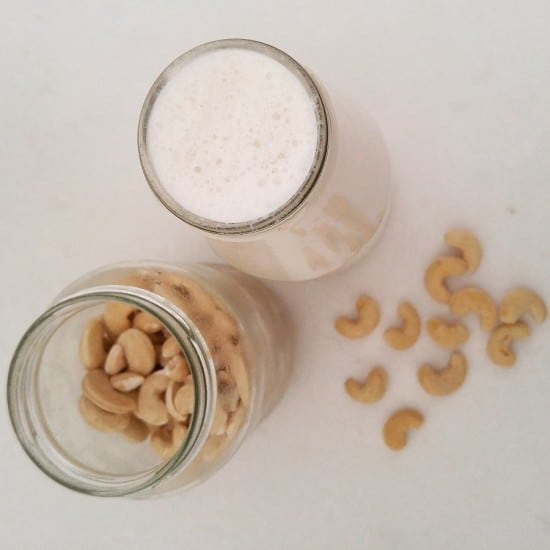
Cashew milk is my go-to milk because it’s the easiest. Cashews are already quite soft, so they do not need to be soaked for a long time. They also contain very little fibre, so there is no need to strain.

To make:

Soak 1 cup of raw cashews in water for a few hours or overnight. Rinse, and blend with 4 cups water. Done.

I tend to blend my cashews with 1 cup of water at a time, for 30 seconds, before adding the next cup of water. I find that there are less (no) lumps in it this way.

Makes 1.2 litres. Lasts 7 – 10 days in the fridge. It may get thicker over time, in which case add a little more water to it.

cashew-milk-and-cashews-treading-my-own-path

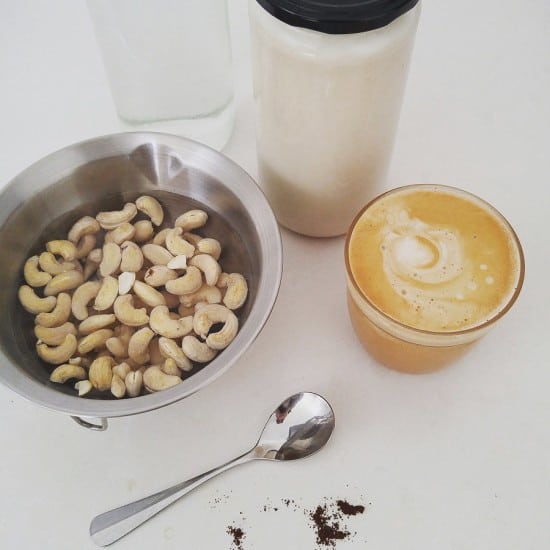
cashew-milk-makes-great-plant-based-coffee-treading-my-own-path

Cashew milk works absolutely amazingly in coffee, too :)

How to Make Almond Milk

Almond milk is the most common nut milk, but it isn’t the easiest or quickest to make. That doesn’t mean it’s hard, mind! It just needs soaking a little longer, and also straining.

To make:

Soak 1 cup of raw almonds in water for at least 12 hours, and even 24 hours (change the water every 8 hours or so). Rinse, and blend with 4 cups of water.Now you need to strain.

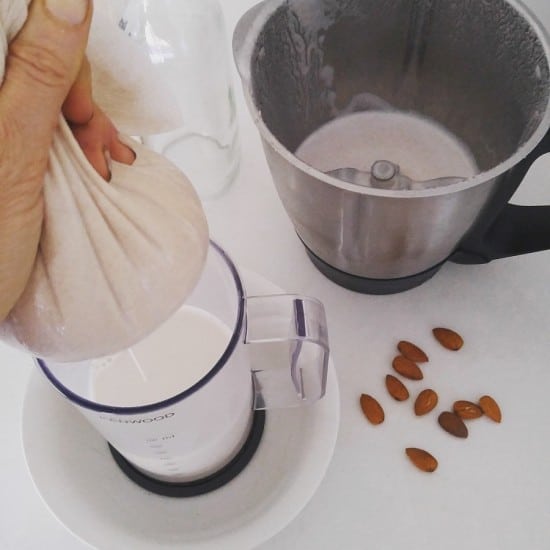
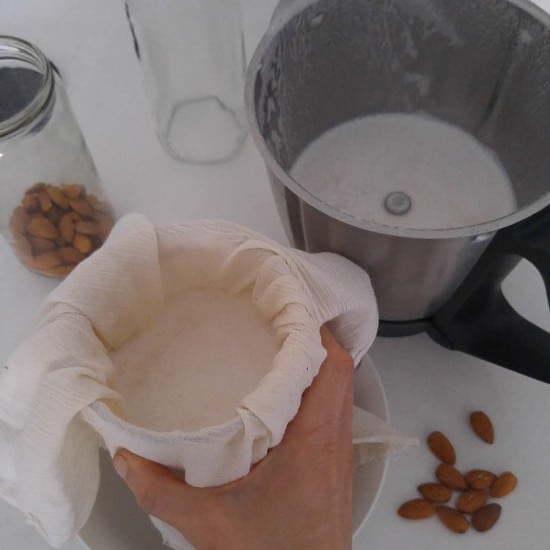
I strain my almond milk using cheesecloth as it has a fine weave and is 100% cotton. Spread the cheesecloth over a bowl or jug, pour the milk over and allow the almond milk to drip through. Squeeze to get any remaining drops out.

straining-almond-milk-treading-my-own-path milking-almonds-to-make-nut-milk-treading-my-own-path

I bought my cheesecloth off the roll at a fabric store – it is very inexpensive. (Cheesecloth is not the same thing as muslin. Muslin has a much looser weave and the fibre all gets stuck!)

Alternatively, you could use a clean tea towel or old pair of tights, or even a fine mesh sieve. Before I had the cheesecloth, I used one of my mesh produce bags. There is absolutely no need to buy an expensive plastic nut milk bag!

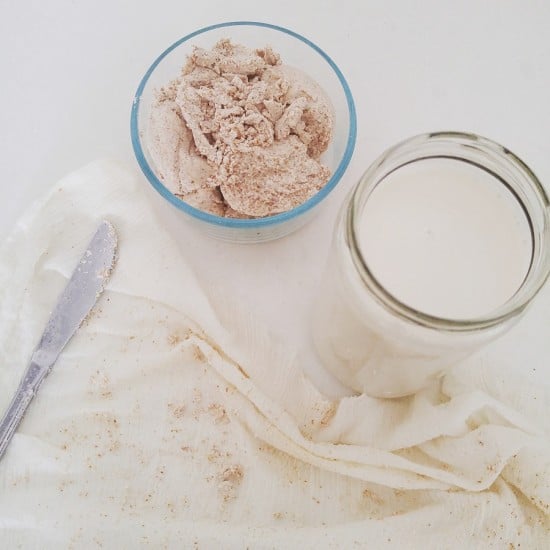
Makes about 800ml, and leaves a cup of almond pulp. Don’t throw the almond pulp away! It will last in the fridge for a week, or freeze it. And then make chocolate brownies : ) (Recipe below).

fresh-almond-pulp-and-almond-milk-treading-my-own-path

Fresh almond pulp (almond milk on the right). I use cheesecloth the strain, and scrape the excess pulp off with a knife.

How to Make Other Nut Milks

Other nut milks can be made in the same way, and most will require some kind of straining, although they won’t produce as much pulp as almond milk does. I’ve made macadamia milk (no need to strain), brazil nut milk and walnut milk.

Cheaper Nut Milk Alternatives

Nuts can be expensive. Increasing the ratio of nuts to water will make a more cost-effective milk, but will also dilute the milk. I tend to use the ratio 1:4 nuts:water but this could be increased to 1:5 or 1:6.

As well as nuts, you can also make plant-based milk with seeds, oats and peanuts (which are techincally a legume, not a nut).

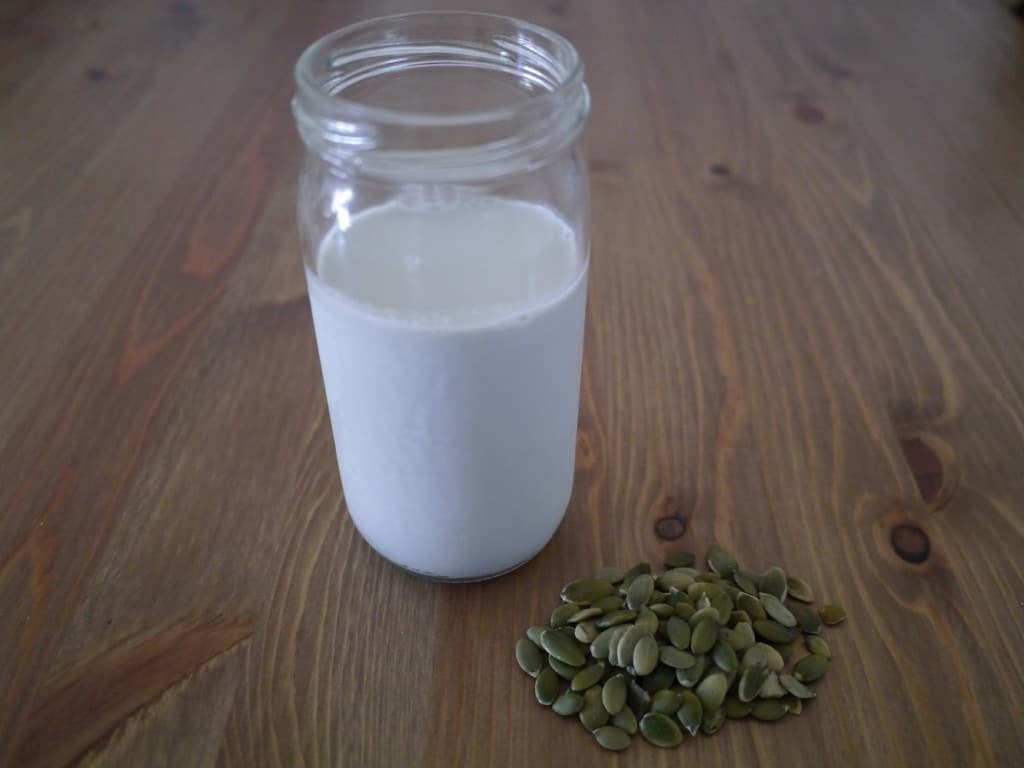
Pumpkinseedmilk

Homemade pumpkin seed milk :)

These work out much cheaper than nut milks. I’ve tried making sesame seed milk (not recommended – it has a very strong flavour!), pumpkin seed milk (which is absolutely delicious) and sunflower seed milk. Flaxseed milk is also popular, although I’ve never tried this.

As above, the principle is the same. Soak, then blend 1 cup seeds with 4 cups water, and strain.

Now, let’s talk about what to do with the leftover pulp.

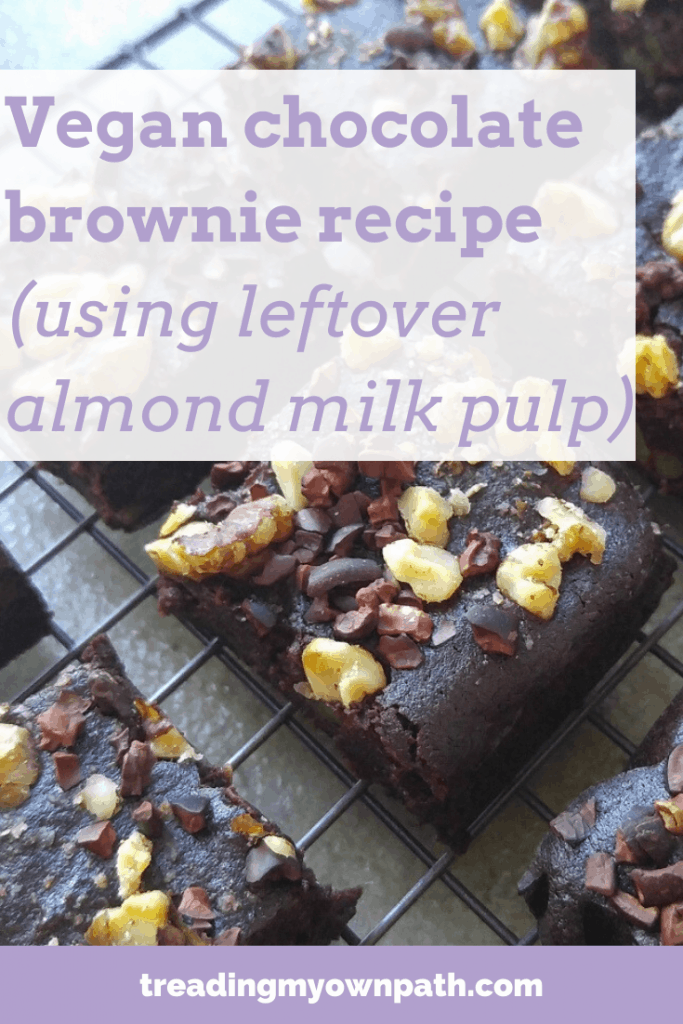
What to Do with the Leftover Pulp: Make Almond Pulp Brownies

This recipe has become my go-to almond pulp recipe. I’ve made savoury crackers, and macaroons too, but nothing beats chocolate-y goodness, so I always come back to this one.

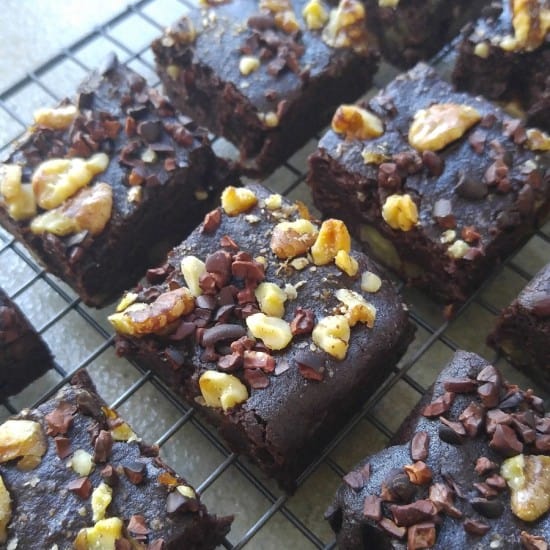
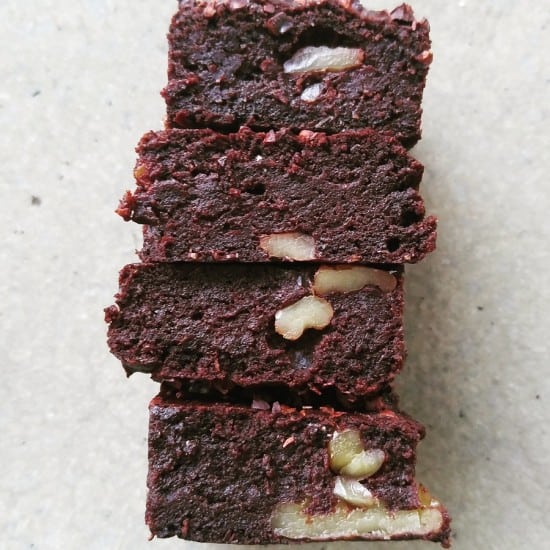
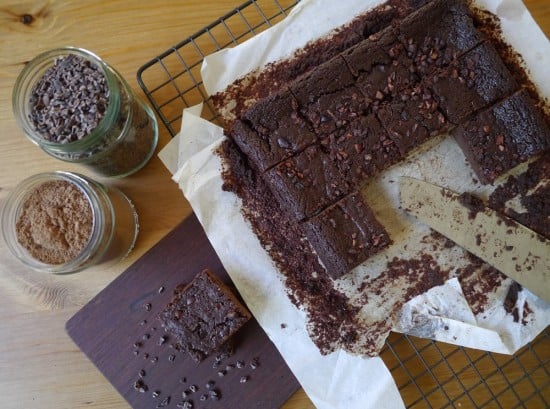
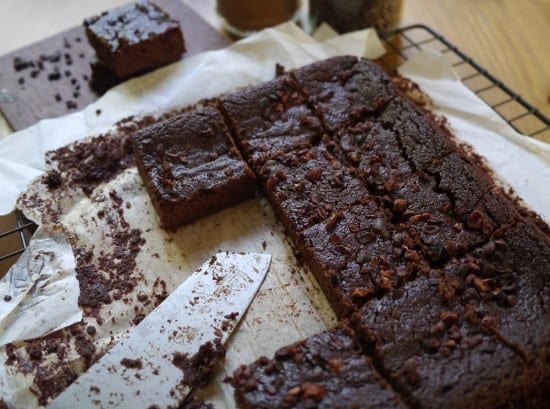
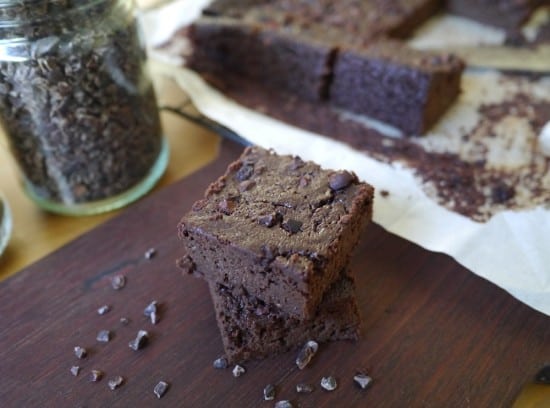
vegan-almond-pulp-aquafaba-brownies-treading-my-own-path

Ingredients:

180g sugar (I use rapadura sugar)
1 cup almond pulp, approx (the pulp left over from using 1 cup of almonds to make almond milk)
80g cocoa powder (I’ve used both cocoa powder and raw cacao for this – I prefer cocoa powder but it doesn’t really matter. You might want to add a little more sugar if using cacao, though)
1/2 cup (110g) coconut oil (I use deodorised as I find the coconut oil flavour a little intense in desserts)
9 tbsp aquafaba (chickpea water – effectively a waste product being put to good use. Find out more here!)
1/2 cup (60g) spelt or other flour
1 tbsp vanilla essence
1/2 tsp salt
1 cup macadamias/walnuts/raspberries/chocolate chips/something else delicious
(or you could leave plain. But I consider all good brownies to need some kind of crunch)

Optional: a few tablespoons of cacao nibs and/or chopped nuts to top.

Method:

Line a square baking tin (if you use baking paper) and preheat the oven to 175°C.

Melt the coconut oil in a pan. Turn off the heat, add the almond pulp and stir to combine.

In a separate bowl, combine the sugar, cocoa powder and flour, and mix well. Add to the pan and stir in. It might seem really dry at first, but it will incorporate. Once combined, add the vanilla essence, salt and walnuts (or delicious thing of your choice).

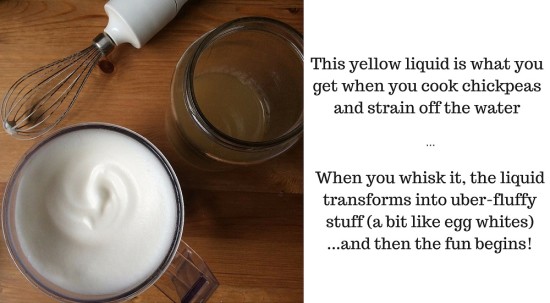
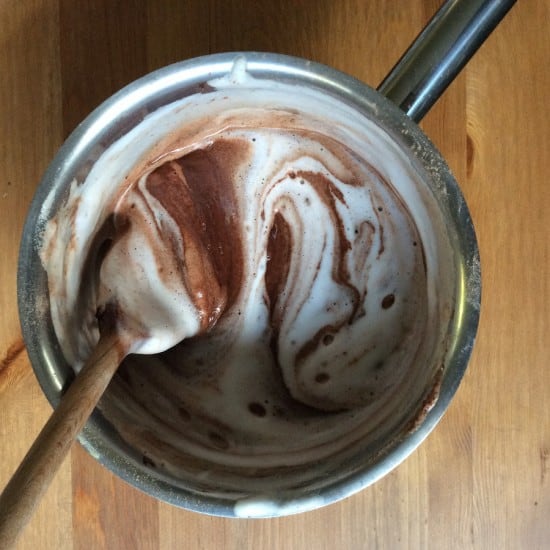
In a tall cylinder, whisk the aquafaba to form stiff peaks. (This will take longer than you think.) I use a stick blender with a whisk attachment and it takes at least 5  minutes of  constant whisking. Add the aquafaba to the brownie mixture in the pan, slowly folding to incorporate with as little stirring as possible.

This yellow liquid is what you get when you cook chickpeas and strain (and keep) the water

aquafaba-and-chocolate-brownie-mix-treading-my-own-path

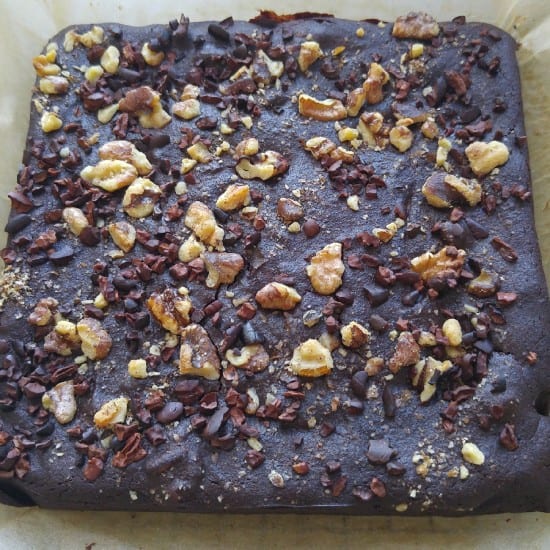
Once incorporated, pour into the baking tray. Sprinkle the toppings on (if using) and bake in the oven for 20 – 25 minutes until the top is dry.

chocolate-brownie-slab-treading-my-own-path vegan-almond-pulp-aquafaba-brownies-treading-my-own-path plant-based-aquafaba-brownies-treading-my-own-path

Best stored in the fridge if you don’t demolish the whole lot in one sitting.

Now I’d love to hear from you! Have you ever made nut milk (or seed, oat or rice milk)? Which is your favourite? Which is your least favourite? If you’ve never made it before, is there something putting you off? Do you have any other alternatives to suggest? What about aquafaba – have you ever experimented with that? Are you just a little bit tempted to make these chocolate brownies?! Anything else you’d like to add? Please tell me your thoughts and leave a comment below!
It’s Not About Perfect. It’s About Better.

I receive several requests a week from companies telling me how much they think my readers would love to hear about their fabulous (their words, not mine) products. Some even offer to pay me. I turn them all down.

As someone with a passion for zero waste, plastic-free living and minimalism, I believe in practicing what I preach. I’m not interested in plastic-packaged anything, or overseas shipping, or “stuff” in general, and I’m pretty sure you’re not interested in me spruiking it, either.

I’m proud that I keep this website advertisement-free, and I don’t intend to change that by running sponsored content.

But a few weeks ago I received this email, and it made me look twice.

I am writing from our company Tipsy Oil. We are the world’s first company to collect, wash and reuse wine bottles for bottling our Western Australian grown extra virgin olive oil. Recycling the bottles actually costs more currently than buying brand new bottle but we’re not a company that aims to become a cash cow!

Additional to this, obviously one bottle of olive oil in a recycled bottle won’t save the world, but Tipsy definitely makes consumers slightly more aware about recycling. As a very young company, we are hoping to engage writers like yourself to review or post about our vision to gain a greater awareness of our product and ultimately help with the problem of pollution.

It piqued my interest.

Firstly, I love the fact that they use glass over plastic, and not new glass either: they re-use wine bottles – because they think it is the right thing to do. (I’ve talked often about how glass in Western Australia is not recycled by crushed into road base, so this has particular local relevance.)

Secondly, I love that they are a Western Australian company (based only a few suburbs away from me), making Western Australian olive oil using Western Australian grown olives.

It makes no sense to me that shops here continue to sell Italian and Greek olive oil when we produce our own oil in Australia. Nothing against Italian and Greek olive oil of course – if I lived in Italy or Greece that is what I would use! But why ship bottles of oil across the globe when we already have it here?

I also love the fact that they say “one bottle of oil in a recycled bottle won’t save the world, but…”. I think lots of companies DO think that their product will save the world, and I found this quite refreshing. As for the “but…” – to me, this says we know we’re not perfect, but we’re doing what we can.

But of course – I was suspicious ; ) I’ve learned the hard way that just because somebody says their product is green, that doesn’t mean that it is! I emailed back. Where were they sourcing these bottles? Can customers return the bottles for refills or re-use?

I received this lovely email response:

Returning the used olive oil bottles is an excellent idea and something that I just added to our Tipsy Trello board! Thanks so much for the idea!

The recycled bottles are currently sourced from Gargarno’s restaurant in Nedlands, Perth, WA. As we grow bigger and start gathering bottles from other restaurants, we hope to have a special label for each restaurant to show where the bottles came from. But right now there is still so much to organise!

I absolutely agree with your comments around plastic, and as we mature as a business we hope to move to 100% recycled goods. However, I am sure you can imagine the difficulties with even getting a product to the market!

To give you some back story, I started Tipsy back in 2014 at the ripe age of 23 with the vision of creating a fully recycled bottle company with staff that loved the company and at the same time work with local companies instead of mega corporations. Now 25, I realise that it’s a lot harder than just writing the idea down on a piece of paper. We’ve run into things like bureaucracy, labels that absorb oil, Anthracnose, and printers that don’t know where the centre of the label is. So I hope you can give us some time to get out recycled act together!

Also, just got a really great idea about using metal caps for Tipsy Bottles just then!

In fact, we had such a great email conversation afterwards that we’re planning to meet soon to talk about all things sustainability. I like their vision, their openness, their transparency – and their willingness to hear new ideas.

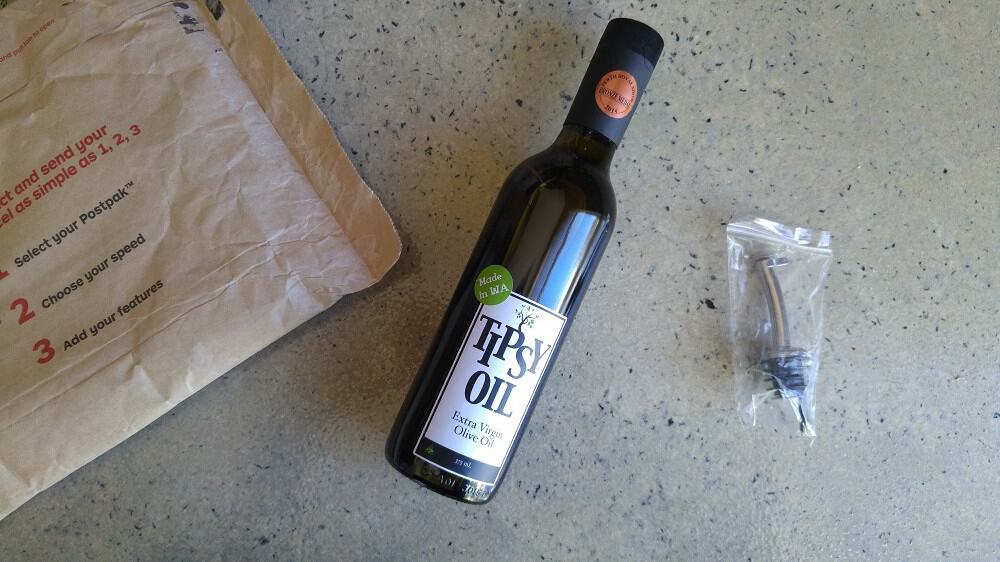
That was the best thing for me – being able to start the conversation, plant a seed and try to inspire change. They did send me a bottle of their oil: I insisted there was no plastic packaging, and the parcel looked like this:

Treading My Own Path Tipsy Oil Plastic Free July

No plastic packaging (the envelope is 100% paper, including the padding) but it came with a pourer in a plastic bag! The bottle has a plastic lid, but Tipsy Oil are looking into replacing the plastic with metal in future.

The padded envelope is filled with recycled paper, so plastic-free. I hope that this is how they will choose to send other products in future.

As for the pourer, I would say it is unnecessary, but I have been meaning to get one since the bottle lid on refillable macadamia oil bottle split into two. Still, I’m not sure they should send them as standard. The small plastic bag?! Gah!

The bottle lid itself is plastic – I hope as a result of our conversation this is something that is going to change.

Let me make one thing clear. I won’t be buying this product myself, and I’m not going to pretend otherwise. I can buy olive oil in bulk from my local store, but I’ve gone one step further this year and picked and pressed my own olives. (Coincidentally, I filled old wine bottles!)

That said, I get that not everyone is going to want to bottle their own oil. Maybe you don’t have olive trees in your area. Maybe you don’t have access to an olive press. Maybe you simply can’t be bothered! (And that’s okay – we don’t all have the time or inclination to do everything ourselves.)

Treading My Own Path Picking and Pressing Olive Oil

The olive picking dream team (minus my husband, who took the photo), the olives we collected and our portion of the pressed olive oil : )

I also get that not everyone has access to a bulk store, and not all bulk stores sell olive oil. There need to be alternatives. What excited me about Tipsy Oil was the reminder it gave me that there are companies out there trying to do the right thing, and create positive change.

Where we can, I think it is important to support them. In particular, the whole experience brought home to me three important points:

It is important to start where people are at.

I could wax lyrical about how great picking my own olives is, or how wonderful my local bulk store is, but for many of you, that would not be helpful. All of us are on different journeys, and have different amounts of time, energy and patience available.

We may not be able to buy in bulk or pick our own, but we can all look for local suppliers, businesses and stores who are trying to do the right thing.

We can all ask questions and make conscious choices. And we can all champion the people and companies we find who are trying to do the right thing.

Whether we need what they are selling/would use it ourselves or not, I think there is an importance in spreading the word of those trying to make the world a better place.

Let’s start conversations.

Had I not had the conversation with Tipsy Oil, they might not have thought about switching their lids from plastic to metal.

They might not have thought about looking into a bottle return scheme for customers.

These are small things, but they still have an impact. It all makes a difference. Who is to say that other companies will see what these guys are doing and feel inspired to take action themselves? Actions are like ripples, and we have more influence than we think.

Simply asking questions, providing feedback, or even having a chat with the lady at the checkout about the choices we make all have the ability to spark change. Never underestimate the influence you have, nor your power to make a difference.

It’s not about perfect. It’s about doing what we can.

I truly wish that bulk stores were an option for everybody, but the reality is, they aren’t. Instead of thinking that because we can’t do everything, there is no point in doing anything: we should all do what we can.

Imagine if every single person on the planet committed to reducing their waste by just 10%? Think of the impact that would have!

Imagine if all of the people in Perth who don’t have access to bulk stores chose to purchase locally produced olive oil in re-used bottles – think of the carbon emissions and virgin glass we could save!

In my version of a perfect world, we would all shop at bulk stores, there would be no single use packaging, and the world would be a lovelier place. I definitely believe that this is something we can work towards: we can strive for perfection, but we also need to be realistic.

Let’s not let perfection stand in the way of better. Let’s start where people are at. Let’s make better choices ourselves, start conversations and begin new dialogues, and support those that try to make a difference.

It’s not about being perfect. It’s about doing what we can.

Now it’s your turn to tell me what you think! Is there anything you have struggled with because it is not “perfect”? Do you ever feel disheartened because you can’t do everything? Have you made compromises that are still better than your old choices, and if so what are they? Have you found local suppliers to champion or begun to ask questions and start conversations? Have you ever had a company change its policy or look into changing it simply because of something you said, or wrote, or suggested? Have you ever stopped supporting a company you previously loved because they were NOT open to change? Have you ever let “perfect” stand in the way of “better”? Do you have any other thoughts, questions or snippets of wisdom to add? I love hearing from you so please leave me a comment below!
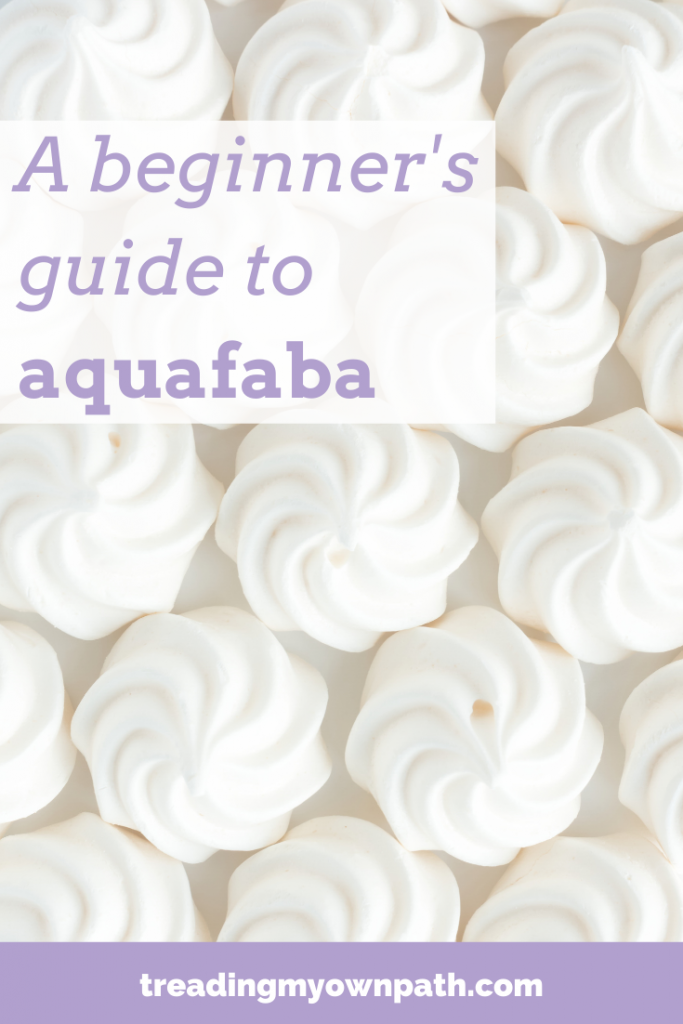
A Beginner’s Guide To Aquafaba

You know when you cook chickpeas (or other beans and pulses) from scratch? You boil them on the stove top for an hour or two, and then you drain off the cooking liquid? You gotta stop throwing that golden cooking liquid down the drain!

I’m serious. Yes, I’m talking about that stinky, kinda slimy, smells-a-bit-like-old-trainers liquid that disappears down the plughole when you strain your freshly cooked chickpeas. Because it is a magical ingredient. I kid you not.

It turns out that chickpea water (chickpea brine), which alternatively and rather more glamorously is also referred to as aquafaba, is a miracle ingredient… something that isn’t waste at all, but is actually very useful! You can whisk it up like egg whites and use it in baking to make cakes, icing, macaroons and meringues.

It’s taking the vegan world by storm because it’s making the impossible possible, but even if you’re not vegan and you eat eggs, the chance to use a waste product to make something edible and delicious can’t be scoffed at!

This yellow liquid is what you get when you cook chickpeas and strain (and keep) the water

I first heard about aquafaba when I posted a picture on Instagram of a big batch of chickpeas I’d cooked, and somebody asked if I was saving the liquid to make meringues. It sounded crazy (and unfortunately I’d just tipped 2 litres of it down the drain) but after seeing some pictures suggesting it could actually be done, and in spectacular style, I was sold.

There might be a lot of beautiful images out there showcasing the miraculous things that can be done with aquafaba, but as a beginner, I had absolutely no idea where to start. Lots of the recipes refer to using the aquafaba from tinned chickpeas, but I cook my own chickpeas, so I wanted to know how to use this kind of aquafaba.

Not being able to find this information on the internet, I spent an entire weekend whisking and testing this chickpea water (and eating far more meringues than I care to remember) and as a result, I think I’ve mastered the basics.

First Up – Cooking Your Chickpeas

If you’re still buying chickpeas (or other pulses) in tins, you are seriously missing a trick. Pulses are super cheap to buy, you can find them in bulk (so packaging free), they take up hardly any space in the pantry and they last forever. You can cook them up in bulk and they freeze really well. Cans are bulky, BPA-lined (meaning chemicals leaching from the plastic into your food), the brine often contain added salt and sugar, plus they are pretty resource-heavy being made from metal, and use a lot more fuel to transport than their dried counterparts. Make your own – it’s easy!

Ingredients: dry chickpeas, water

Soak your chickpeas in water, ensuring they are in a big bowl with enough water covering them as they will expand (depending on the variety, up to three times the original size). Soak for a minimum of 8 hours (overnight). I tend to soak mine for 24 hours or more (changing the water every 8 hours or so) until white bubbles appear in the water. Be sure to throw this water away – it is not the aquafaba!

To cook, place in a large pan and cover with fresh water. Bring to the boil and cook for 1.5 hours. You want to ensure the chickpeas remain covered (you can top up with a little extra water, and keeping a lid on the pan will stop as much evaporation) but try to ensure there isn’t too much extra water. As you cook, white scum will come to the surface. Scoop this off and discard.

After 1.5 hours, drain the chickpeas ensuring you keep the cooking liquid – this is the aquafaba!

I usually cook dry chickpeas 1.5 kg at a time, meaning I end up with about 4 kg cooked chickpeas, and this makes around 2 litres of aquafaba. Chickpeas freeze really well. Decant into glass jars and once completely cool pop into the freezer. Wait until completely frozen until sealing with lids. I use regular glass jars and I have never had one crack.

Aquafaba will keep in the fridge for up to a week so don’t feel like you have to use it straightaway. If you don’t want to use all the aquafaba at once, this freezes really well too. Pour into an ice cube tray and once completely frozen decant into a glass storage container and keep in the freezer.

Aquafaba: How to Turn the Yellow Liquid into White Fluffy Stuff

What you’ll need: a good whisk, and a big bowl…plus a little patience ; )

Pour the yellow chickpea liquid into a big bowl, and start whisking. The bowl needs to be big because as it fluffs up, it will expand to more than 5 times its original volume – so be prepared! You will also need a good whisk. A hand whisk isn’t going to cut it. Neither is a food processor or blender, even a high powered one (I tried). I have a stick blender with a 700W motor, 5 speeds and an additional turbo button, and this just about managed, although the motor did get uncomfortably hot. I would recommend a hand held whisk with two beaters, or a mixmaster or something with a little more power.

Whisking Aquafaba Some More

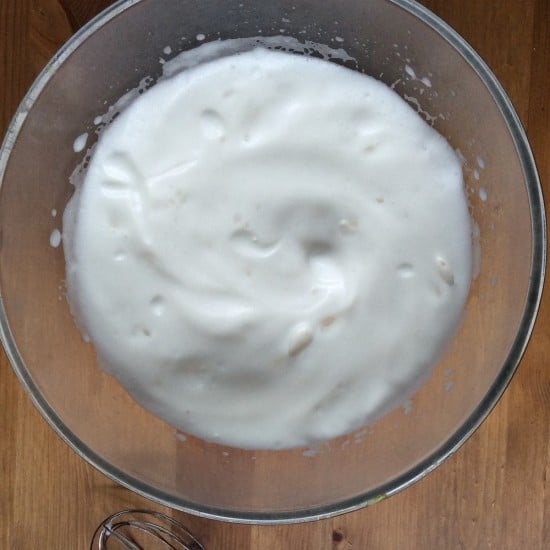
This is my aquafaba before adding cream of tartar. Because I don’t have a super powerful whisk, I found cream of tartar helped form the stiff peaks you need for meringues.

Chickpea water needs to be whisked for a long time. (Long being relative of course, but in the age of electric gadgets we expect instant results, so be warned!) You will need 10 – 15 minutes of constant whisking to get the aquafaba to full fluffiness and stiff peaks. On the plus side, you don’t seem to be able to overwhisk aquafaba like you can egg whites, and if you need a break from holding the hand whisk (or like me, are worried about burning out a stick blender), it seems fairly forgiving to stop-starting.

Lastly, don’t be too worried about how concentrated your chickpea water is. Remember, egg whites are fairly runny before you whisk them, and aquafaba is the same. If you think your liquid is really watery you can reduce it a little in a pan, but don’t be too worried about this. I reduced 2 cups of aquafaba to 1 cup in a saucepan by simmering, and then whisked, and actually found it fluffed ever so slightly less than the original non-reduced aquafaba. The main thing will be a good whisk, and enough time.

How to Make Aquafaba Meringues

I based my experiments on this basic aqaufaba meringue recipe. Far more meringues than I actually wanted to eat later, I think I’ve mastered the basics. My next challenge is to improve the shape – something I think I will achieve with a slightly better whisk, and probably a little more patience!

Ingredients: 1 cup aquafaba; 1.5 cups granulated sugar, ground into powdered sugar; 1 tsp vanilla essence and 1/2 tsp cream of tartar.

Whisk the aquafaba into stiff peaks. Ideally you want a mixture so stiff that if you turn the bowl upside down, the aquafaba won’t fall out, but my hand whisk isn’t up to beating quite that well. (If yours is, you may not need to cream of tartar.)

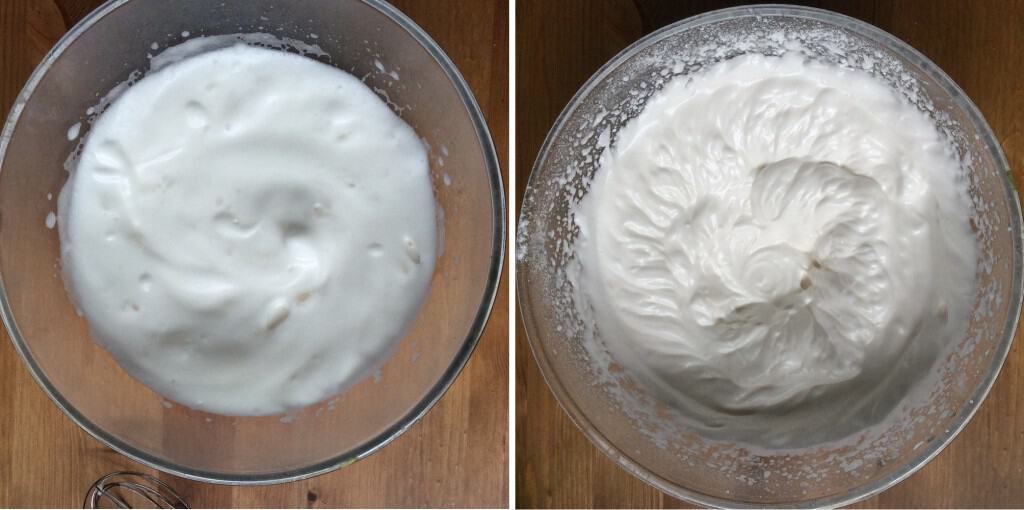
Once the peaks are as stiff as you can get them, add the cream of tartar, still whisking. This will help firm up the peaks. Next, add the sugar slowly. This is important… you don’t want to deflate the bubbles you’ve created. Add 1 tbsp powdered sugar at a time, whisking continuously to incorporate. Yes, it takes ages, but rush and you’ll flatten your meringues.

Whisking Aquafaba Before and After Adding Cream of Tartar and Sugar

The bowl on the right is the aquafaba once the cream of tartar and sugar have been added. The sugar gives a shiny gloss to the aquafaba.

When all the sugar is incorporated, add the vanilla essence.

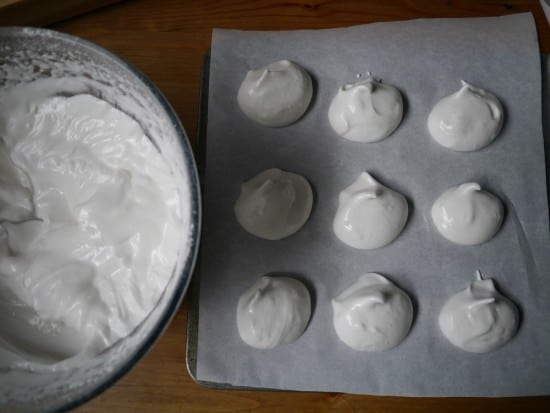
Turn your oven on to the lowest temp. Recipes state the temperature needs to be between 80 – 110°C. My gas oven actually doesn’t go below 120°C but as it never seems to get to temperature anyway, it didn’t matter. Line baking trays with baking paper, and blob the meringue mix onto the paper (I used a soup spoon, and the blobs were about 4cm diameter).

Aquafaba meringues

Aquafaba meringues about to go in the oven. I still haven’t mastered how to keep the shape once they go in the oven…that’s the next challenge!

Pop the meringues into the oven, and leave for 1.5 hours minimum. You aren’t actually trying to cook the meringues but dry them out. If they go brown, your oven is probably on too high.

To test if they are ready, see if you can remove one from the baking paper (ideally without taking the tray out of the oven). If it still sticks, leave in the oven. Keep testing until the meringues can be removed cleanly from the paper. When they are ready, turn the oven off, open the door slightly and leave to cool completely before removing. You’re better off leaving to cool in the oven overnight rather than putting them in a container whilst still slightly warm.

Store in an airtight container if not eating immediately.

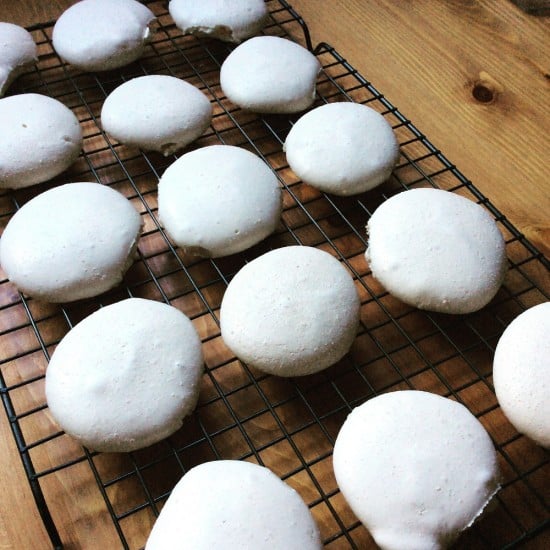
Aquafaba Meringues on a Cooling Rack via Instragram

What’s Next – Aquafaba in Baking

If you’re interested in seeing more amazing creations with aquafaba, there is a great Facebook group called Vegan Meringue – Hits and Misses with lots of recipes to try when you’ve mastered the basics. It’s also a great community and a brilliant source of inspiration!

I’m hoping to spend plenty more time in the kitchen experimenting with this stuff! I’ve already attempted making chocolate brownies using aquafaba and was really pleased with the result (especially as it was a first attempt), and with a few more tweaks I’m hoping to perfect this (update! Recipe for aquafaba chocolate brownies has now been added.).

I’m also keen to try macaroons. Playing with aquafaba is so much fun!

Aquafaba chocolate vegan brownie aerial view Aquafaba chocolate brownie slice Chocolate Vegan Brownie

Now it’s your turn to join in! Tell me, have you heard of aquafaba before? Are you tempted to give it a go, or is something holding you back? Have you already experimented with it? Have you created aquafaba masterpieces or struggled with a sticky mess? If you’re a pro, do you have any advice or tips?  Do you have any questions or need any beginners tips…especially in what NOT to do? (I’m no expert, but I’ve had my fair amount of failures in the last couple of weeks!) Or are you totally grossed out by the whole thing?! I’d love to hear your thoughts so please leave a comment below!

12 Tips For Reducing Food Waste

On Tuesday night I saw the documentary Dive! It’s a documentary about people living off America’s food waste. It’s one I’d recommend: short, to-the-point, educational and inspiring.
Here’s how the documentary is described by the makers:

“Inspired by a curiosity about our country’s careless habit of sending food straight to landfills, the multi award-winning documentary DIVE! follows filmmaker Jeremy Seifert and friends as they dumpster dive in the back alleys and gated garbage receptacles of Los Angeles’ supermarkets. In the process, they salvage thousands of dollars worth of good, edible food – resulting in an inspiring documentary that is equal parts entertainment, guerilla journalism and call to action.”

And the trailer:

Food waste is a problem in so many ways. It’s estimated that a third of all food produced for us to eat ends up in landfill. A third! Food that’s taken land and energy to produce, required water and nutrients, needed labour to ensure it grew, could be harvested and processed, fuel to transport…and then it ends up in the bin. If that’s not the biggest unnecessary waste of resources, then I don’t know what is.

Meanwhile, whilst we’re throwing all this perfectly edible food in the bin, people are going hungry. I’m not just talking poor people in less developed countries in overseas nations. I’m also talking about the people right here in our communities. In America one in six people are at risk of hunger. In the UK almost 1 million people have used food banks to get access to food.

The majority of this wasted food will end up in landfill, taking up valuable land space. Because of the sealed landfill environment, food waste breaks down here anaerobically, releasing methane gas (a greenhouse gas) into the atmosphere.

You’d expect there to be some food waste at all steps along the chain, but food waste on this kind of scale is completely unnecessary!

There’s clearly a broken system that allows this kind of food waste to occur, and there’s a need for change. However, as consumers, we can still take some responsibility. It is estimated that half of all the food we actually buy goes to landfill.  There’s plenty of scope for us to make changes to the way we shop, and the way we think of food.

Here’s some ideas to help you reduce the amount of food you throw away!

Things we can do to reduce our food waste

1. Understand best before and use by dates.

If something is stamped with a “use by” date, it should be used before that date. If it’s stamped “best before” it means the retailer thinks it would be better if you used it by that date, but it will be perfectly safe to eat after this date.  Remember, retailers have a vested interest in you throwing the old one in the bin and buying a new one!

2. Use your judgement.

Learn to recognise if something is bad or not, rather than relying on the ultra-conservative supermarket “best before” dates.

3. Don’t buy more than you need!

The special offers and bargains touted at you in every aisle and every corner of the supermarket are there to make you spend more, not save you money, and they can become overbearing and wear you down. It may seem counter-intuitive to only buy one if the second one is “free”, but if it ends up in the bin, you haven’t saved anything. Leave it on the shelf for someone who needs it. If you stop shopping at the supermarkets you will have less exposure to all the advertising, and will buy less as a result.

4. Store it properly.

When you get home from shopping, it’s easy to dump the bags down on the counter and think you’ll sort them later, or just stuff everything in the fridge quickly. But taking the time to sort things out means less food goes to waste. Ensuring that chilled food remains chilled, rotating the new food with the things that are already in your fridge, and putting anything that is prone to wilting in a salad crisper or suitable storage container will extend the life of your shopping and mean there’s less going bad.

5. Use the most perishable items first.

Plan your meals and arrange your fridge so the food that is most perishable gets used up before the longer-lasting stuff.

6. Cut the bad bits off.

If a piece of fruit of veg is bad, cut the bad bit off rather than throwing the whole thing away. If only part of a product has gone bad, use your judgement as to whether or not it’s salvageable.

7. Find alternative uses.

Milk that has started to sour may not be great on your porridge but will work wonders in baking. My mother  uses sour milk to make scones, and they are delicious. Fruit that is going soft can be stewed to make compote, and limp vegetables can be made into soup.

8. Make use of everything.

Rather than peeling your veg, give them a good scrub and cook with the skins on. If you do peel them, keep the scraps and use to make vegetable stock (you can store in the freezer until you have enough). Meat and fish bones can also be used to make stock. Egg shells can be ground down and sprinkled on the garden – they are a great source of calcium. Citrus rinds can be made into candied peel, or the zest can be frozen or dried; if you don’t want to eat them you can use them to infuse vinegar to make a citrus cleaner.

9. Don’t throw food away!

There are plenty of alternatives to sending scraps to landfill. Feed them to chickens (ask your neighbours if you don’t have your own), compost, worm farm, use a bokashi bin or even dig a hole in the garden. For dry goods and things you bought but don’t like, even if the packets are open, try donating to family and friends, or even listing on Gumtree or Freecycle.

10. Buy the ugly fruit and veg!

People from western cultures have become accustomed to buying perfect fruit and veg, but that’s not what it looks like in real life. Even though we know this, we still gave a tendency to look for the “best” ones in the stores. When you go shopping, keep an eye out for ugly, misshapen fruit and veg, and buy these instead. You’re probably saving them from landfill!

11. Speak to your local supermarket and / or independent grocer.

Talk about food waste. Find out if they donate to food banks, if they compost, or if they have any other ways that they reduce waste. Start the conversation.

12. Volunteer at a Food Bank. 

Food banks don’t just need food, they need people. The numbers of people (predominantly volunteers) needed to collect, wash, process and deliver this food  is what stops Food Banks being able to distribute more food to more people in need.

Now I’d love to hear from you! What struggles do you face when trying to reduce your food waste? What successes have you had? Are there any tips you’d like to add? Anything that has worked really well for you? Have you ever tried dumpter-diving?! Please share your experience and leave a comment below!