10+ Practical Ideas for Eco-Friendly Plant Pots

I started my plastic-free life back in 2012 and my gardening life long before that. When it comes to plastic-free gardening, though, I’m still a relative newbie. I lived in an upstairs apartment for my first few zero waste years, so there was no garden to practice with.

I’ve been living in our new place, complete with garden, for over a year now, and there’s been plenty of opportunity to learn. I’ve come to realise that whilst plastic-free might be the goal, there is so much “waste” plastic that can be reused in the garden, that I’m more focused on zero waste (and reusing) than plastic-free.

I’d rather use what exists than purchase new “zero waste” items.

I thought I’d share some of my plastic-free and zero waste gardening tips, beginning with eco-friendly plant pots.
Choosing Eco-Friendly Plant Pots when Growing from Seed

The best way to avoid waste is to grow from seed. Saving your own seeds, and swapping seeds with others, is the best way to source seeds. However, it isn’t always practical. If you’re establishing a new garden, like I was, you’ll probably need to buy seeds.
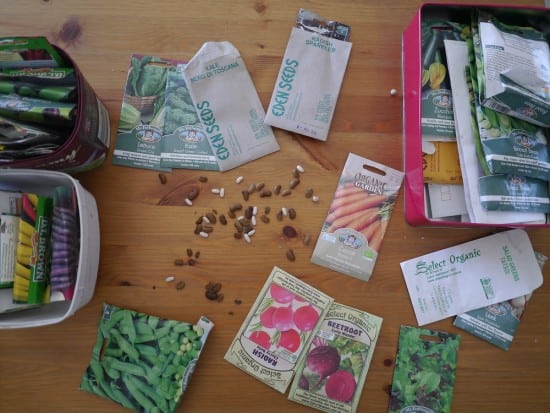
However, before you go shopping, I’d recommend looking for local gardening groups and seed swaps, just in case. A few of our local libraries even offer seeds to “borrow” – the idea is that once you’ve planted them and have your own seeds, you return these to the library.

Some seeds can be sown directly in the ground, but most need planting into trays or pots before planting out.

Toilet rolls

Toilet rolls are the perfect size for seedlings, and you can fold one end over to make a base. However, if you have a productive garden, getting enough can be a challenge!

If you need more, Buy Nothing groups and Gumtree are a great way to find them. Similarly, if you don’t need your own, they are a great way to offload them to someone who does. Save them up until you have enough to entice someone to make the trip, and give them away.

It sounds bizarre, but if you look you’ll see that old toilet roll tube trading is a real thing! ;)

Newspaper Pots

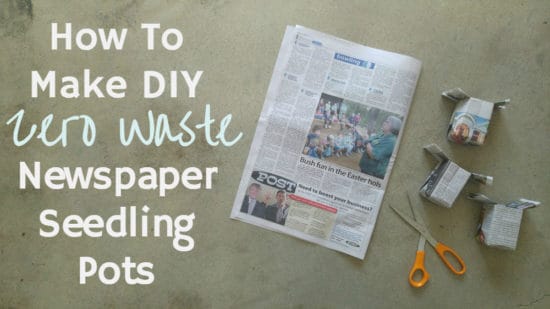
My favourite way to make seedling pots is folding them, origami-style, using old newspaper (you can find DIY instructions for making seedling newspaper pots here). There’s no tape and no glue, no tools required and it takes less than a minute to make one.

I love these as, unlike toilet rolls, there’s no need to store them. Grab a couple of old newspapers and make everything you need in half an hour.

You can buy tools to make newspaper pots. They are usually made of wood, and to make the pot the newspaper is wrapped around a cylinder and pressing into an indented base (here’s an example of a wooden paper potter). Personally I think they are unnecessary, and as a minimalist I like to keep my tools to essentials only.

Wooden Seedling Flats

These are wooden boxes that are not compartmentalised, used for seed-raising. They are filled with soil and seeds sown, which can be transplanted once they’ve germinated.

Seedling flats can be made from softwood (like pine) or hardwood. If looked after properly and maintained, they can last several years. The most eco-friendly option are those made from reclaimed timber and offcuts.

Soil Blockers

Soil blockers are metal presses that allow you to press soil together to make cells to plant seeds without any other material. I first heard of soil blockers via Milkwood, and whilst I love the idea, I’m yet to give them a go. A friend has recently purchased one so I’m keen to test it out and will keep you posted.

Purpose-Bought Compostable Pots

It’s worth noting that ‘compostable’ is not the same as ‘biodegradable’. Compostable means it will break down in a compost bin or soil into humus (natural material) with no toxic residue. Biodegradable means it will be broken down by bacteria under certain conditions (often tested in a lab).

A ‘biodegradable’ label does not guarantee it will be broken down into constituent parts, only that it will break down small enough that it cannot be seen. It does not guarantee there will be no toxic residue.

There are a lot of pots that fall under the “compostable” category. The most eco-friendly ones are natural and made of waste materials like coconut coir or aged cow manure. Less environmentally sound ones are made with brand new wood fibre, and/or peat moss (removal of peat moss has been linked to global warming).
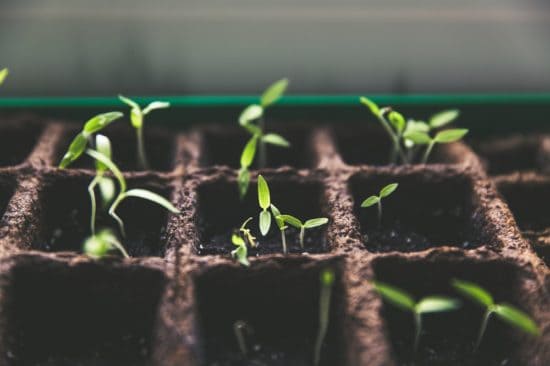
Whatever they are made from, they are designed to be single-use. They require energy to manufacture, package and transport. If we can use what we already have, that is a more eco-friendly option.

They are more durable than newspaper or toilet rolls, so are a good option for growing seedlings to sell or where they need to look more professional.

Purpose-bought Biodegradable Pots

Biodegradable (but not compostable) pots are often made with PLA plastic, also called corn starch or plant-based plastic. This is a polyester made from plant material rather than fossil fuels like traditional polyester.

Some PLA pots will state that they are compostable, but this will usually refer to composting under controlled conditions. They should state the test standard used and be “certified compostable.” Without the certification, the claim is meaningless.

These pots are a more eco-friendly alternative to traditional fossil-fuel based plastic pots. It should be possible to reuse them a few times before they begin to break down.

Personally, if a pot says biodegradable but does not say compostable, or is made of PLA plastic, I would avoid it unless absolutely necessary.

Things I don’t recommend:

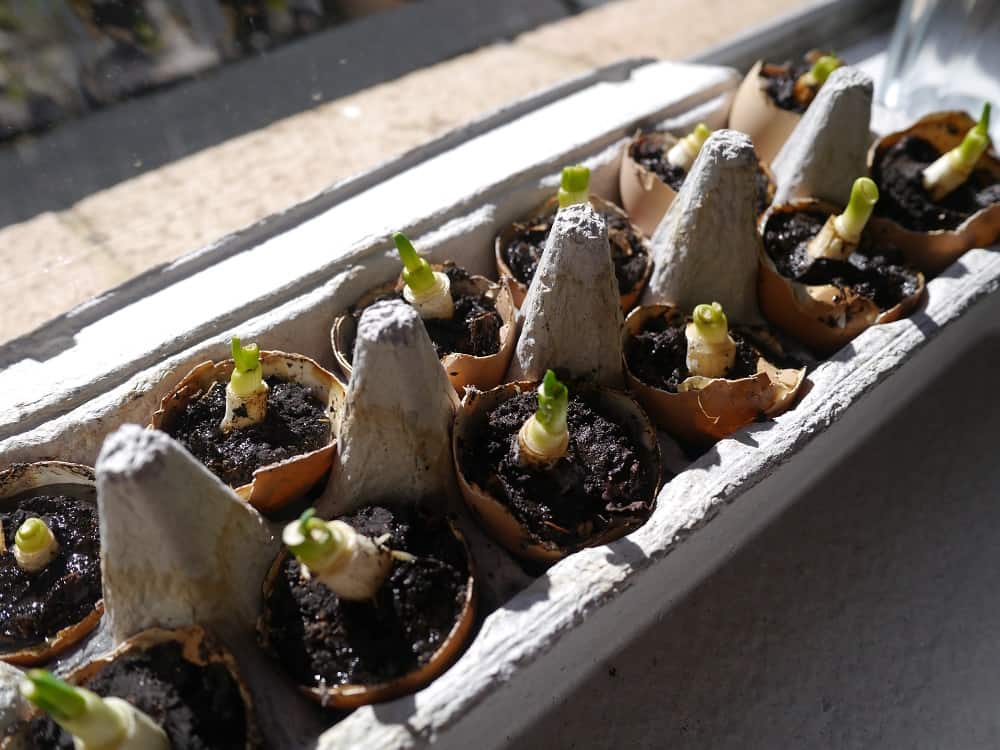
Eggshells might look cute, but they are ridiculously impractical to fill. I found the same with egg boxes, and they are so absorbent they dry out the soil, but if you don’t live in a hot climate, they might work. On the downside, too cold and damp and they will encourage mold growth.
Terracotta pots aren’t great for seedlings as the roots can attach to the clay and get damaged in transplanting. Brand new compostable seedling punnets might sound green, but they seem a waste of resources when there are so many other options to use.

Transplanting Seedlings to Bigger Pots

Sometimes seedlings need to be transplanted into bigger pots before heading out to the veggie patch.

Reusing Seedling Trays/Plastic Pots

I’m a big fan of re-using what we have. We don’t use plastic at home, but I often find plastic plant pots thrown out on verge collection day, and I collect them to re-use. Plastic yoghurt pots, milk bottles and other plastic containers that can all be re-used to make plant pots.
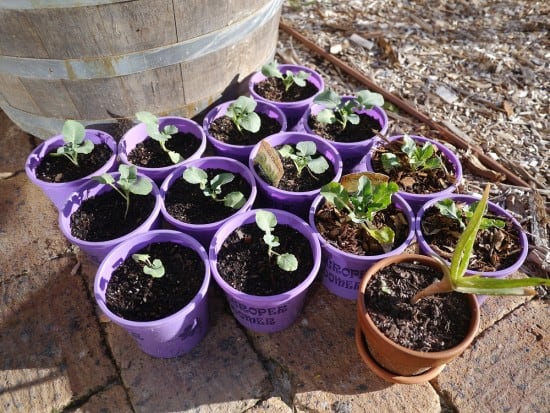
Plastic that has been used with soil is difficult to clean and won’t be recycled. That’s fine if you intend to reuse the plastic as plant pots again and again. If there’s a choice, it is better to choose plastic that isn’t recyclable over plastic that is, and aim for as many re-uses as possible.

Plastic that is left in the sun will also begin to photo-degrade (break down into smaller pieces). They will last better in cooler, shadier conditions.

Potting On (Transferring Plants from Small Plant Pots to Bigger Plant Pots)

Seedlings eventually grow up, and either go into the garden or need bigger, more permanent homes. Whilst it’s easy to find small pots in various sizes, as the size goes up the opportunities become more limited. Here I’ve focussed on some of the biggest options, which are big enough to plant a small tree.

Terracotta Pots

I’ve found that terracotta pots aren’t great for small plants that I intend to repot as the roots get damaged, but they are a great plastic-free option for bigger plants, bulbs or annuals. We got these pots from the verge when our neighbours moved to Queensland.
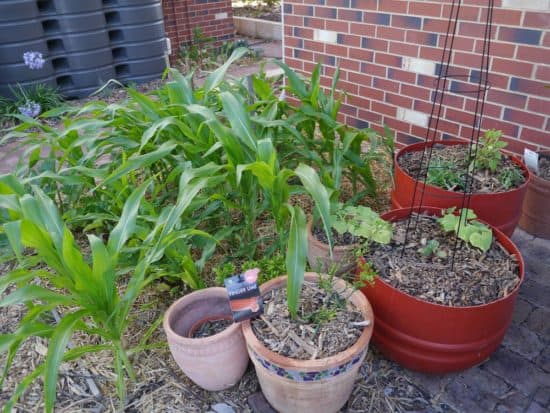
One thing to note about terracotta – it is porous, which means in hot summers it can wick moisture out of the soil. One solution is to paint or glaze on the outside or the inside, to maintain the moisture of the soil, or choose pots that are already glazed.

Wine Barrels

I love wine barrels. They look beautiful and rustic, and are a waste product of the wine industry, but they are also very expensive to buy. These two wine barrels were purchased several years ago, but now they’d cost more than $100 each. Great for a feature, but not practical if you are on a budget or need more than one.
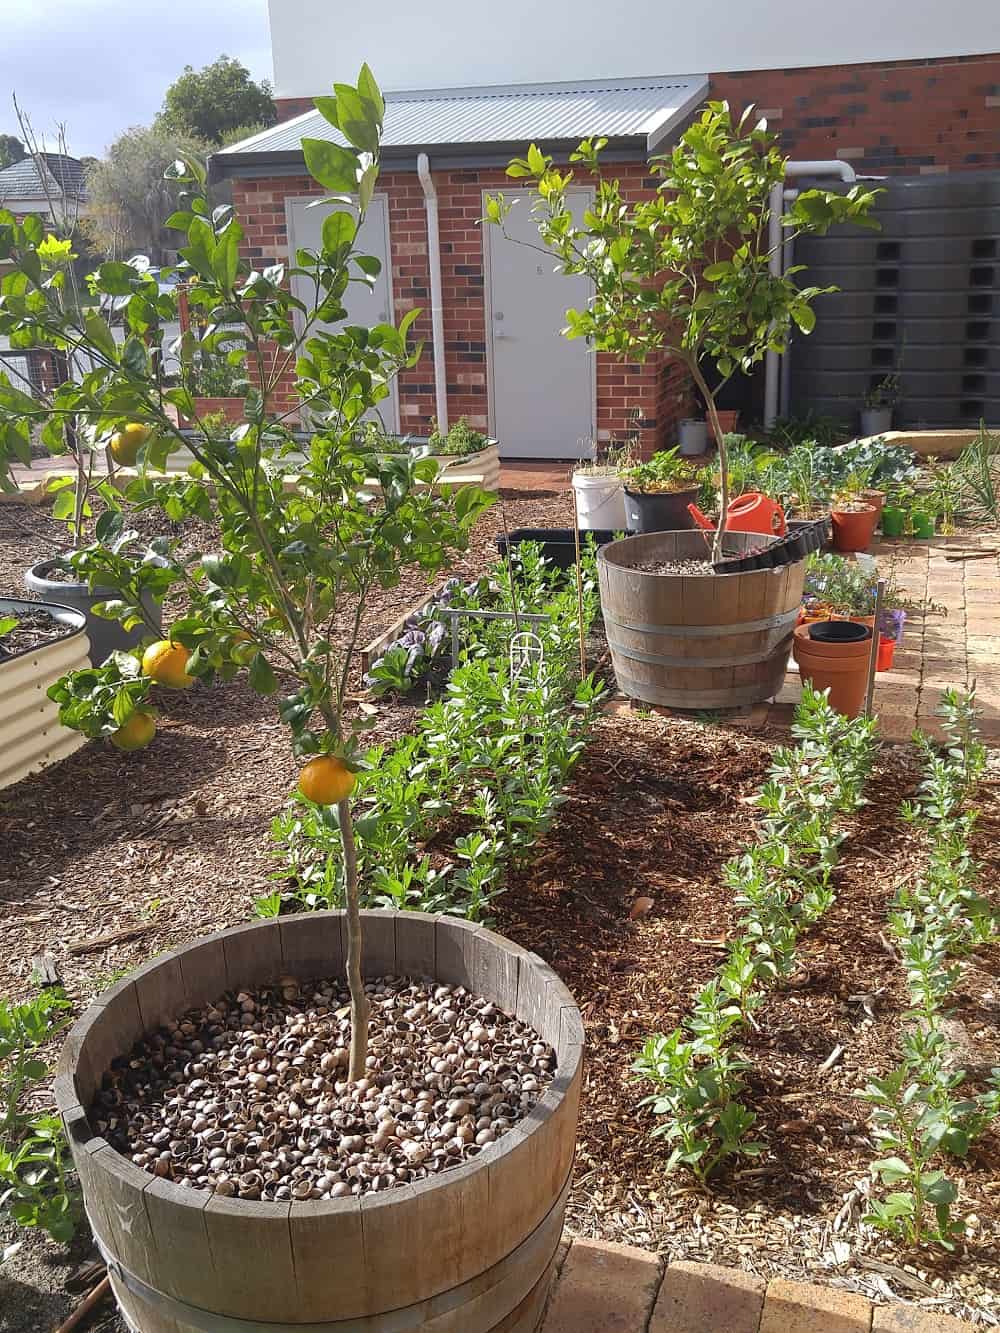
Wine barrels can be stained or varnished to help protect them from the weather, but ultimately the wood will break down. In Perth with its long dry summers, a wine barrel receiving haphazard (or no) care should last several years. In wetter climates I’d expect they’d need more management.

Olive Barrels

Olive barrels are big 190 litre food-grade plastic barrels that olives are imported in. They cannot be re-used by the import/export industry, so they are a waste product. Yes they are plastic, but they are second-hand. Much as I hate plastic, I love re-use,. Most terracotta pots for sale in WA are imported from Italy, whereas these barrels are already here. They are also extremely low cost – one barrel costs around $25 and can be cut in half to make two pots.
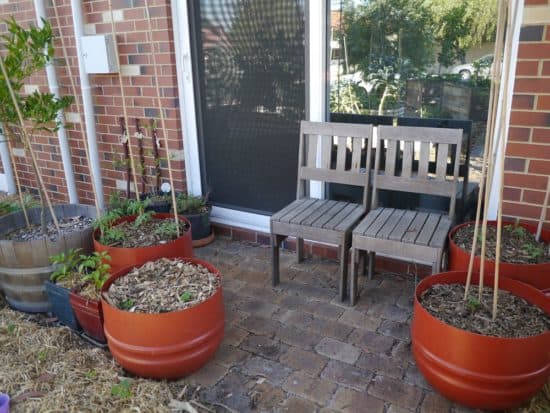
I would always choose the orange barrels, which are food grade. The blue ones are chemical barrels and most originally contained pesticides and fungicides, or other chemicals. They also tend to buckle in full sun, whereas the orange ones do not.

I’ve made all my olive barrels into wicking beds, meaning they have a hole at the side rather than the bottom, and a reservoir below the soil to hold water. This means the soil can wick water from the reservoir in summer, so the plants need less watering. Because a container needs to be fully waterproof to do this, it is difficult to do without plastic.

Upcycled Things

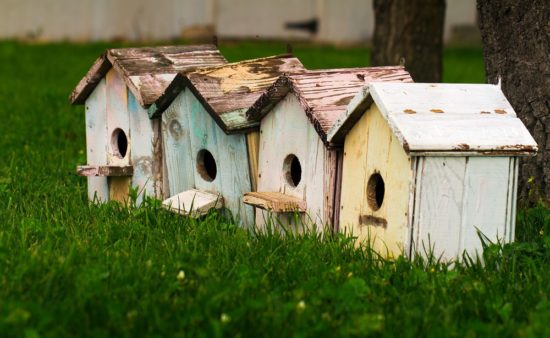
Honestly, it is only your imagination that will restrict you when it comes to finding eco-friendly plant pots. I’ve seen garden beds and plant pots made of old toilets, sinks, bathtubs, metal tins, plastic clam-shells and much more.

Just because it isn’t round and sold in a garden centre, it doesn’t mean that you can’t grow something in it!

Now I’d love to hear from you! Do you have any other suggestions to add to this list? Do you have any “not-to-do”s or things to avoid? What’s the craziest thing you’ve ever seen used as a plant pot? And more importantly – did it work or was it a fail?! Please share your thoughts in the comments below!

Permaculture Principles for Modern (Zero Waste) Living

Have you heard of permaculture? Founded by Bill Mollison and David Holmgren in the 1970s, permaculture was the development of agricultural ecosystems intended to be sustainable and self-sufficient. The term came from “permanent agriculture.”

Let me tell you, it’s actually about a lot more than gardening.

Since the 1970s, the idea has expanded and grown, as has the movement. At its core it is a ‘systems thinking’ approach, and the design principles can be applied to anywhere where sustainability is the focus.

But many people would describe permaculture as a “philosophy” – a set of guidelines to live by. Many people would describe zero waste in the same way. Both have the idea of fair share, not taking or using more than we need, not wasting resources or people.

Because of this, I think permaculture principles (and ethics) are just as relevant for plastic-free (and zero waste) living. They are relevant to people living within cities, and without so much as a pot plant to their name.

But many people without gardens simply don’t know enough (or anything!) about it.

Let’s change that! I’d like to introduce the permaculture principles, and their relevance (as I see it) to the zero waste movement.

Permaculture Living: The Three Ethics

At the centre of the movement are three ethics: people care; earth care; and fair share. I would argue that anybody who believes in sustainability believes in these three ethics.

Permaculture Living: The 12 Principles (And How They Relate To Zero Waste Living)

The 12 principles of permaculture, developed by David Holmgren in 2002, are described as “thinking tools”. Used together, they can enable us to re-design both our environment and our behavior in a world of less energy and resources.

They are guiding principles for an ethical lifestyle.

Observe and Interact.

To me, this is about taking the time to look around us, to explore our surroundings and learn from others. We often learn good habits from others, or we find answers simply by watching and thinking.

By asking questions, seeking out information and being open to learn, we can come up with solutions that work for us.

Catch and Store Energy.

To me, this is about efficiency. Making the most of things when they are abundant, and being able to use them when they are not.

We think of energy as electricity or power, but it’s just as true for water and food, and the energy embedded in resources. From a zero waste perspective, maximising the use of anything is encouraged.

I like to think of reusables as “caught and stored energy”. An item, build to last and used forever. Rather than single use items that require energy to make, energy to ship and then are gone from usefulness forever. Wasted energy.

Obtain a Yield.

In gardening terms, this principle is pretty obvious. Actually, it should apply to everything we do. Money is another obvious yield, but it goes deeper. We don’t have to be paid for something to get pleasure from it. Yield can also mean enjoyment, satisfaction, motivation, and fulfillment.

When we love to do something, the pleasure of simply doing it can be its own reward.

There is a danger of doing things that bring us no pleasure, satisfaction nor other reward: they ultimately leave us burned-out, demotivated, resentful and frustrated.

That’s not sustainable.

Apply Self Regulation and Accept Feedback.

Permaculture looks at this from a systems perspective, but I think it’s just as relevant for individuals.

None of us are perfect. We strive to do the best we can. When we receive feedback telling us there is a better way, or pointing out something we hadn’t thought of before, we can begrudge and feel judged and not take action; or we can embrace the challenge to improve ourselves a little more.

Use and Value Renewable Resources and Services.

This is definitely a principle that underpins both the plastic-free and zero waste movements. Most plastic is made from non-renewable fossil fuels, and recycling options for all plastics are limited (and result in downcycling).

The zero waste movement embraces a circular economy, and aims to see nothing sent to landfill.

Both movements value choosing materials that are natural, renewable, reusable, recyclable and biodegradable.

Produce No Waste.

My favourite principle! Clearly the zero waste movement is built around “produce no waste”, but permaculture has a different (broader) perspective.

Whilst permaculture recognizes there is a bigger system, the zero waste movement can lean towards individualism.

In permaculture, reusing and repurposing other people’s waste is a huge part of reducing our impact and use of resources. The zero waste movement celebrates individual action and achievement: it focuses on reducing personal landfill waste, but doesn’t always recognize that waste is still produced upstream.

Personally, I think they both have a place, and I think both ideals can learn from the other.

Design From Patterns to Details.

This principle recognises the value in observing before doing, and the importance at looking at the bigger picture before making choices.

From a zero waste/plastic-free perspective, I see the patterns as “habits” and details as “stuff”. Rather than deciding to embrace a low-waste lifestyle and then spending hours choosing the best mason jars to equip the pantry with, it is better to look at our habits first.

Take time to look for the patterns, and then decide what fits best.

It’s another way of saying: take time, observe first, and do second.

Integrate Rather Than Segregate.

Integration is important for any community. It’s what glues community together, and it’s what creates a movement. To get the best outcomes, we need to work together.

There is no ‘them’ and ‘us’. There is only ‘us’.

Whether we teach, motivate, encourage or provide support, communities are best when we embrace networks, share freely and collaborate.

Community is strong in both permaculture and zero waste, and for many of us, that’s the best part.

Use Small and Slow Solutions.

Bigger isn’t always better. Small and slow solutions are at the heart of the zero waste movement. Taking time, making do, thinking creatively; embracing local and seasonal.

Use and Value Diversity.

There is never a “one-size-fits-all” approach. There is rarely a single way to do anything. There are different voices and different perspectives, and different ways of doing things, even when the outcomes are similar.

We connect with different stories, and everyone has something to add.

Use Edges and Value the Margins.

In permaculture, we talk about the interfaces between things being where the most valuable, diverse and productive elements lie. The edge of a pond, lake or river; or the edge of the forest where the trees meet the grassland.

In zero waste, I think of these “edges” and “margins” as the parts that are often seen as waste – things like offcuts or scraps. Yet they have just as much potential and are just as valuable – it often just takes a little creative thinking.

Creatively Use and Respond to Change.

“Vision is not seeing things as they are but as they will be.” Both the permaculture and zero waste movements are build around a desire to do things differently; to do things better than the “status quo” of overconsumption and exploitation.

Both embrace creativity, not at an artistic level but at a solutions-based, practical and ideas level. Looking at the system, and creating new ways to do things better. Seeing things that aren’t working, and coming up with better ways.

It isn’t about having all the answers, or creating change on a global scale. It’s about being creative with what we know and what we see, and doing things differently.

For me, both permaculture and zero waste living offer practical solutions for those of us that feel dissatisfied with the current ways of the world, and want to  create a more positive future. Neither are perfect, but they enable us to do things differently, and encourage those that follow to go one step further.

Now I’d love to hear from you! Is permaculture new to you or old news? How do you think the permaculture principles compare to zero waste living? Which principles do you personally see as the most important – or do you think all of them? Do you have any personal principles that you live by? Anything else to add? Please share your thoughts in the comments below!

Behind the Scenes: What ACTUALLY Happens to Recycling

I love a good tour of a recycling facility or a landfill site. Asking the question “where does our rubbish and recycling actually go?” is one thing, but to actually go and have a look? That’s a completely different experience.

Recycling is presented to us as a green, clean solution – but the truth is, it’s stinky, resource-intensive and run by markets. Meaning, if it’s not cost-effective to recycle, then it won’t be recycled. If no-one wants to buy the stuff that we’re collecting for recycling, then it won’t be recycled.

My first visit to a recycling centre (which has the technical name of Materials Recovery Facility, or MRF – pronounced “murf”) was back in 2012. I’d just taken part in Plastic Free July, and was working hard to reduce my plastic and choose glass, paper and cardboard instead.

That MRF visit changed my perspective on waste almost as much as Plastic Free July did.

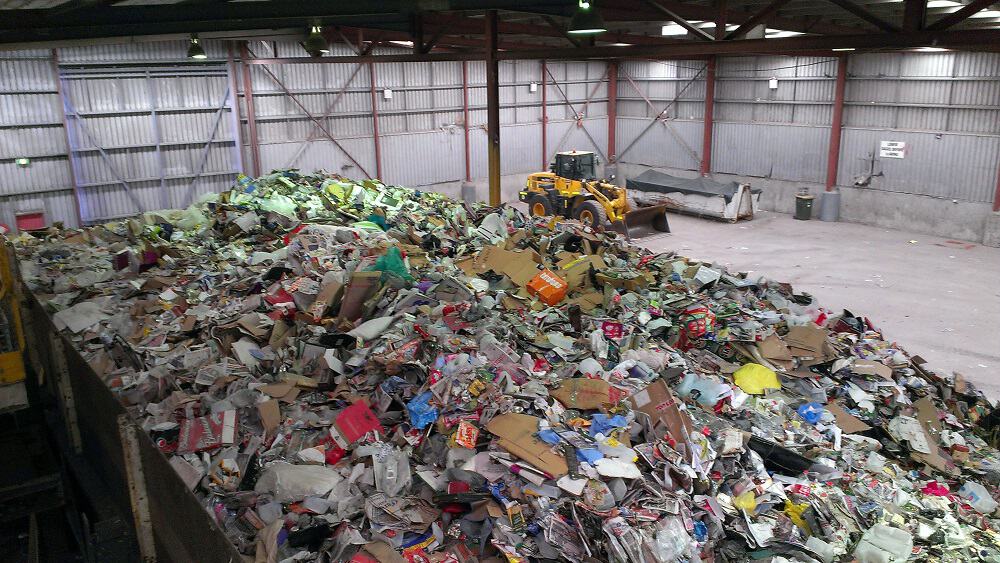
Because it didn’t look like how recycling looks like in the brochures.

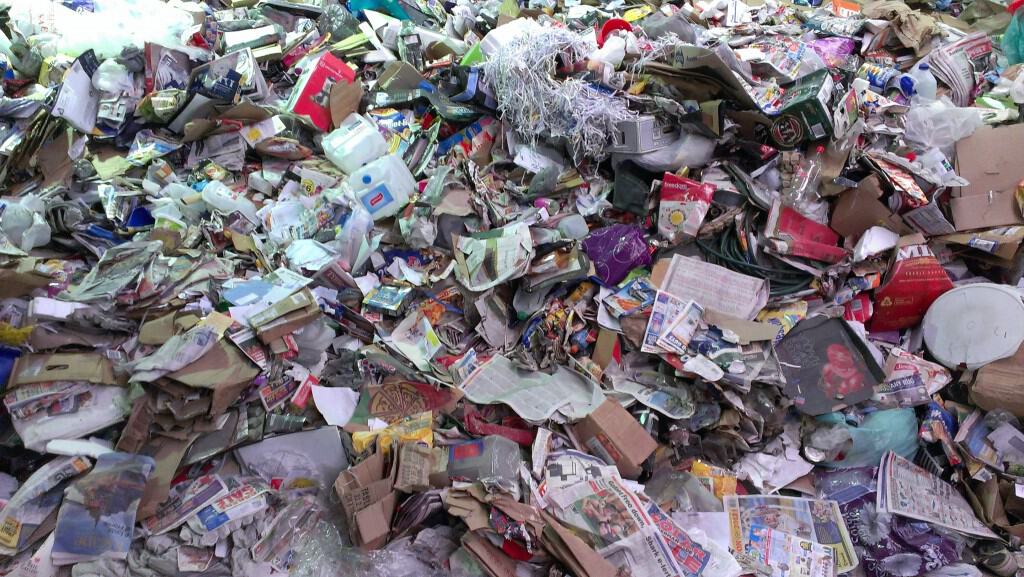
Because it was kinda stinky and gross, and there was so much of it.

Because the guy showing us around was hell-bent on telling us: if we can’t sell it for good money, we send it to landfill.

This was the recycling from just a few suburbs collected in a single afternoon.

Visiting that MRF challenged my perceptions of recycling. It wasn’t green, or clean. It was a business, and it was running for profit. If landfill was a cheaper option than recycling, then the resources were landfilled. The ones that were recycled were baled into containers and shipped overseas for processing.

Everything went overseas for processing. None of that happened in Perth.

The biggest revelation for me was that glass is not recycled at all in Perth. Some MRFs sell glass to be crushed into road base (which I personally don’t consider to be recycling), but at this MRF, all glass was landfilled.

(Five years later and this is still true: glass is still not recycled in Perth, nor it seems, on the east coast of Australia.)

That visit to the MRF changed the way I viewed waste completely. There I was, choosing glass over plastic, only to find out that all that glass was heading to landfill.

That was not what I had expected.

That was my realisation that it wasn’t just plastic I needed to refuse, it was all packaging. I hadn’t heard of “zero waste” back then, but that visit was the start of my zero waste journey.

I’ve been pretty obsessed with waste ever since, and I’ve been to plenty of MRFs and other waste recovery places to find out exactly what goes on. I thought I’d share a few of these insights for those of you who can’t make it to one.

What Goes on at a Materials Recovery Facility (Recycling Centre)?

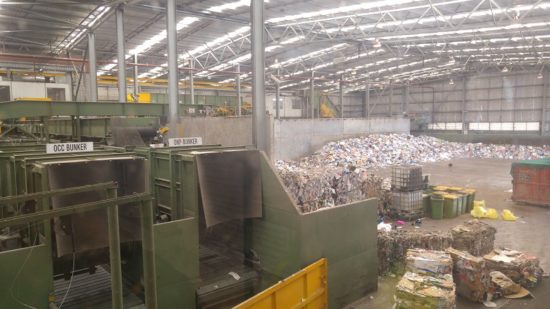
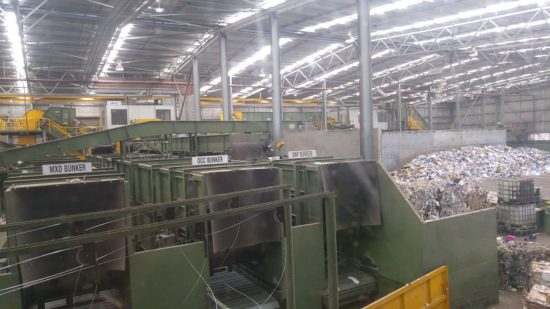
This is one of several recycling facilities in Perth. This facility services 5 councils. It cost $20 million to build.

The recycling is dumped on the floor by the recycling trucks, and from there is loaded onto a conveyor belt and the various recycling streams are sorted.

First the cardboard and paper is separated by spinning rollers into mixed paper, old corrugated cardboard and old newspaper (the three structures labelled in the picture below).

The glass is sorted by a tremel, crushed and used for road base. The steel is separated by a magnet, the plastic is sorted by an optical eye that can differentiate PET, HDPE and mixed plastic, and these are separated. An eddy current is used to separate the aluminium.

The resulting materials are baled and loaded into containers for shipping overseas: China, Malaysia or Indonesia. The recycling facility works on 3-month contracts with these purchasers.

What happens once these materials arrive overseas is a grey area. The companies have standards and agreements to adhere to for recycling and processing the waste, but there are also reports that most of the plastic is burned as a cheap alternative to fossil fuels.

What Happens with Commercial Composting?

Commercial composting can use various different “wastes” but for households, there are two main types of collection – those that use a dedicated food organics and garden organics bin (FOGO – they do love acronyms in the waste industry!) and those which compost the general landfill bin.

This facility composts the landfill bin. This means a much higher level of contamination.

Residents tend to put things in their landfill bin that they are told they cannot recycle. That makes sense, yes? But it means plastic, broken glass, pottery, broken electronics and all kinds of other stuff gets mingled in – and sent here for composting.

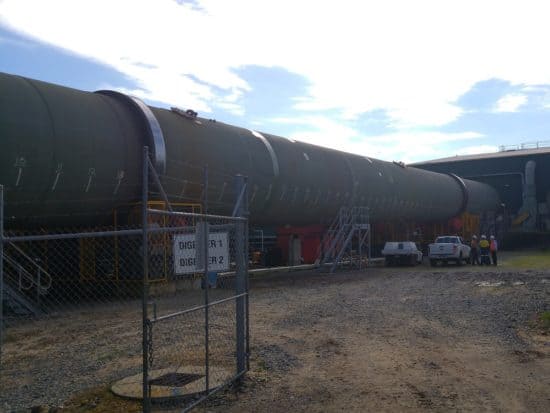
The first job is when the landfill waste arrives here is to remove as much of the big contaminants (bicycle wheels, gas bottles, large plastic items) from the waste. This is sorted with a big truck. Then it’s loaded into the composting machines, called digesters. They are 67m long, and there are 4 of them at this facility.

The “waste” is rotated in the digester for 3 days before being deposited in a large warehouse (the size of two soccer fields) to mature. It’s turned every few days by a machine, and cooled using giant fans to circulate air.

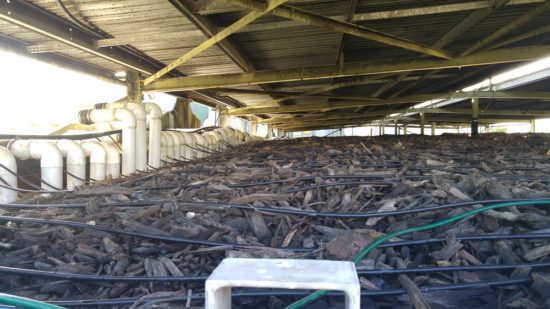
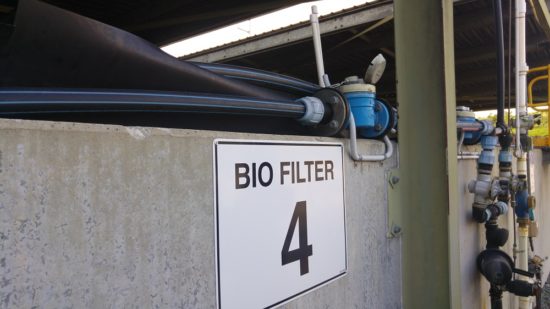
To prevent odours, the digesters have these enormous biofilters, made of tanks filled with water and wood chips. There are four of these: one for each digester. The air is sucked out with a vacuum filter.

The compost is then sieved and screened to remove metal, plastic, glass and other pieces, and transported for further processing. Because it still has high levels of contaminants, it is only suitable for agricultural use.

Commercial composting facilities that accept dedicated food and garden organics bins have much lower levels of contamination and produce a higher grade compost.

Is This Typical? Is This What Happens to MY Recycling?

The truth is, every recycling facility is different. Some are much more high-tech than this, and some are much lower tech. Some use hand-pickers (real people who separate rubbish and pick out contaminants) and others rely solely on machinery.

Commercial composters are also different, and processes vary. Some councils don’t utilise these services at all, and simply landfill the contents of the landfill bin.

No two Materials Recovery Facilities are exactly the same. (Even where the machinery is the same, the contractors might be different, the ability to sell resources to markets is different, volumes will differ, and operating costs – meaning profitability -will be different.) If you are even the slightest bit interested in waste and where it goes, I recommend visiting your local one. Many (but not all) are open to the public. Contact your local council or waste contractor, and ask if they run tours.

Even if they don’t, there might still be an opportunity to have a look. Ask the question!

No Recycling Facility has 100% Recycling Rates

Recycling is always subject to contaminants, error and changes in the market. Someone putting the wrong thing in the wrong bin can contaminate a whole load (think asbestos and hazardous waste).

Markets change all the time. The value of plastic fluctuates with the price of oil. If oil prices are low, there’s less incentive for manufacturers to use recycled plastic as new plastic will be cheap. If oil prices are high, it’s more expensive to ship low-cost materials overseas for processing.

Councils often encourage us to put things into our recycling bins to get us into good habits. Or, they might prefer non-recycables to go to a recycling facility for sorting and removal, rather than putting them through a commercial composter (where they can do more damage). Or they think it is just too confusing to go into details, and we’ll get overwhelmed if they don’t make it really simple for us.

Acceptance of a material into a recycling bin is not a confirmation that the material will be recycled. It just means that it is the preferable option: to establish good habits, reduce contamination elsewhere, and give us faith in the recycling system.

Recycling Uses Huge Amounts of Energy

Recycling takes a huge amount of resources. Trucks need to collect those recycling bins from our streets, drive them to sorting facilities (and sometimes they get taken to a transfer station first, meaning two road trips) and then heavy machinery is required to sort the different streams. Then the materials need to be baled, loaded into containers and shipped to their final destination – which is often overseas.

Once overseas, there’s more processing and transportation.

Yes, recycling helps reduce new materials from being mined out of the ground. Yes, it uses less energy overall than making new things. Yes, it definitely keeps things out of landfill and keeps materials in circulation longer.

Recycling is definitely preferable to not recycling.

But recycling is not a perfect solution. 

Recycling is not a get-out-of-jail-free card.

Refuse, rethink, reduce, reuse and repair – they all come before recycling.

Much as I’d love to live completely waste free, we don’t live in a circular economy. Many things are not designed for reuse. I still produce recycling – everyone does. I still receive letters in the mail, purchase the odd thing in paper or cardboard, buy wine in glass bottles on occasion, and  find plastic packaging entering my home.

But I try to keep my recyclables to a minimum. If I can refuse something, then I will.

I pop those things I can’t (or choose not to) avoid in my recycling bin and I hope for the best.

Before I embarked on my zero waste lifestyle, I would see my full recycling bin as a badge of honour for being the responsible eco-citizen. Now I see anything that enters my recycling bin as a waste of resources, a failure of my imagination, a flaw in the system.

Most importantly, I see these things as something to work at improving for next time.

It is fantastic that recycling exists. It saves all those resources from landfill, and gives them the opportunity for reuse. We will always need recycling, but we mustn’t rely on it, or think of it as the solution.

Recycling is a great place to start. But it’s a terrible place to stop. We can do so much better.

How I Feed My Dog Without Plastic

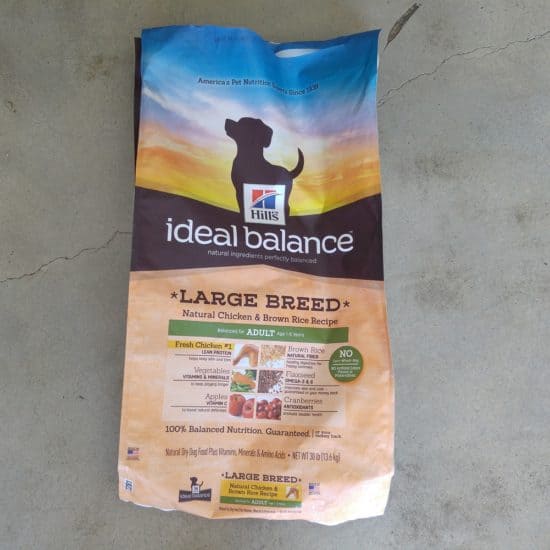
You may remember that my Plastic Free July pledge this year was to stop buying dog food in plastic, and start making it myself. Aside from the plastic, I didn’t love that the brand that suited our greyhound best was imported from the USA, I didn’t love that it was supporting industrial agriculture, and I didn’t love that it was highly processed.

These are all things I try to avoid, and I was very conscious that buying this was against so many things I believe in.

Believe me, we tried other brands. We tried all of the Australian ones, and several other high quality ones. Whilst he ate them all with equal vigour (our boy loves his food), we noticed other effects: fat depositing around his neck, weight gain, loose stools, and one brand that led him to go to the bathroom four times every single day.

Not to mention, all the brands left his skin very itchy. Sometimes he would nibble at his legs so much his skin would bleed.

Enough is enough. I had to at least try homemade dog food.

Our greyhound Hans came to live with us a year ago. It was time to stop making excuses, and start knuckling down and getting the plastic-free dog food happening.

 Getting Started with DIY Dog Food

The internet can be an overwhelming place, and full of contradictory information as to what is best. My three main concerns were:

  • How would I know how much to feed him? (Wet food is very different to dry food.)
  • How would I ensure he was getting all the nutrients he needed?
  • How would I know that the food was safe?

Before I go any further, disclaimer. I am not a vet, nor am I an animal dietitian. This is not professional advice nor a recommendation. This is what I am exploring for our dog based on my own research and am sharing for information purposes only. Please do you own research or consult a professional.

How Much Do I Feed My Dog?

There are plenty of guidelines for feeding dogs wet or homemade food on the internet – and of course, they are all slightly different! I realised that if I underfed or overfed him, it would eventually become apparent with changes in his weight, energy levels and appearance.

Hans weighs 30kg, and he’s being fed 800g – 1kg of food per day.That seems to fit within most recommendations.

How Do I Ensure My Dog Gets All the Nutrients They Need?

I worried about this for a while, before realising that there are plenty of commercial pet foods that fall short here. Dog nutrition wasn’t even considered a few decades ago. Not forgetting, there are plenty of people who do not consume all the nutrients that they need.

In natural habitats, dogs are scavengers. They don’t get two meals a day fed to them out of a bowl. They might not get two meals a day.

That’s not to say I don’t want to do my best. But it gave me some perspective.

I looked into nutritional supplements to add to homemade dog food, but many of the recommended ones are not available in Australia.

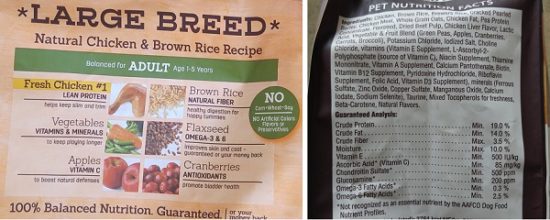
I looked at the labels to discover the ingredients, did some research into the nutritional benefits, and opted to make my own.

How Do I Know My Homemade Dog Food Is Safe?

That was the easiest one to answer, because there is plenty of information on the internet regarding ingredients that are safe for dogs, and those that are not.

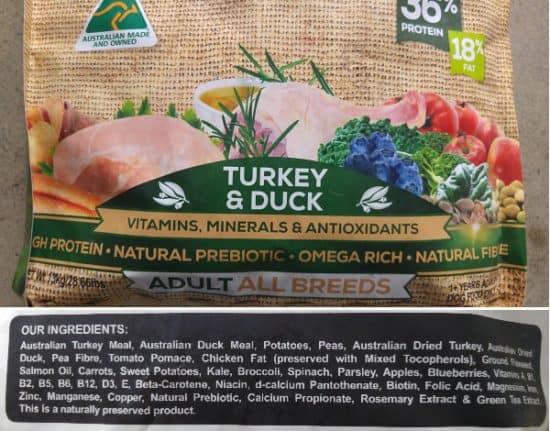
The second thing I found helpful was to look at the ingredient lists on the dog food I was buying, and try to mirror these ingredients in the dog food I was making.

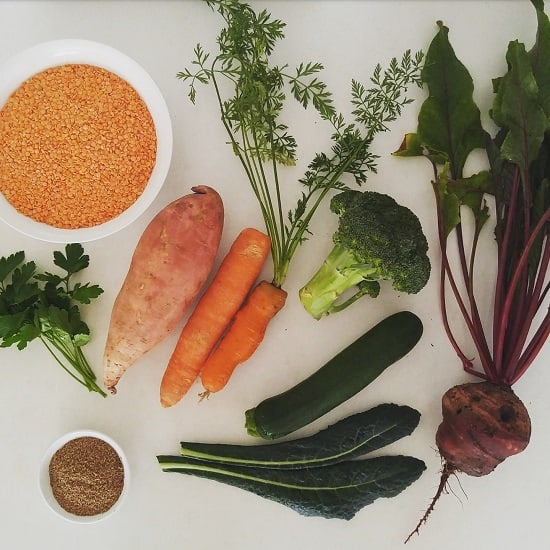
Half the ingredients are things commonly available: carrots, sweet potato, rice. Other ingredients had unpronounceable names. For these, I asked the internet:

  • What is [insert name of unpronounceable ingredient]?
  • What foods contain [unpronounceable ingredient]?

Then, if I wasn’t sure, I’d ask: is [food containing unpronounceable ingredient] safe for dogs?

It turned out that these ingredients were either preservatives or a component/vitamin/mineral found in many natural foods.

In terms of toxicity, or malnutrition – these things become apparent over time. We are keeping a close eye on Hans and if we notice any change in his appearance or behaviour, we will consult a vet.

DIY Homemade Dog Food – Vegetable Component

Dogs need protein, fat, minerals and vitamins. Dogs don’t actually need carbohydrates at all. Carbohydrates like white rice and corn are  typically used in commercial dog foods as a filler, because they are cheap. But they offer little nutritional value.

For several months before I embraced the DIY dog food, I tested various ingredients on our greyhound. I’d add a small amount to his bowl along with his kibble. He gobbled everything up. And I mean everything.

I’ve heard that greyhounds can be fussy eaters. Not our boy!

The vegetable component has three parts, in equal proportions.

1. Protein component: 33%

Rather than use carbohydrates as a base, I use lentils. They are cheap but contain protein and vitamins. Typically I use red lentils as they are quick to cook. I soak for 30 mins, rinse thoroughly, and boil in a pan for 30 minutes. Once they have cooled I blend to a puree.

Red lentils are my preferred choice, but I have also used green/brown lentils, puy/French lentils, chickpeas and black beans. (Chickpeas and black beans require much longer soaking and cooking times.)

2. Sweet Potato or Pumpkin Cooked Vegetable Component: 33%

Sweet potato is a good vegetable to give dogs, because it contains beta-carotene, a pre-cursor to vitamin A. It also grows well in Western Australia and is available all year round.

Occasionally I use pumpkin (butternut squash or Japanese pumpkins) as an alternative.

I grate in my food processor, then steam for 12 minutes until cooked, and blend together with the lentils.

3. Raw Vegetable Component: 33%

This tends to be mix of whatever is in the fridge or the garden, but typically is 50% raw carrots and 50% of a mix of green leafy vegetables, beetroot, brassicas (broccoli, cauliflower), zucchini/courgette and cucumber.

These are blended together raw, and then mixed with the lentils and orange vegetable components.

DIY Dog Food – Vegetable Fats

I add a tablespoon of oil (olive oil or coconut oil) to every meal, and/or 1 tablespoon of ground flax seeds. Hans is also a huge fan of both peanut butter and tahini so I sometimes stir this through his food as a treat.

DIY Dog Food – Animal Products Component

Hans gets a fair amount of protein from the vegetable component of his diet, but we also add fish, eggs and other animal products.

Sardines: 4-5 per Week

Rather than feed Hans fish oil or supplements, it makes sense to me to feed him whole sardines. He eats whole sardines (head, guts and all) and he loves them.

Eggs: 2-3 per Week

Several of our friends have egg-laying chickens, so we source our eggs directly from them rather than buying commercially produced eggs. I also save the eggshells, wash, dry and grind them into a powder, and add a tablespoon along with a raw egg mixed in with his food.

Chicken Necks: 4 a Day

We’ve got a system with our butcher now where we drop off a big container, and when he gets chicken necks in, he fills up the container and gives us a call to collect. I was terrified of giving Hans chicken necks at first because I’d read that dogs can swallow them whole. Of course, the first time I gave him one, he swallowed it whole. And the second one. Naughty boy!

Now I have to hold them at either end and feed them by hand to ensure he bites in the middle and chews before swallowing.

Other Meat

I’m still finding my way with this one. I’m still exploring the various butchers and trying various options, and I don’t have an answer… yet. Hans is happy with whatever he gets, so it’s up to me to find a waste-free, sustainable and local option that I’m happy with.

DIY Dog Food – Nutritional Supplement

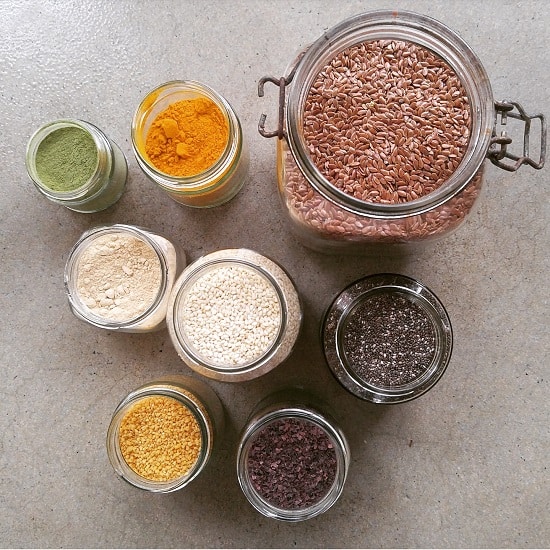
I make up a supplement to add to the dog food to give it an extra nutritional punch. I looked at a number of supplements (both available for purchase and DIY recipes), looked up the nutritional content of each ingredient, and made my own based on that, along with what ingredients I could find.

The ingredients I use: ground flax seeds, ground sesame seeds, chia seeds, barley grass powder, lecithin, turmeric, maca powder, and seaweed (either dulse flakes or wakame).

(I realise these ingredients might sound very foreign! I’ve been able to find most of them in bulk at The Source Bulk Foods, who have 35 stores across Australia. The only one they don’t stock is wakame. They also sell other things like brewer’s yeast and other green powders which can be used instead/as well as. Outside of Australia, I’d try a health food shop.)

I’m still playing around with quantities of each ingredient, and also how much to use.

DIY Dog Food – Progress so Far

So far, we have been DIYing it for about 7 weeks. As with all new habits, getting into a routine is the hardest part. We’ve also had to pretty much empty our freezer of our food to fit in Hans’ food!

I can’t report back regarding cost yet, as we are still finding our way. I hope to do an updated post in a few months with actual recipes and costs involved.

The Positives:

Hans loves his new food! He gets much more excited now we’re serving up fresh food than he did with kibble (although he still thought kibble was pretty darn fantastic.)

I feel better about what I’m feeding him. I just feel more comfortable knowing his food is natural and not made in a factory somewhere overseas.

His energy levels are unchanged.

His stools are much better! Which is very helpful when you’re trying to pick them up with newspaper and take home to compost ;)

He has completely stopped itching. Whatever it was that was irritating his skin in the kibble, it’s no more. Hurrah!

The Negatives:

Hans has lost a bit of weight. Actually, we think he might have been a little overweight before (something that is VERY hard to tell with a greyhound). Lots of people have commented on how good he looks and how good his coat looks. But we are keeping an eye on him to ensure he doesn’t get too skinny.

We now have a new friend (or should I say trip hazard) in the kitchen. Whereas he never showed much interest before, now he knows that his dinner comes from there, he is like a constant companion. And if you open the fridge door – there he is beside you!

Did I just hear the pantry door open?

Now I’d love to hear from you! This is all new to me, so I’d love to hear from your experiences. Do you make your own dog food, and if so, what ingredients do use use? What lessons have you learned? If you want to give it a go but are unsure where to start, what are you stuck on? Are you a vet and do you have any (off-the-record) advice? Anything else to add? Please leave a comment below!

Plastic Free and Taking the Challenge One Step Further

For most of us, living with less waste begins as a personal journey. As we start to discover more about the issues caused by waste, particularly plastic, and the options and alternatives, most of us begin wondering how we can get others involved. Whether it’s our families, our friends, our colleagues, the local school, the local cafes or shops, we want to spread the message and bring others with us on the journey.

Today’s post is about what you can do to take that step: to take the ‘living with less waste’ message out of our homes and into the community.

Host a Movie Screening

A movie screening is a great way to get people together to raise awareness of the issues, and start a discussion about solutions and alternatives.

One of the first things I did after signing up to Plastic Free July for the first time back in 2012 was attend a community screening of the plastic documentary Bag It. Even more than signing up to the challenge, that documentary changed my life. In a little over an hour I’d gone from feeling fairly relaxed about my plastic use to realizing that plastic was a huge problem but with so many solutions – and something that I could do so much about.

Movie screenings can be as big or as small as you like. Anything from:

  • borrowing a DVD from the library and showing it to a few friends and family;
  • Getting a community screening license from a distributor to show a movie in a public place such as a community hall or function room;
  • Using community screening platforms such as Tugg, which allows you screen documentaries in cinemas, through selling tickets in advance. The model works a little like crowdfunding – if not enough tickets are sold, the screening is cancelled.

If you’d like some inspiration for a good documentary to show, my top 10 list of documentaries might be a useful starting point.

Host a Plastic-Free Morning Tea or Supper

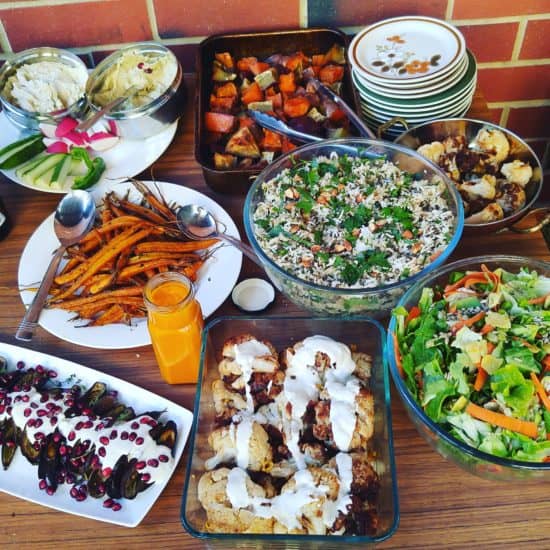
Invite others in your local community, workplace or school to attend a waste-free morning tea or supper, where all of the food has been purchased and prepared without single-use packaging.

You can invite community members to accept the challenge and bring a dish without packaging, or you can prepare or source it all yourself to ensure no sneaky plastic makes its way in.

Inviting someone to speak is a great way to engage the group with some of the solutions. Here’s some ideas:

  • Invite a local organisation to talk about the great waste reducing initiatives they’ve adopted;
  • Invite a local eco store to attend to talk about some of the products they sell and their benefits;
  • Invite someone who lives in the in the local area to share the story of how they reduced their own waste.

Set a table with some reusable alternatives to talk about, and give everyone the chance to share their ideas and ask questions. The idea is to get everyone thinking, and talking…and then acting!

Host a Litter Pick-Up or Beach Clean-Up

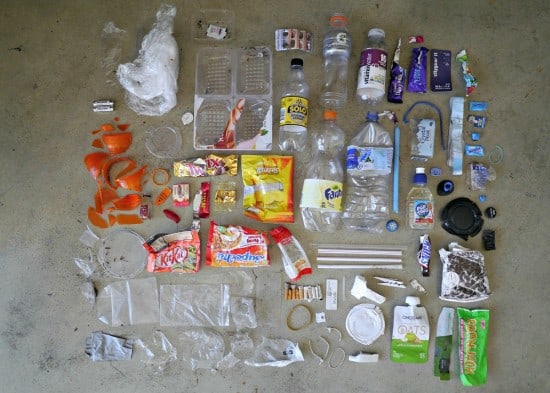
A litter pick-up is a powerful way to get others fired up to take action. Connecting others to places where litter ends up brings attention to the scale of the problem, and taking action by removing the litter goes a huge way towards protecting the ocean. Removing litter from the environment is also a positive reinforcement of the impact we can have when we work together.

To organise a litter pick up, set a date and time, gather necessary equipment (gloves, tongs, buckets, bags or old pillowcases to collect the litter) and start promoting it to your community. Offering a (plastic-free) morning tea is a great way to reward those who turn out to help and another way to continue to conversation.

Join (or Start) a Local Boomerang Bags Group

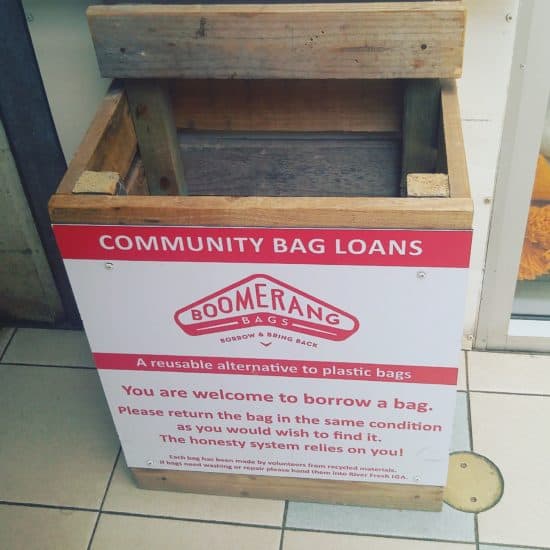
In an ideal world we’d all remember our reusable bags – but everyone forgets sometimes, right? Boomerang Bags was set up to reduce plastic bags by providing free bags for shoppers to borrow and bring back. But even better than providing bags, Boomerang Bags is all about communities getting together to volunteer to sew their bags, out of freely donated old fabric.

Before a group launches, they need to make 500 bags. (Nobody wants to launch and then run out of bags in the first weekend!) Boomerang Bag depositories are placed in shopping centres, and then the public are free to take and then return as required.

You can find out more about Boomerang Bags here, including where the current groups are and how to start your own group.

Get your Local Cafe (or Business) Involved

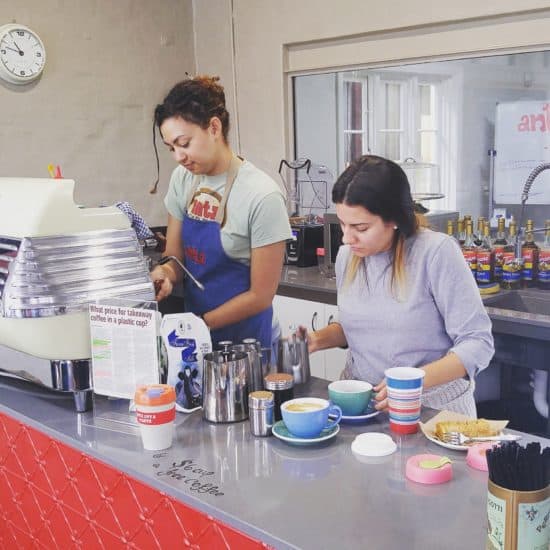
If your local cafe doesn’t give a discount for reusable coffee cups, your local store insists on giving plastic bags to everyone, or your local bar dishes out plastic straws with every drink, have a chat to them to see if they are willing to do something about it. You never know if you don’t ask!

Asking a local cafe, store or business to take part in Plastic Free July is a great way for them to be part of a global challenge and test customers’ receptiveness to charges or discounts, no longer offering single-use items and other initiatives.

Find out if there are other local initiatives that they can be a part of. Responsible Cafes is an Australian volunteer-run organisation which supports cafes who offer a discount to customers who use reusable cups. They have posters for display, and information that cafes can share with their customers. Plus all cafes that sign up are placed on a map, allowing locals to support the cafes near them who are doing the right thing.

Now I’d love to hear from you! Have you taken zero waste or plastic-free living into your community, and if so, how? Have you been to any great community events? Are there any other ideas you’d like to add to this list? Any of these you’re planning to adopt? Please tell me your thoughts in the comments below!