How I Wash My Hair with Bicarb and Vinegar

Most people are a more than a little intrigued when I tell them I wash my hair with bicarb and vinegar. (The ones that aren’t? They either say, me too. Or they raise their eyebrows in slight alarm!)

Then of course, everyone wants to know the specifics. How does it work? How is it applied? How often do I need to wash my hair? All great questions. If this has been puzzling you, today I’m going to share some answers.

If you’re really not up for trying it yourself, I’ve also shared a post on alternative plastic-free hair shampooing options. But before you head over there, why not read this anyway – you might be pleasantly surprised!

Washing My Hair With Bicarb and Vinegar

I’ve been washing my hair with bicarb (sodium bicarbonate, also called bicarbonate of soda or bicarb soda) and vinegar since 1st June 2014. I wrote a blog post about it at the time, along with my reasons why (aside from avoiding the plastic bottles). Three years later, I’m still using it, although I often use rye flour as an alternative to bicarb (I’ll talk about this later).

Here’s a picture from the first washes back in 2014…

…and here’s one from this week.

I’m definitely a convert.

So how does it work?

How much of each (bicarb and vinegar) do you use?

I have slightly-shorter-than-shoulder-length hair, and I use between a teaspoon and a dessert spoon of bicarb per wash. This is my shampoo replacement. I use 1/8th cup of white vinegar, diluted to a cup with warm water, as my conditioner replacement.

How do you apply bicarb and vinegar to your hair?

I mix the bicarb with a small amount of water to make a watery slurry (bicarb is water soluble). I apply to my hair, rub in (you wont be able to feel it like you can regular shampoo) and then rinse off with warm water.

I pour the vinegar/water mix over my head slowly, rub in, and then rinse off as I would regular conditioner.

I towel dry my hair as normal.

What containers do you use to store them?

I don’t keep them in the shower. I keep a jar of bicarb under the sink, and a bottle of white vinegar under the sink too. After trying various bowls and cups, I now use my stainless steel measuring cups in the shower. I was never particularly worried about breakages, but it could happen. I also find it easier to pour from the measuring cups than a regular cup or bowl.

A friend of mine tried bicarb and vinegar hair-washing, and kept the diluted vinegar ready in a bottle in the shower. I don’t do this because I learned the hard way that vinegar + hot water is a much more pleasant experience than vinegar + cold water. I would only do this if I lived somewhere so hot I wanted a cold shower.

Aren’t you meant to use apple cider vinegar?

I use regular white vinegar. I know that apple cider vinegar is commonly cited as the vinegar to use, and I’ve tried it, but I prefer white vinegar. I find apple cider vinegar leaves my hair duller. Apple cider vinegar is slightly less acidic than white vinegar, but I’m diluting 1:8 times with water, and rinsing off after a minute or less.

Don’t you smell of vinegar?

Actually, no. If you’re worried about smell, white vinegar dissipates almost instantly upon rinsing. Apple cider vinegar will take a little longer. The first time I ever tried this I was paranoid that I smelled like fish and chips, but I think it was just that my hair is much closer to my nose than anyone else’s.

If you’re really worried about smell, or miss the fragrance of traditional shampoo, you can add a 1-2 drops essential oil to the vinegar before applying.

How often do you wash your hair?

I wash my hair every 3-5 days. Not so much because my hair gets greasy, but because the curls start to look straggly. If it’s only been 3 days, I might omit the bicarb step and just do the vinegar rinse.

Will my hair fall out?

There was an article going around the internet, stating that using bicarb and vinegar to wash your hair will make it fall out. I’ve written my thoughts on that here. There’s no reason why using bicarb or vinegar to wash hair would cause hair loss.

After 3+ years, I still have a full head of hair.

You mentioned rye flour. How does that work?

Instead of using bicarb, I’ve also used rye flour to wash my hair. Bicarb is a salt, and is mined from the ground. Rye flour is ground from rye, a plant. Sustainable speaking, rye is probably the more eco-friendly option. It also leaves my hair much shinier than bicarb. Plus, as it’s not water soluble, it mixes with water to form a paste which is much easier to apply to your hair.

On the down side, if you aren’t careful you can end up with huge flakes of rye flour that look like brown dandruff. Believe me, discovering chunks of flour falling out of your hair as you ruffle it is quite alarming.

To reduce this, you can sieve the flour before you use it (a tea strainer will likely have the finest mesh). Also, post washing, be sure to towel dry your hair really well. And never ever apply to dry hair, or you will end up with a flour crust on your scalp!

Anything else?

If you’re switching from regular shampoo, your hair will take some time to adjust. Regular shampoo tends to strip oil from the scalp, so the skin compensates by making more oil. Some people find when they first use this that they have oily hair for a few days, or even a few weeks. Push through!

Ultimately though, this isn’t for everybody. It works particularly well on people with curly hair. If you’ve tried for a few months and you still don’t like it, maybe it’s not for you. Don’t worry, there are plenty of other options.

If you haven’t tried it, I definitely recommend you give it a go! There’s something very satisfying about personal care products that come from the pantry and with single ingredients.

Can I tempt you?!

Now I’d love to hear from you! Have you tried the bicarb and vinegar method? Do you love it? Did you hate it? Are you tempted to give it a go? Please share your thoughts in the comments below!

DIY Body Scrubs (4 Recipes plus a Simple Formula to Invent Your Own)

Is that food on my face? Yes, it is! I take great satisfaction in making DIY skincare products out of regular ingredients that I have in the pantry. There are a few reasons:

  • If it’s safe enough to eat, then it’s safe enough to put on my skin. I don’t need to worry about reading labels, or trying to decipher chemical names, or battling through greenwash claims.
  • Food items are some of the easiest things to find plastic-free and generally packaging-free. Chemicals come in bottles. Coffee grounds, sugar, salt – all of these things can be picked up from bulk stores.
  • It keeps my home uncluttered. I like owning things that have multiple uses, and that goes for ingredients as much as for other stuff. One jar with multiple purposes. Plus, it’s kind of fun when you run out of something in the bathroom to just head over to the pantry, rather than traipsing all the way to the chemist.

That said, my bathroom routine is super simple (you can read about it here). Gone are the days when I thought I needed all of those products that the marketers tell us we need. I had the day cream, the night cream, the eye cream, the body lotion, the face scrub, the body scrub… I also had a cluttered bathroom and an empty wallet!

I’m also a big fan of making things that involve little effort. I like to make things from scratch, but I also like these things to take minutes to put together and to be fail-safe (I don’t want to stuff it up and have to throw anything away).

Mixing ingredients together in a jar, now that’s the kind of level of complexity I’m talking about.

DIY Skincare Scrubs from Scratch

Body scrubs exfoliate the skin and remove dead skin cells (there’s plenty of marketing mumbo-jumbo about glowing skin and improved lymphatic drainage and looking 20 years younger, but I’ll spare you any wild claims.) Some body scrubs also moisturise and these generally have an oil base alongside the exfoliating ingredient. I’m a big fan of products with multiple purposes, and I’m also lazy, so any product that can clean, exfoliate and moisturise all in one suits me perfectly!

A good body scrub has three main components: an exfoliator + a moisturiser + essence

By essence I mean more than the fragrance: I also mean the way it makes us feel. For example, lavender is known for its calming and sleep-inducing properties, citrus is energising and awakening, and chocolate feels decadent and indulging.

Good Natural Skin Exfoliators

Sugar, salt, dried coffee, used coffee grounds, ground oats, ground rice, bicarb of soda.

Different exfoliators have different properties. Sugar is considered more gentle on the skin than salt as the crystals are smaller and they dissolve more easily in water. Oats and ground rice are gentler on the skin and may be more suitable for face scrubs.

Good Natural Skin Moisturisers

Olive oil, almond oil, jojoba oil, grapeseed oil, sunflower oil, coconut oil.

Oils are not created equal. Some have far superior properties – and often far superior price tags to match. Olive oil is readily available and affordable so is a great optionto start with.  It does have a strong fragrance and a green tinge though, whereas almond oil is a more natural colour and without a strong fragrance.

Coconut oil is unusual in that it is solid below 25°C. If you live in a very cold climate you may have a hard time getting a scrub made with coconut oil out of the jar, but if you like the idea of having a more solid product to rub in it’s a good choice.

Ideas For Essences

Essences don’t need to be fancy. You can skip them entirely and leave the scrubs plain if you prefer, or just add a drop of essential oil for fragrance. Or you can go to town, combining essential oils and flower petals and all kinds of things. Up to you.

Stimulating essential oils: grapefruit, lemon, lemongrass, orange, peppermint, bergamont

Relaxing essential oils: lavender, rosemary, cinnamon, ylang ylang, rose, chamomile

Other ingredients to add: lemon, orange or lime zest; lemon, orange or lime juice; lavender flowers or rose petals; honey; thyme or rosemary; cocoa nibs; loose leaf tea (green tea, chamomile tea, peppermint tea).

DIY Body Scrub – a DIY Formula

A body scrub needs to be easy to remove from the jar, spread on your skin and rinse off.

Start with a tablespoon of your chosen oil, and a tablespoon of your chosen exfoliator, and combine. Add more of either to get your preferred consistency. Add your essences last.

If adding dried herbs, flowers or tea you may need a little more oil, as these will soak up the oil.

If adding lemon, lime or orange juice, you may prefer a little less oil as these will add more liquid to the pot.

Test it out! Always do a patch test first. Put a small amount on your skin in the crease of your elbow, and wait 24 hours to see if there is any adverse reaction. Use it in the shower, and see if you like the consistency. Make a note of any adjustments you might want to make. Test on your body before trying on your face as your facial skin is more fragile, and always avoid the eye area.

DIY Body Scrubs: 4 Recipes to Get You Started

From left to right: citrus olive oil scrub; coffee scrub; lavender sugar scrub; green tea and epsom salts scrub.

These are some ideas to get you started – feel free to play with the ingredients you have to hand and make your own combinations. All of these scrubs are fresh and do not contain preservatives, so are best stored in the fridge and/or used within a couple of weeks.

Citrus Olive Oil Scrub

Ingredients:

2 tbsp olive oil (30 ml)
1/2 cup sugar
2 tsp lime zest
juice of 1/4 lime
Optional: a drop of lemon, grapefruit or lime essential oil

Mix together the sugar and oil. Add the lime zest and lime juice, and essential oil if using. You can add extra sugar or oil to get your desired consistency. Spoon into a glass jar.

Allow the scrub to settle. A layer of olive oil on the top of the jar will help keep it from spoiling. Stir before use.

Coffee Scrub

Ingredients:

2 tbsp spent coffee grounds (ask a local cafe for their used grounds)
2 tbsp sugar
2 tbsp coconut oil
Optional: a drop of orange essential oil

Method: melt the coconut oil if solid, and mix the coffee, sugar and oil together. Add the essential oil last. Store in a glass jar in the fridge.

I love using coffee grounds as they are a waste product. You could use fresh coffee, but why wouldn’t you want to have a cup of coffee first?! If you use homemade coffee grounds, let them dry out as the extra moisture will mean it spoils more quickly. There’s no reason why you couldn’t use olive oil instead of coconut oil. I just like to experiment :)

Lavender Scrub

Ingredients:

3 tbsp almond oil
1/2 cup sugar
2 drops lavender essential oil
Optional: 2 tsp dried lavender flowers

Method: mix the oil and sugar together, then add the flowers and essential oil.

You could substitute the lavender flowers for chamomile flowers or rose petals, and lavender essential oil for chamomile or rose geranium. Almond oil works better than olive oil as the delicate floral flowers can be overpowered by the olive.

Green Tea Scrub

Ingredients:

3 tsp Epsom salts
3 tsp bicarb
1 tsp matcha powder
3 tbsp olive oil

Mix the dry ingredients together, then add the olive oil. Pour into a glass jar.

Epsom salts are not actually salt, but a mineral compound containing magnesium which is thought to be very good for the skin. If you can’t find Epsom salts, regular salt or sugar will be fine. If you don’t have matcha powder, you can use regular green tea.

Now I’d love to hear from you! Do you make your own skincare products? Do you want to, or is it something you can’t see yourself bothering with? Do you have your own favourite recipes or flavour/scent combinations? Are there any other products you make from scratch? Have you ever had any disasters, or things not going to plan? Any tips you’d like to add? I’d love to hear from you, so whether you’re a DIY skincare enthusiast or avoid it at all costs, please leave me a comment telling me your thoughts!

<

p style=”text-align: center;”>
Disclaimer: the information here is provided for information purposes only and does not constitute medical advice. It is a record of my own experiences. Always do your research before using ingredients on your skin, particularly when using essential oils.

Plastic Free {Bicarb Free} DIY Deodorant – for Sensitive Skin

I love my homemade deodorant. I first tried it back in 2012 when I was still a little skeptical about DIY concoctions (if I’m honest, I thought they were just for hippies). What made me convert?

The fact it actually worked.

That’s all we want from a deodorant, really. Sure, we don’t want chemicals and excess packaging – but it has to work, right?! There are plenty of natural deodorants on the market, but most are very expensive, don’t smell great and don’t actually work against body odour very effectively, either.

Plus very few have completely plastic-free packaging.

The deodorant I’ve been using since 2012 is a super simple recipe, and all the ingredients are edible (except the essential oil). There’s no heating or melting involved, just a little mixing, which suits my laziness when it comes to these things.

The ingredients are 1 tbsp bicarb, 4 tbsp cornflour (or arrowroot / tapioca flour) and 2-3 tbsp coconut oil. The coconut oil depends on the ambient temperature – you’ll need less in summer and more in winter. You want a paste. Mix in a jar and add a few drops of your favourite essential oil. To apply, get a small amount on your fingertips and rub in. (You can find the recipe here.)

This recipe has been serving me well for 4 years, but bicarb can be a skin irritant for some. It’s fine for me, but my husband reacts to it. I tried changing the ratio from 1:4 to 1:6 and even 1:8 bicarb:flour (note – the more you dilute it, the less effective it is) but the issue was the same. His skin became red, inflamed and sore and it took a few months for it to settle back down again.

Ever since then I’ve said I’ll experiment with a DIY non-bicarb deodorant. I don’t move very fast it seems!

But the good news is I have finally kept my word and made a bicarb free deodorant. Not only that, but I (and my husband) have tested it and can confirm that a) it works (hurrah!) and b) there have been no adverse skin reactions. Phew! I can also buy all the ingredients completely packaging-free.

For anyone else out there who struggles with super sensitive skin and cannot use bicarb deodorants, this recipe is for you. Give it a go.

It’s not quite as simple as just mixing some ingredients in a jar but it’s really not that much harder, promise. There’s some melting involved. Nothing complex – I like to keep things as simple as I can!

Final product: bicarb free DIY deodorant.

Bicarb free DIY deodorant.

TIP: I would also add: it’s not quite as effective as the bicarb version I use, and it works best applied to clean skin. Whilst the bicarb one can mask smells if reapplied, this one won’t!

Bicarb Free DIY Deodorant: Recipe

Ingredients:

1.5 tbsp grated beeswax
1 tbsp shea butter
4 tbsp coconut oil
4 tsp white kaolin clay
8 drops tea tree essential oil
8 drops cedarwood essential oil
10 drops lemon myrtle essential oil

A note about the ingredients:

Beeswax: beeswax is solid at room temperature (it melts at 62°C) so helps make the mix firmer. I used beeswax as it’s really local (my neighbour who lives 4 doors away produced this). The only other solid subsititue I can think of would be cacao butter so maybe next time I’ll give this a go as it would be a great alternative for vegans.

Shea butter: shea butter melts at 38°C so is more solid than coconut oil. It’s very moisturising and is thought be anti-inflammatory – which is good news for sensitive skin.

Coconut oil: this is a soft oil that melts at 25°C. It helps keep the deodorant soft so it can be rubbed into the skin. Coconut oil is also thought to have anti-bacterial properties.

Kaolin clay: kaolin clay is a white clay (bentonite clay has similar properties) that replaces bicarb and does a similar job. It absorbs liquid and neutralises bad smells. Clumping kitty litter is actually made of bentonite clay! There are other types of clay available but these are more expensive. I’ve heard that green clay is the most absorbant of them all so at some stage I’d like to try this… it’s in the queue ; )

Essential oils: I’m lucky enough to be able to buy refills (packaging free) so I have some flexibility with my choice. I chose tea tree oil as it is anti-bacterial and cedarwood as it is anti-inflammatory. Both also have strong smells and are often used in commercial natural deodorant recipes. I find both scents quite overpowering and not hugely pleasant so I used lemon myrtle (which I love!) to mask them. Lemon myrtle is an Australian bush scent with the most amazing smell! If you have limited choice, go for a single oil and choose one that you can use elsewhere. Tree tree oil is affordable, available in larger sizes (meaning less packaging overall) and great for cleaning too. (When choosing essential oils, it is important to read up on the properties, particularly if you are pregnant.)

Ingredients for making bicarb-free deodorant (for sensitive skin).

Ingredients for making bicarb-free deodorant (for sensitive skin).

Method:

Heat some water in a pan on the stove, and place a glass bowl over the pan. You don’t want to heat the oils directly as you’ll damage them. Add the beeswax to the bowl and stir until melted (I used a metal spoon as it’s easier to clean than wood).

Add the coconut oil and continue to melt, stirring occasionally. Once both are melted, add the shea butter and remove the bowl from the heat.

The shea butter should melt with the heat of the other two ingredients. You can place back on the heat if it needs some help but be careful of overheating shea butter as it can turn grainy. Stir to aid the melting process and to combine.

Add the clay 1 tsp at a time and whisk to incorporate. Once all 4 tsp have been added, leave to cool, whisking occasionally. It will begin to thicken after only a few minutes (less if your room is cold). Once you notice the thickening and there is no head radiating from the mix, add your essential oils to the mix and whisk in. If you add them when it’s still hot, you will lose all their beneficial properties!

Final product: bicarb free DIY deodorant.

Final product: bicarb free DIY deodorant.

Pour into a shallow jar with a wide neck or a tin, and leave to set. It will set into a paste that feels tacky and is easy to scoop with your fingers. (If you live in a very cold climate and find it too hard, you may like to add more coconut oil or less beeswax next time to get the right consistency, but it will soften with the warmth of your skin.)

Store with the lid on in a dark place. To apply, take a small amount with your fingertips and rub into your skin. will keep for ages.

Now tell me…are you going to make it?! If yes, I want to hear what you think! If not, why not? Have you ever tried making DIY deodorant before? What ingredients did you use and what success did you have (or not have)? What about other DIY skincare products – are you a fan or do you tend to put them in the “too-hard” basket? What are your simplest solutions to bathroom essentials? I love hearing your thoughts so please leave me a comment below!

Plastic Free Zero Waste Natural Sun Cream

I’m a fan of sun hats. I’m a fan of long sleeves. I’m a fan of staying in the shade. When it comes to facing the sun, I’d much rather do any (all) of these than apply sunscreen.

I can’t bear the thought of all those chemicals in store-bought sunscreen being absorbed through my skin, and for the longest time, I’ve played Russian roulette with the sun. I didn’t apply sunscreen, and I tried to avoid getting burned. This means all of the above, and trying to dodge the sun between 10am and 4pm.

The truth is, that’s not always possible – when the weather is beautiful, I want to be outside!

Living in Australia with its fierce sun and hole in the ozone layer is very different to living in rainy England… and it means if I do get caught out and I’m not wearing sunscreen, I get burned.

Getting sunburned is not clever. Two in three Australians will be diagnosed with skin cancer by the time they are 70, and skin cancer accounts for 80% of newly diagnosed cancers every year. After being caught out and sunburned one too many times, I realised that I needed to embrace using sunscreen.

I still advocate the hat, the long sleeves and the shade, but in the times when that isn’t enough, sunscreen is better than sunburn. Chemicals aren’t good for us, but sunburn is definitely not either!

I wondered, is there a way to protect ourselves from the sun without all the chemicals… or the packaging?

Chemical Blockers versus Physical Blockers

There is a huge difference between the regular “conventional” sunscreens, which use physical and chemical blockers (and are a cocktail of synthetic chemicals), and the “natural” alternatives, which use only physical blockers.

The physical blockers used in sun cream are zinc oxide and titanium oxide. Zinc oxide blocks both UVA rays (these are the deep-penetrating rays that cause skin cancer) and UVB rays (these are the ones that cause redness and sunburn, and are the ones that SPFs are rated against). Titanium oxide is a good UVB sunblock but is not as effective as zinc oxide in blocking UVA rays.

Conventional sunscreens may also use zinc or titanium oxide as a physical blocker, but use chemical blockers too. Most chemical blockers only protect against UVB rays. These chemicals don’t sound natural or healthy, and in many cases, they’re not. Some chemicals in sunscreen are hormone disruptors, for example.

We’re not just exposing ourselves to these chemicals either – these sunscreens wash off and the chemicals enter our waterways and the ocean.

Treading My Own Path Zero Waste Plastic Free Sunscreen Alex Blajan

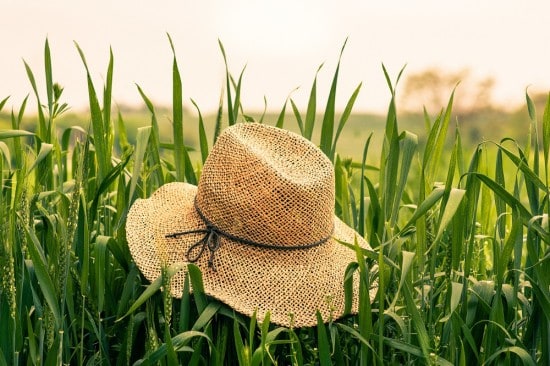
Hats are an awesome physical blocker for sun protection – but even the widest brimmed hat can’t cover everything!

Sunscreen and Nano Particles

Traditionally zinc oxide creams were very thick and created a white barrier on the skin, meaning they were hard to apply (and looked a bit silly).  By making the zinc particles smaller, newer creams have come onto the market which absorb more easily and don’t leave white residue. These creams contain smaller zinc nanoparticles (classed as particles smaller than 100nm or 0.1 micron) and microfine particles (usually ranging from 0.1 micron to 2.5microns (100nm – 2500nm).

The concern with these is that they can be absorbed through the skin, and the smaller the particles, the more easily they are absorbed.

Suncreams containing zinc oxide usually state that they are “nano” or “non-nano”. Studies show that zinc oxide particles between 4nm and 20nm have the potential to be absorbed into the skin, and will be absorbed through damaged skin.

Anything smaller than 4nm will definitely be absorbed, and anything bigger than 45nm will not be absorbed. (You can read this study here.)

Conventional sunscreens use nano particles sized between 5 – 20nm – small enough to be absorbed through the skin. Non nano zinc oxide particles are larger than this and fall outside the absorption range, although some nano particles may still be present.

Most eco and natural brands use non-nano particles in their sunscreen.

Can I Buy Zero Waste Sunscreen?

Because sunscreen is heavily regulated and each batch requires testing, most small producers shy away from making their own. This makes it hard to find locally produced sunscreens that avoid the excess packaging. There is an American brand called Avasol who make a natural, non nano sunscreen packaged only in cardboard, with an SPF of 30. This is the best zero waste alternative I’ve come across. I don’t use it myself but I have friends who do.

Avasol Plastic-Free Sunscreen

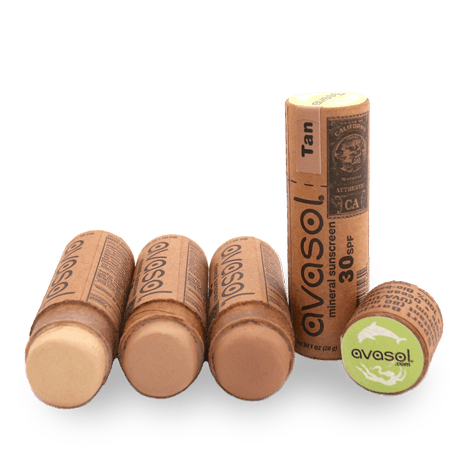
Avasol sunscreen is an American brand that comes packaged in a cardboard tube.

What About DIY Alternatives (and how do I know the SPF)?

Yes, it is possible to make your own, but there are two things you need to know.

  1. You will not be able to calculate the SPF. SPF stands for Sun Protection Factor: it is a  measure of the effectiveness of sunscreen against UVB rays. The higher the SPF, the more protection against sunburn the sunscreen offers. The number (SPF 20, SPF 30 etc) means how many times longer a person can stay out in the sun without getting burned relative to how long they can stay out with no sunscreen assuming 2mg per cm² is applied. Sunscreen is tested in vivo by volunteers who apply sunscreen to their skin and see how long it takes to burn (ouch). In vitro tests use a spectrometer. It is not a case of adding up the SPFs of various ingredients. The only way to find out how long homemade sunscreen will protect you for is to test it yourself.
  2. You will need to use a physical barrier – either zinc oxide or titanium oxide – for it to work effectively. Many plant oils have low SPFs (coconut oil and olive oil have a natural SPF of up to 7, and other plant oils have SPF properties) and applying these to the skin may help you avoid burning if you have olive skin, don’t burn and only expose skin to sun outside of the 10am – 4pm (and you live outside of Australia). Combining ingredients does not increase the overall SPF, and there is no magical high SPF plant oil. Also, their effectiveness against UVA rays (the ones that cause DNA damage and cancer) are unknown.

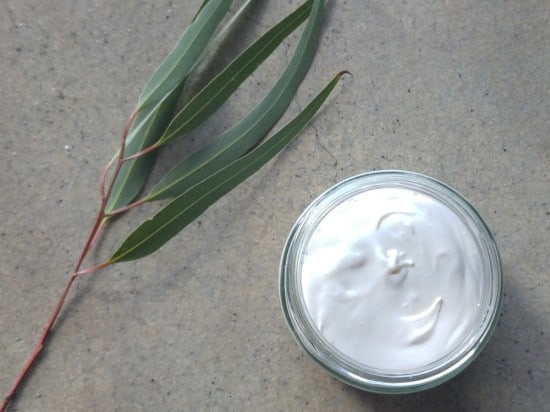
Zero Waste Plastic Free Sunscreen: My Recipe

Zero Waste Plastic Free Sun Cream Sunscreen in Jar
My solution to the issues of chemicals, packaging and sourcing products locally was to make my own. I’ve been able to source all of these ingredients without packaging, but I realise that this may not be possible for everyone. If you can’t find ingredients sold without packaging in stores, find out if there are any local skincare producers or soap makers close to you who may be able to sell you some ingredients without packaging (that’s what I do).

You can also try switching up some of the ingredients if you have other options available to you. Whilst some ingredients can be subbed, zinc oxide is a non-negotiable – that’s what makes it sunscreen! If you need to buy ingredients in packaging, look for one that is recyclable, and remember – one container of zinc oxide will create many containers of zero waste sunscreen.

Important: this sunscreen has worked for me, and I am sharing my personal experiences. Do a small patch test when using for the first time. Avoid going in the sun at peak times and wear a hat and long sleeves. Sunscreen is a last resort, not an excuse to lay in the sun for 8 hours!

Zero Waste Plastic Free Sunscreen Ingredients Treading My Own Path Plastic Free July

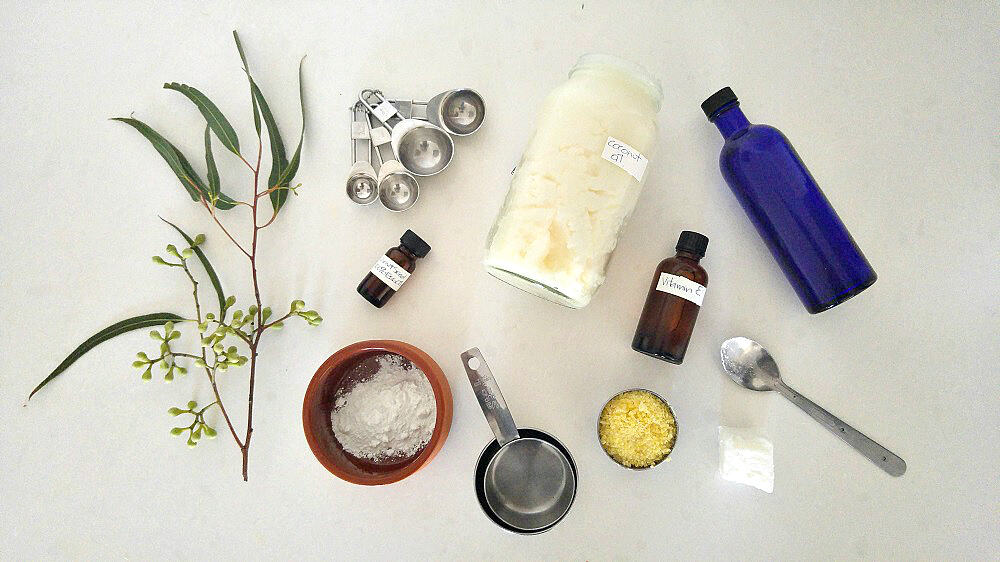
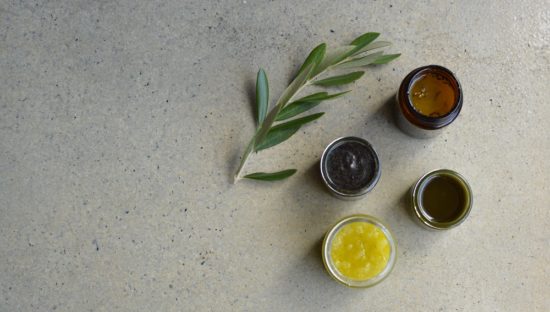
Ingredients for zero waste plastic free natural DIY sunscreen.

Ingredients:

1/2 cup almond oil (or olive oil)
1/4 cup coconut oil
1/4 cup beeswax
2 tbsp (27g) shea butter
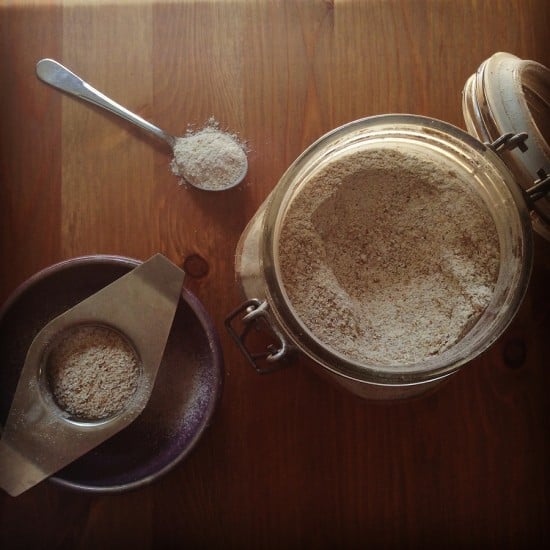
2 tbsp non-nano zinc oxide powder
1 tsp vitamin E oil

OPTIONAL: 20 drops of essential oil (check this list first as some essential oils are phototoxic and can assist burning!)

More info on the ingredients:

Almond oil – I used sweet almond oil as that is what I use as my standard moisturizer. It is a great oil for the skin. However, it’s also far more expensive than olive oil (and according to in vitro tests, has a lower SPF of 4.7 versus the olive oil SPF of 7.5) so next time, I’ll be using olive oil.

Coconut oil – this oil is solid at less than 25°C and helps the lotion hold its form. It is very moisturising and has a natural SPF of around 7 – two properties that make it a great oil to include in sunscreen.

Beeswax – beeswax helps make this into a lotion at room temperature. This means no need to store in the fridge – handy if you want to take your sunscreen with you! It also helps make the sunscreen waterproof. Even if we’re not going in the water,the sun makes us sweat and we don’t want the sunscreen to wash off.

Shea Butter – is highly moisturising and good for dry and aging skin. It is a solid at room temperature but melts on contact with the skin, making it a good base for lotions. Look for shea butter that has been naturally processed rather than refined with hexane (a solvent).

Zinc Oxide Powder – this is the active ingredient. Zinc oxide is a physical blocker that works by reflecting / scattering UV light. It is non-irritating and suitable for sensitive skin. Zinc oxide sunscreens leave a white tinge on the skin – the bigger the zinc particles, the whiter this will be. The zinc oxide powder I used was 0.3 – 0.85 microns.

Vitamin E – this vitamin is often found in skincare products and is believed to have antioxidant and skin-healing properties, although evidence is limited and studies are ongoing. It helps prolong the shelf life of the other oils in the lotion. I used it because I have it, but you could do without.

Method:

Overheating oils can damage their properties, so I tend to melt mine one by one, starting with the most heat-resistant and working down to the least.

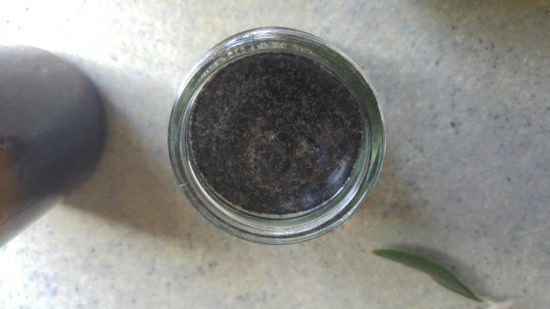
  • Place a glass bowl over a pan of boiling water (a double burner) and add the beeswax. Stir until melted, and add the coconut oil. (If your coconut oil is solid, the beeswax may solidify again on contact, but continue to heat and it will melt.)
  • Turn the heat off, and add the almond oil (or olive oil), using a whisk to combine. Once this is mixed in, remove the bowl from the heat.
  • Add the shea butter to the bowl and stir to combine. Once it has melted, whisk the mixture. Continue to whisk until you notice the mix beginning to cool, lose transparency and change to a golden colour.
  • Once the bowl feels cool and the mixture looks golden and opaque, add the zinc oxide powder using a whisk to combine.
  • Add the vitamin E and essential oils, if you are using.
  • Pour into a clean and dry glass jar, and seal with a lid.
Melting beeswax in a double boiler

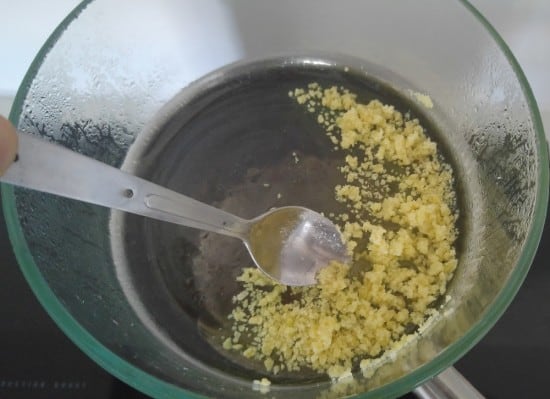
Melting the beeswax over a double boiler (a glass bowl on top of a saucepan with water in it – the water is heated and that is what warms the oils)

Melting oils in a double boiler

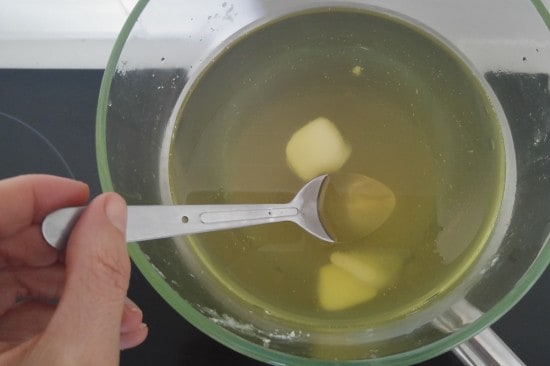
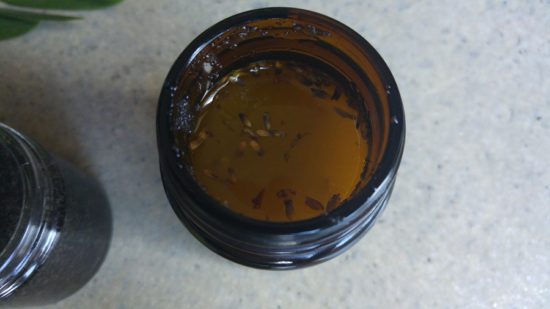
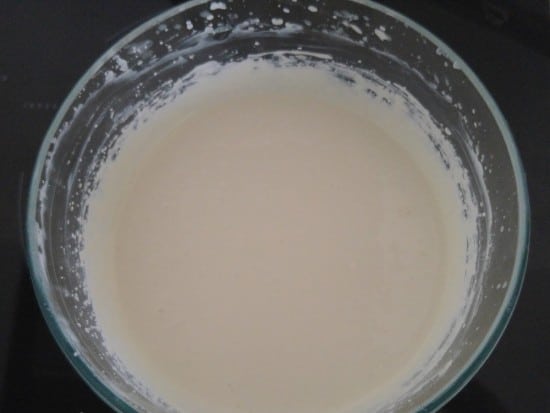
Melting the shea butter. (The beeswax, coconut oil and almond oil have already been added.) The oils look golden and transparent. Once they begin to cool, they lose the transparency and begin to look opaque.

Melted oils before adding zinc oxide powder

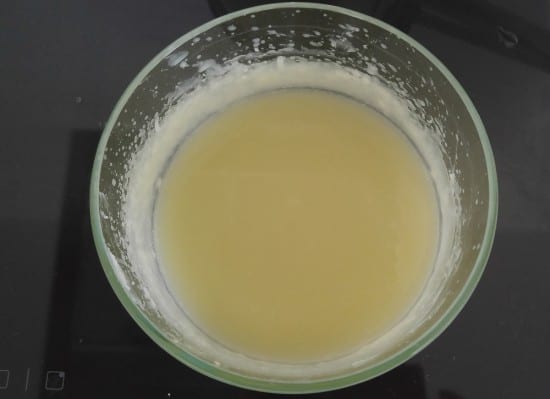
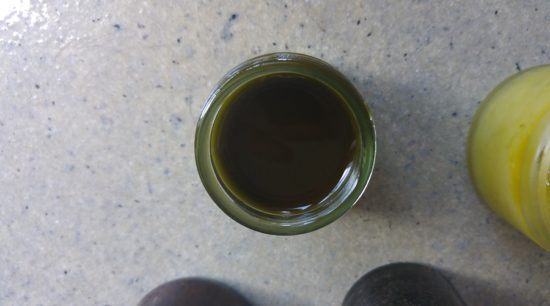
Once removed from the heat, the oils will cool and lose their transparency. Keep whisking to keep everything combined.

Zero Waste Plastic Free Sunscreen Mixing Zinc Powder into Oils

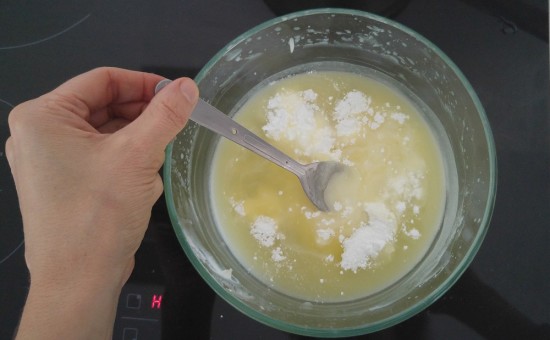
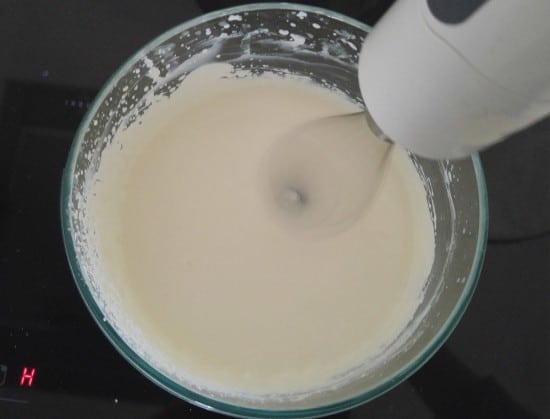
Once it’s cloudy and does not feel hot, add the zinc oxide powder. Stir in with a spoon and then whisk to combine. The powder will mix but will not dissolve so there will be some white specks.

Melted oils before after adding zinc oxide powder

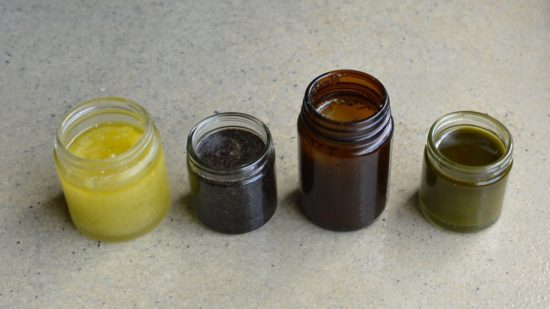
Cream after adding the zinc oxide powder and whisking.

Zero waste plastic free sunscreen Whisking ingredients together

Now add the vitamin E and any essential oils, and whisk to distribute thoroughly. Pout into a clean glass jar and leave to cool completely.

Rubbing Non Nano Zinc Oxide Sunscreen into the Skin

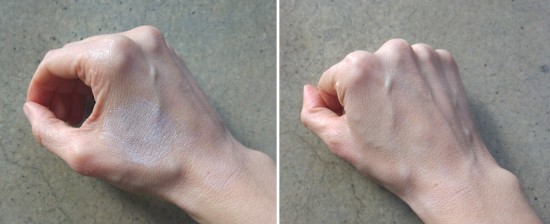
When applying to the skin, it appears white. The more it’s rubbed in, the less white it appears. I like the white sheen that remains as it helps me see where I’ve applied the cream and which bits I’ve missed!

Zero Waste Plastic Free Sun Cream Sunscreen in Jar

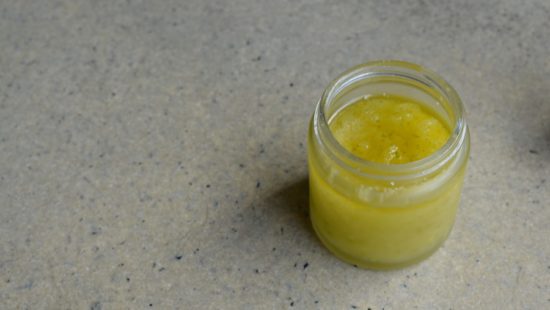
Zero waste plastic free sunscreen: the finished product.

Zero Waste Plastic Free Sun Cream Sunscreen on a teaspoon Plastic Free July

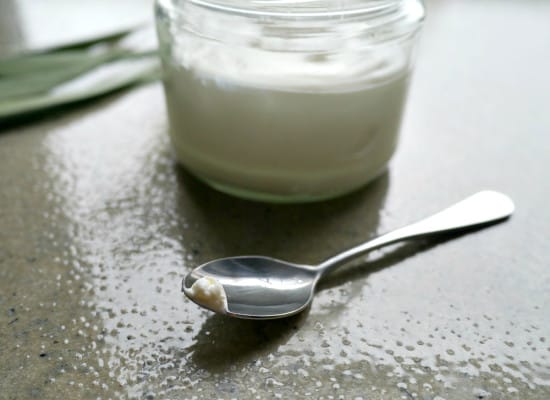
You can see from the spoon that the consistency is fairly thick. Changing the oil and wax combinations will change the consistency.

If you think this seems a bit complex (and I’d love to simplify it at some stage) then there is an even simpler solution. Simply mix some zinc oxide powder into your regular moisturiser. Job done ; )

Now I’d love to hear from you! Have you made sunscreen? Do you have a recipe you’d recommend, or any great ingredients you think should be included? Have you had any recipe fails, or do have any important “do-nots” to share? Are you unsure about making your own? Have you found any great zero waste or plastic free sunscreens available for purchase that you’d like to share? Have you tried Avasol and what did you think? Anything else that you’d like to add? Please tell me your thoughts in the comments below!