Keeping chickens: an Omlet Eglu Chicken Coop Review

This post is a collaboration with Omlet.

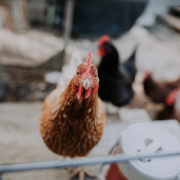
If there is one thing that’s unexpectedly brightened up my 2020, it’s chickens. Adopting chickens back in February was (probably) the best decision I made this year. These adorable, quirky little birds are just bursting with personality, and I really can’t imagine being without them.

And now I’m ready to improve my set-up and expand my flock.

Chickens like to be with other chickens… except when those chickens are new, or sick. In which case, chickens like to decide to demonstrate who is boss by mercilessly attacking the other chickens. (Eventually, a new status quo is established, but it’s pretty brutal in the moment.)

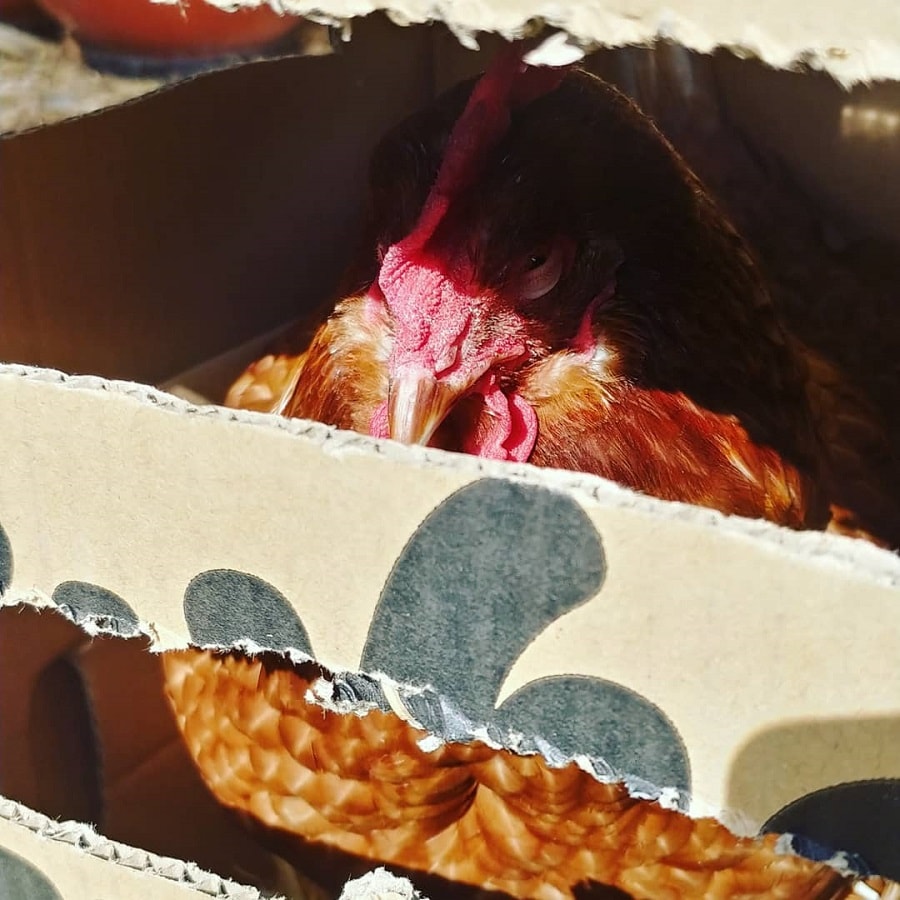
Back in February I started out with 4 chickens, but Billina sadly died of old age in September. She was sick off and on for the last few months, which involved quarantining (in a converted cardboard box in my office) and then reintroducing her to the flock a number of times – and in the space of just a week she’d go from accepted member of the family to UNPRECEDENTED THREAT.

Which was all a big drama for everyone.

And she wasn’t the biggest fan of the cardboard box (as soon as she started feeling better, she let me know).

The good news is, she lived out her very last days as a happy chicken hanging out with her friends, but it got me thinking about having a better future setup for new, sick, injured or possibly even broody chickens.

(Aside from the chickens-fighting-with-other-chickens factor, it is good practice to quarantine new chickens from existing chickens to reduce the chances of passing on diseases to one another).

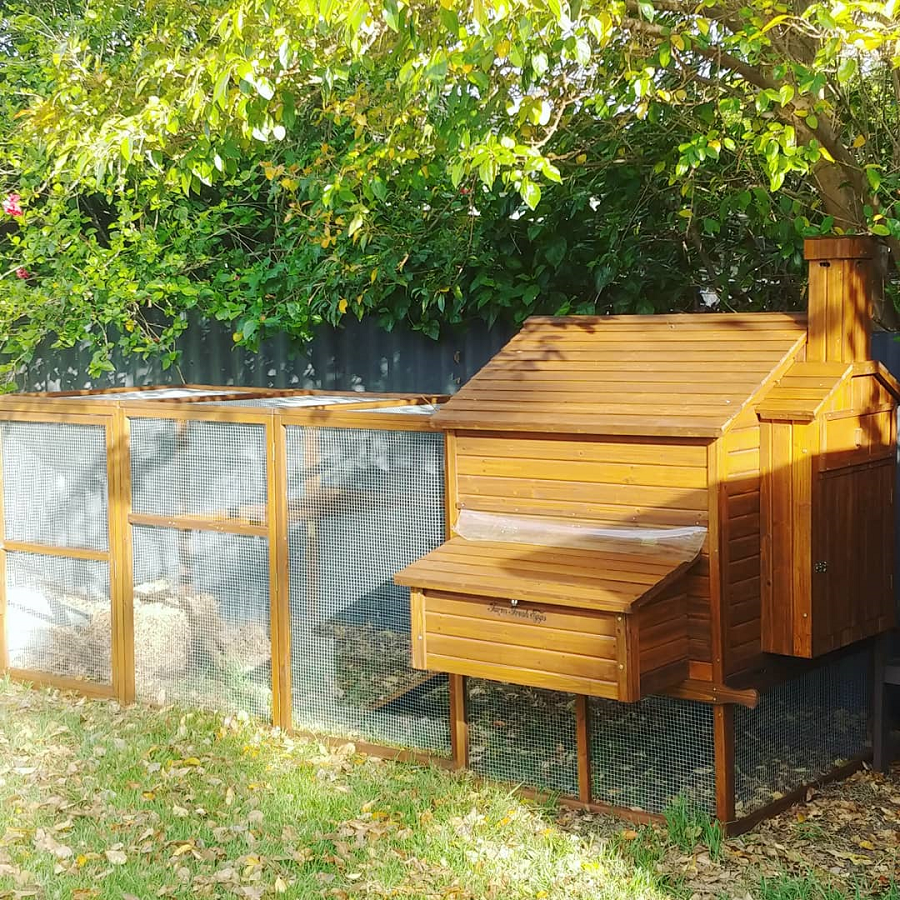
Long story short… I decided a chicken tractor would be a useful addition to my setup.

A chicken tractor isn’t an actual tractor, it’s a moveable chicken coop lacking a floor. They are called tractors because the chickens dig up the top layer of soil – and then they can be moved to another area with fresh grass and bugs to eat.

Chicken tractors are often a rectangular or A frame design, with a shelter/house section. They are are great for:

  • Quarantining sick, injured or new chickens;
  • For mumma chickens to raise their baby chicks;
  • To allow chickens to graze a particular patch of garden whilst stopping them get access to those bits they are not supposed to be grazing (like the veg patch).

They can be used as temporary or permanent accommodation for chickens, depending on how often the tractor is moved, or whether the chickens are also allowed some free-ranging time and space.

Traditionally they are made of wood and wire, I’ve also seen some made entirely out of metal – and then there’s the Omlet options, with the houses made out of plastic and the runs made out of metal mesh.

Why I opted for an Omlet Eglu chicken tractor

There are a few reasons why I prefer the Omlet option over the other options.

  • Omlet make modular products, which gives them flexibility. My chicken tractor is an Eglu Go UP, which means the house is raised off of the ground – but it can be removed from the frame for ground dwelling. This makes it suitable for chicks (who are too small to climb up stairs), and also quail… and even rabbits. Being modular, it can also be dismantled for storage.
  • You can add components or remove them according to your needs, such as extending the run, or removing the wheels, or adding handles. They also sell spare parts – something I always check for.
  • The plastic house part is insulated, which makes it more suitable for the Perth climate than a metal house, which could bake the poor chickens.
  • It also packs down reasonably easily. Whilst I wouldn’t say it flatpacks, it is easy to disassemble for storage if required as opposed to a rigid structure that’s moveable – yet also permanent.
  • You only need a hand-held screwdriver to assemble – hurrah! I have zero DIY skills to build a wooden A frame chicken tractor. (I do feel a bit of shame about this, as I’d love to be some kind of handy upcycler, but it is not me. I would have no idea how to start putting one together from scratch.)
  • Being plastic, the Omlet is super easy to clean and completely weatherproof. Wooden chicken coops get covered in poop, and wood is not easy to clean. If I’m using it to quarantine sick birds, this is not ideal. Wood also needs to be treated every year to stop it deteriorating. And wood can harbour red mite – a chicken pest.

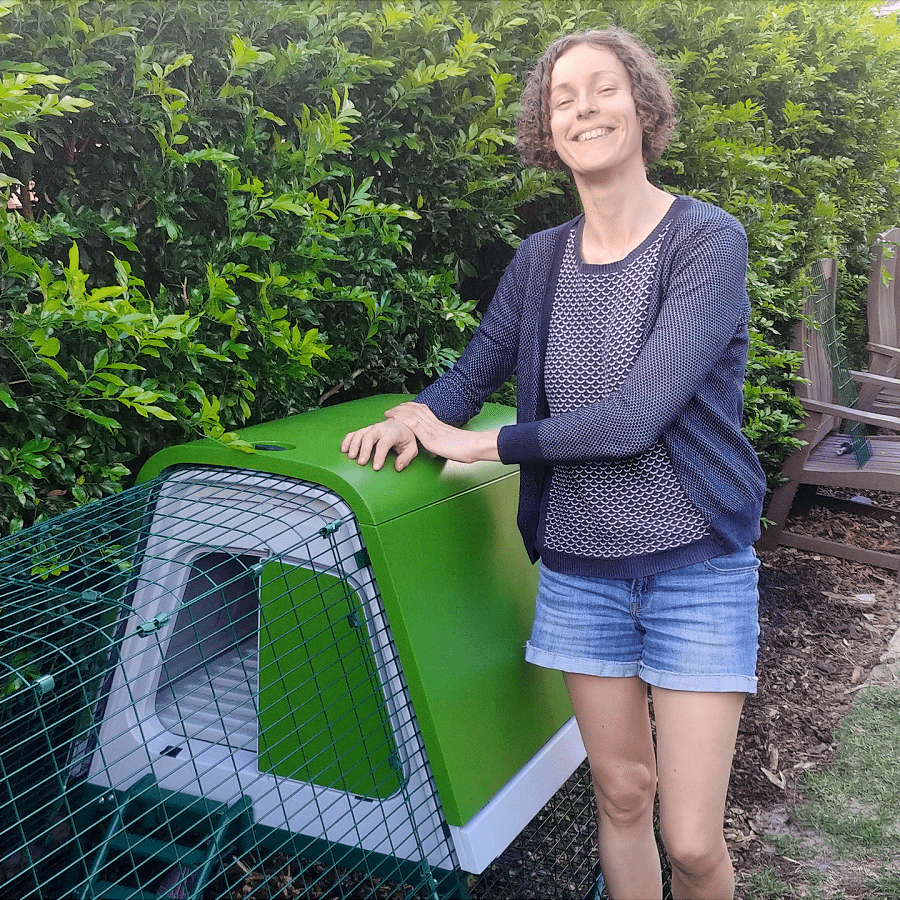
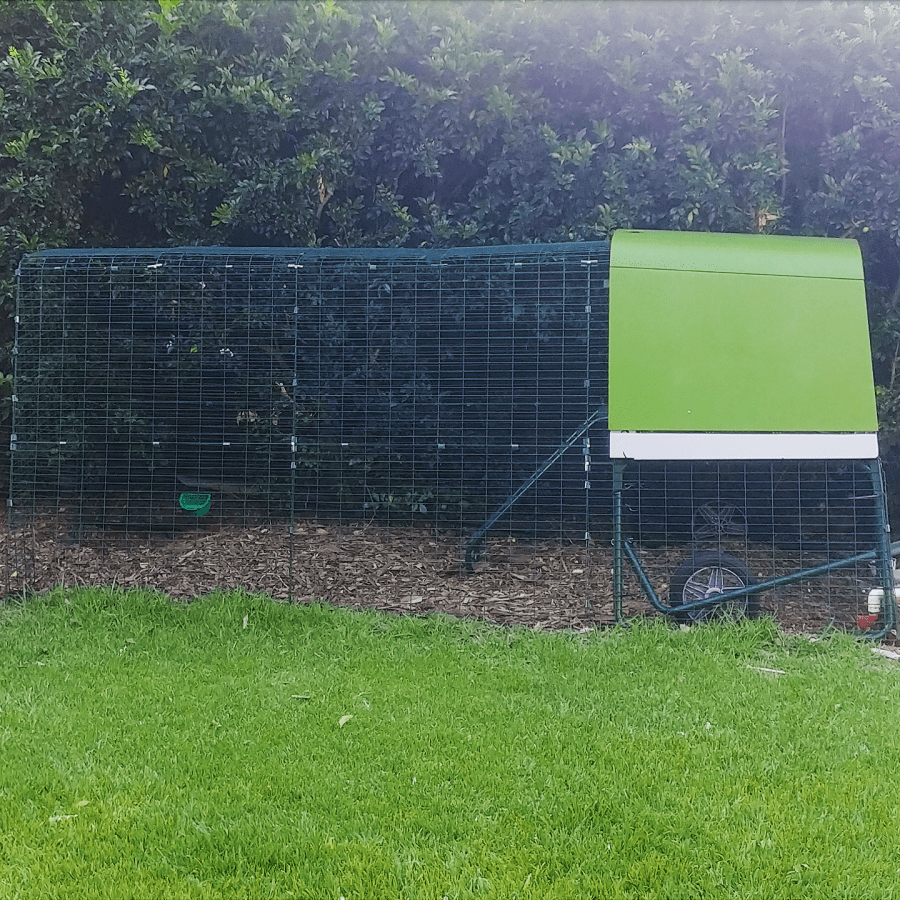
Omlet Eglu Go UP – a review

Omlet sent me one of their Eglu Go UP chicken coops to review, and also provided me with a 10% discount code to share with you (the code is TREADING10) – which will work on their Australian, UK, Irish and USA sites.

Omlet have three different chicken coops:

  • the Eglu Go: the original Omlet chicken coop which sits on the ground and is attached to a fox resistant run. Can house between 2 and 4 chickens, depending on the size of the breed.
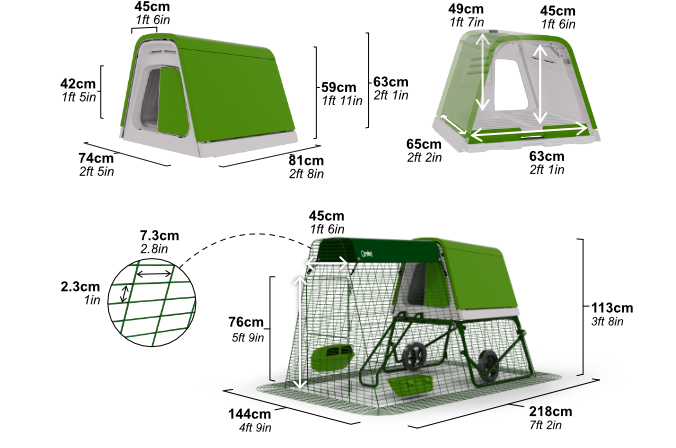
  • the Eglu Go UP [this is the one I chose]: the same Eglu Go house, but raised on a frame (it’s accessed by a ladder) which allow the chickens to go underneath.
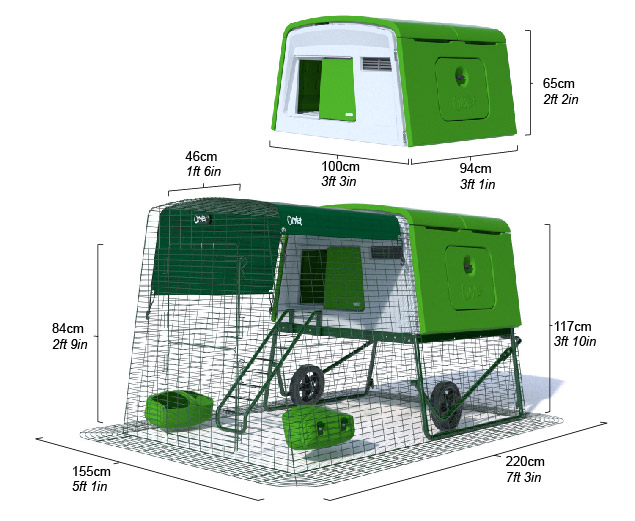
  • the Eglu Cube: a bigger and squarer chicken coop, also raised on a frame – big enough for 10 small chickens, but too big for me and my needs.

I chose the Eglu Go UP because Perth is a hot climate, and the space under the raised house provides a nice shady spot to dust bath. Also, by raising the house off the ground, and allowing the chickens to roam underneath, the same roaming space has a smaller footprint, making better use of the space and takes up less garden.

What I love about the Omlet design though, is that if I changed my mind later on, I could simply take the house off of the frame, and place it on the ground. (I’d need to modify the run to make it compatible with the house – and close the gaps, but that’s not too hard.) I’ve thought about getting quail in the future, and the Omlet Eglu Go is ideal for quail when placed on the ground (they don’t do ladders) and with the perch tray removed.

Setting up the Omlet Eglu Go Coop

Predicted setup time (according to Omlet): 30 mins; actual setup time (according to me): 50 mins.

Tools required: a handheld screwdriver.

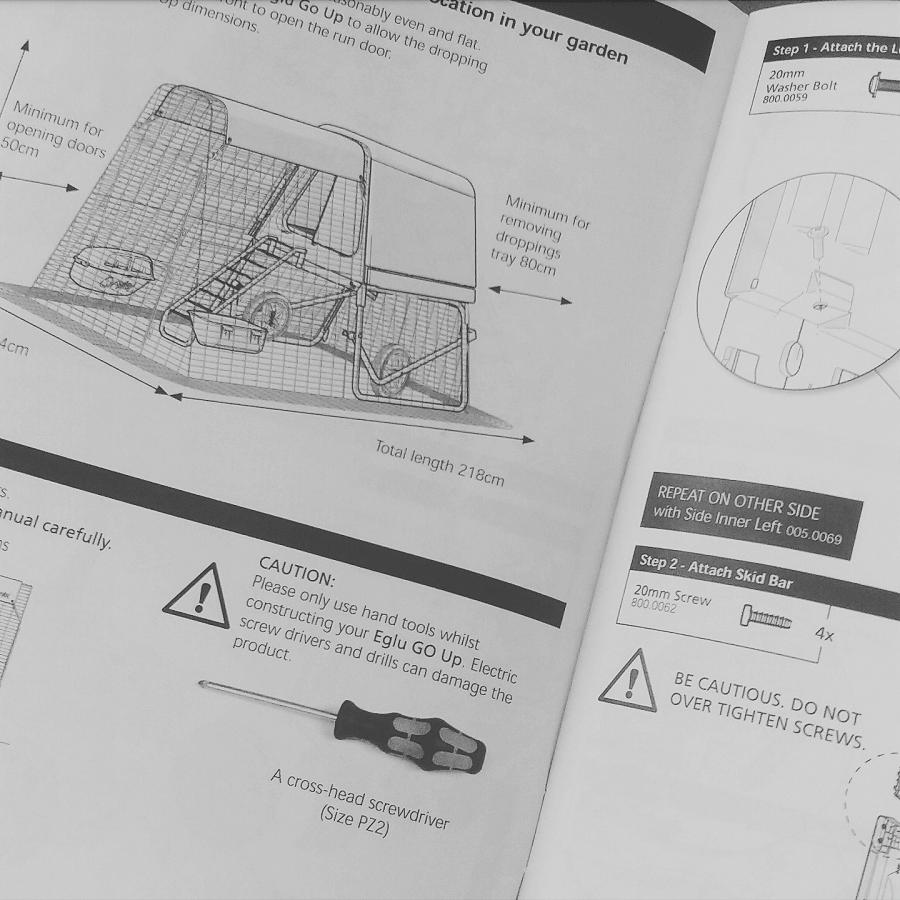
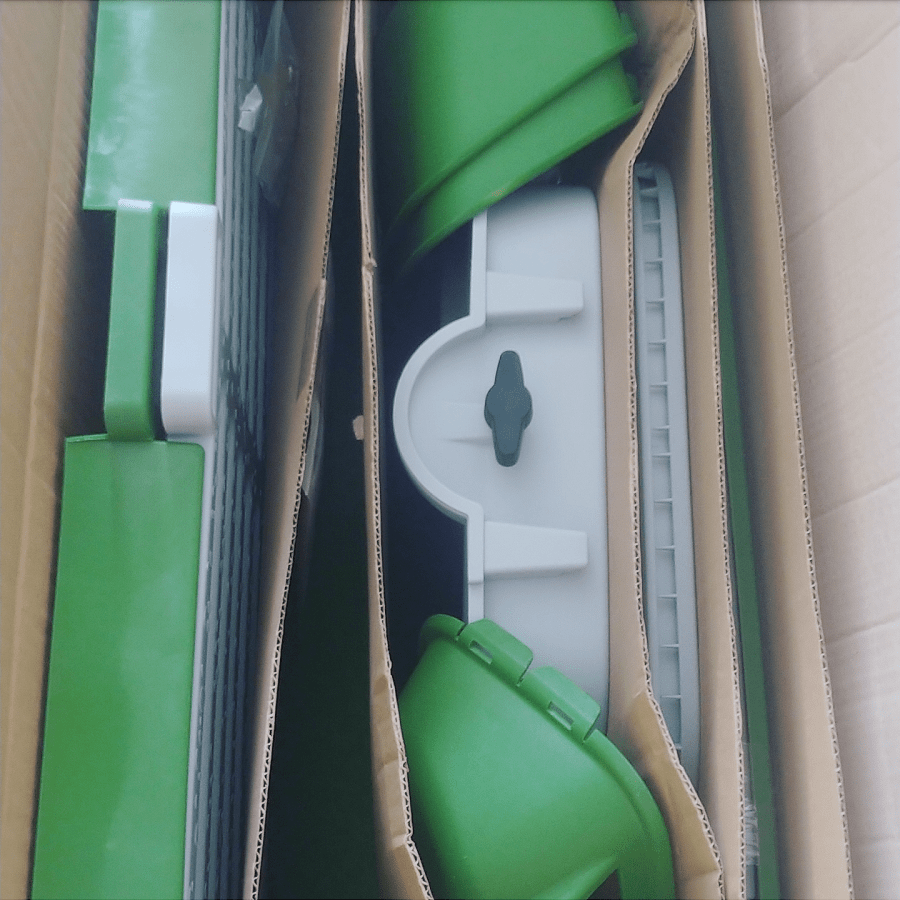
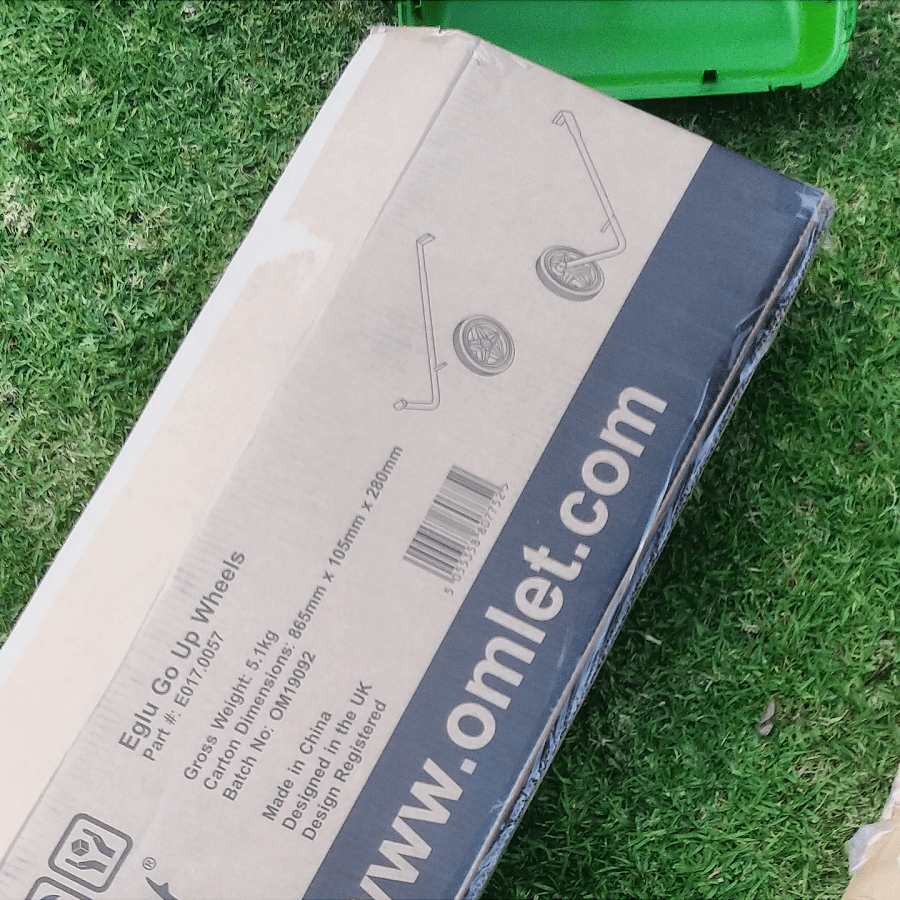
The house comes flatpacked as a series of panels, with some metal screws included to hold it all together. No polystyrene in the box, hurrah!

(The run comes in a separate box.)

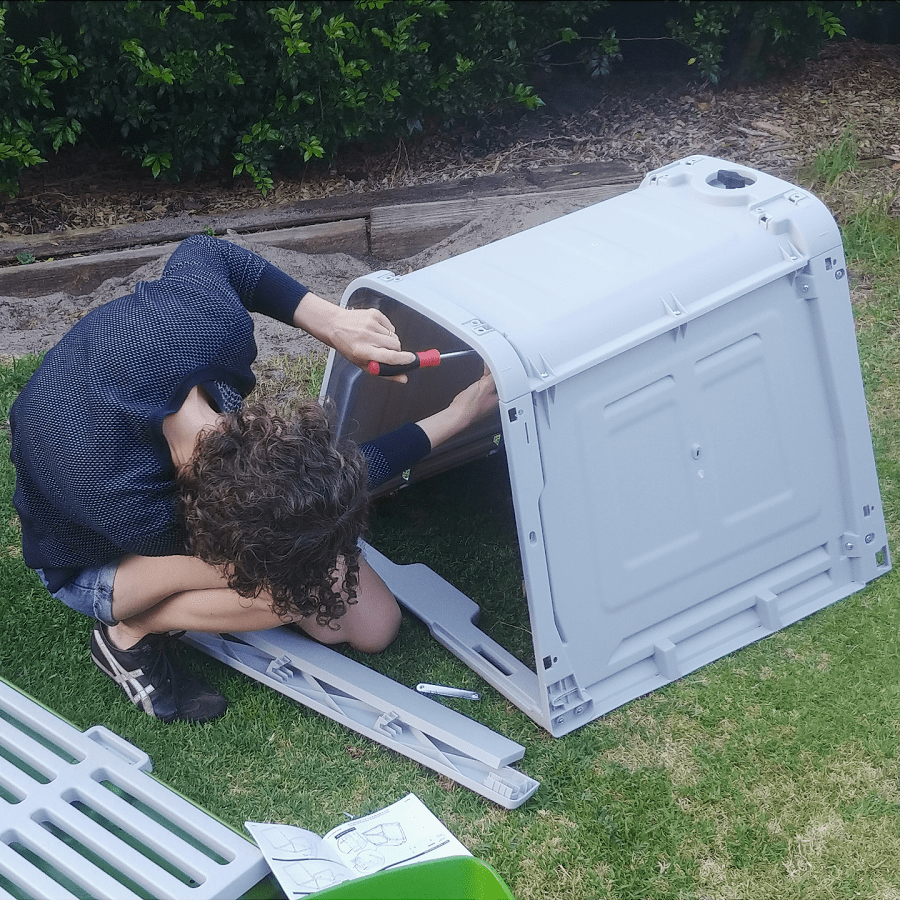
The instructions were great, really detailed and easy to follow – although I did have to check everything fifteen times, which is why it took me longer to set up than expected.

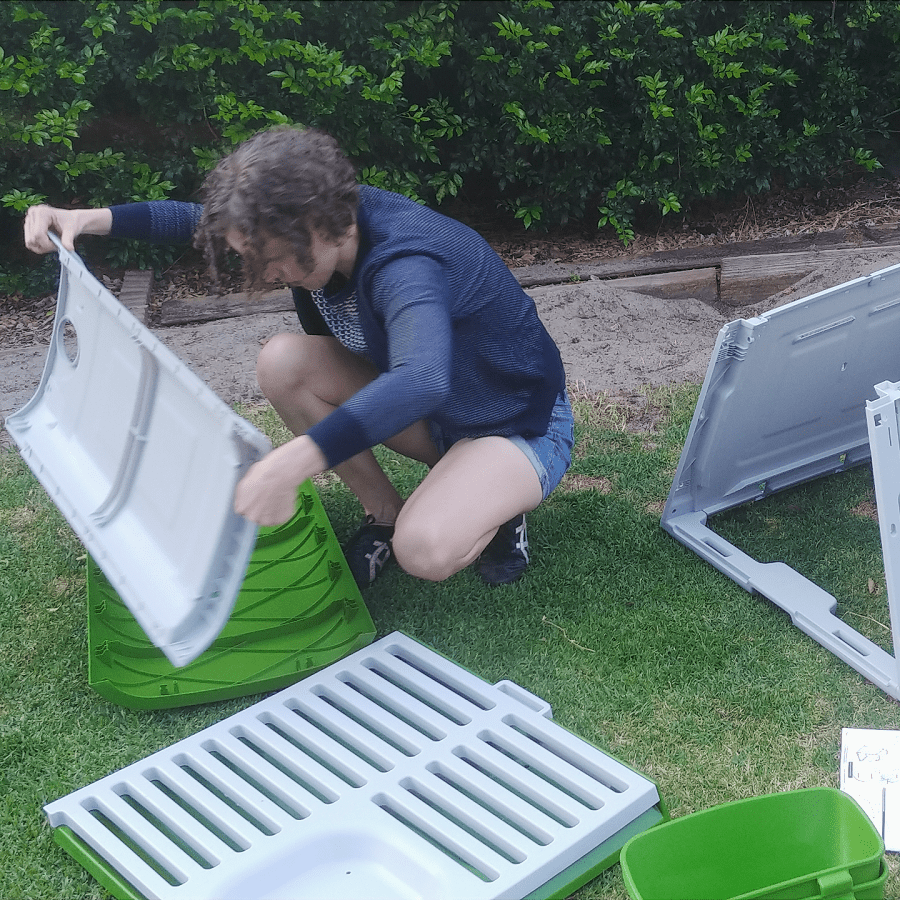
The house comes as two sides, a base, a roof, a back and a front – and some green external cladding (they also have a pink option) that insulates the coop.

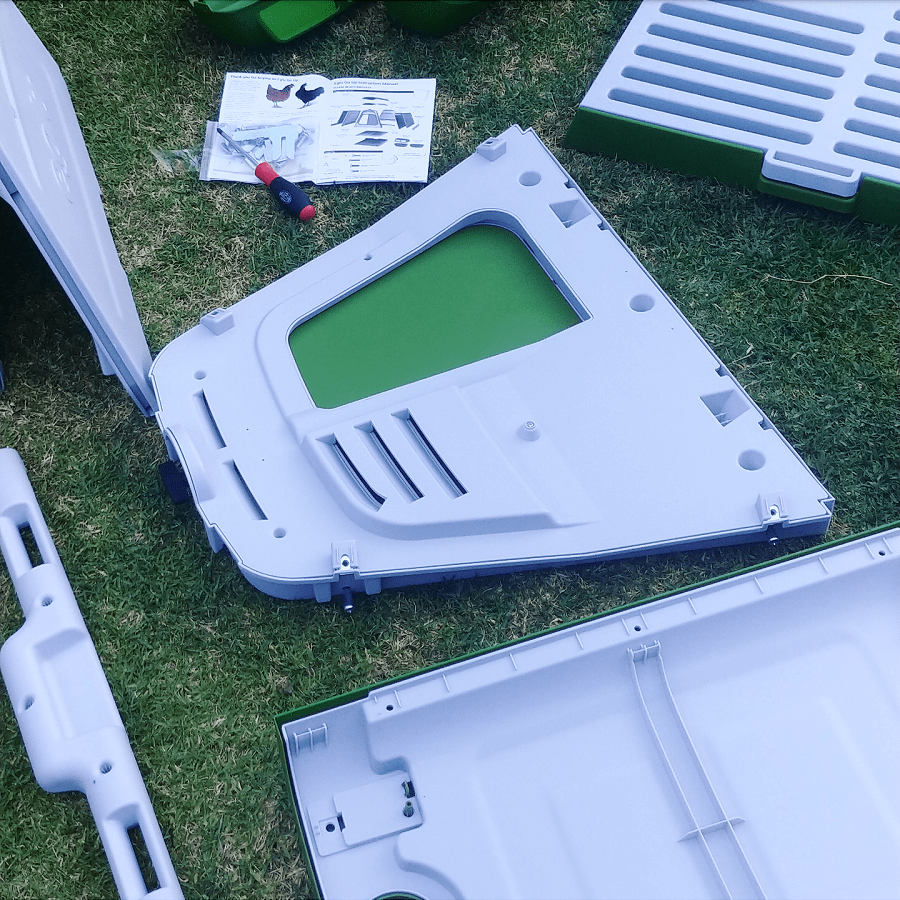
Screwing it together was relatively straightforward.

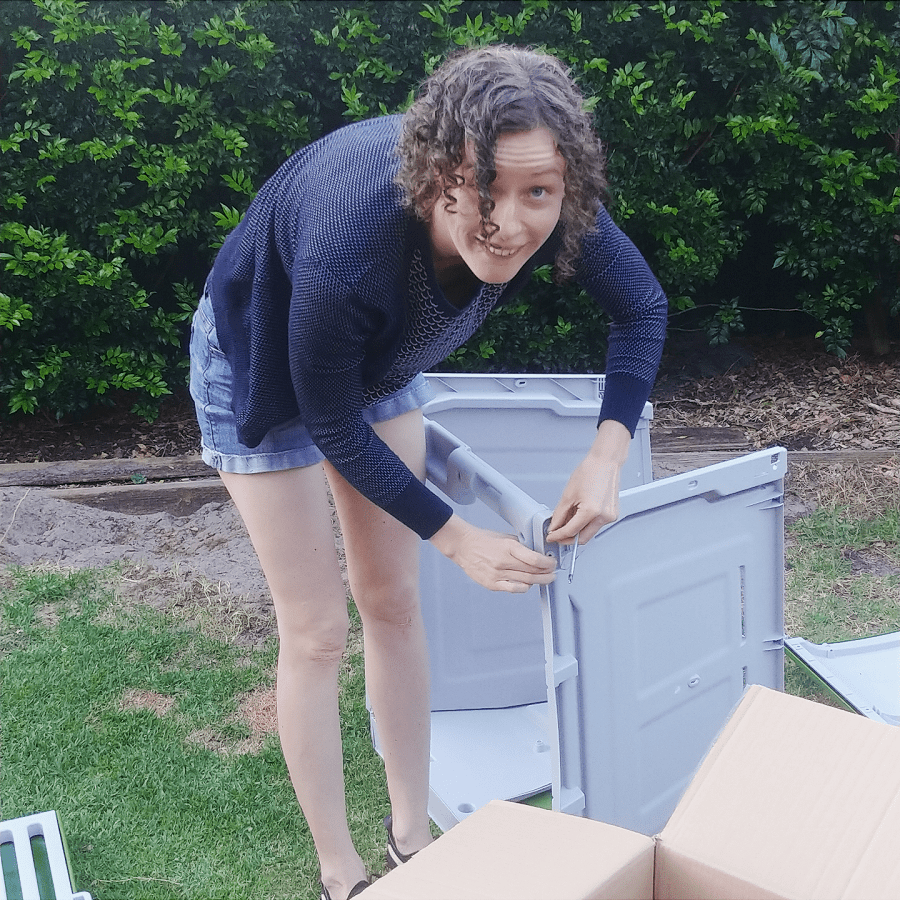
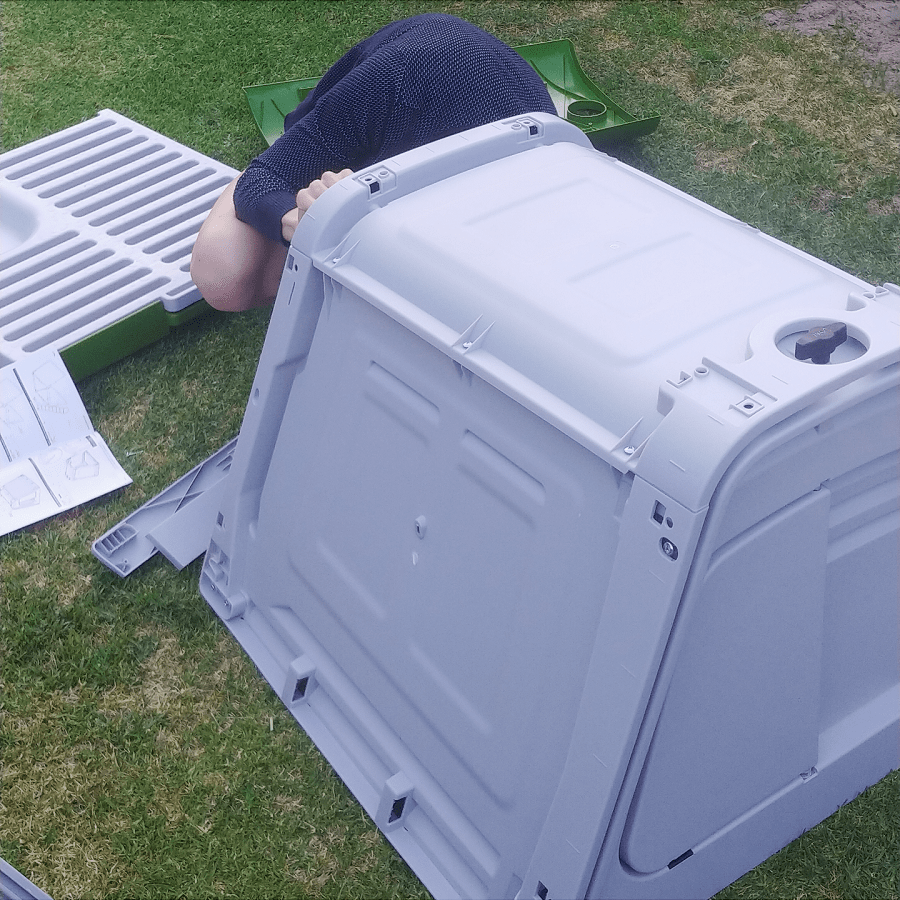
Once the house is screwed together (but before the outer green cladding goes on) the stand needs assembling – the frame that the house sits on.

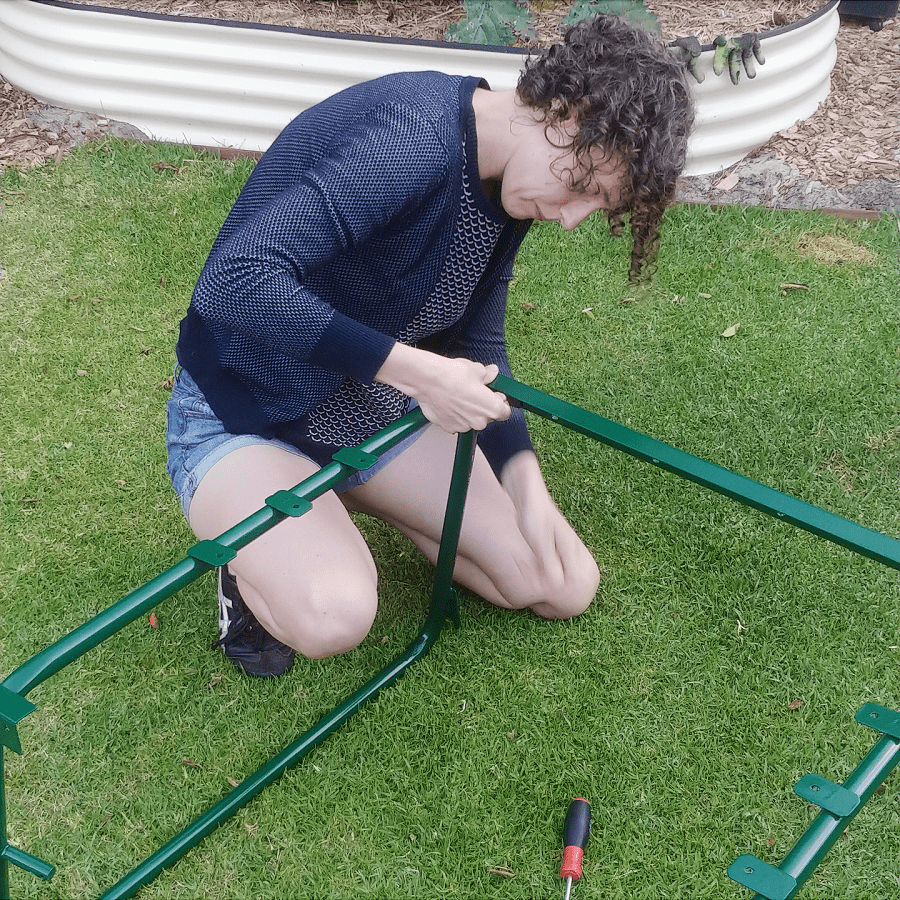
There is also the option to add wheels to this frame, to make the coop easier to move around the garden. You hold the opposite end and maneuver the coop into the position you want. If you’re intending to keep the coop in the same place, you probably don’t need the wheels. You can also lift the coop with two people as an alternative.

Once the frame is assembled and the wheels attached, the house sits on top and is held in place by two sturdy metal holding plates. The green cladding clips in place, and the house is done.

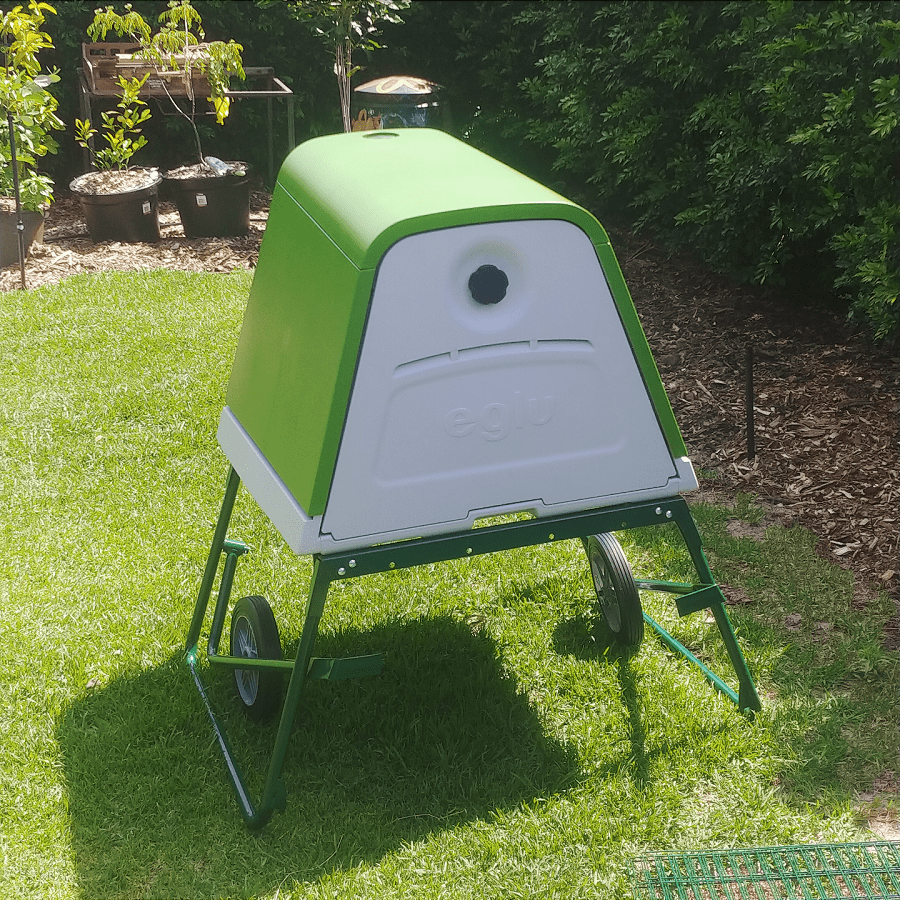
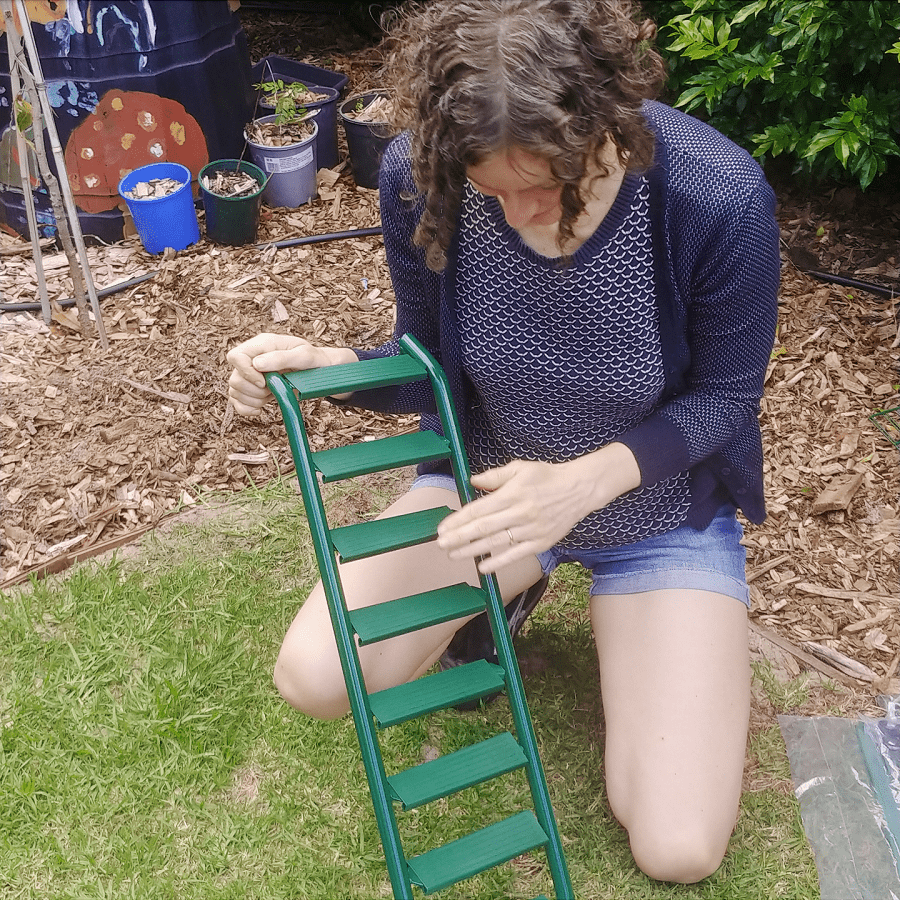
Wondering how the chickens get into their house? With a ladder, of course!

Next, assembling the run.

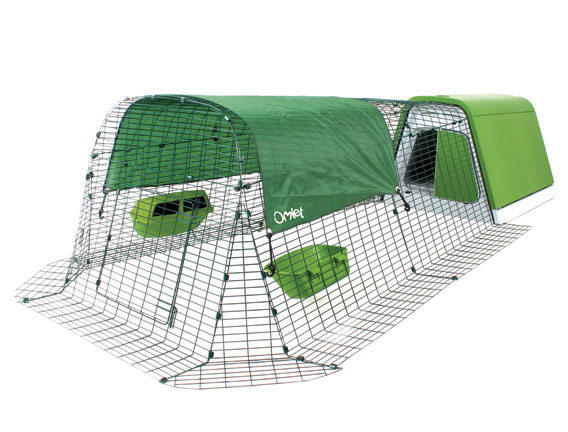
Setting up the Omlet Eglu Go Coop Run

Predicted set-up time 2 hours, actual set-up time 2 hours.

No tools at all required for this bit.

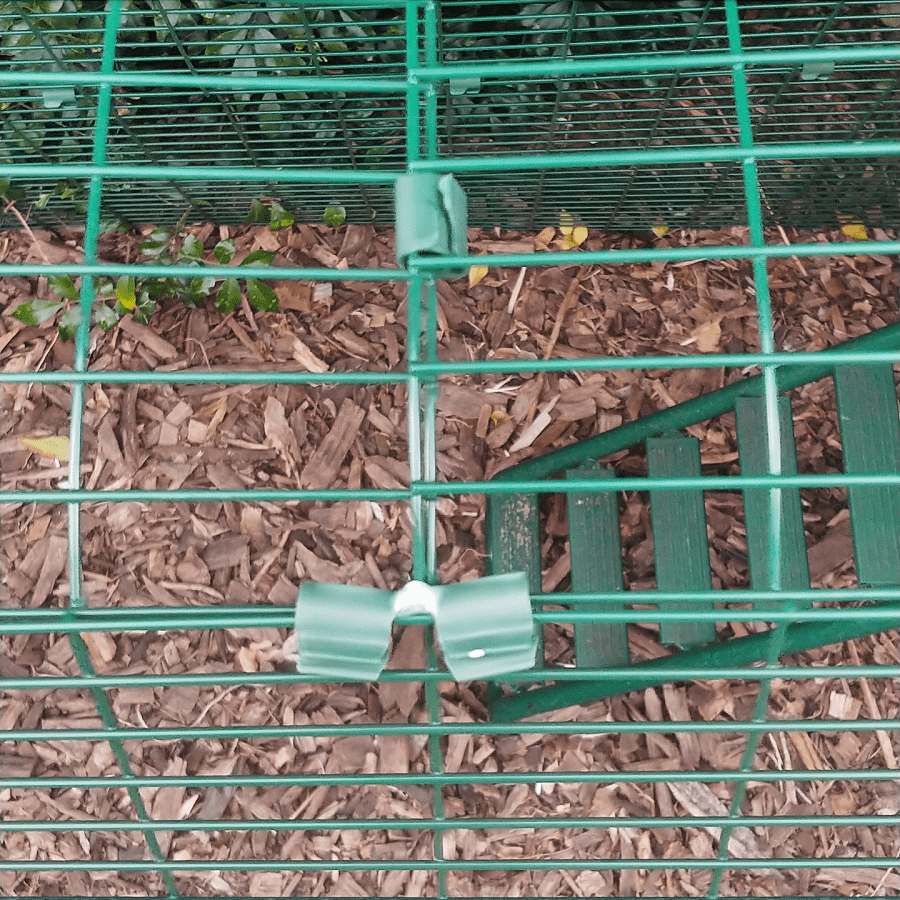
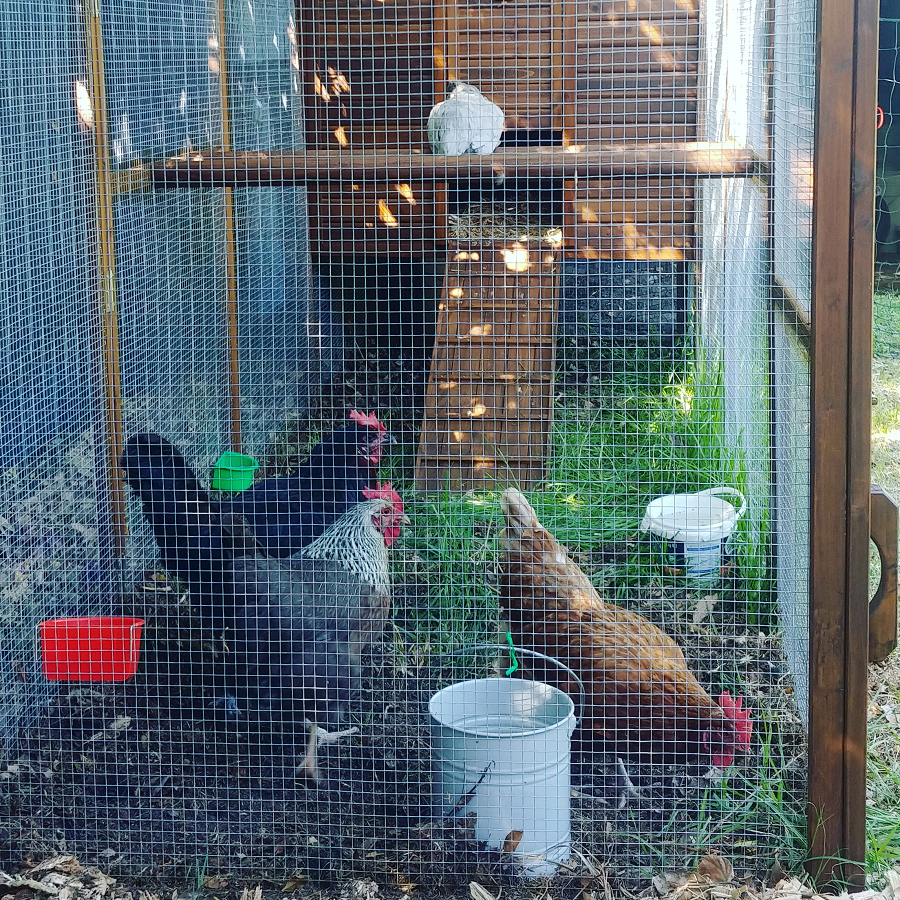
The run is made up of a series of welded mesh steel panels that securely attached to the coop. There’s also a mesh ‘skirt’ that can go around the edge to help deter predators (I haven’t used the skirt as I’m fortunate enough to live in an area without foxes).

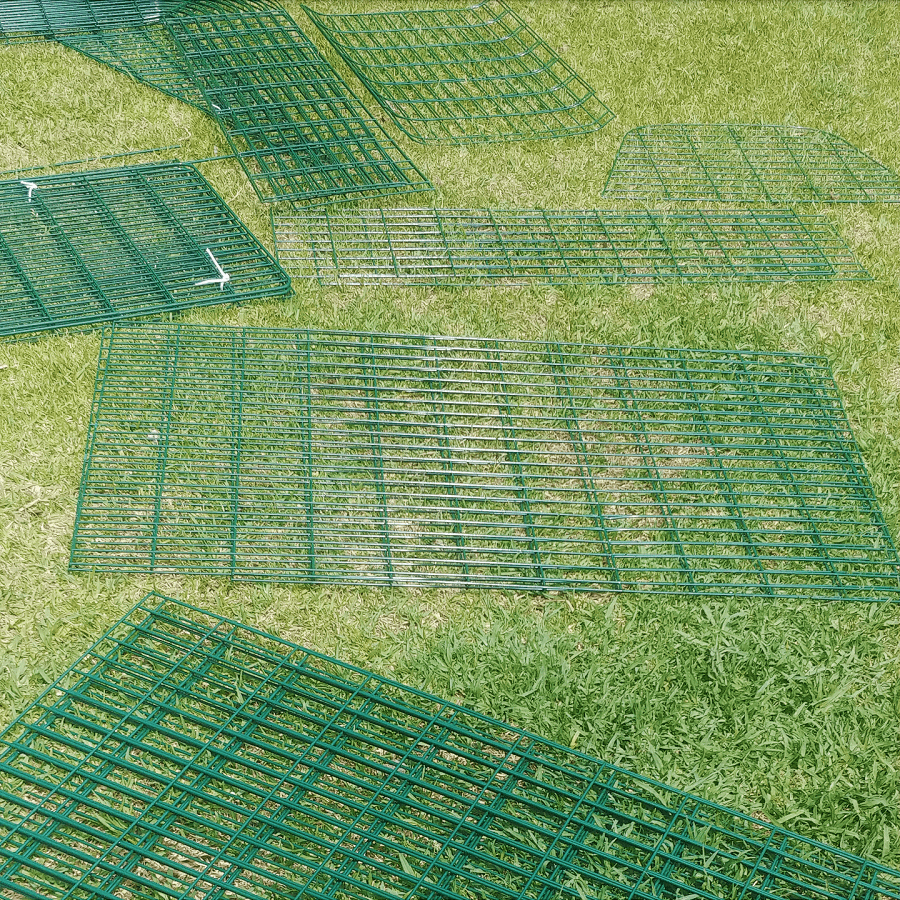
The mesh panels clip together with plastic clips. That might not sound super secure and it’s a little wobbly whilst it’s being put together, but once it’s all in place it’s pretty sturdy.

The clips can be opened and closed to allow for the run to be dismantled. Being plastic, I am sure the bending of the joint will slowly weaken over time, and also degrade in (Australian) sunlight. A follower on Instagram told me that after 4 years in the Queensland sun her Omlet coop clips have started to break. Replacement clips are available, or you could use wire, string, or something else to secure it all in place.

It’s helpful to have two people to assemble this – one to hold the pieces in place whilst the other clips them together.

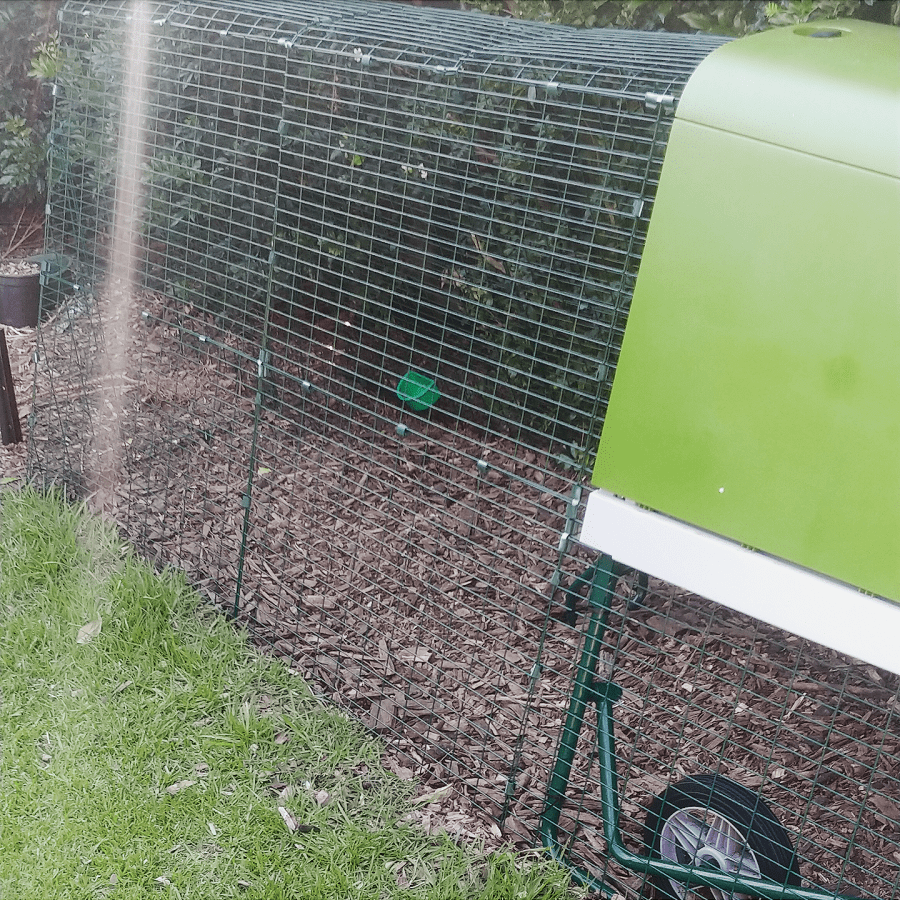
The coop can be purchased by itself, or with a 2m run, and any number of 1m extensions can be added. I added a single extension to make my run 3m. The longer it is, the more awkward it would be to manuevre the coop/run around the garden, but 3m is fine.

A quick tour of the Omlet Eglu Go UP chicken coop

The door to the chicken coop can be swung open and shut with a liftable and turnable knob placed in the roof.

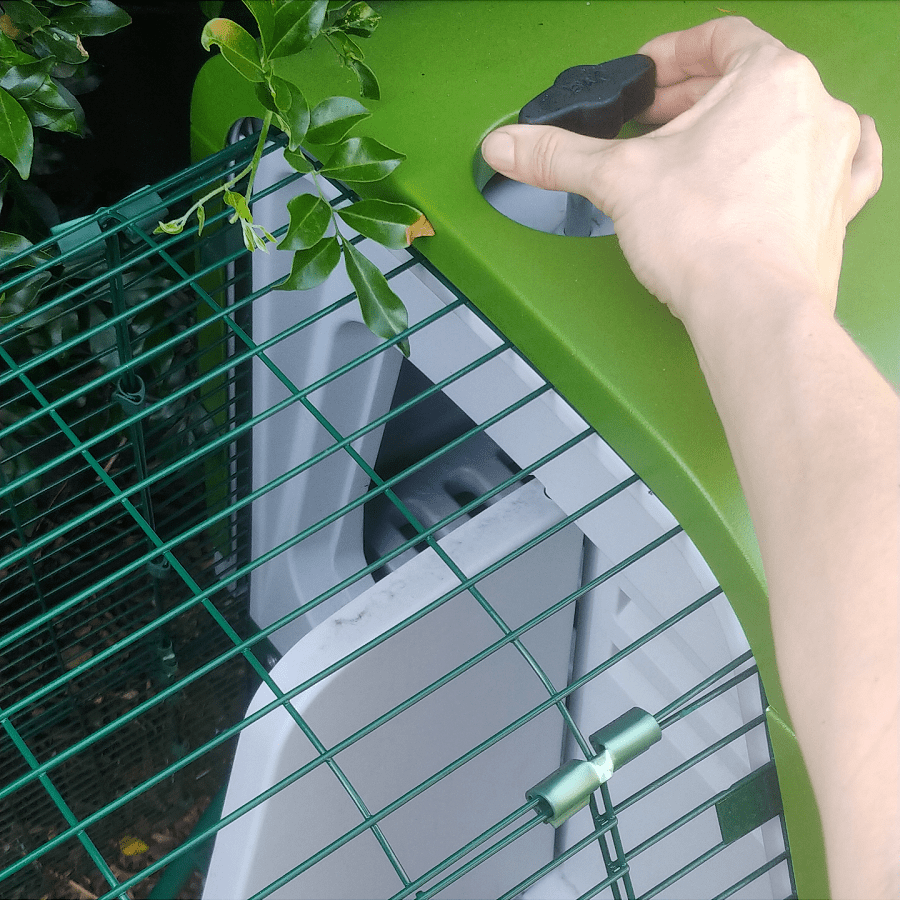
The side panels have vents, so closing the door does not affect air flow, but it helps keep the chickens secure – a great feature if predators such as foxes or snakes are a concern.

At the back of the chicken house there is a removable panel which can be taken off by turning the big knob at the back, and this gives access to the coop.

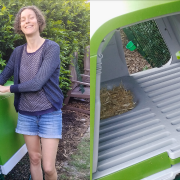
The internal tray is removable and slides out, and is made of two parts (the top one is grey, and the bottom on is green). On the top part there is a nesting box area, set slightly lower than the rungs, and then the rungs. (Chickens prefer to perch on flat or wide beams, so these work well.)

There are gaps between the rungs so their poop drops into the bottom tray. The two trays separate easily, and the whole thing can be hosed down to clean.

Honestly, cleaning this coop is a dream.

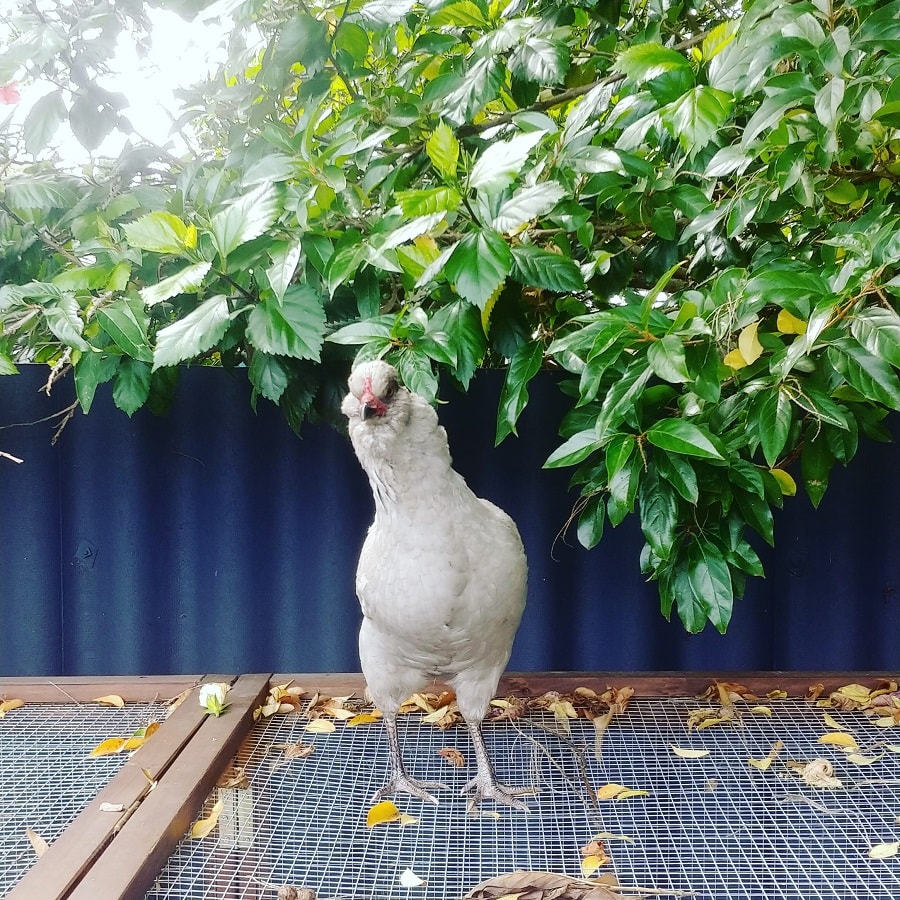
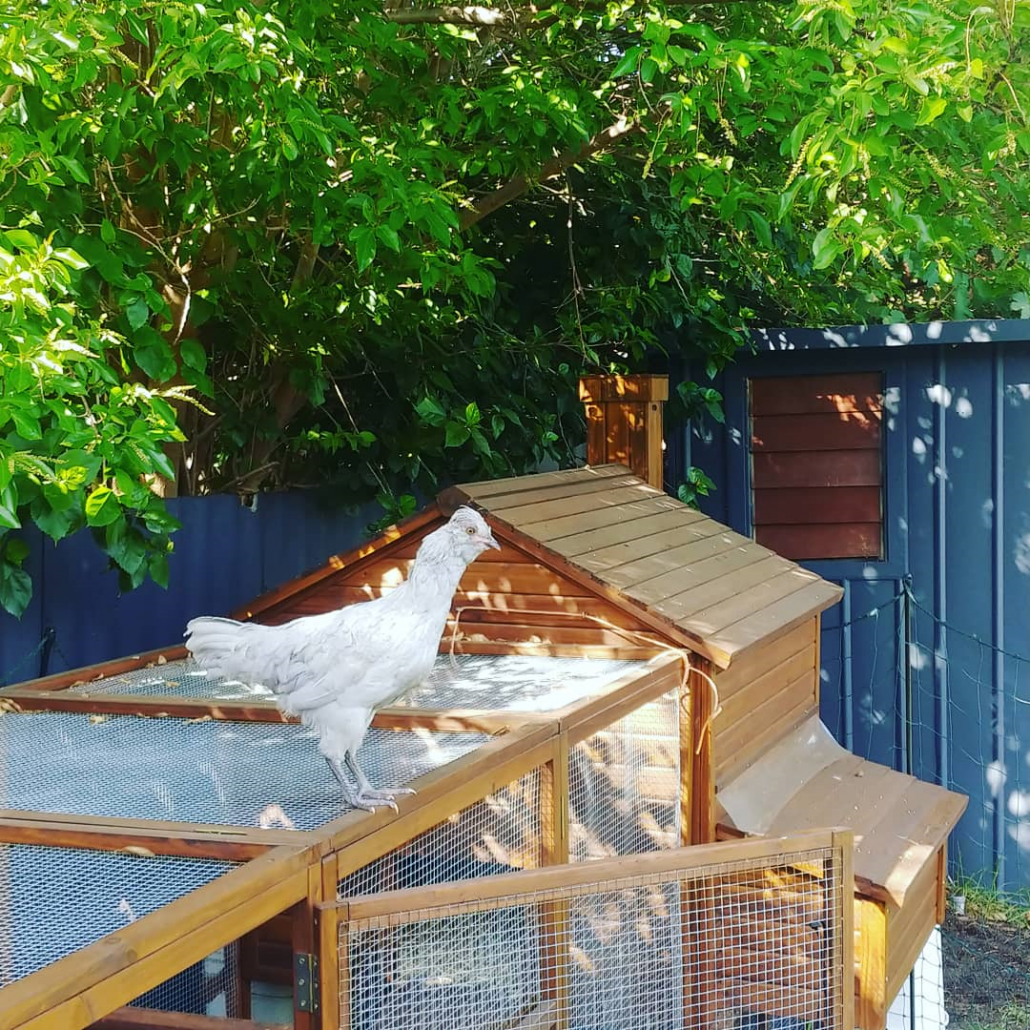
And of course, to test it out… I have two new chickens.

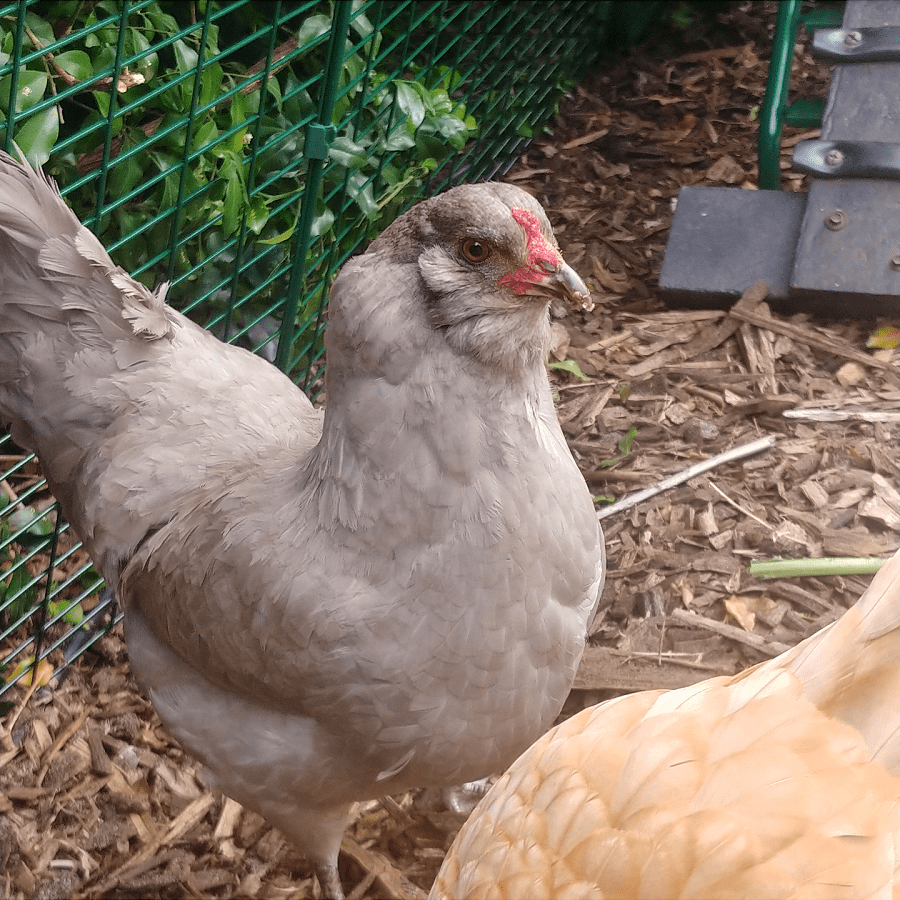
These two have come from friends who are travelling around Australia for a year. The orange feathered chicken – a solid Isa brown called Dorothy – was too busy eating to pose for pictures. The grey chicken, Betty, is the sister of Alison, my existing Araucana chicken.

Oh and fun fact – araucana chickens lay blue eggs!

Final thoughts on the Omlet Eglu Go UP

I’m really impressed with this mobile chicken coop. It’s well designed, sturdy and secure. The coop is completely weatherproof, and easy to clean. (I can’t stress enough how easy to clean it is.) And whilst I expect some colour fading in the sun, it’s robust and made to last (the house is UV stabilised, and the run is metal), and a zero maintenance option.

If you have zero or minimal DIY skills, it is a great no fuss option.

I love the fact that it’s adaptable (by placing on the ground and removing the perch tray, it becomes suitable for quail or rabbits) and modular, and that the company sells spare parts.

There’s also a thriving second-hand market for these items so if you no longer need it down the track, it’s easy to find a new owner. (That said, it’s less easy to find Omlet products second-hand, as they get snapped up quickly and are often priced similarly to new products.)

You’ll find more information about the Eglu Go UP (and all the other pet products that Omlet make) on their official websites (and don’t forget, if you choose to make a purchase you can save 10% with the code TREADING10)

Omlet Australia / Omlet Ireland / Omlet UK / Omlet USA

And of course, if you have any questions about the Omlet chicken coop – or if you wish to share your own experiences – I’d love to hear from you so please get in touch and leave a comment below!

5 steps to a productive food garden (progress in pictures)

It’s been just over a year since I moved into my “new” (1970s) house, and just under a year since my garden transformation began. (The transformation from lawn to productive food garden, that is.) And this last month, things have really (finally) taken a big leap forward.

There is still so much to do, but a lot of things have come together, and it’s starting to resemble in real life what until now has only existed in my head.

The main change, which was holding everything else up, was installing reticulation. I already had a bore installed, which is a pump that pulls up groundwater (the groundwater level where I live is pretty close to the surface). Using groundwater means I don’t have to use mains drinking water for the garden.

Having reticulation means I don’t have to water everything by hand every day.

(The alternative to not watering at all would be living on a sandpit.)

Having reticulation means I can now plant out my garden beds, and believe me, I wasted no time. The front garden is well on its way to becoming a productive food space.

If you’ve been following along since the project began, it is virtually unrecognizable these days.

I wanted to talk you through the five stages of getting this up and running. Depending on the scale you want to grow, stages might take less (or much more) time – but the principles are the same.

Step 1: Planning the growing space

Before I could install reticulation, I needed to figure out (more or less) what I was going to do with the space, as different plants have different water requirements. Some things have no water requirements. Also, different types of reticulation are more practical in certain spaces.

Not to mention, installing reticulation means digging trenches everywhere and laying PVC pipe, so I needed to know where the paths would be and the edges of zones. (This is why I haven’t planted out heaps of plants so far… I didn’t want to kill them all when all the roots are messed with.)

The previous reticulation was pop up sprayers everywhere, which meant my laundry got soaked as one fired directly onto the clothes line, my chickens got soaked as one fired directly onto them, Hans the greyhound got soaked as one fired directly onto his wallowing hole…

Plus delivery drivers parking on my verge (when there is a perfectly good driveway or road) had trashed the PVC pipe so when it was turned on, a man-made geyser channelled litres of water down the street.

Not every corner of the garden needs water (such as the places we sit). So thinking about where plants will grow and where they won’t is an important first step.

Figuring out what I will plant now and how the garden will evolve in future was pretty important so water goes to the right places. It’s not that I can’t change the reticulation later, but it is more expensive and very inefficient to do so! I can add on to what I have, of course.

Step 2: Deciding on plant zones

I have four main growing zones in the garden: vegetable beds, fruit trees, lawn and the verge. Each of these is now set up with its own watering schedule and different type of reticulation.

For the vegetable beds, I wanted overhead sprayers. They allow an even distribution of water across an area, and work for both raised beds and in-ground beds. They are the most flexible option: I can interchange the types of beds (installing raised beds, or removing them) without having to alter the reticulation, as well as switching things like orientation.

Drip lines (which I had at the old place) are fiddly with vegetables because different crops have different spacing requirements, so what works one season might not work the next. There is also heaps of pipe to move every time you want to add stuff to the soil. And because the drip lines sit on the soil, raised beds need raised pipe, and if you remove the beds you also need to lower the pipe.

For the trees, I’ve used drip lines. The trees are round the edge of the property, next to the fence and down the side of the house, so sprayers wouldn’t work as well – plus they’d spray the chickens, the dog and my laundry. Plus trees tend to stay in the same place for a long time, so its unlikely I’ll need to change anything here.

For the lawn, I’ve used overhead sprayers. I find pop-ups really annoying – they break all the time, get stuck in the lawn and are generally frustrating. The overhead sprayers are located around the edge of the lawn – it is small enough not to need anything in the centre.

The verge will be drip lines (so delivery drivers have nothing to snap). But it’s currently still weedy lawn, so I’ve left that until autumn when I’m ready to plant out.

Step 3: Figuring out a watering schedule / installing the reticulation

If you live somewhere with plentiful rainfall, you can probably skip this step – or at least on this scale. For me, this was a big (and expensive) job… but it had to be done.

The bore pump and original control box were still usable (although the control box needed moving) but everything else needed updating. Trenches were dug everywhere (the whole place was chaos) and pipes laid, and then more pipes laid.

But when it was finally turned on, and there was water! – oh, it was worth it.

(The previous reticulation pipes are decades old, and the control box is something out of the 1980s, so it had a good innings. The new pipework should all last a (my) lifetime. Expensive upfront, but over 20 – 30 years, not so much.)

Step 4: Preparing the soil for the vegetable garden

My plan has always been to have in-ground beds at the front of the house, and as soon as the reticulation was installed, I got creating them. I wasn’t sure I’d have enough time to even get things growing this year – my rule is, if it isn’t in the ground before Christmas day, it doesn’t get planted until April. Perth summers are too hot to be trying to get seeds and young seedlings going in January/February.

To get started quickly, I cheated – and ordered in a veggie concentrate mix. My soil, being basically hydrophobic sand, has nothing of worth for vegetable growing. To make the amount of compost I’d need for all these beds (prepping them all at once) would take years.

Not to mention all of the different soil amendments I’d need, too.

I ordered 2 cubic meters of veggie concentrate from the Green Life Soil Co for the beds. It’s a mix that can be mixed 50:50 with existing sandy soil to grow vegetables. It meant I could shovel, and plant the next day.

(As opposed to something like lasagne beds, which need a few weeks after creating before planting out – time that I don’t have, I need to use the cooler days whilst they still exist – and would also mean driving around getting all the components, and on a huge scale.)

I prepped the soil using a broadfork to loosen the sandy soil, and then shoveled the concentrate on top, and raked and forked it in.

Once the beds are established I can add compost and other elements as I need them, but starting from scratch – and in summer – I wanted to give my plants the best chance of success.

I ordered enough soil mix for what should have been 4.5 – 5 beds, but I seem to have enough for 5.5, so I’m keeping going until it’s all dug in. I have space for 7 beds in total, all 4 m long. I’d like to tell you it is enough space (along with my two and a half raised beds at the back) but I really don’t think it is!

(I was going to order enough soil for 7 beds, but the guy at Green Life talked me out of it. I think he was worried I was biting off more than I could chew!)

Step 5: Planting out my vegetable garden

As I prepped the beds, I started planting. Not a moment to waste!

I’ve used a mix of seedlings grown from seed and bought seedlings (capsicums, marigolds for companion plating with the tomatoes, basil because my seeds were duds, and cherry tomatoes because I was struggling to even find seeds – I always said to myself I would never buy tomato seedlings as they are so easy to grow but I panicked! I’ve since found seeds.)

Because I wasn’t sure if the reticulation would be finished I didn’t plant seeds early, and I also have a lot of expired seeds, so I decided to have a clearout and see what germinated. It’s resulted in a bit of a motley crew but it means next year I will be much more organised.

{Coughs.

At the front I’ve planted:

Bed 1 – Roma tomatoes and basil.

Bed 2 – capsicums and eggplants/aubergine.

Bed 3 – cherry tomatoes and basil.

Bed 4 – cucumbers (Lebanese and Armenian) and I’ll be planting zucchini/squash.

Bed 5 – corn (Chinese mini corn, that’s started to germinate, and regular corn from an old seed pack, so we will see what happens there.) Once the corn is done, I’m going to plant climbing beans in between.

Bed 6 – this bed is currently sandwiching the raised bed I already had full of leeks, that I’m keeping for now. Until I can harvest the leeks, at least. I’ve planted pumpkins on one half, and I still need to add soil to the other part. I might plant spaghetti squash here.

Bed 7 – I don’t have soil for this yet, but I’m thinking about planting okra here. This bed is the most exposed, and okra can handle the heat pretty well.

I have excess tomato seedlings, and I also want to grow gherkins, so I’m planning on planting these in some of the empty wicking bed pots.

At the back I’ve planted:

Raised bed 1: blackjack zucchini and bush/dwarf beans (Cherokee yellow, and purple).

Raised bed 2: Virginia bunch peanuts (my kale in there is still looking good so it’s staying, and there are carrots still from winter).

Raised bed 3: the smaller bed is still filled with leeks, and ruby chard.

I also have some overwintered chillies – jalapenos, cayenne and birdseye – in large pots, so I’ve refreshed the soil and these will be good for another summer. I’ve already pickled my first jar of jalapenos.

Creating a productive food garden – what’s next?

At the front, the three raised beds made out of a chopped up rainwater tank need filling with soil and planting out. I’ve started a lasagne bed in one with things I had on hand (leaves, grass clippings, straw and compost) but I need to finish it off, fill the second one and put the third one into place (which involves relocating my two compost bins, one of which is still mid-brew).

The hedge area next the vegetable beds is going to be removed and planted with fruit trees – something else that probably won’t happen until winter.

And then there’s the digging out of the lawn on the verge.

At the back, I’m adding a second passion fruit near the first because the plan is to add an outdoor shower (why let the water go down the drain when you can add it directly to the soil?!) and the new passionfruit will screen one side.

(Haven’t figured out the screening of the other side, or the front yet!)

I was hoping to plant a couple more trees but all of the nurseries have sold out of what I want (a panache fig and a persimmon – they blame Covid). I’m also keen to get my fruit tree espalier area set up, but I might need to change the fencing (which is currently asbestos) so that might be a bigger, slower and more expensive job than I’d like.

So there is still a lot to do, but it is starting to come together. The more pressing challenge will be keeping all the plants I’ve planted alive (I’ve mulched with pea straw, and I’ll be setting up shadecloth), and then eating and preserving the harvest so it doesn’t go to waste. I’m not sure a gardener’s job is ever done.

Now Id love to hear from you! Are you growing food right now? What have you planted? Or if you’re in winter, what are you planning for Spring? Want to set up a new veggie patch and have questions for getting started? Anything else to add? Please share your thoughts in the space below!

How I’m planning my garden for food production

I’ve officially lived in my “new” (to me) house for 12 months (since October 2019). I started my garden transformation project in January and whilst it’s no way near being finished, I thought it was time for an update.

I thought I’d talk you through some of the planning and design, and explain the different choices I’ve made and why I’ve made them.

Just as a reminder, this is what I started with:

My garden is designed with permaculture principles in mind. What this means, is designing for the climate and with nature, rather than against it. I completed a Permaculture Design Course back in 2016, which is two weeks of full-time learning, and is a great foundation for making good decisions around environmentally sensitive garden design.

There are 12 principles to permaculture which help inform all the decisions. Some are self-explanatory, and others have a few different meanings depending on the context. The principles are:

  • Observe and interact;
  • Catch and store energy;
  • Obtain a yield;
  • Apply self-regulation and accept feedback;
  • Use and value renewable resources and services;
  • Produce no waste;
  • Design from patterns to details;
  • Integrate rather than segregate;
  • Use small and slow solutions;
  • Use and value diversity;
  • Use edges and value the marginal;
  • Creatively use and respond to change.

Permaculture garden design: designing for the climate

When planning a garden it’s helpful to think about the patterns (permaculture principle: design from patterns to details). Things that might change from day to day, but run in cycles, whether they are monthly, yearly or something else.

One of the biggest considerations when planning a garden is the climate. It affects so much: the types of things you can plant, when you can plant them, how much water you need, whether you need wind or sun protection, and I’m sure there’s more.

In Perth, we have a Mediterranean climate, hot (brutal) summer sun, and lack of rain. On the plus side, there are 300 days of sun a year, and where I live, we don’t get winter frost.

Which means I need to have a good and reliable water source (reticulation is a must, unless you want to water everything by hand every day in summer), and shade for the hottest summer months.

(Yes, in Perth, plants that are described as ‘needing full sun’ need some shade in summer.)

The temperature range also dictates the kinds of plants that will thrive. I can plant some tropical plants (bananas and mangoes will grow well, but not as well as in the tropics) and I can plant some cooler weather plants (like apples and pears, but they need to be low chill varieties as there won’t be a frost – which some trees need).

Mediterranean plants grow really well, as it’s the ideal climate for them.

Permaculture garden design: designing for microclimates

Within most gardens there are microclimates. Put simply, conditions will be different in different spots of the garden. Some spots will get the gentle early morning sun (here it comes from the north), others will be blasted by the brutal afternoon sun from the west). Buildings can radiate heat and create warmer zones. Some areas will be shaded in winter, others all year round.

You don’t need to have a big garden to have microclimates. A sunny spot right outside the kitchen doors only big enough for a couple of pots is a microclimate.

But it helps to be aware of microclimates (permaculture principle: design from patterns to details) so that you can choose plants that will survive best in these areas. In my garden, tropical plants need to go in the sunniest spot and get full winter as well as summer sun. Planting next to brick walls will help beause of the radiant heat (this isn’t really an option in my garden).

Deciduous trees (those that lose their leaves and go dormant in winter) can be planted in a spot that gets summer sun and winter shade (closer to buildings). Without summer sun they won’t set fruit. Because they lose their leaves in winter, they won’t cast a big shadow over the garden like an evergreen tree will.

Permaculture garden design: planning zones

In permaculture design there are five zones, but for urban gardens it’s really only practical to have zones 1 and 2 (and maybe 3).

I’ll run through the permaculture zones quickly.

The zones are often imagined as concentric circles, but when applied to a block or dwelling, they tend not to be perfectly round, following boundaries and paths.

  • Zone 1: Closest to the house and/or following well-used pathways. These are the spots that require the most attention and will be visited most frequently. Usually described as the spot for a kitchen garden: vegetables, herbs, kitchen compost bins, seed raising.
  • Zone 2: Slightly further away from the house, and requiring slightly less maintenance. Perennial vegetables might be in this zone, along with fruit trees, beehives, chickens or quail.
  • Zone 3: Further away again, and usually dedicated to farmland: farm crops, orchards, livestock and semi-sufficient bird flocks, dams. I would argue that an urban native verge could be considered as zone 3.
  • Zone 4: A semi-wild area. In permaculture design, this is where you might forage or collect firewood, and possibly grow a woodlot.
  • Zone 5: Wilderness.
  • Zone 6: Not an official permaculture zone – the wider community. This is useful to think about in urban design when there is no space for outer zones, because produce can be swapped or traded, or several households can benefit from a single tree.

When I talk about zones in my urban garden, I’m really talking about zones that I’ve decided within permaculture zones 1 and 2, with some consideration for zone 6. (Permaculture principle: obtain a yield.)

Any vegetables I grow fit into the category of ‘kitchen garden’ rather than ‘urban farm’ because I’ll want to access them frequently and will be planting smaller beds of many different crops. I’m not planting out whole fields and then leaving them to do their thing.

Plant zones I’m planning for:

  • A herb garden. Herbs add so much flavour to a meal, and are easy to grow.
  • A vegetable patch. Of course.
  • Perennial vegetables. Plant once and they come up year after year (examples: asparagus, artichokes.)
  • Deciduous fruit trees.
  • Evergreen fruit trees.
  • Lawn. (Reluctantly, but my greyhound still needs some space to whizz about!)
  • Chickens. The long-term plan is to let them free range different areas of the garden at different times of the year, but they still need a house and a base.
  • Native plants. These are waterwise plants native to the local area (or sometimes, a little further afield) that attract pollinators and provide habitat.

With all of this in mind, let me share the latest update for the garden. I’m pretty excited because this week someone is coming round to help me sort out the reticulation with my plan in mind, which means the part of all of this where I get to plant *all the things* is getting closer.

(If you’re new here, you might like to read these first: My garden transformation project (Progress update: month one to three) ; My garden transformation project: why I’m digging out my lawn by hand ; My garden transformation project (progress update: month three to six).)

Planting out the front verge

I haven’t made any progress on the verge, but now the front lawn is dug out I’ve set my sights on removing this. The plan is to plant natives here, to provide habitat and food for insects, birds and whoever else might like to come here (permaculture principle: use and value diversity).

Because it’s not my land but council land there are some restrictions around what I can plant. I’m not allowed to place fixed structures (like raised garden beds) and because there is no footpath I have to leave a 1.5m gap between the road and the plantings.

The big fiddlewood tree which dominates the verge dictates some of the design for my front yard, as it casts a huge shadow in winter over the garden.

Planting out the front yard

(With your back to the house, the front garden faces north-east.)

I finally dug out all of the grass at the front (permaculture principle: use small and slow solutions), and am pleased to report that there was been no return of couch grass over the wet winter months.

(Not to say there won’t be any regrowth, but if it hasn’t come yet I think it will be very manageable.)

The plan from here is to turn the front into one giant in ground veggie bed zone (permaculture principle: obtain a yield). It will be a rectangle from the edge where I took the photo to the green box on the far wall (the gas meter), and across about as far as the silver metal bed.

It will measure 7m x 4m, approx. (Those two cream raised beds were a temporary solution whilst I was still digging out the grass. They’ll be moved: either to the back garden, or if I can’t find space there I’ll list them on Gumtree, which is where I got them in the first place.)

Along the back where you can see a small wooden (painted blue) raised bed and a hedge, I’m going to plant deciduous fruit trees, probably stone fruit that grow in a vase shape. I’m planning to place a compost bin in between each tree. I think the big tree on the verge will give too much shade in winter for evergreen trees (permaculture principle: observe and interact).

These three metal beds were an old rainwater tank my neighbour had, that she chopped into four pieces. She is keeping the base, and gifted me the other three bits. I’m going to try placing these on the boundary between the verge and the front garden, which is under the tree. There is a bit of competition between roots here, so the raised beds will give more growing area to the plants I plant.

There is also a lot more shade, meaning it isn’t suitable for sun-loving edibles. I’m thinking I’ll plant one with herbs, one with perennials and leafy greens, and one with tea (well, plants that tea can be made from, like chamomile, rather than literal tea plants) and medicinal herbs.

Planting out the eastern side of the block

Going round the corner where the gas meter is, towards the back garden, is the eastern side of the house.

This doesn’t get much sun – the tall trees in the neighbour’s yard block the early morning sun (well, that and my fence!) and the house shades the space from the afternoon sun. It’s noticeably cooler than the rest of the yard (a microclimate!).

Because the bed along here is raised and the house is single storey, the top canopy of the trees here reach the sun for most of the day in summer. Which got me thinking – could I grow deciduous fruit trees along here?

The fruit will need 5-6 hours of sun to set, and it will only be possible on the higher branches, but I’m going to give it a go. I’m also going to espalier the trees I plant too, which means growing the branches along horizontal poles. This means I can train the branches to reach the sun, the fruit won’t grow over the neighbour’s fence, and will be easier to net for fruit fly in what is a fiddly space. I’m not sure it will work, but worth trying.

The best deciduous trees to espalier are the pome fruits (apples, pears, quince) and persimmons will also work. (Stone fruit don’t, as they prefer to grow in a vase shape and their branches aren’t suited to it.)

At the end of this space is the pomegranate I planted earlier in the year. This section gets more sun, so I’ll definitely be able to get another (deciduous) tree in here – I’m thinking a persimmon.

Planting out the back yard

The back yard is where most of the work has happened so far. Being the biggest space, there are a number of zones: the tropical / evergreen fruit tree zone, the lawn, chickens and the deciduous tree zone.

I added some raised garden beds to the tropical zone when Covid-19 hit in March, because the front wasn’t ready and I wanted to grow vegetables, fast. They’ve been great. Once the front is established and the trees grow bigger I may remove them (the small one first), but they’ll stay for another year or so at least.

Behind the veggie beds are a banana, a papaya, an ice cream bean (which is a nitrogen fixer), an orange berry and a macadamia. Plus two Chilean guavas and a lemon verbena, which are more shrubs than trees – and four pineapple plants.

The macadamia is planted in the far (west) corner and will be a shade tree as it grows, protecting the rest of the garden from the brutal afternoon summer sun.

As the trees get bigger I’ll probably remove the hedge too, to give them more space.

There is a lawn zone because I don’t live by myself and others like the lawn. One of the reasons I moved was to give Hans the greyhound more space, so I can’t really take it all away from him!

I’ve planted more deciduous trees closer to the house ( a mulberry and a fig), as they get less sun in winter due to shading from the building.

I’ve added a passionfruit to act as a screen – it’s not deciduous but it’s fast growing, and so it can climb high (and the top of the trellis is in full sun).

Since I planted the passion fruit (in July) it’s barely grown – in fact, it’s shrunk…, but with the warmer weather I’ve spotted new shoots, so I’m hoping it’s going to cover the frame pretty soon.

The screen is to hide the washing line (and protect the clothes from bleaching in summer!) and keep some sun off of the building. This helps keep the inside of the house cool, and reduces the need for cooling in summer.

(The tree in the foreground is a lime; there’s also a lemon next to it.)

Once I’ve got the reticulation in, I can start to think about layers. (Because there will be a lot of digging to install it, I didn’t want to plant too much and have to disturb all the roots.)

When people talk about permaculture they often talk about food forests, which is a low maintenance system of food production based on woodland ecosystems that incorporate food trees, shrubs and perennial vegetables. Food forests can be divided into a number of layers:

  • The canopy: the tallest trees. The fiddlewood tree on the front verge is a canopy tree, and my neighbour’s avocado (which is the biggest avocado tree you’ve ever seen, and helps shade the garden from the afternoon summer sun. Eventually the macadamia, ice-cream bean and mulberry will be canopy trees.)
  • Understory layer: trees that flourish under dappled light.
  • Shrub layer: woody perennials such as berries. The two Chiliean guavas and lemon verbena are part of this layer.
  • Herbaceous layer: annuals like flowers and herbs.
  • Groundcover: plants that cover the bare mulch. Sweet potato is a great one, and there are plenty of green manures.
  • Rhizosphere: root layers. Sweet potato are part of this layer as are ginger, turmeric and galangal, regular potatoes, Jerusalem artichokes.
  • Vertical layer: climbers or vines.

I don’t have too many plans for the different layers yet, as I’m still focused on the canopy and understory layers. As these grow, I’ll start to add things underneath.

The best time to plant new trees is early autumn, so most of my planting will need to wait another few months. In the meantime I can still grow vegetables, and ensure the compost bins are cranking. Always something to do!

Now I’d love to hear from you! Are you investing more time in the garden (or allotment, or community patch) right now? What are you growing? What has been your biggest challenge? Any questions about my garden? Any other thoughts? Let me know in the comments below!

My garden transformation project (progress update: month three to six)

I’m six months into my year long project to transform the garden from lawn (front and back) to the beginnings of a food forest. And because I promised I’d share my progress (or lack of) with you, it’s time for an update.

My goal is to produce more of my own food, have surplus to share with the neighbours, make the garden a more diverse ecosystem, use plants to help reduce the harsh summer heat, and have a place to spend time away from screens and the news.

If you missed the first update, you can read it here (progress report month one to three).

In some ways it doesn’t feel like I’ve got much to report, but looking through the photos, things have certainly changed a little.

Digging out the lawn (front garden)

After a mammoth effort and bit of help from the neighbours, the lawn at the front is 90 per cent dug out. There is still a strip next the the driveway, and the last of the garden bed mounded against the house.

(Before you ask me any questions about lawn removal, have a read of the post I wrote explaining why I’m digging it my lawn by hand.)

My long-term goal is to put in-ground vegetable beds here. I also want to put up a frame and grow a grape vine (or two) across the front of the house to help keep out the harsh summer sun. Grapes are great because they are deciduous – they will shade the house in summer but lose their leaves in winter, and let the winter sun in.

Once I’ve got the last of the grass out I’ll make a bit more of a plan.

In the meantime I was gifted some seed potatoes and had some leftover leek seedlings (and a few silverbeet swapped with a neighbour for some surplus kale plants), and I still had soil left from my bulk delivery for the back yard garden beds.

So I bought a couple of second-hand raised beds on Gumtree as a quick and easy way to plant these out.

The front garden looks a little weird currently, but the plan is starting to form (even if only in my head).

Digging out the lawn (back garden)

I haven’t made a huge amount of progress here, but I have expanded the grass free area between the fig and the mulberry, and cleared the grass behind the big raised vegetable beds.

I also removed a bit more grass to plant the lemon and lime trees.

(If you’re thinking they are planted close together, that is deliberate. I don’t want them to get too big in this spot, and so being close the roots will restrict one another. I just need to prune them as they grow to ensure the branches don’t get tangled together – which is easy to do.)

Growing trees:

At the end of March I purchased a few trees to plant (including the lemon I just mentioned – the lime was a housewarming gift).

I’ve planted the macadamia in the south-west corner of the garden. As it grows, it will shade the rest of the garden from the harsh afternoon summer sun and protect the other plants. Macadamias are native to Queensland and can handle a bit of brutal summer sun.

I’ve planted the pomegranate in a spot that doesn’t get much sun in winter, which is fine as they are deciduous. As it grows taller it will have more access to the sun year round (it just needs to get as tall as the gutters, really) which will help with fruiting.

I planted the Chilean guava, a lemon verbena and an ice-cream bean tree (grown from seed, this one) along the back between the banana and the macadamia. The ice-cream bean has not appreciated being transplanted and I’m waiting to see if it survives. I did grow a few more successfully from seed, so if this one fails I have a back-up.

Ice-cream beans are nitrogen-fixing trees, meaning they have nodules on their roots which add nitrogen to the soil from the air. Magic. I want to have a few nitrogren-fixing plants to help with the soil biology. (All Acacia species are nitrogen-fixing too, and we have some great native ones so I’m hoping to add some smaller ones in too at some stage.)

Growing vegetables:

The three garden beds at the back are looking great, and I’ve started to pick the broccoli and cauliflower. One they go I’ll sow more carrots and plant some beetroot seeds.

I’ve also got plenty of kale (three different types), possibly too many leeks, garlic (which will be harvested in spring), silverbeet and a sole ruby chard, some peas that aren’t very happy with life, and mixed Asian greens (pak choi/bok choy, an interesting green one that I have no idea what it is, and possibly a third variety). There are also a few carrots germinating in between.

Garden plans: what’s next?

The passion fruit I purchased in March is still in its pot (and yes I’m feeling guilty about that) and my next plan is to rip out some of the rosemary hedge and get that in the ground. I have a few other potted plants that need to be planted out (like the bay tree).

The rest of the front lawn needs to come out, and I need to submit my verge plan to council so I can get that started. (More grass digging. Yay.)

I also want to chip away at the lawn out the back, so the various mulched sections start to join.

Then there is the reticulation to be sorted (I got a quote, but did nothing with it – but I’ll need this sorted before September) and hopefully the final front garden vegetable beds will be prepped.

Lots to do!

Now I’d love to hear from you! Do you have a garden, or garden plans? What are you planting? What are you reading up on and learning about? Anything else to add? Share your thoughts in the comments below!

My garden transformation project: why I’m digging out my lawn by hand

When it comes to transforming my garden into an edible and productive food space, there’s one task that’s taking up most of my time currently: digging out the lawn. And if there’s one question I’m answering most often from the garden updates I post it is this: why are you digging out your lawn?

Which actually has two meanings: why aren’t you keeping the lawn? and why have you chosen digging out the lawn as your method of removal?

It’s not a short answer, so I thought I’d explain it here.

Why I’m digging out my lawn (why I’m not keeping the lawn)

I would like to grow edible food in my garden. I would like fruit trees and vegetables. I’d like native plants too. To grow these, I need to remove the lawn.

Lawn in Western Australia is not like lawn in Europe. If I leave it, it won’t grow into a beautiful field of wildflowers. In summer it will be dead without a lot of inputs. What does grow will be non-native grass species and weeds like castor oil (which is toxic to dogs – it’s the source of ricin).

My climate doesn’t naturally support meadows.

Growing lawn in Perth is hard work and takes a surprising amount of resources. It needs a lot of water to keep it green. I have a bore (which is a pump that draws water from the ground, as opposed to using drinking water from the tap) but even so, our groundwater levels are dropping and in my opinion, it is a waste of water to keep so much grass alive.

Anyways, I’m only allowed to use my bore reticulation three times a week. Any other watering needs to be drinking water.

The reticulation that’s in place to keep the lawn green is plastic and the parts break all the time. It breaks, and the trickle is replaced with a jet stream that gushes gallons of water down the road at the front (or floods the garden at the back). After replacing a few broken bits (luckily with second-hand freebies I was given, not new plastic) only to end up with more broken bits, I decided to just switch it off.

Then, it needs fertilising to keep it green. Lawn fertilisers cause a lot of problems in our rivers, because they are soluble fertilisers than run-off into the water and contribute to algal blooms (which kill the fish).

My non-fertilised lawn is yellow and patchy. Which is fine, because I’m digging it out.

Yes, lawn feels nice underneath the feet (well, when it’s not dead). Although our Australian grasses are not as soft as the European grasses, so it isn’t quite the same. But there are parks close by with lots of grass that are properly maintained and accessible to lots of people.

I know that a lot of non-Western Australians will look at a garden full of coarse wood chip mulch and think it looks ugly and weird. It took me a bit of getting used to when I first saw it, too. But if meadows are what happens to grasses in Europe, this layer of dead tree matter is what nature does in our natural bush areas.

It acts to protect the soil from the harsh sun, retains moisture underneath – and eventually breaks down to add carbon to the soil.

Although it looks extreme now, eventually I’ll cover most of my mulch with plants so it won’t be so obvious.

Why I’ve chosen digging out the lawn as my method of removal

There are lots of ways that people choose to get rid of their lawn. Digging mine out by hand (well, I did contemplate a turf cutter, but I’ve stuck with the spade) was the only option I really considered. I know there are plenty of ways, but I have my reasons for choosing this. Let me explain them.

Perth grass is TOUGH.

Even though I told you grass dies here in summer, it doesn’t actually die. Every autumn when the rain returns the dead patch of yellow grass resurrects itself. It dies, and yet it is almost impossible to truly kill.

There are a few species of grass used for lawns in Perth, and I have a few, definitely included these two.

Kikuyu grass: a tropical grass speces Pennisetum clandestinum, native to the highland regions of East Africa. Grows rapidly and aggressively. Categorized as a noxious weed in some regions. Has underground runners and its root system can grow to 3 metres deep.

Couch grass: a drought-tolerant grass described as ‘high maintenance and invasive’. It has an extensive root system with fine roots that is difficult to remove. Can grow through concrete. Also called Wintergreen couch – I wonder if this is because it dies back in summer and returns with vengeance in winter?

I don’t want to use chemicals (which is often recommended)

Because our grasses are so hard to kill, many gardeners and organizations recommend using glyphosate (you might know it as Roundup) to kill lawn. It’s a controversial chemical that’s been banned in many European countries due to safety concerns.

Whilst verge gardens tend to be non-edibles (well, for humans only) I’m not interested in using chemicals to kill any of my lawn that will remain in the soil and enter the food chain.

Smothering/solarising doesn’t work well in Perth

Lots of readers have suggested I just cover the grass with cardboard and mulch, or use black plastic to solarise the grass and kill it. I know that these methods work well in other places with other types of grasses, but they aren’t great in Perth.

If it has worked for you, brilliant (and I’m sure it can be done). But when it doesn’t work, all that happens is you create a cosy, warm, wet environment for the grass which means it expands its root networks, and eventually busts through the mulch/plastic.

An earlier guide to verge gardens by the Water Corporation specifically advised against these methods, recognising that they rarely work.

I’ve seen many, many examples of mulching/solarising grass failing in Perth, and I can’t say I’ve ever seen an example of it working successfully on the types of grass that I have.

Putting the work in up-front

Even if I thought that mulching/solarising was a great idea, and wanted to give it a go, I’d need to wait several months for the grass to die before I could plant anything in the ground. And I don’t want to wait.

The sooner I can plant trees the better, and the sooner I can plant vegetables the better.

Also, I think putting in the work up-front means not playing catch-up later. I don’t want to spend the next six months digging out regrowing grass – especially not grass that has grown through raised garden beds and now has 1+ metre deep roots.

I expect there will still be some regrowth, but it should be a lot less than if I’d just tried to plant on top.

The level of the land

One other reason why sheet mulching with cardboard and then heaping on the mulch wouldn’t work for me – at the front at least – is that the ground level is already a little high. It’s higher than the driveway, which means when it rains all the water (and mulch) will run off onto the concrete and down the drain.

In a place that’s short of water, this is a huge waste. I need to ensure any water that falls stays in my soil.

Adding an extra 10-15 cm of mulch on top would create a mini mountain, and just exacerbate the problem.

By removing the lawn I’m reducing the height of the land slightly, so the new surface is flush with the kerb/driveway.

Knowing my land

I did contemplate getting a turf cutter, and a few friends suggested just getting a bobcat in to blitz it in a couple of hours. But I decided to do it by hand.

Out the back, I don’t need it all done at once, so I’m chipping away as I’m ready to plant trees or put in beds.

At the front I am removing the whole lot, but I’ve found the by-hand approach useful.

There is a huge tree on my verge, and I don’t want to trash all of its roots with heavy machinery.

There are gas pipes, water pipes (and PVC reticulation pipes!) under the lawn, and I don’t want to damage anything.

It’s been useful to go slowly and see exactly where the roots from the big tree, my neighbours’ trees and my hedge extend, remove random bricks I find, and also see the condition of the soil (which varies from extremely bad to pretty bad. But I did find a worm. Just the one. Yeah, Perth soil is really not great).

Because I want to put in-ground beds at the front, its useful to know if there are networks of roots or blocks of concrete under the soil before I plant anything out.

Removing the lawn – progress to date

The one advantage of living on a sandpit rather than heavy clay soils is that it is fairly easy to dig out grass. It isn’t back-breaking work… but there is a lot of it.

My superstar neighbour has given me a hand out the front (I think she is impatient for it to look good!) and it is quite amazing how much can be removed in a day.

Currently, the front looks like this:

(The plants are a native Geraldton wax I transplanted from the back garden, a lemongrass bush and the beginnings of my broad bean patch).

I’m going to have another blitz at the weekend, and I’m hoping it will almost all be gone when I’m done.

Here’s the back, with the new beginnings of my citrus ‘grove’ and my raised garden beds beginning to fill up:

So that, my friends, is the extremely long answer to the question: why am I digging out my lawn. It’s fairly boring work up front, but the long-term rewards will be worth it.

Now I’d love to hear from you! Any more questions about lawn or lawn removal? Any experiences of removing lawn yourself – both successful and unsuccessful? Any other thoughts at all? Please share in the comments below!

My garden transformation project (Progress update: month one to three)

I’m three months into my year-long project to transform my garden from lawn {sobs… so much lawn!} into the beginnings of an urban food forest – veggie beds and fruit trees. And I thought it was time for an update – and some progress shots.

Let me tell you, I hate in-progress shots! That time when it’s obvious you’ve done ‘something’, but it all looks patchy and half-baked and nothing the vision that’s in your head.

That’s the stage I’m at right now.

But it’s good to document progress nonetheless, and hopefully there will be a time when there are ‘after’ shots that look at least vaguely like my vision!

The garden transformation project: from lawn to food forest

The first thing I did was make a rough plan of the different ‘zones’ in the garden. I’ll talk more about how to do this in a separate post, but in simple terms, it means thinking about a few things.

First, the different uses. There are the uses/functions that I want: do I want lawn? Patio? Veggie beds? A chicken run? Fruit trees? A pond? A space for the dog? etc etc.

Then there are the different microclimates within my boundary – which affect which things will work successfully in those spaces, and which won’t work.

Even though my block is pretty small, there is still a spot that gets beaten by the afternoon sun, several spaces that won’t get any sun in winter because of the shade patterns, a cooler side area with little light that is more suitable for trees (because they can grow up to the light).

There’s also what’s going on outside my block to consider. The neighbours’ buildings and trees (which provide shade – which may or may not be a good thing, depending on where they are); trees also have roots that do not understand boundaries and like to get into unsuspecting garden beds.

And then there are the limiting factors of the climate. In Perth, the sun (and heat) is a limiting factor; water is another. And water alone isn’t enough to keep plants alive on blistering 40°C+ days in full sun. Shade is important, too. Then there is the fact that certain plants just won’t grow (and others will do fantastically well) where I live.

I can want a coconut palm tree with all my heart, but I just don’t have the right climate (not wet enough and winters are much too cold) to grow one to fruit.

So with all these things in mind, I have a few different zones:

  • The front verge – natives/edible natives (the verge is connected to my front garden but the land is owned by the council, not me. They encourage the planting of native gardens (which are waterwise) on verges.
  • The front garden (north facing) – I’d like to put in-ground veggie beds here, but there is a huge tree at the front and I need to figure out if there will be enough sun in winter.
  • The side strip (east of house) – deciduous fruit trees. There is a raised bed along the side so they have a bit of extra height to get to the sun, which they will need to set fruit. In winter when the sun is lower, deciduous fruit trees are dormant, so that works.
  • The back garden (southern end, at the back) – this is where I’m putting the hardiest and tropical plants. They will get sun all year, and will be battered by the summer afternoon sun, so it makes sense to choose the hardiest trees for here. The plan is that as they grow bigger they will provide shade from the afternoon sun for the smaller and more sensitive trees and other plants.
  • The back garden (in the middle, eastern side) – I’m planning to put citrus trees here. They will still get sun in winter.
  • The back garden (in the middle – western side) – I’m keeping some lawn. For now. They say relationships are about compromise, and here is how I compromise…
  • The back garden (furthest north, nearest the house) – deciduous trees. This spot won’t get a lot of sun in winter, which makes it perfect for deciduous trees.

(I’ll write a post sometime about planning for fruit trees, because there are a few things to know if you’re going to grow them successfully.)

These are the before photos from when I moved in (well technically from the real estate agent, hence the wide angle lens and bright colours, and taken in August when the rain is plentiful).

I’ve already written about my first steps: getting the compost cranking, and getting chickens. I also had a change of plans when I decided in March to put in some vegetable beds (something I was going to wait until later in the year – possibly September – to do).

My other priorities over the past three months have been:

  • Digging up the lawn and mulching to bring some life back into the soil;
  • Mulching the dead area down the side of the house, to get the soil semi-ready for fruit trees;
  • Starting to plant trees in other spots around the garden;
  • Getting quotes to sort out the reticulation;
  • Beginning a verge plan to submit to the council (they offer a rebate).

Digging out the lawn (front garden)

In Perth, it’s too hot to have exposed soil. The sun just kills all life. The answer is mulch. Coarse street tree prunings are ideal – they are also affordable, and sometimes even free.

After being on the waiting list at mulchnet since the October weekend I moved in, I got lucky in January. A free truckload of mulch.

Some might say, perhaps too lucky…?

I’d already started digging up the lawn at the front before this arrived – I’d shovelled four trailerloads of mulch from a friend’s place (which involved borrowing a trailer from Buy Nothing and utilising her trailer towing skills).

But now I have enough mulch for a lifetime.

In the photo below, the pile on the right is the four trailerloads, and the pile on the left is my lifetime supply. You can see the turf I’ve dug out waiting for the green waste collection on the verge (they happen four times a year).

Eventually you won’t be able to see most of the mulch covering the ground for plants, but they need to be planted in late autumn / winter / early spring when they have more chance of establishing roots and surviving.

It will also take a few years to get the plants properly established.

Digging out the lawn (back garden)

I planted a banana tree in my ‘tropical’ zone at the end of December – my first tree. It’s next to the (metal) shed to provide shelter and reflect some warmth (radiated heat) in winter.

From this spot I began to dig out more lawn. (It was a particularly straggly and patchy spot.) I’ve added a papaya and four pineapples.

Elsewhere, I also planted two more trees – a dwarf mulberry (grafted) and a fig, closer to the house. These go dormant in winter and I wanted to get them in the ground now to establish some roots first.

I’ll never forget being told this at a fruit tree workshop several years ago: never plant a one hundred dollar tree in a five dollar hole. The point being, invest in the soil more than the tree. Now my mulberry wasn’t $100 (it was $25) and the fig was a freebie grown from a cutting, but I still heed to that rule.

With the soil I have, it needs all the help I can give it.

That sand next to my mulberry tree is my base soil. Digging out a heap of that ‘soil’ to replace with compost, aged manure, seaweed, clay and a bit of biochar (scored from the side of the road) took a few hours.

But the effort, and investment in amendments like these, is worth it in the long run.

Figs are notorious for having spreading roots, but they actually grow very well with restricted roots. Pots are good but here, they dry out quickly. So I tried something I saw on the interwebs – planing in a washing machine drum.

This is one of those in-progress shots that I hate, where the trees look so small and weedy. The grass between and behind them will eventually be removed – there’s just only so much grass that can be dug out per week!

They are both fast growing trees, however, and they’ve already started to look a little less pathetic, and have reached the height of the hedge.

Growing vegetables

During summer, I’d planted out a small garden bed with tomato plants. It was positioned in its original spot to get the morning sun and afternoon shade (but no winter sun). Sadly, rats got almost all of the tomatoes (and the cayenne chillies I planted in the adjacent orange tub, disappointingly).

The whole area looks weedy and bedraggled. I decided to move the bed to a better spot for winter, and away from the hedge. (I also have a medium term plan of planting a macadamia tree where the bed is – to provide afternoon shade in summer to the rest of the garden.)

This is where the plan deviated slightly. I’d just finished digging in this bed (22nd March, my photos are date stamped so I can be sure!) when all of the coronavirus changes were starting to happen – food shortages, store restrictions, vegetable seedlings and seeds selling out, and potential lockdown.

And so I panic purchased two big garden beds to get started growing vegetables now. I went with raised beds because a) I have a dog that doesn’t like heights so won’t climb in them b) they were the quickest thing to get going c) if I want to move them later on, they are actually very lightweight d) there is a good second-hand market for them, so I can sell later if I change my mind. Oh and e) they match the one I already have.

I ordered them on the Monday, expected them to be delivered by the weekend, and they came the next day.

I spend that weekend digging out the lawn, had a soil delivery the following Monday and got the first bed ready that day. It took me until the end of the second weekend to finish the second one.

I’ve planted the beds out with seedlings, garlic and seeds from my stash that are mostly expired – so we will see if any germinate. So far I’ve had luck with radish and not much else, but it is early days.

Garden plans: what’s next?

It’s still very much on my to-do list to get the reticulation sorted, particularly as I’m beginning to plant more things out and don’t to damage any roots putting it in later.

The next priority is planting trees. I’ve purchased a few (including the macadamia I mentioned earlier) and I have a few grown from seed.

I’d normally have waited a couple more months before purchasing, when the weather is cooler, but I was worried they might lock down the tree place, so I made my move early. Now it’s important to get them in the ground.

Oh, and the other priority – digging out more lawn. Sigh.

Now I’d love to hear from you! Any garden questions, send them my way! Any comments, send them my way too! And any other thoughts you have, about growing vegetables or fruit trees, planning a garden, or anything else – share them all. Just leave a note below :)

How to get started growing vegetables…fast

At the start of the year, I started a project to transform my front-and-back lawn into a productive food garden. I got the compost cranking early on, and four chicken ladies moved in to help with pest control, weed suppression and providing manure (oh, and eggs). I’ve been slowly working on a garden plan, and my next steps were sorting out reticulation (to water the garden) and planting trees.

However, then life as we know it turned upside down, and priorities shifted.

In light of the continuing food shortages in the stores and impending isolation, not to mention that a lot of food sold here on the west coast is reliant on trucks arriving from the east coast (which feels fragile with all this uncertainty), I decided that growing vegetables was my new priority.

It seems that growing vegetables is everybody’s new priority, as veggie seedlings and packets of seeds have become the new toilet roll – selling out everywhere.

If you’ve decided you want to start growing food – whether you’re not sure where (or how) to start, or you just panic bought a heaps of seeds or seedlings and you’re not quite sure what to do with them, I thought I’d talk you through the process.

How to set up a vegetable garden…fast

One thing I want to be clear about is setting up a vegetable garden fast is not the cheapest way to do it. Fast will cost you more. As just one example, seedlings cost more than packets of seeds, and packets of seeds from a store cost more than swapping saved seeds with a neighbour.

As another example, making compost is cheaper than buying a bag from the store…. but if you don’t have a compost bin set up, you’re looking for at least 8 weeks before it’s ready. And that’s assuming you have enough stuff to fill it straightaway.

We are in unusual times, and what we might do in “normal” circumstances isn’t necessarily what we are doing now.

Fast costs more. But if your priority is securing a food supply for you, your family and your neighbours, or avoiding the stores as much as possible, the cost might be worth it.

Planting your veggie garden – containers or in-ground?

There are pros and cons to every option, and some plants will do better in one or the other.

In-ground beds

This is the cheapest option by far, and in-ground beds are less likely to dry out or become waterlogged than containers. Plus, worms and other good guys are free to come and go. In a hot, dry climate like Perth, these work well because they lose less water than growing plants in containers.

On the downside, they aren’t great if you have mobility issues, and your dog, other pets or young children may not understand the difference between lawn and vegetable beds.

With in-ground beds, you do need to know how good your soil is. When I lived in the UK and had an allotment, I could put anything into the ground, add nothing to the soil, and get a great crop. If I plant out seeds or seedlings straight into the ground in Perth, they’d shrivel and die (or at least, not get very big). There are various amendments I’d need to add to my beds – compost, clay (I live on a sandpit), rock minerals, and potentially other things too.

If you’re not sure what I’m talking about, and you’re keen to get your veggie garden started fast, I’d suggest going with containers or raised beds and buying soil. If you have a little more time, I’d suggest finding some local gardeners to chat to (either garden groups on Facebook, or even the staff at the local garden centre) about what they’d recommend for where you live.

Raised garden beds

The cost of these can vary substantially. Brand new beds made from colourbond steel or wood, or made by a tradesperson are at the top end; second-hand beds can be sourced for less (they are usually easy to track down on online classified sites like Gumtree), and at the bottom end, people make their own with salvaged materials and offcuts.

One advantage of the metal ones is they are lightweight and easy to move – so if you find you’ve put them in the wrong spot, or decide down the track you no longer need them and want to sell them, this is fairly straightforward. Wooden beds are more difficult to move once in place, as are brick/slab beds.

In colder climates, raised garden beds can work well for crops that like warm summers (aubergines, tomatoes, peppers etc). In hot climates like Perth, they tend to dry out, particularly metal ones, that get hot (we’d be better with sunken beds, really) and aren’t ideal for the climate. They might be a good option if you struggle with bending and kneeling, or you suspect in-ground beds will be trampled by dogs and children.

Raised garden beds also need to be filled with soil: the bigger the bed, the more soil, which is another expense. There are ways to save on the cost of soil, if you go down this route:

  • Rather than buying bags of soil, find a local soil yard where you can buy bulk soil. you may be able to bring a trailer and load up, or you may be able to order a soil delivery. It is much more cost-effective than buying bags (plus, no waste).
  • Buy soil suitable for growing vegetables, and buy the best quality you can afford. When it comes to soil, you get what you pay for.
  • Vegetables only have roots that are 25-30cm deep, so only buy good soil that will fill your beds 25-30cm deep. If you have deeper beds, fill the base with something else. I’ve seen people use empty milk bottles (because they have square sides they work pretty well), or you could fill with street tree mulch. If you have to buy soil, buy the cheapest soil for the bottom, and put the good stuff on the last 20-30cm only.
  • If you live in Perth, you can find bulk soil at Green Life Soil Co or Carlisle soil yard. Search for ‘landscaping supplies’ or ‘soil yard’ to find options near you. You can order street tree mulch Australia-wide from mulchnet.com.

Containers

If you’re short on space or have a tight budget, containers are a good option. They can be anything from purpose-made plant pots to old wine barrels, to repurposed olive oil drums or plastic tubs. They need less soil than a garden bed.

However, some plants are challenging to grow in containers, and whatever you do plant will need more looking after – watering more often and feeding the soil.

If you’re planning to grow in containers, check how big the plants will get and ensure you’ve chosen a big enough container – or you won’t get a crop. Lettuce, radish and spring onions won’t take up much space; cauliflower, broccoli and courgette/zucchini get huge, and you’ll need a big pot for just one plant.

Grow food in the right location

Vegetables need a certain number of hours of sunlight to grow. Summer vegetables like tomatoes, capsicums, squash, courgettes and cucumbers need full sun and lots of it. Kale, lettuce and spinach will still grow well with less sun.

When planning on where to put your containers or beds, you need to choose a spot that’s best for them rather than best for you. Full sun is ideal in winter (when daylight hours are less), afternoon shade is good in summer. The sun is also a lot lower in the sky in winter, meaning shadows from buildings and trees are cast a lot lower.

In an ideal world, planning a garden, you’d map out the sun patterns for spring, summer, autumn and winter (so 4 times a year) in morning, lunchtime and mid-afternoon. It’s easy to figure out where the sun is tracking in the sky, but how far the fence shadow or the neighbour’s tree reaches on the shortest day is harder to figure out. There are suntracking apps, but I prefer the slow approach. Usually.

Examples of shadow differences at the same time of day, three months apart (summer and autumn):

If you head outside today, in March, and make a note of where the shadows are, that’s a helpful start. Shadows will get shorter in summer and longer in winter. If you’re heading into winter and notice the shadows are already covering the site where you want to plant, it might not be ideal. If you’re heading into summer, there will be less shadow as the sun gets higher.

It’s an important consideration with in-ground beds, but matters less with containers, as you can move them. If you have the option, orient garden beds directly north (in the southern hemisphere) or directly south (in the northern hemisphere).

Choosing plants (seeds versus seedlings)

If you’re wanting to start a veggie garden quickly, you’ll want to choose plants that grow quickly and can be eaten quickly.

Vegetables that grow quickly and can be planted now (in spring in the northern hemisphere and autumn in the southern hemisphere) include:

  • Carrots
  • Salad leaves – so many different varieties to choose from
  • Greens – kale, Swiss chard, spinach
  • Lettuce (which are really salad leaves left to grow into full-size lettuce)
  • Beans (bush or dwarf beans grow faster than other types)
  • Spring onions
  • Beetroot
  • Radishes (one of the fastest growing vegetables)

Generally speaking, the fast-growing varieties I’ve mentioned above are easy to grow from seed, and much more affordable this way. It’s better to avoid root vegetables as seedlings as transplanting can damage the roots. Plus, one root vegetable seedling will give you one root vegetable (so one carrot seedling will give you one carrot, compared to something like a bean plant, where one plant will give many pods).

Seedlings are more established plants, so you’ve got a headstart on the growing process. You might like to buy lettuce or spring onion seedlings, or slower growing vegetables (pepper/capsicum seedlings will save you a few weeks of growing time). If there are multiple plants in each cell, you’ll need to thin them out or they will suffocate one another and not grow well.

If you can’t get seeds or seedlings at the garden centre, online gardening groups are a great place to swap seeds. Even if you can’t go out, members will often post seeds to you if you cover the postage (I’ve done this in the past).

You can even plant seeds you find in your pantry – such as coriander, mustard, amaranth or parsley seeds.

Whatever you choose, ensure you plant according to the instructions (and if there are no instructions on the packet, check online). Some plants – like broccoli or cauliflower – need a large space to grow, even though the seeds are tiny.

Start small, and learn as you go

You’ll learn much faster once you’ve started, so don’t try to read everything beforehand. Start, but start small.

The way I learned to garden was sticking some seeds and plants in my allotment, and seeing what happened. Then, as I noticed issues (seeds not germinating, or yellow leaves, or plants being munched by birds) I’d look up solutions. Some seeds can take weeks to germinate (others are fast, so you may have a dodgy packet of seeds), yellow leaves can indicate a nutrient is missing from the soil, or perhaps there is too much watering, and netting or cut up plastic bottles can protect seeds from birds (in the UK, birds would always eat my beans – but here in Perth the birds aren’t interested).

If you really don’t know what you’re doing, don’t do too much too soon. Plant a few things one week, and a few things the next, and so on. Better this than spending a fortune buying a raised garden bed and planting hundreds of dollars worth of plants, only to realise down the track you put the bed in completely the wrong spot, and discover all the plants you chose are frost-sensitive after they are wiped out overnight.

There is so much information out there. Books, YouTube videos, blog posts, social media pages and groups. Where possible, try to find information that’s local to where you live. The people growing food where you live will know what pests are common, which varieties grow best, the weather patterns, what to plant right now, what you might need to add to the soil… and where to find what you need.

Growing food is fun, a useful skill to have, and infinitely rewarding. It’s easy to forget the problems of the day when you’ve got your hands deep in soil. And there is nothing (nothing!) that tastes better than a homegrown carrot. Not even chocolate. Promise.

Now I’d love to hear from you! Are you starting to try growing food for the first time? Are you stuck or have any questions? Have you been growing food for a while and have any tips for newbie growers? Anything else to add? Please share your thoughts in the comments below!

How to grow a pineapple from scratch (from a pineapple)

This year, I’m working hard to transform my little patch of lawn into a productive food forest – or the beginnings of one, anyways. (They say Rome wasn’t built in a day, and I’m pretty sure they say a forest doesn’t grow in a year – but the foundations can be laid, for sure!)

If I was to buy a heap of plants to fill the space, I’d be bankrupt pretty quickly. Where possible, I’m trying to fill the space with plants I’ve grown from nothing – or rather, from cuttings, seeds, roots and runners.

It’s not possible with every plant I’d like to have, but there are lots of options.

I love the idea of using ‘waste’ to create something new. And I love watching nature do its thing. One of my favourite things to grow right now is pineapples. They are magical.

I thought I’d talk you through the how.

Pineapples are a tropical plant, but they will grow successfully and fruit in Perth (where I live). They’re also quite a fun plant, so they look good regardless of whether they fruit or not – but having plants that could potentially also feed me in the future is a winner.

If you’re not in a Mediterranean or tropical climate, you can still grow pineapples, but they’ll need to be kept indoors during the cooler months. I’ve read that it’s possible to get them to fruit, but I imagine it’s a lot more work.

Nevertheless, they make a fun indoor plant if you’re in colder climes. A cool experiment. A good conversation starter. An excellent gift.

Here’s how you grow one.

Step-by-step guide to growing a pineapple

You’ll need a pineapple with its green spiky head attached. If you’re lucky, you’ll find a pineapple with a more than one head, or possibly a main head and side sprouts. For every head, you’ll be able to grow a plant, so the more the merrier.

This pineapple has a main head, and a little side shoot to the side. Two future pineapple plants for the price of one pineapple.

Next, chop off its head – or rather separate the fruity part from the green spiky part. You want to try and cut between the fleshy pineapple part and the head so that there is no fruit attached to the green head part. (The fruit will rot which won’t be good for the plant.)

Pull off some of the bottom outer leaves. You may see roots when you do this, or you may just see little stumps that will grow into roots. Pull off enough that there’s a small ‘stem’.

Sit the pineapple on top of a jar filled with water, ensuring the stumpy root part is submerged. The leaves can help prop the plant up on top of the jar.

Suspending the pineapple rather than sitting in a saucer ensures the roots have space to grow downwards.

Wait.

The pineapple may sprout roots straightaway, or nothing may happen for ages. (I’ve tried two varieties: one sprouts straightaway and the other takes forever.)

Ensure the water is topped up so the root part stays submerged. I haven’t found it necessary to change the water.

Eventually, roots appear.

I wait until the roots reach the bottom of the jar (we are talking a few weeks at least), and then I repot in some well draining soil. Eventually I plan to put mine in the ground, but they can be grown in containers.

You have a pineapple plant!

More things to know about growing pineapples

Pineapples do not grow or fruit quickly. Growing a pineapple this way will take 24 months to fruit, and another 6 months for the fruit to develop. Plus one plant grows one pineapple, so you won’t be inundated in pineapples.

Another thing to know about pineapples: they take most of their nutrients through their leaves, not the soil. Feeding with worm castings, soluble seaweed solution or another natural feed is better than synthetic fertilisers which may burn the leaves and damage the plant.

Finally, you might come across information that tells you that you don’t need to bother getting the pineapple head to root before planting, and you can simply stick the freshly cut head straight into a pot or in the ground. Personally, I love watching the magic of roots appearing right before my eyes.

That would be lost if I simply stuck the head in some soil, which is why I prefer this method.

Here’s the beginnings of my pineapple plantation (all grown from pineapple tops)…

Now, doesn’t that just make you want to head to the shops to buy a pineapple?!

Now I’d love to hear from you! Have you had any success growing plants from scraps? Have you had any fails? Anything on the to-do list for one day soon? Any questions about growing plants from scraps in general? Anything else you’d like to add? Let us know your thoughts in the comments!

Why I’m Keeping Chickens (for Zero Waste)

I’ve loved the idea of having chickens since my days of renting an upstairs apartment. I was hopeful in my last place that it might be possible, but being a strata (7 units on a single block with 7 owners and opinions – plus tenants in the mix) there needed to be consensus, and alas – there was not.

Since I moved, chickens have been back on the plan, and three weeks ago, they moved in.

Now clearly I’m no chicken expert (!) – although side note, I did read a lot of books on the subject first, more on that in a second – but I thought it might be interesting for you if I explained why I’ve got chickens, how chickens fit with a zero waste lifestyle and what you might like to do if you’re thinking of getting chickens, too.

Why chickens?

Lots of reasons, actually! Chickens have a lot going for them.

Reducing food waste.

Chickens are great munchers of food scraps. They can’t eat everything – they won’t eat rotten or mouldy food (and it is dangerous to feed them this) – but they’ll eat cores and seeds and rinds and stems and bits that might otherwise head to the compost caddy.

Pest control.

Chickens are omnivores and will eat all kinds of insects: grasshoppers, cockroaches and caterpillars, for example. They will actually also kill and eat mice. Because I want to grow food in my back garden, chickens can help keep the bad insects under control.

They are also great for managing fruit fly, which live in the soil for part of their life cycle (the larva and pupa stages) and can wreck fruit crops. Not that I have any fruit trees producing fruit yet, but I will.

Lawn control.

Chickens eat grass. A flock of chickens can easily destroy a lawn – which in my case, is exactly what I want. Much better that it gets eaten than sent to landfill. As well as nibbling the tips they dig around and scratch it up (and poo on it) so it doesn’t stand a chance. Hurrah!

(The bit of lawn I do plan to keep is definite chicken no-go zone. For obvious reasons.)

Chicken manure.

All this eating has to end up somewhere! Chicken poop is high in nitrogen and good for the garden. It needs composting before adding to plants (it can burn young roots).

Chickens make great pets.

I love the idea of having chickens around, rustling around the garden and foraging for insects and eating my weeds. They are much more self-sufficient than dogs or cats.

Eggs.

I left this until last because although it might seem to be the most obvious, there are plenty of other reasons to keep chickens. I’m not particularly fussed about the egg part, as I don’t buy eggs as part of my grocery shop (I occasionally eat eggs from friends with chickens, and sometimes if I order breakfast out).

Most of the eggs I get I intend to give away to family and friends that might otherwise buy eggs. I’ve eaten some too. I’d rather use them than waste them, but I still don’t eat that many.

I know vegans who keep chickens and eat their eggs only (because they know how the chickens are fed and treated ). I also know vegans who keep chickens and leave the eggs for nature (chickens will actually eat their own eggs), but this works better if you’ve got more space. Broken stinky egg in the coop isn’t going to be fun for anyone.

Just to be clear, unless you have a rooster as part of the flock (which isn’t necessary and isn’t allowed in most urban areas), the eggs are infertile. A chicken’s shelled menstruation, as a vegan once told me. So eating eggs doesn’t kill unborn chicks.

Getting started: do some chicken research

Personally, I’m not into ‘winging it’ (no pun intended) when it comes to keeping live animals. I’d rather have a good grasp of the basics and have an idea at least of where to look and where to go if I run into problems. Of course we can’t learn everything beforehand, but having a basic understanding goes a long way.

Read chicken books

I literally borrowed every book in the library to do with keeping chickens (and one of keeping quail) as well as borrow another from a friend. There was lots of stuff in there that was irrelevant for me, such as raising chicks, showing chickens at competitions and – no thanks – how to eat your chicken (I don’t eat meat anyway, but eating your pets seems a little wrong).

But there was lots of useful tips too, and it was helpful (honestly!) to read conflicting opinions on things.

If you’d like to read up on keeping chickens, I found these three books to be the best:

Backyard chickens: how to keep happy hens, by Dave Ingham (Australia)

Chickens: the essential guide to choosing and keeping happy, healthy hens, by Suzie Baldwin (UK)

Keeping chickens: getting the best from your chickens, by Jeremy Hobson (UK)

(All were available at my library.)

Find people in your neighbourhood with chickens

I have lots of friends who keep chickens, so this was easy for me. One in particular (who has been keeping chickens for 5 years, and has a flock of 12) lives two streets away.

It’s handy to have people in your nieghbourhood to ask questions, and also to pop round and look at their setup (they can give you advice about predators, sourcing things like food and advising on good local vets in a way that a book never could).

If you’re not fortunate enough to already know someone with chickens (and even if you are), there are also online communities.

Join an online chicken community

There are heaps of forums dedicated to keeping chickens, and also plenty of Facebook groups so connect with people this way. (If you don’t have local friends with chickens yet, try connecting with local owners here.)

Forums and groups are a great way to ask questions and find knowledge; however it’s not always obvious which advice is right or who to trust. It also depends on the question and the consequence of wrong advice. Particularly with sick chickens, the advice of a vet will be better than trying a homemade remedy from somebody you don’t know whose chickens you’ve never seen.

Talks and workshops

It goes without saying: if you can get to a talk or workshop by a chicken owner, you’ll learn heaps. I went to one by a vet, and it was really helpful – there was a big focus on chicken welfare with lots I hadn’t considered before.

Getting ready for chickens: setting up home

There are a more things few things to consider before actually getting chickens and bringing them home. Including their home!

Rules and regulations

You’ll want to check with your local council whether chickens are allowed, how many you can keep and if there are any other restrictions (such as being a certain distance from the house, or away from fences).

The fences rule might seem arbitrary but actually, a lot of fences in Australia were sprayed with toxic chemicals such as Dieldrin right up to the 1970s. It’s worth getting eggs tested if you intend to eat them to check that your soil isn’t contaminated – whether with Dieldrin or something else. If it is, there are remedial measures (removing and replacing the soil, or building a concrete base for your coop).

Choosing a suitable home

It’s important to choose a home that’s suitable for the climate, and predator proof.

I’m in the fairly unusual situation of living in a suburb that doesn’t have foxes. Fox-proofing my chicken coop isn’t necessary, but for most people, it’s an absolute must. Some people may have to think about snake-proofing, too, and also birds of prey.

The only threat where I live is hawks, and they tend to only take chicks and maybe young ones, but not full-grown hens.

Ideally, chickens need shelter from the elements, a dark space to lay eggs, and somewhere secure and well ventilated to sleep. The need shade, access to dirt for dust bathing and also space in the sun.

I’ve read that chickens can manage on 1m2 per chicken. Manage maybe, but when you factor in all these things, plus the fact they will poop in this space too, more space is really better. Allowing them to graze somewhere else during the day makes for more sanitary conditions and happier chickens.

It’s possible to buy coops or make your own. I was very stressed about this, not having any skills to make my own but really wanting to find something second-hand over buying new. Even with plans, I think a DIY coop would take me months to build.

My prayers were answered when one of my readers (Alison) saw I was reading chicken books, and donated her second-hand but unused coop.

This is Alison’s Retirement Home for Second-Chance Chickens:

Another friend lent me some fencing so that I could create a run for during the day to extend the space. She also lent me a couple of feeders to use, and gave me some crumble (a type of chicken food) to get my flock started.

Honestly, I think she was impatient I was taking so long! I don’t like to rush these things…

Bringing chickens home

The books all write about going to reputable breeders, but I only want to rehome or rescue chickens (I don’t want to add more animals to the world). Factory farmed (battery) rescues aren’t recommended for newbies like me (both the books and an experienced friend told me this) and so I rehomed some chickens from a family who had a change in circumstance and could no longer keep them.

I took my friend with me when I got them (honestly, I’d never have caught them without her!) and she gave them the once over so that if there was anything that needed treating, we could deal with it. I wouldn’t know what to look for. One came with lice and mites, but we’re working on that and she has a clean area to dust bathe (which suffocates them).

I only planned on getting three, but there was a cute little teenager there who I couldn’t resist bringing with me…

She’s called Alison, and she is an araucana. The other three are all different breeds.

One is an ISA brown called Billina, who is the boss of the flock, mostly because she is the bravest. The others run for cover when I come, but not Billina. She trots up to see what’s on offer.

The black chicken is an Australian breed called an Australorp. She is huge with a black beady eye and she is called Dark Emu. Despite her size she is scared of everything. Half the time I think she has escaped because she blends in so well with the shadows.

The chicken with the collar is a welsummer called BossyBoots, mostly because she is bossy even though she is not the boss. She pecks at poor Alison (definite mean streak, this one). She is also extremely loud, announcing when she (or anyone) has laid an egg – and sometimes announcing even when there is no egg. People can hear her on the next street (I wish I was joking).

And that’s the flock! They’ve been here three weeks, and so far so good. It’s amazing to discover all their personalities and I’m very fond of them all already. Looking forward to more chicken adventures as the months unfold…

Now I’d love to hear from you! Do you have chickens? Tell me more! Are you thinking about getting them? Do you have any questions about keeping chickens, or any advice for newbie chicken keepers like me? Let’s get the conversation started: share your thoughts below!

Zero waste gardening: turning lawn into food, starting with compost

This year, I’m turning my attention to transforming my garden from lawn into (a version of a) food forest. Think fruit trees, veggies, herbs and edible natives. If you’re new here, you might not know that I moved house last October: away from my previous place with its shared community garden, to a new space… and my very own backyard.

(And front yard. And verge. So much potential.)

Any old posts you’ve read will be about that previous place. Now, I’m starting again from scratch. Almost literally, as the new garden is about a blank a canvas as you can get.

Well, if that blank canvas was covered in lawn, perhaps.

There’s a few reasons why I want to spend more time in the garden this year. Yes, gardening is fun, and yes, there is nothing tastier than food you grow yourself. But it’s more than that.

You might have heard people talking about ‘resilience’ in the face of the growing climate crisis: growing food is something that we can do to be more resilient.

Even if it’s a few pot plants on a window sill.

Knowing how to grow food is a useful skill to have, and being able to share with your community is a great way to strengthen it. That’s resilience.

Then there’s the fact that the all of the screen time and the news can be overwhelming. I felt it more and more last year, and I need to find more space to truly switch off. Gardens can be that space.

As for writing about it… Well, I think there is always opportunity to talk about gardening from a zero waste perspective: avoiding plastic packaged products and synthetic chemicals, making do, re-using and repurposing, and the best one of all: sharing.

Plus there is rarely (never?) a single right way to do something. I want to share what I do and why, and generate discussion and no doubt more good ideas!

And as I have a blank canvas, I thought it would be a good opportunity to document my progress over the year. Maybe there will be some examples of ‘setting goals and smashing them’ or more likely it will be about troubleshooting and dealing with things when they don’t go to plan. Ahem. (Which option has your vote?)

Here are the ‘before’ pictures (back yard, and front yard):

And… here’s the plan. By December, I’m hoping going to have most of the lawn removed, some fruit trees in, a native verge and vegetables planted. That’s in twelve month’s time. I think that’s doable ;)

(Don’t worry, I’m not suddenly turning this into a gardening blog! I’m going to post an update once a month throughout the year, talking through the choices I’ve made and showing you – I hope! – some progress. There’s plenty of other things on waste, reducing plastic and sustainability that I still want to talk about. It won’t be all plants!)

Creating an edible garden from scratch:

Month 1: starting with the soil

Soil might sound incredibly boring, but that is where I’m beginning. Not with plants, not even with plans, but with soil.

Of course, what I really want to do is go to a garden centre and buy ALL the plants (because that is the fun part of gardening). But without knowing where they are going to go, and without good soil to plant them in, any plants I plant aren’t going to thrive.

I live in Perth, Western Australia. It’s basically a city built on a giant sandpit. The grey gutless sands of the Swan coastal plain (as they are less-than fondly called) are officially among the worst in the world. Possibly even the worst.

They are also extremely old, meaning they are nutrient poor.

This is what lurks just beneath the lawn:

I learnt to garden in the UK. There, you could pop anything in the ground at the right time of year and it would take off. Sadly, do the same in this soil, and your plants get smaller and smaller until they disappear altogether. (Well, except the local native plants of course – but I want to grow edible Western vegetables like broccoli for the mostpart.)

If I lived somewhere else, soil might not be my priority. Here in Perth, it has to be.

(Thinking about my long term goal of creating an edible garden, it’s not that soil comes ahead of planning, but soil and compost take time to create. Starting to think about soil now means that there’s composting happening whilst the planning of where the compost – and the plants – will go begins.)

First task, set up the compost bins and fill them up.

The very first thing I did when I moved was dig in the compost bin. Before I’d unpacked much more than the kettle. There was no way any of my food scraps were going in the landfill bin!

(If you’d like tips on getting started, I’ve previously written about how to set up a successful compost bin).

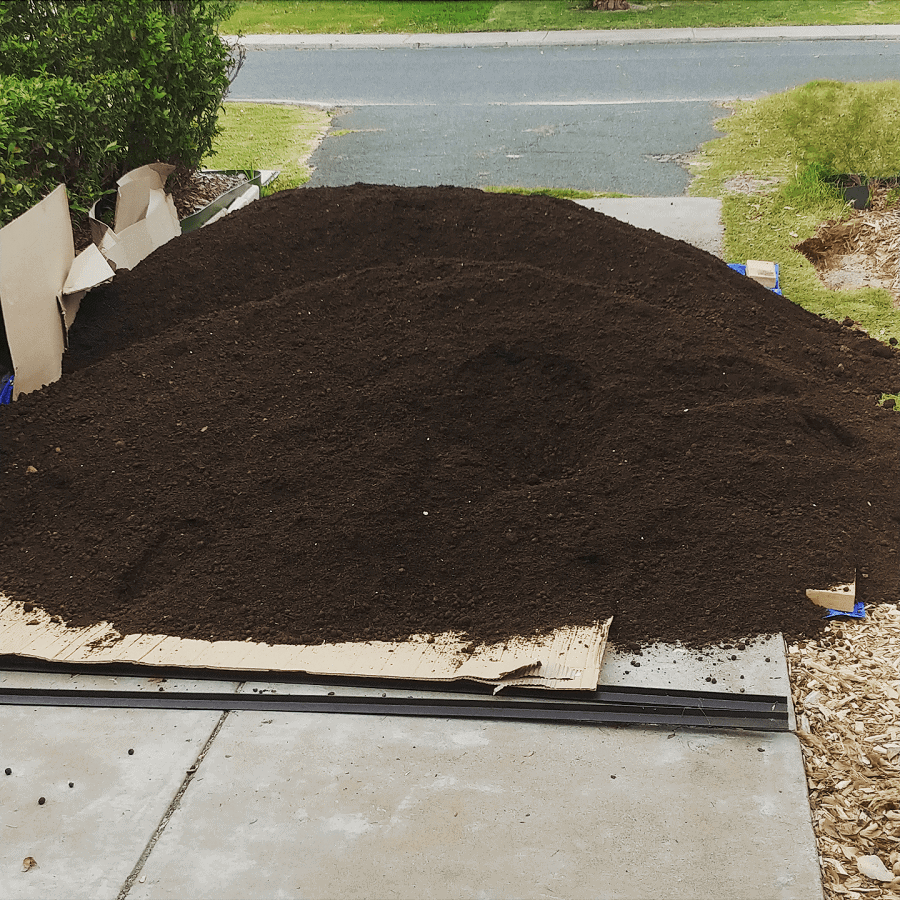
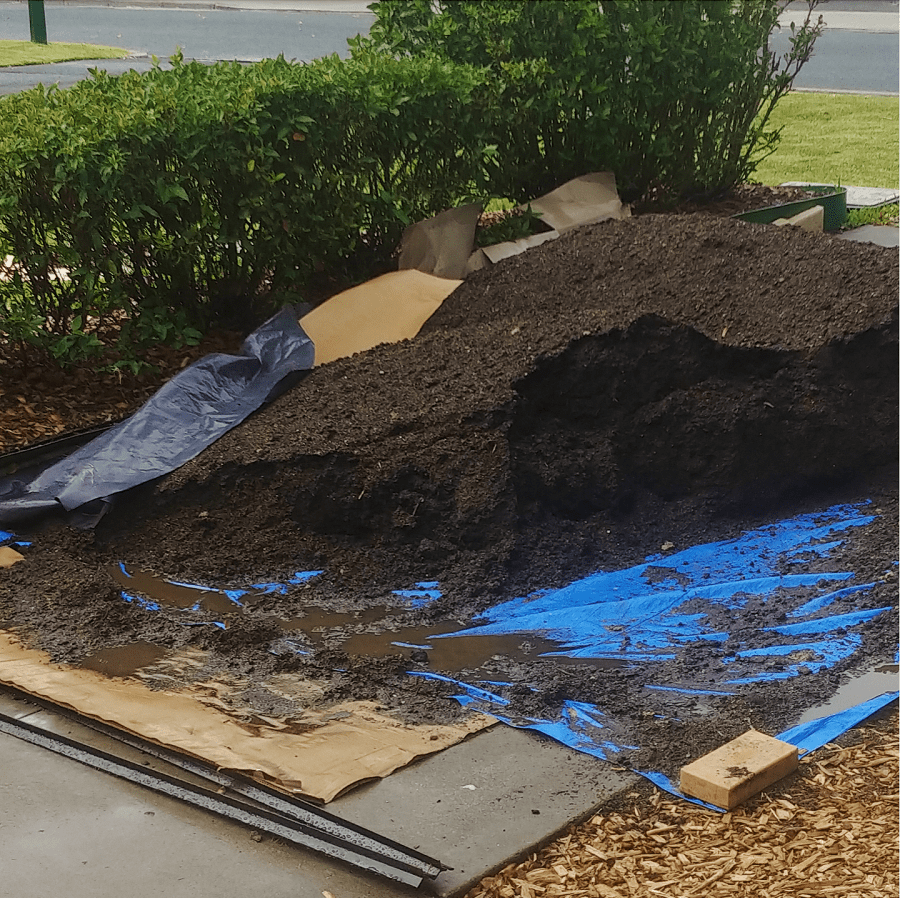
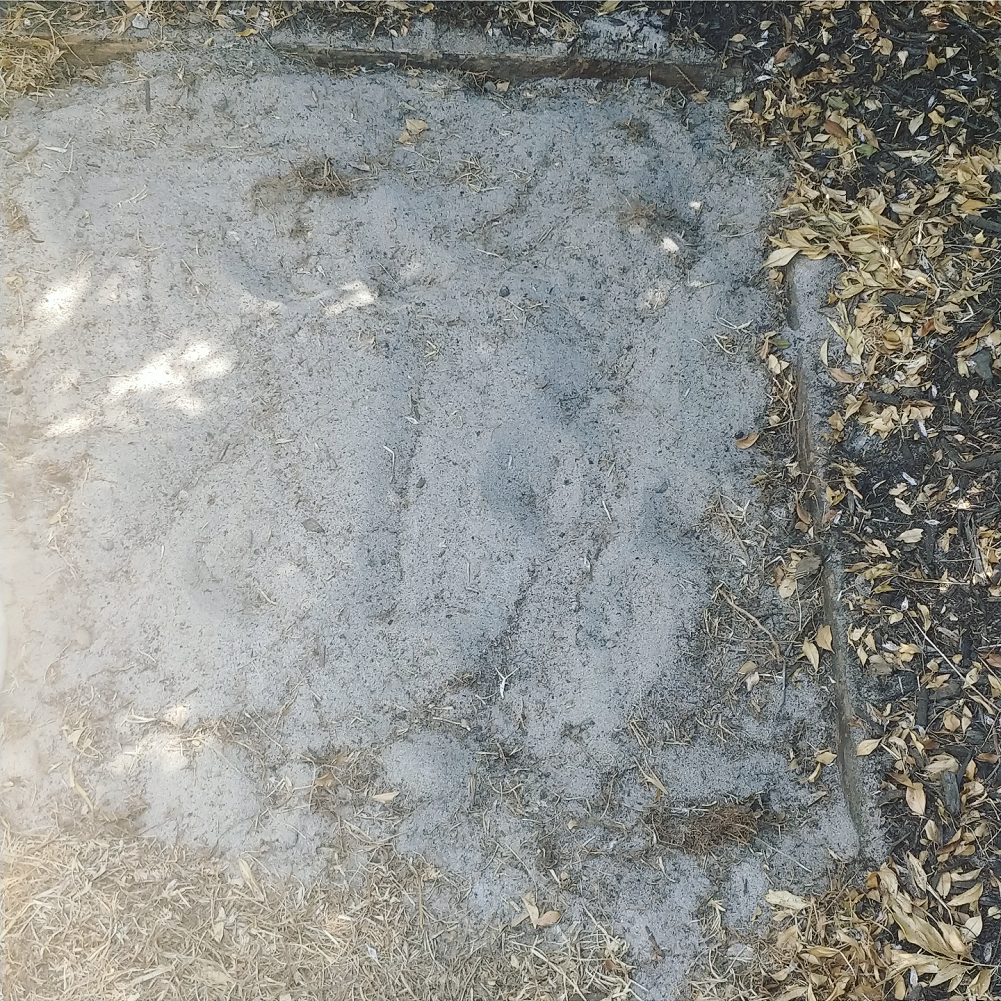
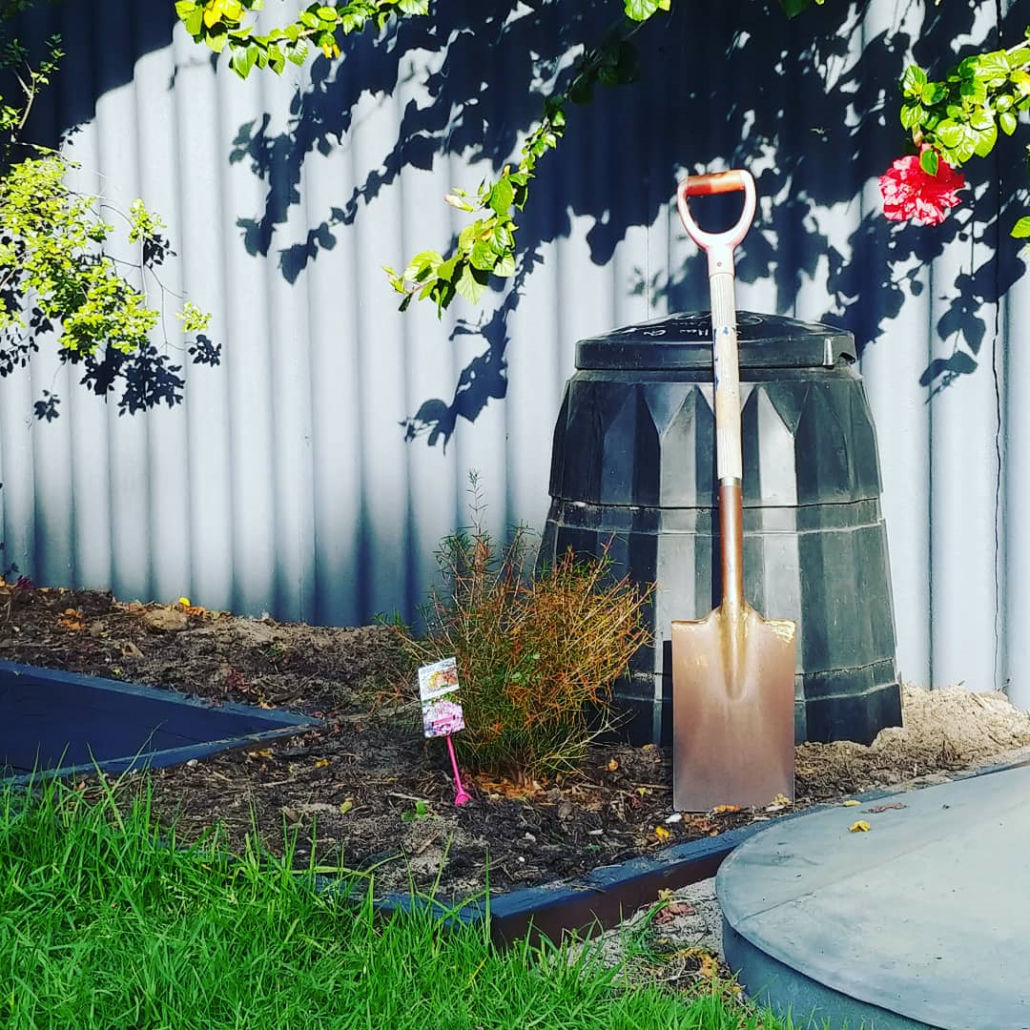
The thing about creating good soil is that you need a lot of compost.

How to create better compost, quickly:

Just putting the food scraps of two people in this bin would take forever to fill. And so, I gathered other ‘waste’ from different places to fill my compost bin.

  • I collected some bags of spent coffee grounds from a local cafe (most cafes do this – either proactively by putting ‘free’ compost by the door, or if you ask);
  • I was connected (via a request that came to a local community garden) with a guy making homebrew who has a 20 litre bucket full of spent grain every few weeks;
  • I’ve been given bags of shredded paper from an office (shredded paper gums up the recycling and isn’t meant to go in our kerbside recycling bins);
  • A friend with chickens has filled up some buckets with chicken manure and straw;
  • I persuaded by next-door neighbour’s lawnmower man to leave the grass clippings on my lawn for me to compost;
  • I rescued some tree prunings awaiting the verge green waste collection and shredded them (I invested in a second-hand shredder, so much fun);
  • I spotted another neighbour raking leaves to throw in the bin and gave him a bucket to fill for my compost;
  • I’ve updated my address on sharewaste.com to receive food scraps from neighbours – no takers yet but I’m sure they will come.

One bin quickly filled up, and I’ve now set up four bins. Two at the back, and two at the front. The two at the front are accessible for the neighbours to pop in their excess waste.

(FYI – I got all my compost bins second-hand, and three of them were free. Two were gifts, one was a score from my local Buy Nothing group and one I purchased via Gumtree.)

What’s so great about compost?

Ah, I’m glad you asked!

Good soil is a mix of organic matter, water, minerals, sand, clay, insects and microorganisms all supporting one another and helping plants to grow. Too much clay and the soil gets waterlogged; too much sand and the water drains away too quickly.

My soil is almost entirely sand. There’s next-to-no clay, and very little organic matter. Adding compost increases the organic matter, improves the soil structure and holds water in the soil, allowing nutrients to dissolve. It creates an environment for insects and microorganisms to thrive, and plants to grow.

If you think about nature, trees and bushes and plants are dropping leaves and small branches all the time. These leaves sit above the roots and break down (compost) in situ. They protect the soil from the sun, and trap moisture when rain falls. Animals come to eat berries and add manure to the tree roots. That’s composting, the way nature does it.

And if you think of most urban gardens, there are very few trees. If any leaves drop, they are usually raked up and not allowed to return to the soil. Lawn might look green – although it takes a lot of water and nutrients to keep it that way – but underneath, there’s not much going on.

Compost bins are replicating and speeding up what happens in nature, and providing that same resource to be added to the soil. With compost that we create ourselves, we get to choose where it goes and how we use it.

Compost does add nutrients to the soil, but it tends not to be nutrient-rich (most bags of compost will have slow-release fertilizer added for this reason). You only get out what you put in – so if your compost is made up of shredded paper, dry leaves and grass clippings, it will be teaming with life (microbes and insects) but won’t be high in nutrients.

This is fine when you’re growing flowers, or plants that don’t need a lot of nutrients, but isn’t so great for ‘hungry’ plants like vegetables – especially if you’d like a good crop.

If you’re composting food scraps, coffee grounds and adding seaweed and manure, it’s going to be better – but with the hungriest crops there may still be a need to add more nutrients (especially in nutrient-poor soils like mine).

For now, I’m not worried about the specifics of the soil. I haven’t planned exactly what I’m planting where, so my compost is for the basics: adding carbon, retaining water, and supporting life.

Up next: planning out the garden (and designing for the climate).

Now I’d love to hear from you! Do you have compost bins, and how do you use your compost? Do you utilize any interesting ‘waste’ when filling up your bins? Do you live in Perth and struggle with overcoming the sandpit? Anything you’d like to know more about? Please share in the comments below!