9 ways to get the most out of your freezer (+ reduce food waste)

My freezer has saved many a food item going into my compost bin. Overripe bananas, leftovers I’ve eaten for five days straight and really can’t bear to make it six, onion peels that I’ll use to make stock – the freezer is great for both reducing food waste, and treating future us to a ready-made meal in the form of something we prepared earlier.

Many of us are doing bigger and less frequent grocery shops than we might normally do, and cooking more than we might normally do – and this is putting extra pressure on the freezer.

Which let’s face it, for many of us is also a bit of a stick-it-in-there-and-forget-about-it zone.

My freezer is fairly small, which means that there’s always less room in there than I’d like. But it also means that I’ve got good at keeping my freezer organised, and making the most of the both space and the utility.

If you’d like to use your freezer more efficiently, here are my tips.

1. Ensure your freezer is a frost-free zone

If your freezer resembles a small iceberg, it’s not running as efficiently as it could be – and that ice is taking up valuable leftovers space. If this is the case, you need to defrost your freezer.

Defrosting it will melt the ice – then you just need to ensure the melted water is removed and it’s wiped dry, and turn it back on.

Whenever I defrost my freezer, I put my freezer contents in a neighbour’s freezer temporarily. You can also put frozen food in the fridge or use an esky/cool box to slow down defrosting. Any meat, fish or dairy products are better not refrozen, but vegetarian leftovers will probably be fine to go back in the freezer.

Make sure your freezer is set to (and running at) -18° C (0° F) before you fill it back up.

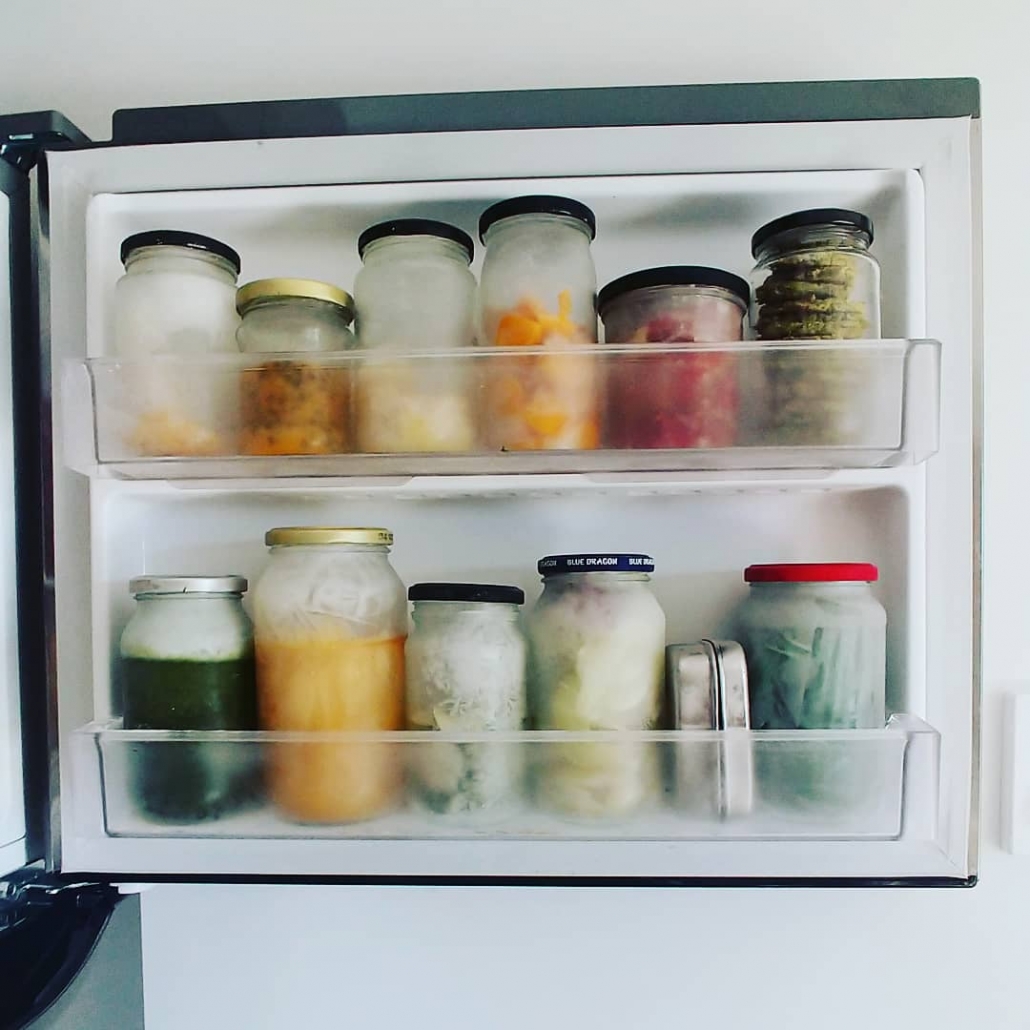
2. Audit your freezer

It’s really useful to go through your freezer every few months and see exactly what is in there – because there will be something you had forgotten about. Hopefully something tasty!

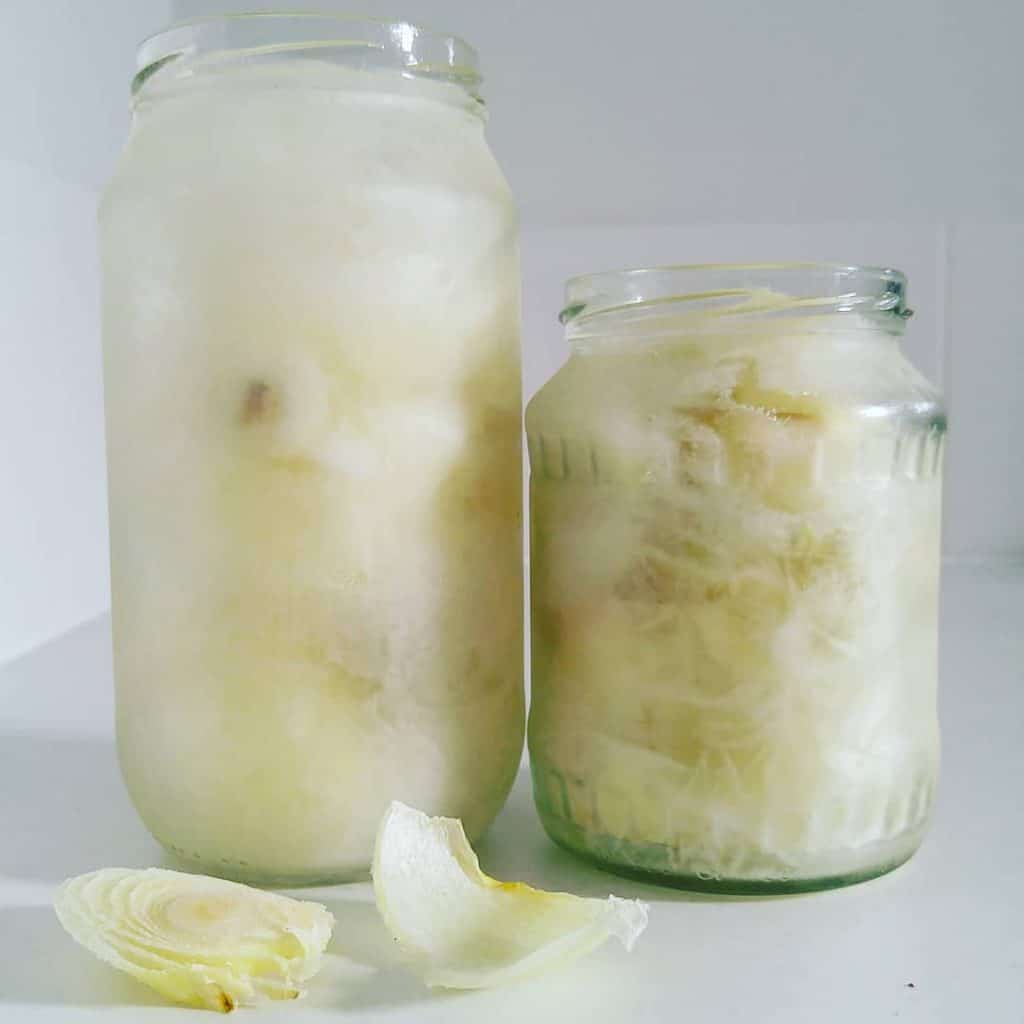
(With me, its usually extra jars of onion scraps for stock making. Sigh.)

It’s best if you can pull everything out and have a good look. That way you won’t miss anything, and you’ll spot half-empty containers and other things you might have missed.

Once you know what’s in the freezer, here’s some ideas to organise it better:

  • Make a plan to use anything old, or anything you have lots of, in the coming weeks;
  • Ensure anything you have lots of isn’t on your shopping list;
  • Put the oldest stuff at the front so you are more likely to notice (and therefore use) it;
  • Make sure everything is labelled (or at least the suspiciously ambiguous stuff);
  • Pop a reminder in the calendar for 3-6 months time, so you remember to do it again.

(I label my jars with a wax pencil – it’s easy to rub off. You can by them from art supply stores. You could also use a marker pen, or stick labels on.)

3. Prioritise what you keep in the freezer

If you’re like me, with a small freezer, you’re probably constantly juggling things to make space. When I need to make space for something else, there are a few things I think about.

What’s most valuable to be in my freezer?

Without a doubt, the most useful thing for me in my freezer is ready-cooked meals, ideally in 1-person or 2-person portions.

Generally speaking, the more prepared something is, the better. So frozen banana cake, or a frozen smoothie, is better than a frozen banana. A jar of stock is more useful than a jar of onion peels.

These are all things that save me time in the future (convenience) – which is what I value.

Value is also related to the cost of the item (what it would cost to replace), and the space it takes up.

Remove non-essentials.

I don’t keep ice in my freezer all the time (no space!) so if I have an ice cube tray in there during a sort, this is the first thing to go.

I also tend to have a bunch of ‘saved’ items in the freezer. I often have a jar of lemon zest, and maybe orange and lime zest too. That’s three jars. if I’m having a cull, these will go.

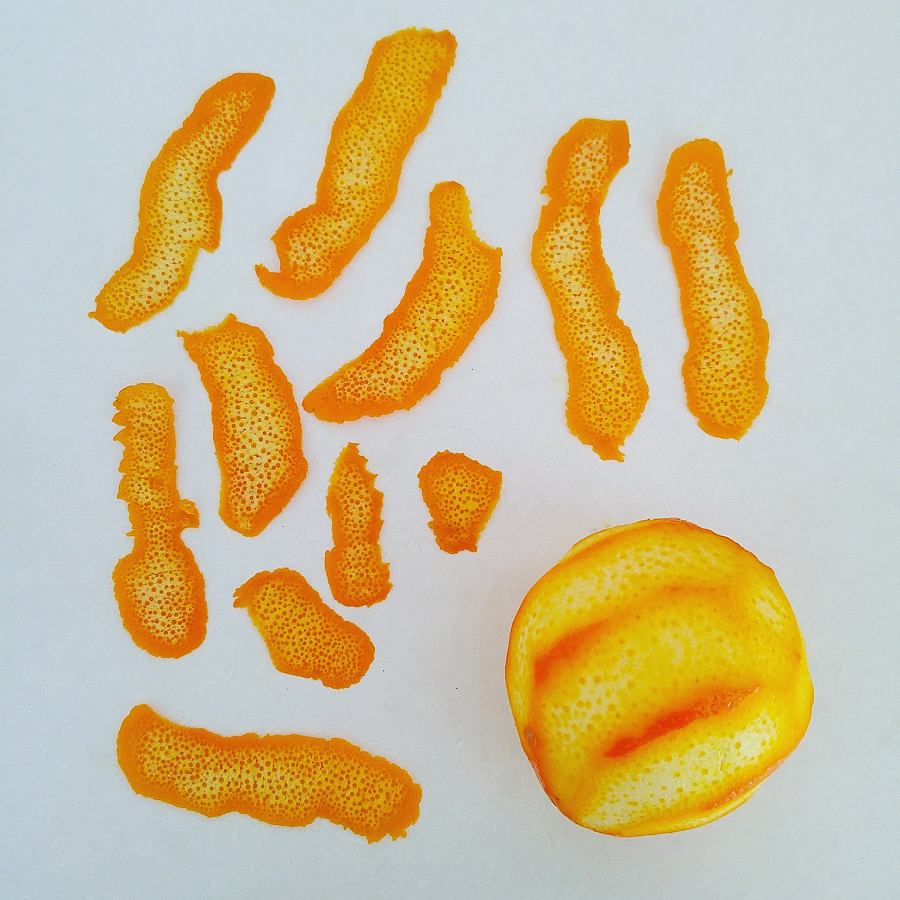
I don’t zest every citrus fruit I ever eat, so I don’t feel too bad about putting these in the compost if I’m short of space for something else. (Plus, it’s easy to make more down the track.)

Try to keep the contents balanced.

The more you rotate the food in your freezer, using up things and replacing them with new (different) things, the more you’ll get out of your freezer – literally.

I like to have a few slices of bread, a few portions of leftovers, maybe a jar of stock and a couple of jars of sauce, some frozen bananas – and then some snack items like falafels, fritters or hummus.

Rather than long-term storage, I use my freezer as a way to extend the life of leftovers, and make my meals more interesting – especially when the fridge is running low.

Prioritising doesn’t have to mean throw away.

If you do have to remove some things from the freezer, you don’t have to throw them in the bin. You can pop in the fridge where they will last a few days (they will defrost pretty slowly in there).

If it’s something that you know you won’t eat, but someone else might, you could try listing on the olioex app (it’s a free food sharing app).

4. Learn what you can freeze

In short, you can freeze almost everything (one important exception is meat and fish that has previously been frozen, and then defrosted).

When food is frozen, the water expands, which can change the texture. You’ll notice this with raw fruit and vegetables, which go mushy once frozen because the frozen water breaks the cell walls.

But this isn’t a problem if you intend to cook with them (using berries in baking, or veggies in soup) because cooking also breaks the cell walls.

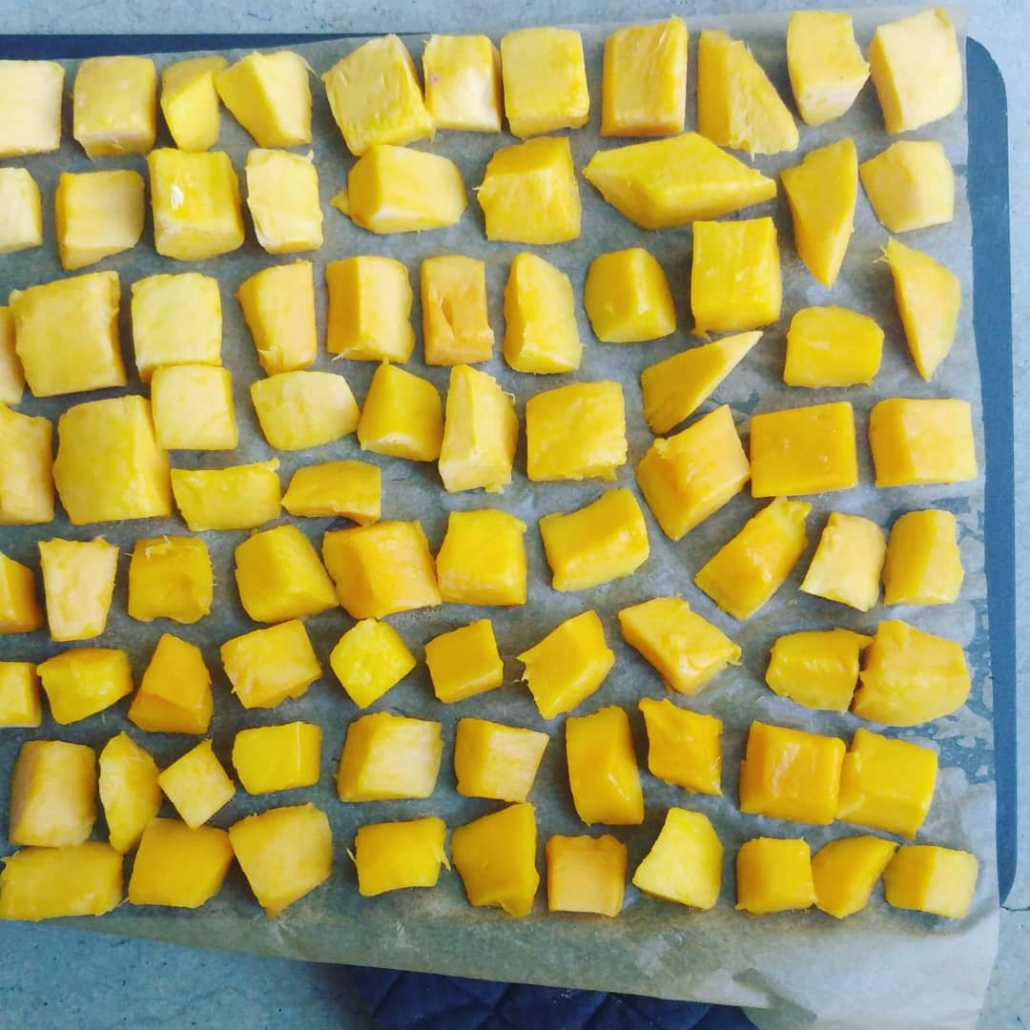
Vegetables often freeze better if blanched (heated briefly in boiling water, then submerged in ice) first. But it’s not the end of the world to just freeze raw.

I always freeze my onion peels, leek ends and other bits I’ll be using to make stock raw, because they will be boiled later, so texture doesn’t matter.

You won’t notice much change in texture if you freeze cooked food. I often roast vegetables, and then freeze them this way. It also means that when I defrost, they are cooked and ready to go.

Milk and yoghurt can be frozen but freezing can change the texture of these – particularly of non-homogenised full-fat milk, which can go lumpy. It’s still edible, but may be better used in cooking rather than in coffee or tea.

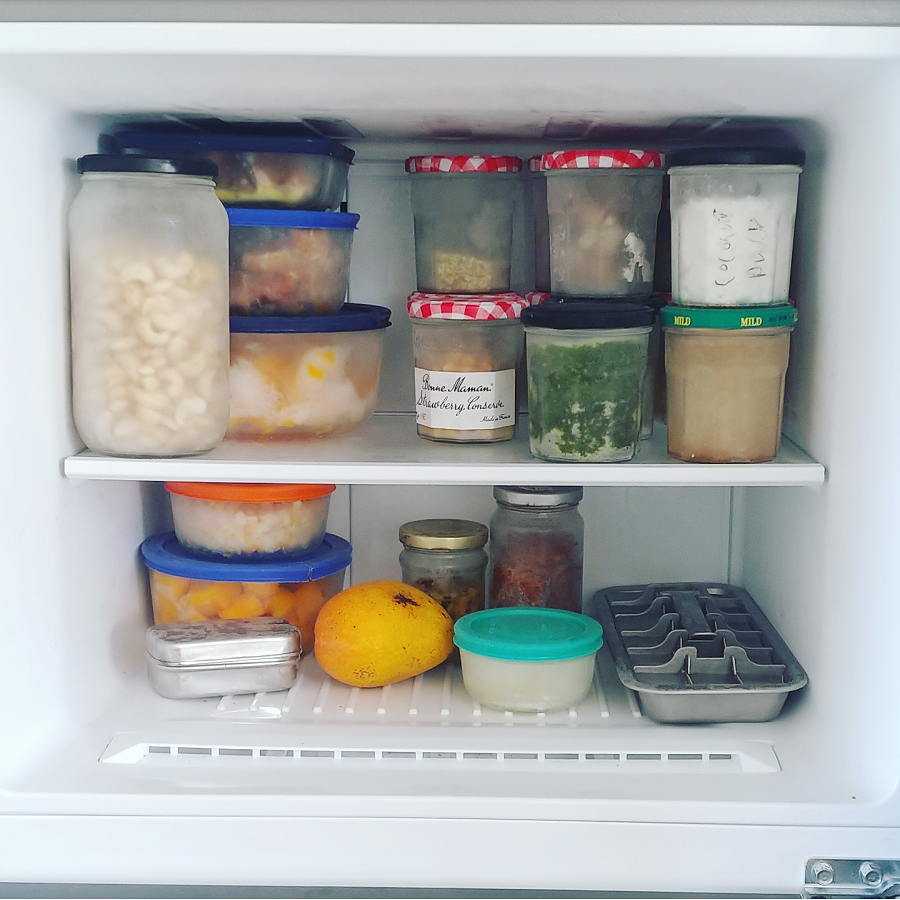
5. Choose suitable containers

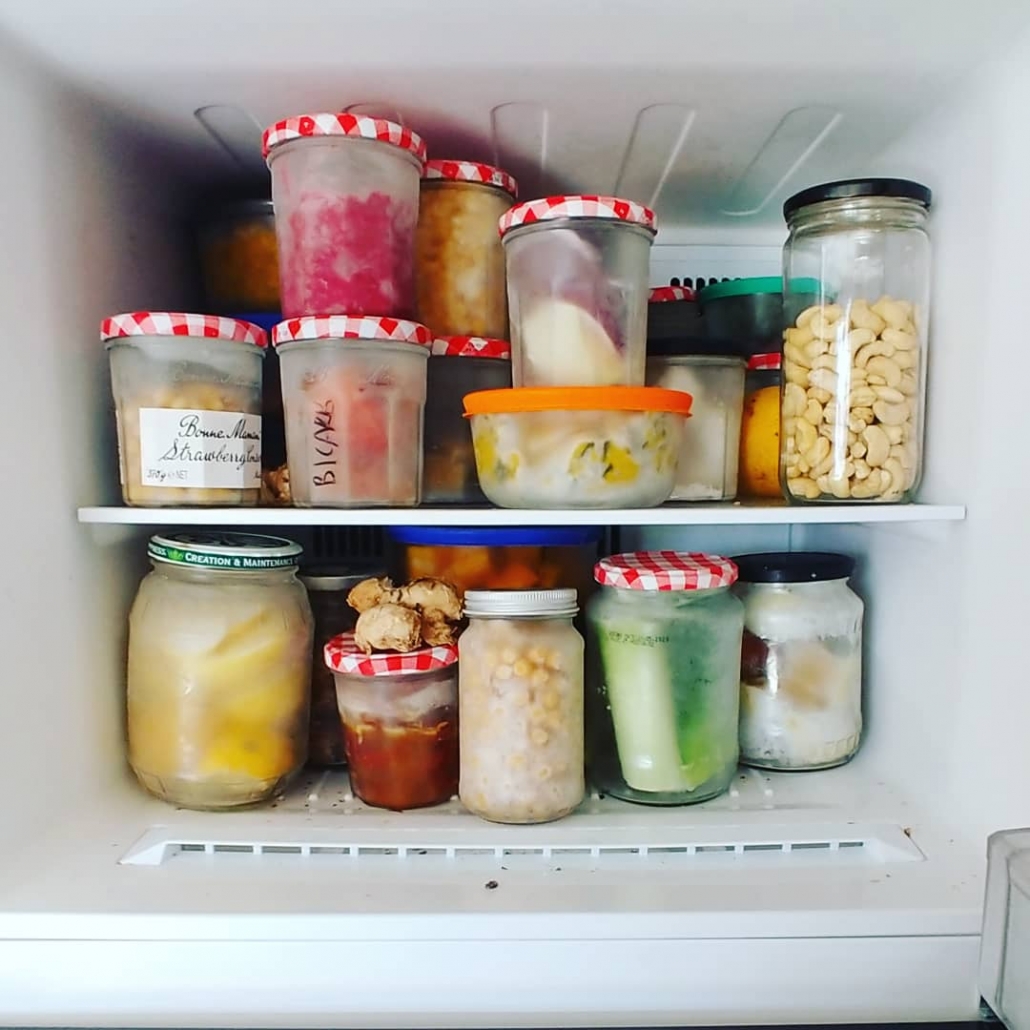
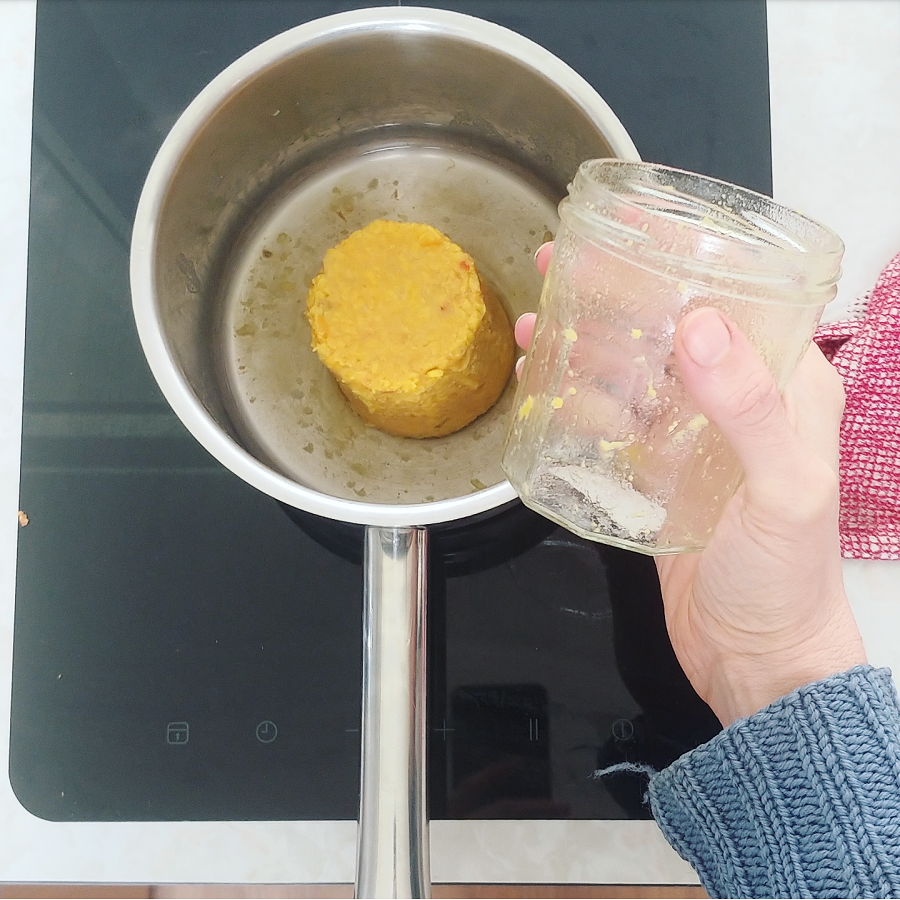
I prefer to freeze in a mix of glass jars, and Pyrex containers. I’ll occasionally freeze something in a stainless steel lunchbox, but they are less useful as you can’t see what’s inside (and frozen metal hurts my fingers when prising the lid open).

(Yes, you can freeze in glass. Instructions here.)

Bigger glass containers are more efficient in terms of space, but you’ll need to defrost the whole thing at once. Which is fine for traybakes or leftovers you made specifically for freezing, but less good for item you’d like to separate, like chunks or frozen berries.

Tip: if you want to freeze berries, or anything cut into chunks, you can freeze on a tray, and once frozen, add to a big container. That way they don’t all stick together, and you can scoop out just what you need.

Smaller containers are great if you just want individual portions, but the containers take up more space, particularly solid ones like glass or thick plastic.

For small containers, I love Bonne Maman jam jars. They are readily available and free, and to be delight, I discovered that there is enough space in my freezer to stack them, which makes the most of the space.

The tapered sides means it is easy to freeze in them (they are unlikely to crack, unlike narrow jars) and it is easy to slide still-frozen leftovers out to reheat in a saucepan.

I’m sure you all know that I’m not a fan of single-use plastic. If you simply don’t have room for solid containers, you could consider investing in some reusable silicone storage bags. And I do mean invest, because they are not cheap – but look after them and they will last a lifetime. Buy the best you can afford – if you have the budget, I recommend the Stasher bags (expensive, but you do get what you pay for), and can guarantee that they do not leak.

If reusable storage bags are out of your budget, and you’d prefer to use single-use plastic ziplock bags or similar, remember that you don’t have to use them once only. Wash and reuse them as many times as you can.

For freezing bread, I used a reusable cloth bag for years. After a million recommendations from readers I now have an Onya bread bag, purpose-made for freezing bread.

It’s not a necessity, but it will help keep your bread fresher for longer in the freezer.

6. Reduce freezer burn

Freezer burn happens when the fan that moves air around the freezer sucks out the moisture from the food, leaving pockets of air that discolour the food, and taste weird. Food that has freezer burn isn’t unsafe but it isn’t tasty, either.

The longer something is in the freezer, the more likely it is to develop freezer burn.

The more you can exclude air (and air circulation) from your food, the slower this will happen. Keeping food in containers helps, and packing containers tightly.

For really sensitive (or expensive) items, wrap with paper within in the container, which can help reduce the exposed surface area.

Make sure you’re rotating your food, eating the oldest things first, and don’t leave anything in the freezer too long. Whilst a few months will probably be fine, ultimately time is not on your side!

7. Label what you freeze

I am very bad at this, but it really is a good habit to get into. You might remember what the item is when you freeze it, but that doesn’t mean you’ll remember in six months time.

One label is better than no labels (it’s a start)…

And as the weeks/month pass, you’re less likely to remember the date – or even the year – you froze something.

So get into the habit of labelling what an item is (if it’s not obvious) and when you froze it.

8. Keep your freezer running smoothly

If you’ve gone to the trouble of defrosting your freezer, you don’t want it icing up again any time soon. There are a few things that speed up ice creation in freezers, so here’s a list of do’s and don’ts.

  • Don’t put hot food (such as leftovers) in the freezer. Let the food cool down, and ideally chill it first;
  • If you’re putting frozen items from the store in the freezer, wipe off any condensation or water that may have formed on the packaging;
  • Try to minimise how long you leave the freezer door open;
  • Check the freezer door seal, and if it’s not sticking properly, invest in a new one (it will also save you paying more than you need on electricity);
  • Don’t stuff your freezer so full that air can’t circulate;
  • Don’t block any fans or vents that say ‘do not cover’ on them.

9. Love your freezer and it will love you back.

Freezers are a pretty epic modern invention. By freezing, we can extend the life of our food, provide future us with tasty snacks and pre-prepared meals, and bypass the problem of ‘there’s nothing in the fridge’.

Keep your freezer frost-free, (relatively) organised and filled with things you like to eat, and you’ll be rewarded time and time again.

Now I’d love to hear from you! Are you good at making the most of your freezer, or could your freezer do with a bit of love and attention? Any tips you’d like to share, or questions about freezing? Any successes or fails when it comes to freezing food? Any other thoughts? Please share in the comments below!

How my zero waste habits have changed since Covid-19

The coronavirus pandemic has certainly changed a lot of things. From the things we are actually not/no longer allowed to do, to those habits we’ve been forced to rethink and then those we’ve decided to change, there seems to be very few aspects of daily life left untouched.

When it comes to zero waste, low waste and plastic-free living, it’s been interesting to me to see all of the changes. Some businesses have stepped up their game to ensure they continue to create less waste, others have had no choice but to soften their approach. The same goes for individuals and their habits.

I wanted to share how my own habits have changed (and stayed the same) since the pandemic arrived. We’ve all got different ways of dealing with things, and differing priorities, and it’s not to say that my way is the best way, nor am I encouraging you to do what I do. Depending where you live, it might not even be possible right now.

Zero waste – or low waste, at least – might not be a priority for everyone now, but it is still a priority for me. I think I’m hardwired to have heart palpitations at the thought of throwing something into landfill! Of course I’ve had to make changes and compromises (I think we all have, right?) but I’m still trying to navigate these choices whilst keeping my values in my heart.

My zero waste habits that haven’t changed

Shopping at bulk stores

Most of the bulk stores here in Perth are still open, and many are still accepting BYO containers. (I heard of one that was ordered to stop by the council Health department, and I know of a few that have closed to customers and are offering a pick-up/collection service only).

I’ve been lucky to be able to head to my usual bulk store and stock up using my own jars. When the infection rate was at its peak I did use a collection service where I pre-ordered and picked up a few things in paper bags, but for the most part I’ve been able to buy my groceries packaging-free.

Getting (or not getting) takeaway

Personally, I see dine-in and takeaway as two different things. I dine-in when I want to take my time, enjoy the food and the company of the people I’m with. I get takeaway when I’m tired, it’s late and there’s nothing in the fridge. Because I refuse to buy takeaway in anything other than cardboard, my options are limited to pizza and (veg) burgers. Which aren’t things I want to eat particularly often.

Before Covid19, I’d maybe get breakfast, or coffee and a cake a couple of times a month, and maybe dinner with friends once or twice a month also. I’d probably eat takeaway pizza once or month or so (usually at the insistence of the person I live with). With the restaurants closed, I can’t dine out – but I don’t see takeaway as an equivalent. In my mind, they are very different things. Replacing dine-in with take-out doesn’t work for me.

Plus, with the fridge more full than it’s ever been, there’s no ‘there’s nothing in the fridge’ excuse. So my takeaway habit hasn’t changed. Pizza, once a month.

The sharing economy

You’ve probably heard me rave about the Buy Nothing project a million times – it’s a network of hyper-local community groups allowing people to swap and share rather than buy new. Many Buy Nothing groups have closed down temporarily due to the pandemic, however ours has remained open for requests and ‘essentials’ (I live in a lower socio-economic area, and sometimes our members need support of food and other items to make ends meet).

Fortunately, although ours is still operating on a limited basis, I’ve been able to connect with so many neighbours in the past that I have a fairly good network to be able to borrow, share and give outside of the group structure.

And so I borrowed a tarp from one neighbour for a soil delivery, got a sourdough starter from another neighbour (to make crumpets), and dropped off some excess spinach plants for a third neighbour.

If there’s one thing I miss most during this lockdown, it’s my community. Normally there is so much swapping, sharing and banter, and I sorely miss it. I’m grateful that our community is still ticking along and connection is still possible, even though this is not a patch on what is was.

My zero waste compromises for Covid19

Buying new stuff

Well, so far I’ve purchased one new thing – but it broke pretty much all-the-rules that I follow. I needed a cable to connect my monitor to my laptop. For the past two years I’ve been using a cable borrowed from a friend, who had always said it was a long-term loan and he might need it back. Well, working from home came around and he needed it back.

I tried Buy Nothing, but no-one had a spare. I couldn’t find a local computer store. I didn’t want to just head to the mall on the off-chance – and I was conscious that office supplies were selling out as so many people were starting to work from home.

So I used click-and-collect – something I never do. I like to support local stores who don’t have these services, avoid big chain stores, and ideally find stuff second hand. This wasn’t an option either, and so I went to the big-chain store to receive my cable – all ready-packaged in a plastic bag.

I did think about kicking up a fuss and returning the plastic bag, but this was when uncertainty around Covd19 was at its peak and I didn’t want to stress the store guy out any more than he probably already was. Plus I assumed they wouldn’t reuse the bag anyway.

So I sucked it up and took my first plastic bag home in about 7 years.

(I photographed the moment for prosperity, and I’ll take the bag to Redcycle for recycling.)

I haven’t needed to buy anything else, although I dearly want a mortar and pestle (I currently try to flatten my coriander seed with a knife, because my food processor is not up to the job)… but I’m holding out.

Buying items in (home) compostable packaging

My personal low-waste rule is to avoid as much packaging as possible. I’m not perfect, but I always try to bring my own jars/bags/containers, and dine-in rather than get takeaway. Or go without.

It’s easy to go without when there are other options, but when these are taken away, your choices are very limited.

I’ve loosened my rules to include completely compostable and biodegradable packaging. Which means I can now buy ice-cream from the local gelateria – they use compostable sugarcane containers, which successfully break down in my compost bin.

I’ve hardly gone nuts – I think I’ve used about 6 in the last two months. I really believe that the zero waste movement is about using less packaging and embracing reusables and returnables, not just switching the material of single use packaging.

As soon as reusables and dining-in is allowed, I’m tightening up my rules. Until then, I will enjoy ice-cream.

Some zero waste wins

Takeaway coffee

I rarely buy takeaway coffee (I prefer to dine in, or make my own at home – I have an excellent manual press and stovetop steamer that makes amazing coffee). Personally, using disposable cups for anything other than a life-threatening emergency is a no for me. I just can’t do it!

I’ve noticed a few people on various zero waste groups about the place saying that they are happy to use disposable cups to support their local cafes. Whilst I like the sentiment, this is somewhere I’m not willing to compromise – and I really don’t think that my buying a $4 coffee once in a blue moon is going to keep a cafe (that’s had to close its entire restaurant down) afloat.

But after settling on my choice, I discovered that cafe closest to me is offering a returnable refillable cup service run by Renome – reusable cups that you pay a deposit for, and return for cleaning once you’re done (if you want a refill, you simply return your cup to the box, and are served with a freshly cleaned one).

Now this is something I can get behind.

The scheme has existed for a while, but until now I had no reason to use it. The great thing is that the cup is ultimately refundable, so I don’t need to ensure I use it 17 times (which is the case with a plastic KeepCup) to offset the carbon footprint. As long as the cup is used that many times, it doesn’t matter by who. And it’s not more ‘stuff’.

(There are a handful of cafes around Perth actually still accepting KeepCups, but none close to me.)

Supporting local

I think all of us feel a real draw towards supporting local businesses in these times. I don’t have the budget to suddenly start ordering takeaway every day (plus the packaging would give me heart palpitations, and I don’t think my arteries would be too pleased either).

I only buy ‘stuff’ that I need, which isn’t much stuff, and I’m not going to suddenly start shopping for ‘things’.

What I have been able to do is to support local food producers. I’ve been ordering extra in my local veg box (which I’m thankful that I already used, as a lot of these schemes have closed to new customers after a surge in demand).

I found an amazing mushroom grower – The Mushroom Guys – that usually supplies to restaurants, but with the lockdown has turned to selling mushroom boxes to customers. And they are things of beauty.

(I have a bit of a weakness for mushrooms and it’s one of my goals to eventually have a setup where I grow my own.)

A friend sells microgreens and I started a weekly order with him.

It’s meant my grocery spend has gone up, but as there is no spend on eating anywhere else, and as it’s a short-term thing, I’m happy to support local growers and have fresh food delivered to my door.

I’m lucky to have the option, and I’m taking it.

Some zero waste misses

Sneaky plastic

Oh, the sneaky plastic! Yep, I’ve been caught out with this a few times. When you shop at the same places and buy the same things you learn how to avoid the sneaky plastic, but when you’re going to unfamiliar places or buying different stuff, it happens.

A local cafe started stocking bread from a bakery and I placed an order only to find it came in a plastic bag. I asked for bulk risotto rice with my veg box (they run a bulk store also) and got a shiny plastic packet of the stuff instead.

It makes me more aware for next time – sometimes I forget that this is how most places do things!

Can you be zero waste during Covid19?

In Australia, so far things have not gotten as bad as they have in other places, and restrictions have not been quite as tight. We’ve been lucky, and hopefully we will remain this way. I’ve been able to shop at the bulk store and use reusables, and loosen my rules a little to allow for a little fun (or ice-cream, as it’s also called).

I know not everyone has been as fortunate. It helps that my day-to-day routines have not been disrupted too much – I regularly work from home, and I don’t have to navigate homeschooling.

This isn’t a competition. I just wanted to share how I’ve been navigating the choices, and what my experience has been. I’m sure yours has been very different. The thing I’m most sure about, is that whatever your current situation is, whatever you’re having to do to get by, it doesn’t not mean the end for zero waste.

We’ll get through this, and I think our resolve will be stronger for it. Right now, staying safe is the most important thing of all.

Now I’d love to hear from you! How has the pandemic changed your low waste habits? What has stayed the same for you? What things have you been forced to change, and what things have you chosen to change? Have your priorities shifted, and how? There’s no wrong answers and I’d love to hear about your experiences and get your perspective on this, so please share in the comments below!

My garden transformation project (Progress update: month one to three)

I’m three months into my year-long project to transform my garden from lawn {sobs… so much lawn!} into the beginnings of an urban food forest – veggie beds and fruit trees. And I thought it was time for an update – and some progress shots.

Let me tell you, I hate in-progress shots! That time when it’s obvious you’ve done ‘something’, but it all looks patchy and half-baked and nothing the vision that’s in your head.

That’s the stage I’m at right now.

But it’s good to document progress nonetheless, and hopefully there will be a time when there are ‘after’ shots that look at least vaguely like my vision!

The garden transformation project: from lawn to food forest

The first thing I did was make a rough plan of the different ‘zones’ in the garden. I’ll talk more about how to do this in a separate post, but in simple terms, it means thinking about a few things.

First, the different uses. There are the uses/functions that I want: do I want lawn? Patio? Veggie beds? A chicken run? Fruit trees? A pond? A space for the dog? etc etc.

Then there are the different microclimates within my boundary – which affect which things will work successfully in those spaces, and which won’t work.

Even though my block is pretty small, there is still a spot that gets beaten by the afternoon sun, several spaces that won’t get any sun in winter because of the shade patterns, a cooler side area with little light that is more suitable for trees (because they can grow up to the light).

There’s also what’s going on outside my block to consider. The neighbours’ buildings and trees (which provide shade – which may or may not be a good thing, depending on where they are); trees also have roots that do not understand boundaries and like to get into unsuspecting garden beds.

And then there are the limiting factors of the climate. In Perth, the sun (and heat) is a limiting factor; water is another. And water alone isn’t enough to keep plants alive on blistering 40°C+ days in full sun. Shade is important, too. Then there is the fact that certain plants just won’t grow (and others will do fantastically well) where I live.

I can want a coconut palm tree with all my heart, but I just don’t have the right climate (not wet enough and winters are much too cold) to grow one to fruit.

So with all these things in mind, I have a few different zones:

  • The front verge – natives/edible natives (the verge is connected to my front garden but the land is owned by the council, not me. They encourage the planting of native gardens (which are waterwise) on verges.
  • The front garden (north facing) – I’d like to put in-ground veggie beds here, but there is a huge tree at the front and I need to figure out if there will be enough sun in winter.
  • The side strip (east of house) – deciduous fruit trees. There is a raised bed along the side so they have a bit of extra height to get to the sun, which they will need to set fruit. In winter when the sun is lower, deciduous fruit trees are dormant, so that works.
  • The back garden (southern end, at the back) – this is where I’m putting the hardiest and tropical plants. They will get sun all year, and will be battered by the summer afternoon sun, so it makes sense to choose the hardiest trees for here. The plan is that as they grow bigger they will provide shade from the afternoon sun for the smaller and more sensitive trees and other plants.
  • The back garden (in the middle, eastern side) – I’m planning to put citrus trees here. They will still get sun in winter.
  • The back garden (in the middle – western side) – I’m keeping some lawn. For now. They say relationships are about compromise, and here is how I compromise…
  • The back garden (furthest north, nearest the house) – deciduous trees. This spot won’t get a lot of sun in winter, which makes it perfect for deciduous trees.

(I’ll write a post sometime about planning for fruit trees, because there are a few things to know if you’re going to grow them successfully.)

These are the before photos from when I moved in (well technically from the real estate agent, hence the wide angle lens and bright colours, and taken in August when the rain is plentiful).

I’ve already written about my first steps: getting the compost cranking, and getting chickens. I also had a change of plans when I decided in March to put in some vegetable beds (something I was going to wait until later in the year – possibly September – to do).

My other priorities over the past three months have been:

  • Digging up the lawn and mulching to bring some life back into the soil;
  • Mulching the dead area down the side of the house, to get the soil semi-ready for fruit trees;
  • Starting to plant trees in other spots around the garden;
  • Getting quotes to sort out the reticulation;
  • Beginning a verge plan to submit to the council (they offer a rebate).

Digging out the lawn (front garden)

In Perth, it’s too hot to have exposed soil. The sun just kills all life. The answer is mulch. Coarse street tree prunings are ideal – they are also affordable, and sometimes even free.

After being on the waiting list at mulchnet since the October weekend I moved in, I got lucky in January. A free truckload of mulch.

Some might say, perhaps too lucky…?

I’d already started digging up the lawn at the front before this arrived – I’d shovelled four trailerloads of mulch from a friend’s place (which involved borrowing a trailer from Buy Nothing and utilising her trailer towing skills).

But now I have enough mulch for a lifetime.

In the photo below, the pile on the right is the four trailerloads, and the pile on the left is my lifetime supply. You can see the turf I’ve dug out waiting for the green waste collection on the verge (they happen four times a year).

Eventually you won’t be able to see most of the mulch covering the ground for plants, but they need to be planted in late autumn / winter / early spring when they have more chance of establishing roots and surviving.

It will also take a few years to get the plants properly established.

Digging out the lawn (back garden)

I planted a banana tree in my ‘tropical’ zone at the end of December – my first tree. It’s next to the (metal) shed to provide shelter and reflect some warmth (radiated heat) in winter.

From this spot I began to dig out more lawn. (It was a particularly straggly and patchy spot.) I’ve added a papaya and four pineapples.

Elsewhere, I also planted two more trees – a dwarf mulberry (grafted) and a fig, closer to the house. These go dormant in winter and I wanted to get them in the ground now to establish some roots first.

I’ll never forget being told this at a fruit tree workshop several years ago: never plant a one hundred dollar tree in a five dollar hole. The point being, invest in the soil more than the tree. Now my mulberry wasn’t $100 (it was $25) and the fig was a freebie grown from a cutting, but I still heed to that rule.

With the soil I have, it needs all the help I can give it.

That sand next to my mulberry tree is my base soil. Digging out a heap of that ‘soil’ to replace with compost, aged manure, seaweed, clay and a bit of biochar (scored from the side of the road) took a few hours.

But the effort, and investment in amendments like these, is worth it in the long run.

Figs are notorious for having spreading roots, but they actually grow very well with restricted roots. Pots are good but here, they dry out quickly. So I tried something I saw on the interwebs – planing in a washing machine drum.

This is one of those in-progress shots that I hate, where the trees look so small and weedy. The grass between and behind them will eventually be removed – there’s just only so much grass that can be dug out per week!

They are both fast growing trees, however, and they’ve already started to look a little less pathetic, and have reached the height of the hedge.

Growing vegetables

During summer, I’d planted out a small garden bed with tomato plants. It was positioned in its original spot to get the morning sun and afternoon shade (but no winter sun). Sadly, rats got almost all of the tomatoes (and the cayenne chillies I planted in the adjacent orange tub, disappointingly).

The whole area looks weedy and bedraggled. I decided to move the bed to a better spot for winter, and away from the hedge. (I also have a medium term plan of planting a macadamia tree where the bed is – to provide afternoon shade in summer to the rest of the garden.)

This is where the plan deviated slightly. I’d just finished digging in this bed (22nd March, my photos are date stamped so I can be sure!) when all of the coronavirus changes were starting to happen – food shortages, store restrictions, vegetable seedlings and seeds selling out, and potential lockdown.

And so I panic purchased two big garden beds to get started growing vegetables now. I went with raised beds because a) I have a dog that doesn’t like heights so won’t climb in them b) they were the quickest thing to get going c) if I want to move them later on, they are actually very lightweight d) there is a good second-hand market for them, so I can sell later if I change my mind. Oh and e) they match the one I already have.

I ordered them on the Monday, expected them to be delivered by the weekend, and they came the next day.

I spend that weekend digging out the lawn, had a soil delivery the following Monday and got the first bed ready that day. It took me until the end of the second weekend to finish the second one.

I’ve planted the beds out with seedlings, garlic and seeds from my stash that are mostly expired – so we will see if any germinate. So far I’ve had luck with radish and not much else, but it is early days.

Garden plans: what’s next?

It’s still very much on my to-do list to get the reticulation sorted, particularly as I’m beginning to plant more things out and don’t to damage any roots putting it in later.

The next priority is planting trees. I’ve purchased a few (including the macadamia I mentioned earlier) and I have a few grown from seed.

I’d normally have waited a couple more months before purchasing, when the weather is cooler, but I was worried they might lock down the tree place, so I made my move early. Now it’s important to get them in the ground.

Oh, and the other priority – digging out more lawn. Sigh.

Now I’d love to hear from you! Any garden questions, send them my way! Any comments, send them my way too! And any other thoughts you have, about growing vegetables or fruit trees, planning a garden, or anything else – share them all. Just leave a note below :)

Reducing food waste: store cupboard crumble (+ ideas to use up old fruit)

With the current lockdowns and restrictions on movements, I’ve been rethinking how I use my (rather small) freezer. Now that I really need to optimise the space, I’m removing and using up some of the less useful items that take up space (a few random sticks of rhubarb, and a jar of stock) and filling it up with more useful items – ideally meals, or parts of meals.

One of the things I find really handy to keep in the freezer is crumble topping. Whenever I make crumble I always double the topping, and freeze half. (After all, making double – or triple – the quantity creates exactly the same amount of mess and washing up, but twice the food, and I’m all for that.)

It means down the track, when I discover some sad fruit in the fruit bowl, or a glut of something that I want to use up, I can grab the topping outta the freezer, and voila – almost instant crumble.

Growing up, the crumble I ate was made of refined white flour, refined white sugar, and butter. These days I prefer to make my crumble a little bit healthier.

And as long as you follow the rule of some sweetness, some crunch and some fat, it’s a pretty great idea for using up random ingredients from the pantry.

Making crumble topping

Ingredients:

  • 2 cups rolled oats
  • 1 cup ground almonds (you could replace this with plain flour – wouldn’t be as tasty but kinder on your wallet. Other options are oat flour, rice flour, buckwheat flour)
  • 1/3 cup solid sugar (I like rapadura sugar, but any white or brown sugar that you have is fine)
  • 1/4 cup melted coconut oil
  • 1 cup nuts/seeds (use what you have: chopped almonds, mixed nuts, hazelnuts or pecans, shredded coconut or coconut flakes, pumpkin or sunflower seeds, even buckwheat kernels will all work great)
  • Pinch of salt

(A note if you’d prefer to use butter instead of coconut oil: the traditional way of making crumble is using cubes of cold butter, and rubbing into the flour to make ‘crumbs’. But my guess is, if you’re using chunky ingredients like oats rather than just plain flour, you can just pour melted butter in – it’s the same consistency as melted coconut oil.)

Method:

Mix all the dry ingredients into a bowl, pour melted coconut oil on top, and mix well.

Whatever you’re not using straightaway, pop in a container (I use a glass jar) and store in the freezer. If you don’t have space the fridge is fine. I’d keep in the fridge for a month or two, and the freezer for three to six months.

Reducing food waste: using old fruit for crumble

Crumble is the perfect way to use up old fruit. Apples that have gone floury, pears that have started to go squishy, stone fruit that’s gone wrinkly, blackberries or mulberries that have been sitting in the freezer for months – they are all perfect for crumble.

If you don’t have enough fruit to make a crumble, you can simply chop and freeze what you have until you’ve got enough. Or, you could just make a one person version.

Tropical fruit like bananas and mango will work too. I’ve never seen a crumble for citrus, but I’d love to try 50/50 with orange and rhubarb, for sure.

It can be helpful to stew the fruit before you make crumble. You don’t have to, but it will ensure the fruit isn’t hard in the crumble, and also reduce the cooking time considerably. All ‘stewing’ means is roughly chopping the fruit and chucking in a saucepan with a small amount of water (or orange juice), and cooking for a few minutes until the fruit starts to break down.

I don’t add sugar, because I find the fruit sweet enough, and there is sugar already in the topping. I usually add a sprinkle of cinnamon – and sometimes ginger – to the stewed fruit. Zested orange would be great, too.

Another option is to roast the fruit. Stone fruit are great roasted. Slice, place on a tray, brush with a little oil, sprinkle with a little cinnamon and bake in a medium-hot oven for 15-20 minutes. Takes longer, but tasty.

I like my fruit still a bit chunky, but you can cook it until mushy if you prefer.

How to cook store cupboard crumble

I don’t tend to weigh out fruit, or even the crumble topping. I prefer to measure it visually. Spoon the fruit into an ovenproof dish (I use glass Pyrex) so that it’s a few centimetres (a couple of inches) deep. Then, sprinkle on the crumble topping until it’s the thickness you like. No need to press it down.

Any excess crumble topping can be placed in a glass jar or other container, and frozen until you want to make crumble next.

Bake in the oven on a medium heat (I’d go for 150 – 180°C / 300 – 360°F) for about 15 – 20 minutes. If you’ve stewed the fruit beforehand you don’t actually need to ‘cook’ the crumble so much as warm it through. If you’ve used pecan nuts, opt for the lower temperature as they are prone to burning at higher temperatures.

(Better to cook for slightly longer at a lower temperature than end up with a blackened top.)

It’s ready when the top is browned and the fruit is bubbling.

Although crumble is traditionally a dessert, I often make it for breakfast (cooking the night before and either eating cold, or warming through in the morning). It’s got less sugar in it than a lot of cereals. I think if it as inverted muesli with fruit at the bottom rather than on top.

To store, allow to cool and then refrigerate and then eat within a week, or freeze and use within 3 months.

Now I’d love to hear from you! What ingredients are sitting in your pantry right now, and how are you planning to use them up? Any pantry ingredients you’re wondering how to use right now? What staples are you keeping in your freezer? Any other thoughts? Please share in the comments below!