5 Tips for Letting Go of Unwanted Christmas Gifts

Before you even say it, no. It is not too early to be talking about what to do with unwanted Christmas gifts. If we don’t talk about it, those gifts will be shoved in a cupboard, where they will languish untouched for months, forgotten and unused.

What a waste of resources!

The best outcome for these gifts is that they are needed, wanted and well used.

If you or someone you know received a gift that they don’t want, it is much better to find someone who needs it rather than stuffing it into storage.

The Reasons We Hang Onto Stuff We Don’t Need: Guilt and Fear

Is it ungrateful or rude to pass on a gift that’s unwanted? I don’t think so. No-one asks for gifts they don’t want and don’t like. The gifter may have had the best intentions, but on this occasion, they got it wrong.

We all make mistakes and misjudge things sometimes. That’s just how life works.

It was still kind and generous that they gifted something, and the meaning is in the giving, not the actual object.

But when it comes to letting go of the gift, we can feel guilty.

We feel guilty that they made a poor choice.

We feel guilty that we weren’t clearer about our dislike of hot pink, or the fact we actually went vegan 7 years ago, or the fact that we already own every single cookbook/novel by that author.

We feel guilty that they wasted their time, or money.

The thing is, all of this is about the past. The gift has already been purchased and gifted, and we can’t turn the clocks back. Whether we keep something or give it away won’t change the fact that the gift was a poor choice.

The difference is that keeping something reminds us of this, every time we see the item. Letting something go will let go of this guilt.

Finding new owners for our unwanted things is a great way to alleviate the guilt we feel about parting with stuff – it is hard to feel guilty when you’re bringing joy to someone else.

When it comes to letting go, we can also be fearful.

Fearful that the gifter will find out, and we’ll be judged.

Fearful that if we’re found out we will be seen as ungrateful and maybe not be given gifts again.

This fear is about something that hasn’t happened yet. It may never happen. Is it really a genuine cause for concern, or if it comes true, will it actually be slightly uncomfortable for a very small window of time?

Fear and guilt are not reasons to keep things we don’t need.

Think about it from your own perspective. How would you feel if you knew that a gift you’d purchased for someone was unwanted, disliked and would never be used? Would you rather the person kept it out of guilt or fear, or would you rather they passed it onto someone who loved it?

To Tell or Not Tell?

There’s no need to tell the gifter you don’t like the gift and you’re passing it on, if you don’t want to. If you think it will upset someone, or you’ll feel judged, there’s no need to mention it.

Most people won’t ask what became of the gift, but if you’re worried about that, have an answer at the ready.

If the gifter told you that they kept the receipt in case you want to exchange it, consider that an invitation to tell them that you’d like to exchange it. Obvious as that seems, it can be an awkward conversation, and one we prefer to avoid. But the fact they mentioned it means they’d rather you had something you actually liked than try to protect their feelings. If this option exists, don’t shy away from it.

On the other hand, you might prefer to tell the gifter of your plans. If they were wildly wrong with size, style or taste it may be helpful to say so.

If you put clear boundaries around the gifts you wanted and didn’t want, and these boundaries were trampled over (oh, I know you said only second-hand gifts but these plastic trashy items from the big box store were such bargains!) then it can be helpful (and rather satisfying) to explain your decision. It will also help clear up future misunderstandings.

Don’t forget, if they have no way to know you didn’t like the gift, they may continue to gift in the same spirit.

There’s no right or wrong answer to this. Do what feels right (or easier).

Options for Letting Go of Christmas Gifts

Take it back to the Store.

Some stores will let you exchange items even without a receipt over Christmas, so it is worth asking. Call ahead before you make the trip to double-check. The item will need to be still tagged and unused. You won’t get a refund, but if you simply want to switch size or colour, or swap for another product it is probably the lowest hassle solution.

Sell It.

Online auction platforms like eBay and classifieds platforms like Craigslist and Gumtree are great for listing items for sale from the comfort of your own home. Decide a price you’re happy with, take a few pics, and wait for a buyer. There are also marketplaces on social media for finding interested buyers.

Donate It.

Rather than dump your unwanted gift at the closest charity shop along with all the other unwanted gifts, consider giving the item away by other means. Charity shops are overloaded at this time of year, so it might be better to donate to an organization that will use the item, rather than resell it. For example, a homeless charity might accept sleeping bags and blankets, a refugee centre might take small electrical appliances, women’s refuges might take cosmetics and personal care products, and a food bank will accept food items.

Ask yourself, who might want what I have?

You can also give items away on online classifieds platforms, you can give away via local neighbourhood networks such as Buy Nothing groups, and you can regift – if you think the person will want the item.

If you’re worried about being judged for passing on unwanted Christmas gifts, donating them to a worthy cause can help. It might be a lot easier to say you donated something to an animal rescue centre or hospice than it is to say you sold it on eBay.

That’s not to say one choice is better. As long as the item ends up in the hands of someone who will use it, it is a good outcome.

Letting go of something we don’t need, don’t want and don’t like; it doesn’t make us ungrateful or selfish. It doesn’t make us greedy (if we decide to sell it). Stuff shouldn’t have that kind of power, and it only will if we allow it to. The best thing to do is to pass the item on. Out of sight, out of mind.

Difficult things become easier, and guilt will pass.

Now I’d love to hear from you! What do you do with unwanted gifts? Any additional tips? Do you struggle with guilt? How has this changed over the years? Do you find it easier now than you used to? Any other thoughts? Share all in the comments below!

Community Dishes (to Borrow and Bring Back)

I love it when a plan comes together. This one has taken rather longer than I intended, but finally, it is ready to go. Which means, I can tell you all about it. Introducing the Community Dishes, a set of reusable crockery, cutlery and glassware to borrow and bring back, free of charge.

Why? Because…

It means less waste. Less plastic wrap, less plastic utensils, less single-use disposables, less stuff in the garbage and less litter.

It means less stuff. Less people nipping off to the Swedish furniture store to purchase a huge set of glassware / plates for a one-off event that then languish in the sideboard for years until they are horribly out of fashion and can’t be given away.

It means growing community. Helping people connect with their neighbours, share what they have and consider re-use before purchasing new.

I thought I’d tell you a little bit about the project, and how it works.

The Community Dishes Project – Who, What and Why

Have you ever been to an event where the cutlery was plastic, the plates were disposable and the coffee cups were non-recyclable takeaway cups? Me too. Yes, it is frustrating. Yes, I wish they used reusables too.

The Community Dishes project aims to make this easier for event organizers and hosts to choose the reusable option.

There are plenty of reasons why people choose disposables. Sure, laziness might be true in some cases and lack of knowledge around the plastics issue might be true in others, but I believe most people want to do the right thing. Sometimes, the limiting factors are time and money.

Solutions need to be convenient.

Borrowing large numbers of items is tricky. Most people don’t own party-sized amounts of crockery and cutlery, and borrowing a handful here and a handful there is a logistical (and time-consuming) nightmare.

Hiring is an option but small organizations and community groups can be priced out of this.

I wanted to find a solution, and the Community Dishes project is exactly that. A kit of crockery, cutlery and glassware that can be borrowed for free.

Disposables are viewed as cheap and convenient, so for a solution to be workable it needs to be cheap and convenient too. The Community Dishes kit is free to borrow. Yes, it does need to be washed up and returned clean, but the goal is to make everything else (the borrowing, using and returning) as convenient as possible.

There’s 50 each of cutlery, side plates, bowls, mugs, water glasses and large drinking jars. (There are no wine glasses as wine and liquor stores often provide free glass borrowing services.) The kit is packed into boxes similar to those used by hire companies for ease of transport and storage.

The crockery, cutlery and glassware is catering standard, white, and matching. Catering quality is slightly more expensive upfront, but less prone to chip, crack or break – and doesn’t change style or colour with the seasons as high street homewares brands do.

Whilst it might have been lower waste to fossick through charity shops, experience has shown me that caterers and coffee vans prefer to use standard vessels whose volume they know, and finding matching sets would be a struggle. Also, I wanted it to be as easy as possible for breakages to be replaced with matching stuff.

The funds to establish the kit were provided thanks to a Keep Australia Beautiful (WA), Community Litter Grant.

Community Dishes – How Will It Work?

In theory, anyone can borrow the Community Dishes kit. In practice, because it relies on trust and goodwill to ensure the items are returned (and clean), it needs to stay local and with a community focus. To begin, the word is being spread via the local Buy Nothing Groups, and also the various Perth Transition Town Network groups.

The administration of the kit is run by volunteers (me).

The plan is to record all the borrowing, and count the number of items reused and disposables avoided. In this way, we can measure the impact.

The plan is also to learn from the wins and successes and mistakes of this project, and use this knowledge to create a simple project template, so other people might be able to replicate the idea in their own communities.

It’s hard to talk too much about how it will play out as it’s early days, but by Christmas day 490 items will have been used and reused. That’s potentially 490 pieces of single-use and disposable packaging refused. By this time next year, the numbers should be well into their thousands.

I’ve put together a simple website (which I published yesterday) with some more info about how the kit works and what the project hopes to achieve. You can find out more at communitydishes.org.

There’s still some fine tuning to do, in particular with signage, record keeping, and logistics. The important thing though, is that the dishes are out there, being borrowed and reducing single-use disposables and litter.

I’m excited about the potential, and look forward to sharing more as the project finds its feet. I’d love to see other projects like this one spring up, and hope that the lessons I learn will help others.

Less waste, less stuff, and growing community.

Now I’d love to hear from you! Is there anything else you’d like to know about the project? Do you have your own experience with similar projects? Would you use something like this, if it was available? Anything else that you’d like to add? Please share your thoughts in the comments below!

DIY Recipe: Spreadable Soft Cashew Cheese

It is rare that I make something once and share it straight away, but I was so impressed by this recipe that I simply had to. Soft, spreadable and cheesy tasting, this simple blend of cashews and a few other things is a taste explosion, I promise.

If you’ve avoiding dairy, want to eat more plants or like trying new things in the kitchen, this is for you.

I’ve been wanting to experiment with making plant-based cheeses for a while, and I actually decided to go to a workshop to get started. (I went to one of the workshops at the Raw Kitchen in Freo.) Whilst I’m not afraid to experiment, plant-based cheese uses big quantities of nuts and I am afraid of buying ingredients and then throwing them in the compost.

The workshop allowed me to taste and smell and feel the texture of the different things we made – something I’d never glean from a recipe. Definitely worthwhile.

This cheese recipe is a slightly-tweaked-but-mostly-intact recipe from that workshop.

You’ll need to allow a couple of days from start to finish (but don’t panic, the actual making time is about 5 minutes. The rest is waiting around). You’ll also need a high powered blender or a food processor for best results, but it should still work without.

How to Make Cashew Cheese

Ingredients:

2 cups cashews, soaked overnight and then rinsed
2 cloves garlic, crushed
1/2 cup cold water
Juice of 1/2 lemon
2 tbsp olive oil
2 tbsp hulled tahini
4 tbsp nutritional yeast (nooch)
1/2 tsp smoked paprika
1 tsp salt
1 tsp probiotic powder (I used Inner Health Dairy Free Powder – I prefer powder to capsules as there is more ingredient for my money, and less waste/packaging)

A few notes on the ingredients:

Cashews are smooth, creamy and do not have a strong flavour or colour, making them ideal for plant-based cheese. Other nuts will also work but the result will be less smooth, more fibrous and they will have the flavour and colour of the nut used. They will still taste delicious though!

The nutritional yeast adds a cheesy flavour to the mix, and some yellow colour. It will definitely taste less cheesy without this, but a small amount of turmeric will add some of the yellow colour. 

Paprika adds some colour and also smokiness to the mix.

Probiotic powder is what ferments the cheese and gives it a unique tangy flavour, and probiotics are great for the gut. Honestly though, it is still super tasty without the probiotics, so if you don’t have, it is still worth making. You will be able to use straightaway as there is no need to wait for fermentation to occur.

Method:

Blend the soaked, rinsed cashews briefly until they resemble crumbs (this helps ensure it is smooth). Add everything except the probiotic powder, and blend until smooth. Try to avoid overheating the mixture – it is better to stop and allow to cool before blending again if it is taking a while to become smooth rather than running the blender continuously.

Add the probiotic powder and whizz briefly to combine.

Scrape the blender contents onto cheesecloth or into a nut milk bag, twist into a ball and suspend over a bowl to allow to drain. You could place in a sieve and suspend this over a bowl, or hang. Do not let the cheese ball sit in the draining liquid.

Leave at room temperature for 24+ hours to ferment. (My house is warm, and 24 hours works for me. If yours is colder, allow 48 – 72 hours.

Open the cheesecloth / nut milk bag and scrape the cheese into sealable containers (or a dish covered with wax wrap) and store in the fridge. The cheese will continue to ferment in the fridge, but much more slowly – you will notice the flavour getting more sour over time. Keeps for 5 – 7 days in the fridge.

Soft Cashew Cheese Recipe Suggestions

Spread on toast, use as a dip, or roll into balls or a log shape (roll in nuts, herbs, spices or dukkah for extra flavour) and serve on a cheeseboard. It also works really well stirred through pasta and – hurrah – it doesn’t separate. Cook the pasta and veggies first and stir the cheese through just before serving.

Now I’d love to hear from you! Have you experimented with making vegan plant-based cheese? Any recipes you’d recommend? Have you been able to find the ingredients in bulk? Any other thoughts? Please share in the comments below!

10 Easy Zero Waste Hacks from Instagram

There are plenty of zero waste solutions and plastic-free living hacks, and many are so small and simple (when you know what they are, of course!) that they never make it to a blog post. They’re the kinds of snippets that I share on Instagram – but that’s not very fair for those of you who don’t use the platform! Even if you do, it isn’t always very easy to find them again.

So I thought I’d put together some of my most popular tips over the year for you. None are big enough to be a blog post in themselves, but that doesn’t mean you should miss out!

1. Don’t let fresh water run down the drain – collect it to use.

Most of us are comfortable with the idea of turning off the tap whilst we brush our teeth, but when we’re waiting for the cold water to run hot, it’s easy to let it go straight down the drain.

Instead, use a bottle or container, collect the water and use it later.

I used to use old wine bottles to do this, but because my hot water tank is on the roof three stories up, it takes forever to run hot – it can be 7 litres of cold water first. And that is a lot of wine bottles. Now I have two big Klean Kanteen growlers, and I use my other water bottles for the extra.

I’ll use the water for cooking, and also in the garden. My hot water tank isn’t old, so I’m not too worried about using the water to boil pasta. However some people have old water tanks and don’t trust their pipes, and if that’s you, use the water for cleaning, to water house plants and on the garden.

2. Use your cooking water on the compost.

Sticking on the subject of water, collect the water from cooking rice, pasta and veggies, and pour it on the compost (or on the garden). There’s nutrients in that water, and they are going down the drain if you don’t save them!

If it’s water from cooking veggies you can probably use it to water plants, but pasta water will be too starchy.

I tend to use a saucepan to collect the water – ideally a dirty one so the hot water dislodges some of the food – and tip that outside.

3. Label your bulk jars using a grease pencil.

I rarely label my pantry jars, I mostly know what things are without the labels. Pasta – yep I can tell that by looking at it, no label required. The one thing I’ve found hard to identify is white powders. There’s a big difference between laundry powder and bicarb soda and rice flour, so it’s quite an important one.

I use a grease pencil. It’s a wax pencil, it comes off fairly easily so I’m not committing a jar to one type of ingredients forever, and the lead is wrapped in paper.

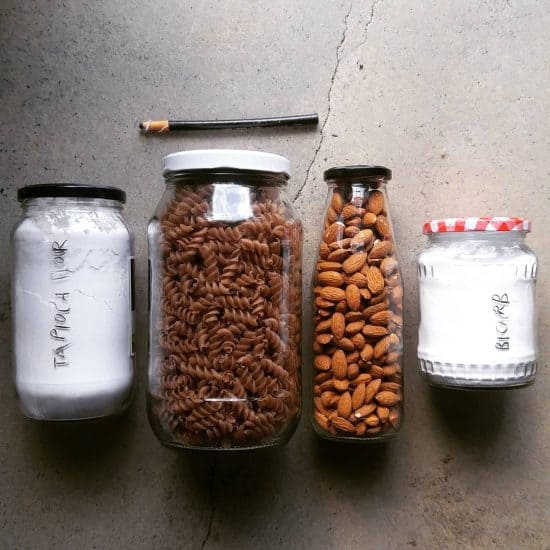
 Wax pencils (they are sometimes called chinagraphs) can be found in art supply stores, usually without packaging. I have a black one and a white one, although the white one is rarely used.

4. Reusables do not need to be single purpose.

I’m a fan of anything with multiple purposes – it means less stuff, and more use for the things I own. My KeepCup has been used far more often as a water glass, for buying things at the bulk store and taking home leftovers than it has been for buying takeaway coffee – which is something I rarely purchase.

Glass jars can be used for takeaway smoothies and lunch on-the-go, produce bags can be used for straining nut milk. The best one I heard recently was somebody using their hat to buy loose mushrooms from a grocery store!

5. Remove the labels from your glass jars without getting jar rage.

Glass jars are so useful in so many ways, and upcycling old glass jars is the most zero waste solution. But first, you need to get that old sticky label off. And sometimes, that can be a battle and a half.

Soak the jar in water, and hopefully the label will come loose. Try to scrape it off. If that doesn’t happen, wipe coconut oil on the label and wait a few hours, and then the label will come off.

You’ll probably be left with a sticky, gluey smear on the glass jars. For this, eucalyptus oil (and I’m told lemon oil works but I have never tried this myself) will get it off. Dab a small amount on an old rag, and wipe.

The result: gleaming glass jars that don’t have Dolmio labels with an expiry date of 1994 or “keep refrigerated” sitting in the pantry.

6. Save your onion peels (and other veggie scraps) to make stock.

Whenever I peel an onion, I save the tops and tails and outer skins and pop into a jar in the freezer. (Yes, glass jars can be frozen.) I collect until I have a good amount, and then I make stock.

To make stock you boil the skins with water. You can add other veggie scraps (or bits of veg) – zucchini, carrot, potato, garlic, herbs. I’ve found too many brassicas (broccoli, kale stems, cabbage etc) doesn’t make for good-tasting stock, so I leave these out.

I don’t tend to peel carrots or potatoes so I rarely have these scraps, and I often make stock just with onion. I then use the stock to make risotto. It can be cooled and frozen too.

7. Make DIY vanilla essence.

Anything in little bottles tends to be more packaging than product. To avoid the tiny little bottles, I’ve been making vanilla essence for years – using brandy. (I purchased a bottle to make a Christmas cake years ago, used a teaspoon – as you do – and then discovered I could make vanilla essence with the rest.)

Use 1-2 vanilla pods, slit down the middle with a knife, pop into a glass jar, cover in brandy and leave. The flavour infuses over time. I probably wait a month until I first use it.

Once it’s run out, I top up again with brandy. I do this a few times until I notice the vanilla flavour has diminished. Then I dry out the pods, grind to a powder and use in baking.

8. Cook more than you need, and freeze for later.

I rarely cook a meal for one. I’m a huge fan of cooking extra, eating leftovers few a few days, and freezing meals for later. Pasta sauce, lentil stews and dahl all freeze extremely well. I make quadruple batches of falafel and freeze half. Roasted veggies, extra lentils or beans – yep, I freeze it.

Crumble topping – make one, freeze one for later.

It doesn’t take much extra time to make more, and it makes exactly the same amount of mess in the kitchen, so for me it’s win-win. It means that when I don’t have much spare time to cook, I can fossick through the freezer and find something healthy, homemade and delicious without having to do too much.

9. Hack your recycling.

If the two choices are landfill or recycling, I want to opt for recycling. Because of the way our recycling is sorted in WA, size matters. Anything too small (smaller than the palm of your hand) will be missed, and probably jam up the machines.

There are a few hacks to get around the size issue.

With bottle caps, which are steel, pop into a steel can, and once it is half full, squeeze shut. The caps can’t fall out and will be picked up by the magnet when the metal are sorted.

With aluminium foil, save it up until it is a ball about the size of an Easter egg, and pop that in the recycling. When it’s this size the eddy current will be able to sort it. Wine bottle caps that are made of aluminium can be added to the ball, as can aluminium blister packs (if there’s no plastic).

10. Make tea from fresh herbs.

This is one of the easiest, cheapest and tastiest hacks ever. Rather than buy dried herbal tea, find the fresh stuff and make your own. Mint grows almost everywhere, it is hard to kill and people who grow herbs often are willing to share, so you don’t even need to grow it yourself.

I tend to drink mint tea, or lemongrass and ginger tea (I grow lemongrass, and can buy Australian ginger). My neighbours drink sage tea and lemon verbena. There are plenty of options.

Zero waste and plastic-free living is about thinking creatively and finding solutions. These solutions don’t need to be complicated or expensive. Often it is the simplest ideas that work best!

Now I’d love to hear from you! Have yo any great tips to share – either that you learned from someone else or made up yourself? Are there any hacks above you’d never thought of before? Anything you’re going to embrace? I’d love to know what simple hacks, tips and tricks you’ve learned so please share in the comments below!