How to get started growing vegetables…fast

At the start of the year, I started a project to transform my front-and-back lawn into a productive food garden. I got the compost cranking early on, and four chicken ladies moved in to help with pest control, weed suppression and providing manure (oh, and eggs). I’ve been slowly working on a garden plan, and my next steps were sorting out reticulation (to water the garden) and planting trees.

However, then life as we know it turned upside down, and priorities shifted.

In light of the continuing food shortages in the stores and impending isolation, not to mention that a lot of food sold here on the west coast is reliant on trucks arriving from the east coast (which feels fragile with all this uncertainty), I decided that growing vegetables was my new priority.

It seems that growing vegetables is everybody’s new priority, as veggie seedlings and packets of seeds have become the new toilet roll – selling out everywhere.

If you’ve decided you want to start growing food – whether you’re not sure where (or how) to start, or you just panic bought a heaps of seeds or seedlings and you’re not quite sure what to do with them, I thought I’d talk you through the process.

How to set up a vegetable garden…fast

One thing I want to be clear about is setting up a vegetable garden fast is not the cheapest way to do it. Fast will cost you more. As just one example, seedlings cost more than packets of seeds, and packets of seeds from a store cost more than swapping saved seeds with a neighbour.

As another example, making compost is cheaper than buying a bag from the store…. but if you don’t have a compost bin set up, you’re looking for at least 8 weeks before it’s ready. And that’s assuming you have enough stuff to fill it straightaway.

We are in unusual times, and what we might do in “normal” circumstances isn’t necessarily what we are doing now.

Fast costs more. But if your priority is securing a food supply for you, your family and your neighbours, or avoiding the stores as much as possible, the cost might be worth it.

Planting your veggie garden – containers or in-ground?

There are pros and cons to every option, and some plants will do better in one or the other.
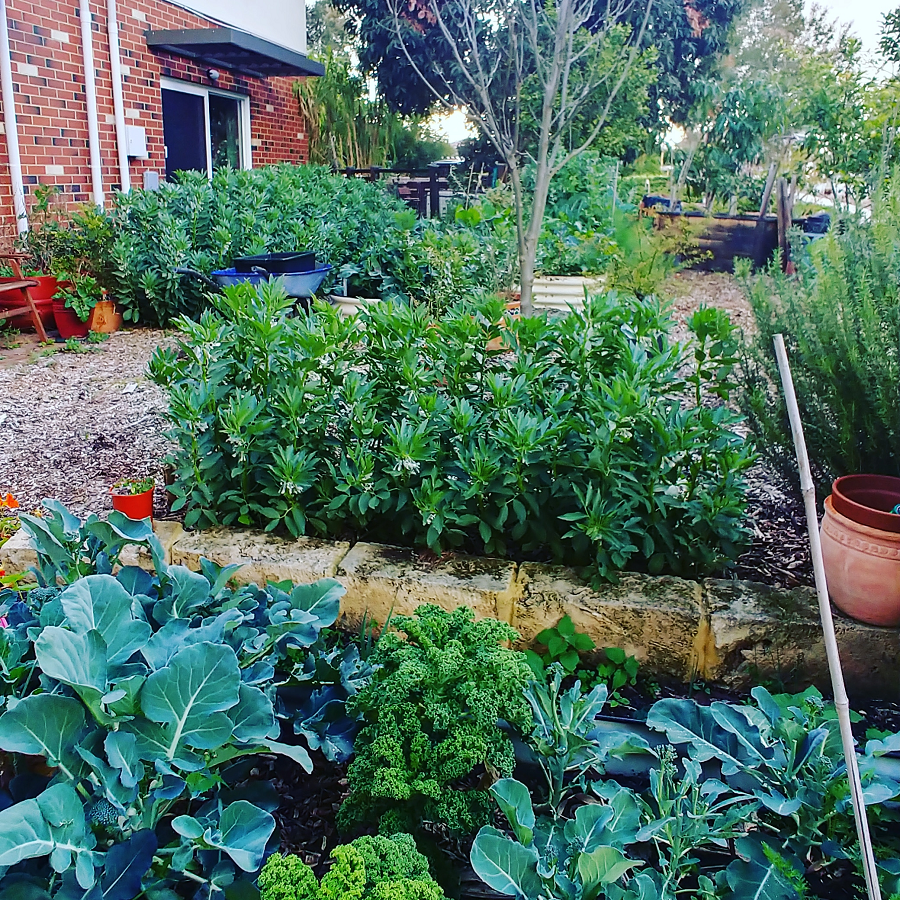
In-ground beds

This is the cheapest option by far, and in-ground beds are less likely to dry out or become waterlogged than containers. Plus, worms and other good guys are free to come and go. In a hot, dry climate like Perth, these work well because they lose less water than growing plants in containers.

On the downside, they aren’t great if you have mobility issues, and your dog, other pets or young children may not understand the difference between lawn and vegetable beds.

With in-ground beds, you do need to know how good your soil is. When I lived in the UK and had an allotment, I could put anything into the ground, add nothing to the soil, and get a great crop. If I plant out seeds or seedlings straight into the ground in Perth, they’d shrivel and die (or at least, not get very big). There are various amendments I’d need to add to my beds – compost, clay (I live on a sandpit), rock minerals, and potentially other things too.

If you’re not sure what I’m talking about, and you’re keen to get your veggie garden started fast, I’d suggest going with containers or raised beds and buying soil. If you have a little more time, I’d suggest finding some local gardeners to chat to (either garden groups on Facebook, or even the staff at the local garden centre) about what they’d recommend for where you live.
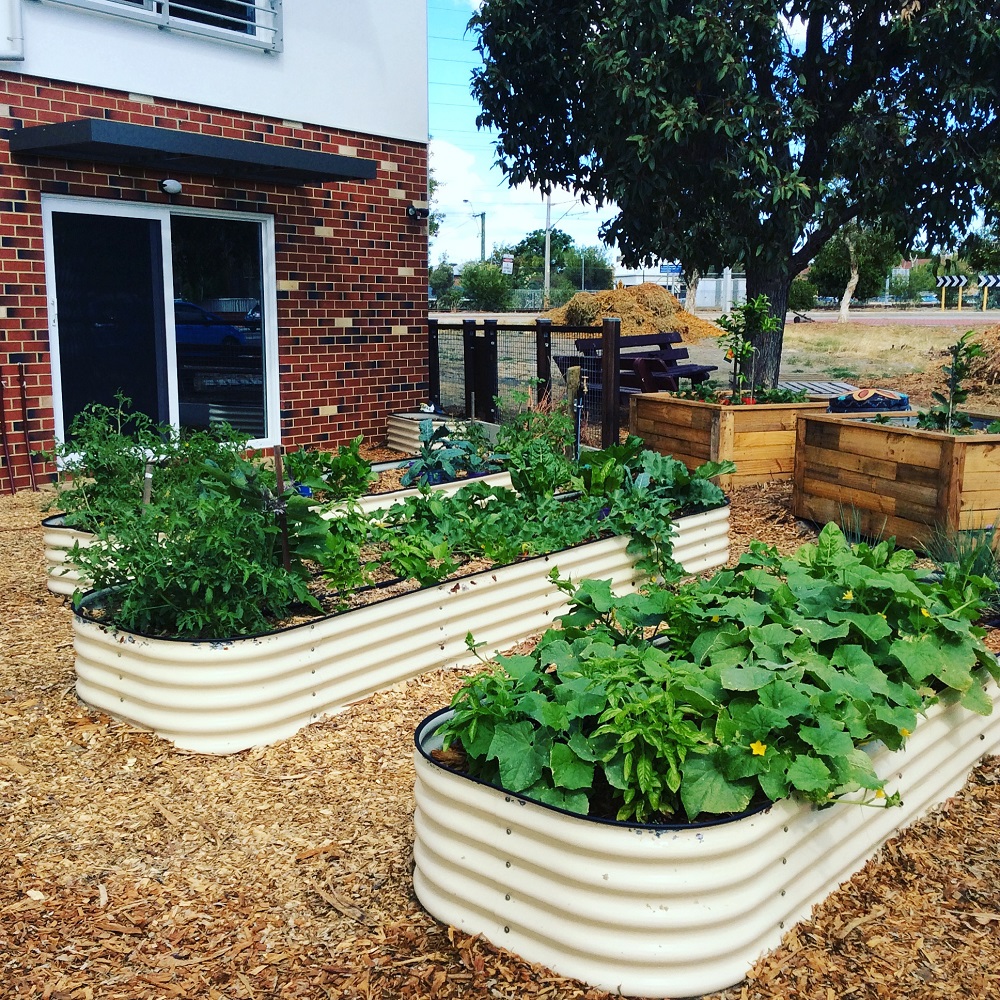
Raised garden beds

The cost of these can vary substantially. Brand new beds made from colourbond steel or wood, or made by a tradesperson are at the top end; second-hand beds can be sourced for less (they are usually easy to track down on online classified sites like Gumtree), and at the bottom end, people make their own with salvaged materials and offcuts.

One advantage of the metal ones is they are lightweight and easy to move – so if you find you’ve put them in the wrong spot, or decide down the track you no longer need them and want to sell them, this is fairly straightforward. Wooden beds are more difficult to move once in place, as are brick/slab beds.

In colder climates, raised garden beds can work well for crops that like warm summers (aubergines, tomatoes, peppers etc). In hot climates like Perth, they tend to dry out, particularly metal ones, that get hot (we’d be better with sunken beds, really) and aren’t ideal for the climate. They might be a good option if you struggle with bending and kneeling, or you suspect in-ground beds will be trampled by dogs and children.

Raised garden beds also need to be filled with soil: the bigger the bed, the more soil, which is another expense. There are ways to save on the cost of soil, if you go down this route:

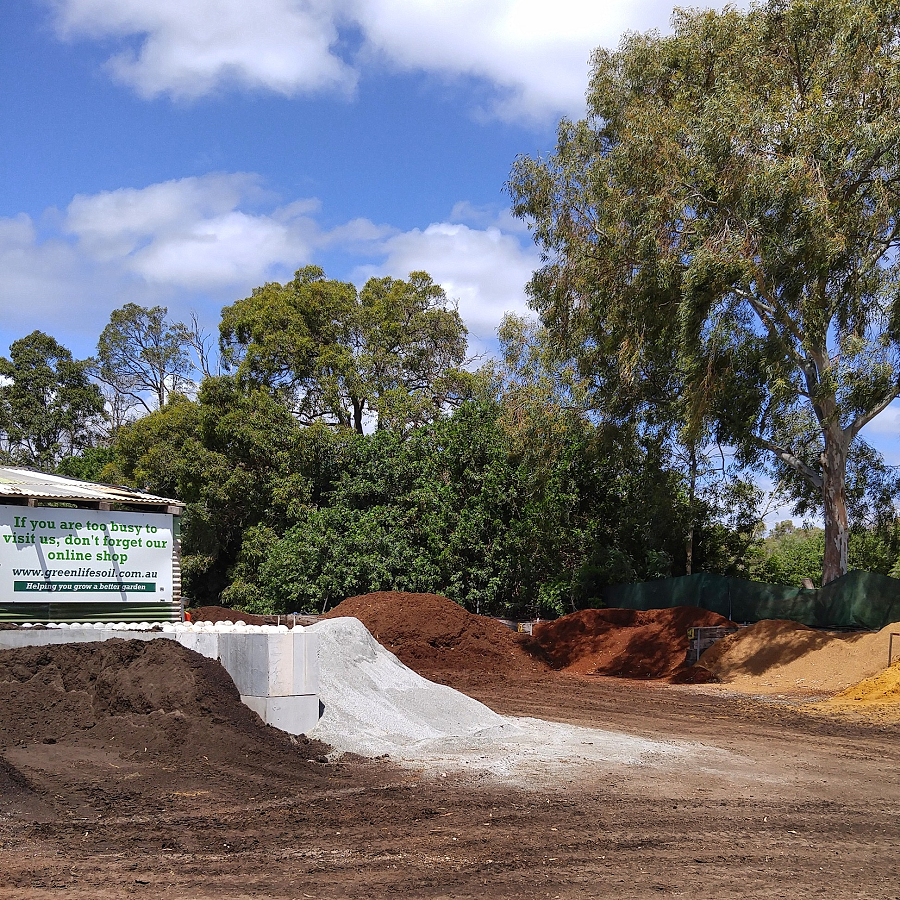
  • Rather than buying bags of soil, find a local soil yard where you can buy bulk soil. you may be able to bring a trailer and load up, or you may be able to order a soil delivery. It is much more cost-effective than buying bags (plus, no waste).
  • Buy soil suitable for growing vegetables, and buy the best quality you can afford. When it comes to soil, you get what you pay for.
  • Vegetables only have roots that are 25-30cm deep, so only buy good soil that will fill your beds 25-30cm deep. If you have deeper beds, fill the base with something else. I’ve seen people use empty milk bottles (because they have square sides they work pretty well), or you could fill with street tree mulch. If you have to buy soil, buy the cheapest soil for the bottom, and put the good stuff on the last 20-30cm only.
  • If you live in Perth, you can find bulk soil at Green Life Soil Co or Carlisle soil yard. Search for ‘landscaping supplies’ or ‘soil yard’ to find options near you. You can order street tree mulch Australia-wide from mulchnet.com.
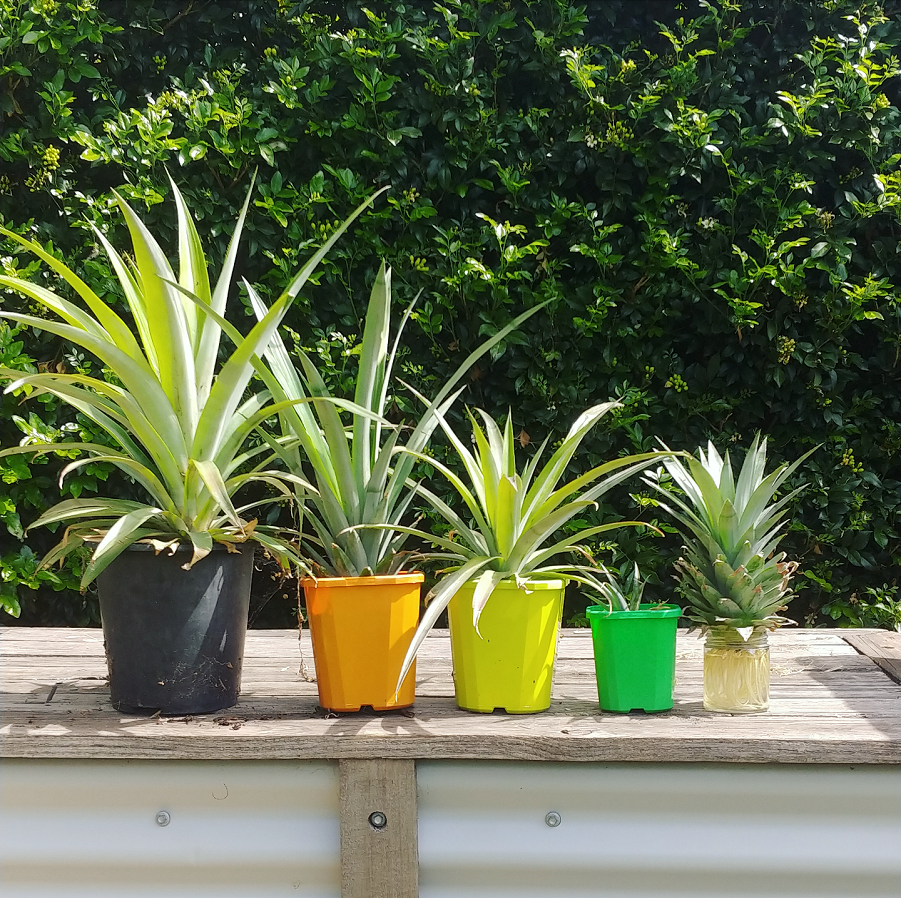
Containers

If you’re short on space or have a tight budget, containers are a good option. They can be anything from purpose-made plant pots to old wine barrels, to repurposed olive oil drums or plastic tubs. They need less soil than a garden bed.

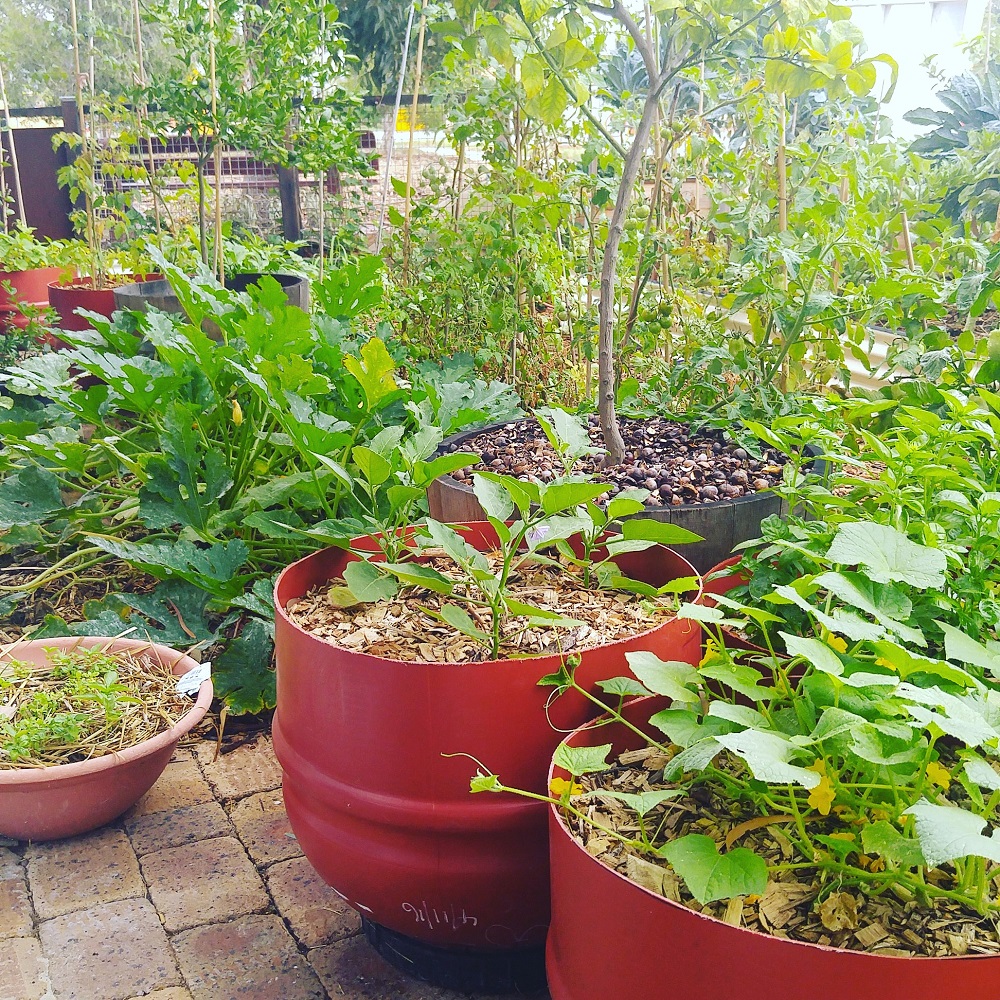
However, some plants are challenging to grow in containers, and whatever you do plant will need more looking after – watering more often and feeding the soil.

If you’re planning to grow in containers, check how big the plants will get and ensure you’ve chosen a big enough container – or you won’t get a crop. Lettuce, radish and spring onions won’t take up much space; cauliflower, broccoli and courgette/zucchini get huge, and you’ll need a big pot for just one plant.

Grow food in the right location

Vegetables need a certain number of hours of sunlight to grow. Summer vegetables like tomatoes, capsicums, squash, courgettes and cucumbers need full sun and lots of it. Kale, lettuce and spinach will still grow well with less sun.

When planning on where to put your containers or beds, you need to choose a spot that’s best for them rather than best for you. Full sun is ideal in winter (when daylight hours are less), afternoon shade is good in summer. The sun is also a lot lower in the sky in winter, meaning shadows from buildings and trees are cast a lot lower.

In an ideal world, planning a garden, you’d map out the sun patterns for spring, summer, autumn and winter (so 4 times a year) in morning, lunchtime and mid-afternoon. It’s easy to figure out where the sun is tracking in the sky, but how far the fence shadow or the neighbour’s tree reaches on the shortest day is harder to figure out. There are suntracking apps, but I prefer the slow approach. Usually.

Examples of shadow differences at the same time of day, three months apart (summer and autumn):

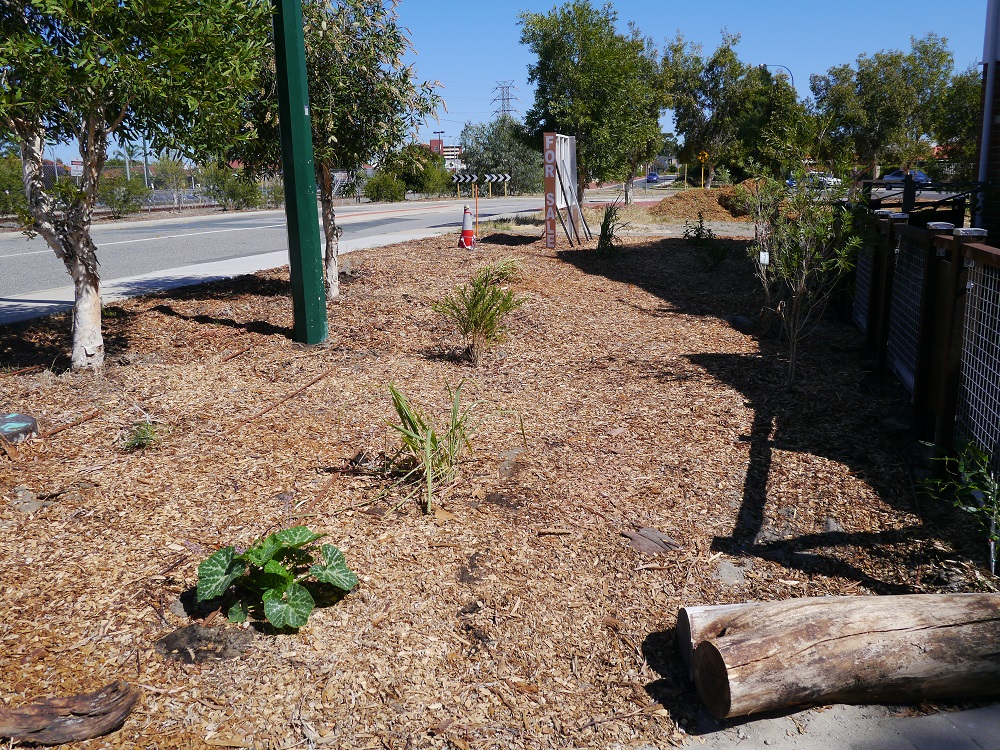
If you head outside today, in March, and make a note of where the shadows are, that’s a helpful start. Shadows will get shorter in summer and longer in winter. If you’re heading into winter and notice the shadows are already covering the site where you want to plant, it might not be ideal. If you’re heading into summer, there will be less shadow as the sun gets higher.

It’s an important consideration with in-ground beds, but matters less with containers, as you can move them. If you have the option, orient garden beds directly north (in the southern hemisphere) or directly south (in the northern hemisphere).

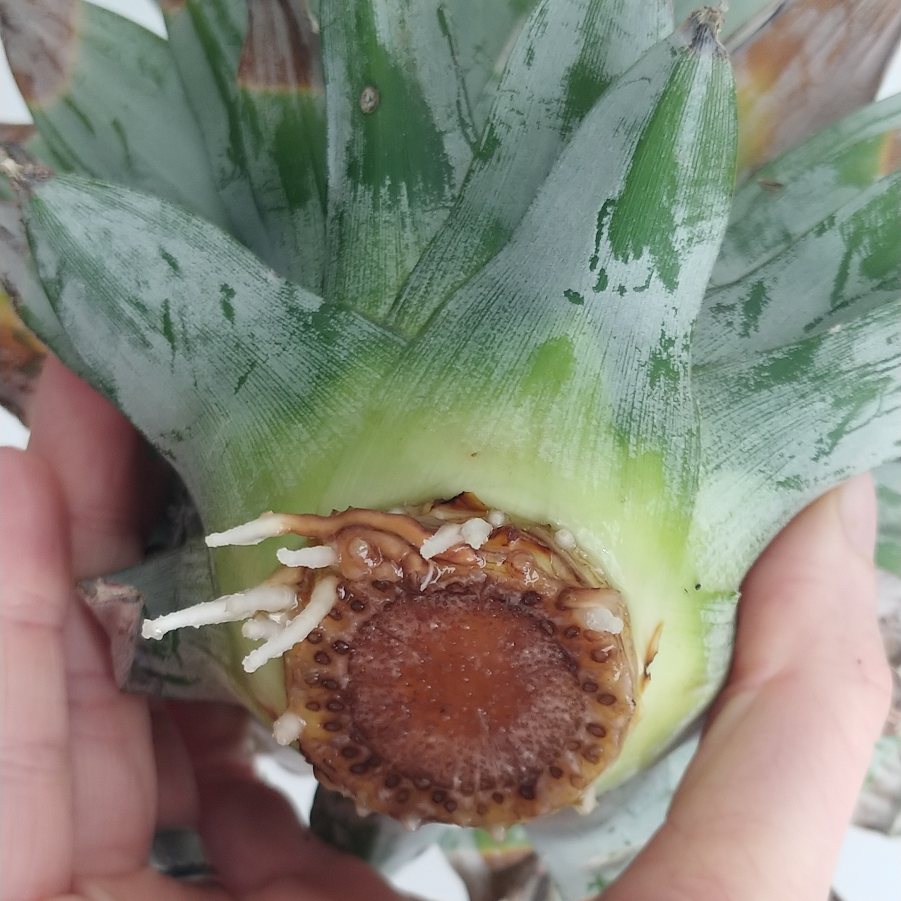
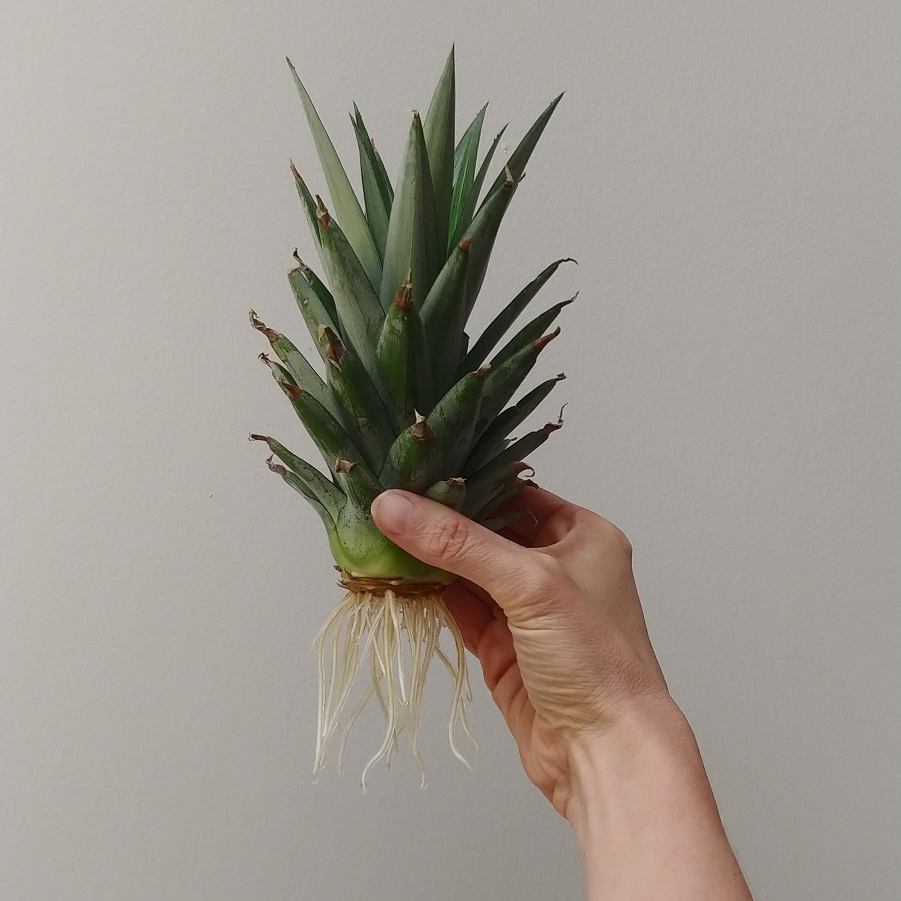
Choosing plants (seeds versus seedlings)

If you’re wanting to start a veggie garden quickly, you’ll want to choose plants that grow quickly and can be eaten quickly.

Vegetables that grow quickly and can be planted now (in spring in the northern hemisphere and autumn in the southern hemisphere) include:
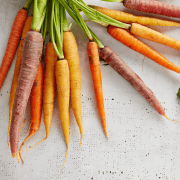
  • Carrots
  • Salad leaves – so many different varieties to choose from
  • Greens – kale, Swiss chard, spinach
  • Lettuce (which are really salad leaves left to grow into full-size lettuce)
  • Beans (bush or dwarf beans grow faster than other types)
  • Spring onions
  • Beetroot
  • Radishes (one of the fastest growing vegetables)

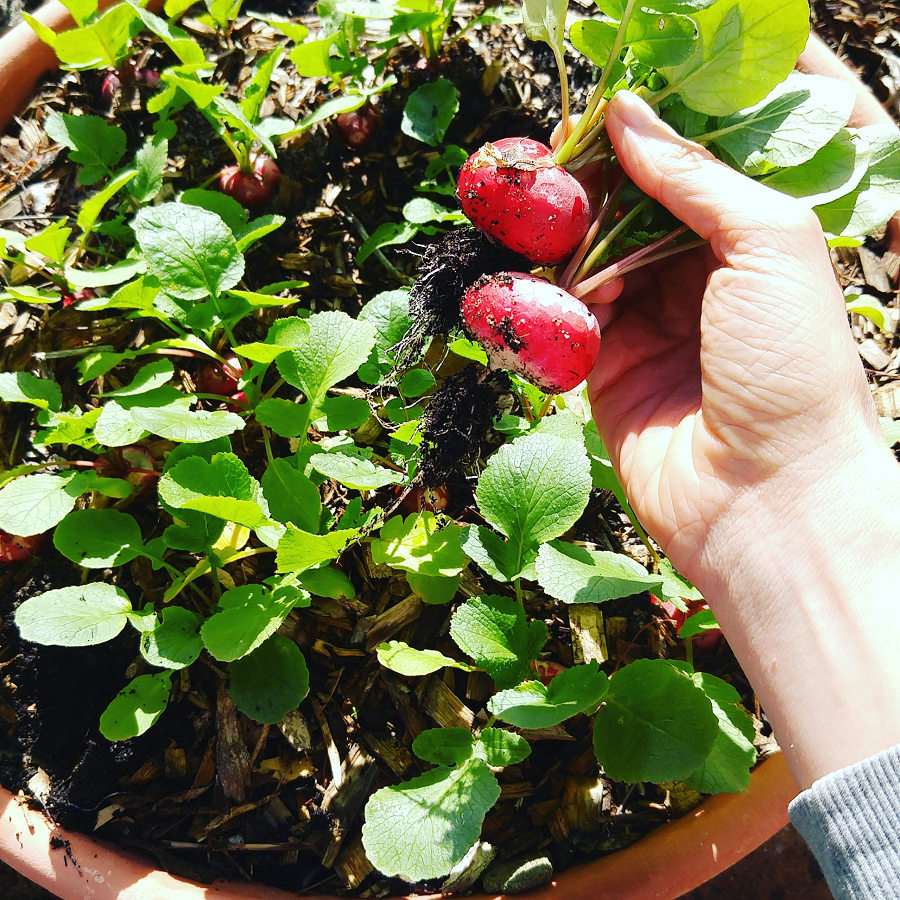
Generally speaking, the fast-growing varieties I’ve mentioned above are easy to grow from seed, and much more affordable this way. It’s better to avoid root vegetables as seedlings as transplanting can damage the roots. Plus, one root vegetable seedling will give you one root vegetable (so one carrot seedling will give you one carrot, compared to something like a bean plant, where one plant will give many pods).

Seedlings are more established plants, so you’ve got a headstart on the growing process. You might like to buy lettuce or spring onion seedlings, or slower growing vegetables (pepper/capsicum seedlings will save you a few weeks of growing time). If there are multiple plants in each cell, you’ll need to thin them out or they will suffocate one another and not grow well.

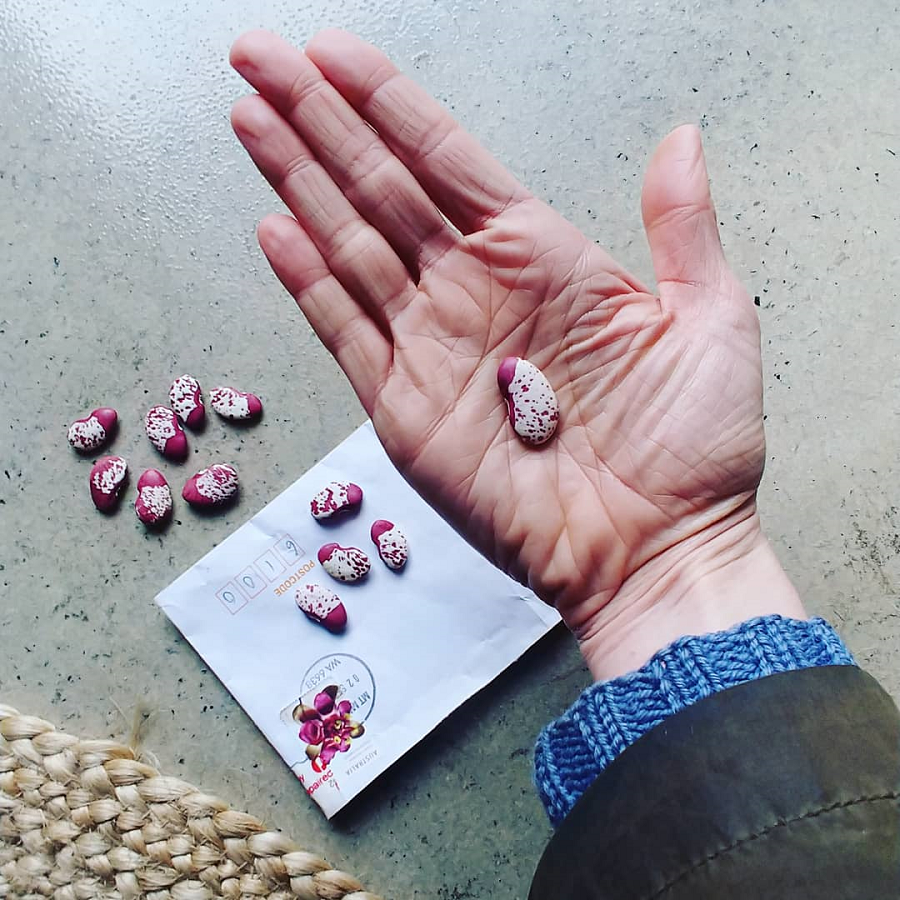
If you can’t get seeds or seedlings at the garden centre, online gardening groups are a great place to swap seeds. Even if you can’t go out, members will often post seeds to you if you cover the postage (I’ve done this in the past).

You can even plant seeds you find in your pantry – such as coriander, mustard, amaranth or parsley seeds.

Whatever you choose, ensure you plant according to the instructions (and if there are no instructions on the packet, check online). Some plants – like broccoli or cauliflower – need a large space to grow, even though the seeds are tiny.

Start small, and learn as you go

You’ll learn much faster once you’ve started, so don’t try to read everything beforehand. Start, but start small.

The way I learned to garden was sticking some seeds and plants in my allotment, and seeing what happened. Then, as I noticed issues (seeds not germinating, or yellow leaves, or plants being munched by birds) I’d look up solutions. Some seeds can take weeks to germinate (others are fast, so you may have a dodgy packet of seeds), yellow leaves can indicate a nutrient is missing from the soil, or perhaps there is too much watering, and netting or cut up plastic bottles can protect seeds from birds (in the UK, birds would always eat my beans – but here in Perth the birds aren’t interested).

If you really don’t know what you’re doing, don’t do too much too soon. Plant a few things one week, and a few things the next, and so on. Better this than spending a fortune buying a raised garden bed and planting hundreds of dollars worth of plants, only to realise down the track you put the bed in completely the wrong spot, and discover all the plants you chose are frost-sensitive after they are wiped out overnight.

There is so much information out there. Books, YouTube videos, blog posts, social media pages and groups. Where possible, try to find information that’s local to where you live. The people growing food where you live will know what pests are common, which varieties grow best, the weather patterns, what to plant right now, what you might need to add to the soil… and where to find what you need.

Growing food is fun, a useful skill to have, and infinitely rewarding. It’s easy to forget the problems of the day when you’ve got your hands deep in soil. And there is nothing (nothing!) that tastes better than a homegrown carrot. Not even chocolate. Promise.

Now I’d love to hear from you! Are you starting to try growing food for the first time? Are you stuck or have any questions? Have you been growing food for a while and have any tips for newbie growers? Anything else to add? Please share your thoughts in the comments below!

Why coronavirus does not mean the end of zero waste

You may have heard stories or even seen local businesses in your area make the decision to ban reusable coffee cups, or reusable containers. I first heard about this when Starbucks made the decision at the beginning of March to not only refuse reusable coffee cups but also switch all dine-in reusables (cups, plates, cutlery) to single-use disposables.

(Although interestingly they will – at the time of writing – still accept your pre-handled money, unlike other stores which are now also banning cash and allowing only contactless payments).

Around the same time I heard that Bulk Barn, the largest bulk foods store in Canada, is no longer allowing single-use containers. Now, more and more places are announcing similar policies. And I started seeing people ask – is this the end of zero waste?

No, coronavirus is not the end of zero waste. Here’s why.

Coronavirus and the rise of single-use disposables

Before I even begin, I want to emphasise that we are in a unprecedented situation, and it is hard for any business owner to know how to react or what to do to reduce the spread of disease and keep their business running. I think many stores want to do ‘something’ and without clear guidelines as to what this might be – other than shutting doors, which isn’t an easy business decision even if it’s great to prevent the spread of disease – they are trying to take action however they can.

So we might have our opinions on what is inconsistent and what is overreacting and what is sensible and what is necessary. But they are just our opinions, and even the experts are in unchartered territory right now.

Something I read at the weekend that really stuck with me was this: “When you’re dealing with exponential growth [which is what experts are saying we have with infection rates] the time to act is when it seems too early.”

So let’s save our judgement, because we really don’t know.

But what I know to be true – whether we see more and more businesses switching to single-use disposables over reusables because of coronavirus, and even if those businesses decide to keep policies in place after the threat has passed (assuming that it does), is that it doesn’t spell the end of zero waste.

As so often happens in the media, it is being framed all wrong.

Coronavirus can’t touch what zero waste really is

We could have a conversation about what ‘waste’ really means, and whether single-use disposables are truly a ‘waste’ if they are helping reduce the spread of disease.

(After all, almost all of us would argue that hospitals are a great place to use single-use plastic, for exactly this reason.)

But we are not going to have that conversation. Because that keeps the conversation around reusables, and anyone who has been trying to live low waste or zero waste for more than about five minutes knows that the choices we make and habits we form are so much more than reusable coffee cups and takeaway containers.

Zero waste is not – at its heart – about reusables. Zero waste is a mindset. It’s an attitude, a philosophy, a goal, whatever you might prefer to call it. Reusables make zero waste living easier, but they aren’t a make-or-break.

The idea that zero waste is over because we can no longer purchase takeaway coffee from a multinational corporation in a reusable cup is missing the bigger picture. Takeaway coffee generally – there are bigger issues, when it comes to waste. Yes, as a society (well, in western parts of the world, and for the more privileged part of society) we might drink a lot of takeaway coffee, but it’s a small part of the global waste footprint.

Regardless, it is disheartening to see businesses take a step backwards (in terms of sustainability) and make these choices – even when they are justified for other reasons.

Rather than feel frustrated, I wanted to remind you of all the ways that we can try to live with less waste. Because there are plenty of things we can still do, and I like to focus on the positive (and the practical).

Zero waste things you can do in spite of coronavirus

Think creatively about the packaging you need to use. You might not have a choice about being able to use your own containers to the store. You might not currently have a choice with which store you buy your groceries from (if your preferred or regular store has run out of what you need). But maybe you can think creatively about what you buy or how you buy it to reduce your packaging (particularly single-use plastic).

Could you choose the unwrapped produce? The bigger pack sizes? The options without individual packs inside packs? The brands packaged in cardboard? Could you by in bulk (rather than from bulk) and split a larger amount with friends or family? If you can’t do it all, go for the small wins. It all helps.

Make something from scratch. Whether you simply haven’t been able to get something you usually buy pre-prepared, or your simply faced with more at-home time than you’re used to, now is a great time to learn to make something from scratch. Been wanting to try DIY nut milk since forever? Wondered about making bread, or crackers? Fancy giving DIY moisturiser a go?

Perhaps you can use this situation as an opportunity to try ‘one more thing’.

Reduce your food waste. You might not be able to choose whether or not you can BYO packaging, but you can work to ensure you’re not wasting the food that you buy. With the panic buying we’re currently seeing, it makes even more sense to ensure we are using up what we actually buy before it goes bad.

Make sure you are storing food properly so that it lasts, clear out your freezer to make room for leftovers, make a ‘use me first’ shelf in the fridge so everyone in your household knows what needs eating first.

(I’ve got a free resource coming soon all about reducing food waste, so keep your eyes peeled.)

Compost your food scraps. This is different to reducing food waste. This is ensuring that those inedible bits (cores, pips, stems, outer leaves etc) are not put into the landfill / general waste bin. Whether you can set up a system at home – I’ve written about composting, worm warms and bokashi systems if you’d like to know what your options are – or whether you make the most of community composting services, this is a great way to reduce waste.

Now is a great time to set something up – or at least start doing the research.

Buy less stuff. The best thing you can do to reduce your waste is to buy less stuff. Even ‘sustainable’ stuff has a footprint. A big part of the zero waste lifestyle is making do, and making things last. Maybe that means getting stuff fixed. It’s extremely unlikely you’ll never need to buy anything again ever – but as a general rule, the less you buy, the more sustainable you are and the less waste you create.

If you need something, see if you can borrow, or find it for free on Freecycle, Freegle or Buy Nothing. Libraries don’t just lend out physical products, they lend out ebooks, online movies and electronic versions of magazines too – so even if you can’t get to your physical library, you might have options. If you need to buy something, check out the second-hand options first.

(Whether this is possible will depend on what it is and where you’re living – and what the isolation restrictions are – but it is still a consideration).

If you do need to buy something brand new, don’t feel guilty about that. There are better ways to use your energy. Just try to make those purchases mindfully.

Learn more about the issues you care about. You might not be able to take action now in all the ways you’d like, but you can use this time to read up on topics that interest you, try out some new skills, and connect with like-minded people (even if only online, for now).

There are so many great books (or ebooks and audiobooks) and useful blog posts. And courses and videos. And social media pages and groups.

Take the time to get informed.

Write letters and apply pressure to those in power (or make a plan to). It might seem like an inopportune moment to be hassling your supermarket about their single-use plastic packaging policy, or asking your local government member to support a plan to divest in fossil fuels, but these issues aren’t going away, even if they are buried under more pressing needs.

(In fact, some governments and companies are using the fact that others are distracted to push through unpopular decisions, such as the announcement this week by the Victorian government to lift the moratorium on onshore drilling for gas.)

If you have the time and headspace, you might want to use it to start (or continue) to apply pressure on businesses, organisations or government officials to demand change, or ask for answers on policy and decision-making.

You don’t have to send any letters or emails you write straightaway. If the timing seems insensitive or you know it won’t be looked at, you can prepare for when things are settled, do your research, and be ready to go.

Keep supporting your local zero waste store, or independent local businesses, even if they temporarily have to change their policy and disallow reusables. You’ll want them to be there when things get back to normal, so keep supporting them whilst things get tough.

It’s a lot easier for big multinationals to weather disruption than small stores. They need our help.

I don’t want to sugar coat anything – we are in the strangest of times. There are lots of things to be concerned about. But multinational companies opting for disposable coffee cups isn’t one of them. We are better placed focusing our energy elsewhere.

Now I’d love to hear from you! How are you feeling about waste and sustainability issues – have they slipped from your radar, are they there in the back of your mind, or are they at the forefront? Are you coping or are you struggling right now? There’s no right or wrong answers here and definitely no judgement so tell us how you’re feeling and where you’re at, and share any ideas or thoughts in the comments below. We’re in this together.

Learn skills + share them: how to take action in times of uncertainty

I’ve always been fascinated by skills. Particularly hands-on ones. I’m in awe of people who have skills that I do not – like the shoe man (not a sexist gender assign – the two brothers who run the shoe repair place at my local shopping centre call their business ‘The Shoe Man’), or people who know how to sew, or make things with wood or clay, can fix things, or weave, or, or…

The more turmoil there is in the world, the more I’m drawn to learning skills. Knowing how to do things, even simply understanding how things work, gives me a sense of control (and comfort) in times of uncertainty.

I’m not trying to be completely self-sufficient – in fact, I don’t believe that’s a thing. I know that us humans need each other way more than we’d like to admit. No-one can excel at all the things. Having skills is not about self-sufficiency but self-reliance and community resilience: we need to share the skills we have with others and look after one another.

One of the best things about my zero waste journey has been learning new skills. There are still so many I’d like to tackle (weaving! basket making! grafting!) but I’ve definitely added a few to the toolbox over the years.

I’m grateful that I’ve had the opportunity, and comforted that I can draw on them now.

I wanted to share the skills I have not to blow my own trumpet (I can’t play the trumpet! Not a skill I have!) but to get you thinking about the skills you have, and the skills you want to have.

And then, I want to persuade you to share them (but we’ll get to that at the end).

Soap making

This is one of my newer skills (not shared on the blog yet as I’m still at the learning stage) but it’s what inspired me to write this post. With the coronavirus pandemic, a few things have been consistently selling out at the stores – tinned tomatoes, rice, pasta, toilet paper… and soap.

I’ve needed to make a batch for a while, but it takes a few weeks to cure (and harden – which makes it last longer) – and before the making happened, I ran out. So I asked my friend (who is a prolific soap maker) if she had any spare from her previous batch, and she did.

Three bars of soap, no need to go to the shop, no panic rushing around because everywhere was sold out.

Soon I’ll schedule myself a soap making weekend – and one batch will last me most of the year. (If you want some motivation to give it a go, good old-fashioned soap kills coronavirus. Here’s the science.)

DIY skincare

I make a few of my own products from scratch. I’m a big fan of simple, no fuss, easy recipes that require no specialist equipment and ideally use edible ingredients (meaning I can raid my pantry).

I don’t make everything from scratch all of the time. Recently I purchased some toothpaste because I just couldn’t bring myself to make it – even though it’s a two-minute job. (It’s just that there are always a hundred two-minute jobs that need doing, and this one never got higher up the list.)

But if toothpaste runs out at the store, I won’t panic – I’ll make my own.

I you’re interested, these are the things I make and recipes I use:

DIY toothpaste recipe

DIY deodorant recipe

Alternative deodorant recipe (sodium bicarbonate/baking soda free)

Cold cream moisturiser (can also be used as eye make-up remover and cleanser)

DIY zinc cream (used as sunscreen)

I use a shampoo soap bar (which I buy) and a vinegar rinse to wash my hair; prior to this I used bicarb or rye flour in place of shampoo, and it worked well. I’d happily switch back if I couldn’t buy the soap.

If you’re curious, find out how washing your hair with bicarb and vinegar works.

(Oh, and I use white vinegar, which I buy, but I could easily switch to apple cider vinegar, which I make. It’s super easy and you just need apple cores, a bit of sugar and a jar. Link to DIY apple cider vinegar recipe here.)

Learning to cook

I think knowing how to cook is a really underrated skill. I’ve learned to cook over time (because nobody is born with this knowledge!), but going zero waste really next-levelled my cooking game, because I no longer wanted to buy those pre-packaged and convenience foods in plastic – and so I had to learn how to make my own, from scratch.

I don’t think I’d ever cooked a dry lentil or bean before starting out on this zero waste adventure. Turns out, if you can boil water, you can cook lentils. They are cheap, nutritious and delicious. They also expand up to three times when soaked and cooked (both economical and space-saving – a single packet of lentils takes up much less space in the pantry than the equivalent in cans).

Despite knowing how to cook most of the things, there are still days when dinner consists of toast (I’m not proud) or a bowl of pasta with lemon juice, lemon zest, capers, olive oil and parsley. But importantly, the skills to make things are there.

And there’s always more to learn. I’m keen to try making tofu and tempeh. I said that last year. (Oh, and the year before…) Slowly, slowly.

Learning to grow food

I’ve been growing some of my own food for 10+ years (not all of my own food, not even close!) although I had to relearn much of what I knew when I moved from the UK – where I started out – to Perth, which has a completely different climate.

From an allotment to a small balcony, to a bigger balcony, to community gardens and a community orchard, and now my own back yard, there have been lots of lessons.

With the space to now grow fruit trees, I’m excited for the next stage.

But even in the days with the smallest balcony, there were a few herbs. Something alive and edible. Even without land of our own, it’s usually possible to grow something. Microgreens are another good place to start.

Learning to forage

Another useful aspect of growing food is learning to recognise plants, as there are a surprising number of edible plants and fruit trees on public land. Within walking distance of my place there’s an almond tree and a pecan tree (although good luck beating the birds to those), a fig tree, and several lilli pillies. There are also several overhanging fruit trees – lemons, macadamias and mangoes.

If there’s a black stain on the pavement, there will be a mulberry tree above your head.

(When I was in the UK, brambles – which grow blackberries – were in hedgerows everywhere. There were some apple trees in the square next to where I worked. And mushroom gathering is a growing pastime – one I sadly didn’t embrace before I left.)

Plus, wherever you are… a lot of edible weeds. Which is a whole other food source – and one that grows rather prolifically! Maybe this is a skill reserved for the zombie apocalypse… but you never know, and it’s good to be prepared ;)

Learning to preserve

I learned to preserve when I first got my allotment, because if you grow food you will grow more than you can eat. Things only last so long in the fridge, and there is only so much space in the freezer. Plus freezing vegetables doesn’t do much for them.

Preserving is a way of making things last much longer – often without the need to refrigerate (although some preserves are better refrigerated). Many preserves will last upwards of a year – right around until the next harvest.

I started out learning how to make jams, pickles and chutneys. When I moved to Australia I learned to ferment (sourdough, yoghurt, vegan cheese and vegetables), and more recently got started with dehydrating.

When my fruit trees are cranking (well my future fruit trees – I don’t have many yet) I plan to get into canning – which requires some specialist equipment.

Learning to mend

I can sew a button back on. I can darn holes in my socks. My mending knowledge is no way near extensive (in fact, I’ve pretty much shared my arsenal of expertise) but I’m keen how to learn more about how to mend. Making things last is an excellent skill to have.

(My friend Erin, who is a marvellous mender, has just published her first book Modern Mending, pictured above. Reading and then trying out some of the techniques in this book is one of my goals for the year.)

Learning to share

I truly believe that this is the most important skill of all. Because setting yourself up for ‘self-sufficiency’ by keeping all your skills (and products of those skills) to yourself, and sitting back smugly whilst the world outside – and your neighbours – are struggling is a false victory indeed.

There’s some stuff I’m never going to make. No-one (or very few at least) has time to make all the things. Plus some stuff I find fun to make, other things I find useful to make, and yet more things I just don’t feel that need.

A week ago I gave my neighbour some eggs. A few day later there’s a knock on my door – she has made fresh pasta and has some for me! Pasta isn’t a thing I’d make, and chickens aren’t a thing she’d keep. Sharing skills (and the product of those skills) helped both of us.

(Oh, and she also made pasta for her neighbours on the other side, and the ones next to them.)

Other friends make kimchi, have DIY skills, own tools, can mend, and the list goes on.

Sharing is a skill I definitely want to work on more. I have some incredible generous friends, and neighbours, who give freely – and who inspire me to do more. It’s something I really want to focus on this year.

You’d think sharing might encourage others to take advantage, but I find the opposite happens. Sharing breeds generosity.

I’m offering this up as a solution because it’s worked for me. It’s something practical (and positive) that we can do with our energy and time. If you’re feeling anxious about the way the world is going, or you’re wondering what to do as we’re advised to stay home more, perhaps learning a new skill is a way to put that nervous energy into something productive.

And sharing (be it knowledge, or physical stuff) is a way to help others benefit from what you’ve learned.

Now I’d love to hear from you! What skills do you have, and what skills do you want to learn? Have you been able to share your skills with family, friends, colleagues or your wider comunity? Do you have any other ideas for building resilience in our communities? Any other thoughts? Please share in the comments below!

How to grow a pineapple from scratch (from a pineapple)

This year, I’m working hard to transform my little patch of lawn into a productive food forest – or the beginnings of one, anyways. (They say Rome wasn’t built in a day, and I’m pretty sure they say a forest doesn’t grow in a year – but the foundations can be laid, for sure!)

If I was to buy a heap of plants to fill the space, I’d be bankrupt pretty quickly. Where possible, I’m trying to fill the space with plants I’ve grown from nothing – or rather, from cuttings, seeds, roots and runners.

It’s not possible with every plant I’d like to have, but there are lots of options.

I love the idea of using ‘waste’ to create something new. And I love watching nature do its thing. One of my favourite things to grow right now is pineapples. They are magical.

I thought I’d talk you through the how.

Pineapples are a tropical plant, but they will grow successfully and fruit in Perth (where I live). They’re also quite a fun plant, so they look good regardless of whether they fruit or not – but having plants that could potentially also feed me in the future is a winner.

If you’re not in a Mediterranean or tropical climate, you can still grow pineapples, but they’ll need to be kept indoors during the cooler months. I’ve read that it’s possible to get them to fruit, but I imagine it’s a lot more work.

Nevertheless, they make a fun indoor plant if you’re in colder climes. A cool experiment. A good conversation starter. An excellent gift.

Here’s how you grow one.

Step-by-step guide to growing a pineapple

You’ll need a pineapple with its green spiky head attached. If you’re lucky, you’ll find a pineapple with a more than one head, or possibly a main head and side sprouts. For every head, you’ll be able to grow a plant, so the more the merrier.

This pineapple has a main head, and a little side shoot to the side. Two future pineapple plants for the price of one pineapple.

Next, chop off its head – or rather separate the fruity part from the green spiky part. You want to try and cut between the fleshy pineapple part and the head so that there is no fruit attached to the green head part. (The fruit will rot which won’t be good for the plant.)

Pull off some of the bottom outer leaves. You may see roots when you do this, or you may just see little stumps that will grow into roots. Pull off enough that there’s a small ‘stem’.

Sit the pineapple on top of a jar filled with water, ensuring the stumpy root part is submerged. The leaves can help prop the plant up on top of the jar.

Suspending the pineapple rather than sitting in a saucer ensures the roots have space to grow downwards.

Wait.

The pineapple may sprout roots straightaway, or nothing may happen for ages. (I’ve tried two varieties: one sprouts straightaway and the other takes forever.)

Ensure the water is topped up so the root part stays submerged. I haven’t found it necessary to change the water.

Eventually, roots appear.

I wait until the roots reach the bottom of the jar (we are talking a few weeks at least), and then I repot in some well draining soil. Eventually I plan to put mine in the ground, but they can be grown in containers.

You have a pineapple plant!

More things to know about growing pineapples

Pineapples do not grow or fruit quickly. Growing a pineapple this way will take 24 months to fruit, and another 6 months for the fruit to develop. Plus one plant grows one pineapple, so you won’t be inundated in pineapples.

Another thing to know about pineapples: they take most of their nutrients through their leaves, not the soil. Feeding with worm castings, soluble seaweed solution or another natural feed is better than synthetic fertilisers which may burn the leaves and damage the plant.

Finally, you might come across information that tells you that you don’t need to bother getting the pineapple head to root before planting, and you can simply stick the freshly cut head straight into a pot or in the ground. Personally, I love watching the magic of roots appearing right before my eyes.

That would be lost if I simply stuck the head in some soil, which is why I prefer this method.

Here’s the beginnings of my pineapple plantation (all grown from pineapple tops)…

Now, doesn’t that just make you want to head to the shops to buy a pineapple?!

Now I’d love to hear from you! Have you had any success growing plants from scraps? Have you had any fails? Anything on the to-do list for one day soon? Any questions about growing plants from scraps in general? Anything else you’d like to add? Let us know your thoughts in the comments!