Using Oil as a Facial Moisturiser (+ A DIY Recipe for When Oil Alone is Not Enough)

I never thought I was a sucker for marketing. But when it came to beauty products, I used to spend a fortune buying products with names I didn’t understand (but sounded fancy) from department store beauty counters. You know those counters, the ones with the ladies wearing lab coats (oooh, how science-y!).

I thought those products were better for my skin. Plus they looked so luxurious, with all that (plasticky, single-use) packaging.

{Cringe.}

When I decided to go plastic-free, I realised that rather than trying to replace all of the products in my bathroom, it would be better for my sanity (and success rate) if I chose to simplify. Meaning, less products. I’ve talked about the switches I made and my natural skincare regime before, but today I wanted to focus on one aspect of that: moisturizer.

I used to buy an eye cream, a day cream, a night cream, and body lotion. Maybe after-sun in summer. It makes me laugh (or cry, perhaps) to tell you that, because I didn’t think I was a high-maintenance woman. Those marketing peeps got me good.

Rather than try to find 5 alternatives without packaging, I decided to go for one simple swap to replace all of them. Rather than using moisturiser, I switched to oil.
Using Oil as a Moisturiser

When I say I use oil as a moisturiser, I mean oil as a single ingredient. I do not mean oil-based products or oil blends that contain other chemicals.

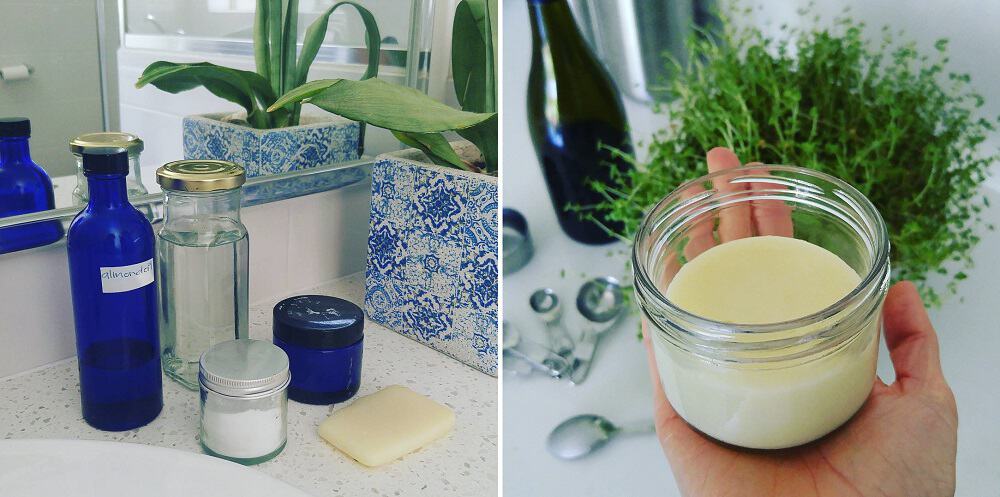
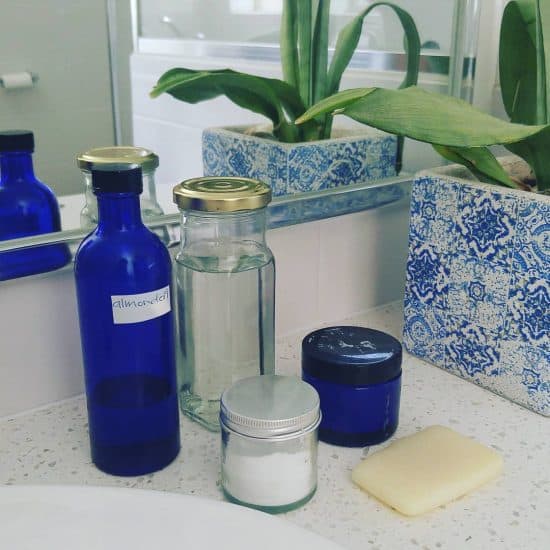
The staple oil I use as moisturiser is sweet almond oil. It is easy to find in bulk, absorbs well, is a neutral colour and has a very mild fragrance.

I have also used jojoba oil, rosehip oil, olive oil, hemp seed oil, coconut oil and shea butter. Jojoba oil is thought to most closely mimic the skin’s natural sebum. Rosehip oil is great, and apparently has anti-aging properties but is more expensive. Olive and hemp seed oil have a slightly green colour and need to be thoroughly rubbed in to avoid a green tinge. Coconut oil and shea butter are more effort to apply (both are solid at room temperature).

One of the other properties that differs between oils is their ability to block pores. Oils are graded on their ability to block pores, known as their comedogenic rating. (A comedone is a plug of dirt, bacteria and oil that blocks a pore and causes a spot: usually a blackhead but sometimes a whitehead).

Ratings vary from 0 (will not clog pores at all) through to 5 (likely to clog pores).

Almond oil, jojoba oil and olive oil are all graded 2, which means they have a moderately low chance of clogging pores. Rosehip oil is rated 1; hemp seed oil and shea butter are non-comedogenic with a score of 0. Coconut oil has a score of 4, and some people who use coconut oil find they do break out in spots.

People with dry skin tend to have smaller pores, and are more suited to oils with a lower comedogenic rating (2 or below). I have dry skin and almond oil works fine for me.

Does using oil make your skin oily? Actually, no.

I know that sounds counter-intuitive. But our skin produces its own natural oil, called sebum. It is produced to lubricate, waterproof and protect the skin. The absolute worst thing we can do is use cleansers and chemicals to try to strip this oil from our skin. That just makes our skin react, and produce more sebum.

Using oil doesn’t strip this sebum, and doesn’t stimulate the skin to produce more. Some people do produce more sebum than others, but that is due to more active sebaceous glands.

Using oil as moisturiser will not make your skin oily.

Oil can make the skin shiny, at least until the oil is absorbed. If shiny-ness is something you care about, a simple face powder will sort that out.

Rather than make the skin oily, using oil can make your skin dry out, particularly if you are prone to dry skin, as I am. I’ve talked about this below, and what to do if this happens.

Tips for Using Oil as Moisturiser More Effectively

Although I say I use oil as a moisturiser, oil does not actually contain moisture. It works as a barrier on the skin, preventing moisture loss. For most of the year this is fine, but in winter, when heating, extra hot showers and exposure to cold winds causes my skin to dry out, the oil cannot add moisture back in.

In contrast, most moisturisers are oil blended with water and stabilised with emulsifier. When they are applied they add moisture to the skin, and the oil acts as a barrier to keep it there.

When I start to notice dry patches on my skin, applying oil alone does not hydrate my skin. It appears to work temporarily, but the dry skin returns. There are some things that I do to help hydrate my skin.

Apply Oil Before Showering

In winter I always apply oil to my face before showering. This provides a barrier to stop the hot water and steam drying out my skin.

Avoid Soap or Soap-Based Cleansers

I use soap on my face very rarely in winter, and do not use it on my body every day. Instead, I use water and oil. Oil cleansing is an age-old method of cleansing, working on the premise that like dissolves in like. Grease and dirt on the skin are replaced with clean oil. It is as simple as putting a small amount of oil on the skin, and then wiping off with a flannel.

Apply Oil After Showering, But Before the Skin is Completely Dry

When I get out of the shower, I blot my skin dry with a towel but I always apply oil to my face before my skin is completely dry. If it has already dried, then I splash water on my face before applying oil. It is harder to rub in as the oil and water don’t like each other, but it leaves my skin much more moisturised.

Drink More Water

This is definitely a case of “do as I say, not as I do” because in my world, I’m constantly realising that it is 4pm and the only thing I have drunk all day is coffee. But I do know that drinking water is good for the skin, and I definitely notice the difference when I drink more water.
When Oil Really Isn’t Enough

Last winter was particularly cold, and my skin got very dry. I didn’t know back then that oil alone wasn’t going to hydrate my skin. I’d apply more and more oil, slathering it on thicker and thicker, and my skin just got drier and drier.

Eventually I realised I needed something with a little more oomph.

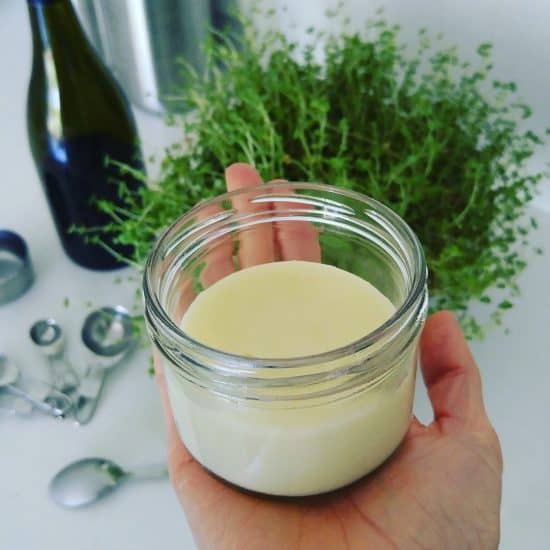
I’ve messed around with a few DIY moisturisers and balms, but the one I come back to often is cold cream. Cold cream is a water-in-oil type of emulsion (whereas most moisturisers are oil-in-water emulsions). Being oil in water, it is soothing and cooling on the skin.

Cold cream can be used as a cleanser, make-up remover, face mask or moisturiser. I’m a big fan of products with multiple uses.

The recipe I use is based on a recipe by Aelius Galenus, a Greek who was born in 129AD. Definitely a recipe that has been handed down through generations!
Galen’s Cold Cream Recipe

INGREDIENTS:
75 ml rose water / distilled water / rain water
15 g beeswax (2 tablespoons)
90 ml olive oil / almond oil
4 drops rose geranium essential oil
Optional: 2 drops vitamin E (vitamin E is a natural preservative)

METHOD:
Heat the rose water in a bowl over a pan of hot water.

Place beeswax and olive oil in a separate bowl over a pan of hot water, and melt. Remove from the heat and pour the rosewater into the melted oil, using a whisk to mix together. (Please be careful as melted oils become very hot and can cause burns.)

As the mixture begins to cool, it will turn opaque. Add the essential oil (and vitamin E, if using) and pour into a glass jar. Use within 6 months.

NOTES: Vitamin E is a preservative, so omitting this might shorten the shelf life of the product. If you are vegan, two alternatives to beeswax are candelilla wax and carnauba wax, which are both palm oil free. They are harder than beeswax so half the amount (1tbsp rather than 2tbsp) if using these waxes.

This cold cream cleared up my dry skin patches within days. Whilst I still use oil as my main moisturiser, I now use cold cream as an extra boost in the winter months, particularly if I am going to be outside.

Now I’d love to hear from you! What is your skincare routine? Do you use oil as a moisturizer? Which is your favourite? Do you make your own moisturiser? Is there a brand that you buy and love? Any other thoughts or questions? Join the conversation and leave a comment below!

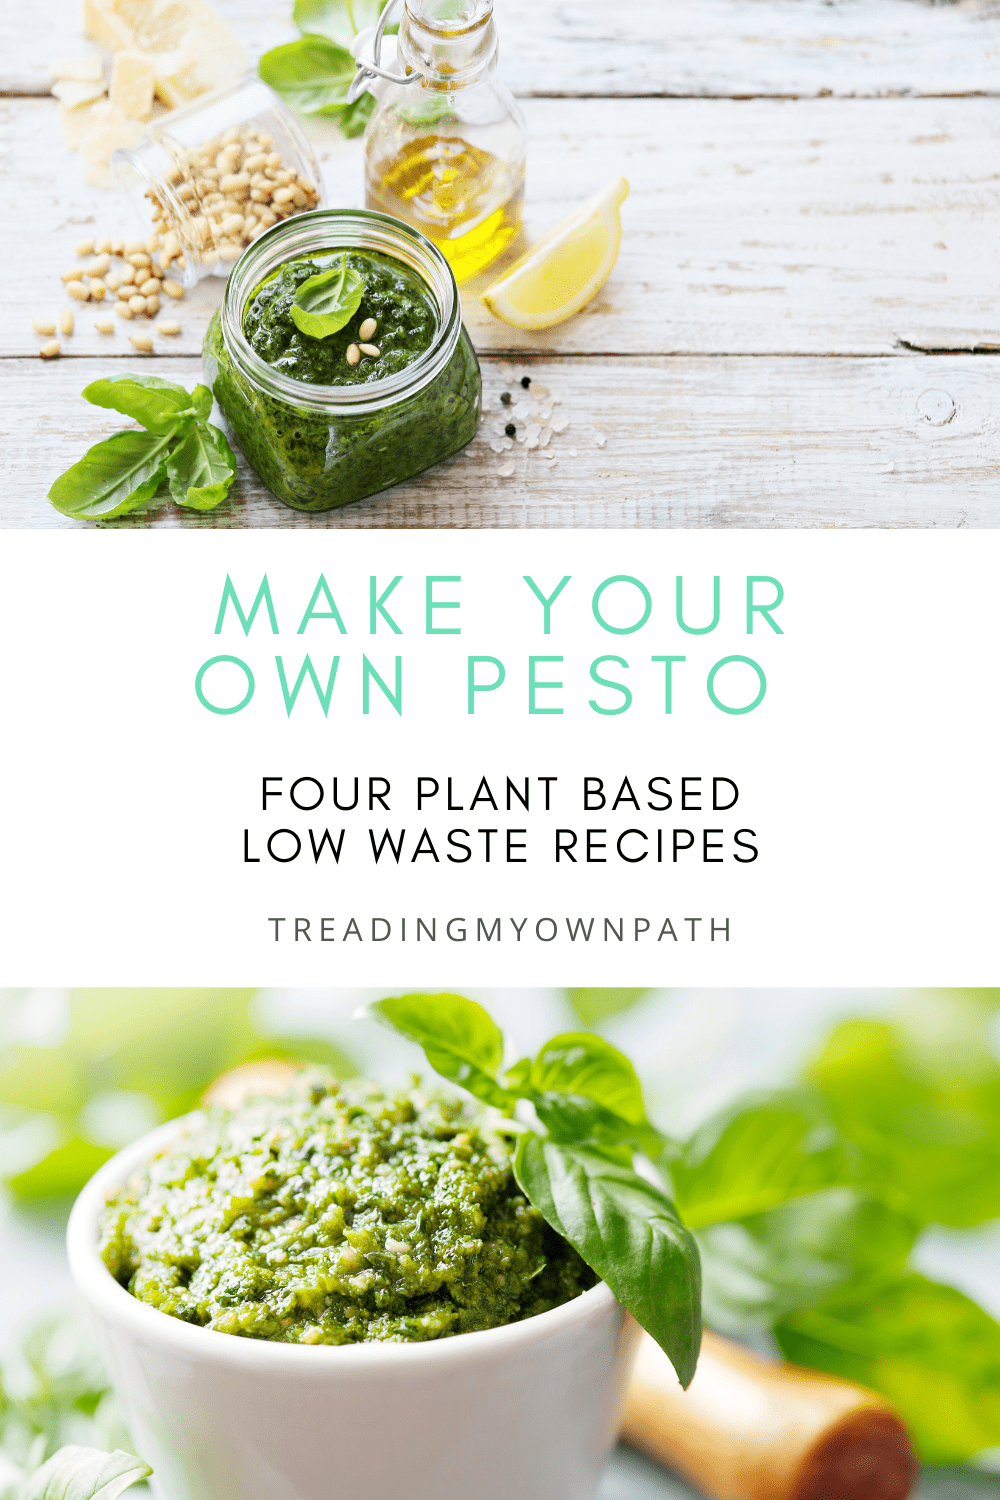
Zero Waste Pesto, Four Ways (4 Plant Based Recipes)

Pasta and pesto is one of those go-to meals when you need to whip something up in minutes rather than hours. Before I went zero waste, I’d make my own pesto sometimes, but I’d also buy those “convenient” jars.

No more! Being zero waste means I avoid buying jars of anything. Pesto is such an easy DIY, and so delicious, that there’s no reason not to make it.

Once you begin making your own pesto, honestly, there is no going back. It’s so fresh and so much tastier, and you can control how much oil and salt you are adding. Plus of course… zero waste!

Vegan recipes use nuts and/or nutritional yeast in place of the parmesan. Nutritional yeast (sometimes called nooch) is a deactivated yeast typically sold as yellow flakes or a powder. It’s most commonly found at health food stores or bulk stores with a health focus (I get mine from The Source Bulk Foods).

If you are vegan but can’t find nutritional yeast, you can omit – the recipes will still taste good, just not quite as cheesy. The nuts will add some of the texture and flavour. If you’re not vegan, you can simply use parmesan where I’ve suggested to use nutritional yeast.

I use a food processor to make pesto. A pestle and mortar will also work, but requires more effort and patience. A herb chopper attachment on a stick blender should work too, but be careful not to overheat the motor, especially when chopping nuts.

Italians look away now! Some pesto tips for non-Italians

Italians take their culinary heritage very seriously, and some of the suggestions I’m going to make here will be considered sacrilege by Italians. But if you’re not Italian, and are happy to be flexible with your ingredients in order to keep them local, use less packaging or make them more budget-friendly, here’s some tips.

Don’t feel limited by pine nuts. Although they are the traditional nut of pesto, plenty of others will work well too. Macadamias, almonds, cashews and brazil nuts all make great pesto. If you’re allergic to nuts or prefer a budget option, sunflower and pumpkin seeds will work too.

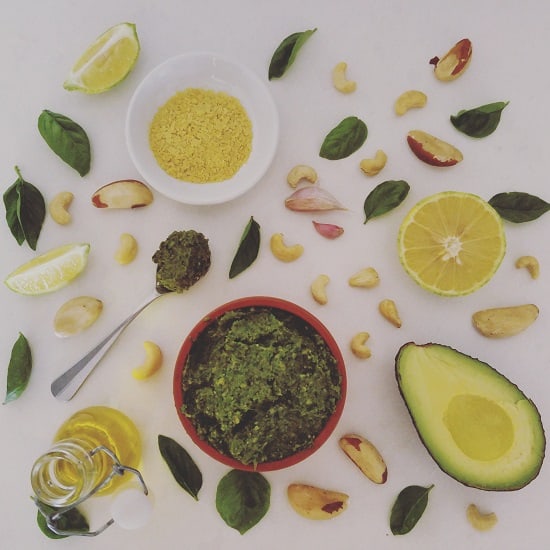
If you’d like to give your pesto a health boost, consider omitting some of the oil and adding avocado instead. Pesto with avocado won’t keep as well, and is more sensitive to cooking than regular pesto, but it’s a healthier choice. I always use avocado in my carrot top pesto.

Finally, experiment with mixing up your greens! Generally I stick to one herb which gives the signature flavour, but often add in small amounts of other leafy greens if I have them to hand. Don’t be afraid to add a little spinach or kale to your basil, or blend in a few beetroot leaves or wilted lettuce.

Regular (Plant-Based) Basil Pesto

I add avocado to my basil pesto to make it more nutritious and less oily. If that seems strange to you, omit the avocado and add olive oil to taste. I’d start with 1/4 – 1/2 cup and go from there. If you’re mixing with pasta, add more oil. If you’re using as a spread, dip or marinade, less oil will make a thicker, more spreadable paste.

Ingredients:

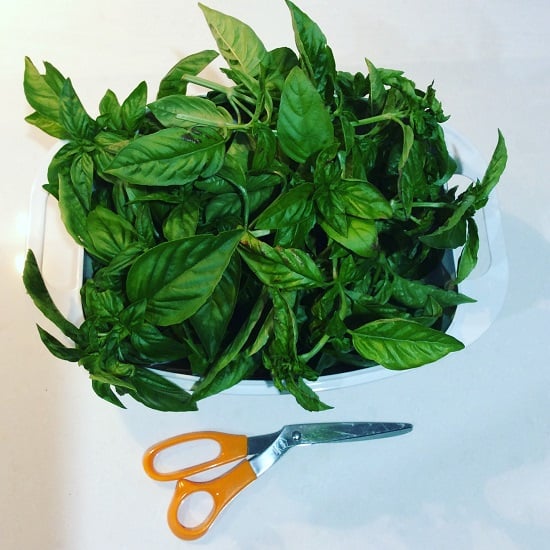
3 cups / 3 large handfuls basil
1/3 cup cashew nuts
3 tbsp pine nuts / 9 brazil nuts
2 tbsp olive oil
1 large garlic clove
Juice of half a lemon
(1/3 cup nutritional yeast – optional)

Method:

Chop the pine nuts / brazil nuts (or blend in a food processor) until they resemble coarse breadbrumbs, and set aside. Do the same with the cashews.

Chop the garlic, then add the basil leaves and blend until fine. Add oil, lemon juice and blend again. Add cashews and blend to combine. Add brazils and nutritional yeast, if using, and stir to combine.

Add more oil to taste if required.

Notes:

Basil pesto has a tendency to discolour, and the lemon juice helps stop this. If not using immediately, store in a jar and pour olive oil on the top to create a seal, and store in the fridge and use within 5 days. Pesto can also be frozen.

Carrot Top Pesto

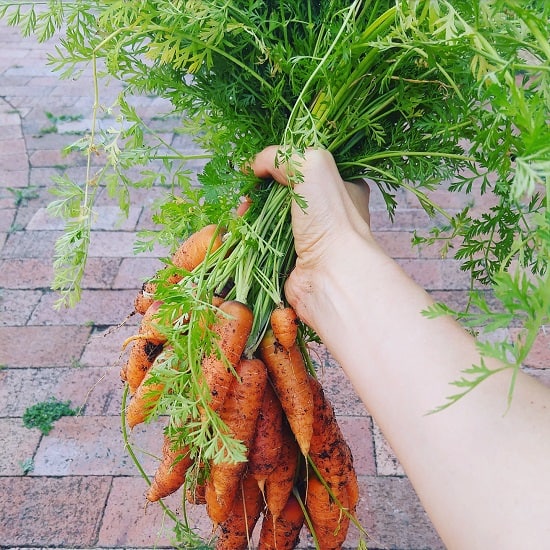
Carrot tops make great pesto. Carrot tops are slightly bitter, so I blend with 1/3 basil to keep the traditional pesto flavour.

Ingredients:

2 cups / 2 large handfuls carrot tops
1 cup / 1 large handful basil
1/3 cup cashew nuts
9 brazil nuts
2 tbsp olive oil
1 large garlic clove
1/2 avocado
(1/3 cup nutritional yeast – optional)

Method:

Chop the brazil nuts (or blend in a food processor) until they resemble coarse breadbrumbs, and set aside. Do the same with the cashews.

Chop the garlic, then add the basil leaves and carrot tops and blend until fine. Add oil and blend again. Add cashews and blend to combine. Add the brazil nuts and nutritional yeast, if using, and stir to combine.

Add more oil to taste if required.

Store in a glass jar in the fridge, and use within 5 days. Can be frozen.

Parsley and Walnut Pesto

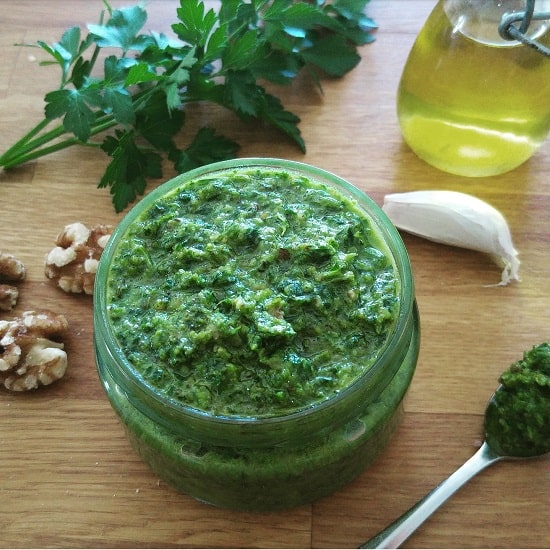
Unlike basil pesto, parsley pesto does not discolour, making it a better option for dips.

Ingredients:

3 cups flat leaf / Italian parsley
1 cup walnuts
1 cup olive oil
3 cloves garlic
3 tbsp nutritional yeast

Makes 1 jar.

Method:

Chop the garlic, then add together with parsley and blend. Add walnuts and blitz, then add oil and combine. Finally, add nutritional yeast and stir through.

Store in a glass jar in the fridge, and use within 5 days. Can be frozen.

Coriander and Cashew Pesto

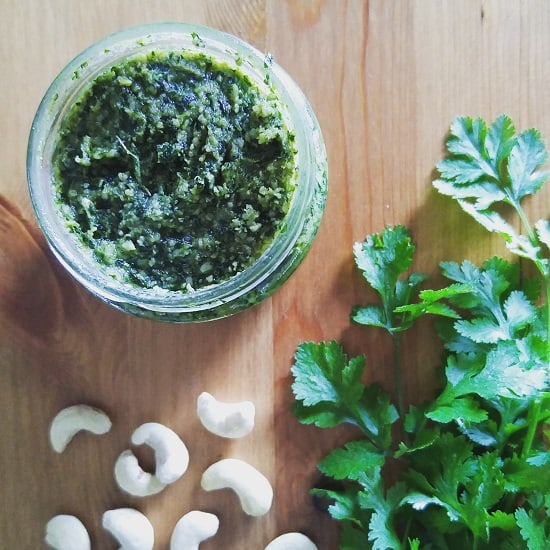
Coriander pesto has a distinctive Thai flavour and is recommended for rice or rice pasta rather than regular pasta. It is also great with vegetables (such as pumpkin, potatoes or mixed with stir-fried vegetables).

Ingredients:

4 cups coriander
1.5 cups cashew nuts
3/4 cup macadamia oil (or other flavourless oil)
1 – 2 cloves garlic

Method:

Chop the garlic, then add the coriander and blend to make a paste. Add the cashews and blitz to combine. Finally, add oil until you reach the consistency required.

Store in a glass jar in the fridge, and use within 5 days. Can be frozen.

Ideas for Using Pesto:

As much as pesto and pasta is a go-to meal, there are plenty more options with pesto.

Here’s a few ideas to get you started:

  • Pesto stuffed mushrooms. Remove the stalks of button or field mushrooms, place upturned on a baking tray and add a blob of pesto to the mushrooms. Top with breadcrumbs if you’d like a little extra crunch, and bake in the oven at a medium heat for 15-20 minutes until cooked.
  • Pesto pumpkin/squash. Thinly slice pumpkin or squash into wedges 1cm – 2 cm thick, and lay flat on a baking tray. Spread pesto on the side that is facing up, and bake in the oven for 20 minutes until cooked.
  • Pesto potatoes. Boil or roast some potatoes, place in a bowl and allow to cool, then stir pesto through.
  • Pesto dip. A classier version of “just eat outta the jar with a spoon”. Chop up veggies (carrot, cucumber, capsicum) or use crackers and dip them into the pesto. Mmm.
  • Pesto spread on toast and topped with mushrooms and/or tomatoes. Pesto is a great spread and combines very well with mushrooms, tomatoes or sauteed greens. Delicious on toast.

Now I’d love to hear from you! What is your favourite pesto recipe? What are you best recipes for using pesto once you’ve made it? Any flavour combinations you’ve tried that were a total disaster? Please share your thoughts in the comments below!

A Zero Waste Guide to Reusable Coffee Cups

Is a reusable coffee cup a zero waste essential? Well, that depends on your perspective. Do you think that coffee is a life essential? ;)

Seriously, whether you personally think so or not, the fact is that over 500 billion disposable coffee cups are produced every year. Which clearly shows that plenty of people do think coffee is a life necessity.

Reusable coffee cups are the obvious solution if we are to do something to stem this tide of disposables heading to landfill (or worse) every year.

Use a reusable just 15 times and the environment wins. (Hocking’s 1994 lifecycle energy analysis found that ceramic cups needed to be used 39 times, plastic cups 17 times, and glass cups 15 times before they became equally energy efficient to plastic-lined paper cups.)

Bear in mind that a reusable, looked after, will last for many years.

The message that these cups send is just as (maybe more) important than the vessels themselves. It’s about showing the solution. Demonstrating to the public that there is an alternative. Showing others that there are people (us!) who care about this issue, and are doing something about it.

Making reusables a little more socially acceptable, and single-use disposables a little less so. Changing the story about convenience.

With this in mind, I’ve put together a list of some of the best reusable coffee cup brands that I could find. Companies that not only make great reusables, but that care about the impact single-use items have on the planet.

(This is not a sponsored post. None of these brands have paid to be featured.)

Choosing Reusables: Coffee Cups

All brands listed below make cups that are barista standard. This means they hold the same volume as standardised disposable takeaway cups, and fit underneath a coffee machine.

Most reusable takeaway cups do have a small element of plastic or silicone, because they need a sealable lid and a band to protect the fingers from burns. Their primary purpose is takeaway, after all.

I’ve listed brand websites below, but if you’re looking for a local store to make a purchase from, I have a worldwide list of local online zero waste stores. Please try to support a local independent business, if you can. The big department stores and Amazon really don’t need our money, and these small businesses do.

7 Reusable Zero Waste Coffee Cup Brands I Recommend

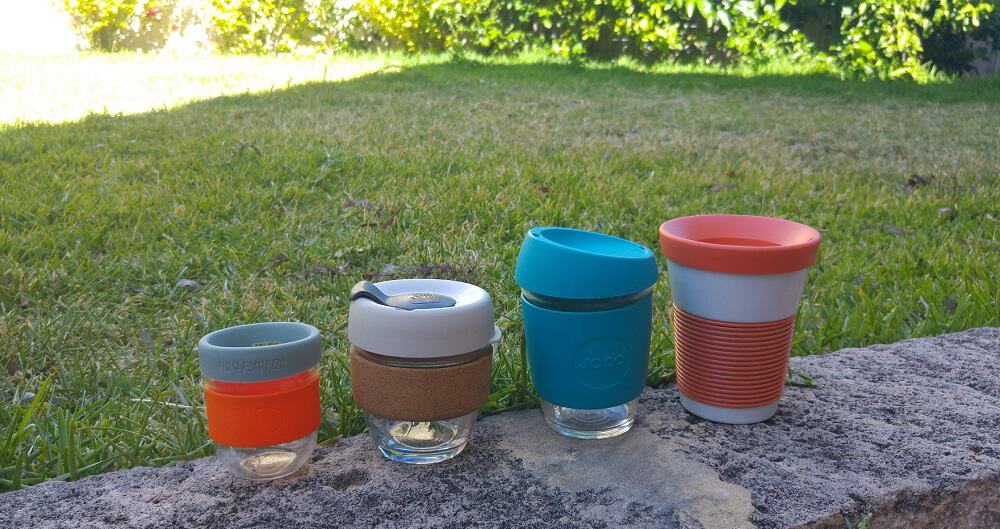
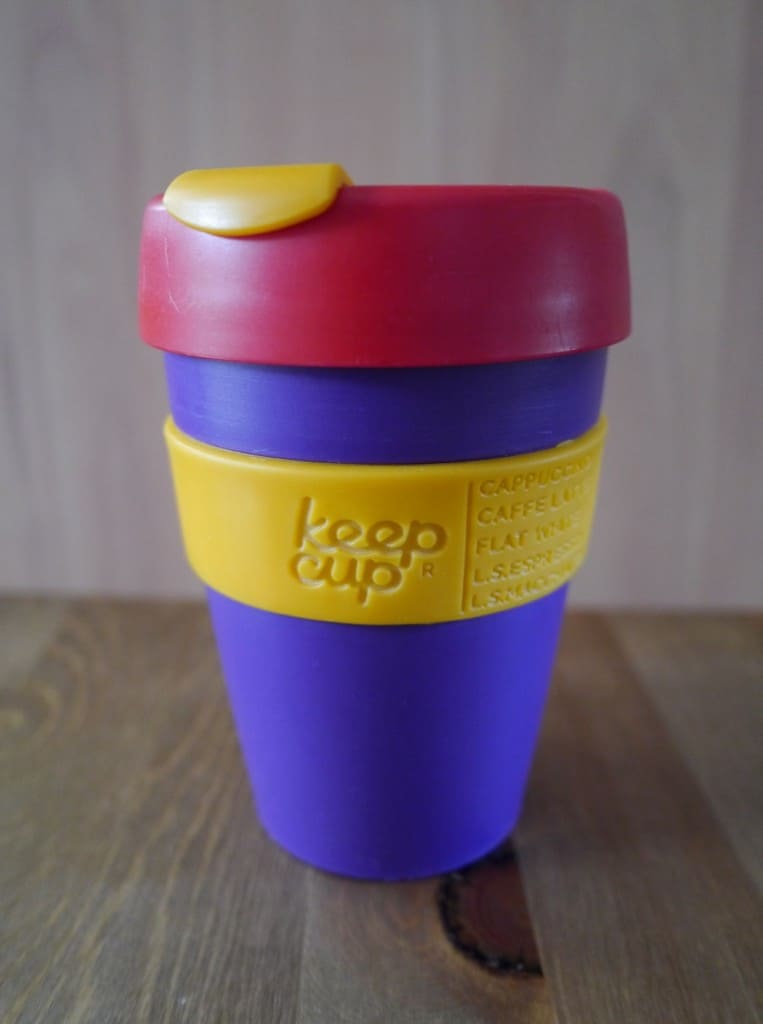
1. KeepCup

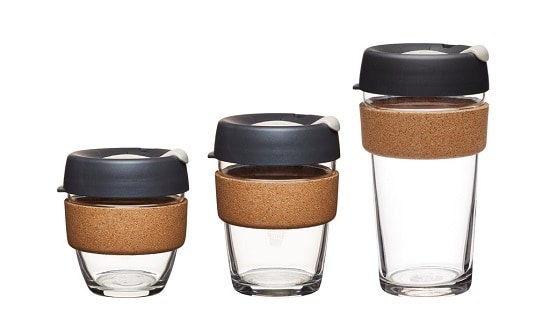
KeepCup is possibly the original reusable cup brand, and if not the first, definitely the most well known.

KeepCup began in 2009, and are now sold in 65 countries around the world. KeepCup ship from Australia, the UK and the USA.

Their cups are available in both plastic and glass. All cups have a plastic lid (plastic #4, LDPE) which is hard and rigid, with a plastic plug (a polyethylene polymer called TPU). The bands are made of silicone.

Their plastic cups (plastic #5, or polypropylene – considered to be the best food grade plastic with thermal stability) come in 5 sizes: 4oz (the ideal size for a babycino), 6oz, 8oz, 12oz and 16oz. Their glass cups come in 3 sizes: 8oz, 12oz and 16oz. Additionally, they offer a glass “LongPlay” booster for the 12oz and 16oz sizes which creates a double-walled vessel to keep hot drinks hot (and cold drinks cold) for longer.

Their KeepCup Brew edition features a glass cup (8oz, 12oz or 16oz) with a cork band, making it their least plastic option.

W: https://keepcup.com

2. JOCO Cup

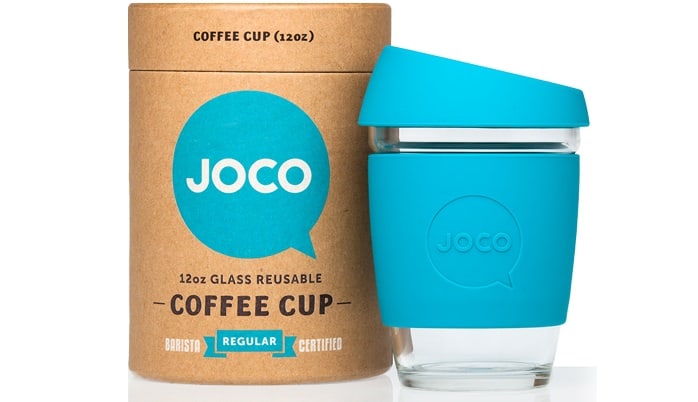
JOCO cups were the first company to produce a barista standard glass coffee cup. The glass cups come in 3 sizes: 8oz, 12oz and 16oz. The lid is made of silicone, which makes it soft and rubbery. The band is also made of silicone.

JOCO cups are distributed worldwide, and ship from Australia and the USA.

W: https://jococups.com

3. La Bontazza

La Bontazza is another Australian company (influenced by Italian style) that produces reusable glass coffee cups with silicone lids and bands. La Bontazza are the only company I’ve found that make a small 4oz reusable coffee cup in glass – perfect for short macchiato drinkers, espresso drinkers and babycino drinkers (who are old enough to handle a glass cup).

Their three cup sizes are 4oz, 8oz and 12oz.

W: http://www.labontazza.com

4. Planet Cups by Pottery for the Planet

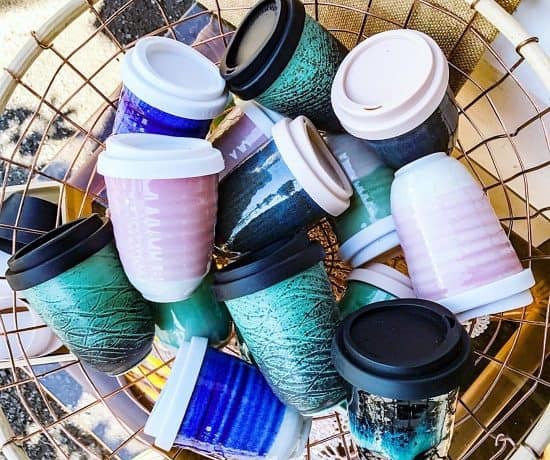
Planet Cups are handmade pottery cups fitted with a silicone lid, and with an optional silicone band. They are available in 3 sizes: 6 oz, 8oz and 12oz. Every single cup is unique, being made by Renton Bishopric ceramics in their Queensland studio.

The cups are not currently sold via their website, but stockists can be found via their social media channels.

W: http://www.rentonbishopric.com

5. Cupit by Kahla

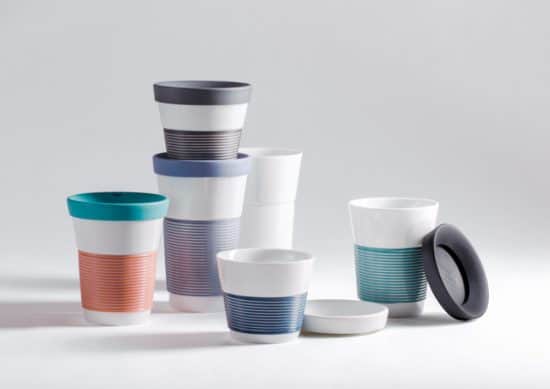
Kahla is a German ceramics manufacturer who produces Cupit, a range of white ceramic reusable coffee cups in three sizes: 8oz, 12oz and 16oz. The lid is available to purchase separate from the cup. Both the cups and the lids are made in Germany.

The ceramic cups have a silicone foot at the base, making them non slip. The lid is plastic, and the band that wraps around the cup is fixed and cannot be removed. The cups are slightly heavier than a glass reusable coffee cup, and are very sturdy.

W: http://en.kahlaporzellan.com

6. Klean Kanteen

Klean Kanteen produce insulated stainless steel tumblers with a plastic tumbler lid in 3 sizes: 8oz, 16oz and 20oz. The tumbler lid is designed for transporting liquids (although it is not leak proof) but is not designed for drinking through.

W: https://www.kleankanteen.com

7. Ecojarz

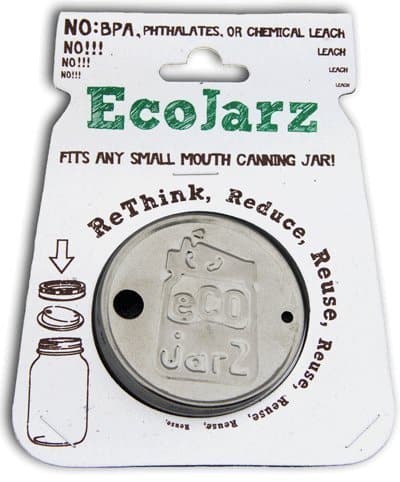
For anyone who doesn’t drink takeaway often and doesn’t see the need for a purpose-built vessel, Ecojarz offer an alternative: a stainless steel drinking lid with silicone seal that fits your existing wide-mouth mason or canning jars.

They also offer hot drink holders and silicone bands.

W: http://ecojarz.com

Of course, I realise that reusable coffee cups aren’t for everybody. (Is anything?!) You may not be a daily takeaway coffee drinker. But I’ve no doubt that you know someone who is. The public’s perception of plastic bags has shifted, plastic pollution awareness is rising, and tackling disposable coffee cups seem the next logical step.

Reusable coffee cups are a great and practical solution.

Let’s get the conversation started. Bring on the reuse revolution. 

Now I’d love to hear from you! Do you use a reusable coffee cup? Do you use one of these brands listed or an alternative I haven’t mentioned? Do you make do with a DIY approach? Do you think reusable coffee cups are a load of nonsense? Any other thoughts to add? Please share your thoughts in the comments below!

What I *Actually* Mean By Living “Plastic Free”

What if I told you that “living plastic-free” doesn’t actually mean living plastic free at all?

Let me explain.

A reader of this blog, Stephanie, recently contacted me to share an online article that she had read, and had found rather discouraging. The article opened with the statement “I’m suspicious of people who claim to live plastic-free” and the title of the article was “I tried to give up plastic for a month and realised it’s impossible.”

Woah.

I like to look towards the positives, the solutions, the next steps. Any article that begins by declaring defeat is unlikely to inspire and motivate (how can it?!) and I tend to avoid reading them. Give me a good news story any day!

But I read this one.

I came across some arguments I hear surprisingly often. What about laptops, and mobile phones, and credit cards? True, I use all these things. I also came across some thoughts that had never crossed my mind before in the context of plastic-free living: using plastic furniture in public spaces; answering the (plastic) telephone at work, or taking public transport (yes, buses and the London Tube both use plastic as a construction material).

I feel that the idea of “plastic-free living” is perhaps sometimes taken more literally than it is often meant.

In my view, there is nothing suspicious about claiming to live a plastic-free life. No-one is out to fool anybody. In my experience, anyone who says they live plastic-free is trying to be as transparent as possible about the things they do and don’t do, the choices they make… and the mishaps they have along the way.

I can’t speak for everyone who claims to live plastic-free, but I can speak for myself. I’d like to explain what I mean when I say that I live a plastic-free life, what I don’t mean, and when plastic-free doesn’t actually mean plastic-free.

Here’s my thoughts.

What Living Plastic Free Actually Means (To Me)

I always say that plastic-free living is a journey. Like any journey, things change along the way. What I mean when I say “plastic-free” today isn’t necessarily what I thought it meant when I began.

My plastic-free journey began in 2012 when I signed up to Plastic Free July and saw the documentary Bag It. Both the challenge and the documentary opened my eyes to the issues, but also my own habits, and made me realise just how much of the plastic I bought was avoidable.

It made me feel embarrassed that I’d never realised before, and determined to do what I could to make a difference and refuse all future plastic.

My first challenge was to reduce all the single-use plastic from my life. By single-use I meant anything that was designed to be used once. Not just things like plastic bags and takeaway coffee cups, but also things like plastic bottles of shampoo. Whilst the container might last a few months, it is not designed to be refilled and is therefore single-use.

With single-use plastic the main thing on my radar, other types of plastic hadn’t yet reached my awareness.

One of the first purchases I made when I embraced this plastic-free life was a reusable plastic KeepCup. I remember my husband (who has been with me on this journey since the beginning) posting a picture of them on Facebook, and one of his old school friends came back with the comment “but it’s plastic!”

We rolled our eyes and shook our heads at this lack of understanding. In our minds, it made total sense!

Of course, now I can see why there was a lack of understanding. Clearly, buying a plastic cup for Plastic Free July is not actually plastic-free in itself. It made sense at the time because it was reducing all the single-use plastic.

(5 years on, this cup is still going. My husband uses it at work. Would I make the same purchase today? No. But that’s part of the journey.)

Six months into my plastic-free living journey, and I’d found plastic-free solutions to a lot of the products that I’d previously bought regularly in plastic. I’d also stopped buying so much stuff generally (my minimalism journey had also begun) which gave me the space to think more carefully about the things that I did buy.

My single-use plastic avoidance became all plastic… where there was a reasonable alternative.

I started out as an idealist, but I soon realised that reason had a part to play. What does “a reasonable alternative” mean? For me, reasonable means practical, affordable (and I am happy to pay more for plastic-free items) and suitable.

It is possible to find plastic-free alternatives to most items. But not all.

Sometimes, plastic items have their place. I avoid new plastic as much as possible, but I’m happy to reuse plastic items to save them from landfill. If I think something is well made, built to last and serves a purpose, and I cannot think of (or find) a better alternative, then I consider plastic.

This includes the plastic olive barrels that I’ve upcycled into veggie beds in my garden, the clothing with plastic fibres that I’ve purchased second-hand from the charity shop, and the empty plastic yoghurt tubs I’m currently collecting via the Buy Nothing Group for mushroom growing.

What do I mean when I say I live “plastic-free”? Well, I mean no single use plastic packaging. I mean that I don’t buy brand new plastic things, unless there is absolutely no alternative, I consider that item to be necessary, and it is not not available second-hand. I minimize my second-hand plastic purchases, but I don’t avoid them completely.

For me, plastic-free is not an absolute. I make exceptions. I’m also very transparent about the exceptions that I make. Plastic-free living is an ideal, a goal to work towards, and a journey. I’m doing what I can, and always striving to do better.

What Living Plastic Free Doesn’t Mean (To Me)

At the start, I was determined to eliminate plastic completely from my life. Over time, I’ve taken a more moderate approach to what’s practical and possible for me.

I still use a mobile phone and a laptop. I have plastic travel cards (a Smartrider and an Oyster card). I have plastic bank cards, and I use plastic money (Australian bank notes are made of plastic). Plastic still sneaks into my life in other ways.

Plastic-free does not mean living in a house that I built myself from tree branches. (Natural building is a thing, so it’s not out of the question that I could live in a plastic-free house. But I don’t.) Maybe one day I’ll get the skills and the space to do it. Or maybe not. For now, I live in a house with recycled plastic/stone kitchen benches, plastic guttering, a plastic bathroom bench, a plastic rainwater tank, plastic doors, windows and frames.

Plastic-free does not mean avoiding touching anything plastic. The pipes that bring water to our house the cables that bring electricity and the internet to our house, every kind of transport (public or private) – it all features plastic.

Plastic-free does not mean refusing medical treatment. I take painkillers in packaging on the rare occasion I need to, I have a plastic filling (I wasn’t choosing mercury as the alternative option).

Plastic-free has never meant (and never will mean) throwing existing plastic away. In my home, plastic that is perfectly usable will never be replaced it with something that is plastic-free for asthetic reasons.

If I need to buy something in plastic so that I can avoid plastic in the future then I do. I buy seeds that come in plastic bags, but I am saving my seeds so in future I can use my own. I bought a second-hand plastic compost bin so that I can make my own compost and not need to buy plastic-packaged soil amendments for the garden.

Plastic-free living, for me, is not about taking things to extremes. It’s about finding alternatives, solutions and better ways of doing things. Every piece of plastic ever made still exists. If I can reduce my plastic by 95%, that’s a lot of plastic refused.

Does it really matter that I use a small amount of plastic to reduce my impact in other areas? To me, no.

When Is Plastic-Free not Plastic-Free?

I am passionate about living with less waste (you might have noticed). For me there are three branches to this, and they are all slightly different. There’s zero waste, which is about sending nothing to landfill. There’s plastic-free, which is about using no plastic. Then there’s the broader aspect of sustainability, using what already exists.

The way I live is the result of these three elements (plastic-free and zero waste and reducing waste) colliding. My ultimate goal is reducing landfill and making the best use of resources. So sometimes I choose second-hand polyester over brand new organic Fairtrade cotton. Or upcycled plastic buckets rescued from landfill over French oak wine barrels.

It’s not that one option is better than the others. There’s rarely a perfect choice. I just do what feels right to me and my values.

I say I live plastic-free because it’s a label that people can understand. It’s certainly a lot less of a mouthful than “I live single-use-plastic-free-and-new-plastic-free-but-occasionally-I-buy-second-hand-things-made-of-plastic-but-mostly-I’m-plastic-free”. It starts conversations, encourages new ideas and provokes dialogue.

Plus, it’s a way of doing something good for the planet, and for ourselves and our community.

I’m not one to dwell on the negatives. I could lament all of the things that I can’t change, and the things that hold me back from perfection. I could give up before I start, because I’ll never make 100%. But plastic-free living is not about perfection. It’s about making better choices. 

There’s so much opportunity to make change to reduce our collective plastic habit. To refuse single use items, make simple switches, avoid plastic packing. Living plastic-free is 95% possible. But even 1% plastic-free is better than nothing. Let’s not get bogged down with the things we can’t change. We can all change something. Let’s do what we can.

Now I’d love to hear from you! Do you agree that saying plastic-free or zero waste is misleading? Or do you find labels a useful way to strike up conservation and convey ideas simply? Do you use these labels, or do you prefer not to? If you live plastic-free, what plastic compromises do you make? Share your thoughts in the comments below!

How We Started an Urban Food Tree Project

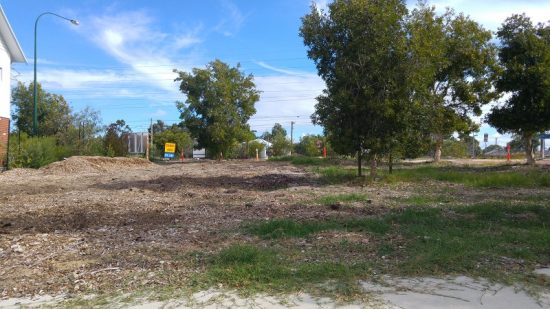
Ever since we first moved to our suburb 18 months ago, I had my eye on the rather sad looking patch of land at the corner of the street.  Despite the weeds and bare nothingness (excluding the few surviving melaleuca trees around the edge), all I could see was the epic potential.

Wouldn’t it be great if we could turn this barren, weedy patch of land into a thriving community orchard?

My neighbours, and one in particular, shared my enthusiasm and vision. Almost as soon as we moved in, the conversation began. At the start of this year, the actual work began, to turn the conversation into reality.

The Initial Idea: Creating a Food Tree Project

Rather than planting an orchard where the goal is to maximise production, we wanted a balance. Growing fruit trees alongside natives and groundcovers creates a more aesthetically pleasing, biodiverse and dynamic ecosystem that will be more interesting to walk through, creates more learning opportunities and is more resilient to pests.

The name “Food Tree Project” rather than an “Urban Orchard” reflects that our goals were broader than simply planting fruit-bearing trees and producing food. The permaculture concept of “Food Forest” didn’t really fit either, because although I followed permaculture principles in the designing, there are too many human inputs to be a true permaculture food forest.

Food Tree Project felt best.

Our Vision:

Community: to provide a space for collaboration, learning, volunteering and sharing; to encourage residents to learn more about growing food and have access to locally grown fruit; and create an attractive and sheltered resting spot close to the train station.

Environment: to increase tree coverage, canopy cover and greenery; to improve the streetscape close to the train station; and to increase biodiversity and provide habitat for birds.

The Plan:

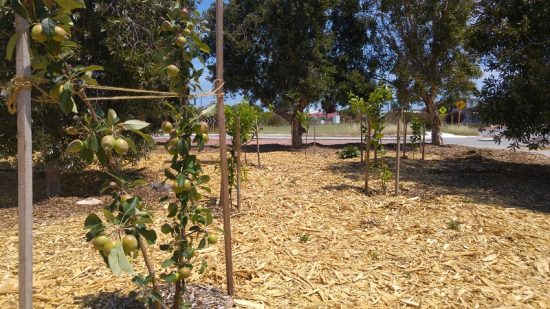
The plan was to plant around 40 fruit trees of varying species on the unused space on the corner of two streets in our suburb, with wide pathways between the trees to allow and encourage public access for community members to see the trees and learn about them.

We also planned to plant native species on the border to encourage biodiversity, and interplant nitrogen-fixing acacias and other ground covers to create a green space between the trees.

The property next to the block has a bore, we are extending the reticulation so that the site will have water access in summer (this is essential in Perth – no water means no trees).

Goals of the Food Tree Project:

There are a number of goals we hope to achieve with this project.

  • Create a welcoming and shady community space by planting trees, and to provide access for residents to locally grown fruit.
  • Provide learning opportunities for interested residents on growing their own food and looking after fruit trees, and to provide volunteering opportunities.
  • To provide a demonstration project and framework that other volunteer groups can take to their local council to plant more trees on underutilised spaces in their urban environment.

The First Step: Getting Council Approval

The scariest step is probably asking for permission. Have you ever heard the expression “ask for forgiveness, not permission?” If we asked the council for permission and they said no, it would be hard to go ahead and do it anyway.

Should we ask for permission, or just do it and hope they didn’t mind?

However, we want this project to be an example of what can be done, a demonstration project to encourage others to approach their councils to plant on underutilized spaces. That meant going through the official channels. So we put together our vision and arranged to meet a council member on the site to discuss our plans.

We met on the site and talked through our ideas. We asked what restrictions they had (for example, banned or unwanted species) and were willing to listen to any needs that they had. I’d recommend meeting in person rather than chatting via email. It’s so much easier to connect with someone when you are face-to-face.

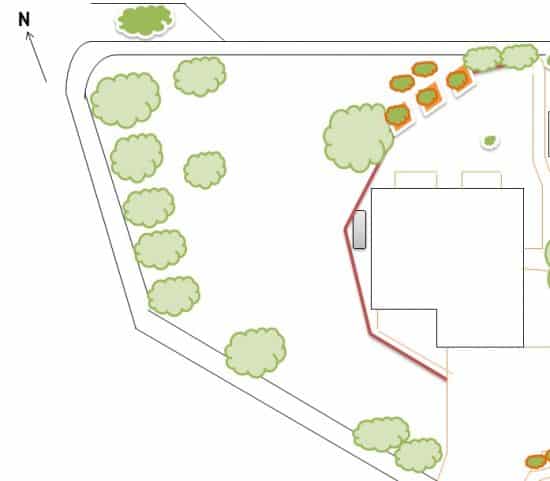
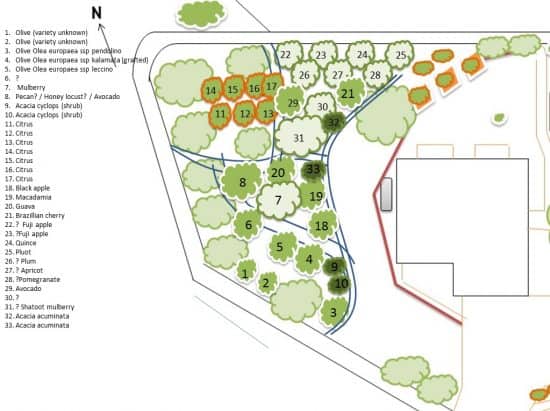
We agreed to put together a plan of the site detailing the trees to formalise the project. I took a screenshot of the Google arial view of the block, then pasted that into Powerpoint. I drew lines over the roads, paths and boundaries, and put cloud shapes over the trees, then deleted the photograph to keep the outline.

The initial outline drawn using Google Arial View and Powerpoint…

…and one of the working drafts (of which there were several!)

On one hand, we were lucky that the council were so supportive. But on the other hand, it wasn’t really luck. My co-conspirator neighbour had been working with the council on a community sump revegetation project for a couple of years prior to this, and had been able to build the relationship with the people there. He had demonstrated his ability to listen, to work together with them to resolve disputes, and show responsibility.

Although it felt like we got approval very quickly, my neighbour joked that the work actually began in 2012. In truth, it probably did.

Step 2: Formalising The Project

As well as submitting a plan for the tree planting, we also had to submit a pest control plan detailing how we would manage the site and deal with pest issues. For this, I referred to the council website and Department of Agriculture website to find out current recommended procedures.

Initially, the plan was to lease the site from the council. This would have required insurance, which we were planning to get through the local community garden (of which both my neighbour and I are members). There would have been a small annual cost for this.

In the end, the plans changed and there is no lease: the land remains under responsibility of the council. Whilst this may seem less secure, there are advantages. The site actually had a road running through it prior to 1990 before the road layouts were changed, and there was road base right through the land. The council came with a bobcat to dig out the road base, which might not have happened had there been a lease in place.

Funding Opportunities

Needing funds to purchase the trees and the reticulation, we approached the local football team (the West Coast Eagles). They have just moved to our suburb and are constructing a new training ground and stadium, and in the process angered the community greatly by chopping down 100 mature native trees.

As they emphasize their commitment to community in their media releases we thought it might be a project they would like to support.

Initially they seemed keen to sponsor our trees, but over time it became apparent that they had ulterior motives. The council had stipulated that all trees removed whilst building the training grounds must be replaced and maintained, and the Eagles were hoping that they could fund our trees as a cost cutting measure. (Funding a few $30 fruit trees would have saved them the cost of sourcing, planting and maintaining mature native trees.)

Without going into details, the Eagles were not transparent with us about this. When we realised (several months later) that, rather than supporting our project because they saw the value in investing in community, they were trying to get out of their responsibilities (clearly a small citrus tree is no replacement for a large gum tree), we decided not to pursue this further.

All the messing around meant time was ticking. It was now the start of winter and we urgently needed to plant the trees if they were to survive the summer.

Preparing the Site, Tree Purchasing and Getting the Community On Board

In short, we didn’t receive funding, and decided we would have to buy the trees, reticulation and soil amendments ourselves. We’d decided that the upcoming weekend would be perfect tree planting weather, and we began sourcing trees. My neighbour purchased seven citrus trees and I purchased another six trees, and we began setting the foundations for the project.

We planted the first few trees ourselves to get an idea of time and how best to do it all.

Next we put it out on the Buy Nothing Group that we were beginning a Food Tree Project in the area, and would anyone like to come and help us weed and plant?

And something wonderful happened.

People said yes, but many also asked us if they could donate a tree, or provide funding to purchase a tree. We hadn’t asked for money, but it was so humbling (and immensely appreciated) that our neighbours wanted to contribute financially.

One tree is not expensive (the costs varied from $20 to $70 depending on the species) but 40 trees adds up. Not to mention the reticulation costs, which my neighbour funded himself. When there’s a whole community on board, that changes things considerably. After our initial tree purchases, the others were paid for by the community.

It also showed us that people valued what we were doing, and wanted to be a part of it. (Thanks to Jayne, Deb, Miranda, Kath, Marisa, Lindi, Kate, Lana and Toni for your contributions.)

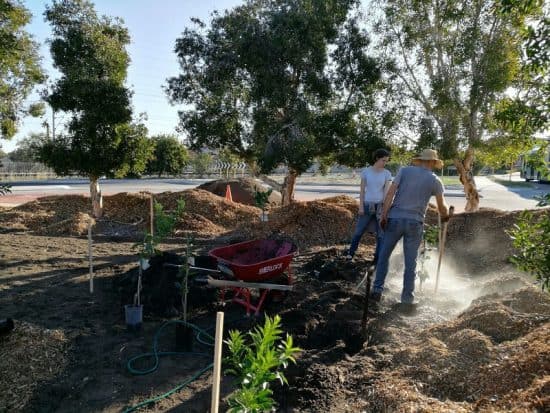
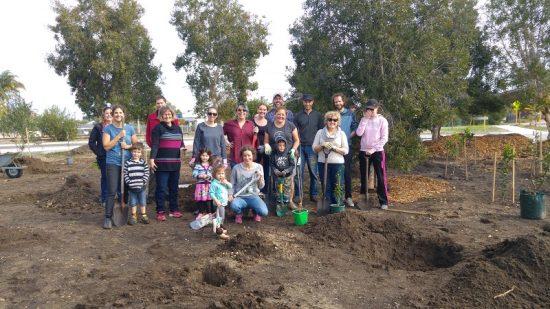
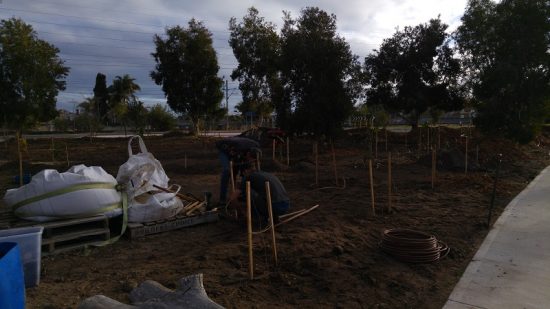
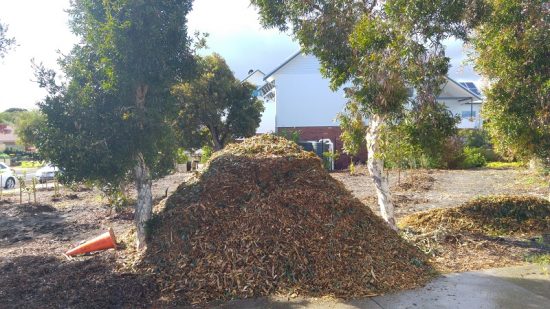
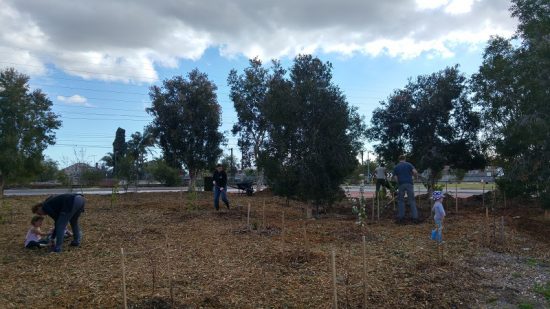
Just as importantly, people came to our busy bees. We weeded the rest of the site, dug holes, spread clay and compost and planted trees. Then we installed reticulation, and mulched the entire site. What could have taken us months was finished in a three weekends.

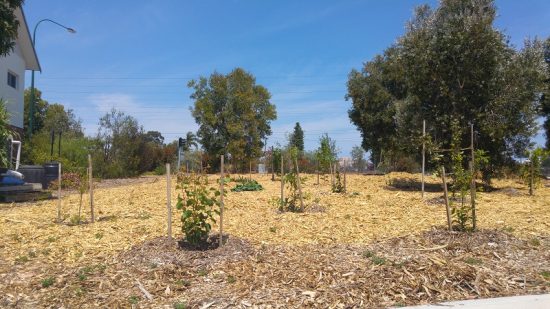
We now have most of the trees planted.

(If you’d like to know more about the project, I recorded a 20 minute video with some details of how we got the project going, and also a walk through of the site and the different trees that we have planted. You’ll find it on my Patreon page.)

What’s Next for the Urban Food Tree Project

Our biggest job is to ensure that the trees survive their first year in the hot Perth summer. With the reticulation in place, this shouldn’t be a big job, but it is a job nonetheless.

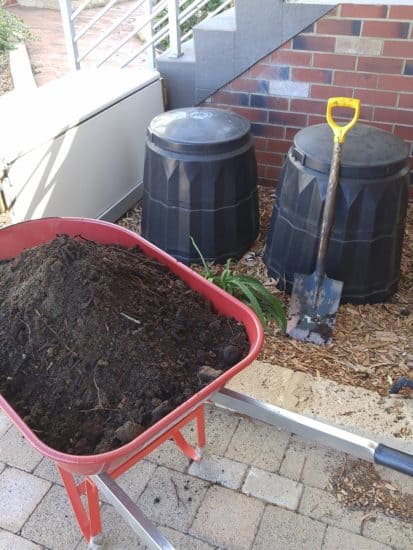
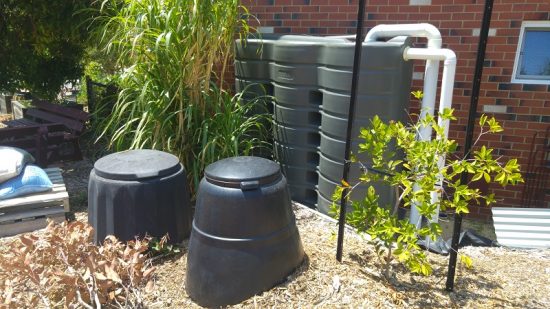
One thing we are doing now is establishing a community composting bank. We’ve put two huge compost bins on the site and plan to add to this as we find more suitable bins on Gumtree. If we can get all of our neighbours dropping good scraps off, we will have a rich supply of compost to feed the trees with. Plus it is another way to involve our neighbours with the project.

When autumn comes round I’m keen to work on the shrub layer and groundcover. Having sunk a lot into the project this year, we didn’t have the funds or the time to do this before now, and summer is not the time to start. We are keen to plant herbs and natives, and as the canopy layer grows these plants will have more chance of success.

At the moment the site looks a little barren, but by next year it should be completely transformed.

Now I’d love to hear from you! There’s so much more I could share about the project, so do you have any questions? Is there anything you’d like me to explain in more detail? Do you have any tips or suggestions for me, or experience with projects of your own? Please tell me your thoughts in the comments below :)