What This Single Wardrobe Item Taught Me About Minimalism

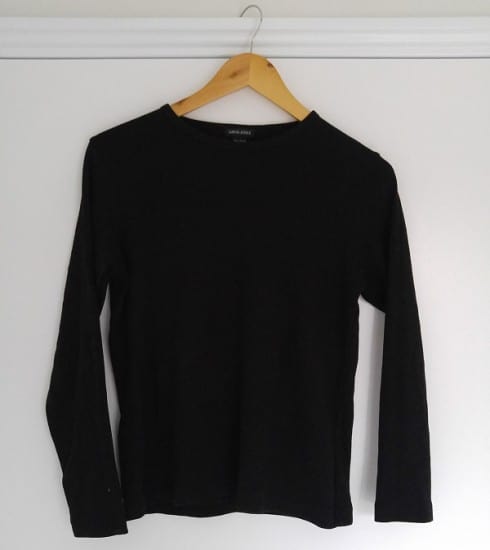
I recently took a trip to the charity shop to find myself a black, long-sleeved top. My previous one had life-expired at the end of last winter, and I needed one to wear underneath a big thick woolly jumper dress (we are in the depths of winter here in Perth, and Australia gets colder than you might expect).

The shopping trip was uneventful – after visiting a few stores, I found a suitable black top (made from 100% cotton – I’m trying to reduce the amount of plastic fibres in my wardrobe) and took it home.

What I bought wasn’t interesting. What was interesting was the realisation that came afterwards.

What one black top made me realise about minimalist living...

What one black top made me realise about minimalist living…

I was trying to remember what the last item of clothing was that I bought. I thought back over the last couple of months, but I couldn’t think of anything.

I thought back a little further, but still nothing.

I remembered that at the start of the year I went on holiday. I definitely didn’t buy anything whilst I was away, and I didn’t buy anything new for the trip. I thought back to last year. I remembered I purchased a new bra (actually, two). That would have been last September. I didn’t buy any new clothes for 9 months.

What was most interesting to me was not that I hadn’t purchased any clothes for 9 months, but that I hadn’t even noticed. I hadn’t wanted or needed to buy anything, and so I hadn’t.

What I owned already was enough. There had been no struggle, no doubt, no frustration and no resentment that I hadn’t purchased anything. That’s what it is meant to feel like, I realised. Minimalism, decluttering and finding our “enough” has nothing to do with going without, or holding back.

It is about finding our “enough”.

Being content with what we have. No chasing more or pursuing better.

How things change! Of course, it didn’t used to feel like that. It didn’t feel like that at all! There was a time when I bought new clothes to cheer myself up, to feel better, to “prepare” for a holiday or new job, for a special occasion or event,… oh, and if I just happened to be walking past a shop window and saw something I liked.

I was never a prolific spender, but I had way too many clothes. The idea of not buying anything new even for a couple of months would have sparked fear, resentment, and probably a rebellious why-shouldn’t-I-buy-it shopping trip. (In fact, I remember an specific occasion where that did happen!)

So what changed?

I realized that I owned too many clothes.

That was probably my first realisation. That my wardrobe was full, yet I didn’t wear many of the things that I owned.

I realized that if I couldn’t bear the idea of throwing any away, I had to stop buying more.

In the beginning, I found wardrobe decluttering really hard. I couldn’t bear to part with anything! I didn’t want to get rid of the tatty old worn out stuff (I care too much about waste) but I didn’t want to get rid of the shiny new stuff either. (I would enjoy wearing it once the old stuff wore out, surely?)

My logic was, that if I couldn’t bear to get rid of anything, then I had to stop buying more.

The logic made sense at the time, but it didn’t seem fair. I resented it. Have you ever felt like that? My tattiest clothes made me feel grumpy when I wore them. Every now and then I’d buy something new – because I wanted to cheer myself up, because I was sick of the same old tatty things, or because I needed something to wear.

Despite having a full wardrobe, I just didn’t seem to have anything to wear.

I realized that my relationship with clothes was all wrong.

I started really asking myself why I had a wardrobe full of clothes, but nothing to wear.

I asked myself why I purchased things, and then never wore them.

I asked myself why I used clothes shopping as a way to cheer myself up.

I found some answers.

I realized that I had a tendency to buy clothes that were a little on the tight side (rather than the next size up) because I really wanted to be slightly slimmer than I was. This slimmed-down version of myself never happened, so I was left with a lot of items that were a little too clingy, tight and uncomfortable.

I realised that many items I owned and liked simply didn’t match with other things that I owned. They weren’t complete outfits.

I realised that when I did buy new clothes, it was a reaction to feeling miserable wearing tatty things. I care about waste, but if wearing tatty clothes makes me want to go shopping, that doesn’t work, does it? I realised that I was a little too swayed by adverts and shop windows.

I realised that other things brought more meaning to my life than clothes shopping, made me happier and were far more fulfilling.

I realized that I needed a wardrobe full of things that I actually liked to wear, and that fitted.

This seems so obvious, but the theory did not match the reality when it came to my wardrobe. There were plenty of “used to fit, and maybe will fit again” items, even though I knew it had been years since I last wore them.

There were plenty of items I liked the look of, but didn’t find them comfortable, or practical. There were plenty of items that didn’t match anything else.

What I needed were clothes that did fit, were versatile and practical, that I liked and wore often. Anything else was wasted space (and resources).

I realized, each time I decluttered, that I could manage with far less than I thought.

Most of us have full wardrobes, and wear the same five or so outfits every day. Back in 2014, I thought reducing my wardrobe down to 100 items would be a milestone achievement. At the time I owned 169 items, and that was after 2 years of decluttering!

Yet when I got to 100 items, I realised that it was still far more than I needed. I wasn’t wearing everything I owned. As I reduced further, I still knew there were items I didn’t wear often enough. I went from feeling like I “needed” things to being very clear that I didn’t. I had enough.

Minimalism is not about going without. Minimalism is about finding our “enough”. In those 9 months, I never felt like I was going without. Not buying anything new was easy.

It hasn’t always been easy, but slowly, something has changed. I stopped pursuing more. I stopped seeking solace through shopping. I let go of the idea of “needing” more and embraced the idea of “enough”.

Owning less has been eye-opening, satisfying, and ultimately, very rewarding. But wanting less is even better.

Now it’s your turn – I’d love to hear your thoughts! Are you working towards pursuing a life with less? What lessons have you learned along the way? What a-ha moments came to you? Have you struggled with letting go, and what are your reasons? What obstacles have you faced? Have you ever felt guilt, or resentment, or frustration in the pursuit of less? (Surely it’s not just me?!) How have you been able to turn that round? Or is it something that you still struggle with? Are you new to the journey, and if so, what are your biggest challenges? I’d love to hear about your experiences so please share them with me and leave a comment below!

Plastic Free {Bicarb Free} DIY Deodorant – for Sensitive Skin

I love my homemade deodorant. I first tried it back in 2012 when I was still a little skeptical about DIY concoctions (if I’m honest, I thought they were just for hippies). What made me convert?

The fact it actually worked.

That’s all we want from a deodorant, really. Sure, we don’t want chemicals and excess packaging – but it has to work, right?! There are plenty of natural deodorants on the market, but most are very expensive, don’t smell great and don’t actually work against body odour very effectively, either.

Plus very few have completely plastic-free packaging.

The deodorant I’ve been using since 2012 is a super simple recipe, and all the ingredients are edible (except the essential oil). There’s no heating or melting involved, just a little mixing, which suits my laziness when it comes to these things.

The ingredients are 1 tbsp bicarb, 4 tbsp cornflour (or arrowroot / tapioca flour) and 2-3 tbsp coconut oil. The coconut oil depends on the ambient temperature – you’ll need less in summer and more in winter. You want a paste. Mix in a jar and add a few drops of your favourite essential oil. To apply, get a small amount on your fingertips and rub in. (You can find the recipe here.)

This recipe has been serving me well for 4 years, but bicarb can be a skin irritant for some. It’s fine for me, but my husband reacts to it. I tried changing the ratio from 1:4 to 1:6 and even 1:8 bicarb:flour (note – the more you dilute it, the less effective it is) but the issue was the same. His skin became red, inflamed and sore and it took a few months for it to settle back down again.

Ever since then I’ve said I’ll experiment with a DIY non-bicarb deodorant. I don’t move very fast it seems!

But the good news is I have finally kept my word and made a bicarb free deodorant. Not only that, but I (and my husband) have tested it and can confirm that a) it works (hurrah!) and b) there have been no adverse skin reactions. Phew! I can also buy all the ingredients completely packaging-free.

For anyone else out there who struggles with super sensitive skin and cannot use bicarb deodorants, this recipe is for you. Give it a go.

It’s not quite as simple as just mixing some ingredients in a jar but it’s really not that much harder, promise. There’s some melting involved. Nothing complex – I like to keep things as simple as I can!

Final product: bicarb free DIY deodorant.

Bicarb free DIY deodorant.

TIP: I would also add: it’s not quite as effective as the bicarb version I use, and it works best applied to clean skin. Whilst the bicarb one can mask smells if reapplied, this one won’t!

Bicarb Free DIY Deodorant: Recipe

Ingredients:

1.5 tbsp grated beeswax
1 tbsp shea butter
4 tbsp coconut oil
4 tsp white kaolin clay
8 drops tea tree essential oil
8 drops cedarwood essential oil
10 drops lemon myrtle essential oil

A note about the ingredients:

Beeswax: beeswax is solid at room temperature (it melts at 62°C) so helps make the mix firmer. I used beeswax as it’s really local (my neighbour who lives 4 doors away produced this). The only other solid subsititue I can think of would be cacao butter so maybe next time I’ll give this a go as it would be a great alternative for vegans.

Shea butter: shea butter melts at 38°C so is more solid than coconut oil. It’s very moisturising and is thought be anti-inflammatory – which is good news for sensitive skin.

Coconut oil: this is a soft oil that melts at 25°C. It helps keep the deodorant soft so it can be rubbed into the skin. Coconut oil is also thought to have anti-bacterial properties.

Kaolin clay: kaolin clay is a white clay (bentonite clay has similar properties) that replaces bicarb and does a similar job. It absorbs liquid and neutralises bad smells. Clumping kitty litter is actually made of bentonite clay! There are other types of clay available but these are more expensive. I’ve heard that green clay is the most absorbant of them all so at some stage I’d like to try this… it’s in the queue ; )

Essential oils: I’m lucky enough to be able to buy refills (packaging free) so I have some flexibility with my choice. I chose tea tree oil as it is anti-bacterial and cedarwood as it is anti-inflammatory. Both also have strong smells and are often used in commercial natural deodorant recipes. I find both scents quite overpowering and not hugely pleasant so I used lemon myrtle (which I love!) to mask them. Lemon myrtle is an Australian bush scent with the most amazing smell! If you have limited choice, go for a single oil and choose one that you can use elsewhere. Tree tree oil is affordable, available in larger sizes (meaning less packaging overall) and great for cleaning too. (When choosing essential oils, it is important to read up on the properties, particularly if you are pregnant.)

Ingredients for making bicarb-free deodorant (for sensitive skin).

Ingredients for making bicarb-free deodorant (for sensitive skin).

Method:

Heat some water in a pan on the stove, and place a glass bowl over the pan. You don’t want to heat the oils directly as you’ll damage them. Add the beeswax to the bowl and stir until melted (I used a metal spoon as it’s easier to clean than wood).

Add the coconut oil and continue to melt, stirring occasionally. Once both are melted, add the shea butter and remove the bowl from the heat.

The shea butter should melt with the heat of the other two ingredients. You can place back on the heat if it needs some help but be careful of overheating shea butter as it can turn grainy. Stir to aid the melting process and to combine.

Add the clay 1 tsp at a time and whisk to incorporate. Once all 4 tsp have been added, leave to cool, whisking occasionally. It will begin to thicken after only a few minutes (less if your room is cold). Once you notice the thickening and there is no head radiating from the mix, add your essential oils to the mix and whisk in. If you add them when it’s still hot, you will lose all their beneficial properties!

Final product: bicarb free DIY deodorant.

Final product: bicarb free DIY deodorant.

Pour into a shallow jar with a wide neck or a tin, and leave to set. It will set into a paste that feels tacky and is easy to scoop with your fingers. (If you live in a very cold climate and find it too hard, you may like to add more coconut oil or less beeswax next time to get the right consistency, but it will soften with the warmth of your skin.)

Store with the lid on in a dark place. To apply, take a small amount with your fingertips and rub into your skin. will keep for ages.

Now tell me…are you going to make it?! If yes, I want to hear what you think! If not, why not? Have you ever tried making DIY deodorant before? What ingredients did you use and what success did you have (or not have)? What about other DIY skincare products – are you a fan or do you tend to put them in the “too-hard” basket? What are your simplest solutions to bathroom essentials? I love hearing your thoughts so please leave me a comment below!

5 Tips for Getting Started with Plastic-Free Living

Could you live your life without plastic? Your answer to this will depend on your lifestyle, where you live and the kinds of things you like to do, the places available to you to shop and how much time you have. Whatever your situation is, I guarantee that you will be able to live with a little less plastic!

How much you choose to eliminate is up to you, but it all makes a difference.

shopping trolley with plastic bags

If your grocery shopping looks like this, then just a few minor changes will make a huge difference!

Many people feel overwhelmed before they even start… and so they don’t start. Or they make a mistake early on and give up, deciding that plastic-free living is something for the “too hard” basket.

The truth is, there is no need to panic, or to feel overwhelmed, or to do nothing simply because we can’t do everything. Change takes time: months, or even years. There is no rule that says everything must be successful on the first day!

There is no all-or-nothing approach to living without plastic: it is a sliding scale, and we just need to find out where we are personally comfortable to sit on the scale. We need to find our happy place: where we’ve made changes we’re comfortable with.

With Plastic Free July approaching, I like to spend time reflecting on my journey and the lessons I learned. This year is my 5th year of supporting the challenge, and I love to share what I’ve experienced with those that are just starting out, or taking it to the next level. If that’s you, read on!

1. Don’t try to make ALL the changes on the first day

It’s unlikely that you are beginning your plastic-free living challenge with a completely empty pantry, fridge and bathroom cabinets. It’s far more likely that you’ll already have food in the cupboard and toiletries in the shower.

Even if they are overpackaged in plastic, this is a good thing (for now!). It means that you can make changes slowly, one by one: as items are used up you can replace them with plastic-free alternatives.

When I signed up to Plastic Free July in 2012, the first things I had to buy were milk, bread, fresh fruit and vegetables. Cheese and yoghurt came later. Pantry staples like pasta and rice came later again. Condiments and specialist ingredients were further down the track.

I had so many products stockpiled in the bathroom (that I hadn’t really been aware of) that I didn’t replace anything here for a few weeks. In fact, it took me 18 months to use up every plastic-packaged item in my bathroom. Plastic-free living is a marathon, not a sprint.

2. Don’t think about the money – for now

If you’ve signed up to Plastic Free July, then you’ve committed to 31 days of living without plastic. I’m going to challenge you for those 31 days, not to think about the money you spend on groceries or toiletries.

Or not to stress about it, at least – there’s enough to worry about for now without having extra stress!

Plastic-free living can seem expensive at first, because buying food from deli counters or Farmers markets or in glass often does cost more than their cheap, lesser quality, plastic-packaged supermarket counterparts. Wholefoods and vegetables are more expensive than processed junk food, but they are also far better for us.

For these 31 days, give yourself a free pass. Open your mind to the possibilities. If your budget is small, maybe tighten the belt somewhere else – reduce how much you spend on alcohol, movie tickets, eating out or takeaway coffee for the month.

The truth is, in time, you’ll decide which things are worth spending the extra money on, and which things you’re happier without. The things you buy will change as you start to find new places to shop with different products on offer.

You’ll adjust your shopping and eating habits, and most people who live plastic-free and zero waste lifestyles find they actually spend less. But again, it takes time: I think it took us around 6 months to notice that our food bill had reduced.

3. There’s no need to rush out and buy anything new

There’s something about starting a new challenge that makes us want to rush out and buy new “stuff”. It’s because changing habits is hard, and buying stuff is easy… and by making a new purchase, we can feel that we’ve started on the journey.

There are a few things in the plastic-free living “toolkit” that make things easier, but you do not need to go out and make a purchase on the first day. Or even the first week. Or even at all!

Before you buy anything, you need to figure out if you are going to use it, and if you have something suitable at home already that you can use or repurpose. Take your time so that you can make the best choices. (This especially applies if you are concerned about your groceries budget.)

Plastic Free Living Zero Waste

The only thing I purchased during my first Plastic Free July was a KeepCup (a reusable coffee cup), made from plastic.

A few weeks later I began to wonder whether buying a plastic cup for a plastic-free living challenge actually made sense (of course it doesn’t). I started thinking about combining plastic with hot liquids. I noticed the plastic started to absorb the coffee flavour.

Eventually I decided to replace it with a glass one (which I still have). Had I taken my time to think about it, I could have saved myself a wasted purchase.

4. Life from scratch…or not?

Homemade Sourdough Loaf Zero Waste Plastic Free Treading My Own Path

When I started down the plastic-free path, I had no intention of making my own bread or yoghurt or pickles. However, I began making all of these things, and for different reasons.

I used to buy bread at the Farmers Market, which meant I had to purchase my bread between 8am and 12noon on Saturdays. This meant that the rest of Saturday was put on hold until I’d secured the golden loaf of sourdough. Freshly baked artisan sourdough is delicious, but it’s also expensive. The Saturday morning stress and the money led me to ask myself the question – could I bake my own?

Once I tried baking sourdough for the first time, I was smitten. Freshly baked bread straight from the oven – there is no comparison. Now I have freshly baked bread whenever I need it, rather than just on Saturdays.

I started making yoghurt when I realised how simple it was. It involves heating up milk, cooling again, adding a small amount of culture (meaning old yoghurt) and placing somewhere warm for 12 hours (you can find yoghurt-making instructions here). Why was I buying it, carrying it home and taking the empty glass jars back when it took less time just to make my own?

I really enjoy cooking ,and baking, and making stuff from scratch. The more I’ve tried, the more I’ve got into it. But I don’t have time to do everything.

I don’t make my own pasta, for example. We can buy pasta from the bulk store, so why would I make my own? I tried making passata once, but it was so laborious I declared never again (or not for a long time). I don’t can my own tomatoes. I use the lazy person alternative – chopping up and using fresh tomatoes instead. It works well enough for me.

If something is impossible to find without plastic, or too expensive to buy, then I consider that I have three choices. Number 1: make my own. Number 2: find an alternative that I’m happy with. Number 3: go without.

Of course there is a fourth option – compromise – but I prefer to stick to one of the first three. That is enough choice for me.

5. The 80/20 Rule

I have a theory that 80% of everyday plastic is easy to eliminate, and the other 20% is the hard stuff. The easy things like plastic bags, plastic straws, takeaway packaging, disposable coffee cups, water and soft drinks bottles, multipacks, individual portions and serves can all be removed from our lives without too much stress.

It just takes a little bit of remembering, and maybe some practice, but not too much change.

The other 20% is the stuff that requires compromise, or bigger changes. Don’t worry about the hard 20%, at least not at first, and don’t give up on reducing the easy stuff just because you know the hard stuff will probably elude you.

Focus on the easy changes that have big wins.

Zero Waste Week Treading My Own Path Reuse 2015

There will always be people ahead of us on the journey, who have achieved things that we can only dream about. We can learn from them, and speed up our own journeys. The truth is, they all started at the same place.

They all started at the beginning.

They chose to make one change, and purchase one less plastic item, and then one more, and they just kept on going. Small steps, in the right direction. That is all it takes.

As always, now I’d love to hear your thoughts! Are you someone who has been on the plastic-free living or zero waste journey for a while, and if so, what tips would you give to someone starting out? Are you embracing the Plastic Free July challenge for the first time this year, and if so, do you have any concerns or questions? Which one of these lessons stands out most for you? Do you disagree with anything? Are there any other lessons that you’d like to add? Any other thoughts about plastic-free living or zero waste living, or the Plastic Free July challenge? I’d love to hear from you so please leave a comment below!

Zero Waste (+ Plastic-Free) Gardening

I may have got to grips with plastic-free living and the zero waste lifestyle when it comes to inside the home, but when it comes to the garden, I’m a plastic-free newbie. Having lived in an upstairs apartment with little more than a balcony for the last four years, I haven’t really needed to think about it.

Now we’ve moved and I finally have the garden space I’ve been dreaming about all that time, I’m really keen to keep up with the plastic-free lifestyle and avoid using plastic in the garden where I can. (Spoiler alert – there have been compromises!)

Of course, paving or wood chip mulch would solve the waste problem straightaway, but I’m keen to grow as much food as I can, so no easy options for me!

Starting from scratch with anything can be daunting, and the hardware stores seem to have more plastic packaging in them than the supermarkets! I do not have all the answers – we have only been living here for three months, after all – but I’m beginning to find zero waste solutions and plastic-free alternatives that work for me.

No doubt in another three months I’ll have far more answers (and if you have any tips of your own, please share them!) but I thought I’d share my plastic-free and zero waste gardening solutions so far.

Starting with the Soil

We were lucky enough that when we moved, the four garden beds were pre-filled with soil (and pre-planted with seedings). However, there is still plenty of space for planting additional things, and empty pots need soil to fill them. Perth doesn’t have soil: it is a city build on grey sand, with no nutrient content or water-holding capacity whatsoever. I

t’s not possible to scoop up some soil from the ground and put it in a pot. You have to source it from somewhere.

We’d been given some potting mix in 25 litre plastic bags (the only size available where I live) but the bags seemed so wasteful that I didn’t want to buy any myself. Instead I found a compromise: coconut coir.

It’s a waste product from coconut growing areas. It comes as a dry, lightweight block wrapped in a very thin plastic layer. Once added to water it expands: this block will make enough to fill a wheelbarrow (90 litres).

To buy this much potting mix would require four bags, and heaps more plastic.

Peat-free potting mix made from a waste product: coconut coir.

Peat-free potting mix made from a waste product: coconut coir.

Coconut coir itself does not have any nutritional value, but can be mixed with worm castings, compost or other fertilisers to add nutrients.

Repurposed Polystyrene Box Plastic Free Gardening Zero Waste Gardening

Coconut coir once water has been added. This old polystyrene box is our old worm farm. Despite hating plastic and especially polystyrene, I couldn’t throw it out knowing it still had (some) use. It’s good for mixing up potting mix and saves me from buying a new container.

Coconut coir is great for raising seedlings, but to top up the garden beds (and create new garden beds) we needed soil. After a couple of phone calls, I found a local soil company that could deliver a trailer load of soil to us. This tiny looking pile is half a cubic litre (500l), which is the equivalent of 40 bags.

Whilst we didn’t need it all, we have been able to store what we didn’t use in our wheelie bin (we don’t use it for rubbish, after all) until we can use it.

Plastic Free Zero Waste Bulk Soil Delivery Treading My Own Path

Plastic-free zero waste soil delivery.

Compost, Worm Castings and Manure

In the beginning, we decided to buy a few bags (in plastic – shudder) of mushroom compost and animal manure, to get things started. We have two compost bins, but they are yet to crank out any compost. In future I hope to make all of our compost at home. (We also plan to get more bins.)

Zero Waste Plastic Free Gardening Homemade Compost Treading My Own Path

Our two compost bins. We hope to get more so that we can produce all of our own compost at home.

Clearly, if we plan to produce all of our own compost at home we will need more plant matter and food waste to compost! We’ve probably got enough weeds on the verge to provide all the nitrogen we could ever want, but compost needs both carbon and nitrogen. Our solution is to collect excess coffee grounds from the local cafe. We’ll also go leaf collecting to gather some extra carbon for the pot.

Repurposing Cafe Coffee Grounds Zero Waste Gardening Treading My Own Path

Coffee grounds from a local cafe (they were pre-packaged in plastic). We may have been a little over-eager… I could not lift these bags, they were so heavy! Coffee grounds are a great compost additive though, and we could never drink this much coffee!

Our solution for animal manure was simple. Our friends own a cow, and offered us their “spare” manure! We can provide our own containers and fill them up. Sounds stinky, but it’s plastic-free at least!

On top of this, we still have our worm farm, and can use the castings to enrich the soil.

Adding Nutrients to the Soil

We’d rather not buy plastic bottles of plant food because aside from the waste, we prefer to feed our plants natural ingredients and these pre-packaged feeds are high in salts and urea. The most natural options recommended seem to be kelp, soy bean meal (an alternative to blood and bone), blood and bone, rock dust, fish hydrolysate and pelletized chicken manure.

The soil company who delivered our soil also sell these in bulk, so we can refill our own containers when we need to.

Another, more cost-effective place to source these products is a stock feed place. We didn’t need the huge quantities, but a local lady purchased some and split the bags into smaller amounts for us. If that hadn’t been an option, these ingredients all have a long shelf life.

Zero Waste Gardening Kelp Soybean Meal Molasses Treading My Own Path

A local lady purchased these in bulk, and split into containers for a group of us. (She added the plastic jar labels – it’s not something I would have done!)

Seedlings and Seeds

To start with, we purchased a few seedling punnets. I’ve begun to plant seeds in the repurposed punnets and hope that I will be able to grow everything from seed in the future. Even seed packets sometimes contain tiny little ziplock bags.

Much further down the track I hope to be able to save my own seeds. Right now we are at the beginning of our journey. I need to learn what grows well and what we like to eat before I even think about saving seeds! I’m not worrying about the tiny little ziplock bags – for now ; )

We have swapped seeds with our neighbours which has worked well, as most seed packs seem to expire before all the seeds have been planted. This way we double our selection (and they do too) and the seeds are fresher – hopefully meaning that more germinate!

Seed Saving and Seed Sharing Zero Waste Gardening Treading My Own Path

Seeds on the left are our neighbours’; seeds on the right are ours. Seeds in the middle are saved from the beans that were growing in the garden. No idea what the different types are, though!

Repurposing

We’ve been able to find heaps of plant pots for free on the verge, which has been great for growing seedlings. Alongside the few seedling punnets we’ve bought, we now have enough to pot on our seedlings to beef them up before they go in the beds.

Reusing old plastic plant pots zero waste gardening Treading My Own Path

Gardening in containers Zero Waste Gardening Treading My Own Path

Plastic Plant Pots Zero Waste Gardening Treading My Own Path

Repurposing Plastic Plant Pots Zero Waste Gardening Treading My Own Path

What about the plastic so far?

There is no way I’m throwing any of the plastic we’ve used so far in the bin. Not a chance! But clearly, plastic bags that contained sheep manure and compost are not suitable for recycling as they are. They need to be clean. Such is my dedication that I cleaned them!

I would have just put them all in the washing machine out of laziness but my husband would have killed me (and I didn’t really want to wreck the washing machine). So I washed them all off as best I could outside (in a tub of water which I used in the garden), and then brought them in and scrubbed them in the shower with an old brush.

Cleaning old plastic bags Zero Waste Gardening Treading My Own Path

True story. I washed out my soil bags so I could recycle them properly.

Cleaning plastic potting mix bags Treading My Own Path

Hanging on the washing line to dry.

The only real waste item we’ve generated so far is the plastic labels that come attached to the seedling punnets. Most of them are currently in the garden reminding us what is planted where, but when the season is finished we may not have another use for them. Still, if we can reduce our garden waste to just a few seedling labels then I will be very happy!

Lindsay Miles Treading My Own Path Zero Waste Gardening

Plastic-free zero waste gardening in action : )

Now I’d love to hear from you! Do you have a garden? Do you have any tips for reducing waste and cutting down on plastic? Do you have any suggestions for how I might improve things further, or notice anything I’ll need to think about in the future? Is there anything you’ve struggled with? Do these struggles remain or have you managed to overcome them? Are there any compromises you make that you think are worthwhile? Are you put off gardening because of all the plastic packaging and chemicals? I’d really like to hear your thoughts so please leave me a comment below!

Why Plastic Free July is Just as Important 5 Years On

Plastic Free July changed my life. A grand statement I know, but completely true. When I first signed up to the challenge of using no plastic in the month of July back in 2012, it was the start of a journey that I could never have imagined. (You can read about my experience after one year of plastic-free living here.)

From the very beginning it was about understanding that if I wanted the world to change for the better, I had to do something about it.

Not only that, but Plastic Free July showed me that this was possible: change was something that I could do. That we all can do. Starting today.

We all have the power to make a difference, and these little actions, repeated by millions of people, add up to mean real change. That’s why when July 2012 was over, I had to keep on going. There was no turning back.

Four years later, I’ve feel like I’ve got living plastic-free down to a fine art. It’s not something I really have to think about any more. Those new habits have become second nature.

I don’t have the dilemmas of the early days… I have new routines, and I’ve found solutions that I’m happy with. It’s taken time, and there have been many frustrations and learning opportunities along the way, but plastic-free is a way of life for me now.

Yet this year’s Plastic Free July challenge is just as important to be as it was back in 2012. Maybe even more so. Here’s why.

Plastic Free July 2016 Plastic Free Living Treading My Own Path

Plastic Free July is definitely about inspiring change on the individual level, but it is about far more than just us and our shopping habits. It about encouraging us to see things differently, to ask questions, to challenge ourselves (and others), and to find new ways of doing things.

It is about inspiring all of us, together, and creating a movement. That’s where the real change happens. Plastic Free July is the chance to get involved with something bigger than ourselves.

It is the chance to become part of a community with a united voice, saying that we want things to be different…and demanding change. Not only that, but demonstrating what that change looks like, and how it can be done.

I’m still very much a part of this movement, and every year, as July comes around again, I feel my excitement growing. I love the swell of energy that starts to build each June, as more people hear about Plastic Free July (and the idea of living plastic-free) for the first time, and latch onto the idea that they really can make a difference.

In 2012 I was there, feeling that it was possible but full of questions about where to start, or what to do, or how to do it. Now I feel like I’ve come through the other side, and I can share my story. So that’s what I do – I share my story. (I’ll be speaking at 6 events in Perth over the next month about plasitc-free living, so if you’re local please come and say hi! Details to follow.)

My message: yes, plastic-free living is possible, and you can do it do. I was just the same as you. There is nothing special or different about me. I simply believed in the ideals enough to work at it, and make it happen. It didn’t all happen at once; just one change at time. That’s all it takes.

You can share your story or your experiences too. Don’t feel like you don’t have a story to share, or that you’re just one person. That’s all any of us are.

There are many voices in the sphere, but that doesn’t mean there isn’t room for more. There’s plenty of room, and we want to hear you! You don’t have to be a blogger, writer or public speaker. You don’t need a website or a social media feed. You just need a voice…and you already have one.

Talk to friends. Talk to family. Talk to work colleagues. Talk to your local newspaper.

What can you do this Plastic Free July? Can you bring people together and start the conversation? Do you have useful or relevant information that you can share? Is there a local event that you can get involved in?  Can you even organize your own – a plastic-free morning tea, or a beach or river clean?

Plastic Free July starts with making personal changes, but that is only the beginning. Let’s not stop there. We all care about the world we live in – that’s what inspired us to make changes in the first place.

We start with us, but let’s not stop with us. Let’s make this about more than ourselves. This Plastic Free July, wherever you are in your journey, can you do one thing that helps spread the word, or starts the conversation, or builds momentum in your community? Can you add another voice to the movement?

Jane Goodall said it best: what you do makes a difference, and you have to decide what kind of difference you want to make.

You can find more information about Plastic Free July at their website: www.plasticfreejuly.org

Now I’d love to hear from you! Have you been involved with Plastic Free July from the early days, or have you come on board more recently… or is this the first time you’ve heard of it? How has your involvement changed throughout the years? Are you still finding your way with making personal changes, or are you getting out into your community and sharing your story and spreading the word? What projects have you been involved with, and what positive impacts are they having? Are you thinking about the next steps, but are yet to take action? How has Plastic Free July (or living without plastic generally) changed the way you live? I’d love to hear your thoughts so please leave me a comment below!