How ethical are our trainers?

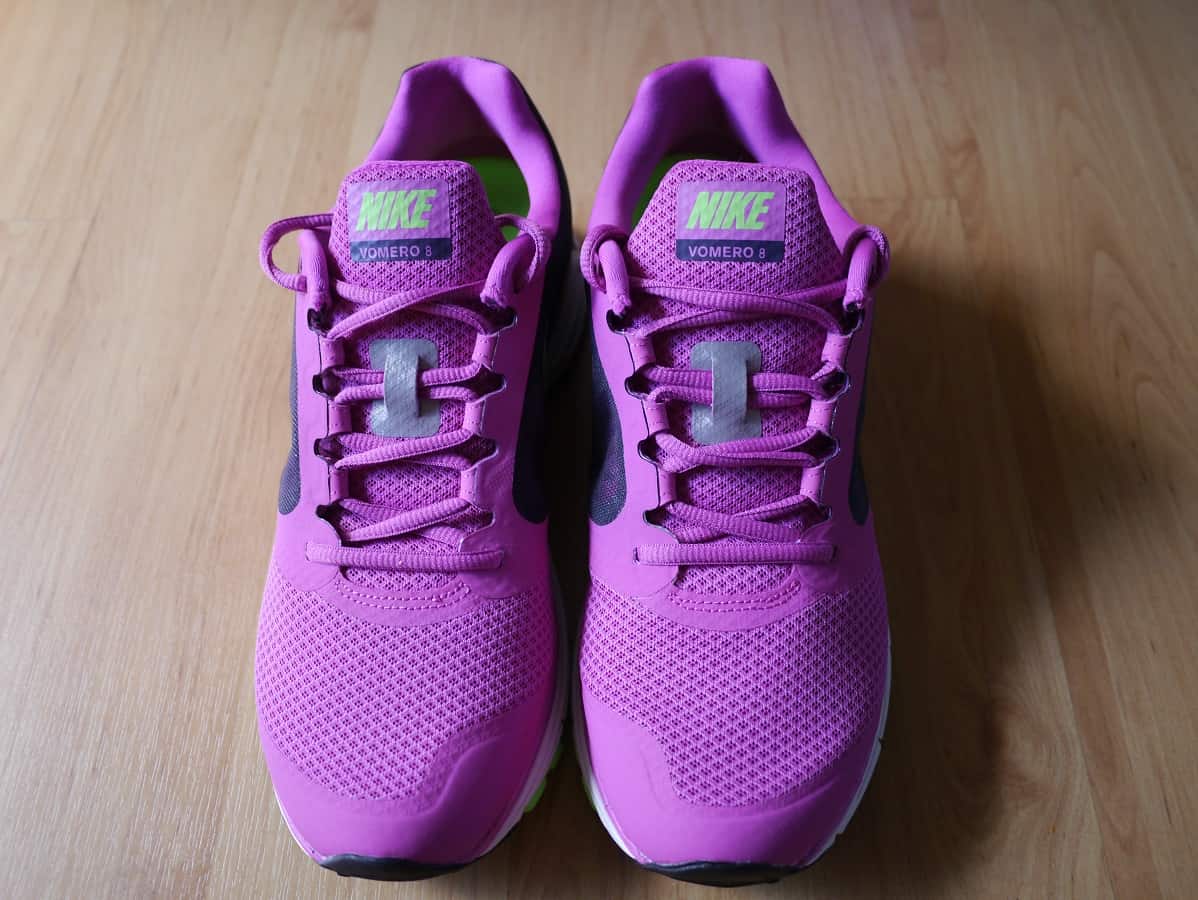
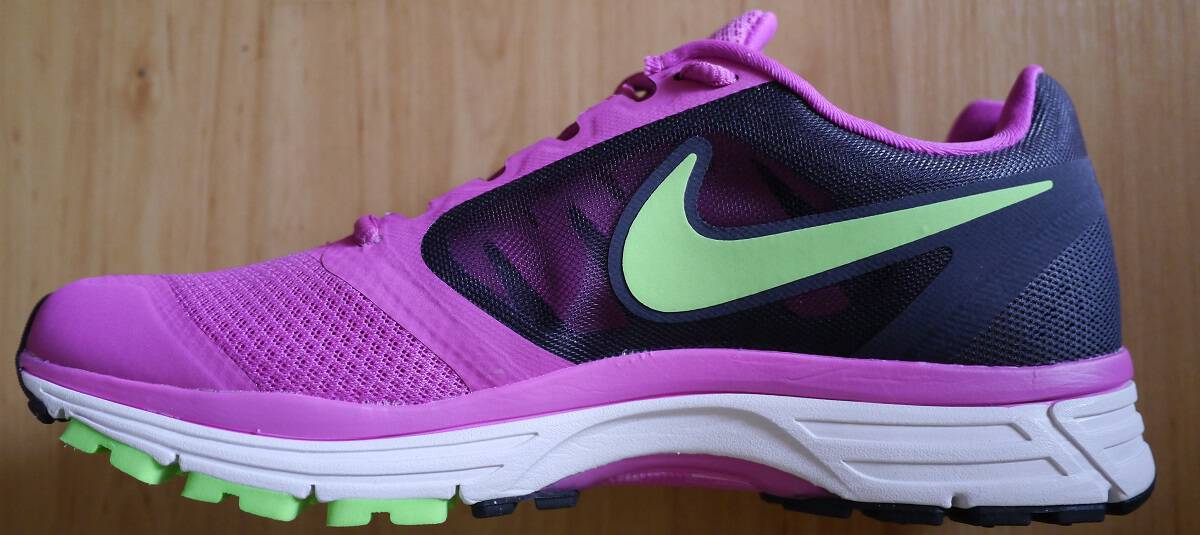
Last weekend I bought a new pair of trainers. They were, in fact, Nike trainers. They were, in fact again, Nike trainers made entirely of synthetic materials – which means plastic. So how does that sit with a plastic-avoiding, environmentally-conscious girl like me who champions ethical and sustainable consumption?

What’s wrong with Nike?

Nike sounds alarm bells for many people because they received a lot of criticism in the late 1990s and were subject to a massive consumer boycott. Nike were targeted because they were a best-selling brand; the reason for the boycott was Nike’s refusal to accept responsibility for the practices and treatment of workers in the factories it subcontracted to make its clothing and footwear ranges.

That was 13 years ago (the boycott ended in 2000). How does Nike perform today? They have definitely become more transparent. They have a detailed section on their website about their reporting and governance, including links to published reports, and an interactive map (last updated May 2013) which lists all the factories that make their products.

Maquila Solidarity Network, a Canadian-based workers rights organisation, published a Revealing Clothing Report in 2006 detailing labour standards reporting by retailers and brands selling clothes, and Nike scored 68%. Of the 30 companies investigated, Nike were fifth in the rankings. Lululemon, the yoga-inspired athletic brand, scored just 18%.

Still, there is a lot of room for improvement. In Ethical Consumer magazine’s latest Trainer buying guide, Nike scored 6.5 out of 20 on its ethical and environmental scale. Which sounds pretty bad, although when you you read further you find that Umbro, Adidas, Reebok, Puma and Brooks scored lower than that.

What about other brands?

Nike aren’t perfect and they still have a long way to go, but they are now committed to transparency. That is an important step. Consider though, that Nike were deliberately targeted for a boycott because they are a best-selling brand with a huge reputation. They were the scapegoat for the clothing industry. What about other, lesser known brands? Were they doing things differently? How committed to sustainability are they? How transparent are their reporting systems?

Looking at the Ethical Consumer scores, many other major high-street brands (Adidas, Reebok, Umbro, Puma and Brooks) scored no better than Nike. Oxfam Australia are putting pressure on Adidas and Puma as well as Nike to improve workers’ rights and other issues they have identified. Clearly Nike aren’t the only guilty party. Nike may have got the bad rap but they’re no worse than any of these other brands.

Are there any ethical trainer brands?

I found three interesting articles about this (two from the Guardian, one from 2008 and another from 2012, and one from the Huffingdon Post). The general consensus seems to be that whilst it’s possible to buy fashion trainers from ethical brands (Ethletic scored 17/20 on Ethical Consumer’s review but only make converse-style trainers), finding athletic sports shoes is more of a challenge.

That’s not to say that there aren’t great brands out there, but it’s going to take a fair bit of research and dedication to find them, and it’s unlikely you’ll find them in your local high-street shop.

Want to know more about ethical shopping?

I’m going to follow up this post with a guide to ethical shopping, but for now I’ll just give a few links if you’d like to read more.

The Rough Guide to Ethical Shopping is a great place to start. This book was published in 2004 so whilst some of the company information is a little dated, the principles remain the same. This is a book I read when it first came out and I learned a lot.

Ethical Consumer is a UK-based magazine available in print and online. They are a non-profit alternative consumer organisation dedicated to the promotion of universal human rights, environmental sustainability and animal welfare. Some of the information is available for free on the website or you can subscribe for £29.95 a year to access all the reports.

Labour Behind the Label is another UK organisation that run campaigns and also publish investigative reports, and works to support garment worker’s efforts worldwide to defend rights and improve wages.

Maquila Solidarity Network have a great list of resources, both Canadian and International, on their website – there’s too many to list and I haven’t checked them all out, but head over there to see if there’s anything that is relevant to you.

How do I feel about my purchase?

Do I regret my purchase? No. I haven’t bought a pair of trainers in over 15 years. I had absolutely no idea what I was looking for. I went to a shop to get some expert advice and these were the shoes that they recommended. I made a decision based on what I needed, what was available and the knowledge I had. I didn’t want to buy second hand because I didn’t want trainers that were molded to the shape of someone else’s feet. When they wear out, I will be able to make an informed decision based on what I know I need, and  I can choose a pair that are made by a more sustainable company. Hopefully I can find some made with natural materials and not plastic! I certainly won’t be replacing them before they wear out, even when the colour goes out of fashion or if I see a new pair on sale for a bargain price. These guys are with me for (their) life.

Another thing I’d like to add, is that (excluding some underwear I purchased in January) this is my first brand new clothing purchase all year. We are almost into September. In 8 months, I have only purchased one new thing. I have also bought a second-hand skirt, a second-hand coat and a second-hand jumper. That is it.

I’m not perfect, and I don’t claim to be. I’m just trying to do the best I can.

Paying full whack for a new pair of trainers

This weekend was a weekend of firsts. I bought my first pair of running trainers since I was at school – and that was a good while ago now. I also paid full price. That’s something I hardly ever (never?) do. What’s going on? Read more

Roasting, soaking, sprouting, activating, or eating raw – a guide to eating nuts

Nuts are super nutritious, and packed full of vitamins and minerals. Not only that, they are darn delicious. They’re surprisingly versatile ingredients too – they work equally well in sweet and savoury dishes, and you can even use them to make non-dairy milk, butter, and cheese. Plus they are used to make the most amazing raw desserts.

There’s a few different ways to buy nuts, but the two most common options are raw and roasted. As I’ve become more interested in learning about whole foods I’ve come across a lot of recipes that talked about soaking nuts, which seemed to add a lot of time to the recipes. When I started investigating raw food, and I found that the term “activated” also came up a lot, and recipes advised using activated nuts. How on earth do you activate a nut, I wondered? And more precisely, why would I bother when (most) nuts are perfectly tasty in their raw state?

The scientist in me wanted to know more. I like to understand things rather than following mindlessly just because I vaguely remember reading somewhere that something was better for me. I wanted to know what all these methods actually mean, what the point of them was, and whether there’s anything behind it.

Or is it just another fad?

Nuts in their natural state

Nuts grow on trees, and have a hard shell that takes a good set of nut crackers plus some considerable hand strength to prise open. Commercial farmers can use machinery to crack them open. The resulting nut once the case is removed is the raw nut.

It’s worth clarifying that raw in this instance means uncooked. Raw in the raw food sense means not heated above 46ºC. This can be a little confusing, for example with cashew nuts, which are often steamed open. These nuts are still referred to as “raw”, since they are uncooked, but they are not strictly speaking raw in the raw food sense as the steaming would have involved heating them above 46ºC. (You can buy cashews that have been cracked open by hand and are truly raw, but they are considerably more expensive.)

Nuts and phytic acid

As well as all their nutritional goodness, raw nuts also contain phytic acid, or phytate. Phytate is the molecule that plants use to store phosphorus, and it is particularly high in bran, seeds and nuts.  Once digested, the phytate in raw nuts, which cannot be digested by humans as we do not have the phytase enzyme, binds to minerals, particularly calcium, iron, and zinc, but also magnesium and manganese, preventing us from absorbing them in the gastrointestinal tract. Phytate has been described as an anti-nutrient for this reason. (If you want to read more about phytate read here and here). Diets high in phytate are thought to cause iron deficiency (see here).

As well as binding to minerals, phytate is also thought to inhibit digestive enzymes such as pepsin (here), trypsin (here) and amylase (here). This is why large quantities of raw nuts can be hard to digest.

Whether you should worry about phytic acid depends on how much you intake. If you just eat a small handful of raw nuts a day, it’s probably no big deal. But if you’re vegan and eating huge quantities of almond butter, cashew cheese and raw (nut-based) cheesecake, you eat a vegetarian diet packed with lentils and wholegrains, or you’re anaemic or suffering from calcium or iron deficiency, then you may want to consider reducing your phytate intake. That doesn’t mean cutting back, it just means preparing your nuts (and also pulses and other wholegrains) a little differently.

All of the ways described below are ways of preparing nuts so as to reduce the phytate levels and make the nuts easier to digest, and allow us to absorb more nutrients.

Roasting Nuts

Roasted nuts are probably the most readily available nuts after raw nuts. Roasting reduces the phytate content of nuts, although there’s not much research available regarding specifics of how the nutritional content of nuts changes when you roast them. It is also thought to improve their digest-ability.

If you do want to eat roasted nuts, you’re far better off roasting your own. That way they’ll be fresher (and tastier), and you can control the oven temperature. Because nuts contain polyunsaturated fats it’s thought that roasting at lower temperatures are better. Also, nuts which contain asparagine, such as almonds, need to be kept below 130°C to avoid producing acrylamide, which is a neurotoxin and carcinogen. (For more information see here and here).

Roasted nuts that you buy from the supermarkets are often not roasted but deep fried. (If they don’t say dry roasted, then they’re not!) There ain’t nothing healthy about that!

Soaking nuts (or “activating” them)

Another option for reducing the phytate content of raw nuts is to soak them. Soaking is a precursor for germination, and the seed uses enzymes to break down the phytate. Soaking time can vary depending on which nut you’re soaking, but overnight is a general guideline.

If you soak the nuts for long enough, they should begin to sprout (germinate). I have never tried this but expect it would take several days. The water should be changed every 12 hours or so (more if it is a very hot day) to help prevent them rotting.

You can eat nuts that have been soaked. They are still crunchy but have a more “crisp” bite than a crunch. They are great for adding to salads or snacking on, but will only keep for a couple of days. They won’t work in recipes that call for raw or roasted nuts though because they are too wet. To enable them to be suitable for baking, they need to be dried out.

Dehydrating nuts

Dehydrating is a method of drying soaked nuts out without cooking them, and uses low temperatures for long periods of time to achieve this. There is a specialist piece of equipment called a dehydrator that can be used, or a fan oven at a low temperature (lower than 50ºC) with the door ajar to allow the moisture to escape, or even leaving them in the sun. Dehydrating nuts takes upwards of 12 hours. Once dried out the nuts resemble raw nuts in flavour and appearance but have more crunch and are slightly drier.

If nuts aren’t dehydrated for long enough then they can go mouldy inside because of the moisture that remains.

Activated nuts

In some health food shops you can buy activated raw nuts. These are nuts that have been soaked (activated) then dehydrated and packaged for sale. They are considerably more expensive than ordinary raw nuts because of the extra time and effort that has gone into preparing them.

The Conclusion?

All this preparation is taking place to make nuts easier to digest, and that can’t be a bad thing. That said, it does require a bit of effort, and if you don’t notice any problems eating raw nuts you’ll probably think it’s not worth the trouble. However, consider this. Whilst you may think it sounds like a modern fad, most traditional cultures soak, sprout and ferment nuts and grains and have done for centuries. It’s not that it’s been invented, more re-discovered. Also, nuts don’t come ready shelled in convenient packs at the supermarket. Back in the old days, if we wanted 500g of nuts for a recipe, we’d have to find a nut tree and then sit and crack them all open by hand ourselves. No doubt this helped limit how many we actually consumed. Nowadays we can consume kilos of them without a second thought. This makes it more important to prepare them properly than if we were just having a small handful now and then.

I try to soak my nuts if I’m adding them to a salad and planned far enough in advance! Soaking is a requirement for making nut milk anyway. As for raw desserts, because of the huge quantities of nuts required, I’ve started using activated walnuts and almonds because I can buy these in bulk. If I just want a quick snack though, I’ll often eat raw nuts straight out of the jar. Perfection is just too hard!

The possibility of today

Yesterday I was trawling the internet and just as I clicked away from the page I was on, four words caught my eye. I only caught a glimpse before the next page loaded and they were gone.

“The possibility of today.” Read more

My take on supplementing your diet

For a long time I’ve thought that vitamins and supplements were a complete waste of money. When I was a student, I remember going for several days without consuming a single fruit or vegetable (I shudder at the very idea now). Once I remember deciding I should supplement my diet with a multivitamin. (I want to shout at myself WHY DIDN’T YOU JUST GO AND BUY SOME VEGETABLES?!!!, but fresh produce can seem expensive when you’re on a student budget, and in those days it wasn’t a priority.) So I went to the chemist and bought the multivitamin that had the most amount of things in it for the least amount of money. At the time, I felt no different, and concluded I should have saved my pennies. Read more

My weekend baking extravaganza

I set myself a challenge this weekend. I decided to try three new recipes of things that I’ve never made before. I love food and I love cooking (which if you read this blog you’ll probably have noticed) but I often feel like I’m making the same things over and over again. That’s partly true because I get a seasonal veg box delivered, and the contents don’t vary much week to week – especially in winter. I consider myself pretty good at knocking something nutritious and tasty up out of whatever is in the fridge and in the pantry, and I love making recipes up, but when I have the same ingredients I tend to make the same kinds of things.

I was feeling a bit stifled, creatively speaking. I don’t tend to use cookbooks and recipes much apart from special occasions, but I decided maybe this was what I needed to re-spark my culinary inspiration. I decided I’d find three recipes that looked great and that I’d never made before, go shopping for any new ingredients that weren’t already hanging about, and get baking.

I had such a fun time! It was great to make things with new ingredients, and follow other people’s recipes rather than tinkering for hours with my own. I used spelt flour for the first time, made raw vegan chocolate brownies and learned about wakame gomasio. It’s definitely re-sparked my creativity again; I’ve been thinking up new ideas and I’m already planning some variations and new recipes.

Here’s a mini showcase of my weekend (I’m so proud of my efforts I thought I’d take the opportunity to show off!):

rawpasty cookedpasty pasty rawbrowniejpg brownie2 brownie3 brownie4 bars2 slicej bars3 So I have a challenge for you. This weekend, make a recipe that you’ve never made before. Maybe something you’ve been meaning to make for a while. Maybe just flick through some cook books for inspiration. You’ve got a week to find a recipe and make sure you’ve got all the ingredients to hand. Good luck!

In addition to my renewed passion for cooking, the other great thing about the challenge was that I started my week with a fridge full of delicious things to eat. How awesome is that?!

Wakame gomasio: what it is and how to make it

I came across a recipe I wanted to try this weekend and one of the ingredients was wakame gomasio. I had no idea what this was. Even more mysteriously, the recipe had an alternative – sesame seeds. What kind of exotic fancypants ingredient with a name like that can be substituted simply with sesame seeds?

So I looked it up. It took me a while to find out what it was and how to make it, but now I know I thought I’d share it. Plus it’s super delicious so I think it’s worth knowing about!

Gomasio (which is also spelled gomashio) is basically a mix of toasted ground sesame seeds and salt. It’s a Japanese condiment that’s also popular in macrobiotic diets (something I don’t know a lot about). Sesame seeds are high in calcium, iron, magnesium and B vitamins (full nutritional information here).

Wakame is a sea vegetable that has been grown by Japanese and Korean sea farmers for centuries. It is an edible seaweed that is high in iodine, calcium and B vitamins (full nutritional information here). It’s also high in sodium so has a salty taste. My local health food store sells this in bulk (plastic-free!).

So wakame gomasio is wakame and gomasio. Fairly straightforward really!

How to make wakame gomasio

The hardest thing is probably finding the wakame, although I found it in several local health food stores. You could also try the Japanese section of your grocery store or online. It looks like this:

wakameIf you can’t find it (or don’t want to use it, simply omit and use the recipe to make gomasio).

Ingredients:

1 piece wakame (when ground should be roughly equal to 1 tbsp)
1/2 cup sesame seeds
1 tsp salt

Method:

Toast the wakame in an oven at 160°C for 10 minutes until dry and crisp.

Meanwhile, in a pan heat the sesame seeds on the lowest heat for 5-10 mins, stirring with a wooden spoon, until the seeds have changed colour from pale to golden. Try to remove them from the heat before they start to pop; if they do begin to pop remove from the heat immediately.

Add all the ingredients to a grinder or mortar and pestle, and grind until you have a coarse powder.

wakamegomasio wakamegomasio3And that’s it!

You can change the quantities of salt and wakame as you wish. If you aren’t using wakame, ratios of sesame seeds:salt can vary from 5:1 (found in commercially available varieties) to 18:1 for traditional Japanese gomasio. If you are using wakame, ratios for sesame seeds:wakame vary with 8:1 being an average. Start with this and adjust to find the combination that you like.

What to do with it

It’s a healthier alternative to salt, and it smells and tastes amazing. In Japan it’s used to season rice. The recipe I used it for was pastry. Feel free to try it whichever way you wish!

A (dentist-approved) homemade toothpaste recipe

Yesterday I finally had a long-overdue visit to the dentist. I haven’t been to the dentist in two years. Whilst you may not think that two years is a terribly long time to avoid the dentist, I must admit that the last time I went the dentist told me that I needed a filling*, and I never bothered to get one.

*To be fair, the dentist seemed quite vague (I think he was a recent graduate), definitely told me it was to be on the safe side, and from what I could see from the x-rays (knowing absolutely nothing about dentistry of course) there was no urgency. So I saved the £120 or so it was going to cost me and cancelled the follow-up appointment.

Moving continents didn’t help either, and then I was further delayed because I rang a few dentists to find out filling prices and all the dentists were really mean. Really really mean. One was outraged that I hadn’t had a filling and told me I would probably need root-canal surgery by now, and another told me that I’d have to have a scale and polish before the dentist would even see me, as their dentists wouldn’t dream of looking into dirty mouths. (For readers who live in Perth, yep, that dentist was in Claremont).

I finally had a recommendation from someone for a dentist whose receptionist was actually nice over the phone, and so I braced myself for the inevitable expense and booked. I also thought that this would be a good opportunity to get some professional advice about my homemade toothpaste… and find out if it was actually working.

Turns out that the dentist I visited is the Nicest Dentist Ever. She didn’t seem phased that I had been told I probably needed a filling and hadn’t bothered to get one. I told her that I made my own toothpaste and we discussed all the nasties in conventional products as well as the fact that I don’t buy products in plastic. I told her what I used to make the toothpaste (recipe below) and she said it contained all the key elements that commercial toothpastes had and would be absolutely fine to use. She was so nice I even admitted that I don’t floss very often.

So she looked at all my teeth, and took some x-rays. She said the brushing and toothpaste was working fine, all the fronts and tops of my teeth were in great condition. I have the green light to continue with my homemade toothpaste!

Unfortunately I still need the filling.

In fact, I need three.

All of the decay is where the teeth touch each other at the sides. Turns out flossing is probably a useful thing to be doing after all.

So, said the dentist. What would I like to do? Obviously I’ll be wanting to keep things plastic-free. She assumed I wouldn’t like the amalgam (silver coloured fillings) because they contain mercury. She also doubted I would like the composite (white) fillings because they are made from resin – or plastic. When I said I didn’t know much about them, she said if I looked them up she was pretty sure I wouldn’t want them either.

I didn’t actually know there were other options. Apparently there is also porcelain, which uses a small amount of resin to bind it but far less than the composite filling, or gold.

Now I’m no gangsta and I’m not sure gold fillings are quite the look I’m after. Porcelain sounds great… except they’re $800 each. Composite fillings are just over $200.

In the end, I chose the composite ones. Plastic or not, I just don’t think I can justify the extra expense.

Appointment is next Tuesday.

In the meantime, it’s great to know that my homemade toothpaste now has dentist approval!

Homemade Toothpaste Recipe – dentist approved!

I’ve posted my original toothpaste recipe here (and also the reasons I make my own in the first place) but this is the one I’ve been using more recently that I’ve tweaked slightly.

Sodium bicarbonate. This is the abrasive that cleans the teeth. It has quite a salty taste that can take a bit of getting used to. It also neutralises stains and odours.

Glycerin. This acts as the lubricant and binder. In the past I’ve also tried coconut oil. I’ve read that glycerin can coat the teeth and form a barrier that prevents re-mineralisation, and some natural toothpaste users prefer coconut oil. However, because sodium bicarbonate can be quite abrasive the glycerin can help protect the teeth. The dentist thought glycerin was better suited than coconut oil.

Peppermint oil. I add this to give the toothpaste the fresh minty taste that psychologically we associate with toothpaste.

Clove oil. I started adding this recently because clove oil has great anti-microbial, anti-viral and anti-fungal properties. You often see clove oil in natural toothpastes and the dentist told me that she still uses it for some of her procedures.

And that’s it! I no longer add extra salt as I found the taste too salty, and the dentist said that with the bicarb it’s not neccessary to have another abrasive.

Method:

Mix 8 tbsp sodium bicarbonate with 6 tbsp glycerin. Add 10 – 15 drops of peppermint oil and 1 drop of clove oil. That’s it!

Store in a jar.

A couple of final things. The dentist also said that what can be more important that the abrasive in the toothpaste you use is the type of brush. Often toothbrushes are more abrasive than the toothpaste. She recommended using a soft toothbrush, particularly if you are worried that your toothpaste is too harsh.

The last thing to bear in mind is that not everything works for everybody all of the time. There are people who only drink fizzy drinks and eat daily Mars bars and have great teeth, and there are others who only eat salad and have mouths full of cavities. This toothpaste contains all you need in a toothpaste to keep teeth and gums healthy, and it is working for me. It should work for you too, but be mindful of what’s going on in your mouth, and if you suspect things are awry, maybe consult your dentist?!

As it turns out, weddings are stressful

For those of you who missed the update, my boyfriend proposed at the start of August. It was a complete surprise, but a very pleasant one. It only occurred to me some hours later that actually, after an engagement comes a wedding. It hadn’t even crossed my mind.

Some girls have dreams of their big day, and have been planning it since they were tiny; I am not one of those girls. I have actually very little idea about weddings. I’ve only been to a handful myself. Read more

One man’s trash is another man’s treasure

I sold my glass jug blender today on Gumtree. Not exactly front page news, I know, but bear with me.

When I got my new kitchen robot I listed my Magimix food processor and my jug blender on Gumtree straightaway. The Magimix sold almost instantly for the money I asked; they are solid gadgets with fantastic motors and I knew it would be easy. I did not have such optimism for the blender. It’s not a bad blender and it still works, but it wasn’t a great brand, it didn’t have a massive motor and it was a few years old. There was only one other same-model Magimix on Gumtree when I listed mine; there were hundreds of blenders.

I listed it anyway, and after a week, rather unexpectedly, I got a call. Someone wanted to buy it, and offered $20. Rather amazed that I’d even got the call in the first place I agreed (I’d listed it for $30).

When the guy turned up, he explained that he had the same blender and the glass jug had fallen off the kitchen bench and smashed. He’d called the manufacturer who’d told him the price of a new jug…and the price of a new blender. Guess which one was cheaper? Yep, the whole unit. They actually advised him on the phone to just order a whole new unit. But rather than buy a new one, he’d checked on Gumtree first, and there was mine.

It makes me so mad that companies do that deliberately. One bit breaks and you have to replace the whole thing. It’s so incredibly wasteful. Of course it doesn’t make sense that a whole unit would be cheaper than its parts. Yet it always seems to be that way. I feel like they’re trying to condition us to never try to repair things or replace parts, but mindlessly buy new ones instead.

We don’t have to stand for that! That’s why sites like Gumtree and eBay are so useful. They give all the people who need replacement parts access to loads of people who have replacement parts. We don’t have to let these companies have their way!

If I’d have sent that blender to the charity shop, there’s a chance it would have gone to landfill anyway. Not all charity shops accept electrical goods, and they also need to be able to test them for electrical safety. Plus I sometimes feel that sending stuff to the charity shops is shirking our responsibility a little bit. It’s too easy to dump our unwanted stuff and feel good about giving to charity when there’s no guarantee they’ll actually want what we’ve given them. This way I can be sure that the item I’m selling has gone on to a new home where it will be used.

People sometimes think I’m crazy for listing things on Gumtree for such small amounts of money. (I have listed things on there for free, but the lowest price I’ve listed something for was 50 cents – and it got a buyer!) But it’s not about the money. It’s about diverting something from landfill and stopping somebody else buying something brand new when there’s a suitable second-hand alternative. Double win! The argument that you haven’t got the time? Seriously?! You need to take a photo, upload it and write a short description. You can do it from your mobile phone in about 1 minute. Not exactly labour intensive!

I’m feeling pretty smug that I thwarted the electronic company’s attempt to get a new sale, pleased that I was able to give the guy exactly what he was looking for, and glad the blender isn’t stuck on a dusty shelf in a charity shop or heading to landfill.

If you’ve got stuff that’s broken or got parts missing, it’s doesn’t mean no-one will want it. I bet for every functioning blender with the glass jug broken, there’s another with an intact jug but a burnt-out motor. Even if you think something’s beyond salvage, someone else may find it useful for an art or sculpture project. Before you chuck it in the bin, give it a go on the second-hand listings sites. You’ve got nothing to lose!