The Less Waste No Fuss Kitchen: simple steps to shop, cook and eat sustainably

My new book ‘The Less Waste No Fuss Kitchen’ will be hitting the shelves in just a few days, and I’m excited to tell you all about it! Especially if you live somewhere where the bookstores are currently closed, so you can’t pop in for a good old snoop.

Never fear – I am bringing the snoop to you!

I’ve also included some answers to some of the questions I’ve been asked. I’ve had a few questions about the book, so just in case you’ve been wondering too, I thought I’d pop them all together for you.

A bit more about the book: introducing The Less Waste No Fuss Kitchen

The book covers three aspects of waste and sustainability: plastic and packaging, carbon footprints and food waste. I wanted to write something that talked about their interconnected nature. There has been lots written on each of the subjects but in isolation. But some of us who care about all of these issues – and we often don’t want to compromise anywhere.

And that makes making choices hard.

Is it better to buy plastic-free but air-freighted from overseas, or is it better to buy plastic-packaged but locally grown?

If groceries packaged in glass have a higher carbon footprint, is plastic packaging better if we want to keep our carbon footprint low?

Is it better to buy everything packaging free, but then increase my food waste as a result? Or choose the packaging to reduce my food waste?

And so it goes on.

What I realised as I was researching the book, is that there is never perfect answer. There are always exceptions to rules. ALWAYS.

Unless we’re going to grow every single thing we eat outside our back door, using rainwater we’ve harvested and seeds we’ve saved, and we’re recycling all our nutrients (I’m not just talking about composting food scraps…), then we are going to have some kind of impact.

Perfect isn’t possible, but better is. And that, my friends, is where this book is here to help. All the ways that it’s possible to take action, to do a little bit better than before. And how to figure out which actions will work (and be sustainable) for you.

Let’s take a look inside the book…

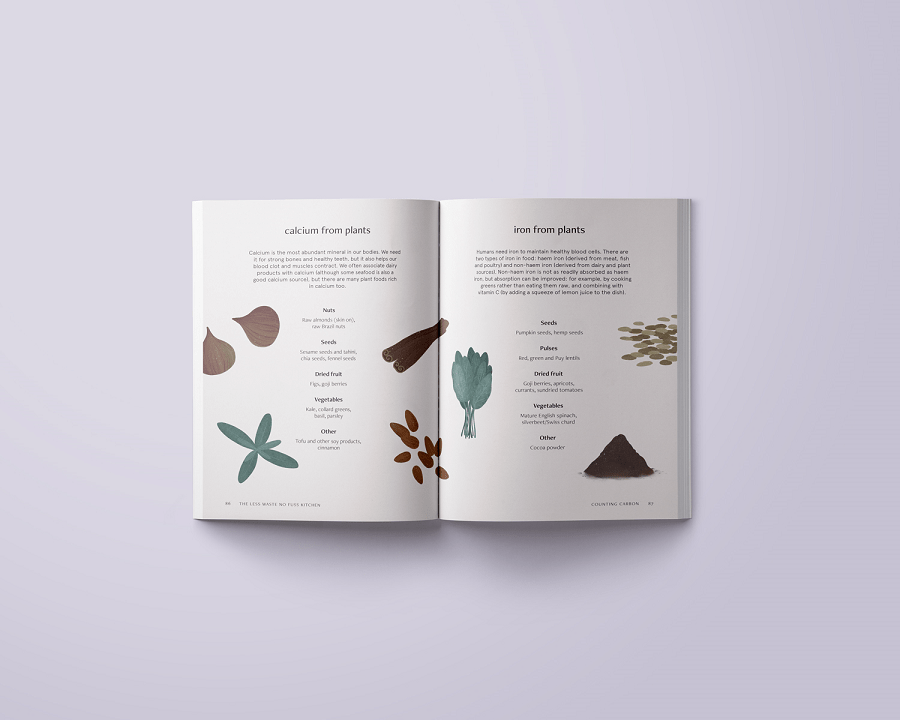
First, the technical stuff. The book is 224 pages, printed on FSC-certified sustainably sourced paper using vegetable inks. It’s full colour and there’s lots of beautiful illustrations throughout – and I even managed to get the illustrator to draw a compost bin, a bokashi bucket… and a mouldy strawberry!

These things are just as important as the pretty stuff, amirite?

A reader asked me if it was gloss paper – no, it most definitely is not! The cover is flexibound, which is half ways between a hardback and a paperback.

Now, the content!
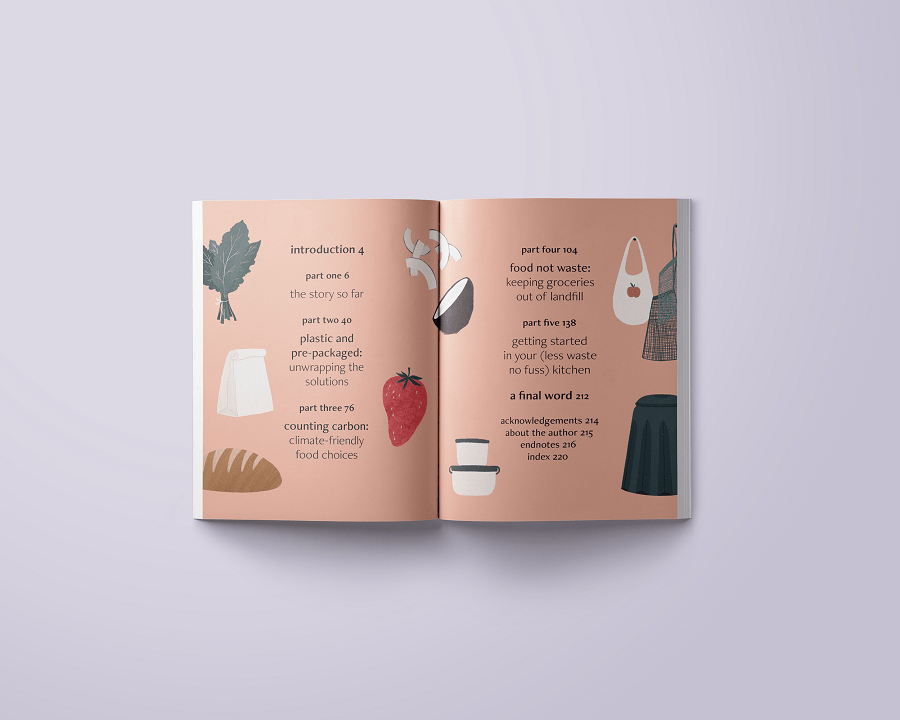
There are five sections:

Part one, the story so far – a look at our modern day food system, how it evolved to be the way it is and some of the problems it has created. I’m not one to dwell on problems, but it’s helpful to have a bit of an understanding of the issues we are trying to fix.

Then, we talk about habits, and making an action plan that’s sustainable for you, starting where you are.

Part two, plastic and pre-packaged: unwrapping the solutions – all about plastic and other types of single-use packaging, and how we can make better decisions around our choices and where possible, use less.

Part three, counting carbon: climate-friendly food choices – covering how our modern food system contributes to greenhouse gas production and all the ways we can lower our footprint, from the way we shop to the things we buy, and what we do with those things once we bring them home.

Part four, food not waste: keeping groceries out of landfill – a look at all the ways we can reduce what we throw away, from better storage to using things up to processing our food waste at home.

Part five, getting started in your (less waste no fuss) kitchen – practical ideas for reducing waste when in the kitchen. From setting up your kitchen to choosing substitute ingredients to use what you have, from tips for cooking food from scratch and simple recipes to get you started.

Here are a couple more sneak peeks of the pages…

Where you can buy The Less Waste No Fuss Kitchen

The best place to buy the book, if you can, is your local independent bookstore. If you can’t physically go into the shop to browse, you might be able to call and arrange collection, or they may deliver.

Alternatively, you might like to support MY favourite independent bookstore, Rabble Books & Games (Maylands, WA). They can post, if you’re not local. All books purchased from Rabble will be signed by me :)

Alternatively, here are some online stockists that are selling my book:

Australia / New Zealand stockists:

Angus & Robertson | Booktopia | Book Depository | Dymocks | Mighty Ape (AU) | Mighty Ape (NZ)

UK Stockists:

(Official publication date is 11 June 2020)

Blackwells | Book Depository | Foyles | Hive Books | Waterstones

US and Canada Stockists:

(Official publication date is 16 June 2020)

Amazon | Barnes & Noble | Books-A-Million | Indigo (Canada) | Indiebound

eBook:

(Release date 15 June 2020)

Apple Books (iTunes) | Kindle (UK) | Kindle (USA)

Don’t forget your library!

If you’re a book borrower and not a book buyer, please don’t forget to ask your library to stock the book. It’s hard right now with so many libraries currently closed, but if staff are still working behind the scenes they might be able to order it in ready for when they re-open the doors. It’s worth checking!

The Less Waste No Fuss Kitchen – your questions answered!

Is The Less Waste No Fuss Kitchen a recipe book?

It’s more of a handbook than a recipe book. There are some recipes in part five, but it’s a much more holistic look at the way we shop, cook and eat. From the places we shop at to the things we buy; from navigating confusing choices to making the most of what we have once we bring it home – the book explores the options and ideas to limit plastic and packaging, lower our carbon footprint, get more creative in the kitchen and reduce food waste – without overhauling our entire lives or chaining ourselves to the stove.

Less waste, no fuss.

Is this a book that vegans will get value from? / Is this a book that non-vegans will get value from?

Without wanting to say ‘it’s a book for everybody!’ (because when is that ever helpful?), if you’re a vegan or a non-vegan who gets value from reading my blog, then you will get value from reading my book. Remember, it’s not a cookbook (although the recipes that are included are plant-based/vegan friendly). There’s no beating anyone over the head with a baguette and telling them what they *should* be doing (or eating) – that’s just not my style.

My approach (here and in the book!) is to avoid being prescriptive, and anyways, I really don’t believe there is a single approach that works for everyone in all circumstances. The purpose of the book – as I see it – is to help you find which approaches will work for you (rather than tell you what I think you should do).

Can I get a signed copy?

Yes! If you order from my favourite local independent bookshop Rabble Books and Games (located in Maylands, Perth WA) you’ll be able to request a signed copy!

Pick-up is available in store, or they offer local delivery, or ship by Australia Post for orders further afield.

Are you doing any events or a launch for the book?

Sadly no, all the events that were planned have had to be cancelled due to Covid-19.

Why are there different covers of the book?

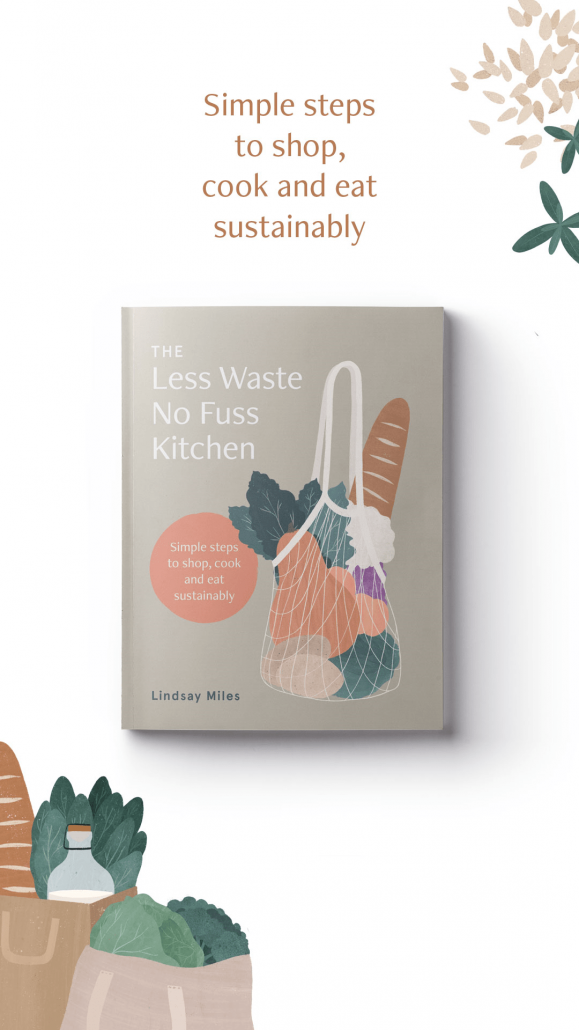
Actually, there aren’t. There is just one cover – this one.
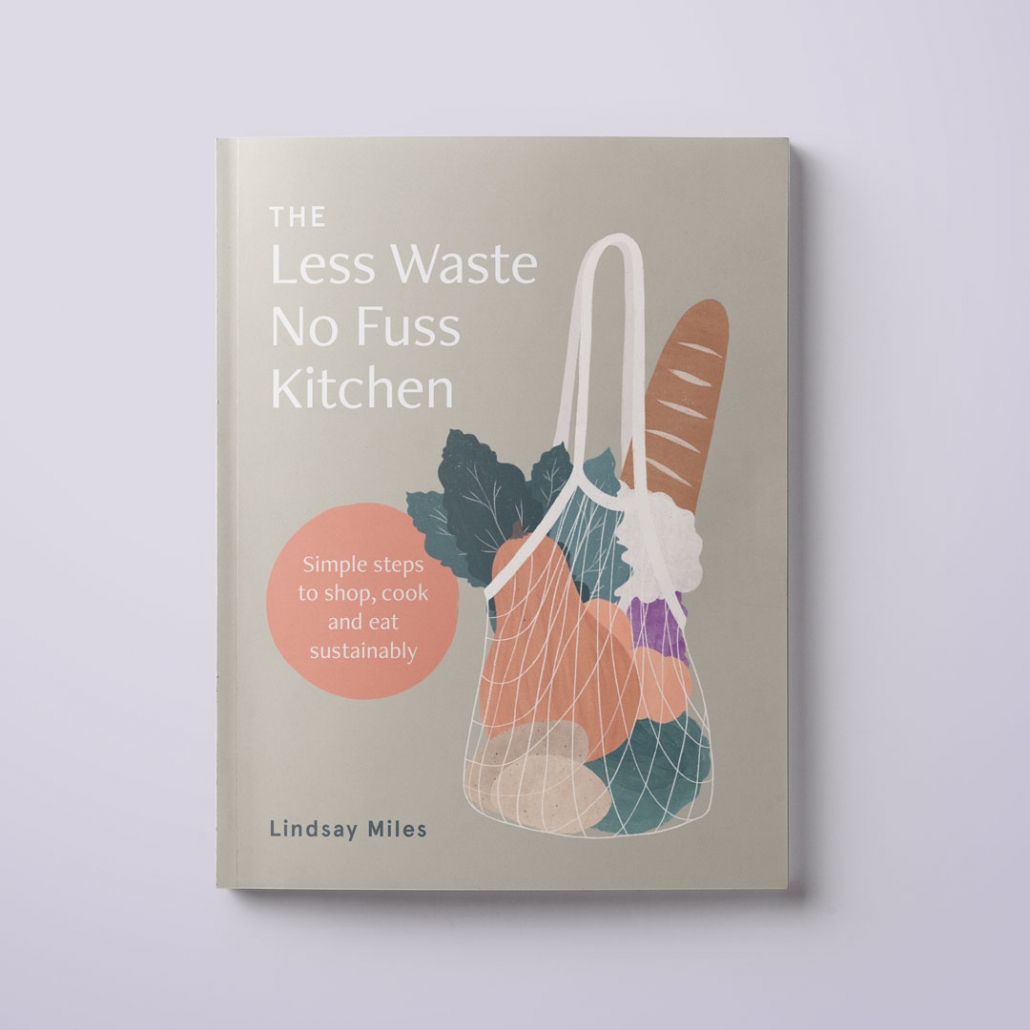
However, the US office of my publisher released a super early concept version of the front cover several months ago (one that I’d never seen before it was plastered all over the internet!) and it’s been a long process trying to get all the stores to update the image. That cover never went to print, and you won’t actually receive a book with any cover other than the one above. Sorry for the confusion!

Is there an ebook or audiobook version?

The ebook is being published on 15 June 2020. There is no audiobook planned at this stage.

I hope that answers all your questions, and gives you a bit of insight into the book. If I missed anything, be sure to ask me.

I can’t wait for you to have a read, and I really hope you find it useful and actionable!

Everything you need to know to get started with home composting

Composting can seem a little overwhelming. There seem to be so many things to worry about; things that might go wrong. It can seem a bit technical and science-y. But actually, the basics are quite simple, and it is easier to get a compost bin cranking than you think.

If you’re composting at home, especially if you’re a beginner, you don’t really need to get bogged down in the details. Understand the principles, and you’re on your way.

If you love the idea of composting, but simply don’t have the option to compost at home (or where you live), this post on composting without a compost bin might be useful.

If you’re keen to get you own compost system set up at home, read on.

Choosing your composting system

There are a few different composting systems (and I’m only talking about composting today – not other methods like worm farming/vermicomposting or bokashi systems).

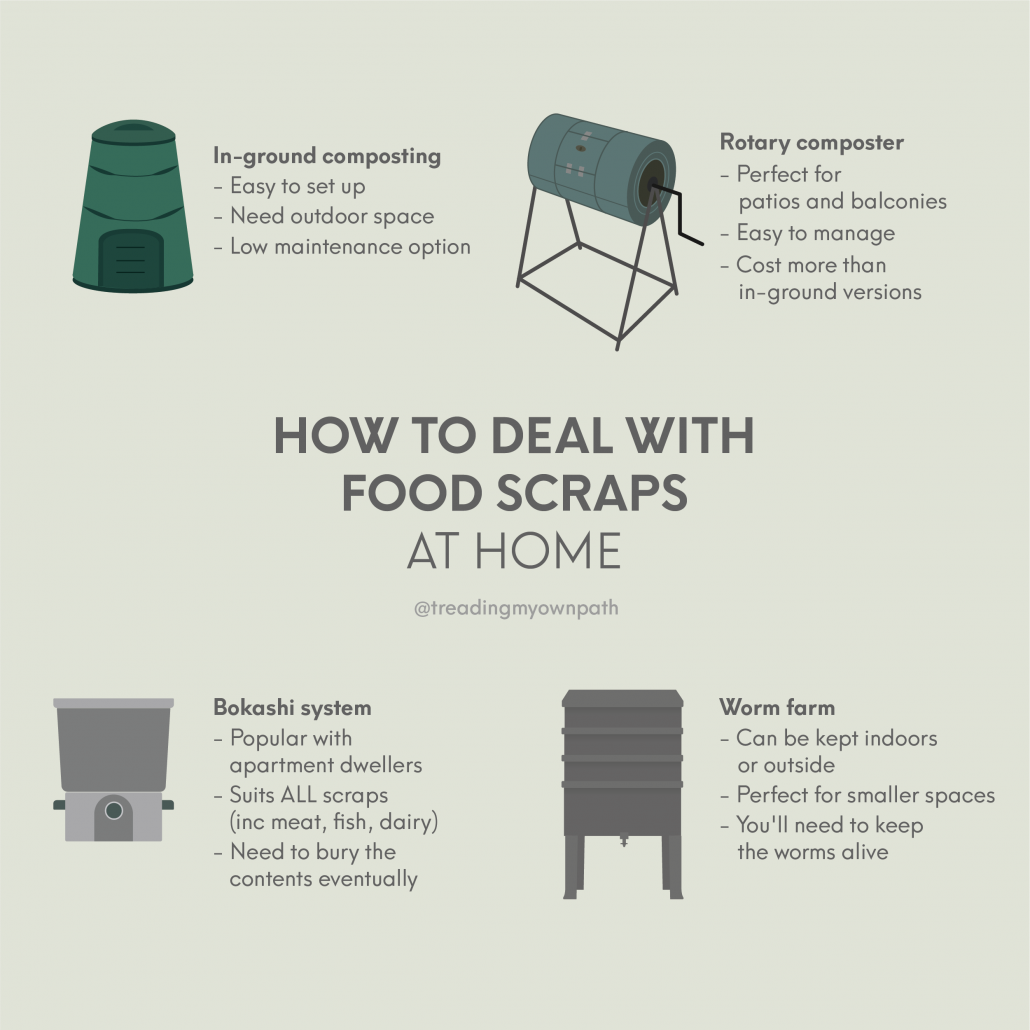
For the beginner, there are two great home composting systems: the regular compost bins we are most used to seeing (I call them in-ground compost bins), that sit on the ground or are slightly dug in, and rotary compost bins, which are an enclosed system mounted on a frame.

Compost heaps or compost bays aren’t great for beginners as they are more difficult to manage. Digging food scraps into the ground or in trenches (if you have space for that!) works too, but it’s not really a ‘system’.

In-ground compost bins

These are easy to set up and low maintenance, and usually cost less than the rotary versions. There are a lot of second-hand compost bins available, so it’s probably not necessary to buy a new one. It’s also possible to make them by upcycling plastic barrels, old bins or other old containers.

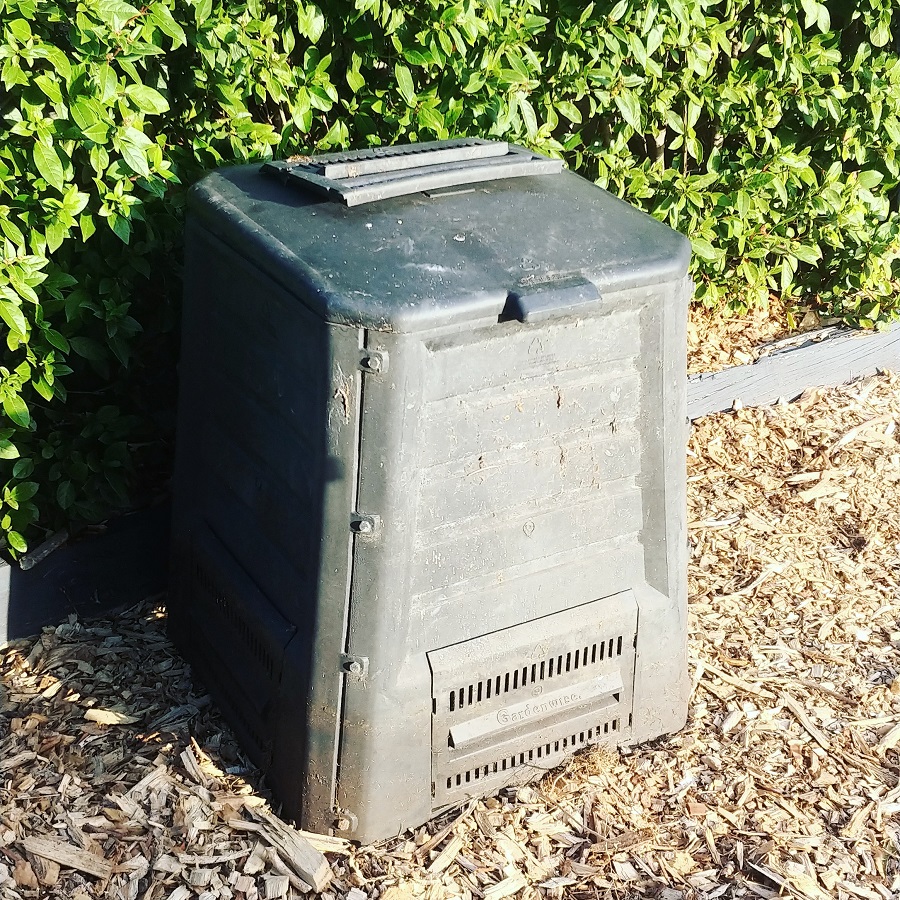
You’ll find different styles of bin, some with doors at the bottom and heaps of ventilation holes, others that clip together and some with no bells and whistles at all.

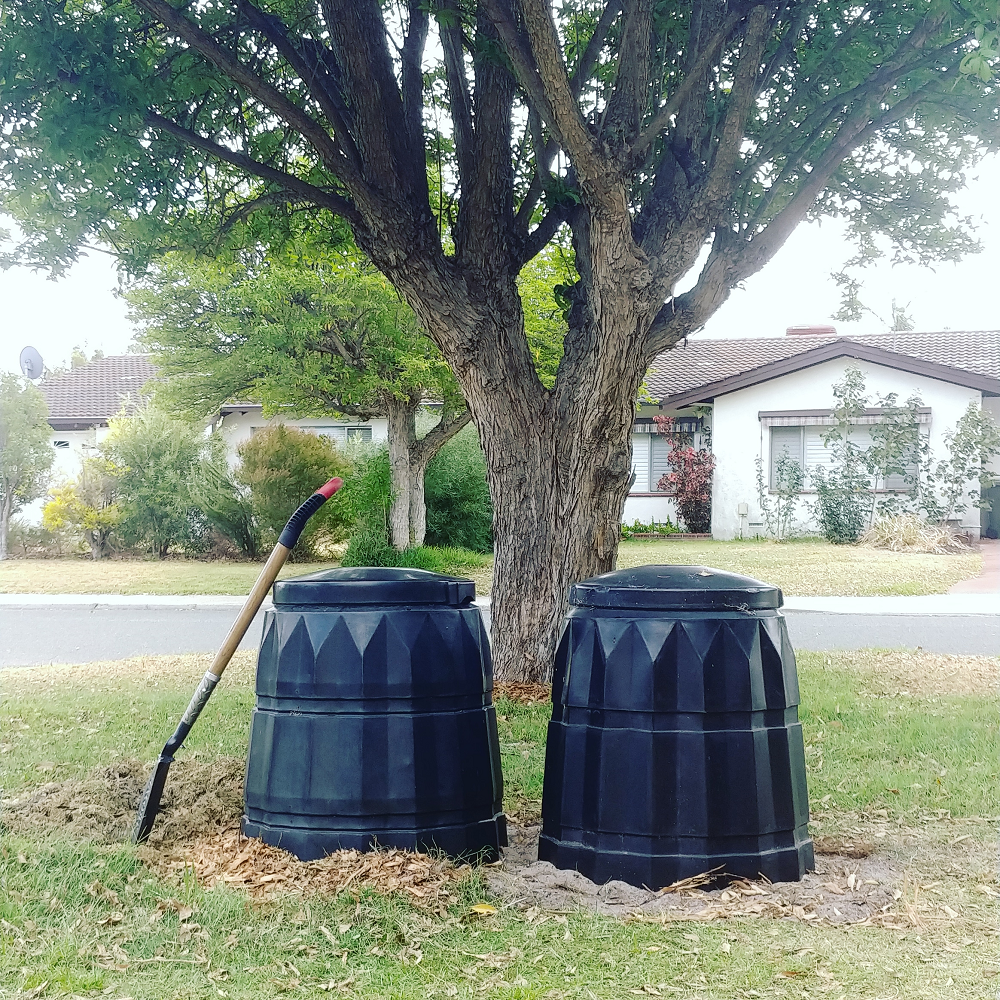
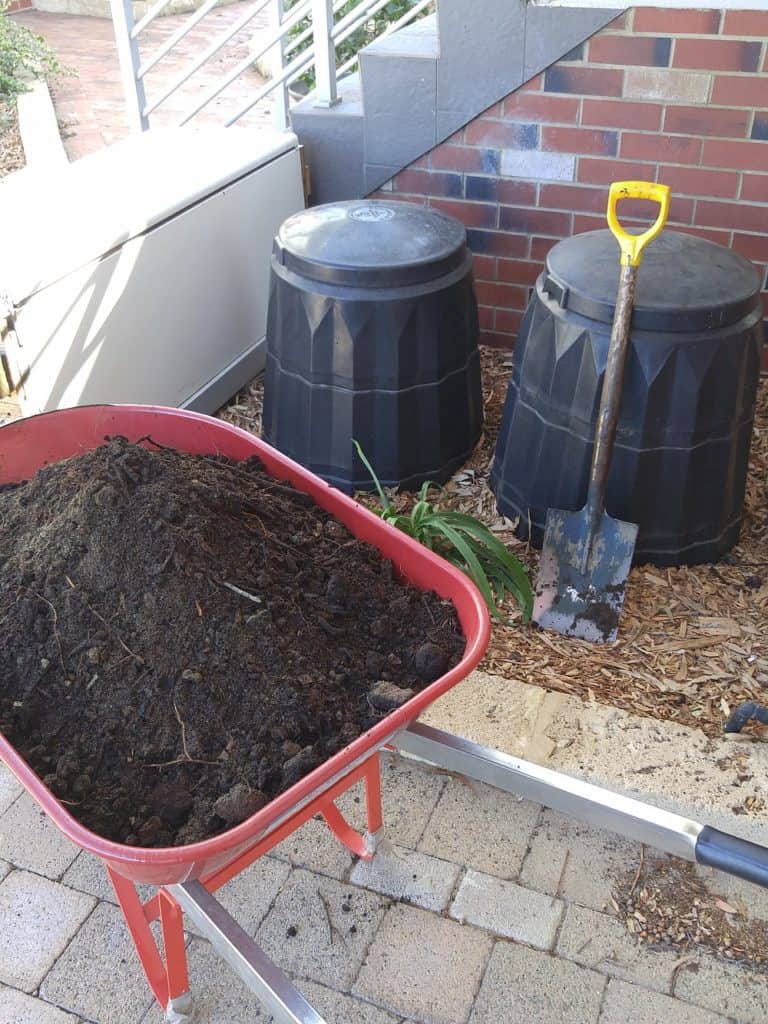
I’m a fan of the no bells and whistles type, pictured below (I call them Dalek bins). These work best for the climate I live in. These types of bin don’t have a base, and I dig into the soil (about 10cm deep).

In my hot climate, any ventilation holes are just gaps for moisture to escape and pests to get in. Plus they provide points of weakness (because we all know plastic breaks down when exposed to sunlight).

Doors at the bottom might look cute, but the reality is it is easier to wait for the entire contents to become compost and dig the whole thing out at once.

That said, it’s possible to make most compost bins work. My neighbour was recently clearing out her shed, and offered me this for free. My plan is to dig it into the ground so that the vents at the bottom are covered, and only use it for garden waste (no food waste) to deter any pests that might want to crawl in the sides.

Because of the gaps along the sides, it will probably need a bit more water added than the other type.

Rotary composters

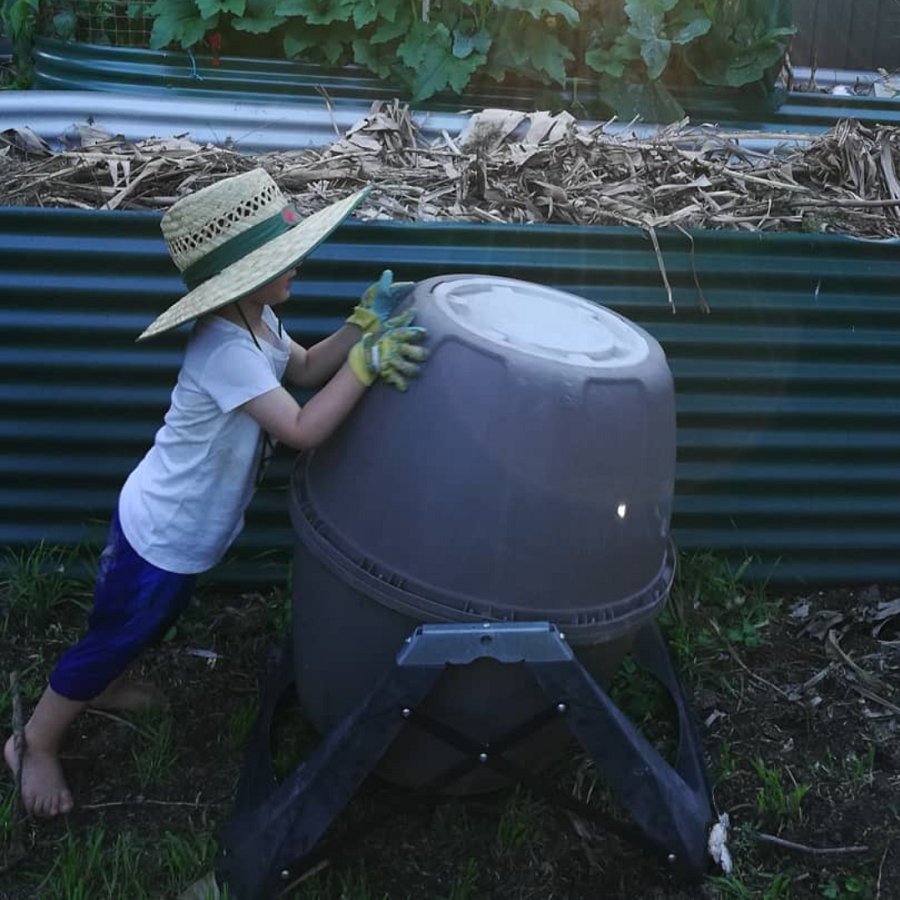
These tend to be more expensive than the in-ground versions, but they are perfect for patios and balconies and spaces where it isn’t possible to dig one into the ground. I’ve seen DIY versions but you’re going to need to be a bit handy to make one, as the cylinder has to be able to rotate on a frame.

There are lots of different styles and sizes, too. Some are long and thin, others are short and squat – and the way they are mounted on the frame (and therefore how they turn) varies too.

When choosing which one is right for you, it’s best to think not only about your space but also your physical capabilities. A huge bin might seem like a great idea, but if you can’t turn it because it’s too heavy, that isn’t going to work.

Another great advantage of these bins is they are less likely to attract pests and are pretty much rodent-proof.

Where to position your compost bin

You’ll often see it written that a compost bin should be placed in sunny spot, but that depends on where you live. If you live in a hot climate, placing a bin in full sun means it dries out. (Compost bins need moisture to work.)

I think it’s more important to think about a spot where you’ll actually use it. At the end of the garden behind the shed might seem like a great idea… until you need to put your scraps in it when it’s dark and raining.

A well managed compost bin shouldn’t smell, so being near a kitchen window shouldn’t matter, but if you don’t trust your skills (yet) perhaps make sure it’s not too near any doors or windows.

If you do have a garden, under a fruit tree is great, as the tree roots will benefit from the compost at the bottom of the bin.

I’d say, choose a warm and accessible spot (in a hot climate, dappled shade / afternoon shade is helpful if possible). Don’t forget, you can always move it later if your first spot doesn’t work out.

Setting up your compost bin

Once you’ve chosen a site for your compost bin (and dug it into the ground a little if it’s an in-ground compost bin – 10cm is ideal), you need to get it set up and ready to accept food scraps.

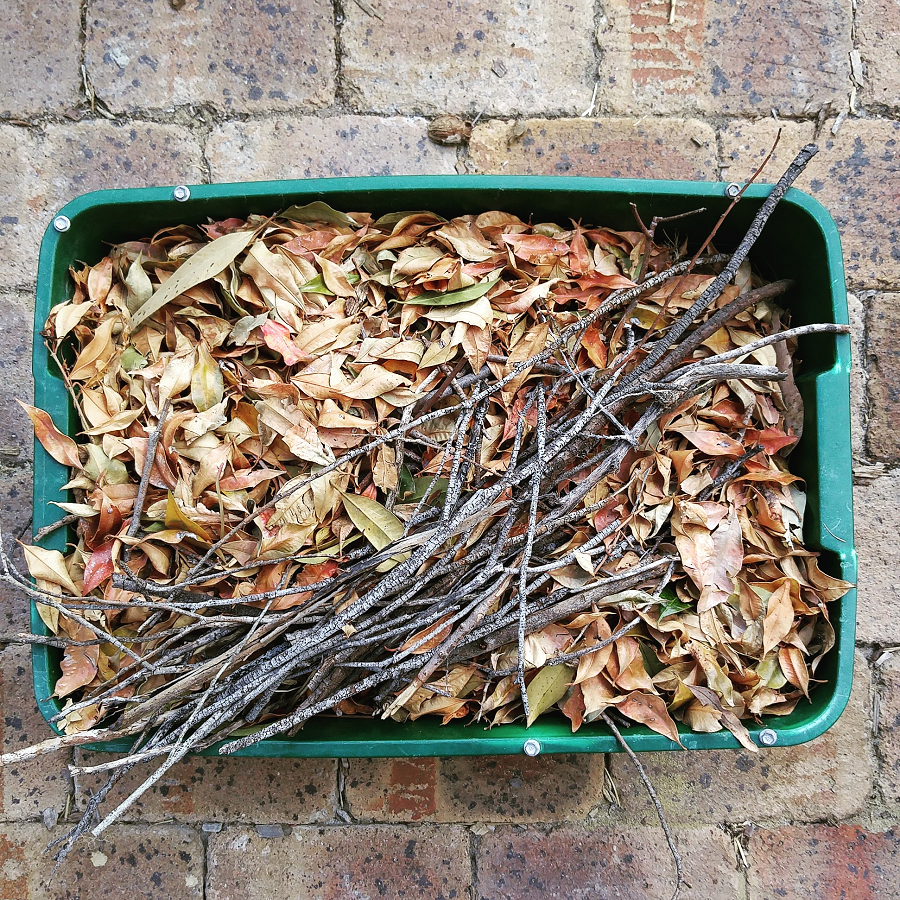
Compost bins need air (oxygen) to work properly, so when you’re setting up a new bin, it’s good to start with something chunky as the base, that allows air flow. Twigs and sticks and egg cartons are great.

The biggest mistake I see (and yep, this was also me when I started) is to add ALL the food scraps, nothing else, and watch in horror as your compost bin becomes a stinky, fly-infested mass of yuck.

Compost bins need balance. In particular, they need a balance of fresh stuff (called ‘greens’) and dead stuff (called ‘browns’). On a more technical level, we are talking about nitrogen and carbon.

Too much nitrogen (fresh stuff) will make for a stinky compost bin as it will break down too fast, using up the oxygen. Too much carbon (dead stuff) and your compost will take forever to break down.

For a beginner, a good rule of thumb is one handful of green stuff, and two handfuls of brown stuff. Or even three handfuls of brown stuff.

Placing a tub of shredded paper, old cardboard toilet tubes, egg cartons, dried leaves, wood chips, sawdust or straw (all carbon rich) next to your compost bin, so that every time you add some food scraps, you can add some carbon easily, works well.

As you add things to your bin, the stuff at the bottom will get compressed, and eventually run out of oxygen. This will make for stinky compost. Turn your compost with a pitchfork or turning fork (like a giant corkscrew) – or by rotation if that’s the type you have – to keep the air circulating. Turning once a week or once a fortnight is fine, or more often if you start to notice any bad smells.

What can and can’t go in my compost bin?

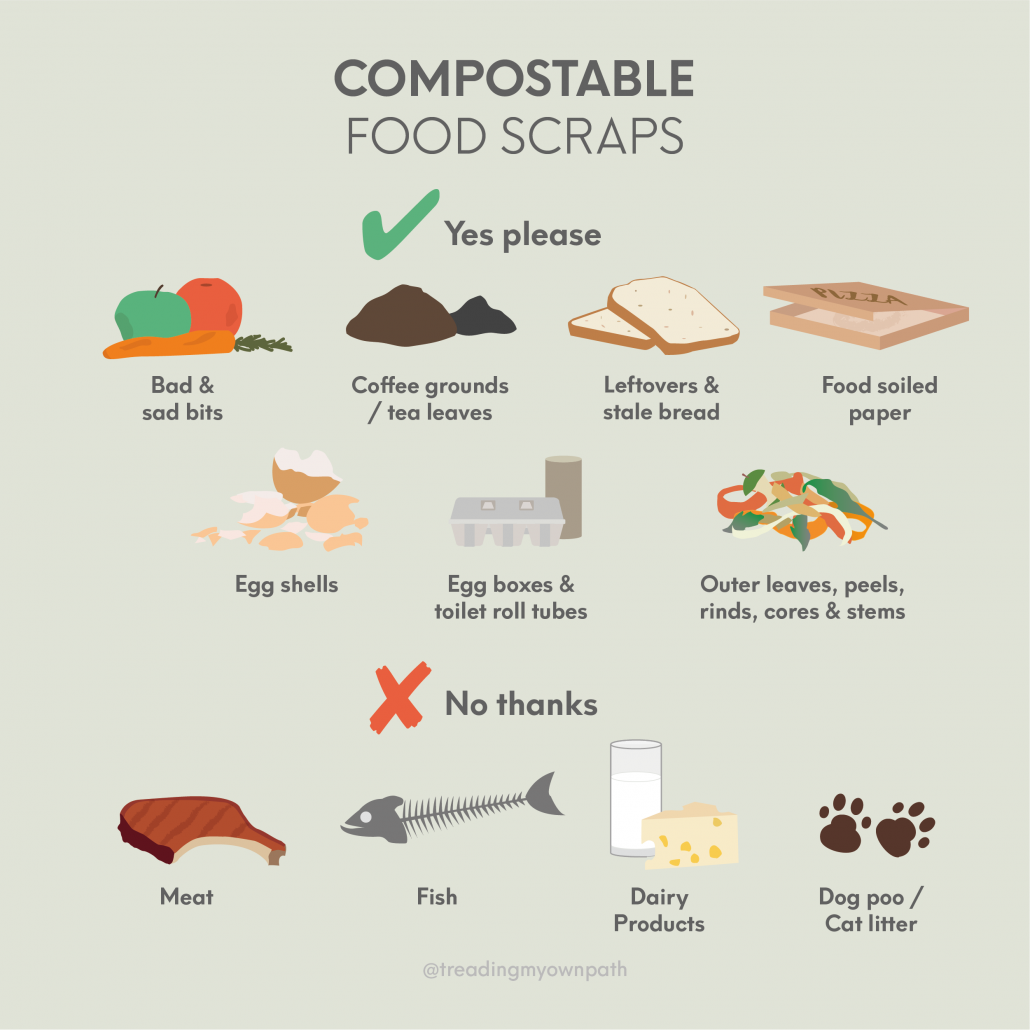
Anything that was once alive will eventually break down to become compost. There are a lot of myths circulating that you can’t compost things like onions or citrus – of course you can! When it comes to plant-based food scraps, everything goes.

As for other food scraps, it’s not that they can’t be composted, but they are more likely to attract vermin, other pests (like flies and maggots) or harbour dangerous bacteria.

As a beginner composter, avoid putting meat, fish, dairy products, bread and large amounts of cooked food in your compost bin if possible.

Thinking about garden scraps, the only things I don’t put in my compost bin are persistent or nasty weeds – things like couch or Kikuyu grass roots, or those weeds that have the spiky seeds that stab you if you stand on them barefoot.

Although home compost systems tend not to get hot enough to kill seeds, most seeds aren’t really a problem. It can be fun to get surprise tomatoes or pumpkin plants germinating from compost. Common weed seeds like dandelions still go in – even if I didn’t put them in my compost bin, the seeds are going to blow in from elsewhere, and they are easy enough to weed out again if they do appear.

Common composting problems

A good compost bin needs variety, oxygen (air), moisture and microbes/insects to keep it working. When one of these things is missing, you get problems or it slows right down.

Stinky compost bin? Add more carbon rich material, and turn your compost to increase air flow. Make sure food scraps are buried. A well managed compost bin doesn’t smell (or smells earthy, like soil).

Dry compost? Add water.

Soggy compost? If you can squeeze water out of your compost with your hands, it is too wet. Add dry material – shredded paper, sawdust, dry leaves.

Insects? Most insects are fine, so don’t panic. Lots of one type might indicate an issue. Ants usually mean it is too dry, so add water. If flies or maggots are a problem, cover the top with mulch or soil, and make sure food scraps are buried rather than sitting on top. The odd cockroach might make you wince but it isn’t going to harm you or your compost. An infestation probably means you haven’t turned your compost for a while. Mix it up, and keep turning it and they’ll find somewhere else to live. Insects have short lives, and will be gone soon enough.

Not doing anything? Adding a handful of compost or manure will add some microbes to your compost to give it a boost. Turning it will also (literally) help stir things up.

Can I set and forget?

If you want ready-to-go compost in 2 – 3 months (in a warm climate), you need to balance your greens and browns, and turn frequently. But if you just chuck it all in and forget about it, it will break down eventually. Much more slowly, but it will happen. Winter (and colder weather) also slows things down.

If you do want to use your compost bin in the garden, two (or more!) bins can be helpful. If you’re constantly adding fresh food scraps to your compost bin, you are always going to have non-composted bits in your compost. Ideally, you’ll fill one bin to the top, and then continue to turn it whilst starting to fill a second one. That way, you’ll have fresh compost ready to go by the time the second one is full.

Once emptied, you can start refilling again and leave the other one to work its magic.

If you want to start composting at home, the best thing to do is to just start. Then, as issues pop up or you have questions, you can troubleshoot one by one. Most problems are easily fixed. Get a compost bin set up, and you’ll learn as you go.

Now I’d love to hear from you! Do you have any questions about composting? Any issues I didn’t cover? Any beginner tips you think others need to know? Any other thoughts at all? Please share in the comments below!

[leadpages_leadbox leadbox_id=123a865e9839c5] [/leadpages_leadbox]

How to freeze food in glass jars (+ defrost it safely)

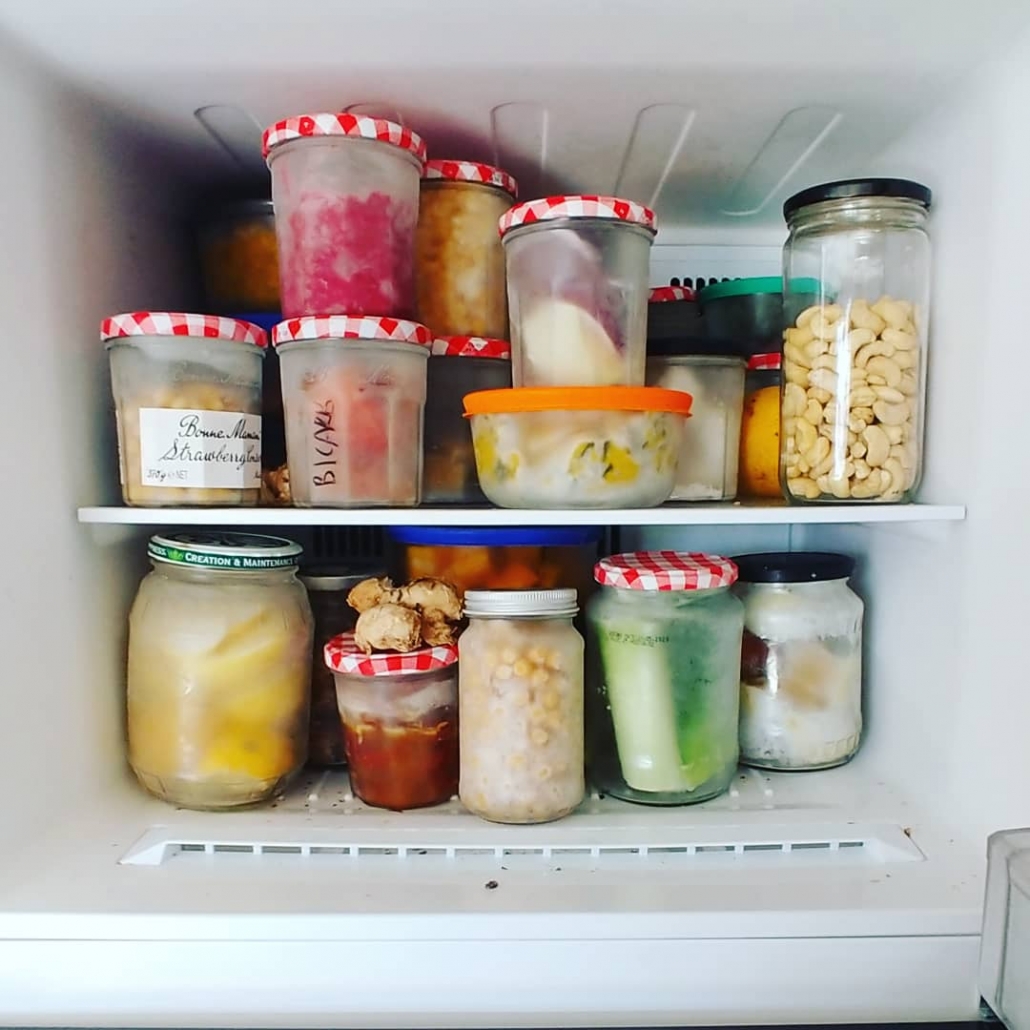
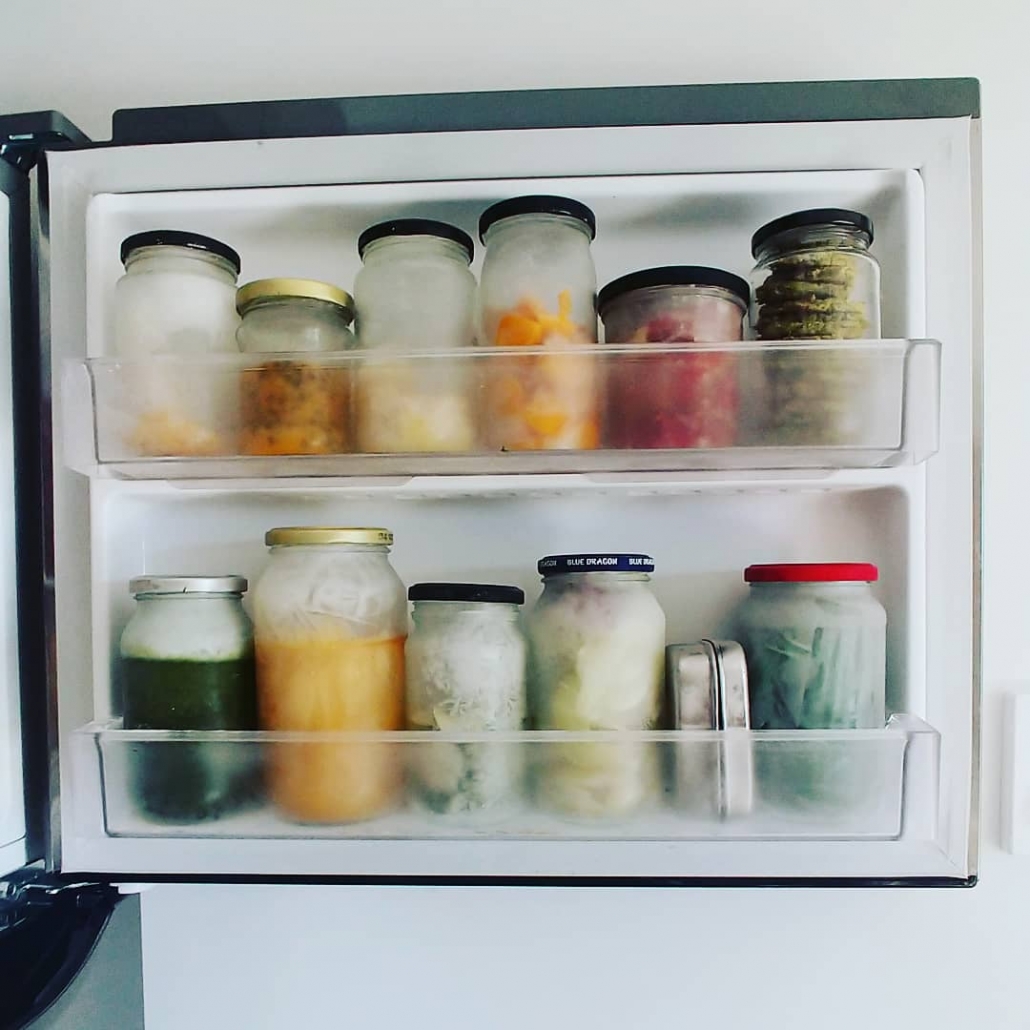
I freeze food in glass jars, and I have done for years (we’re talking at least 15 years). As a student I resented buying things like zip-lock bags to freeze food – they seemed expensive and unnecessary. Glass jars were something I always had to hand – and they come in all shapes and sizes, which meant there was always one suitable for what I needed to freeze.

So that’s what I used.

It’s a topic that gets a lot of questions. Some people are surprised that it’s possible at all, others have tried and failed and want to know why. And there are a few rules you need to follow if you don’t want broken glass in the freezer.

In all my time freezing in glass I’ve only ever had a couple of breakages, and both times were when I didn’t follow my own advice. Stick to the rules, and you’ll be able to freeze in glass jars without breaking anything.

Understanding the science of freezing in glass

First, a science lesson! It’s helpful to understand what’s going on. Glass breaks because of stress. It’s rigid and solid, so when pressure is applied it tends to crack. (Like, for example, when you drop glass on a hard surface. It can’t absorb the impact, so it breaks.)

Although it’s rigid, glass actually shrinks a little when it’s cooled and expands a little when heated. Nothing that you can see, but it happens. When the outside and the inside of the glass have different temperatures (such as putting a glass jar of frozen food into a bowl of hot water, or putting hot liquid into a cold glass) the glass is shrinking on one side and expanding on the other, which creates stress.

The glass cracks to relieve the stress.

Water expands when it freezes. Food contains varying amounts of water and so different foods expand to different amounts when frozen. Pure water will expand the most. (You might have noticed when you make ice cubes that the level of the cubes rises as they freeze.)

Stock, soup and sauces are all liquid, and so will expand more when frozen than foods like bread or wraps, that have a low water content.

As liquids freeze and expand, they need a place to go. The sides of a glass jar are rigid and so the only way to expand is up. If a jar is narrow, or has sides that taper inwards, the extra pressure placed on the glass sides as the contents freeze will make it crack (which relieves the stress).

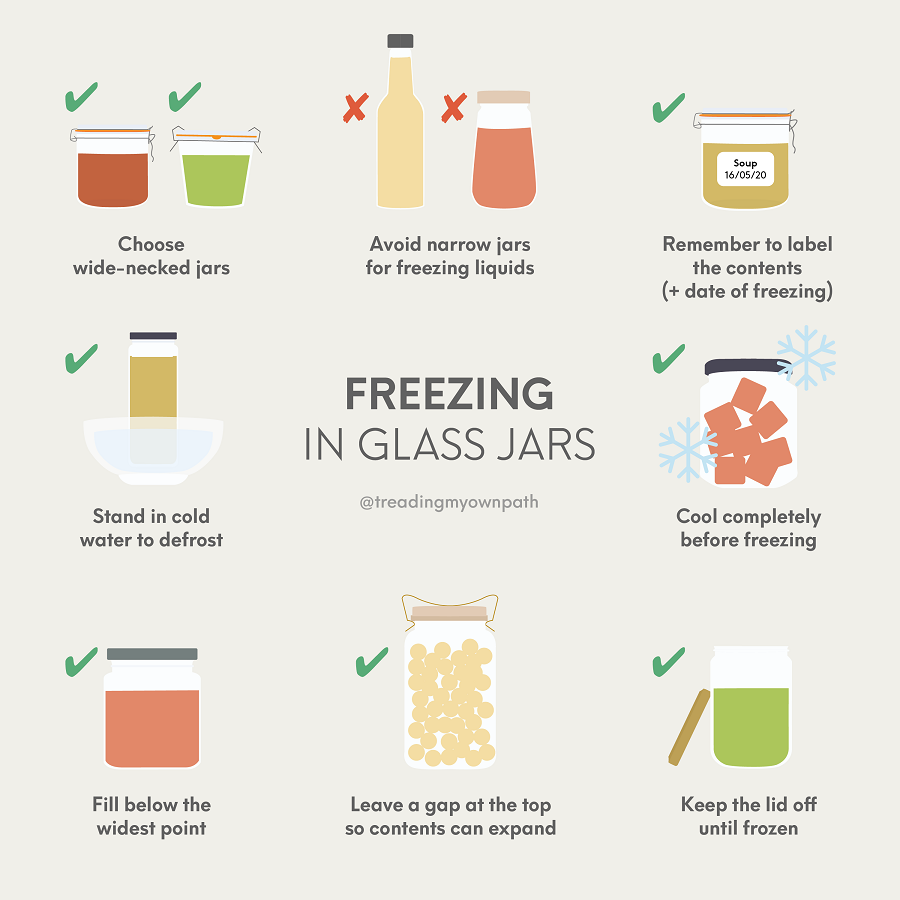
This is why wide-necked glass jars, or those with sides that taper outwards, are better for freezing, especially when freezing liquids.

Filling a wide-necked jar to the brim and then screwing a lid on tightly may also cause a jar to crack, because now there is no space at the top for the food to expand. Leaving a lid ajar until the contents are frozen will prevent this.

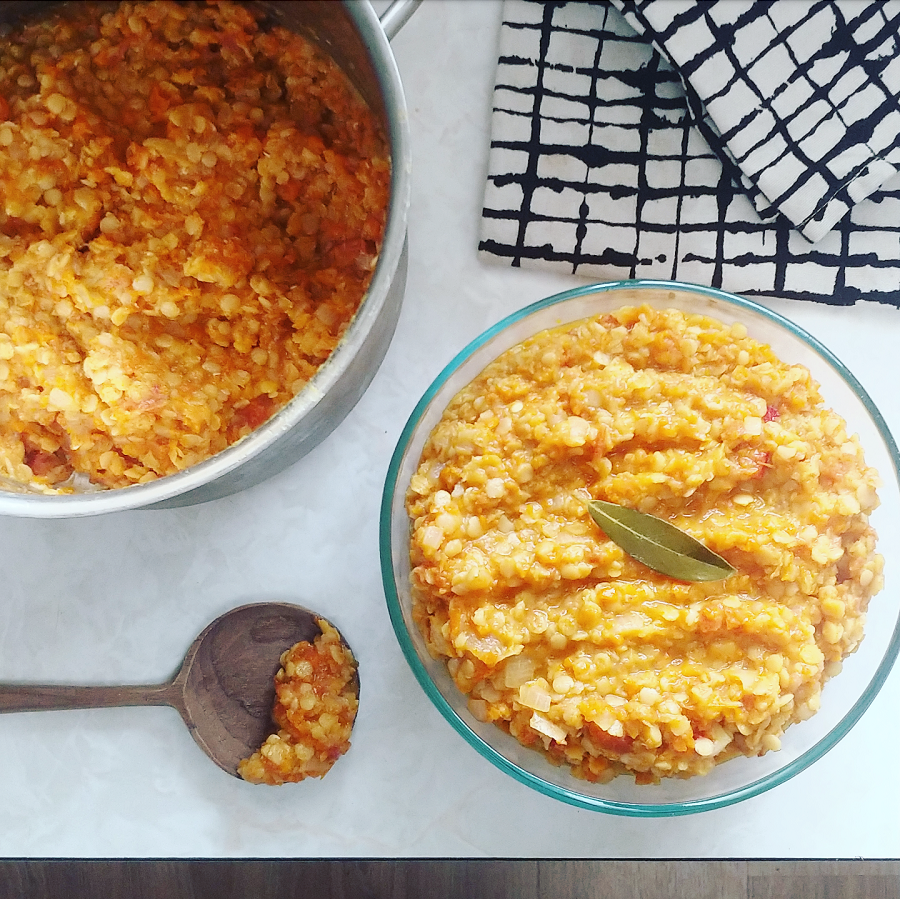
Foods like chickpeas or frozen sweetcorn have spaces between them, so there is less pressure applied to the sides of the glass (the air gaps can be filled) meaning narrower jars can be used for these types of food.

How to freeze food in glass jars: choosing suitable jars

I prefer wide-necked jars for freezing, and ideally those that taper outwards. My absolute favourite is the Bonne Maman jam jar. Each jar fits a one-portion serve, and the tapered sides mean the frozen contents almost slip straight out when I’m ready to heat them up.

They are also free (I rescue from a local cafe, and neighbours who eat jam.)

I can also stack them in my freezer, which maximises the space.

For liquids, a wide neck is very important. For beans, lentils or chopped vegetables, it’s less important, but still preferable.

I always choose jars that would have been through some kind of heating process in a factory. Jars that previously contained jam, pickles or sauce will have been heat-treated, and are my preference. Jars from the reject shop won’t, and are often thinner glass.

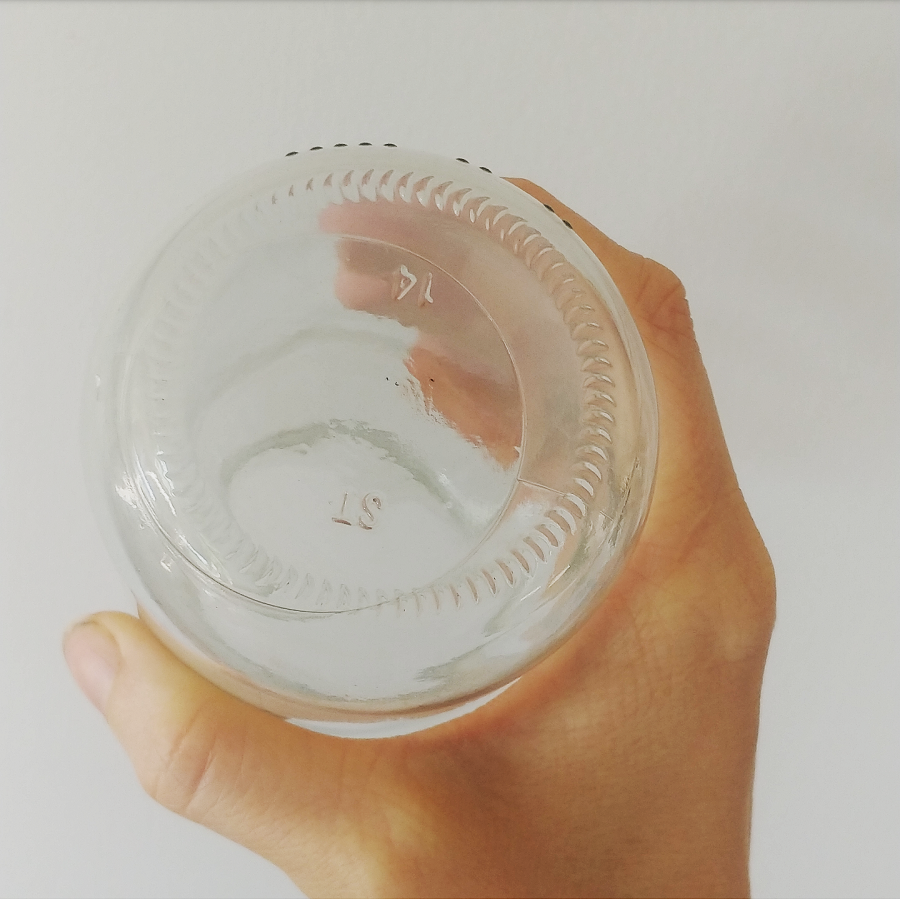
Sometimes you’ll see jars that have a distinctive round circle at the bottom, which is a separate piece of glass fused to the jar. This join is another point of stress weakness, and it’s better to avoid these jars if you can. If you can’t, choose to use only with low water content foods. (Breadcrumbs yes, frozen chickpeas yes, sauces or stock, no.)

I found this out when the base of a jar I’d just used to freeze something fell out as I was washing it up. I didn’t know it was a ‘thing’ until then! Luckily the food was fine, but the process of freezing and defrosting must have weakened the seal, and the jar broke. Now I check for this before using.

If you prefer, you can stick with glass jars that are designated freezer-safe. These tend to be the brands also suitable for canning – they are designed to withstand extremes of temperature. Ball Mason, Fowlers Vacola, Weck, Le Parfait jars are all examples.

How to freeze in glass jars, step by step

Once you’ve chosen a suitable jar, fill it with whatever you want to freeze, following these rules:

  • Fill to the widest point of the jar, and leave a space at the top to allow the contents to expand;
  • Cool the food completely before putting the jar in the freezer;
  • If possible, chill the contents first. Recommended for liquids like stock;
  • Place the jar in the freezer, with the lid off or ajar;
  • Once the contents have completely frozen, screw the lid on tightly.

Don’t forget to label your jars unless it is very obvious what is inside! Your memory will not be as good as you think it is. A date is useful as well as labelling the contents.

The reasons most jars break in the freezer are putting hot contents straight into the freezer, overfilling the jar, using a narrow jar – or all of the above.

My biggest mistake was trying to freeze stock in a passata bottle. Luckily it didn’t crack until it was almost frozen solid, so there wasn’t a big mess to clean up. But it had to be discarded. Lesson learned – these things need room to move!

How to defrost frozen food in glass jars

Heating frozen glass (such as plunging into a bowl of hot water) will make it crack. Don’t do that.

If you’re super organised, you can take the jar out of the freezer and leave on the side for a few hours. Or, you can put in the fridge to defrost overnight.

(If you’re defrosting meat or fish I’d put in the fridge to thaw because they are higher risk in terms of food poisoning.)

A large and well-packed frozen Pyrex container can take a couple of days to thaw in the fridge.

Jars, less watery things, and pieces with more surface area, will defrost more quickly in the fridge.

If you’re less organised, and want to defrost something more quickly, take it out of the freezer and put in a bowl of cold water. It’s important that it’s cold, because warm water will crack your jar. Cold water is still warmer than ice.

Depending what it is, you can add cold water to the frozen item (pour cold water into the jar) – this is how I thaw my frozen chickpeas. It separates them, which means I can get them out of the jar.

It would work for frozen veg, like sweetcorn. You wouldn’t do it to a piece of cake. 

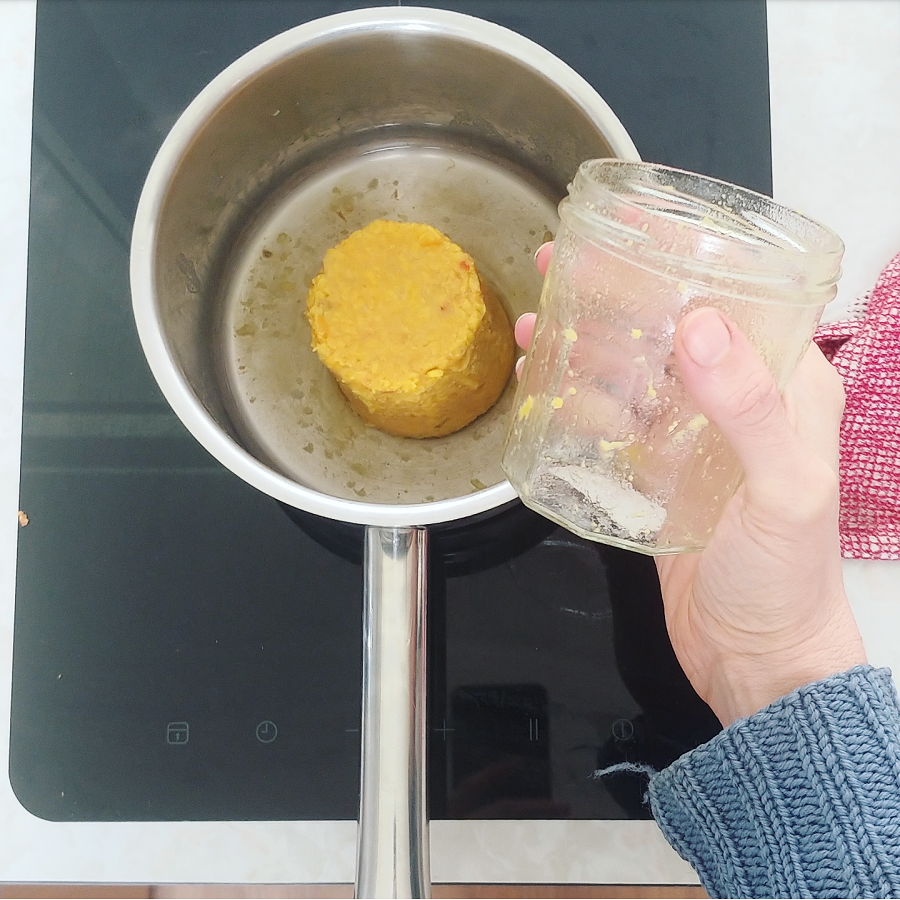
If you’re less organised and also impatient, your best bet is to freeze food in containers or jars that taper outward. Pyrex tapers out slightly, as do Weck jars, as do my all-time favourite, Bonne Maman jam jars. What this means is, as soon as the food starts to defrost, which will happen from the edges inward (the centre will be the bit that thaws last), the frozen food will slide out of the jar.

Take out of the freezer, sit in a bowl of cold water, wait 10 mins or so and then empty the frozen lump into a pan or bowl, or whatever you are going to use to heat up your food. I don’t have a microwave, so I use a saucepan.

I use a low heat and a lid on the pan, and stir to separate the thawed bits from the frozen core. Gradually it reduces down, and eventually its piping hot, and you’re good to go. 

Readers have told me that they put frozen glass jars in a microwave to defrost. I’d be extremely careful doing this, as microwaves don’t heat evenly – if part of the glass is touching hot food and another part is still frozen, the glass will be under stress and may crack. But (apparently) it can be done.

I hope this answers all of your freezing-in-glass-jar related questions! As always, any thoughts, suggestions or ideas that you have, please share with us in the comments. Ask away, I’d love to hear from you!

[leadpages_leadbox leadbox_id=123a865e9839c5] [/leadpages_leadbox]

My garden transformation project: why I’m digging out my lawn by hand

When it comes to transforming my garden into an edible and productive food space, there’s one task that’s taking up most of my time currently: digging out the lawn. And if there’s one question I’m answering most often from the garden updates I post it is this: why are you digging out your lawn?

Which actually has two meanings: why aren’t you keeping the lawn? and why have you chosen digging out the lawn as your method of removal?

It’s not a short answer, so I thought I’d explain it here.

Why I’m digging out my lawn (why I’m not keeping the lawn)

I would like to grow edible food in my garden. I would like fruit trees and vegetables. I’d like native plants too. To grow these, I need to remove the lawn.

Lawn in Western Australia is not like lawn in Europe. If I leave it, it won’t grow into a beautiful field of wildflowers. In summer it will be dead without a lot of inputs. What does grow will be non-native grass species and weeds like castor oil (which is toxic to dogs – it’s the source of ricin).

My climate doesn’t naturally support meadows.

Growing lawn in Perth is hard work and takes a surprising amount of resources. It needs a lot of water to keep it green. I have a bore (which is a pump that draws water from the ground, as opposed to using drinking water from the tap) but even so, our groundwater levels are dropping and in my opinion, it is a waste of water to keep so much grass alive.

Anyways, I’m only allowed to use my bore reticulation three times a week. Any other watering needs to be drinking water.

The reticulation that’s in place to keep the lawn green is plastic and the parts break all the time. It breaks, and the trickle is replaced with a jet stream that gushes gallons of water down the road at the front (or floods the garden at the back). After replacing a few broken bits (luckily with second-hand freebies I was given, not new plastic) only to end up with more broken bits, I decided to just switch it off.

Then, it needs fertilising to keep it green. Lawn fertilisers cause a lot of problems in our rivers, because they are soluble fertilisers than run-off into the water and contribute to algal blooms (which kill the fish).

My non-fertilised lawn is yellow and patchy. Which is fine, because I’m digging it out.

Yes, lawn feels nice underneath the feet (well, when it’s not dead). Although our Australian grasses are not as soft as the European grasses, so it isn’t quite the same. But there are parks close by with lots of grass that are properly maintained and accessible to lots of people.

I know that a lot of non-Western Australians will look at a garden full of coarse wood chip mulch and think it looks ugly and weird. It took me a bit of getting used to when I first saw it, too. But if meadows are what happens to grasses in Europe, this layer of dead tree matter is what nature does in our natural bush areas.

It acts to protect the soil from the harsh sun, retains moisture underneath – and eventually breaks down to add carbon to the soil.

Although it looks extreme now, eventually I’ll cover most of my mulch with plants so it won’t be so obvious.

Why I’ve chosen digging out the lawn as my method of removal

There are lots of ways that people choose to get rid of their lawn. Digging mine out by hand (well, I did contemplate a turf cutter, but I’ve stuck with the spade) was the only option I really considered. I know there are plenty of ways, but I have my reasons for choosing this. Let me explain them.

Perth grass is TOUGH.

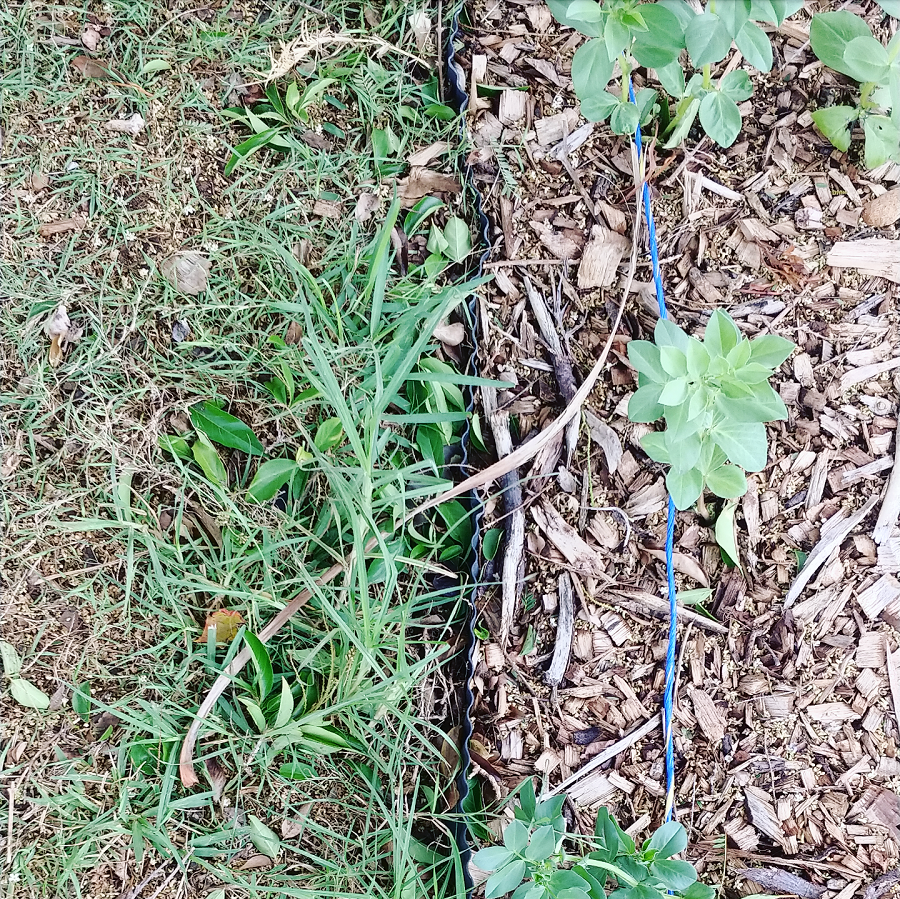
Even though I told you grass dies here in summer, it doesn’t actually die. Every autumn when the rain returns the dead patch of yellow grass resurrects itself. It dies, and yet it is almost impossible to truly kill.

There are a few species of grass used for lawns in Perth, and I have a few, definitely included these two.

Kikuyu grass: a tropical grass speces Pennisetum clandestinum, native to the highland regions of East Africa. Grows rapidly and aggressively. Categorized as a noxious weed in some regions. Has underground runners and its root system can grow to 3 metres deep.

Couch grass: a drought-tolerant grass described as ‘high maintenance and invasive’. It has an extensive root system with fine roots that is difficult to remove. Can grow through concrete. Also called Wintergreen couch – I wonder if this is because it dies back in summer and returns with vengeance in winter?

I don’t want to use chemicals (which is often recommended)

Because our grasses are so hard to kill, many gardeners and organizations recommend using glyphosate (you might know it as Roundup) to kill lawn. It’s a controversial chemical that’s been banned in many European countries due to safety concerns.

Whilst verge gardens tend to be non-edibles (well, for humans only) I’m not interested in using chemicals to kill any of my lawn that will remain in the soil and enter the food chain.

Smothering/solarising doesn’t work well in Perth

Lots of readers have suggested I just cover the grass with cardboard and mulch, or use black plastic to solarise the grass and kill it. I know that these methods work well in other places with other types of grasses, but they aren’t great in Perth.

If it has worked for you, brilliant (and I’m sure it can be done). But when it doesn’t work, all that happens is you create a cosy, warm, wet environment for the grass which means it expands its root networks, and eventually busts through the mulch/plastic.

An earlier guide to verge gardens by the Water Corporation specifically advised against these methods, recognising that they rarely work.

I’ve seen many, many examples of mulching/solarising grass failing in Perth, and I can’t say I’ve ever seen an example of it working successfully on the types of grass that I have.

Putting the work in up-front

Even if I thought that mulching/solarising was a great idea, and wanted to give it a go, I’d need to wait several months for the grass to die before I could plant anything in the ground. And I don’t want to wait.

The sooner I can plant trees the better, and the sooner I can plant vegetables the better.

Also, I think putting in the work up-front means not playing catch-up later. I don’t want to spend the next six months digging out regrowing grass – especially not grass that has grown through raised garden beds and now has 1+ metre deep roots.

I expect there will still be some regrowth, but it should be a lot less than if I’d just tried to plant on top.

The level of the land

One other reason why sheet mulching with cardboard and then heaping on the mulch wouldn’t work for me – at the front at least – is that the ground level is already a little high. It’s higher than the driveway, which means when it rains all the water (and mulch) will run off onto the concrete and down the drain.

In a place that’s short of water, this is a huge waste. I need to ensure any water that falls stays in my soil.

Adding an extra 10-15 cm of mulch on top would create a mini mountain, and just exacerbate the problem.

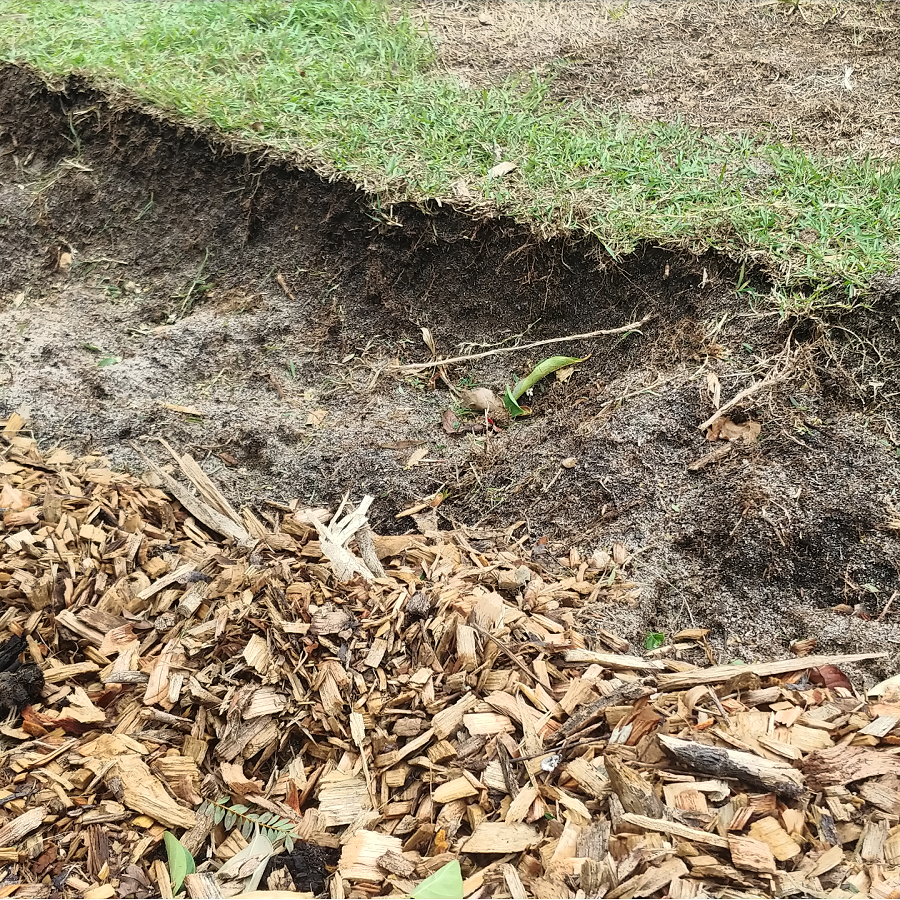
By removing the lawn I’m reducing the height of the land slightly, so the new surface is flush with the kerb/driveway.

Knowing my land

I did contemplate getting a turf cutter, and a few friends suggested just getting a bobcat in to blitz it in a couple of hours. But I decided to do it by hand.

Out the back, I don’t need it all done at once, so I’m chipping away as I’m ready to plant trees or put in beds.

At the front I am removing the whole lot, but I’ve found the by-hand approach useful.

There is a huge tree on my verge, and I don’t want to trash all of its roots with heavy machinery.

There are gas pipes, water pipes (and PVC reticulation pipes!) under the lawn, and I don’t want to damage anything.

It’s been useful to go slowly and see exactly where the roots from the big tree, my neighbours’ trees and my hedge extend, remove random bricks I find, and also see the condition of the soil (which varies from extremely bad to pretty bad. But I did find a worm. Just the one. Yeah, Perth soil is really not great).

Because I want to put in-ground beds at the front, its useful to know if there are networks of roots or blocks of concrete under the soil before I plant anything out.

Removing the lawn – progress to date

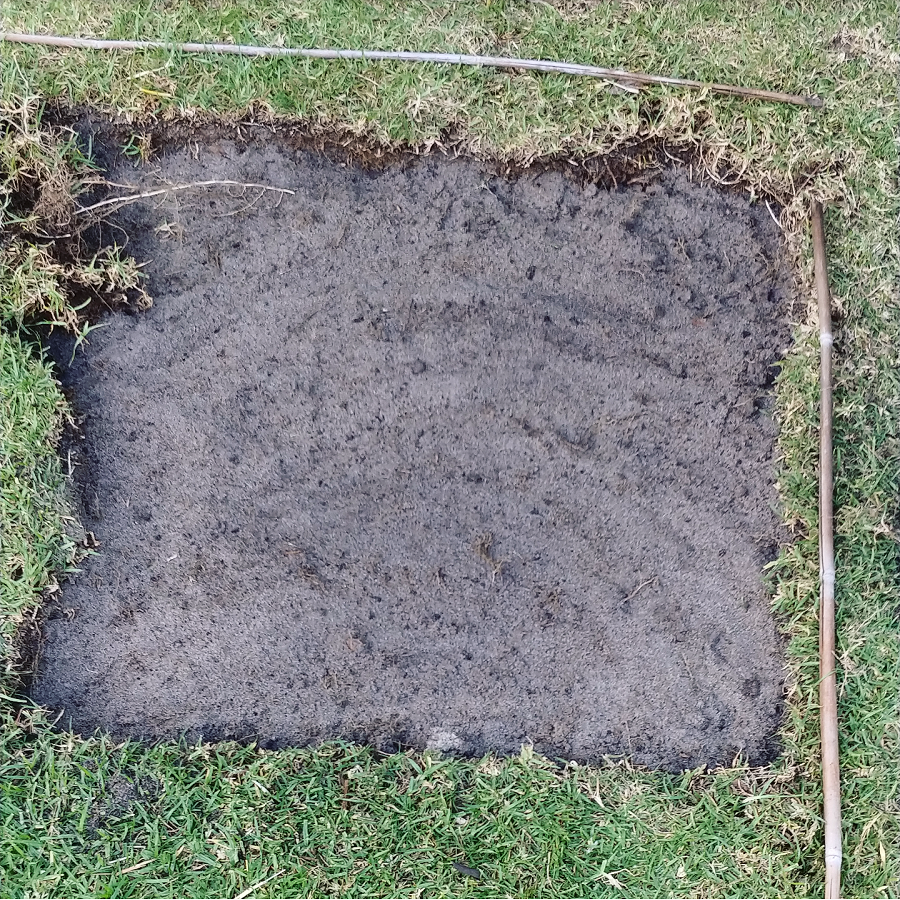
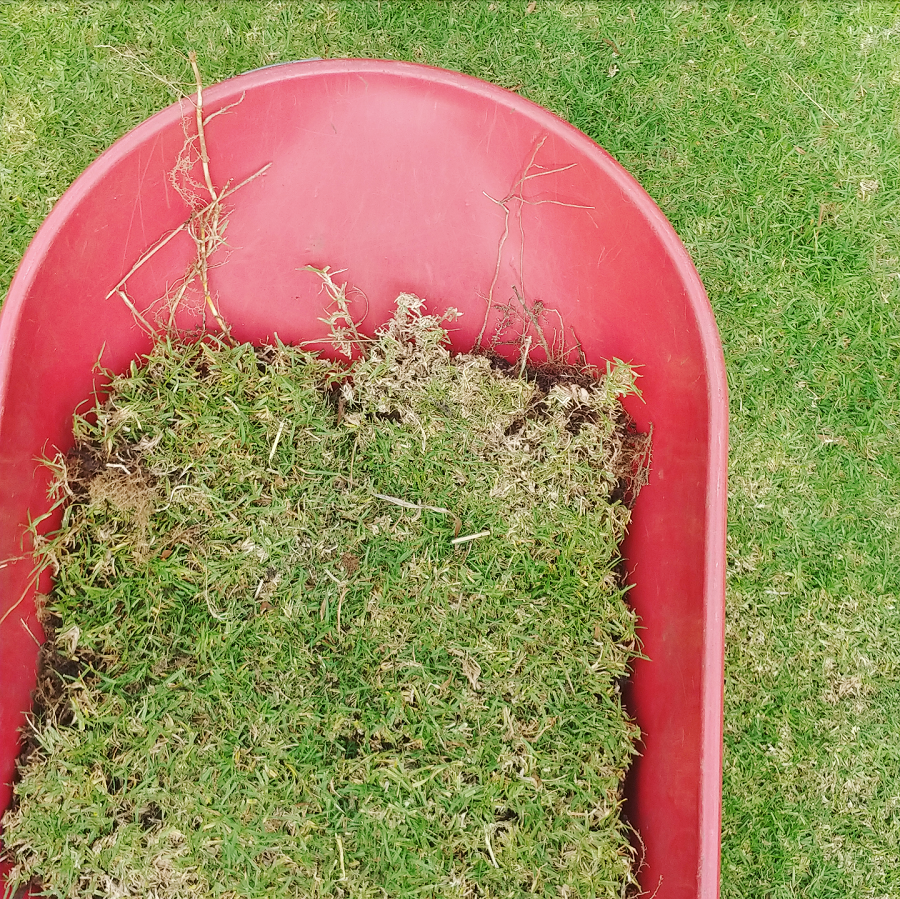
The one advantage of living on a sandpit rather than heavy clay soils is that it is fairly easy to dig out grass. It isn’t back-breaking work… but there is a lot of it.

My superstar neighbour has given me a hand out the front (I think she is impatient for it to look good!) and it is quite amazing how much can be removed in a day.

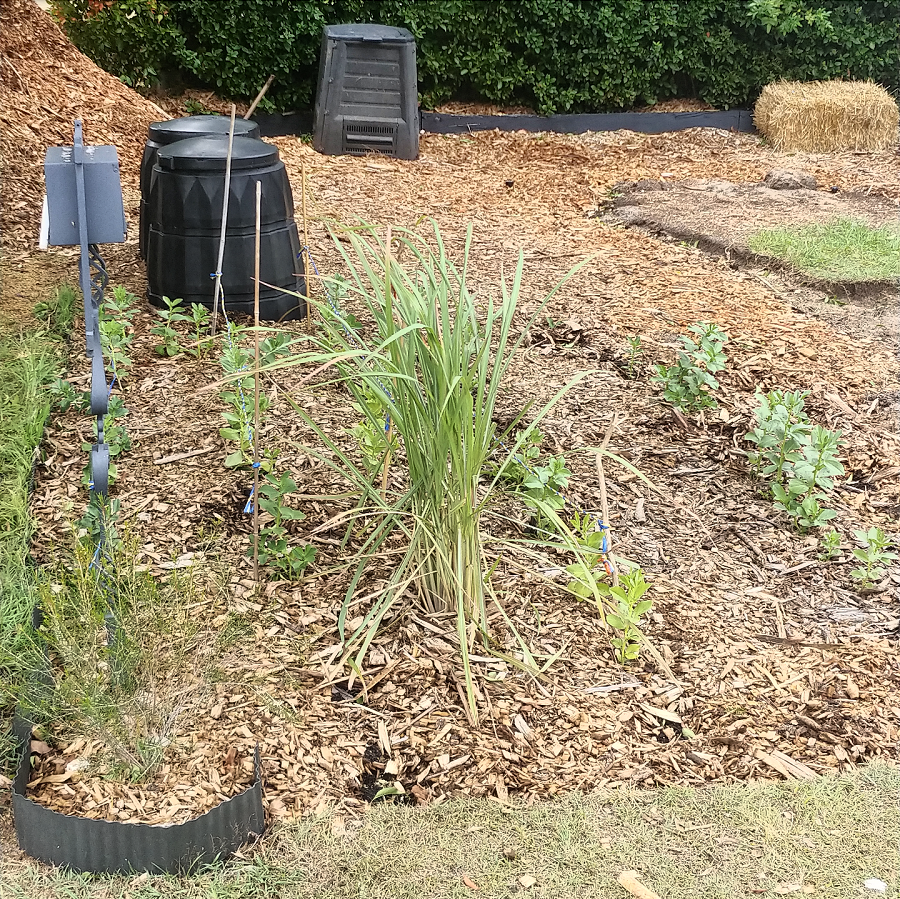
Currently, the front looks like this:

(The plants are a native Geraldton wax I transplanted from the back garden, a lemongrass bush and the beginnings of my broad bean patch).

I’m going to have another blitz at the weekend, and I’m hoping it will almost all be gone when I’m done.

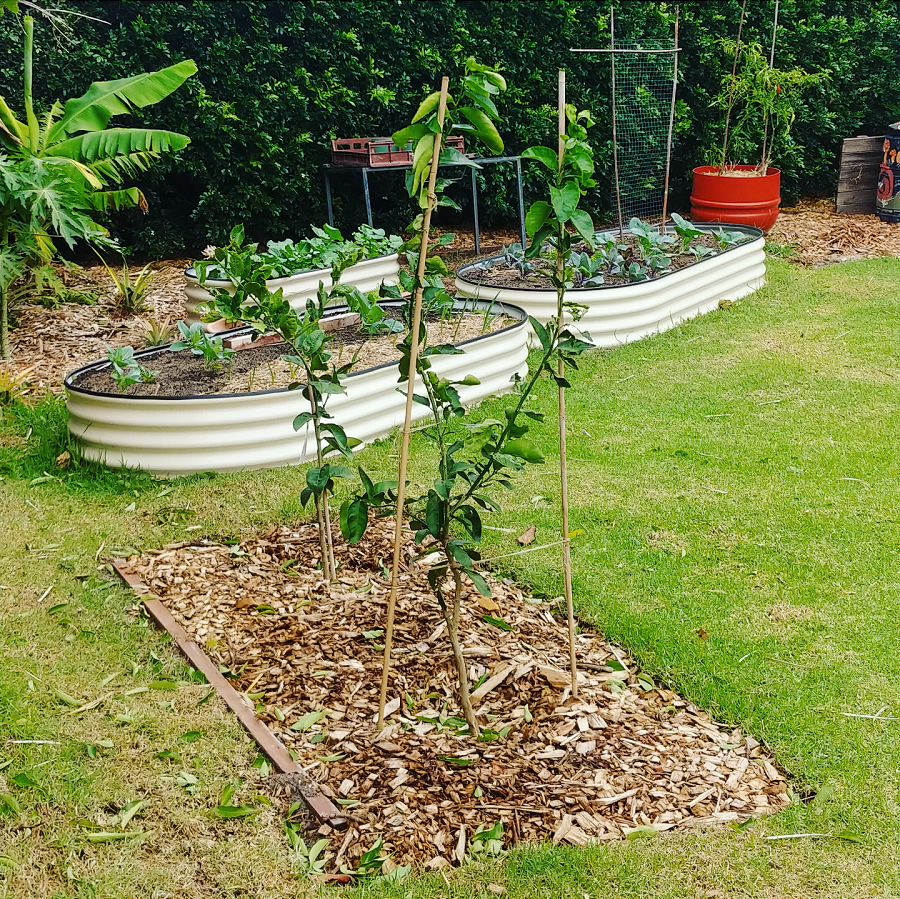
Here’s the back, with the new beginnings of my citrus ‘grove’ and my raised garden beds beginning to fill up:

So that, my friends, is the extremely long answer to the question: why am I digging out my lawn. It’s fairly boring work up front, but the long-term rewards will be worth it.

Now I’d love to hear from you! Any more questions about lawn or lawn removal? Any experiences of removing lawn yourself – both successful and unsuccessful? Any other thoughts at all? Please share in the comments below!

[leadpages_leadbox leadbox_id=123a865e9839c5] [/leadpages_leadbox]