A Beginner’s Guide To Aquafaba

You know when you cook chickpeas (or other beans and pulses) from scratch? You boil them on the stove top for an hour or two, and then you drain off the cooking liquid? You gotta stop throwing that golden cooking liquid down the drain!

I’m serious. Yes, I’m talking about that stinky, kinda slimy, smells-a-bit-like-old-trainers liquid that disappears down the plughole when you strain your freshly cooked chickpeas. Because it is a magical ingredient. I kid you not.

It turns out that chickpea water (chickpea brine), which alternatively and rather more glamorously is also referred to as aquafaba, is a miracle ingredient… something that isn’t waste at all, but is actually very useful! You can whisk it up like egg whites and use it in baking to make cakes, icing, macaroons and meringues.

It’s taking the vegan world by storm because it’s making the impossible possible, but even if you’re not vegan and you eat eggs, the chance to use a waste product to make something edible and delicious can’t be scoffed at!
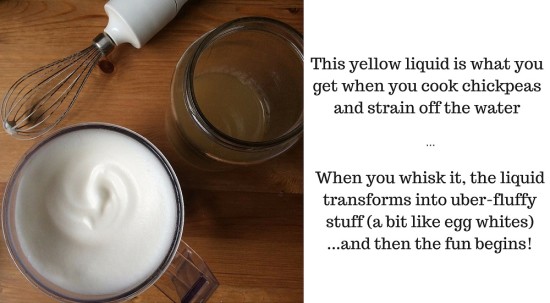
This yellow liquid is what you get when you cook chickpeas and strain (and keep) the water

I first heard about aquafaba when I posted a picture on Instagram of a big batch of chickpeas I’d cooked, and somebody asked if I was saving the liquid to make meringues. It sounded crazy (and unfortunately I’d just tipped 2 litres of it down the drain) but after seeing some pictures suggesting it could actually be done, and in spectacular style, I was sold.

There might be a lot of beautiful images out there showcasing the miraculous things that can be done with aquafaba, but as a beginner, I had absolutely no idea where to start. Lots of the recipes refer to using the aquafaba from tinned chickpeas, but I cook my own chickpeas, so I wanted to know how to use this kind of aquafaba.

Not being able to find this information on the internet, I spent an entire weekend whisking and testing this chickpea water (and eating far more meringues than I care to remember) and as a result, I think I’ve mastered the basics.
First Up – Cooking Your Chickpeas

If you’re still buying chickpeas (or other pulses) in tins, you are seriously missing a trick. Pulses are super cheap to buy, you can find them in bulk (so packaging free), they take up hardly any space in the pantry and they last forever. You can cook them up in bulk and they freeze really well. Cans are bulky, BPA-lined (meaning chemicals leaching from the plastic into your food), the brine often contain added salt and sugar, plus they are pretty resource-heavy being made from metal, and use a lot more fuel to transport than their dried counterparts. Make your own – it’s easy!

Ingredients: dry chickpeas, water

Soak your chickpeas in water, ensuring they are in a big bowl with enough water covering them as they will expand (depending on the variety, up to three times the original size). Soak for a minimum of 8 hours (overnight). I tend to soak mine for 24 hours or more (changing the water every 8 hours or so) until white bubbles appear in the water. Be sure to throw this water away – it is not the aquafaba!

To cook, place in a large pan and cover with fresh water. Bring to the boil and cook for 1.5 hours. You want to ensure the chickpeas remain covered (you can top up with a little extra water, and keeping a lid on the pan will stop as much evaporation) but try to ensure there isn’t too much extra water. As you cook, white scum will come to the surface. Scoop this off and discard.

After 1.5 hours, drain the chickpeas ensuring you keep the cooking liquid – this is the aquafaba!

I usually cook dry chickpeas 1.5 kg at a time, meaning I end up with about 4 kg cooked chickpeas, and this makes around 2 litres of aquafaba. Chickpeas freeze really well. Decant into glass jars and once completely cool pop into the freezer. Wait until completely frozen until sealing with lids. I use regular glass jars and I have never had one crack.

Aquafaba will keep in the fridge for up to a week so don’t feel like you have to use it straightaway. If you don’t want to use all the aquafaba at once, this freezes really well too. Pour into an ice cube tray and once completely frozen decant into a glass storage container and keep in the freezer.

Aquafaba: How to Turn the Yellow Liquid into White Fluffy Stuff

What you’ll need: a good whisk, and a big bowl…plus a little patience ; )

Pour the yellow chickpea liquid into a big bowl, and start whisking. The bowl needs to be big because as it fluffs up, it will expand to more than 5 times its original volume – so be prepared! You will also need a good whisk. A hand whisk isn’t going to cut it. Neither is a food processor or blender, even a high powered one (I tried). I have a stick blender with a 700W motor, 5 speeds and an additional turbo button, and this just about managed, although the motor did get uncomfortably hot. I would recommend a hand held whisk with two beaters, or a mixmaster or something with a little more power.
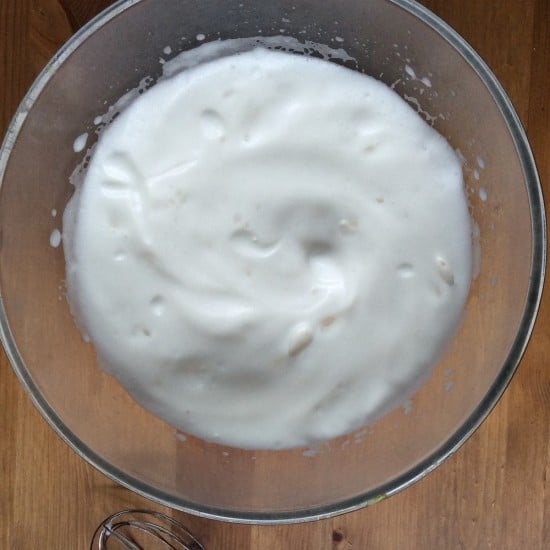
Whisking Aquafaba Some More

This is my aquafaba before adding cream of tartar. Because I don’t have a super powerful whisk, I found cream of tartar helped form the stiff peaks you need for meringues.

Chickpea water needs to be whisked for a long time. (Long being relative of course, but in the age of electric gadgets we expect instant results, so be warned!) You will need 10 – 15 minutes of constant whisking to get the aquafaba to full fluffiness and stiff peaks. On the plus side, you don’t seem to be able to overwhisk aquafaba like you can egg whites, and if you need a break from holding the hand whisk (or like me, are worried about burning out a stick blender), it seems fairly forgiving to stop-starting.

Lastly, don’t be too worried about how concentrated your chickpea water is. Remember, egg whites are fairly runny before you whisk them, and aquafaba is the same. If you think your liquid is really watery you can reduce it a little in a pan, but don’t be too worried about this. I reduced 2 cups of aquafaba to 1 cup in a saucepan by simmering, and then whisked, and actually found it fluffed ever so slightly less than the original non-reduced aquafaba. The main thing will be a good whisk, and enough time.

How to Make Aquafaba Meringues

I based my experiments on this basic aqaufaba meringue recipe. Far more meringues than I actually wanted to eat later, I think I’ve mastered the basics. My next challenge is to improve the shape – something I think I will achieve with a slightly better whisk, and probably a little more patience!

Ingredients: 1 cup aquafaba; 1.5 cups granulated sugar, ground into powdered sugar; 1 tsp vanilla essence and 1/2 tsp cream of tartar.

Whisk the aquafaba into stiff peaks. Ideally you want a mixture so stiff that if you turn the bowl upside down, the aquafaba won’t fall out, but my hand whisk isn’t up to beating quite that well. (If yours is, you may not need to cream of tartar.)

Once the peaks are as stiff as you can get them, add the cream of tartar, still whisking. This will help firm up the peaks. Next, add the sugar slowly. This is important… you don’t want to deflate the bubbles you’ve created. Add 1 tbsp powdered sugar at a time, whisking continuously to incorporate. Yes, it takes ages, but rush and you’ll flatten your meringues.
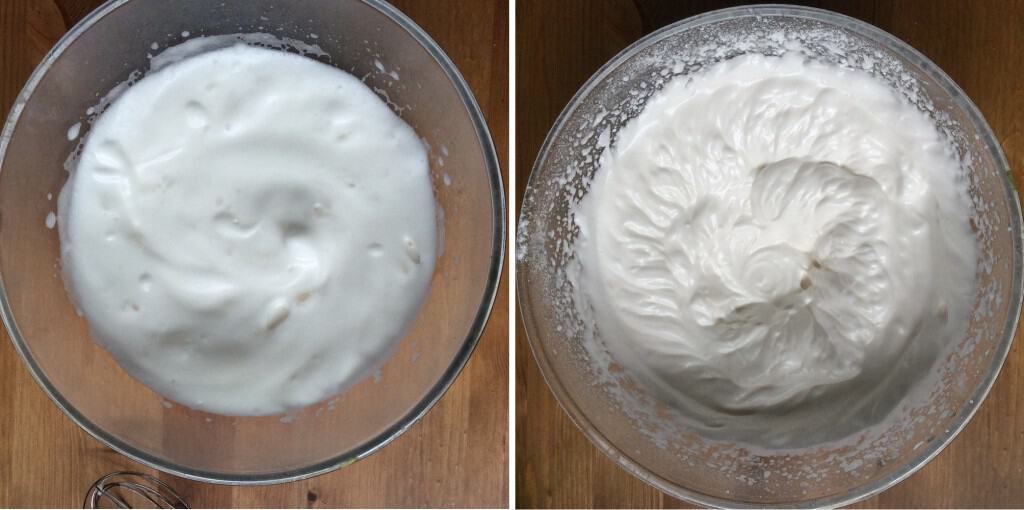
Whisking Aquafaba Before and After Adding Cream of Tartar and Sugar

The bowl on the right is the aquafaba once the cream of tartar and sugar have been added. The sugar gives a shiny gloss to the aquafaba.

When all the sugar is incorporated, add the vanilla essence.

Turn your oven on to the lowest temp. Recipes state the temperature needs to be between 80 – 110°C. My gas oven actually doesn’t go below 120°C but as it never seems to get to temperature anyway, it didn’t matter. Line baking trays with baking paper, and blob the meringue mix onto the paper (I used a soup spoon, and the blobs were about 4cm diameter).
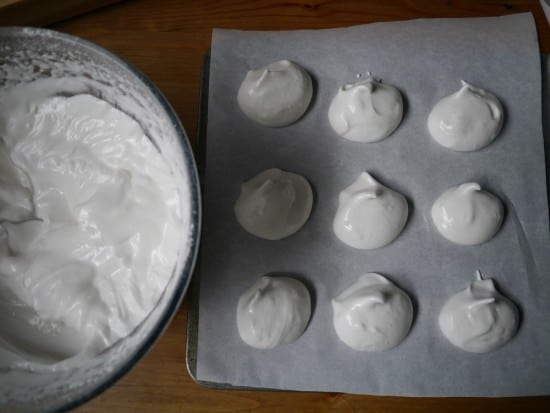
Aquafaba meringues

Aquafaba meringues about to go in the oven. I still haven’t mastered how to keep the shape once they go in the oven…that’s the next challenge!

Pop the meringues into the oven, and leave for 1.5 hours minimum. You aren’t actually trying to cook the meringues but dry them out. If they go brown, your oven is probably on too high.

To test if they are ready, see if you can remove one from the baking paper (ideally without taking the tray out of the oven). If it still sticks, leave in the oven. Keep testing until the meringues can be removed cleanly from the paper. When they are ready, turn the oven off, open the door slightly and leave to cool completely before removing. You’re better off leaving to cool in the oven overnight rather than putting them in a container whilst still slightly warm.

Store in an airtight container if not eating immediately.
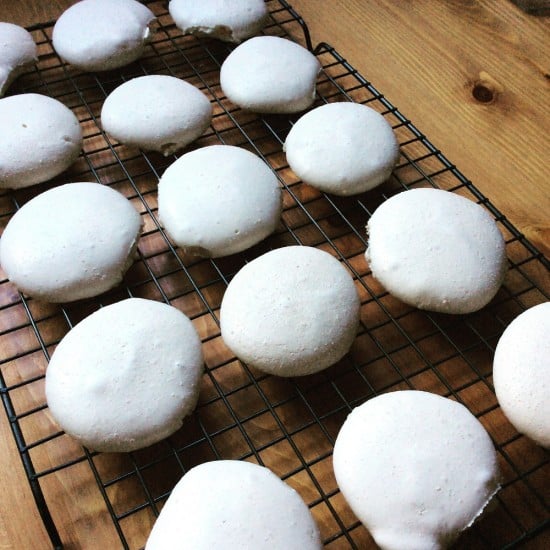
Aquafaba Meringues on a Cooling Rack via Instragram

What’s Next – Aquafaba in Baking

If you’re interested in seeing more amazing creations with aquafaba, there is a great Facebook group called Vegan Meringue – Hits and Misses with lots of recipes to try when you’ve mastered the basics. It’s also a great community and a brilliant source of inspiration!

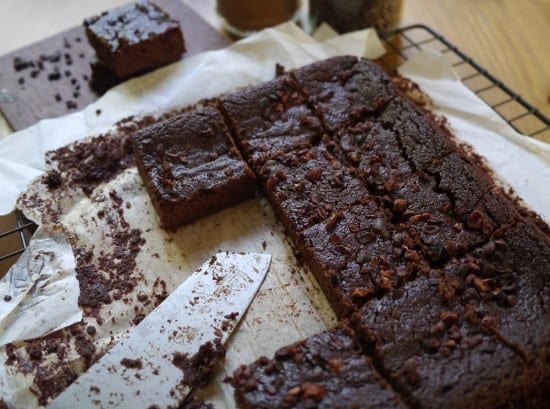
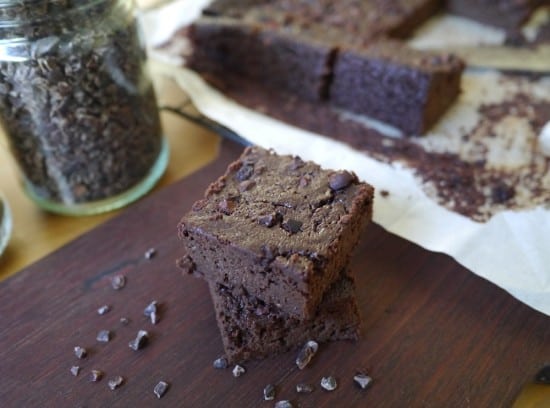
I’m hoping to spend plenty more time in the kitchen experimenting with this stuff! I’ve already attempted making chocolate brownies using aquafaba and was really pleased with the result (especially as it was a first attempt), and with a few more tweaks I’m hoping to perfect this (update! Recipe for aquafaba chocolate brownies has now been added.).

I’m also keen to try macaroons. Playing with aquafaba is so much fun!
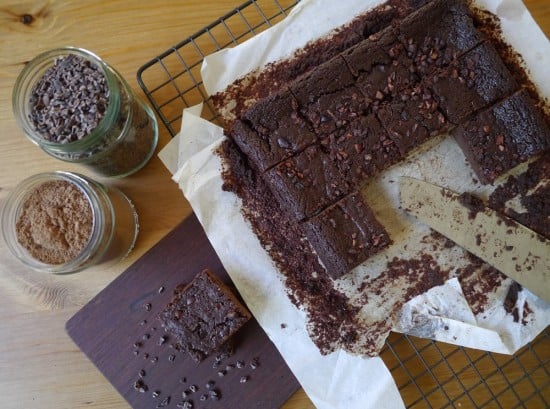
Aquafaba chocolate vegan brownie aerial view Aquafaba chocolate brownie slice Chocolate Vegan Brownie

Now it’s your turn to join in! Tell me, have you heard of aquafaba before? Are you tempted to give it a go, or is something holding you back? Have you already experimented with it? Have you created aquafaba masterpieces or struggled with a sticky mess? If you’re a pro, do you have any advice or tips?  Do you have any questions or need any beginners tips…especially in what NOT to do? (I’m no expert, but I’ve had my fair amount of failures in the last couple of weeks!) Or are you totally grossed out by the whole thing?! I’d love to hear your thoughts so please leave a comment below!

[leadpages_leadbox leadbox_id=123a865e9839c5] [/leadpages_leadbox]

Wardrobe Minimalism: Progress in Pictures

It’s no secret: I struggle with wardrobe decluttering. In my minimalism journey, this has been the hardest area for me to let go. I keep at it, because I know that practise makes perfect, and that decluttering gets easier with time (flexing those decluttering muscles is the only way to make them stronger). When I’m finally finished, the taste of success will be oh so sweet!

About this time last year I undertook a mammoth wardrobe decluttering session, and I photographed everything in my wardrobe. I say mammoth not because of the amount of items I discarded, but because owning so many things made it a big job! I removed every single item of clothing I owned from my wardrobe, shelves, those items hanging behind the door, languishing in the laundry basket and generally distributed about the flat, and made a big pile in the living room. Techinally, several piles.

I lay a sheet out on the floor and category by category, grouped together everything I owned, took a photograph and then considered what I could do without. Once those items were decluttered, I took another photo for prosperity.

I really recommend this process if you want to reduce your wardrobe. Of course, you’d think it would be easier to just look at everything hanging on a rail and make choices from there, but physically moving your things is so much better for a number of reasons:

  • You can be really clear about exactly what you own.
  • You can group things together so you can see exactly how many of every different type of item you own.
  • Physically moving everything makes you realise exactly how much you have. Clothing is surprisingly heavy, and actually lifting and feeling this is much more powerful than glancing at a rail of hanging items.
  • It’s harder to ignore something when it’s in your hands. You can’t miss it, or skim over it, so you consider every single item independently.

Originally, I took photos to write a blog post, but I found it very useful as a tool for helping me see what I owned. I think being able to visually see everything is actually far more helpful than a list. 10 skirts sounds like nothing, but when I see 10 skirts in an image, I see that is far too many! It’s also helpful in working out what goes with what, far more than a list will.

One year later I’ve repeated the process. These pictures show the journey from August 2014 (pre- and post-decluttering), and my progress in October 2015. Remember that my wardrobe decluttering journey actually began 2 years prior to the first pictures in 2014, and clearly I still have quite a way to go!

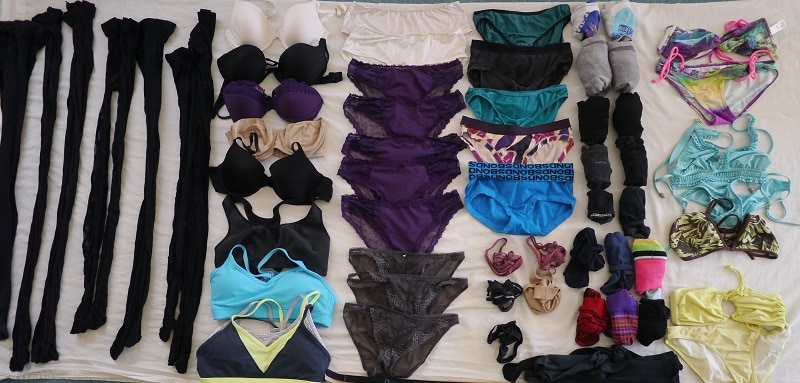
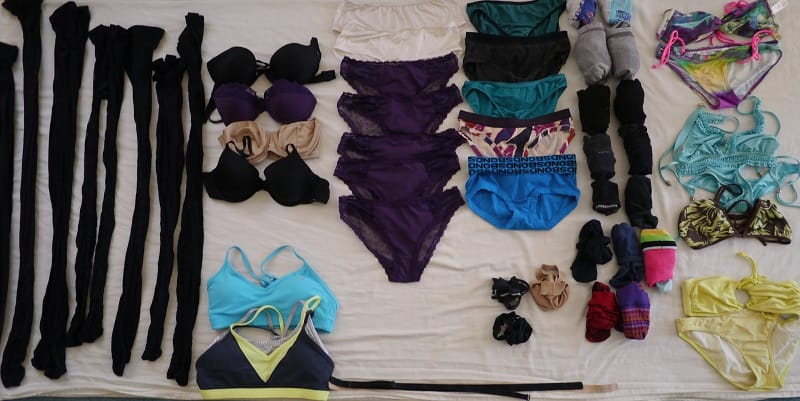
Smalls decluttering

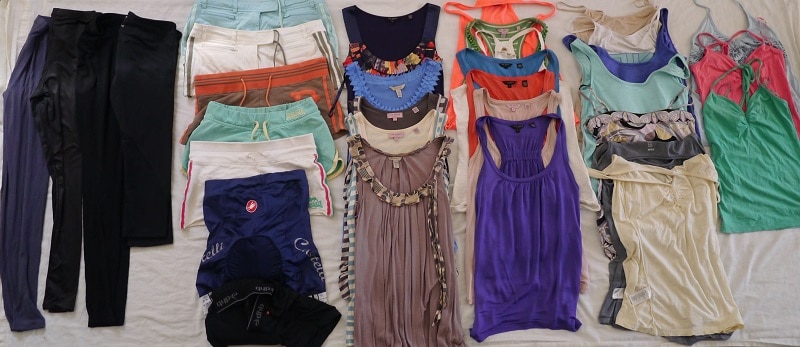
Smalls Pre-Decluttering August 2014

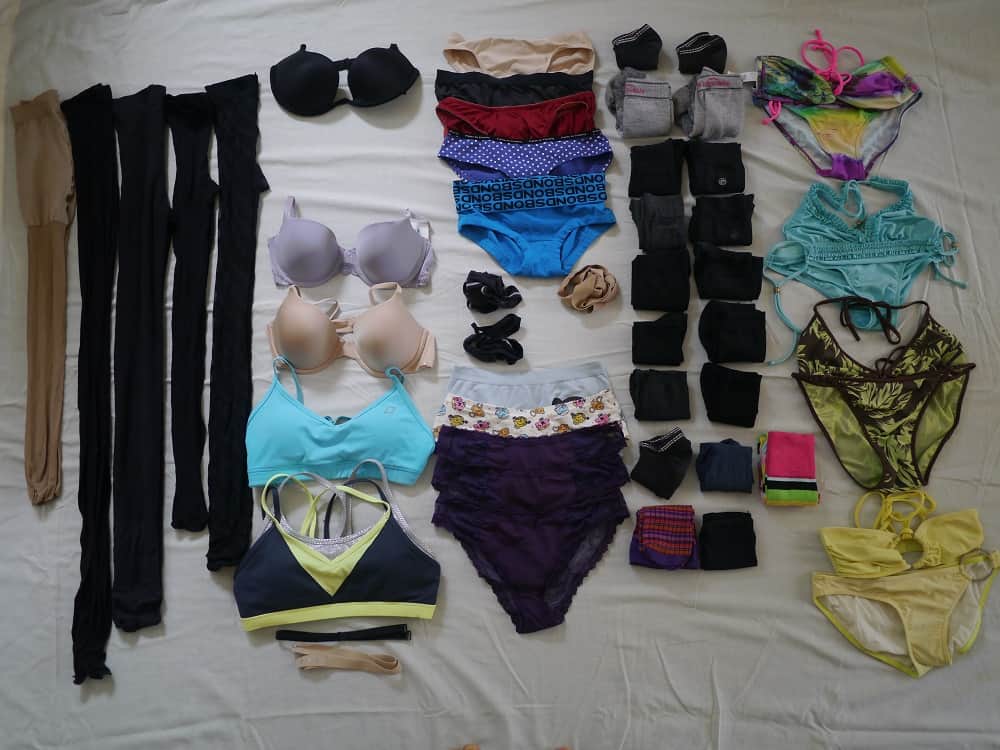
Smalls decluttered

Smalls post-decluttering August 2014

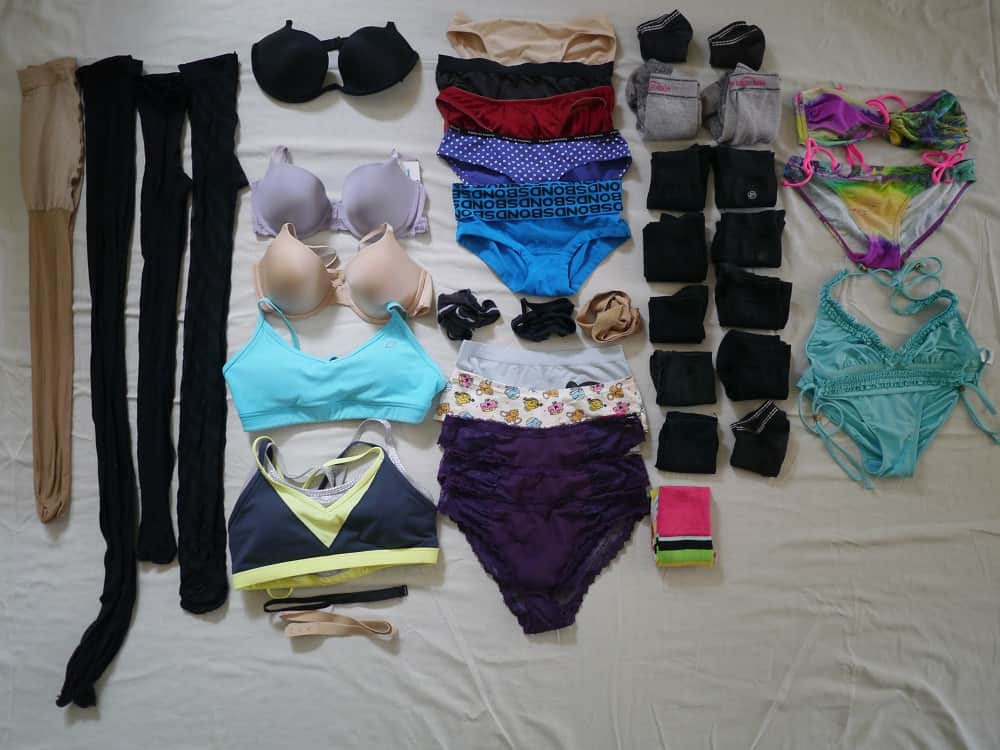
Underwear Cull Wardrobe Minimalism October 2015

Smalls pre-decluttering in October 2015

Underwear Cull Take Two Wardrobe Minimalism October 2015

Smalls post-decluttering October 2015

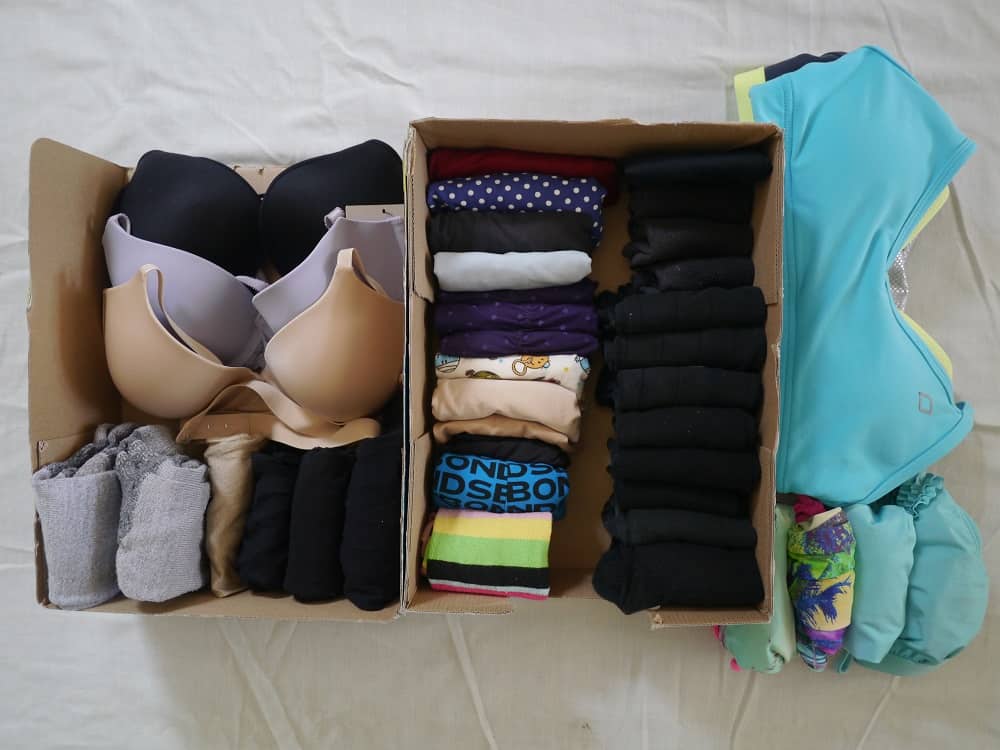
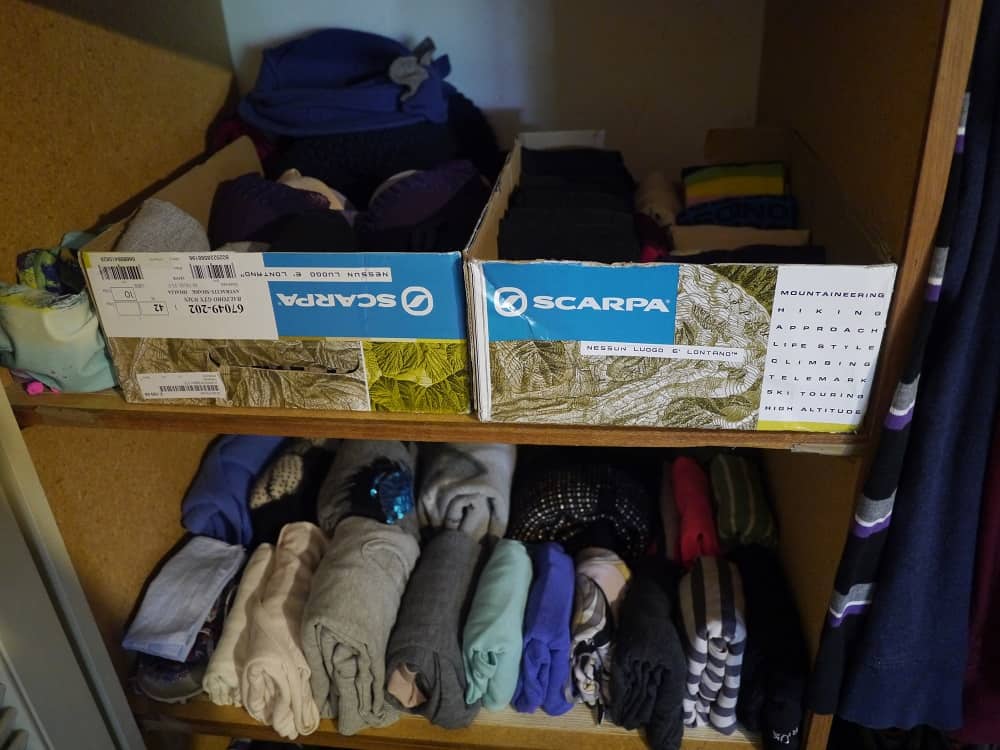
Wardrobe Minimalism Marie Kondo Folding October 2015

And this… folded smalls Marie Kondo style! These boxes sit in the shelf in my wardrobe where the heaped pile of mess used to be, and in 2 months it has not got remotely untidy. Folding works!

More Tops Decluttering

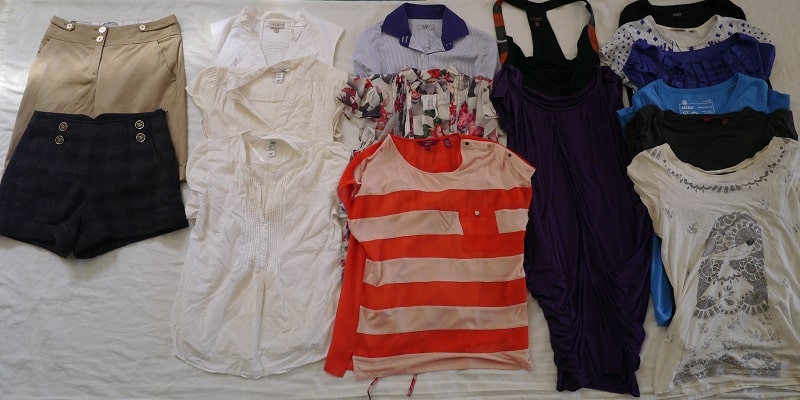
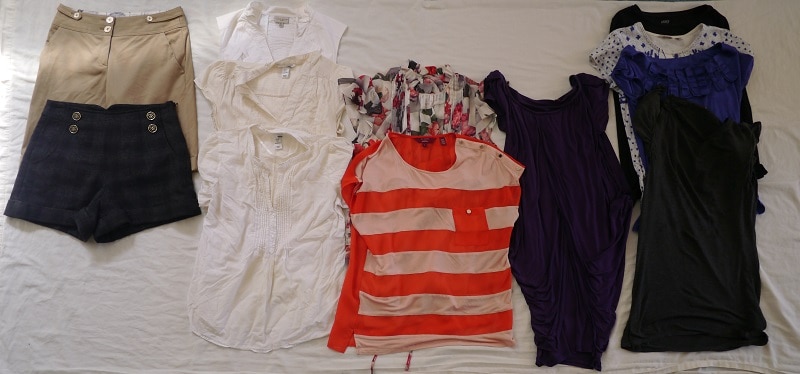
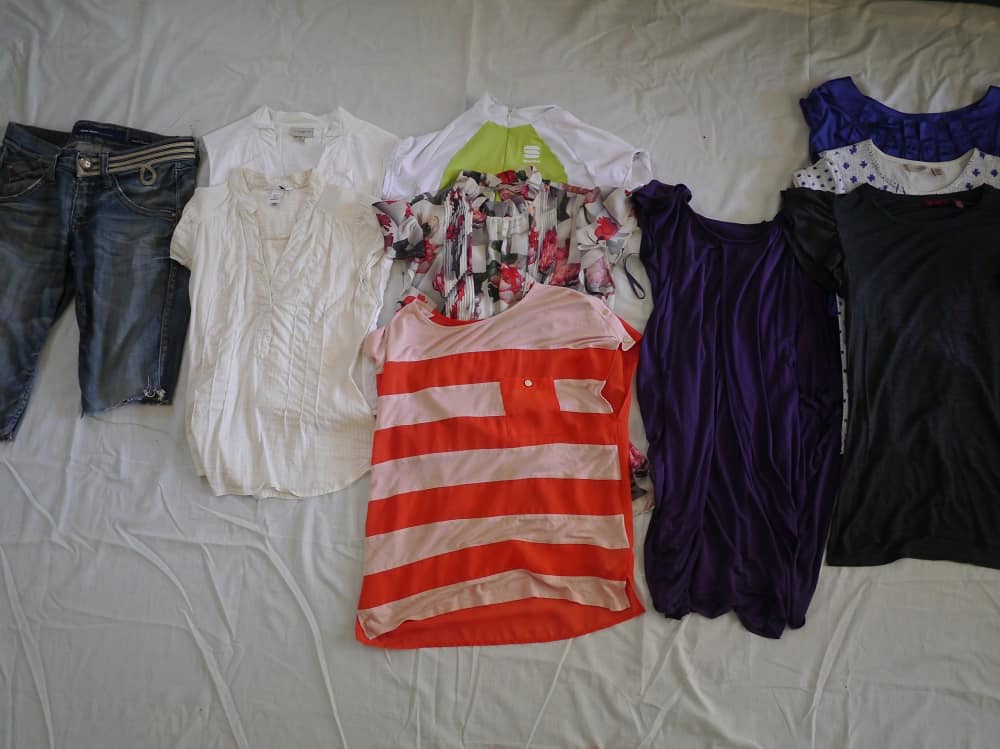
Tops and shorts pre-declutting August 2015. I can’t believe looking at this that I used to own so many tops!

Tops decluttered

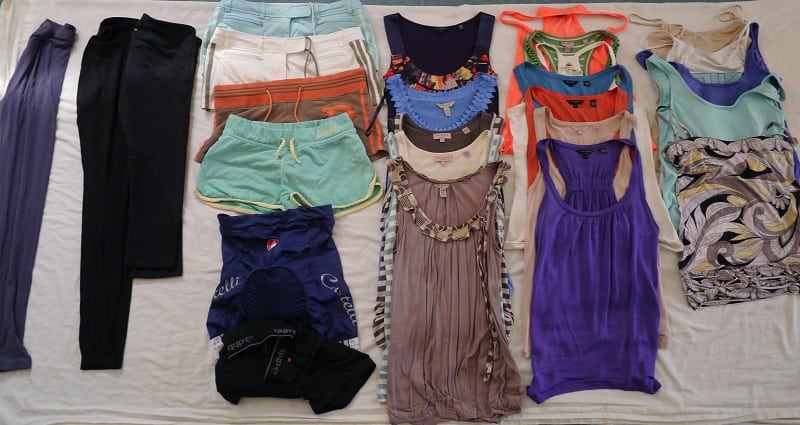
Tops and shorts post-decluttering August 2014.

Wardrobe Minimalism Tops and Shorts Casual October 2015

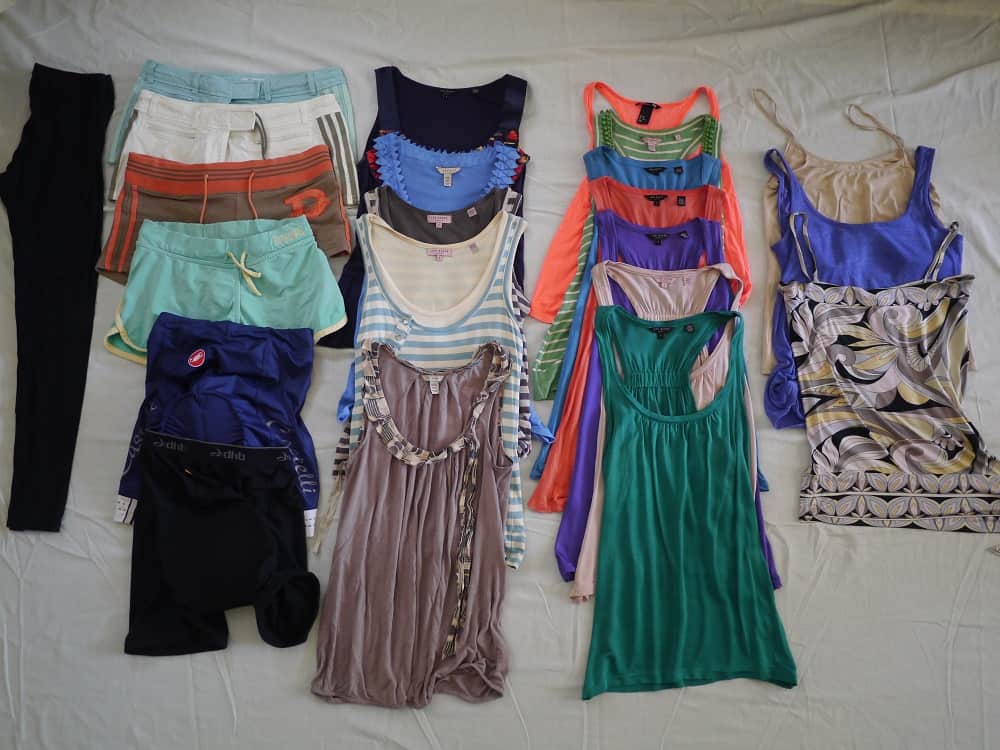
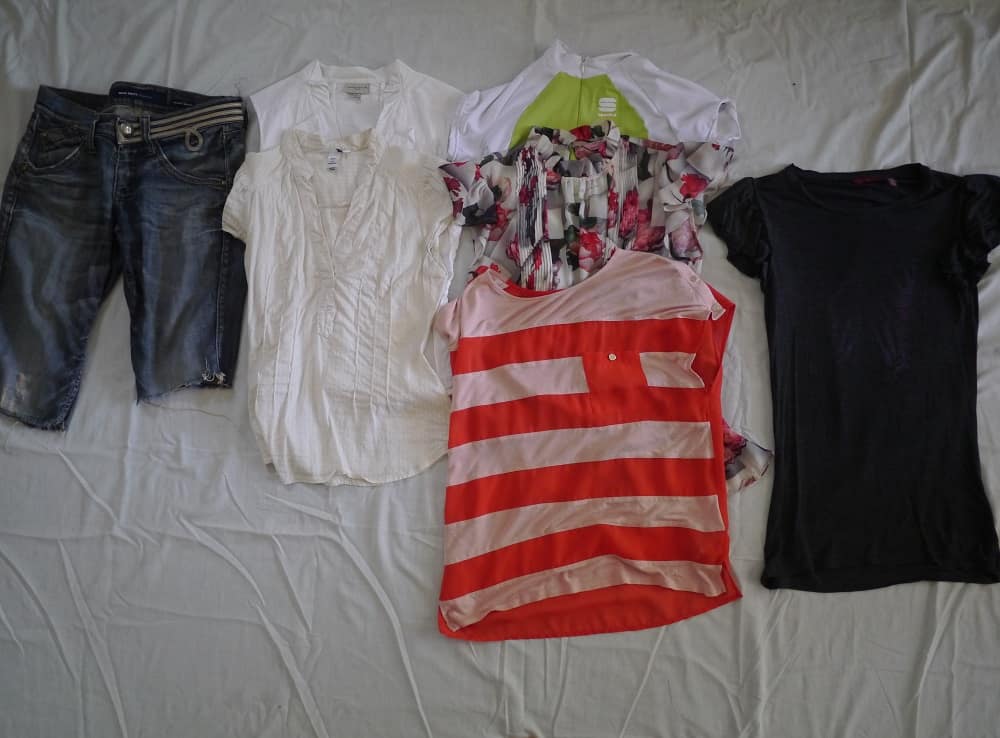
Tops and shorts pre-decluttering October 2015 – a new (second-hand) one has even snuck in! This was a concious purchase – I needed a green top to go with a skirt I own. I have worn it plenty of times. Unlike some of the other tops in this picture…

Wardrobe Minimalism Tops and Shorts Final Cull Casual October 2015

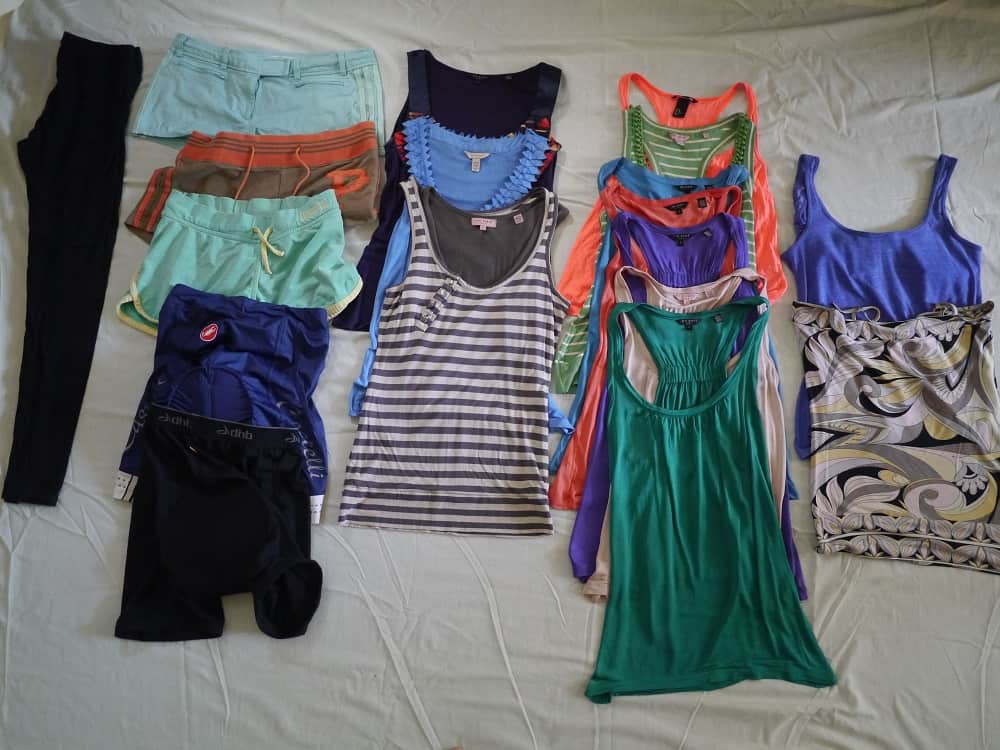
Tops and shorts after decluttering October 2015

Tops decluttering

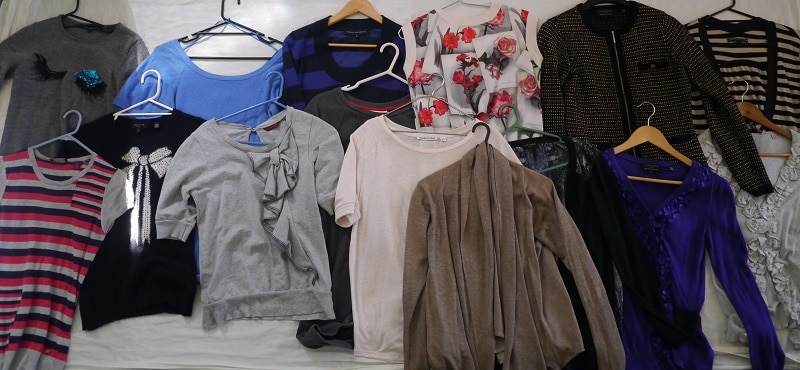
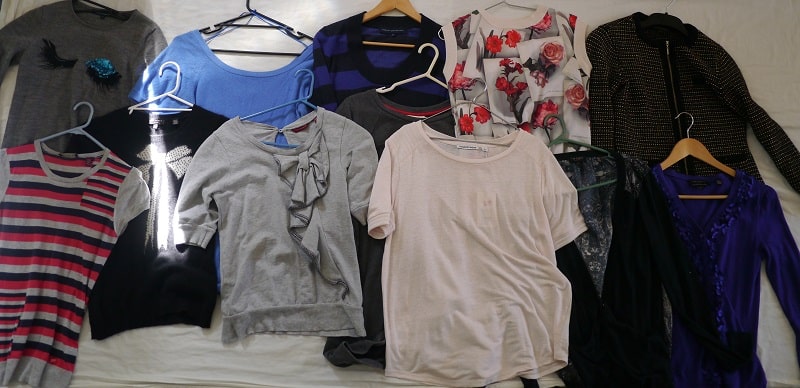
Shirts, blouses and other tops pre-decluttering August 2014

More Tops Decluttered

Shirts, blouses and other tops post-decluttering August 2014

Other Tops Wardrobe Minimalism Pre Cull October 2015

Shirts, blouses and other tops pre-decluttering October 2015. The thick British shorts are gone, and the green top is a cycle top which helps avoid sunburn when out on my bike.

Other Tops Wardrobe Minimalism October 2015

Shirts, blouses and other tops after decluttering October 2015.

Skirts decluttering

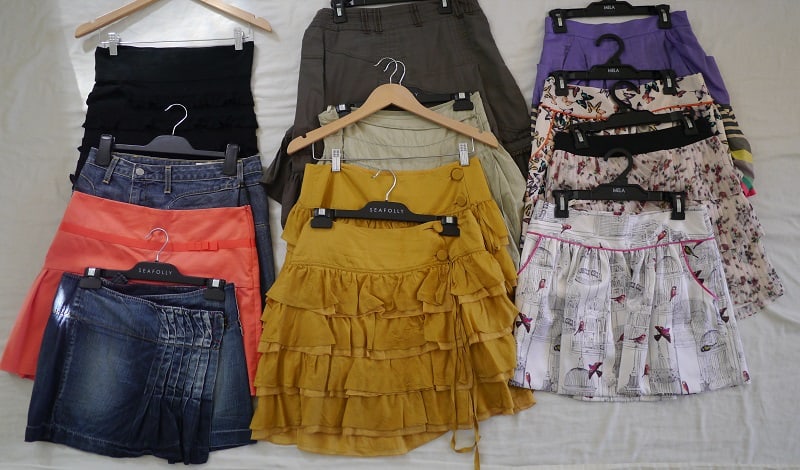
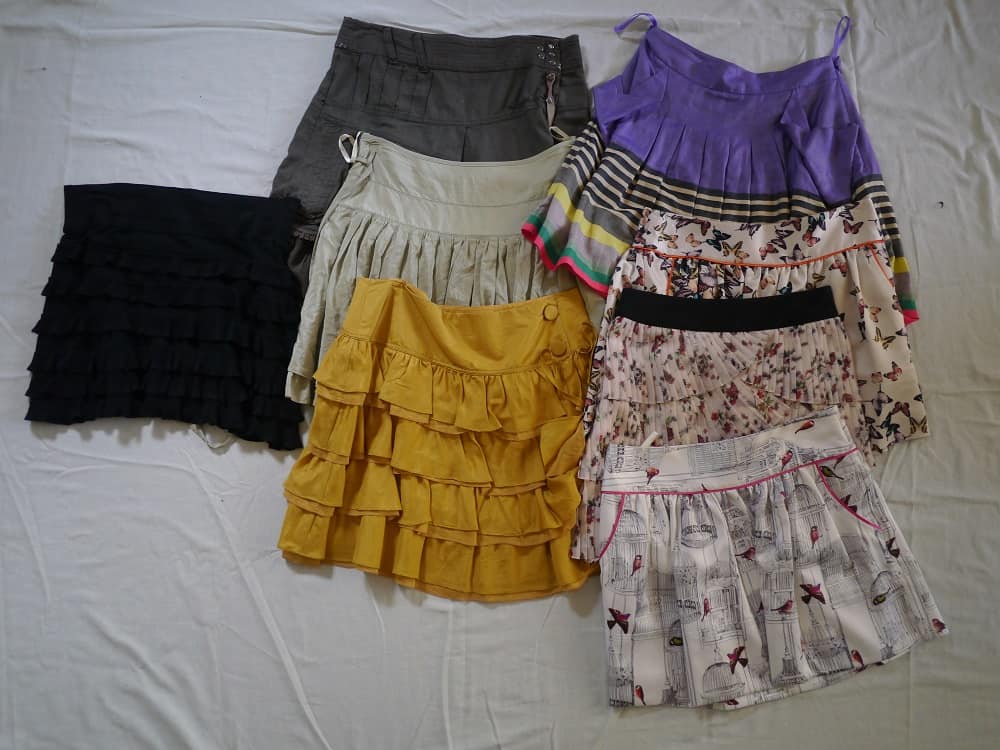
Skirts August 2014. The pre- and post- images are exactly the same as I only got rid of one (the denim one at the front). How many did I wear between then and now? Honestly? Less than half.

Wardrobe Decluttering Minimalism Skirts October 2015

Skirts decluttering October 2015. One of the yellow skirts wore out, I donated the other denim skirt when I went back to the UK, and the coral skirt ended up in the charity shop pile before I took this picture.

Jumpers cardigans decluttering

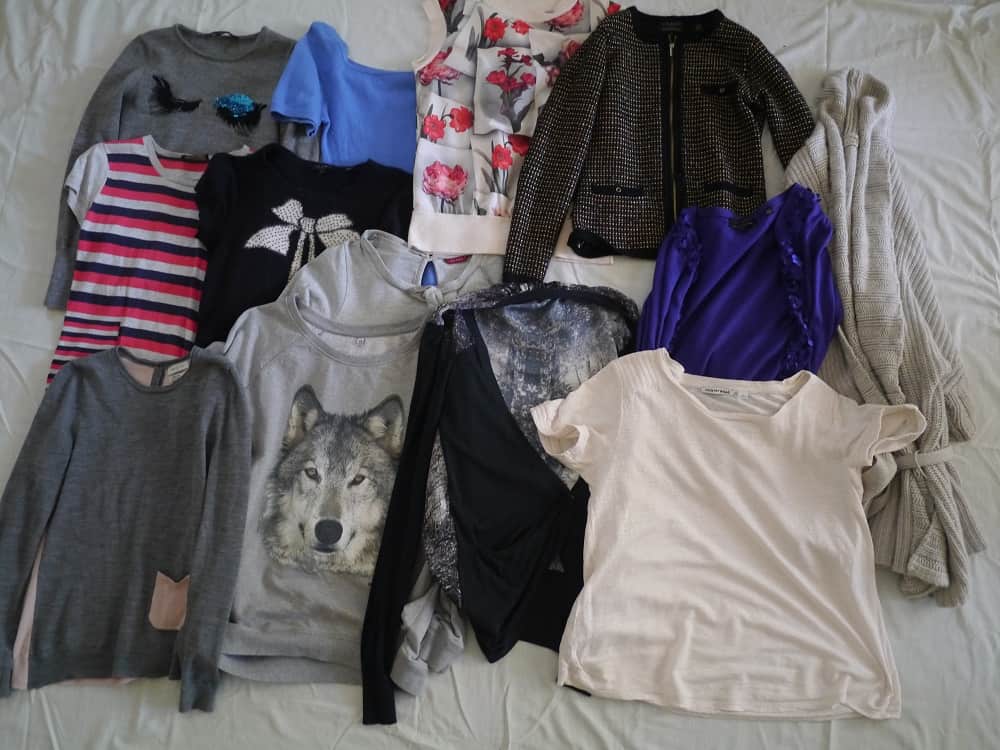
Jumpers pre-decluttering August 2014. Woah, that is a lot of jumpers for someone who lives in a city which has 40 degree summers!

Jumpers decluttered

Post-decluttering August 2014. Well, I say post-decluttering, but there’s not much difference!

Jumpers Decluttering Wardrobe Minimalism October 2015

Jumpers Decluttered October 2015. The cream cardigan on the right is old and somehow escaped the August photos – it must have been in the laundry. I decided to donate the black cardigan right after taking this picture.

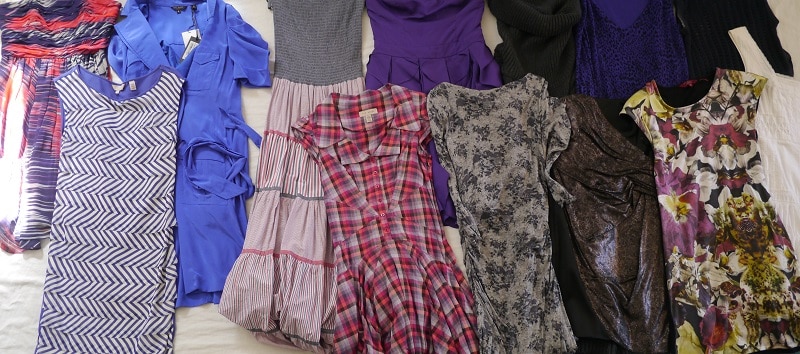
Dresses decluttering

Dresses pre-decluttering August 2014. Looking at this image now shocks me – how can I have owned so many dresses that I wore so little?!

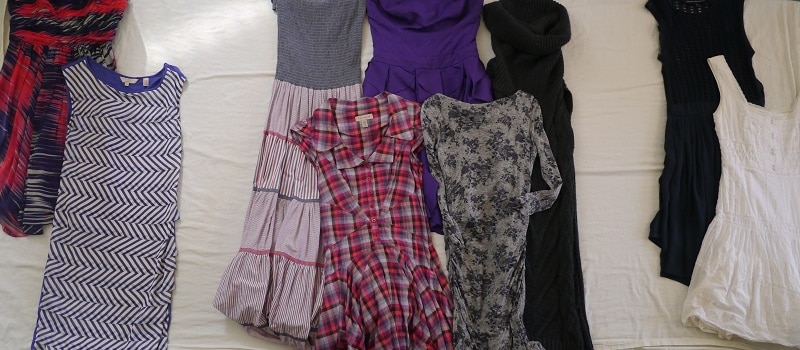
Dresses decluttered

Dresses post-decluttering August 2014. Good effort, but a long way to go! Two of those dresses weren’t worn the entire summer in between 2014 and 2015.

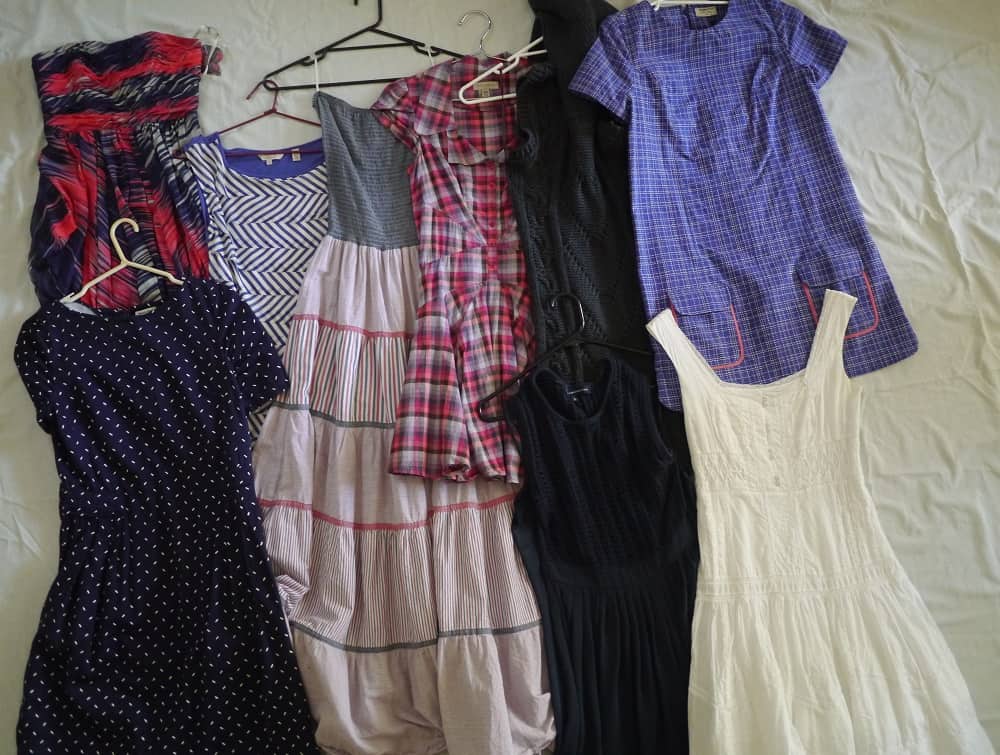
Decluttering Wardrobe Minimalism Dresses October 2015

Dresses post-decluttering October 2015. Two gone, but two new ones have taken their place. Hopefully these will get the wear they deserve!

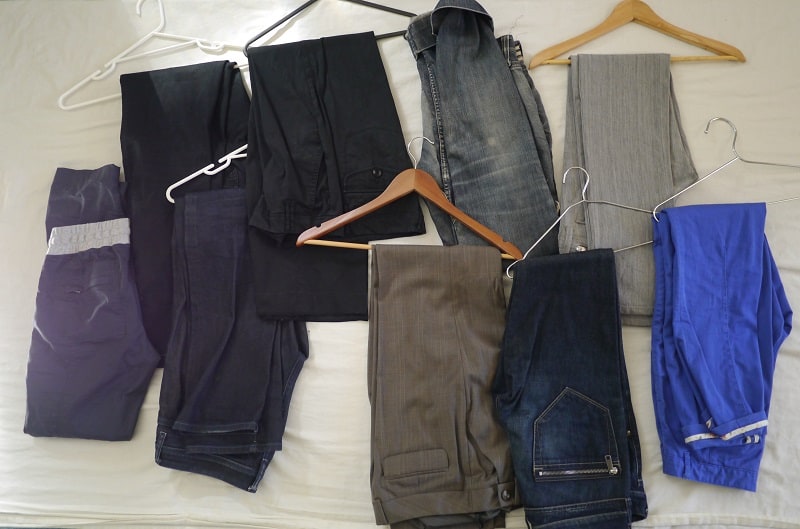
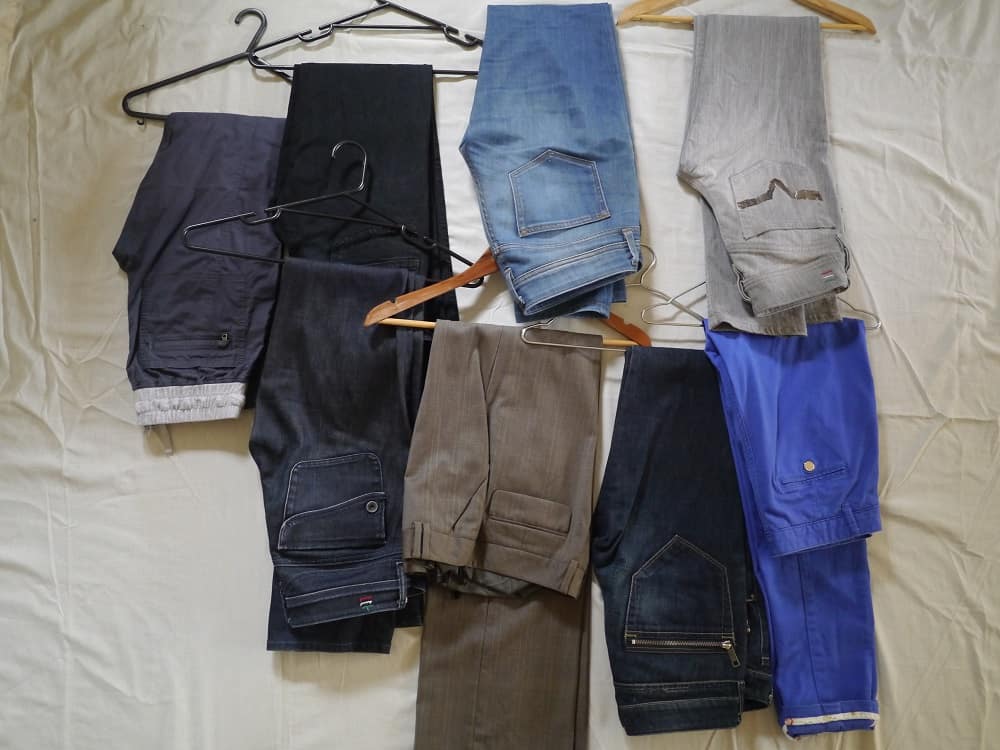
Trousers decluttering

Trousers August 2014

Wardrobe Decluttering Minimalism Trousers October 2015

Trousers October 2015

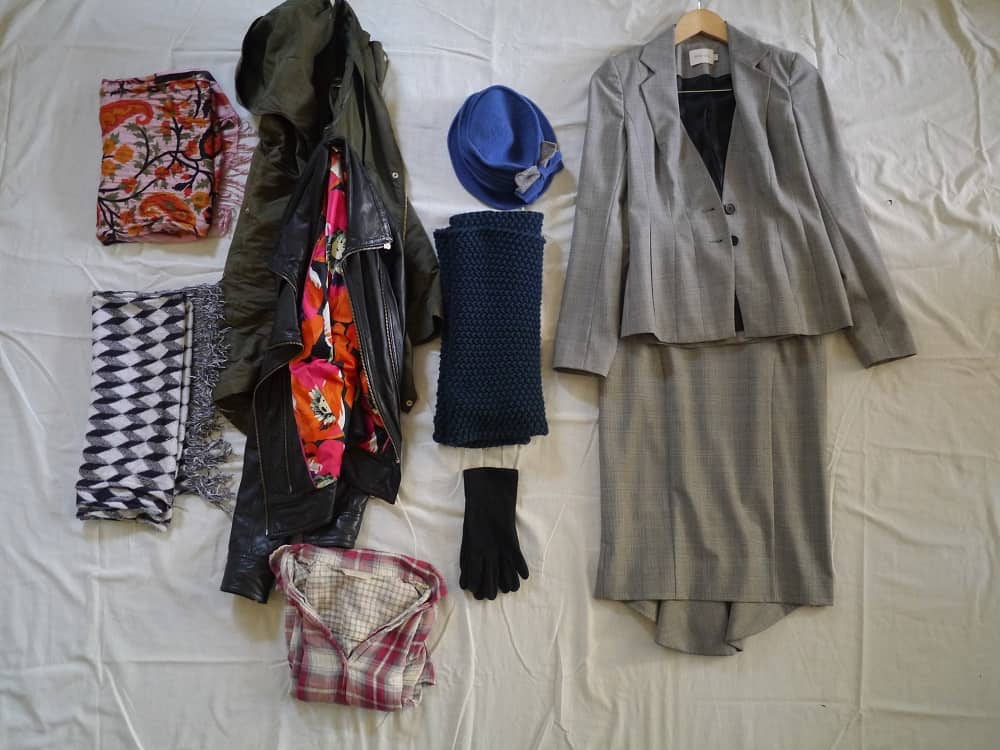
Final Bits and Pieces Wardrobe Decluttering Minimalism October 2015

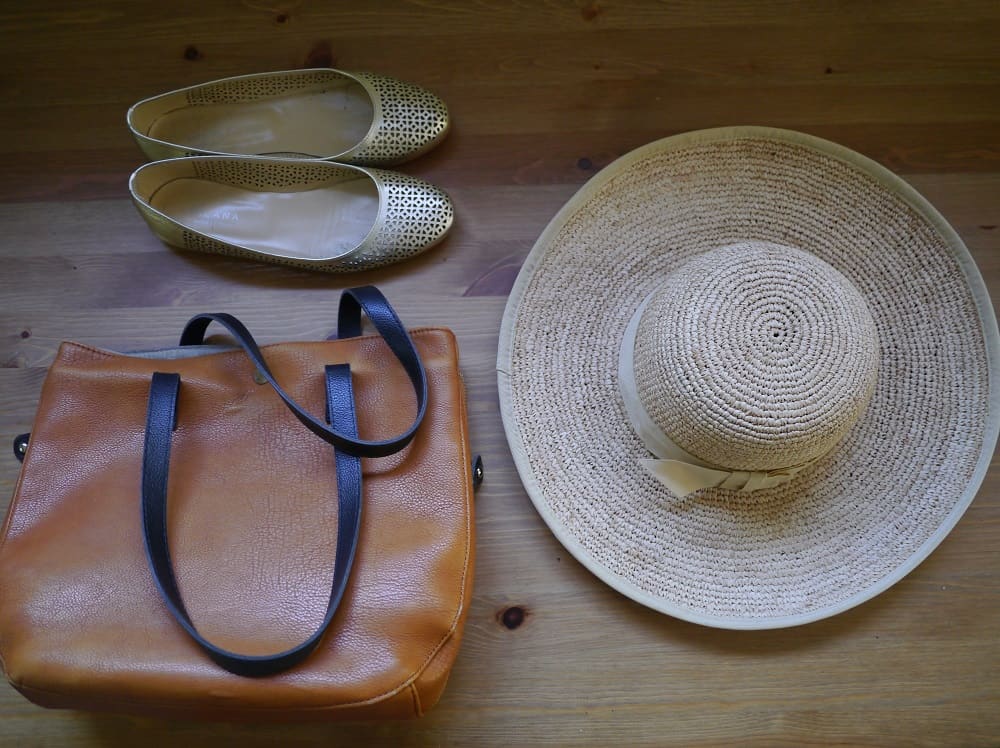
Other bits and bobs October 2015…nothing new since 2014 though : )

Tops and Jumpers Underwear Tidying Marie Kondo KonMari Minimalism

I’ve taken Marie Kondo’s advice to fold jumpers and t-shirts. They are easier to find, don’t take up as much space and folding means I’m more aware of their condition (spills, rips etc). Love this approach!

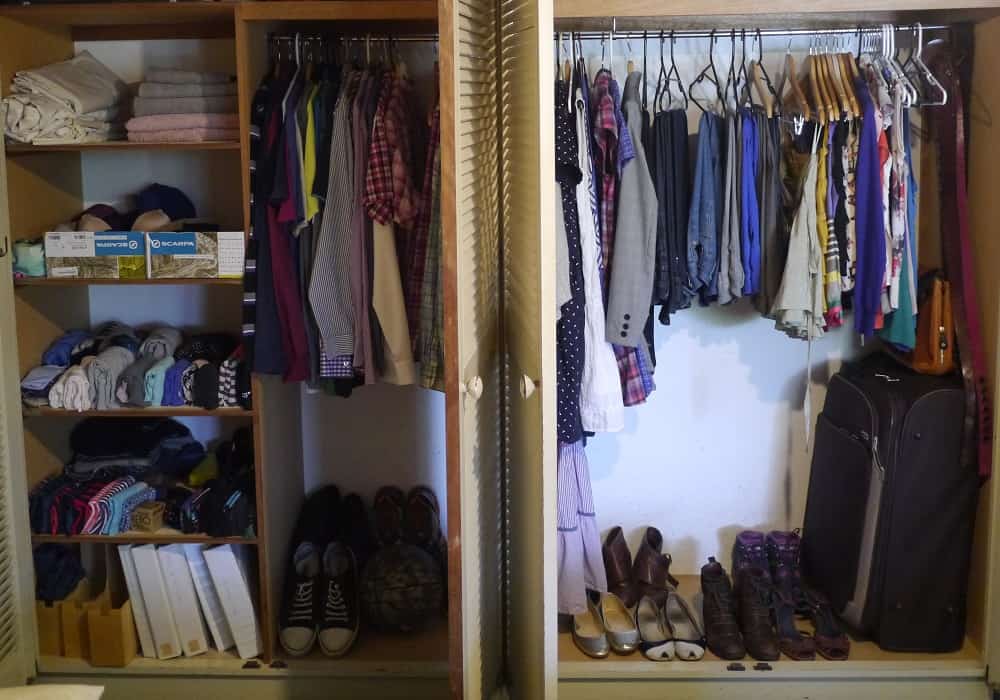
Decluttered Wardrobe October 2015

My newly decluttered and Marie Kondo-ed (meaning folded neatly) wardrobe October 2015. I’ve also switched sides: I realized it made more sense to adopt the bigger half as I have the most stuff. For now! But the decluttering will continue…

Since taking these photos, and writing about my minimalist wardrobe struggle back in October, I’ve had a bit of a wardrobe minimalism breakthrough. Yes I have! A large part of it has to do with all the helpful comments that you left with advice and tips. They didn’t fall on deaf ears, quite the opposite, and I want to thank you all for providing well needed advice. Stay tuned, because I’m looking forward to sharing the next chapter with you shortly!

Now it’s your turn, and I want to hear from you! Now you’ve seen my wardrobe in all its, er, glory…I’d love to hear what you think! Any areas for improvement? Any glaringly obvious mistakes or inappropriate (mis-matching, for example) items? Anything I could add to make what I have much more usable? Any colours missing or over-represented? Any parallels with your own wardrobe minimalism struggle? Anything else you’d like to add?! Please keep the advice coming in the comments below!

[leadpages_leadbox leadbox_id=1429a0746639c5] [/leadpages_leadbox]
Zero Waste Strawberry Recipes (And None of Them Are Jam)

A small miracle happened. I went to the Farmers’ Market…and found plastic-free strawberries! Oh the excitement! The elation! I haven’t bought strawberries in 4 years because I won’t buy them in plastic packaging, and let’s face it, that’s sad, because seasonal freshly picked strawberries are delicious. There was just one catch. They came in the hugest box you’d ever seen. Sold as “jamming strawberries”, there must have been the equivalent of 20 punnets there. I kid you not.

Of course, at the time it seemed like a great idea. I marched home with a massive box of jamming strawberries (which means all those berries that are misshapen, blemished, slightly too ripe, and a couple that were starting to sprout furry bits). It was only then that I realised the enormity of the task ahead: washing, chopping, planning and eating these 20 punnets of strawberries before they expire! As we all know, fresh strawberries do not last long!

Luckily for me I like a challenge, especially one that involves food. After spending a weekend with these strawberries, I have some great ideas for how to use up a glut of strawberries…without making jam.

First Things First: Freezing Strawberries Successfully

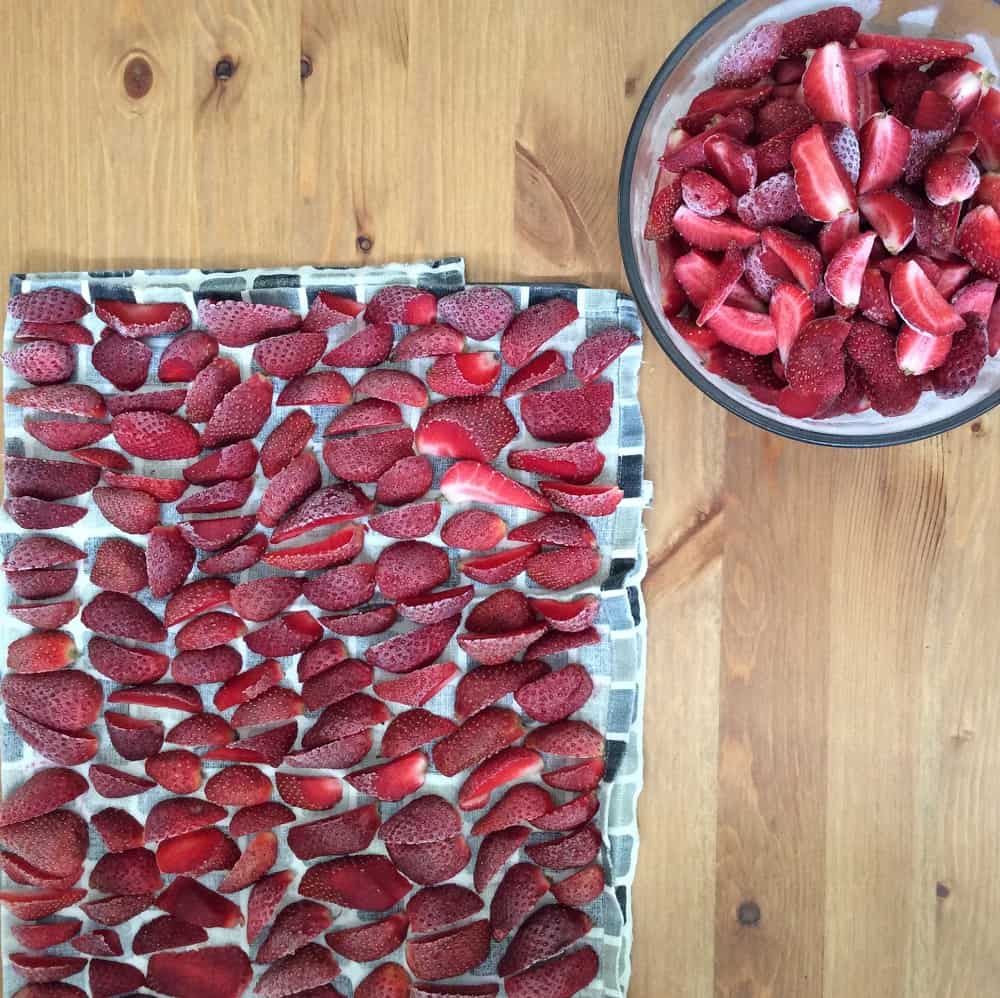
Strawberries actually freeze very well. I wouldn’t trust them not to be mushy when defrosted, but they are perfect for adding to smoothies or using in baking. The trick is not to chuck them all together in a bowl, or you’ll be left with a giant frozen mass that can’t be separated. Instead, after washing, chop into quarters and lay out on a baking sheet lined with a tea towel. Pop into the freezer for a few hours. Remove when frozen, pop into a container with a lid (I use a glass Pyrex container but a glass jar would work too) and keep in the freezer until needed.

Preparing Strawberries for the Freezer

How to prepare and freeze strawberries

Strawberry Sorbet (Contains raw egg)

Ingredients:

400g strawberries, chopped and frozen
200g ice
juice of 1/2 lemon
1 egg white
50g icing (superfine) sugar

Method:

You will need a high-powered blender or food processor for best results.

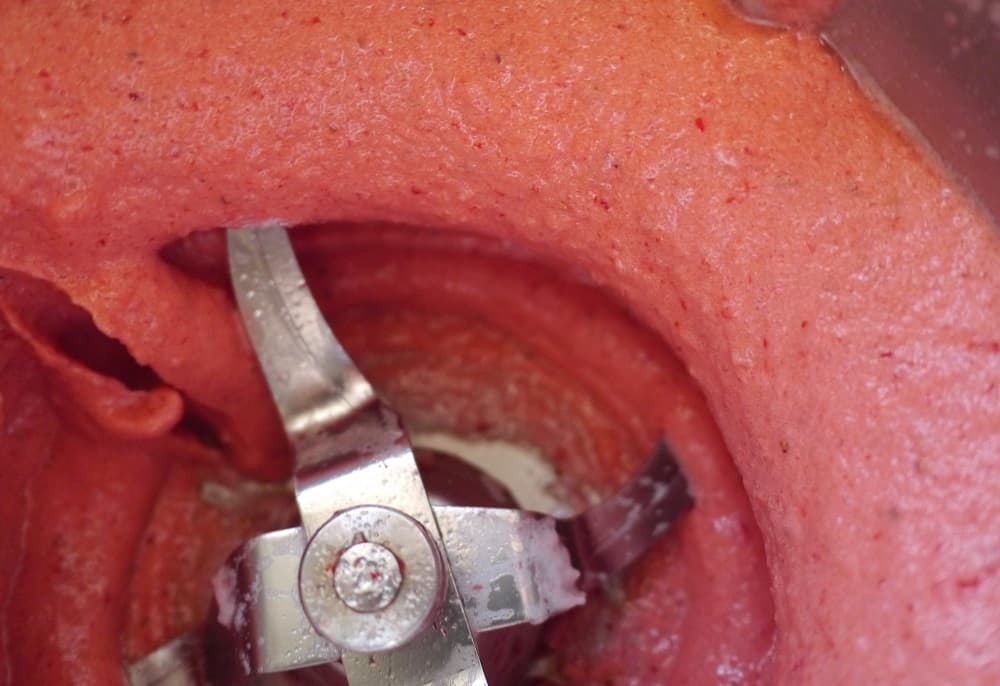
Blend ice, frozen strawberries lemon juice and icing sugar together until smooth. The smoother it is, the less ice crystals will remain – however the longer you blend, the more it will heat up (and melt). If your blender is struggling, pop the jug into the freezer to cool and resume once refrozen.

For best results, use a whisk attachment for this. Add egg white and whisk for 2-3 minutes until fluffy. Eat straightaway. You can freeze leftovers in a glass container however remember that this sorbet contains raw egg, so it’s best not to defrost and refreeze.

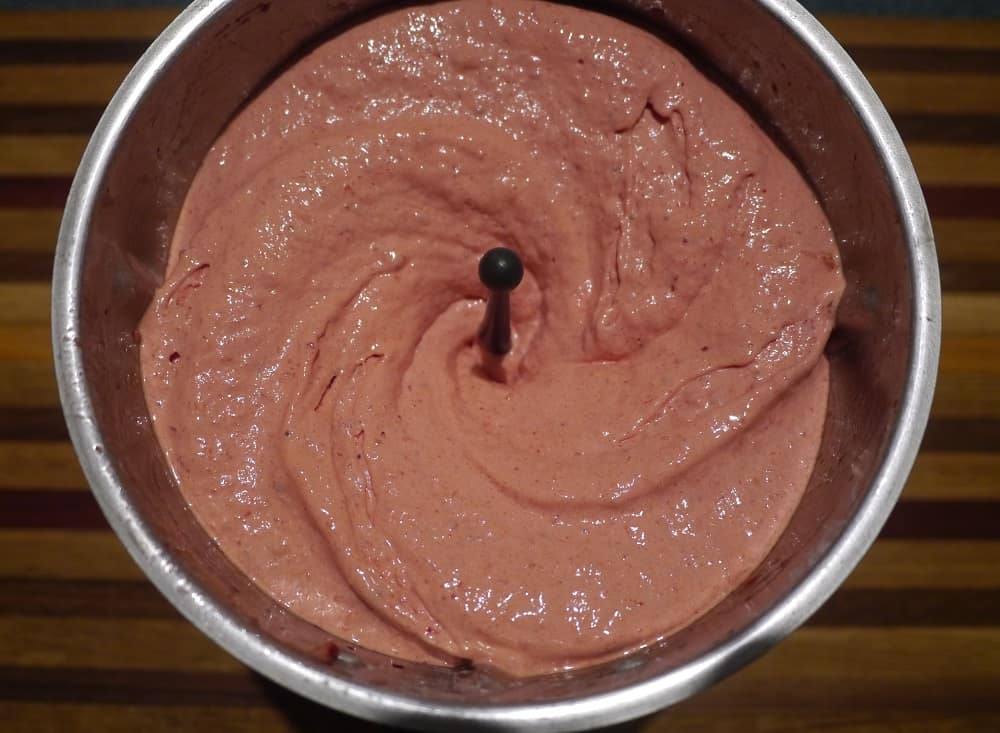
Strawberry Sorbet

All light and fluffy!

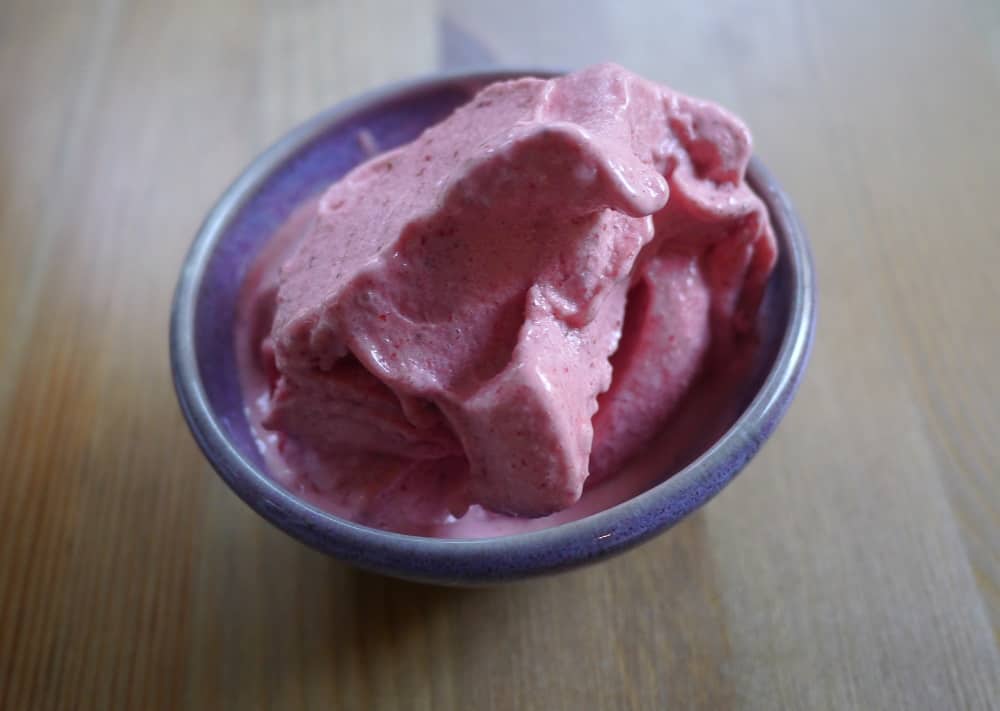
Strawberry Sorbet in a bowl

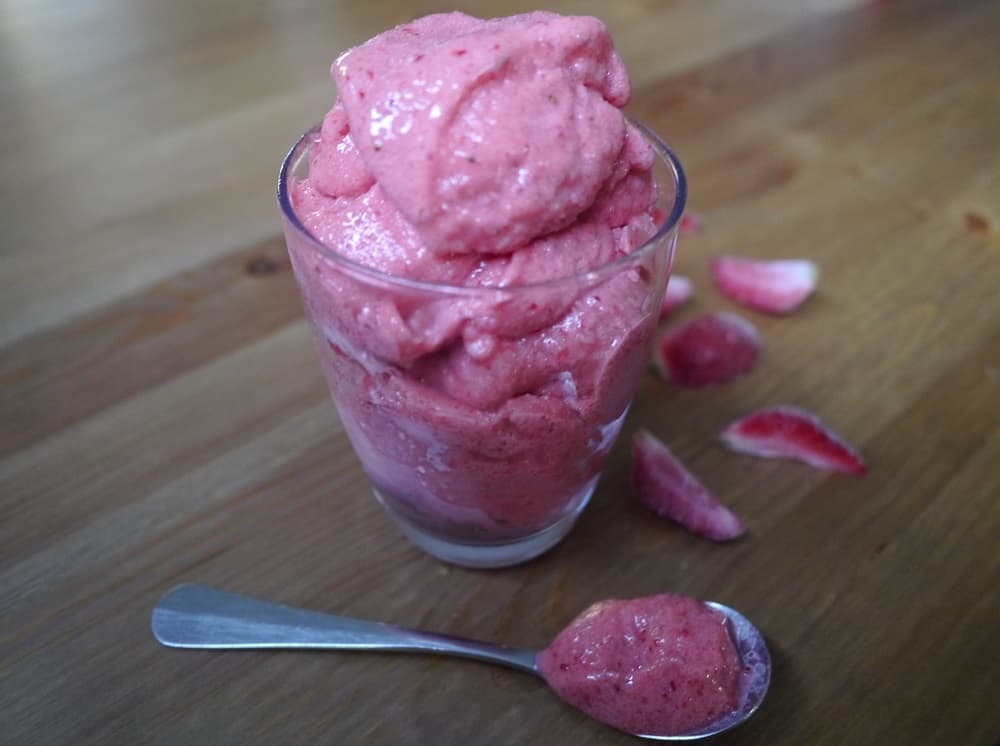
Dairy-free strawberry sorbet (contains raw egg)

Strawberry Sorbet (Vegan)

Ingredients:

400g strawberries, chopped and frozen
200g ice
1 cup aquafaba (liquid left over after cooking chickpeas)
50g icing (fine) sugar

Method:

You will need a high-powered blender or food processor for best results. Blend the frozen strawberries and ice until grainy, and add the sugar. Blend to combine. In a separate container whisk the aquafaba for several minutes until soft peaks form. Using a whisk attachment with your blender, add the aquafaba slowly to the mix and beat for 2 minutes until fluffy.

Eat straightaway, and store leftovers in a glass container in the freezer.

Strawberry Aquafaba Vegan strawberry sorbet icecream

Aquafaba (water drained from cooked chickpeas) can make sorbet fluffy too!

Vegan Strawberry Sorbet Aquafaba

Dairy-free vegan sorbet.

Strawberries on Toast

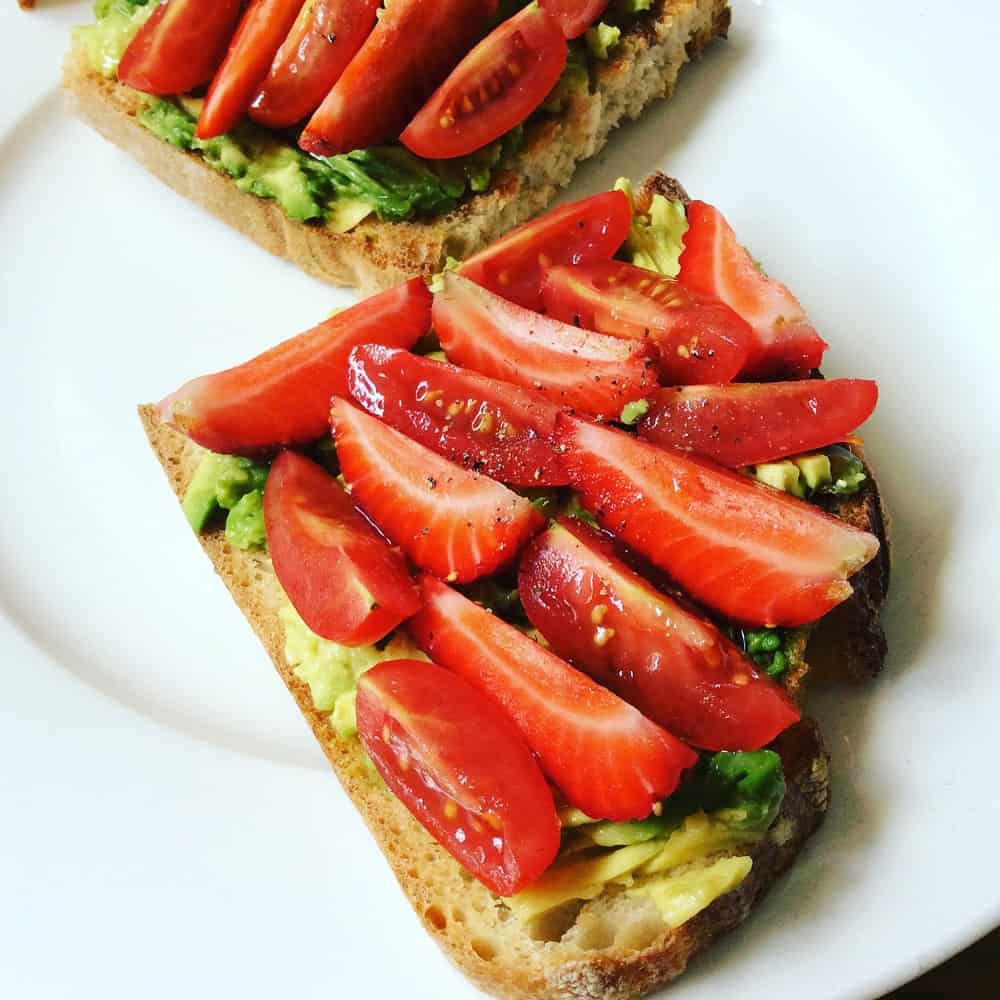
This was conjured up out of desperation, but actually, it was such a hit that I feel it could become a summer regular. It’s not just me that thinks so either; it’s been one of my most popular pictures on Instagram!

Method:

Quarter equal numbers of strawberries and cherry or baby plum (grape) tomatoes. Mash some avocado onto sourdough or other good quality bread or toast, squeeze some lemon juice on the avocado and add chopped fresh herbs if you have them(coriander or parsley would both work well).  Top with strawberries and tomatoes and a dash of balsamic vinegar.

Strawberries on Toast

Strawberries on toast. Trust me, it works!

Strawberry Smoothie

I don’t think smoothies should be dictated, they are more about using what you have on hand. I find almond milk a great base for smoothies, and it’s really simple to make your own.

For the almond milk: soak 1 cup raw almonds overnight. Rinse and blend with 4 cups water in a high powered blender for 2 minutes. Strain using cheesecloth (you can freeze the pulp).

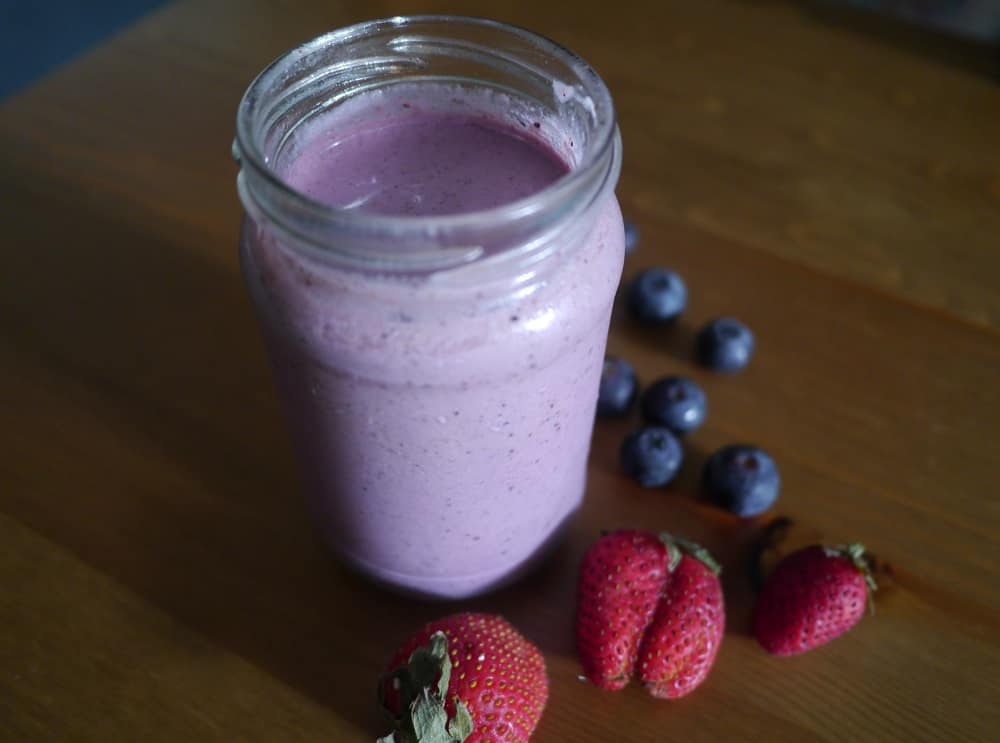
For the smoothie: Blend 1 cup almond milk, 1 cup strawberries, a handful of hemp seeds and a handful of blueberries together until smooth. Add sweetener to taste.

Strawberry Blueberry Hemp Almond Milk Smoothie

Strawberry smoothie. In a jam jar. Just because.

Strawberry Oat Bake

Ingredients:

165g strawberries
35g coconut oil
25g cacao butter (if you don’t have this, substitute for more coconut oil)
2 tbsp macadamia or other vegetable oil
75g honey or other sugar
220g oats
55g almonds
Zest of 1 lemon
1/2 teaspoon vanilla extract

Method:

Blend the strawberries with the vanilla essence until smooth and set aside. Melt the coconut oil and cacao butter in a pan, add the sugar and mix until combined. Stir in oats, ground almonds and lemon zest. Mix until coated.

In a square tin (I used a loaf tin but a square tin would work much better) spread out half the oat mix, and press down with the back of a spoon. Add the strawberry mix and spread over the oats. Top with the final layer of oats. (If you have them, add a handful of chopped nuts into the remaining oats or sprinkle on top. I didn’t do this and wish I had!)

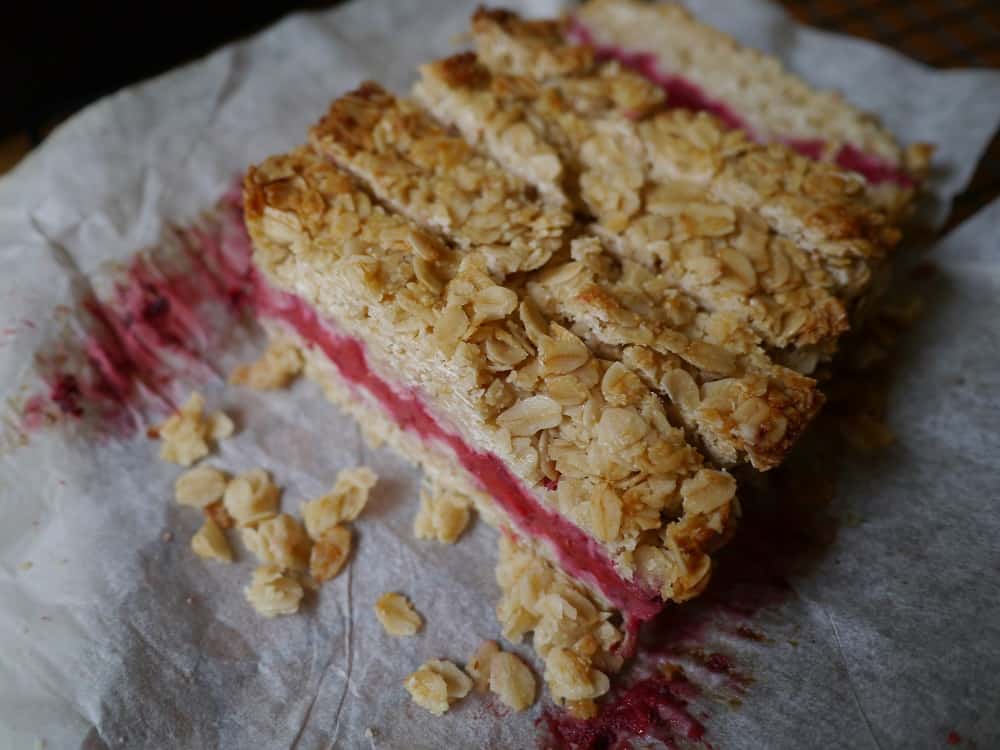
Bake at 200°C for 15 minutes until golden on top. Leave to cool completely, then place in the fridge. Cut into squares or slices once cooled (it will be less crumbly this way).

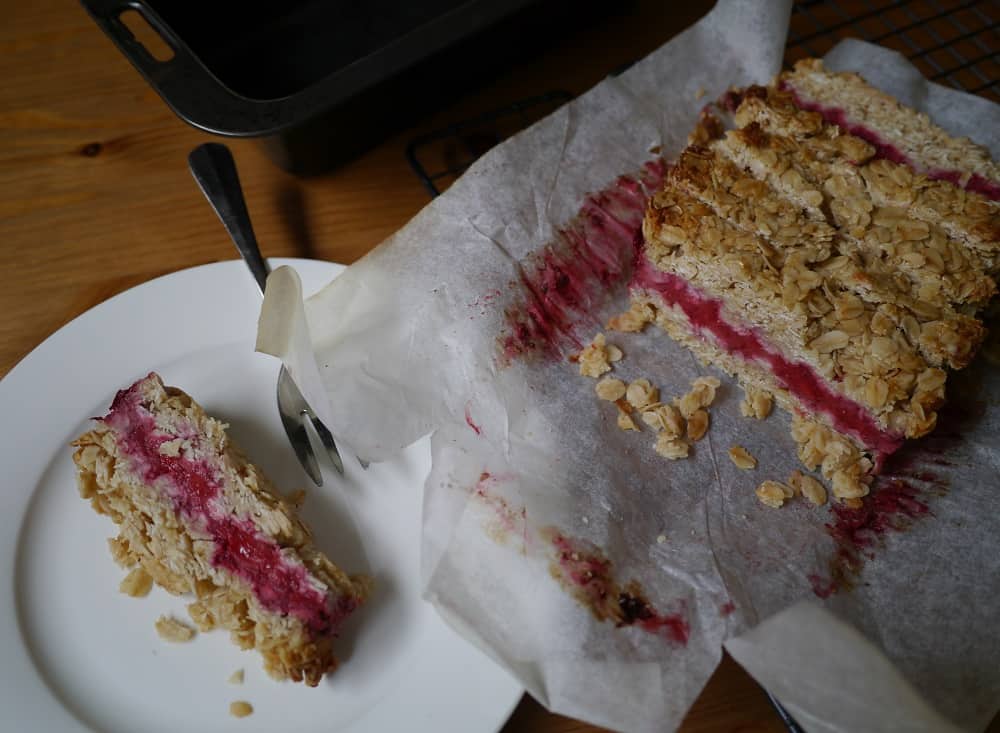
Strawberry Oat Bake

Half the oat mix spread into a tin, then the strawberry mix spread on top.

Baked Strawberry Oat Slice

Strawberry oat bake.

Strawberry Oat Slice Baked

Strawberry oat bake.

Chia Strawberry Jam

I know, I know. I told you I wouldn’t include jam recipes. But this isn’t jam in the traditional sense. By traditional sense I mean adding 400kg refined white sugar to your strawberries, boiling for half a day and then storing in the pantry for all of eternity. This is fresh, it won’t keep more than a couple of days in the fridge, and it’s got all the goodness of fresh fruit. Think of it more as “strawberries that spread”.

Ingredients:

1 cup strawberries, chopped very small
2 tbsp water
2tbsp chia seeds
1 tbsp maple syrup or other liquid sweetener (or more to taste)
Couple of drops of vanilla essence

Method:

This is so ridiculously simple it doesn’t really warrant a “method”. Stir all the ingredients together in a glass jar, put a lid on and leave in the fridge overnight.

Strawberry Chia Jam

Strawberry “jam”, made with chia seeds and fresh strawberries.

I had so much fun with these strawberries that I’m actually relishing the chance to buy another box and experiment some more! The strawberry season isn’t long, and seasonal produce is far more delicious than its imported cousins, so I think it’s worth indulging in the glut whilst it lasts : )