You’ve made it: the last day of Plastic Free July!

Today is 31st July. If you’ve been taking part in Plastic Free July this year, you’ve probably been counting down this day as you’ve struggled with a month of buying no single use disposable plastic. Well here it is!

Congratulations – you made it! Read more

Experimenting with Seed Milks

Seed milk. If the name ‘nut milk’ sounds bad, seed milk sounds far worse. But don’t let the feeble name put you off… they are surprisingly tasty!

Nut milks are a great substitute for cow’s milk in smoothies (and whatever else your heart desires), and I often make cashew nut milk as a base for my smoothies (see recipe here). But nuts can be expensive, and seeds are often cheaper. Plus pumpkin seeds and sunflower seeds are delicious, which got me thinking…

I decided to experiment with making some different seed milks. So far I’ve made sesame, pumpkin and sunflower seed milk.

Recipe: How to Make Seed Milks

To make these, the procedure is the same. Soak one cup of seeds in water for a few hours, or preferably overnight. Drain and put in a blender with 3 cups of chilled water. Blend until smooth.

Next you need to strain. I used one of my produce bags made with a fine netting type material. You could also use muslin, or improvise with some other material. A fine sieve should work. I’m sure old tights would work too – but do make sure they’re clean first!

Drain the liquid into a bowl. Once the pulp is dry (squeeze any excess moisture out) pour the liquid into a glass bottle or jar and store in the fridge. It will keep for up to 5 days.

Sesame Seed Milk

This milk has quite a distinctive and strong flavour. If you love tahini and sesame then you’ll love it; if not you may find it a bit strong. I used it to make my cacao banana smoothie and even with all the rich chocolatey-ness I could still slightly detect the sesame flavour.

I also tried this with (plunger) coffee and was really impressed with the result. It didn’t curdle (hurrah!) and I thought the flavours really complemented each other.

Pumpkin Seed Milk

I love pumpkin seeds and I loved this. The flavour is quite subtle and nutty. It has a slight green tinge, which amuses me slightly too.

PumpkinseedmilkSunflower Seed Milk

Sunflower seeds are the hands-down cheapest option I’ve tried so far. The milk tasted great, but had the unfortunate side-effect of separating into a milky layer at the bottom and a strange red liquid layer on top. It is easy to shake and mix the two layers together again, but none of the other seed or nut milks I’ve made have done this before.

I tried this in coffee and it worked really well too; it didn’t separate or do anything strange.

Other seed milks

I tried these three because that’s what I had in my cupboard. Also, they are all fairly cheap seeds. There’s plenty of others out there though. I want to make hemp and flax seed milk at some point too; both of these seeds are really good for you and have a great nutty taste that I think will work really well. Plus I love experimenting in the kitchen!

The many costs of too much stuff (and some lessons for decluttering)

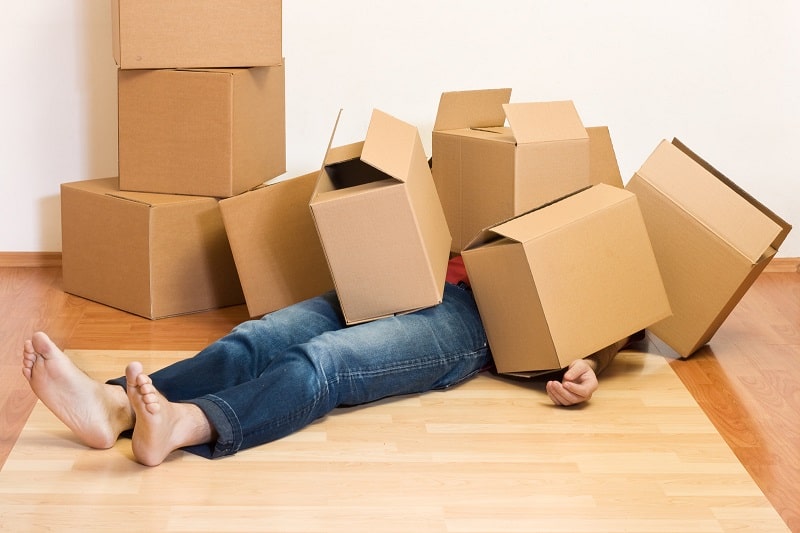
Over time, we accumulate stuff. Maybe we buy it, maybe it’s given to us, maybe we find it. Eventually our space becomes too full and too cluttered, and we need to do something about it.

One solution is to find some more space. There are a few options here. We can move to a bigger house or apartment, we can rent self-storage or a garage, or if we have amenable parents or friends, we can stash our stuff at theirs.

Getting more space costs us – time, money, or both. A bigger house or flat will mean higher costs, or if we decide to live further away in a cheaper neighbourhood then we spend more time travelling (and on fuel). Plus we have to spend time sorting and boxing our stuff and lugging it across town. If we’ve left our stuff with our amenable friends, there’s also the fear factor – the fear that they’ll appear on our doorstep in a few months with all of our stuff because they’re sick of tripping over it.

Plus this stuff cost us in the first place. If we took the time to look for it, and buy it, it cost us. If it was a gift, it cost someone else their time and money. Also, if our stuff was brand-new, there’s an environmental cost too. The raw materials needed to be mined or harvested, transported, processed, assembled, packaged, shipped, displayed and sold in order for us to have it.

Too much stuff also affects us in other ways, too. Clutter can affect our health. Clutter harbours dust and mould, which we breathe in. It makes us stressed and drains our energy. It can be a fire or trip hazard. Having a messy house that’s too full of stuff can be embarrassing, and make us ashamed to invite friends or family over, meaning we can become more isolated. In extreme cases, people have literally been killed by having too much stuff (I’m not going to provide any links but if you don’t believe me, google it.)

We can become slaves to our stuff. The more we have, the more it demands of us, and we end up trying to make our stuff happy. We spend time cleaning and dusting, rearranging and polishing. We buy more stuff to improve our stuff (a new display cabinet to show off our stuff, a bigger wardrobe so our clothes aren’t so squashed, a new addition to our ‘shiny things’ collection that makes it just that little bit more splendid). It is all consuming.

Of course, there’s another way to deal with having too much stuff.

Getting rid of some of it.

It sounds fairly simple, but it’s something I struggle with. Stuff can have a pretty tight grip on us. Living with my boyfriend in our one-bedroom flat – the smallest place I’ve ever lived in – for the last 18 months has been a great experience in living with less. Slowly but surely though, the amount of stuff has built up and the flat is currently feeling less than zen.

We did think about moving into a two-bedroom place, but it would cost us an extra $3000 a year. That’s a lot of money to spend on an extra room to keep all our stuff in. That money could be spent on a pretty amazing holiday. There was no contest. We’re going to stay where we are and I am going to learn how to declutter.

We’ve had a couple of attempts at decluttering so far, with mixed success, and I’ve learned some valuable lessons. Our first attempt was dedicating a weekend to decluttering, where I mostly just got impatient that our flat wasn’t decluttered already. In reality I didn’t really do much to assist the process. We got rid of one box of things. After reflecting, I decided to try a different approach.

Lesson 1: It’s not enough to want to declutter, no matter how much you desperately want it. You have to put in the physical work too.

Lesson 2: Don’t expect miracles. If you’re new to decluttering, or you’ve been a hoarder all your life, you’re not going to change in one weekend. Change takes time.

Lesson 3: If one method doesn’t work for you, try something else until you find something that does.

My next idea was to try to get rid of 100 things by taking smaller steps, and getting rid of 5 things a day. We gathered together a few bits and pieces for the charity shops and Gumtree, and we recycled some glass and cardboard that we’d been keeping (sorry, that I’d insisted we keep) in case they turned out to be useful. Excluding the rubbish and recycling, we got rid of 36 things. Not the 100 I wanted, but we did clear some more stuff.

Lesson 4: Focus on what you did achieve, not what you didn’t, and celebrate your successes, however small they may seem.

Lesson 5: If it all gets too much, take a step back. Come back to it when you feel ready again.

I decided to take some time out, and now I’m feeling re-energised and ready for another attempt. I’ve decided that this time I’m going to focus on clutter. All the stuff that seems transient, and really should have a permanent home, yet somehow doesn’t actually seem to.

I’m going to tackle the clutter from the other side. I’m going to have a major thorough spring clean, one section of the flat at a time. Rather than imagining a clutter-free space, the idea is that I’ll actually create it. Rather than being a conscious thought, it’ll be a physical manifestation. Maybe if I can see it with my own eyes, then my conscious mind will know what’s going on, can let my subconscious mind in on the plan and we’ll all be on the same page. I’ll let you know how it goes.

I don’t have all the answers to successful decluttering, but I’m learning all the time, and I’m hopeful that if I keep at it, it will get easier!

Recipe: Raw Chocolate Mousse (With a Secret Ingredient)

Chocolate mousse doesn’t have to be all about dairy products and refined sugar. You can actually make a much healthier alternative that tastes just as good – no, better! There’s a secret ingredient that gives it the creamy, smooth texture and is really good for you. Avocado!

I say secret, because it’s probably best that you don’t tell anyone eating it that you used avocado until afterwards, lest it put them off. People don’t always like to know that healthy green produce has sneaked into their dessert.

If you don’t like avocados, I promise you that you won’t even know it’s in there. The cacao completely masks the flavour, and by blending it the texture is altered too. (To my sister, who doesn’t like bananas or milk and whom I once many years ago persuaded to try a banana smoothie on the premise that it didn’t taste like bananas or milk…she was nearly sick…this time I ASSURE you that you’d never know.)

In fact, if you know someone who loves chocolate mousse but won’t eat avocados, don’t tell them what’s in it, make it for them and see if they notice. If they do, you’ll just have to eat it all yourself, which is hardly a hardship! (Obviously, if they’re allergic, it’s best you find another recipe!)

This is super simple to make, and tastes amazing. I made mine in my food processor but handheld blender should work, and if you’ve got the patience you could try mashing it all by hand with a fork, although I doubt it will be as smooth.

This makes enough for two people.

Avocado Chocolate Mousse

Ingredients:
1 large avocado
2 tbsp raw almond butter
1 tbsp maple syrup
2 tbsp raw cacao powder
2 tbsp melted coconut oil

Method:
Blend avocado, raw almond butter and maple syrup in a food processor until smooth. Add cacao powder and blend until incorporated. Add melted coconut oil and whizz briefly until combined.

Serve straightaway or store in a glass jar in the fridge for up to 3 days.

avochocmousse1jpg avochocmousse3jpg avochocmousse4jpg

How to Make Your Own Beansprouts

Although they look a little different, these guys are similar to those long white beansprouts that you can buy from the supermarket to put in stir-fries. Although they are both sprouts, the homegrown versions are totally superior, being packed with way more flavour and a good deal more crunch than their insipid white cousins.

Making your own sprouts is super easy, and you can make them from most dried pulses, small bean or seeds.

The smaller the better as they will be the quickest to germinate.

It’s a great way to use up any lifeless dried old lentils that you’ve had sitting in the pantry for months (or years) whilst you wait for an appetising recipe to turn up. All you need is a glass jar, and some water!

The sprouts I’ve been making recently have been using mung beans, as I had a packet in the cupboard (from before my plastic-free days!) that I had no idea what to do with. It’s hard to believe when you look at these hard, dry little balls that there’s any life in them at all!

sprouts1jpg

Yet with a little bit of watering they turn into something super fresh and tasty. They’re also nutritious, containing thiamin, niacin, Vitamin B6, pantothenic acid, iron, magnesium, phosphorus and potassium, and being a great source of dietary fibre, vitamin C, vitamin K, riboflavin, folate, copper and manganese (for nutritional information check here).

I’ve also made sprouts with various lentils, azuki beans, sunflower seeds and chickpeas, often as a mix.

All you need to do is put whichever dried pulses/beans/seeds you want to use in a jar, and cover with water, and leave for a few hours or overnight. They will swell considerably so be liberal with the water. (Don’t be afraid to add more if they appear to have absorbed it all.)

The next morning rinse and add fresh water. After the initial soaking add enough to keep them moist, but not too much so as to drown them! Aim to rinse and replace the water twice a day – more often if the weather is hot. Small sprouts like mung beans should be ready in 24 hours; seeds and larger pulses (like chickpeas) take a bit longer.

sprouts4jpg sprouts3jpg
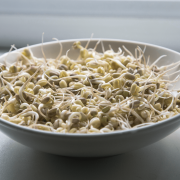
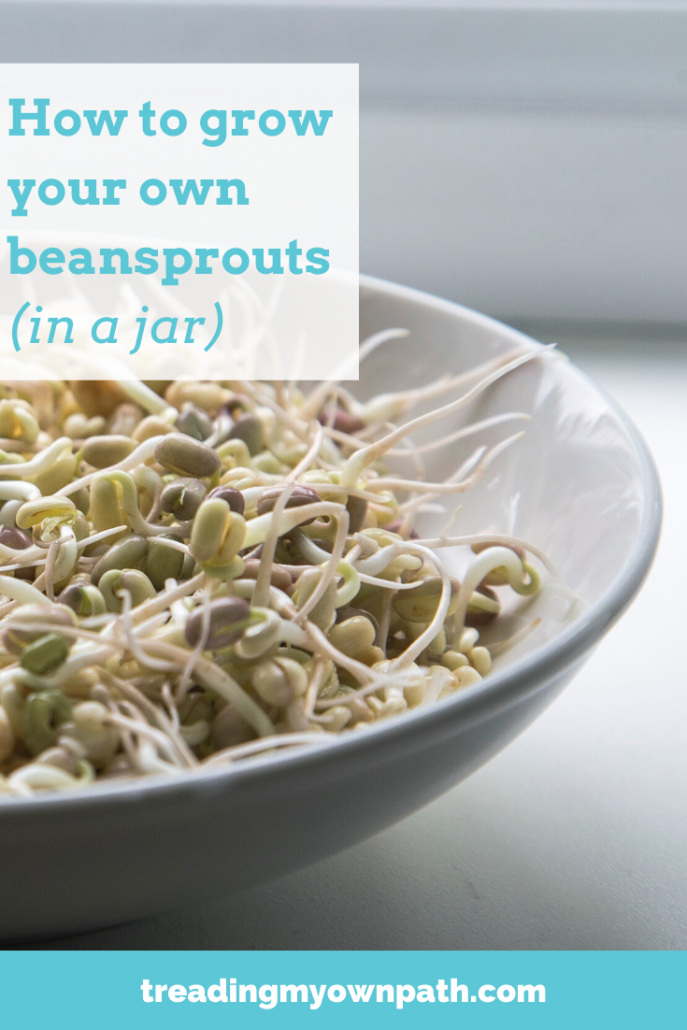
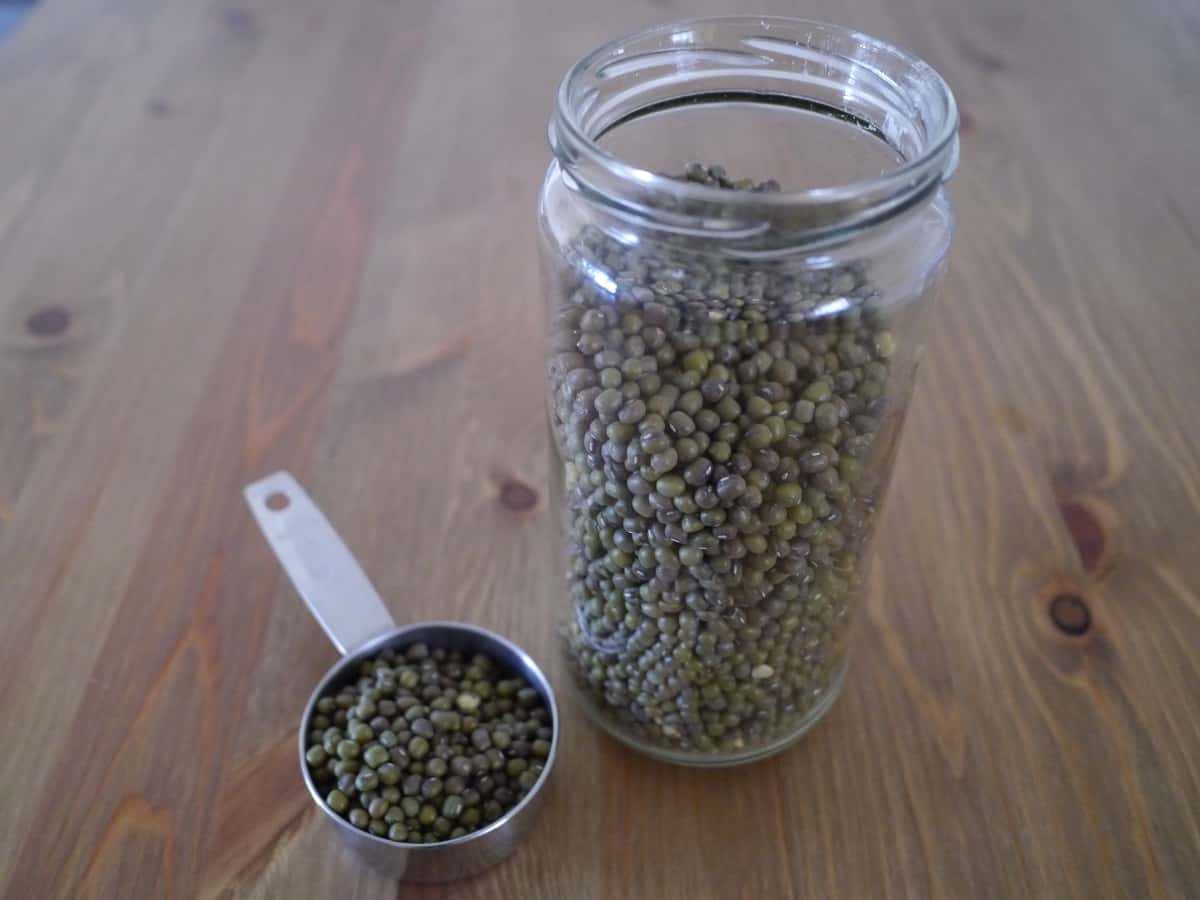
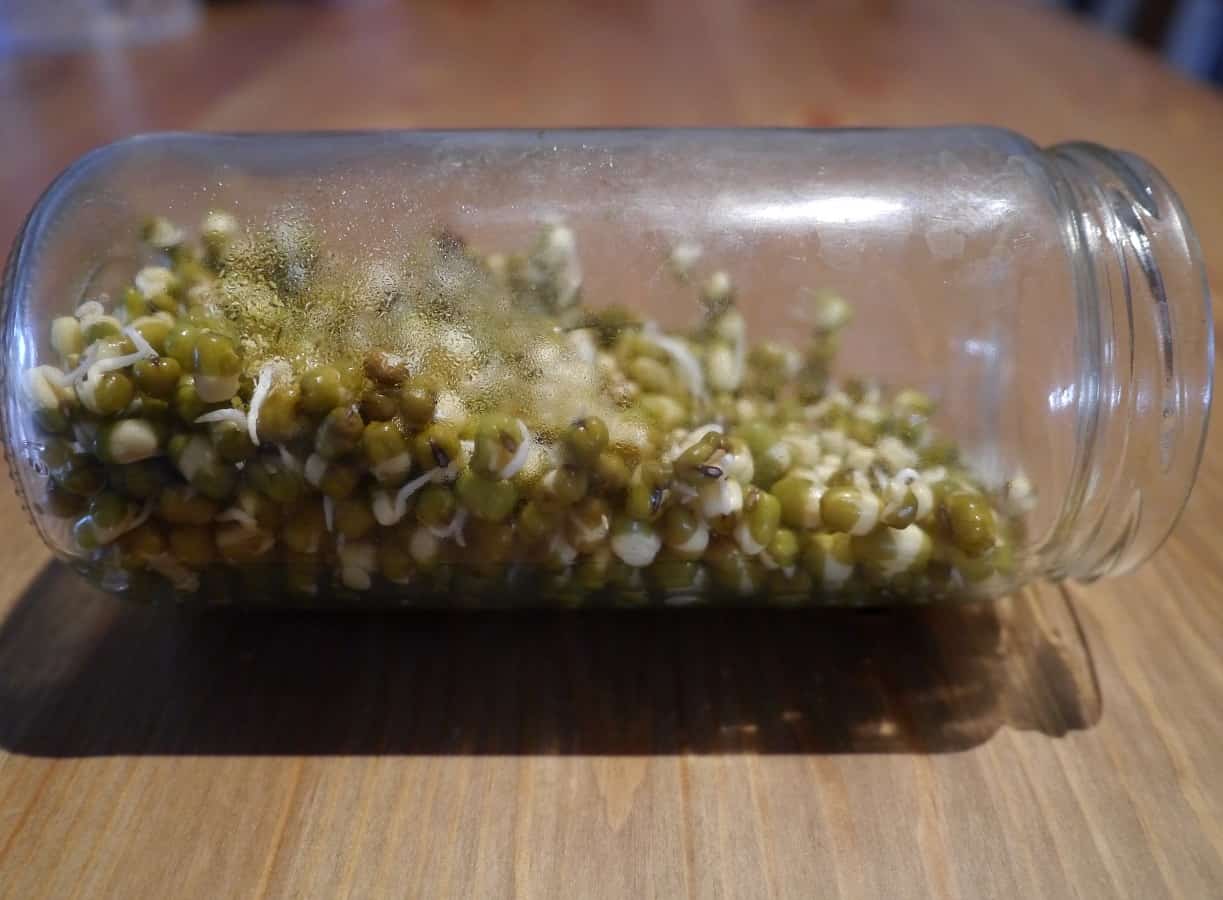
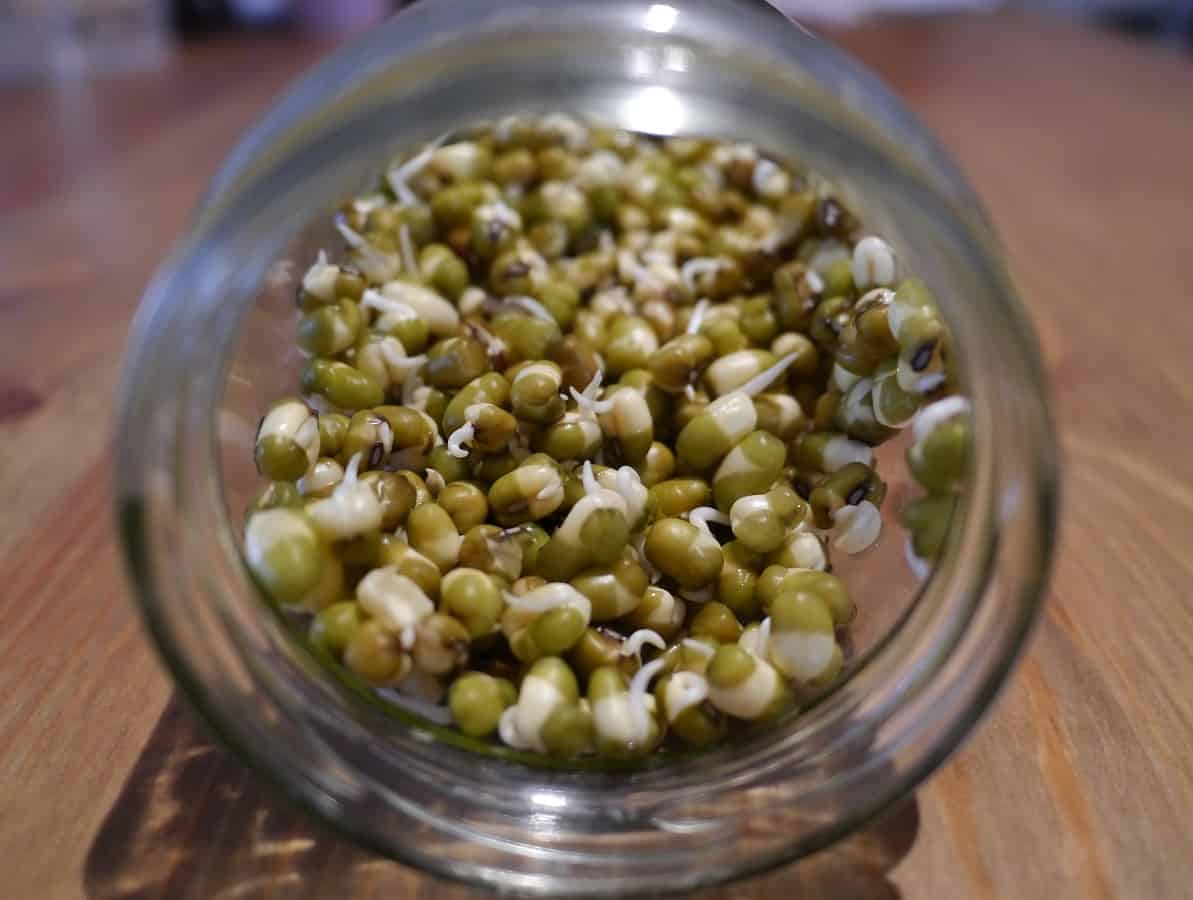
You can eat them straight after the overnight soak, but I prefer to wait until I can see the little root poking out. Once they’ve sprouted I usually keep the jar on it’s side so the ones at the bottom don’t get so waterlogged.

They will keep in the fridge for a few days but as they are so quick to prepare I make small batches often so I can eat them as fresh as possible.

Stir them into quinoa, use in stir-fries, add to salad or just eat straight out of the jar!

A simple way to use less gas (and save money)?

Last week we received our quarterly gas bill. Normally I just groan and pay the money that’s demanded, without really thinking any more about it. (In the UK the gas companies estimate the meter readings so I’d always go check to see if it was actually right, and if it wasn’t I’d call them and ask them to adjust the bill, but here in Australia they actually read the meter before sending you the bill, so there’s no need to double check.)

However, a couple of weeks ago we discovered that our gas usage (and hence our gas bill) is surprisingly high. Have you ever looked at your actual daily consumption? According to our bill, we use 11.49 units a day. That didn’t mean anything to us until we were able to compare  with some other bills, and we found that ours was much higher than others who live in bigger houses and appear to use far more gas.

gasbilljpgWhat are we using gas for in our home?

We have four gas stove tops, but the oven is electric. Our water is heated by gas (although not the washing machine) but we’re pretty good at having 4 minute showers. And that’s it. There’s no gas heating, no other gas appliances. I do a fair bit of cooking, but still, why is it so high?

With the hob, I always put lids on my saucepans, and I always use the smallest ring I can, so there’s not much I can change, other than cooking less.

Which means it must be the water.

Ever since we went to that water workshop and dismissed water as not particularly important (perhaps motivating is a better word), we’ve been plagued by situations that have made us notice how much we take it for granted. I wrote this post about how the next day our water was disconnected for the entire day. Over the following two weeks it was disconnected twice more, both without any warning. Apparently the problem has finally been resolved, but there’s nothing like being without water to make you realise how important it is.

Back to the gas. We are using gas to heat the water we use to shower, to wash our hands and to do the washing up. We don’t feel like we’re using excessive amounts of hot water, so one issue must be how hot we’re heating the water. The thermostat.

To make the shower a comfortable temperature, we turn on the hot water, then add cold water to get it to the right temperature. We’re heating the water using gas, and then cooling it straight back down again. How ridiculous is that?!

Prompted by the gas bill, this weekend we decided to investigate the water boiler. We live in a rental, and had to get a new boiler installed three months after we moved in when the old one exploded. (Literally.) Being a rental, the landlord installed the cheapest one possible. Interestingly, our gas bill jumped up after the new boiler was installed. At the time we assumed it was because it was winter, but now we’ve got a year’s worth of statements we can see it’s definitely the new boiler. This one has a pilot light, whereas the old one didn’t, and pilot lights burn gas, and are not energy-efficient. (If you’re interested in the physics of it all, check this out!) We can’t change our boiler, but we can change the settings to try to reduce our gas usage.

boiler1When the cover’s taken off, there’s two adjustable knobs. One is for the pilot light, and the other is for the water temperature.

boiler2That big blue flame in the middle is the pilot light. The slide-y knob below it adjusts the pilot light – supposedly. We slid it as far to the left as it would go. It didn’t appear to make any difference, but hopefully it did something. It makes sense to keep the pilot light as low as possible, so it burns as little gas as possible.

The round knob at the bottom is the temperature setting. We turned that down and then tested the temperature of the water in the house, so it was low enough that the water was still hot, but there was no need to add cold water.

I couldn’t believe how much gas is used when the boiler is fired up to heat the water.

boiler3Having seen it in all its blazing glory, we’ve also agreed not to fire the boiler up unnecessarily. No post-dinner, pre-washing-up rinsing of dishes in hot water. No running the hot tap too long.

Hopefully our adjustments will save us some gas, and hence some money. It will be interesting to see if it makes a difference (and how much of a difference) when the next gas bill comes in three month’s time.

If you’ve got a gas boiler, have you checked your thermostat recently?

What ‘raw food’ actually is (it’s not just about salad!)

Yesterday was July 11th, and also (you probably didn’t know) International Raw Food Day (I didn’t know either, until Google told me). When I first heard about raw food I have to admit I was seriously uninspired. I imagined cold unappetising plates of salad for meal after meal, and never bothered to look any further into it.

I’d probably never have changed my mind if I hadn’t stumbled across a cafe in Fremantle called the Raw Kitchen about 9 months ago. The food at this cafe is truly delicious, and the continuous queues outside and the difficulty in finding a table at the weekends is testament to how good everyone else thinks it is too. As soon as I ate there, I was hooked. It really opened my eyes to just how tasty raw food can be.

What does ‘Raw Food’ mean?

Put simply, raw food is food that has not been heated above 46°C (115°F). As heat destroys nutrients and enzymes, keeping food below this temperature is thought to keep the food at its optimal nutritional levels, and preserve its life-force. Raw food is sometimes referred to as living food. If you’ve ever seen a plate of over-boiled, grey, lifeless and limp vegetables, you should be able to understand this premise.

Often raw food is also free from dairy, eggs, wheat and gluten. Ingredients used are unrefined and as close to their natural state as possible. To get a variety of textures, forms and flavours, techniques such as dehydrating, blending, soaking and freezing are used.

There can be lot of effort required in preparing raw food. Cooking often makes food easier to digest, so if it’s going to be eaten raw then often it needs to be prepared in some other way to make it more digestible. Raw nuts, legumes and wholegrains contain high levels of phytic acid (phytate), which is the molecule plants use to store phosphorus. Humans cannot digest phytic acid, and it binds to minerals such as calcium, iron, zinc and magnesium, preventing us from absorbing them. To make them easier to digest, there’s a lot of soaking involved (sprouting reduces phytic acid without reducing the nutritional content), and this takes time (often upwards of a few hours). Then, to dry the food again, it needs to be dehydrated, which means using a dehydrator, which run at 46°C and have a fan for air movement, for 8 hours or longer in order to remove moisture. Dehydrators are also used to create the texture of oven-baked food.

My take on Raw Food

I would never eat an entirely raw diet because I love cooked food: I love the comfort of a bowl of piping hot soup on a chilly day, there is a huge space in my life for oven-roasted vegetables and eggs for breakfast on Sunday mornings has to be one of my all-time favourites. Plus, from a sustainability point-of-view, I believe we need to eat according to the seasons, and that means we need to freeze, pickle and preserve. I don’t think it’s possible to eat fresh food every day of the year without importing some of it, and it’s not sustainable to fly fresh produce around the globe.

An entirely or high raw food diet would also put a bit of a strain on the financial budgets of most people, me included. When you try to buy organic, local, free-range and fairtrade it already adds a lot to your weekly shopping basket. To me these are non-negotiable, because the cost of not doing them is far worse. So being able to supplement these with grains helps keep the overall cost of my weekly shop down. Pasta, bread and rice may not have much nutritional value but they’re cheap, filling, and help offset the price of expensive vegetables and other ingredients.

Whilst I understand the principles of dehydrating food, for me, cooking something in the oven at 200ºC for 2 hours makes far more sense. We don’t have solar panels and I don’t think I could justify running a dehydrator for lengthy periods on fossil fuels.

However, there’s definitely a space in my diet for raw food. Particularly raw dessert. There’s no doubt that refined foods have little (or no) nutrition. White flour and white sugar offer nothing but empty calories. So what could be better than a dessert that removes the nutritionally devoid parts and replaces them with ingredients that are super nutritious and tasty?! Yes, raw desserts cost considerably more to make, but our bodies weren’t designed to eat sugary, fatty, carbohydrate-loaded desserts every day (or multiple times a day).

What does raw food look like?

I want to share with you some of the photos I’ve taken from my many visits to the Raw Kitchen. It inspired me to investigate raw food, so maybe it will convince some of you doubter out there that it’s not all lettuce and carrot sticks!

rawmacaroonsjpg falafels cherrycheesecake rawsoupjpg rawcheesecakejpg rawpizzajpg caramelslicejpg

Even the doubters must have thought some of this looks pretty tasty!

The JOCO cup: a reuseable coffee cup made from glass

It’s not often that I see a product that I think is worth raving about. After all, we can’t save the planet by buying more stuff, no matter how great the eco credentials claim to be. But when I came across the JOCO cup I thought it was worth sharing.

I’ve talked before about how takeaway coffee cups are made from fossil fuels (yep, that’s where plastic comes from) and are creating a huge landfill problem. The same goes for those biodegradeable ones that actually need commercial composters to biodegrade (you can read that post here).

The way I see it, there’s two simple solutions. Dine in, or bring your own reuseable cup.

I bought a KeepCup, which is made of durable plastic. I’ve used it countless times. I was torn between buying the KeepCup, which appealed to me because its cups are standardised sizes (8oz, 12oz and 16oz, the same as disposable coffee cups), and buying a non-plastic alternative. I would rather have purchased a stainless steel one (or even ceramic) but they all seemed to come in bizarre and impractical sizes. (If your takeaway coffee cup is too tall to fit underneath an expresso machine, it rather defeats the point of having it, don’t you think?!)

The downside of the plastic KeepCup is that it does retain the taste and smell of the previous drink. No matter how many times I wash it out. Soaking overnight with a teaspoon of sodium bicarbonate does a pretty good job of removing it, but wouldn’t it be better if I could wash it once and be done with it? The plastics used in the KeepCup are polypropylene for the cup (type 5) and LDPE (type 4) for the lid, which are both considered safer types of plastic. They thought that about plastic with BPA and phthalates once though. This type of plastic isn’t easily recycled either, so disposal will be an issue at the end of its life. Reuseable plastic is better than disposable plastic, but the best would be no plastic at all.

So I’ve been quietly waiting for KeepCup to bring out a stainless steel alternative.

It seems like JOCO have beaten them to it. Not with stainless steel, but another non-toxic material – glass. I wish the JOCO cup had been around when I was in the market for one. It truly seems to be the best of both worlds. The JOCO cup is made out of glass, with a silicone band so your fingers don’t get scalded. It’s the only glass coffee cup I’ve ever seen. Plus they come in proper barista sizes: 8oz and 12oz. And they’re easy on the eye, if stylishness is your thing.

JOCO cupThe other thing I love is that they sell replacement glass, bands and lids so if you lose any of the bits (or the glass breaks) you can replace them without having to buy a whole new one. This may seem obvious, but often companies make it very hard to buy replacement parts. If you’ve ever broken the glass in a coffee plunger and tried to buy a replacement you’ll know exactly what I mean.

I don’t have a JOCO cup, and I haven’t tried using one. I won’t be getting one either, because my KeepCup still has plenty of life left and to get rid of it would be wasteful. Discarding old products to buy new ones, however green they may be, is not the sustainable option.

But I know there’s a few people out there who are taking part in Plastic Free July, and maybe haven’t got round to buying a reusable coffee cup of their own yet. In which case, here’s another option for you to consider.

The humble teabag: maybe not so innocent?

I’ve always used teabags. I like their convenience. That’s the thing, though. Convenience is a word that I’ve come to be suspicious of. After all, convenience is what created the plastic pollution problem that we have today. In particular, convenience foods and all its unnecessary plastic packaging. Like pre-peeled bananas on Styrofoam trays and cling wrapped with more plastic to save us all the ‘hassle’ of peeling them. (Think I’m joking?! Check out the Time magazine article about it here.)

I was very pleased when I found out that Twining teabags do not come in a cellophane wrapped box, nor do they come with that plastic-disguised-as-foil inner packaging inside the box. Most other brands have one (or both) of these. Even those ‘silk’ teabags are actually made of plastic. But Twinings offer me plastic-free teabags, hurrah!

I’d been using these plastic free teabags for a while, and I noticed that the thread is held together by a tiny metal staple. Have you ever noticed that? My box of 100 teabags has 100 staples. How are they stapled together? Is there a person sitting in a dark room somewhere stapling teabags together? Has someone invented a machine that can staple the stringy bit to the tea bag with no physical labour required?

Let’s think about this. Metal comes out of the ground. It’s mined. It’s then got to be made into a staple. It’s got to be transported to the teabag factory. Then, somehow, it’s got to be attached to the teabag along with the stringy bit. And all of this occurs to save me the inconvenience of having to remove the teabag from my cup with a spoon. Is that not a tiny bit ridiculous?

Before you point out that other teabag brands do not have staples, or even strings, whilst I know that’s true, I am yet to find any that don’t have plastic cellophane packaging, or plastic ‘foil’ wrapping, or some other unnecessary packaging.

There’s a simple solution of course. Switch to loose leaf tea.


teajpgOver the last few months I’ve slowly been using up my teabag stash, and replacing them with loose leaf tea. The other great thing about this is that loose leaf tea tastes far better. There are a number of grades of tea and the lowest is called dust (or fannings) – it’s this stuff that usually ends up in teabags. If you buy loose leaf tea you’re buying a better quality product.

Switching from teabags to loose leaf tea may not save the planet, but it reduces packaging, prevents plastic-rage (when you get home to discover that the item you were so sure was plastic-free was hiding it all along), and makes a far better brew. What’s not to love?

I was on the radio for Plastic Free July!

plastic-free-july-logo-banner-lgeWhen I spoke at the Plastic Free July launch back in April (I wrote about it here) about my experience of Plastic Free July in 2012, I was also asked to record a brief interview with radio station RTR FM.

Well, this week my interview was aired!

Quite exciting, as I’ve never been on the radio before.

I have no idea how to add media files to the blog – or if it’s even possible – so I’m just going to share the link. If you’re interested, click here to hear the Understorey Plastic Free July programme recorded by RTR FM.

Happy listening!