5 simple (and free) things you can do to have a more sustainable 2021
2020, I think we can all agree, has been a year unlike no other. The best-laid plans (no… wait… all the plans) went out of the window, and for many of us it was tumultuous and unsettling and a bit (or a lot) of a struggle. But if you’re reading this, you survived the year that was (hurrah!), and maybe – just maybe – you’re starting to think about the new year ahead, and making plans.
I think the New Year is always a great time for a reset, even if most of us are not making big, bold plans for next year. (If you are, go you! But I’m sitting the big bold plans out for next year. I’m tiptoeing into the new year, in fact.)
Anyways, I think a lot of sustainable habits went out of the window along with those plans in 2020, and I think a lot of us want to at least try to pick a few of them back up again. Honestly, there are probably a million and one great habits that we could adopt for 2021.
But to list a million and one great ideas would be completely overwhelming.
Instead, I spent some time thinking about which habits I’ve adopted over the past few years that have had a big impact in reducing my waste and living more sustainably, have been relatively easy to start and continue to do, and have been free.
If we are going to ease into the new year gently, we don’t need an overwhelming to-do list. We just need a few simple, easy and effective ideas to get started. Here are 5 of my favourite simple (and free) things that you can do, starting today, to have a more sustainable 2021.
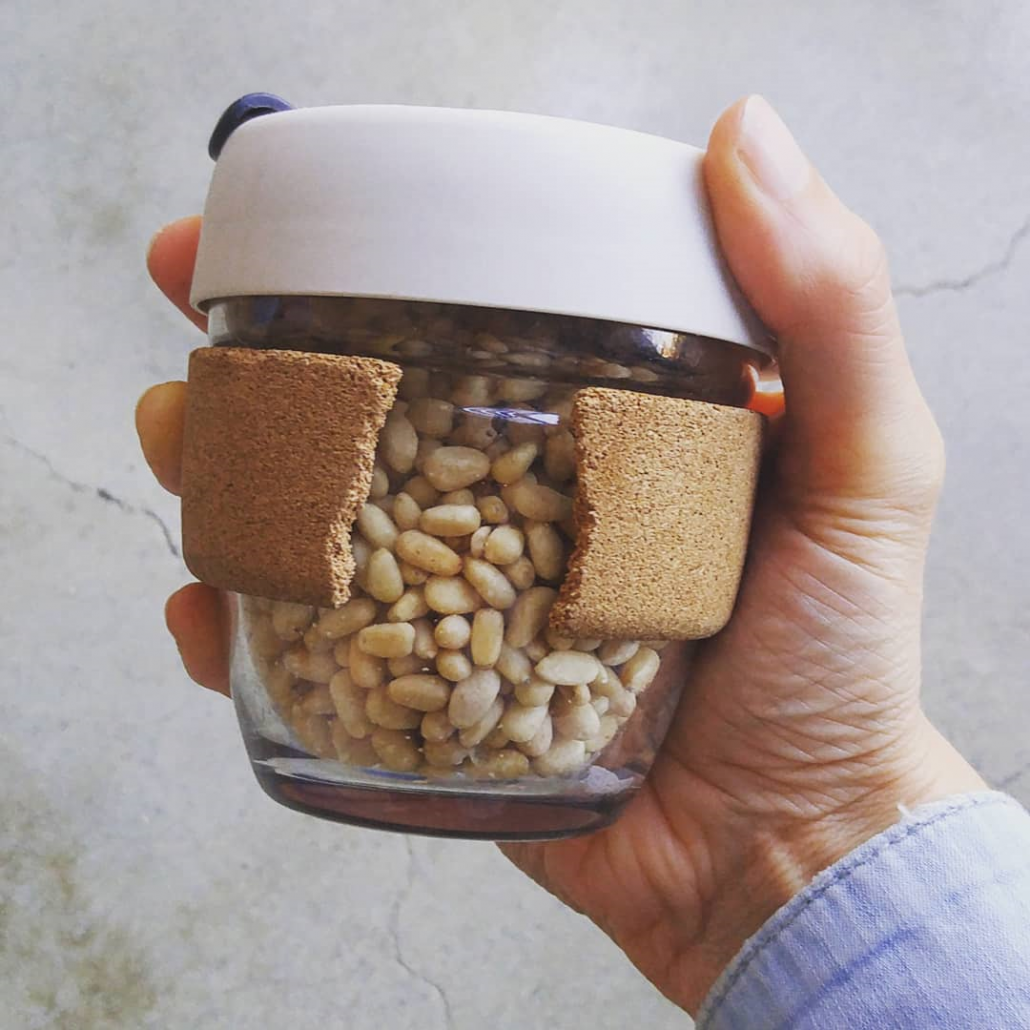
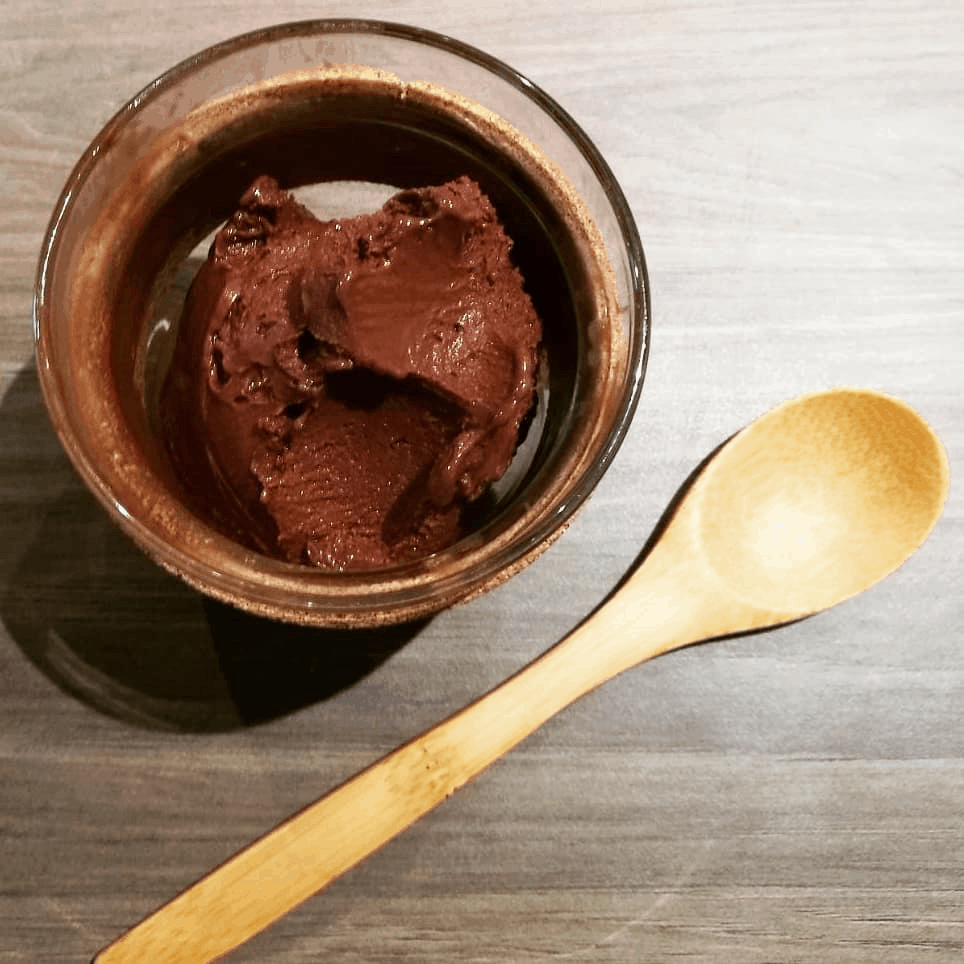
Carry a KeepCup with you.
A KeepCup (but you can choose another branded or non-branded reusable travel cup, or even a sturdy jam jar with a silicone band or a few elastic bands around it), is something I recommend to carry in your bag, bike rack or glove box. It is probably the most useful thing in mine.
And I rarely get a takeaway coffee.
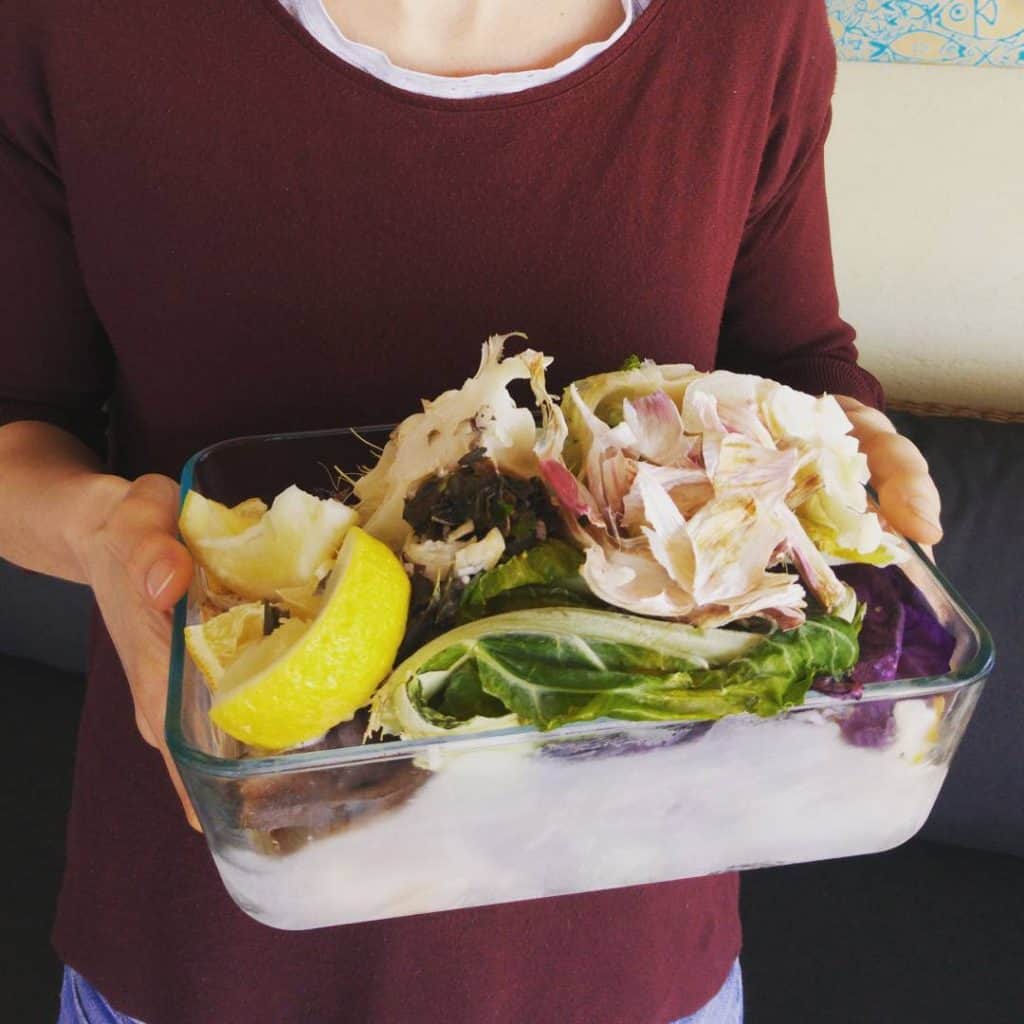
Obviously they are great for takeaway coffee (or tea, or other hot drinks). They can be used to dine-in if the place you’re drinking at only has disposables. They also work as a water glass, and to hold food scraps such as apple cores or banana peels that you want to take home and compost. They can be used as a container when bringing a snack from home, or buying small bakery items, or ice-cream, or when you didn’t bring enough BYO containers to the bulk store. And, you can pack a surprising amount of leftovers in them if you eat out and over-order.
In short, they are practical and useful – and easy enough to carry around.
And I think that carrying around reusables (and using them, obviously) is important for shifting the way that society sees disposables. We need to normalise reducing waste if we want more people to do the same.
If we can change the culture, then we are on the way to shifting policy.
These days, there are so many reusable cups about, you probably don’t need to buy one. (Reusables are almost the new disposables, it seems…) Ask friends and family if they have spares, look on giveaway sites, see if there are any abandoned ones at work.
Or you can buy one, if you really want to. But you don’t have to.
(You’ll often find them in second-hand and charity shops, too.)
Whether you rescue or buy, it can be helpful to think about what would be the most useful for you, as there are plenty of different options. And the best reusable is the one you actually use, so choose one that meets your needs.
Glass is more breakable than plastic or stainless steel, but easy to clean and doesn’t absorb flavours.
Some cups are fully leakproof, others leak-resistant, and others not leakproof at all.
You can choose a tall cup, a small cup, a collapsible cup that fits in your pocket, a cup that fits in the drink holder in your car or on your bicycle. Or a jam jar. Whatever it is that will be most practical for you.
The first ‘swap’ I made when I went plastic-free back in 2012 was getting a (plastic) KeepCup. I switched to a glass one when they were launched in 2014, and I still have that same one now. Whilst there are plenty of reusables you can carry around with you (cutlery, a napkin, reusable shopping and produce bags, a water bottle), the KeepCup remains one of my favourite zero waste swaps, ever.
If you switch to one reusable, start here.
Stop throwing away food scraps.
Food waste makes up 40 per cent of the average household bin in the UK, USA and Australia. Stop throwing away food scraps and you’ll reduce your waste by almost half, and you’ll be able to turn those scraps, which are actually nutrients, into compost, to go back into the soil.
And you’ll reduce your carbon emissions, because food waste in landfill creates methane – a more potent greenhouse gas than carbon dioxide.
Plus, you’ll no longer have a stinky kitchen bin. Wins all round!
Finding alternatives for your food scraps is not as hard as you think. There are plenty of options.
You might be lucky enough to have a council food scraps collection service (it’s sometimes called FO or FOGO – FO means food organics and GO means garden organics). If you have this option, make sure you’re using it to its full potential. Check what’s accepted and make sure everything that can go in this bin is going in this bin.
If you don’t have this service, there are a few ways you can process your food scraps at home.

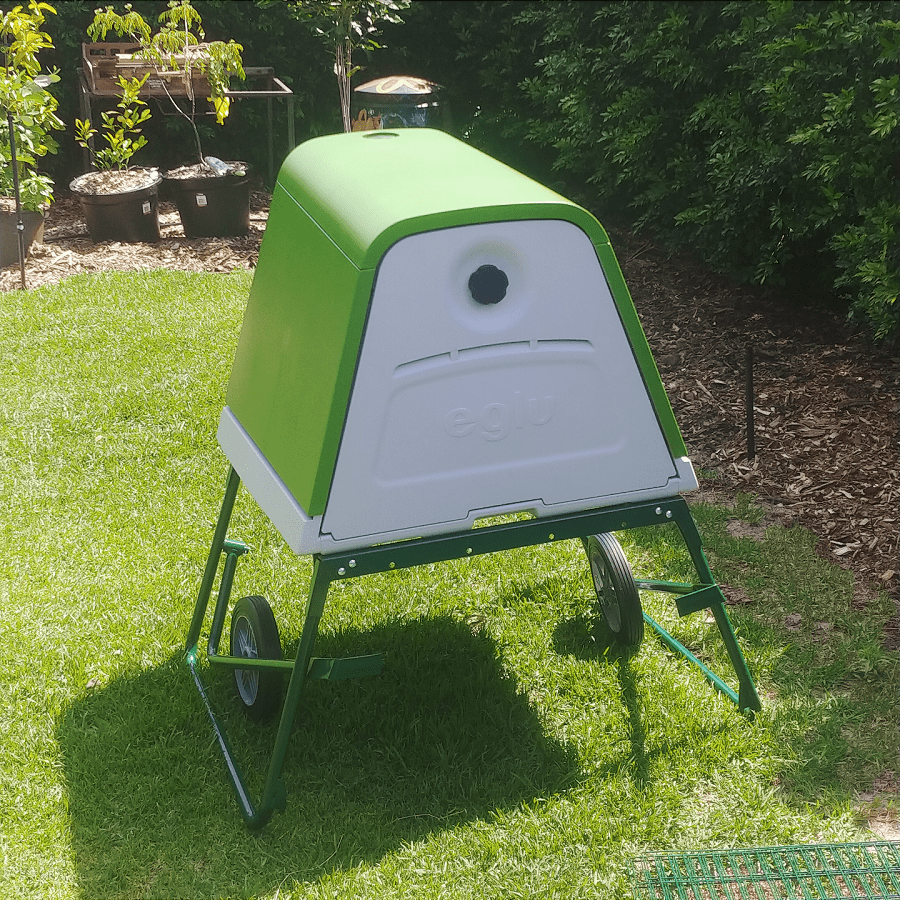
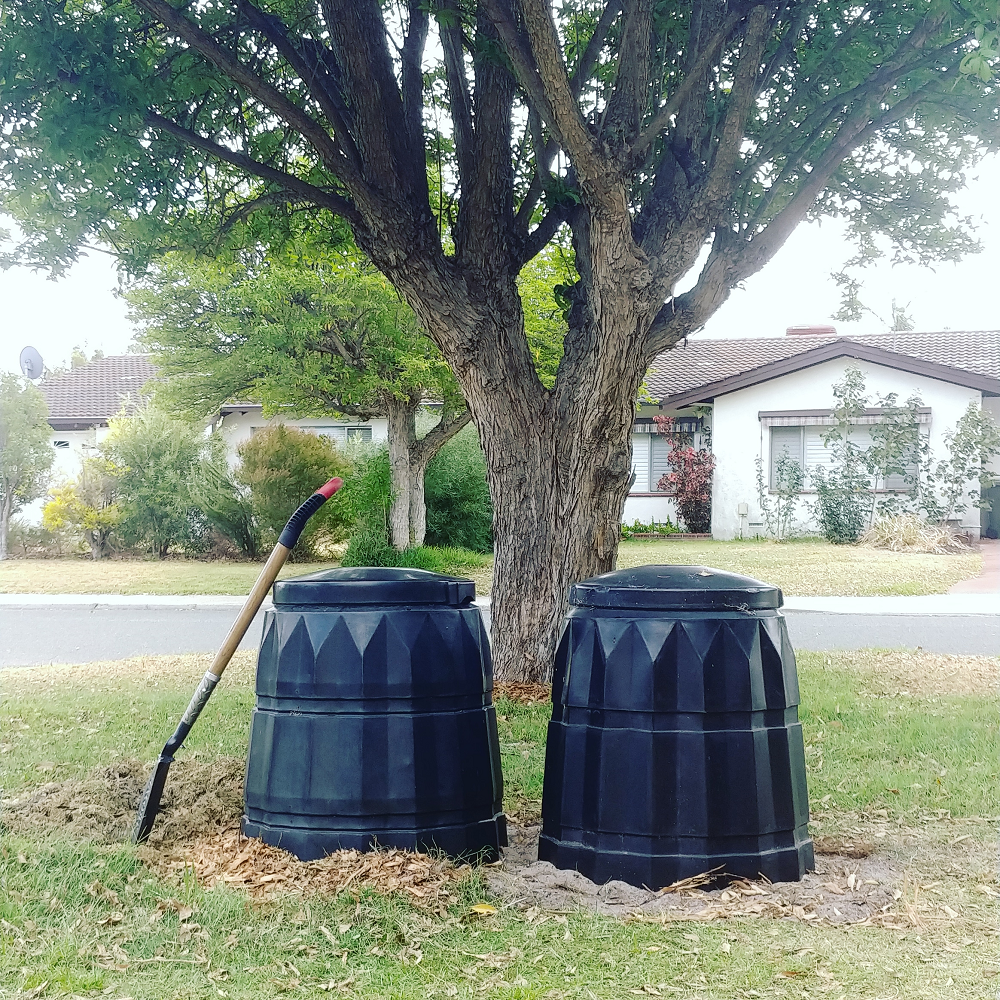
You can set up a compost bin. There are two main options – the Dalek-style in-ground bins, that have an open base that you dig into the ground; or the rotary bins that sit on a frame and are great for patios. Sizes vary so you can pick one for a small space or a large family.
Composting is easy and low fuss – if you’re new to composting, this composting guide has more details on how to get started.
You could establish a worm farm. Worm farms can be kept indoors or outdoors: an indoor one is great if you live in a cold climate, as worms will die if they freeze. They are also excellent for apartments. The worms eat your food scraps and make an amazing nutrient rich product called ‘worm castings’ that is fantastic for gardens.
They take a little (but not much) more effort than a compost bin to maintain – mainly because you have to keep the worms alive. Which means feeding occasionally, and keeping them out of extreme temperatures.
Worm farms come in a variety of shapes and sizes: from plastic ‘worm cafes’ to the large capacity bin-shaped ‘Hungry Bin’ to ceramic and wooden designs (I’ve only seen these available in Europe). And there are in-ground versions too, where a tube drilled with holes is dug directly into the ground or a garden bed.
And there’s the option to DIY – in ground worm farms can be made out of old PVC tube, and worm farm ‘cafes’ can be made using two old polystyrene boxes.
You could set up a bokashi system. These are slightly different from composting and worm farming in that they ferment the food scraps rather than breaking them down. The scraps are placed in a sealed bucket with a tap, and a bokashi bran inoculated with microbes is sprinkled on top.
Fill, sprinkle, fill, sprinkle, until the bucket is full.
Eventually the bokashi waste will need to be buried or composted. Some people add to a compost bin, others add to a pot, top with soil and plant it out.
Bokashi systems are popular with apartment dwellers. They don’t smell, and once full the buckets can be stored for months until a place for burying is found. Plus they are a great way to process meat and fish scraps, cooked food and other items not recommended for compost bins.
If you’d like to know more about bokashi systems, this post explains the ‘what’, the ‘why’ and the ‘how’.
And finally, if you really like the idea of not throwing away your food scraps, but you’re not in a place to start composting or setting up a worm farm just yet, you can piggyback off of other people’s food waste systems. For free.
Simply find someone or somewhere convenient to you (maybe a school, or a community garden, or a cafe, or a neighbour), and drop your food scraps to them. Finding them isn’t that hard, either – check out the resources sharewaste.com or makesoil.org.
Download (and start using) the OLIO app
Still on the subject of food waste, but now we are not talking food scraps, we are talking edible food – food that isn’t wanted. Food we bought and didn’t like the taste of, food we bought and then plans changed, food that stores or cafes produced and couldn’t sell, that sort of thing. Well, OLIO is the app that allows people (and businesses) to connect food that isn’t wanted with people that want it. For free.
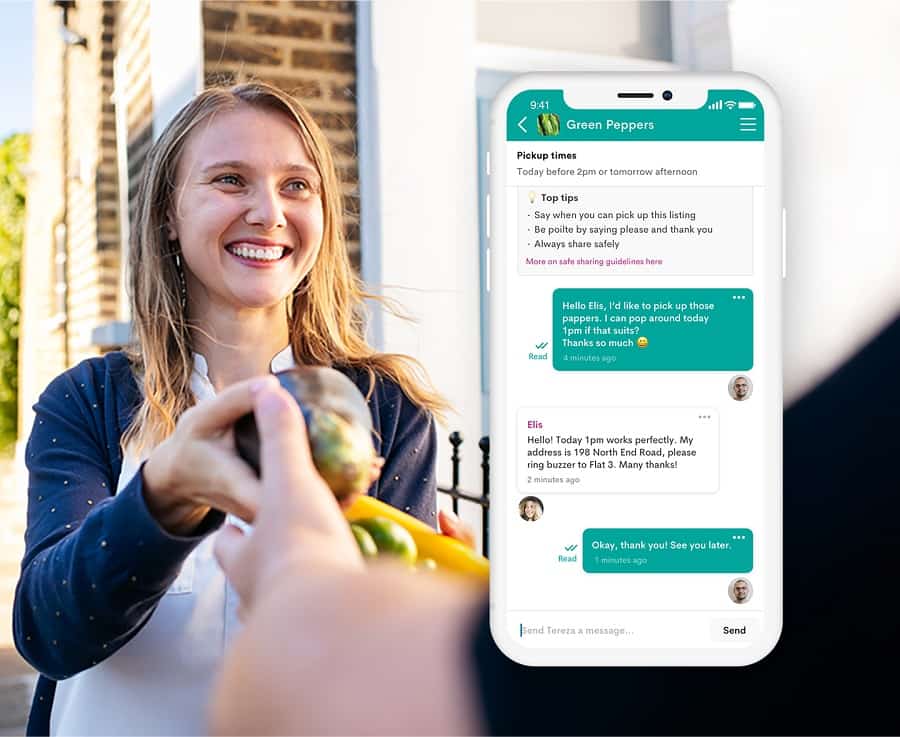
The OLIO app is free, the food is free. There is no catch, just food to be shared and people who want to help. OLIO has been around in the UK since 2015, and now has over 2 million users in more than 46 countries. Best of all, the app has helped save almost 10 million portions of food since it started.
In fact, because it has been so successful, OLIO has recently expanded into non-food items too.
You can read more about OLIO via their website www.olioex.com, and the app is available on Apple and Android.
Buy less stuff from billionaires (and their companies)
Billionaires really don’t need any more money, and they definitely don’t need their coffers lined further by us. I don’t believe anyone becomes a billionaire ethically and sustainably – but even if you did, hoarding all of that wealth is unethical.
(If you have $999 million dollars, then you are not a billionaire. So we are talking about people who have upwards of this.)
I can’t imagine what you can possibly need all that money for. The biggest houses, private jets, buying up entire islands – surely that’s small change when you’re a billionaire?
Oh, and for context: if you worked every single day, making $5,000 a day, from the year 1500 until the year 2020, you would still not be a billionaire. You’d have to work for 548 years, not spending a penny of what you earned, and earning $5000 a day, every day, to be a billionaire.
And yet billionaires own companies like Amazon and H & M, companies which became notorious during Covid-19 for not protecting their workers (who mostly earn minimum wage – or less), trying to avoid paying suppliers and rent, all in order to maximise profits for themselves and shareholders.
This type of business (and wealth hoarding) only benefits the few.
It’s often argued that poor people and those on tight budgets need to shop at these types of stores, where prices are low, in order to survive. But let’s be totally clear – people on tight budgets shopping for essentials do not create multi-million dollar businesses and billionaires. That comes from the middle and upper classes, and people buying more than they need.
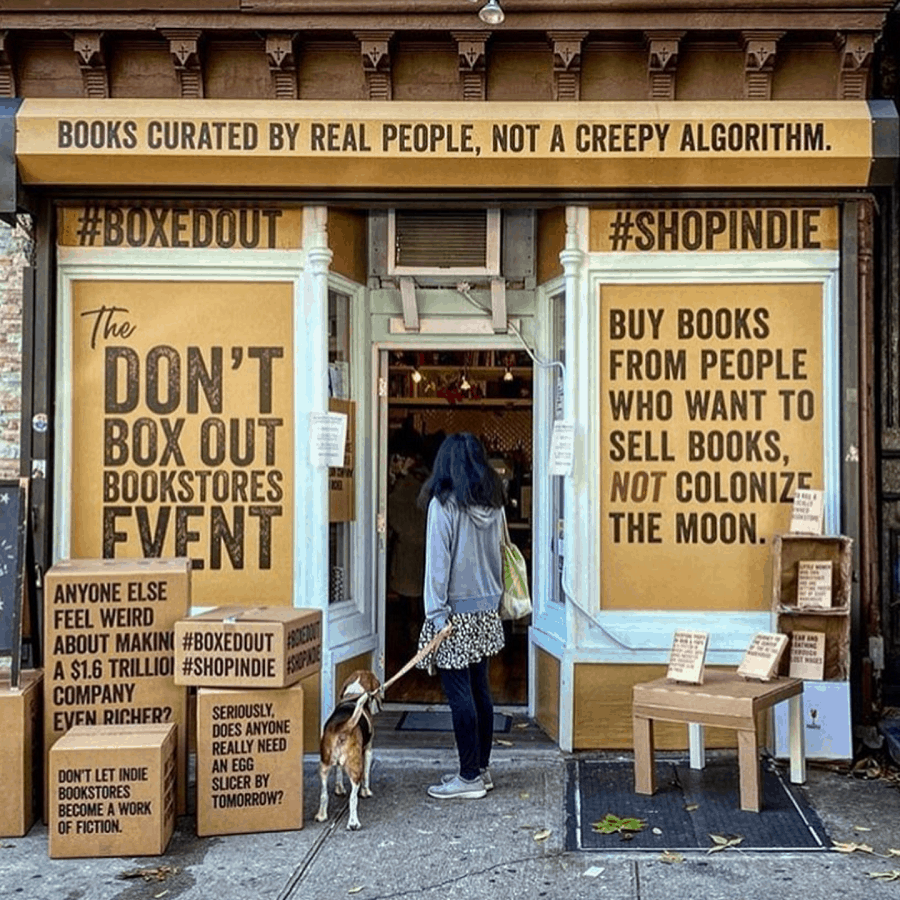
Boycotting billionaire-owned businesses might not be an option for you, and that’s okay. But wherever possible, try to shop at these businesses less. Perhaps by choosing to buy nothing, make do, fix what you have, repurpose something else, borrow something rather than buy it, or shopping second-hand.
Or perhaps by choosing to support a small business or independent retailer instead.
When things are cheap, often the true costs are externalised. We (and definitely not the company) don’t pay for them. Perhaps the resources were taken from land that is being degraded or exploited for profit, perhaps the person who made the item didn’t get paid a fair wage, perhaps the employee who sold or packed the item doesn’t have fair employment conditions or access to healthcare.
We often hear the phrase “when we spend money, we vote with our dollars about the kind of world we want to live in”.
Do we really want to live in a world where a few billionaires hoard wealth at the expense of millions of others?
Join your local Buy Nothing group
Whether you’d like to buy less from billionaires, buy less generally or simply help keep resources in use for longer (and therefore reduce waste), the Buy Nothing project is going to help you – in more ways than you can imagine. It’s a network of hyper-local communities engaging in the true gift economy: giving, sharing, borrowing, lending and placing unwanted and unused items back in circulation for use by others.
The groups operate on Facebook. You can only join one group – the one where you live – and what this means is everyone is close by, so it’s easy to collect an old unwanted table, request a cup of sugar, or ask to borrow some glasses for a party, or a lawnmower, or whatever you need to use (but don’t really need to buy).
The great thing about the group is that generosity breeds generosity. People love to give, people love to receive useful things, and everyone loves to save stuff from landfill.
It also means you get to know your neighbours, and build connections.
My Buy Nothing group is the first place I go if I need something that is the kind of thing someone else might have lying around. It’s the first place I go if I’m wanting to pass on something I no longer need. It makes you realise just how much stuff is already in the world, and how willing others are to share it.
It’s hard to articulate just how great the Buy Nothing project is. If you use Facebook, I’d recommend joining your local Buy Nothing group. And if there is no local Buy Nothing group near you, you can start your own.
The year that has gone has definitely made some sustainable habits harder to keep up with, whether it’s because laws have been changed and legislation brought in, businesses have shifted policy, or life just became too hectic and some things just needed to be dropped.
Whilst we can’t just forget about 2020, and a new year doesn’t magic away all the chaos, there is the chance to reset, even just a little. Hopefully these ideas make your 2021 not only a little more sustainable, but easier and more enjoyable for you too.
[leadpages_leadbox leadbox_id=1429a0746639c5] [/leadpages_leadbox]
Now I’d love to hear from you! Are you feeling ready to start getting back on track in 2021? Or are you sitting things out a little longer? Are you going big, or keeping things small? What’s the first thing you want to tackle? Any other thoughts? Please share your ideas in the comments below!