Picking olives for oil – how to produce enough oil for a year when you don’t own any olive trees

Ah, the annual olive oil harvest. For the last several years, I’ve dedicated a weekend to picking olives and sending them to an olive press to extract the oil. This gives me enough olive oil to last me for a year.

And I don’t own any olive tress.

Every year I’ll post about it on social media, and there are always lots of questions. Questions like:

Where do I find all the olives?

Are there particular types?

How much oil do you get from a kilo of olives?

Where is there an olive press?

And how do I join in?!

After all, there are abundant olive tress in the area where I live, most people use olive oil to some extent in cooking, and everybody likes the idea of getting fresh, local food for free.

(Except it’s not quite free, and I’ll come to that later.)

I just love the olive oil harvest – it ticks all my boxes. Reducing food waste and making use of a “waste” product, local produce with almost no food miles, community (I’ll come to that later too), and the fun and resourcefulness that comes from tracking down all the olives.

Here’s how I go about it.
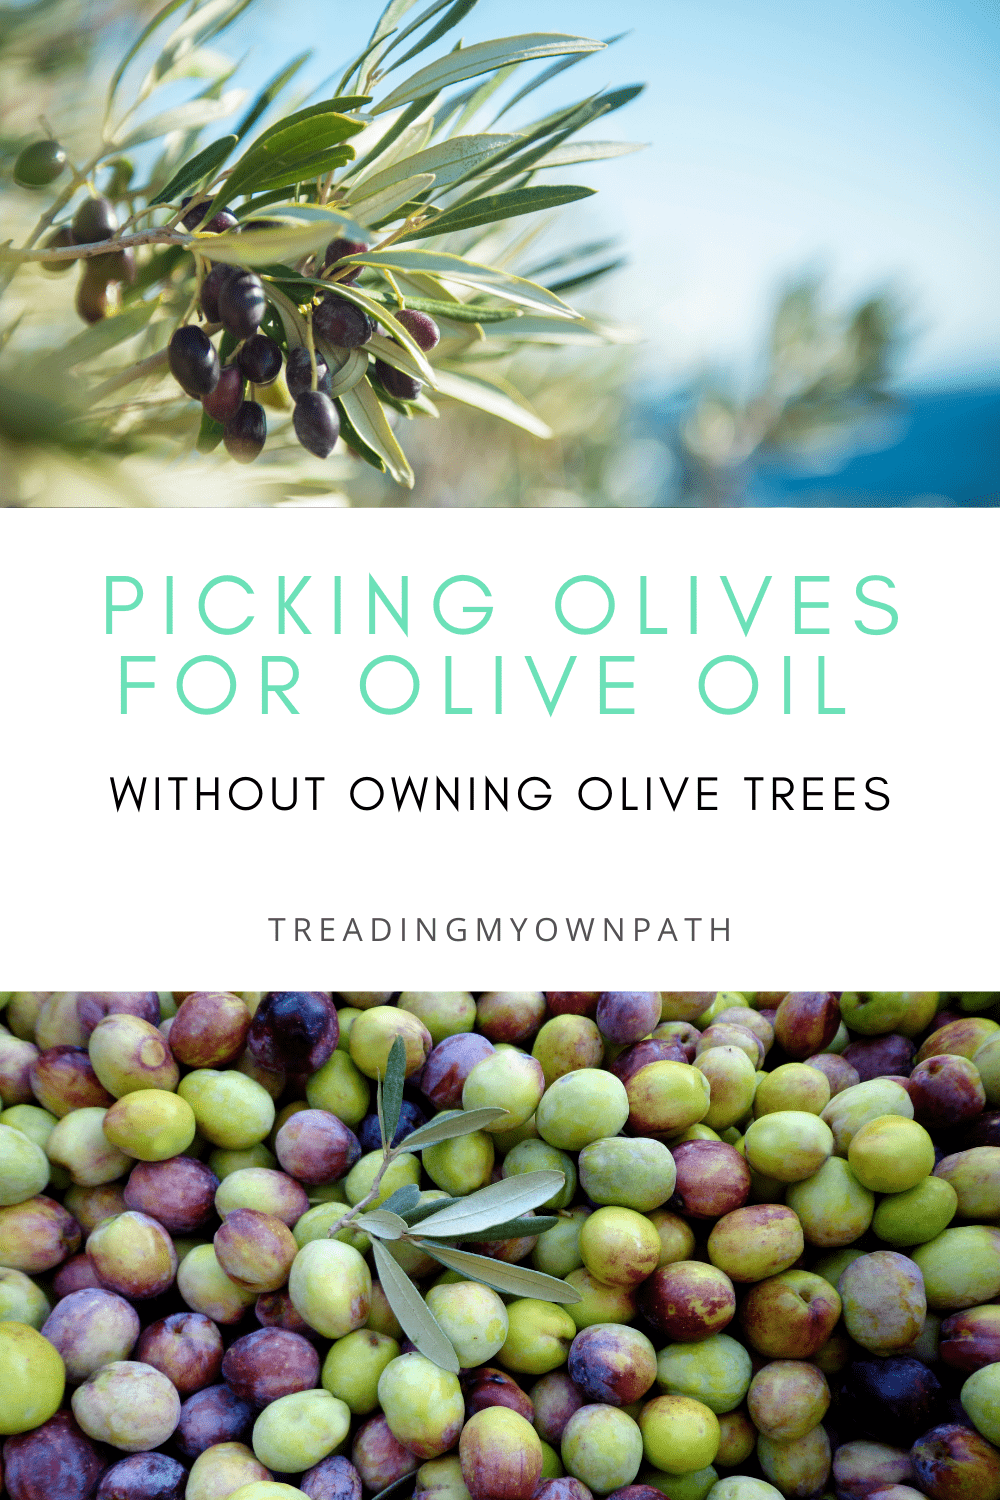
Step 1: Find your people

Olive harvesting (for oil) is something that’s much better to do as a group or community activity than as an individual activity. There are many reasons (including, because doing things as a community is fun!) but the most expensive part is the pressing, and combining olives makes for cheaper olive oil.

The more olives you have, the cheaper it is to press them per kilo.

There might not be a minimum quantity to press your olives, but there will probably be a minimum charge.

At the Jumanga olive press (one of the local Perth presses I’ve used), the processing costs are $26 plus 0.58/kg for quantities up to 55kg and a fixed rate of $58 for 55kg – 100kg. There is a per kilo price above 100kg, their rate drops above 200kg, and drops again above 400kg.

At the York olive oil press (another press local to Perth that the community garden use) there is no minimum quantity of olives, but there is a minimum charge of $190. The York press is better for medium to large batches (their rates drop after 1 tonne, after 2 tonnes, and after 4 tonnes).

Bring anything under 350kg, and you’ll pay $190 (even if you just have 35kg).

And if you need to find 350kg or more of olives, you’ll probably need to find some friends.

Finding friends: there are two options here, either get together with some friends and do it yourself, or find an existing group to join.

I’ve done both, and there are pros and cons to each.

Doing it yourself with a group of friends is the cheapest option, and if you all go picking together can be super fun. But there will be a few logistics you’ll have to sort out.

You’ll need suitable containers to transport the olives, as well as actual transport (and 350kg isn’t light or a car boot job). Is there someone who can deliver the oil to the press on a weekday, and then drive back on another day to collect it? You’ll need a vessel for the pressed oil, and a way to share it with everyone.

Joining an existing group is the easier, but more expensive option. Often participation is limited to members, and so you’ll probably need to pay a membership fee to join. Some community groups will also take a portion of your oil to use for fundraising or other purposes.

So you’ll pay more and get less oil, although you’ll probably benefit from a lower press rate, and someone else will sort all the logistics and transport out for you.
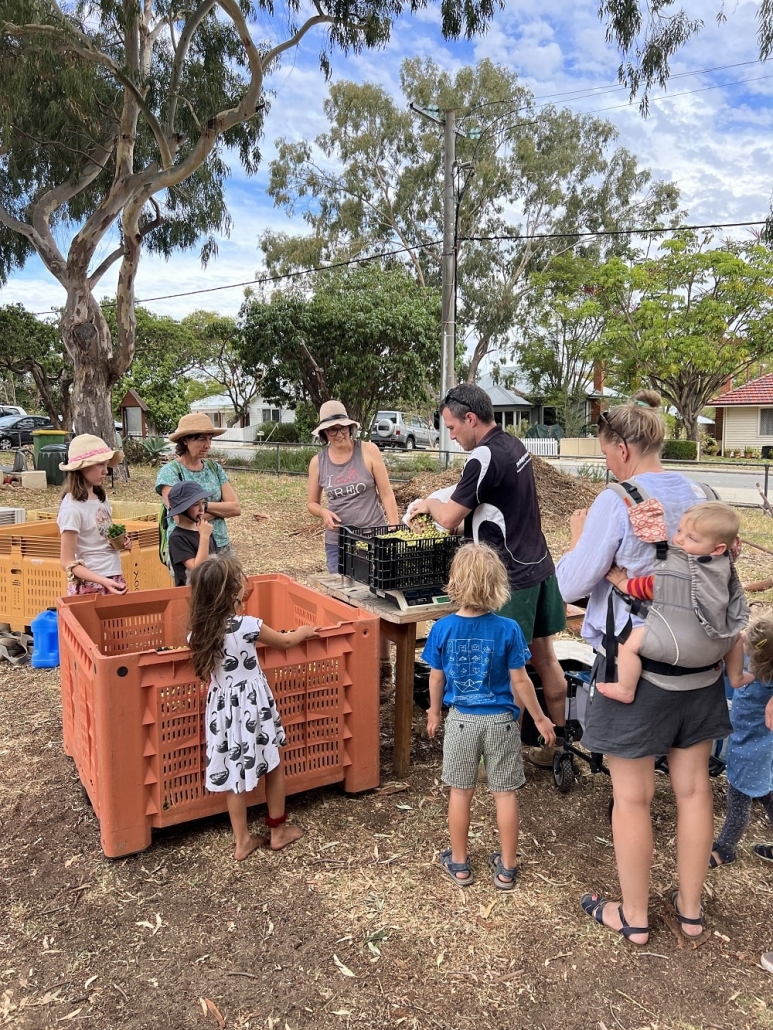
Olive oil harvest 2022 at Hilton Harvest Community Garden

Step 2: figure out how many olives you need

You need a lot of olives to make oil. Typically the yield of oil from olives is 9 – 15%. That means 10kg olives might give you one litre of oil.

There are lots of factors that determine yield. These include:

  • variety – there are 50 -100 types of olives in Australia alone (and several thousand worldwide), with some being better for oil and some being better for eating (these are called table olives);
  • Rainfall/water – large ‘swollen’ olives saturated with water don’t have more oil than small ones, and shrivelled olives might be better for oil;
  • Time of year, or how far into the season it is, which varies according to the weather each year (a late spring means a later harvest);
  • The press used – a commercial press will do a better job than trying to make olive oil at home with a blender.

So when you’re thinking about picking olives, ask yourself how much oil you’d like, and work backwards. 2 litres of oil is 20kg olives (roughly). If you want one litre a month for the year, that’s 12 litres, or 120kg of olives.

Step 3: Book the press

The thing you need last is the thing you need to do first. You can’t just rock up to an olive press with 350kg olives and hope they’ve got space for you! Picked raw olives don’t store for long. You need to know before you head to the press that your spot is booked.

And in olive season, everyone wants their olives pressed at the same time, so it’s busy. (In Perth that’s mid-March to early June.)

We’ve even booked a press a year in advance to guarantee a spot. I’d recommend booking as early as you can.

When you book, you’ll also have to commit to the amount. Whilst there’s a bit of flexibility there, it’s unhelpful for the press operators when people commit to 2 tonnes and then deliver 300kg. Some presses will charge you if you bring more than you pledge.

Once you know the date, you can start planning the harvest. In all the years I’ve been doing it, we’ve always booked the press on a Monday so that all the picking can happen at the weekend.

Step 4: find olives!

Prior to the picking weekend, it’s a good idea to suss out the options. This means finding olive trees on public land, or finding olive trees in people’s yards.

(I count verge trees as people’s yards, even though they are technically public land, as often the residents look after the trees with the intention of picking the olives. Always ask the resident before picking olives from the verge.)

Because olives are a lot of work to process, many people don’t have time to use them. Lots of people hate the mess and staining that black olives make, and you taking them away is also doing them a favour.

Finding olives could mean cycling or driving around the neighbourhood looking for laden olive trees, and then knocking on the door or posting a note in the letterbox.

Or it could mean asking on social media – on community pages, for example – whether anyone has an olives they won’t be using.

(This is what I do, although there’s a bit more risk here as one person’s “heaps” might only be a yoghurt tub full. Or there might be heaps… five metres up from the ground.)

Then again, you might get lucky and they’ll prune the tree for you!
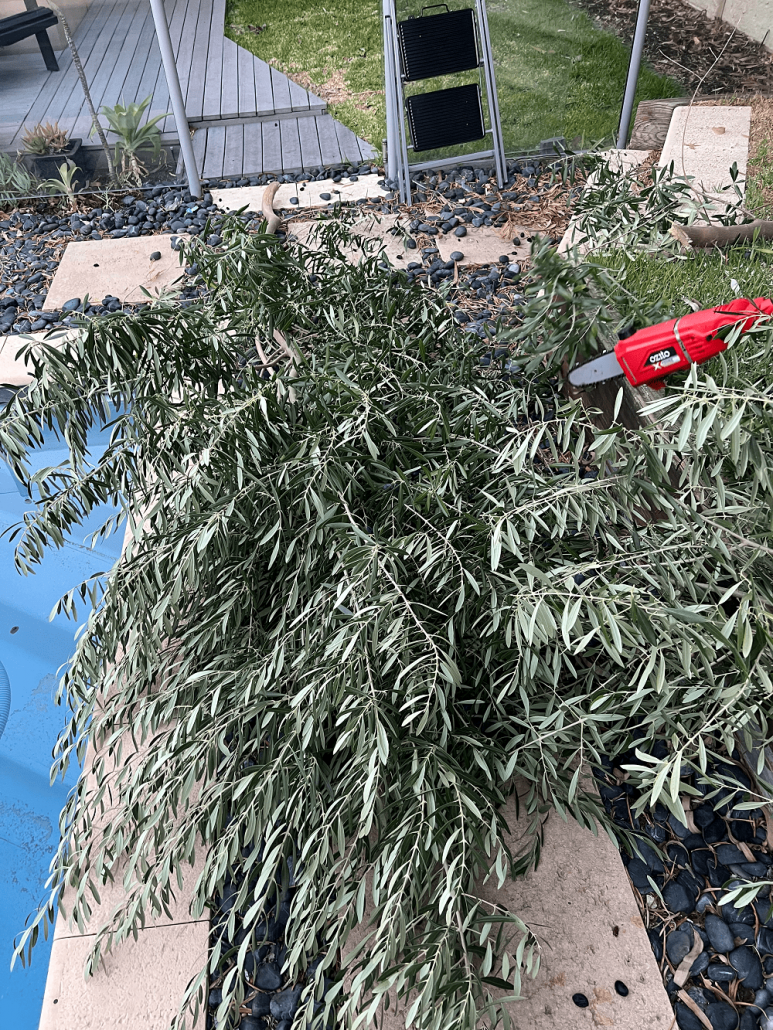
Try to avoid trees on busy roads as they will have bonus exhaust fumes included.

Olive trees tend to fruit well every two years, so one year’s bumper tree might be slim pickings the following year. Meaning, you can’t rely on last year’s winners.

Step 5: picking olives

Once picked, olives have a short shelf life (no more than three days). So the couple of days before the press is when ALL the picking needs to happen.

If you’ve committed to a reasonable amount of olives, it’s best to clear your calendar.

I usually commit to 84 – 96kg. The buckets I use hold roughly 12kg each, so I always commit to a multiple of 12 so I can think of it in buckets. 96kg, which is what I committed to this year = 8 buckets. Although the weight will vary slightly.

This year I’m picking with a community garden, and I need to give 15% of my olives to them as part of the agreement.

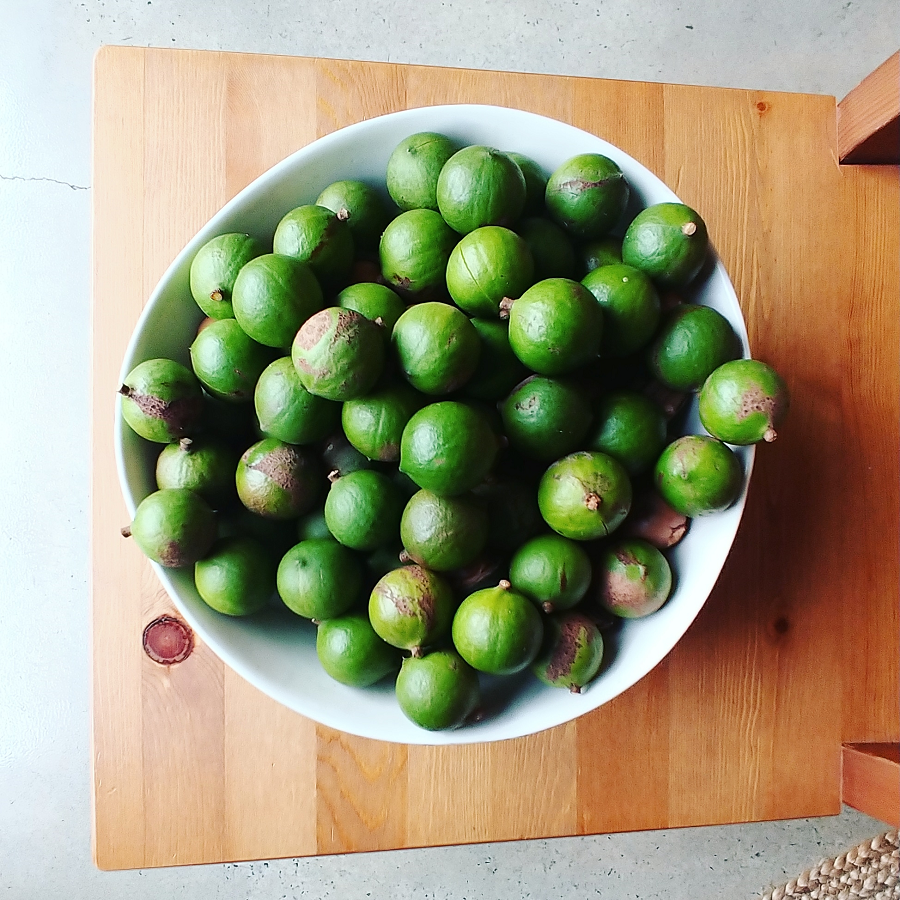
I ended up picking 107kg of olives, so 91kg will be pressed into olive oil for me. I should get 9 litres of oil to last for the year. From all of these olives:
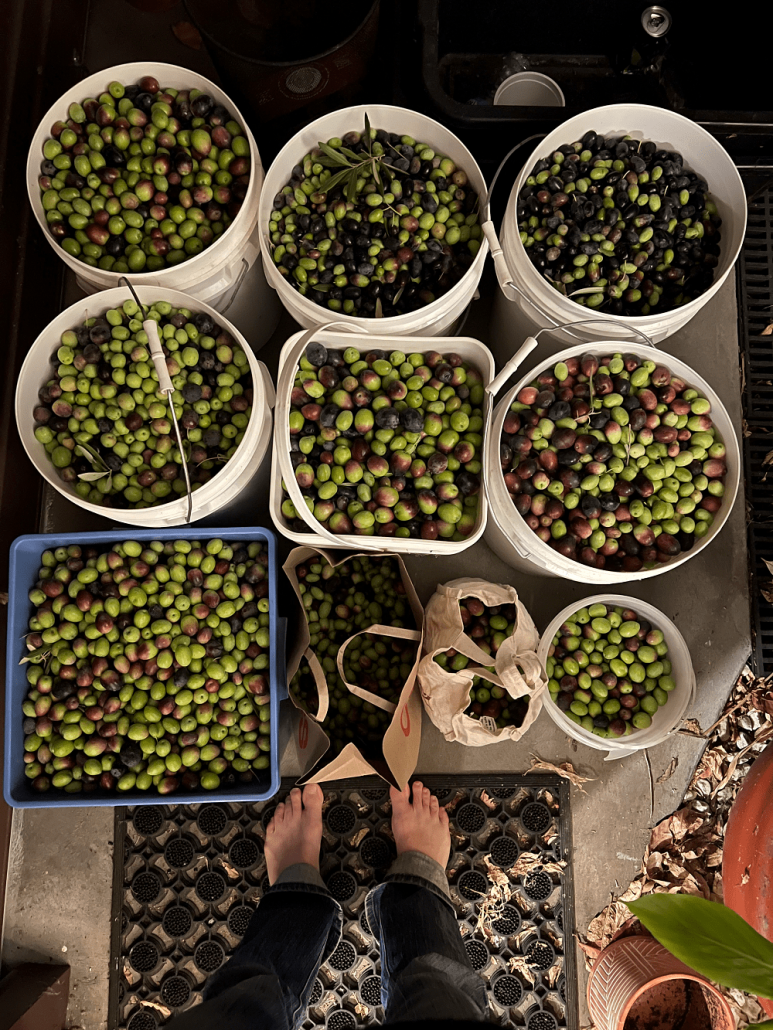
Olive oil harvest 2022

Which olives to pick:

Olives change from green to black as they ripen.

Ideally, you’d pick olives that are green and purple (either 50/50 or 33/66) as they taste best and have a better yield.

Fully green olives can still be picked. They are stronger flavoured and peppery, and have a lower yield. They are also the hardest to pick (they won’t dislodge by shaking the tree)/

Fully purple/black olives are very mild, but often lower in oil than the mixed colour olives. They are very easy to pick, and fine when mixed with green olives.

Wrinkly olives are also fine if the wrinkles are from lack of water and not from being overripe, and aren’t completely shrivelled.

When it comes to picking olives, especially in a community setting, quantity is EVERYTHING. Everyone picks everything they can get their hands on. Except bad, mushy, mouldy olives, of course.

(Commercial olive oil producers would be a lot more discerning.)

Picking everything results for a lower yield than if only oil olives were picked at the perfect time, but the oil tends to have a good flavour as the green, black and mixed colour olives, and all the different varieties, blend together to even one another out.

How to pick:

I’m not going to tell you how to pick as everybody has their system. My friend uses rakes and thinks it”s the only option, and wouldn’t do it any other way. (She picked 180kg this last harvest, so it’s clearly working for her.) You rake the oolives literally and they fall onto a tarp, and you gather them up.

I don’t like the rake option, and I’ve tried it more than once.

I attach a large yoghurt tub with a handle over my wrist, and strip the branches of olives with one hand so they fall into the tub on the other, then decant them into the big bucket. It works for me, and it’s faster than anything else I’ve tried.
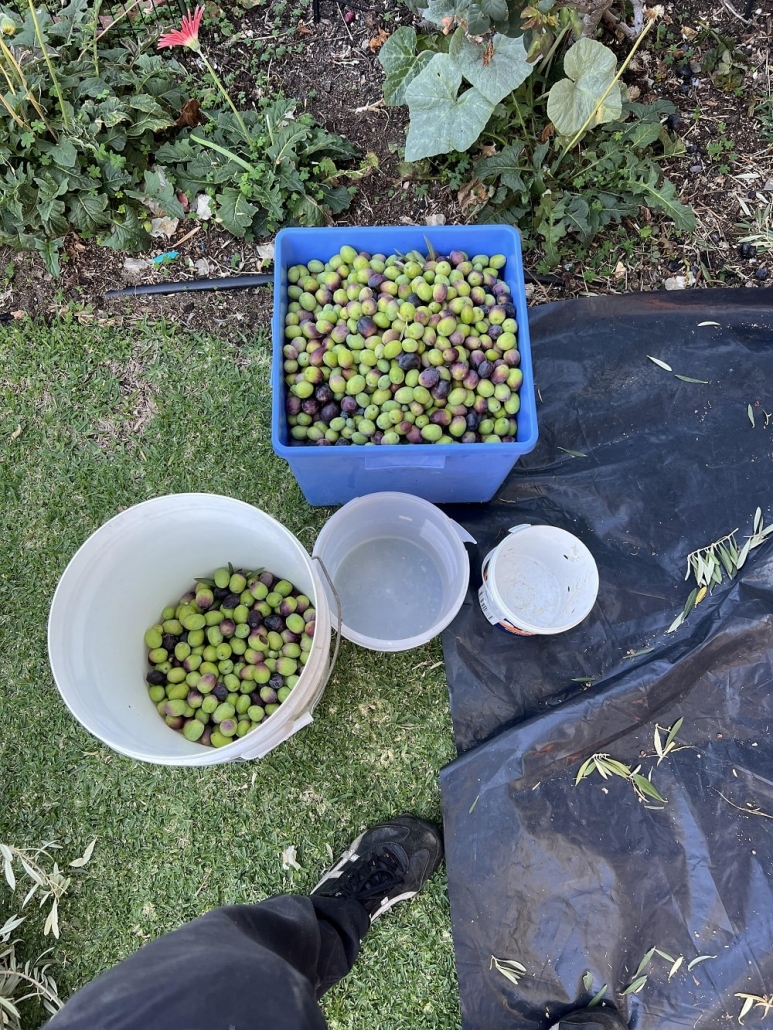
Olive oil harvest 2022

A tarp is useful to collect fallen olives.

A ladder tends to be helpful.

Step 6: take to press

I have to confess, in the 7+ years of doing this I’ve never actually been to the press myself. I do know that in some years the driver has been able to wait and then bring back the oil the same day, and in other years they’d have to return later in the week to collect. I think it just depends how busy they are.

You do need to provide large containers for the press to put the olive oil into.

Step 7: bottling

The oil from the press is unfiltered, which means it contains sediment – just natural fruit waxes and nothing unsafe. Ideally, let the oil sit for 4 – 6 weeks in a cool, dark place to settle before decanting.

Most people use wine bottles to store the olive oil. They are a good size, easy to come by and to clean, and a useful size to use in the kitchen. Dark glass is preferable to clear glass.

Other common questions

I’ve tried to answer some of the other questions I’m asked about olive picking and oil pressing below.

How much does it cost per litre?

The cost of the press is the biggest cost, but isn’t the only cost. There many be vehicle hire and fuel costs (both the presses I mentioned are quite far from the centre of Perth), and the cost of bottles or containers required by the press.

If you need to pay a membership fee to be able to participate, that’s a cost to factor.

The yield obviously makes a difference too – am 18% yield will mean more oil and a lower per litre cost than a 9% yield.

When I used to pick with friends, I’d pay $3.50 – $4 per litre.

Now I pick with a community garden I need to pay membership for, my costs are higher. Last year the cost of oil was $4.92 per litre, but combined with the membership fee worked out more like $7.26 per litre.

Do I give any oil to the people who gave their olives?

Generally, no, although if someone has a particularly fruitful tree, and helps me pick the olives, then I try to drop a small bottle of olive oil round to say thank you. But the whole process is a lot of work (and time), and then there’s a cost, and if I pick a bucket from a tree that only equals 500ml of oil, so there’s not really an excess.

I guess in that way olive oil is quite different to picking other fruits, where your yield is literally what you pick (minus some peels or core, perhaps).

How do I join in?

There are a few community groups in Perth that I know of that do an olive pick/press and are open to new members (if you know any others, please let me know and I’ll add them to the list).

Hilton Harvest Community Garden

North Fremantle Social Farm

Is it worth the effort?

It can be a little stressful when it gets to the weekend of picking and you realise you’re going to be way under your quota if you don’t find more trees, fast. Sometimes the weather can suck, but it’s not possible to postpone. By the end of the day, your whole body aches.
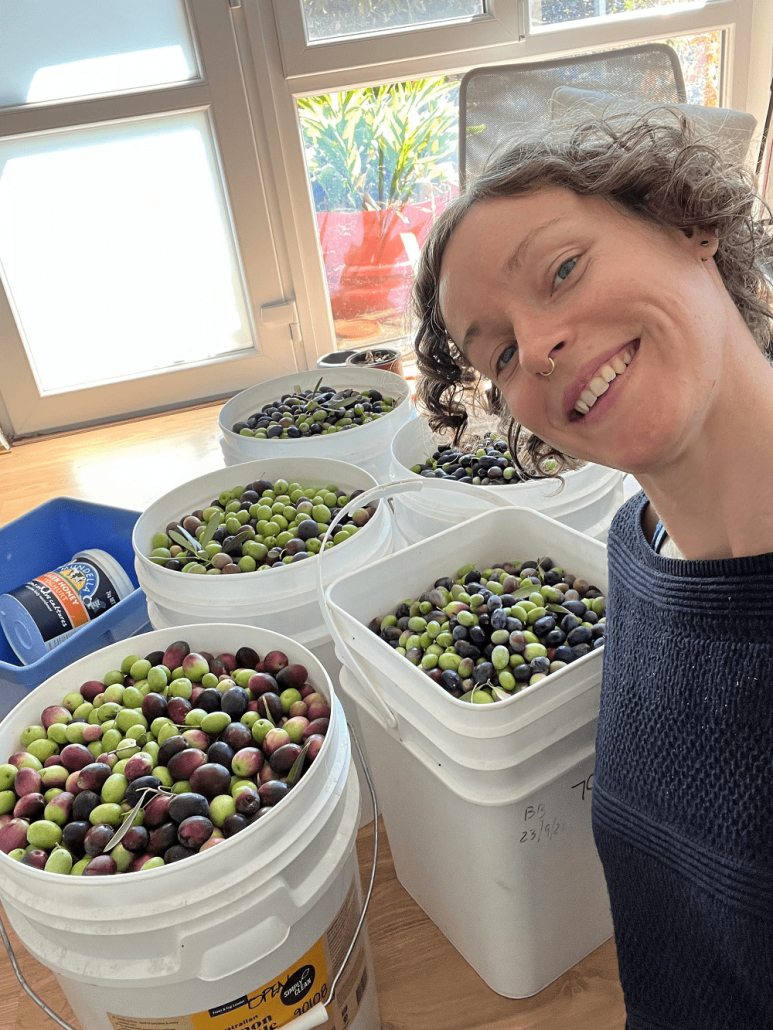
Olive oil harvest 2022

But the satisfaction, to me, of seeing all those buckets of olives that would probably have been wasted – it’s priceless. Most definitely worth it.

Maybe you’ll give it a go yourself next year?!

Now I’d love to hear from you! Any other questions I didn’t answer? Any tips for good public olive trees, or community picking groups to join? Any other presses you recommend (or not)? Anything else to add? Please leave your thoughts in the comments below!
How I started a community street planting project

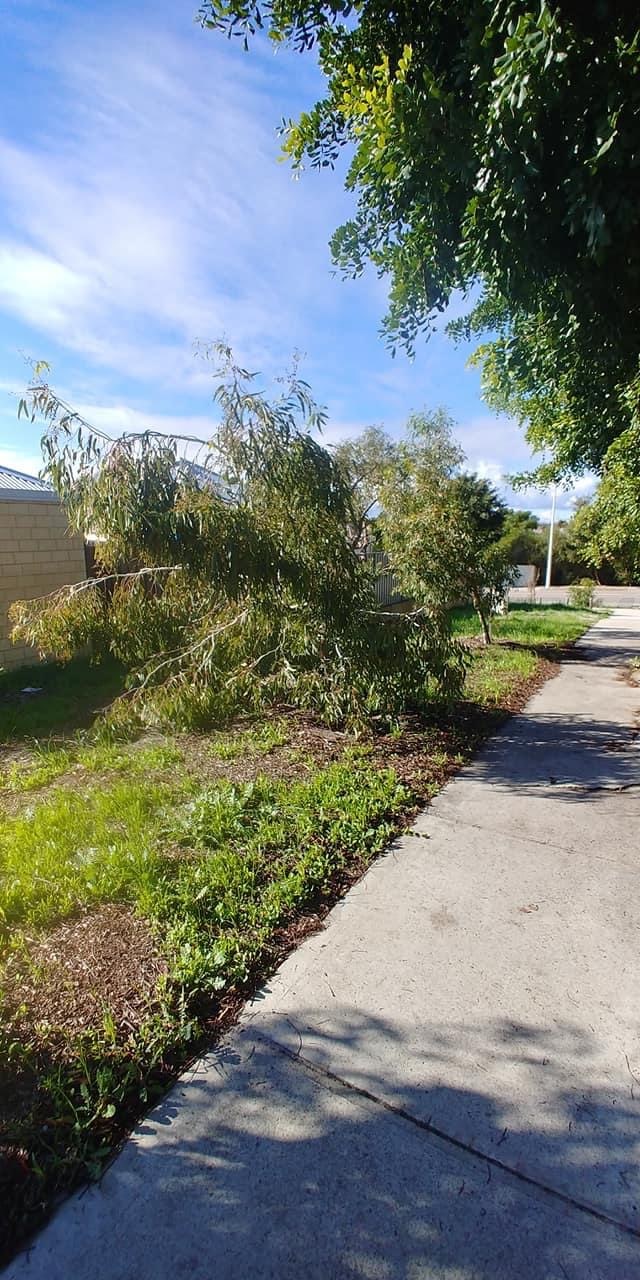
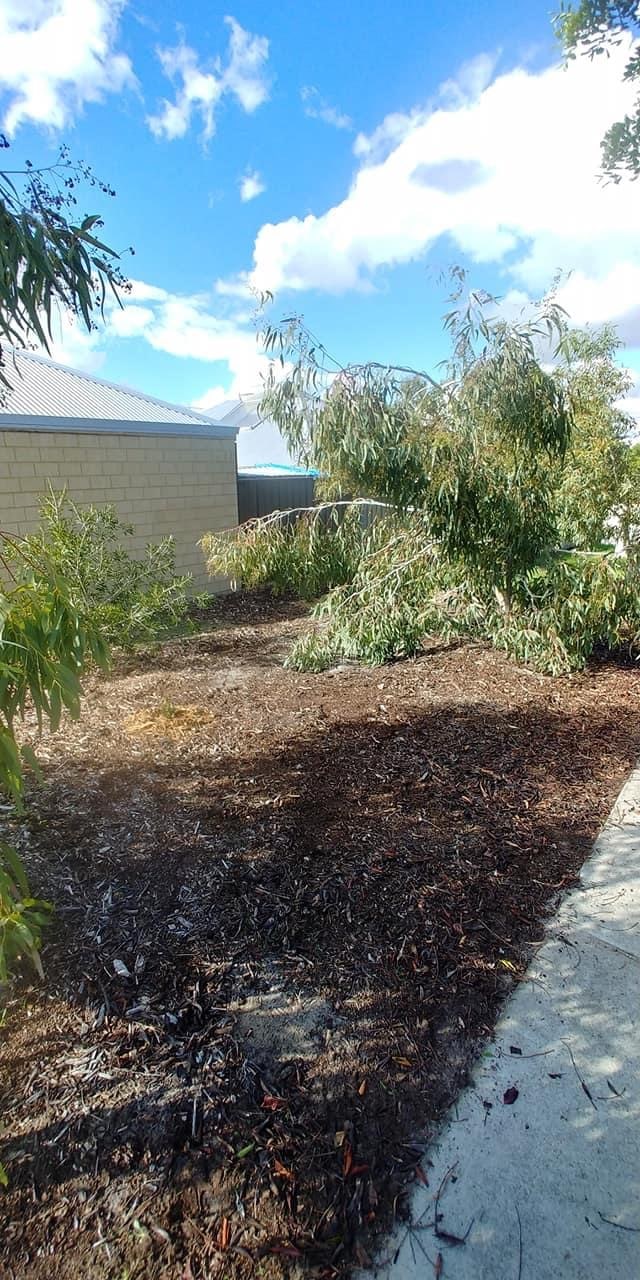
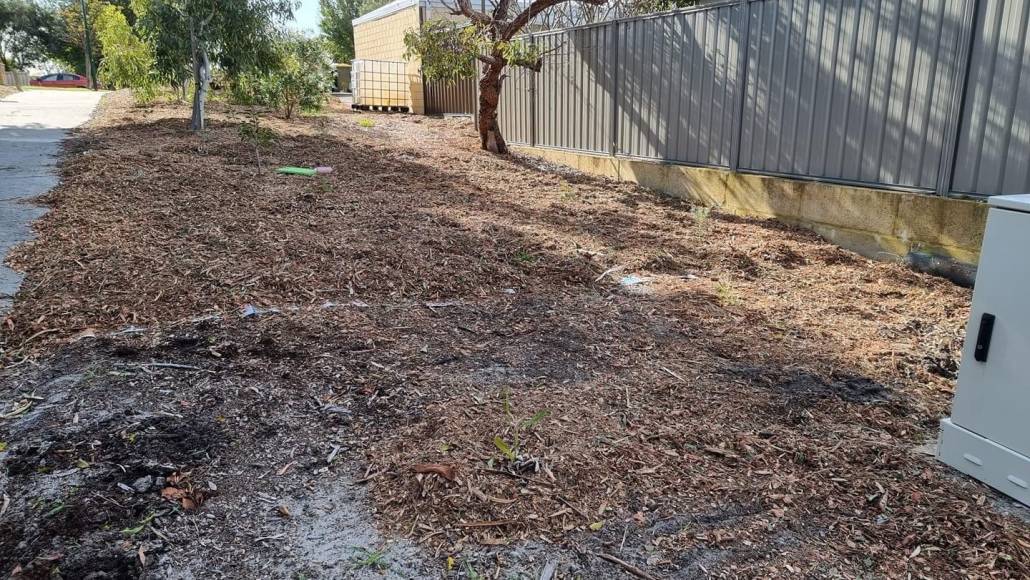
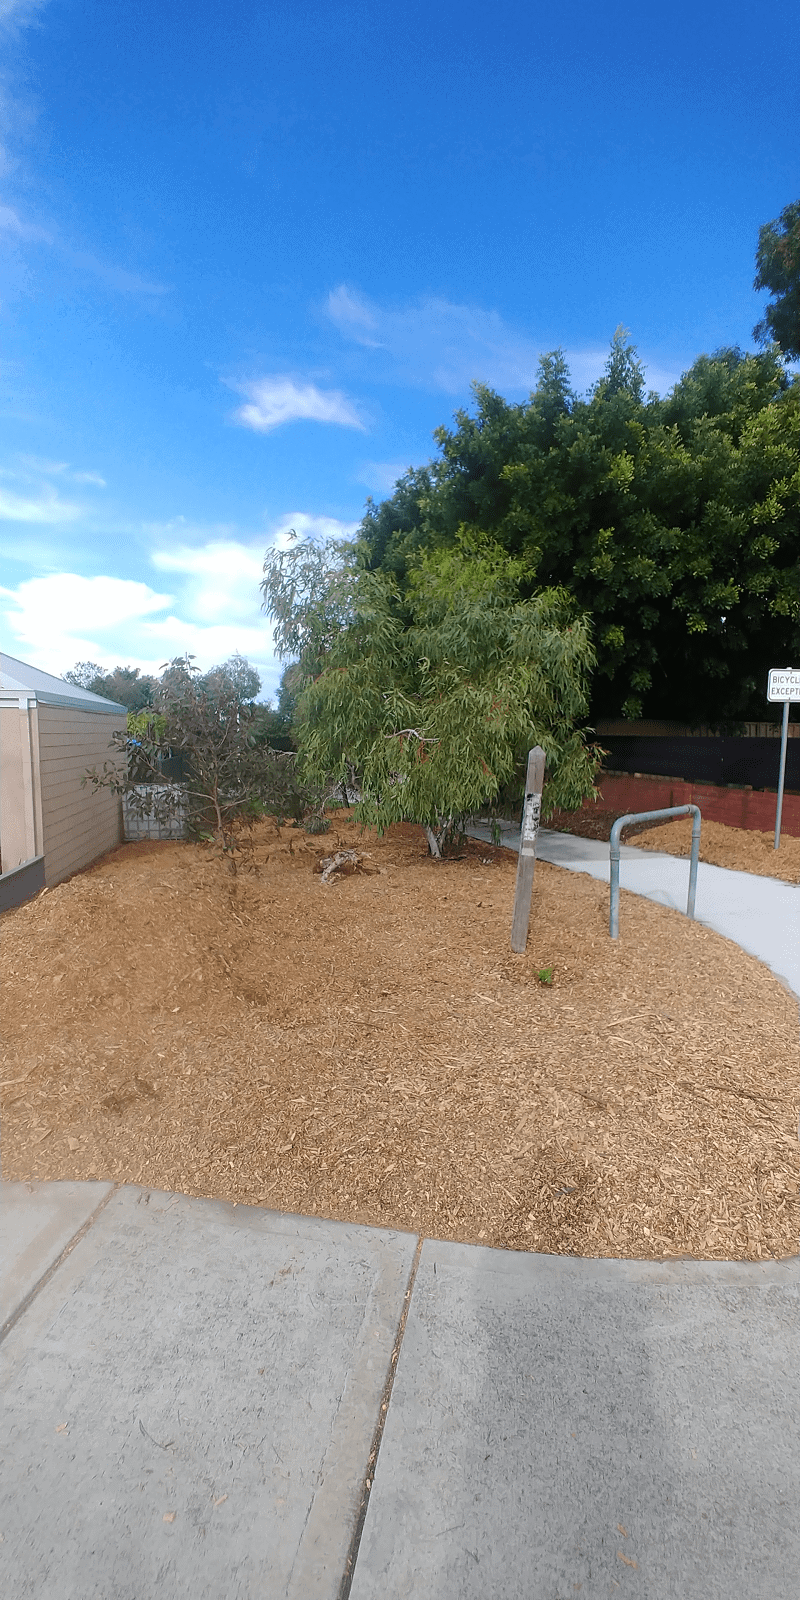
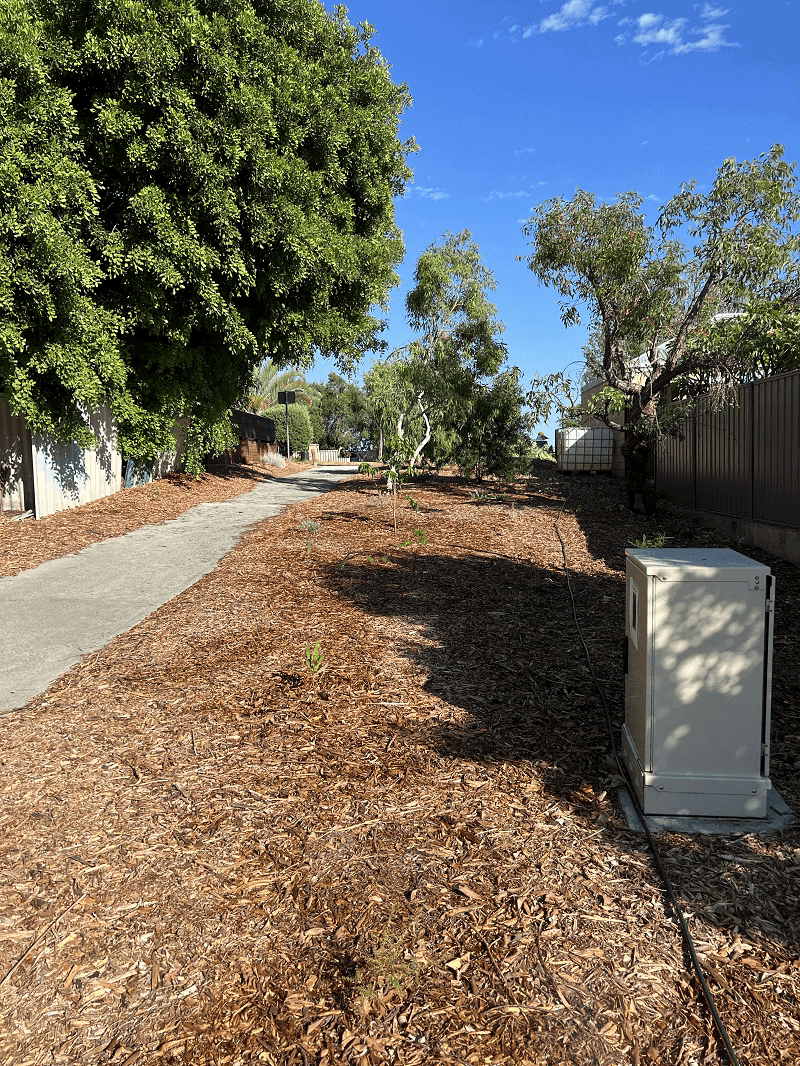
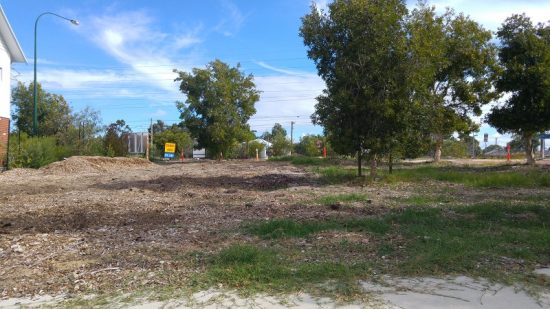
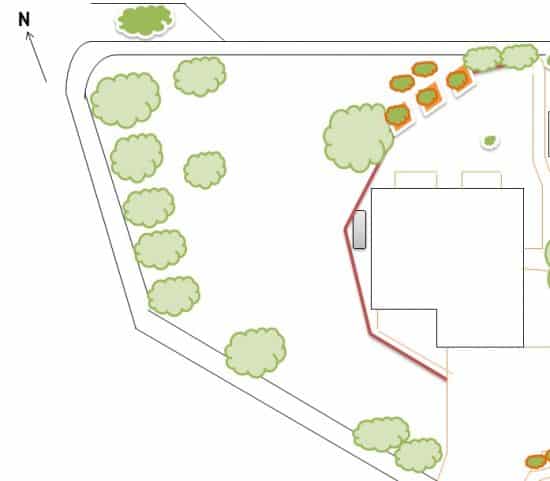
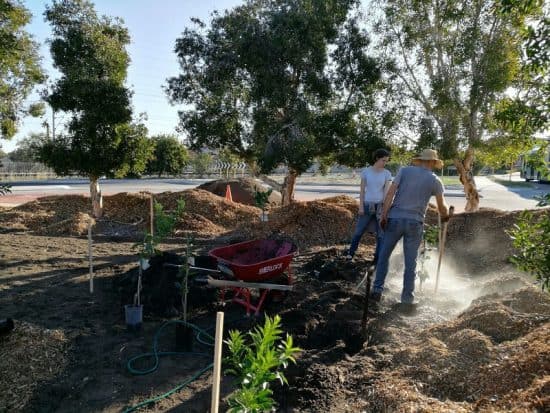
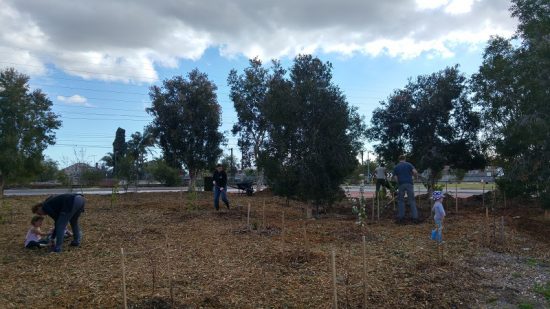
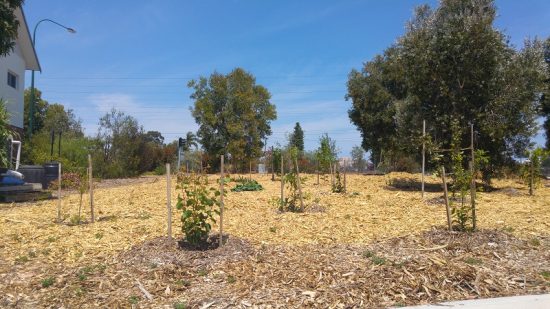
When I moved to the street where I now live two-and-a-half years ago, I immediately noticed the weedy strip of land at the end of it. My street is a cul-de-sac, but at some stage in the past it must have been a through-road to the street behind, because there is still a road-width strip. Now it features a couple of straggly trees, along with a footpath/bicycle path.

The length is about 20m, so it’s not an insignificant size.

Pretty soon after moving in, I hatched a plan to clean it up and plant it out.

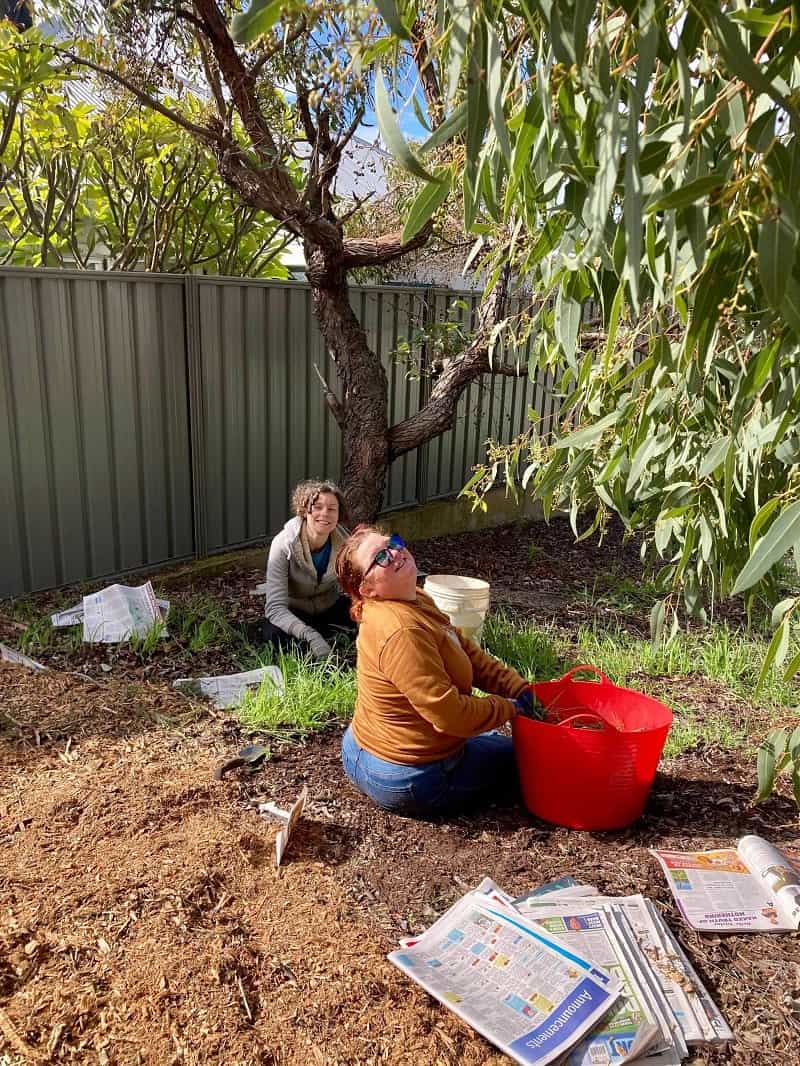
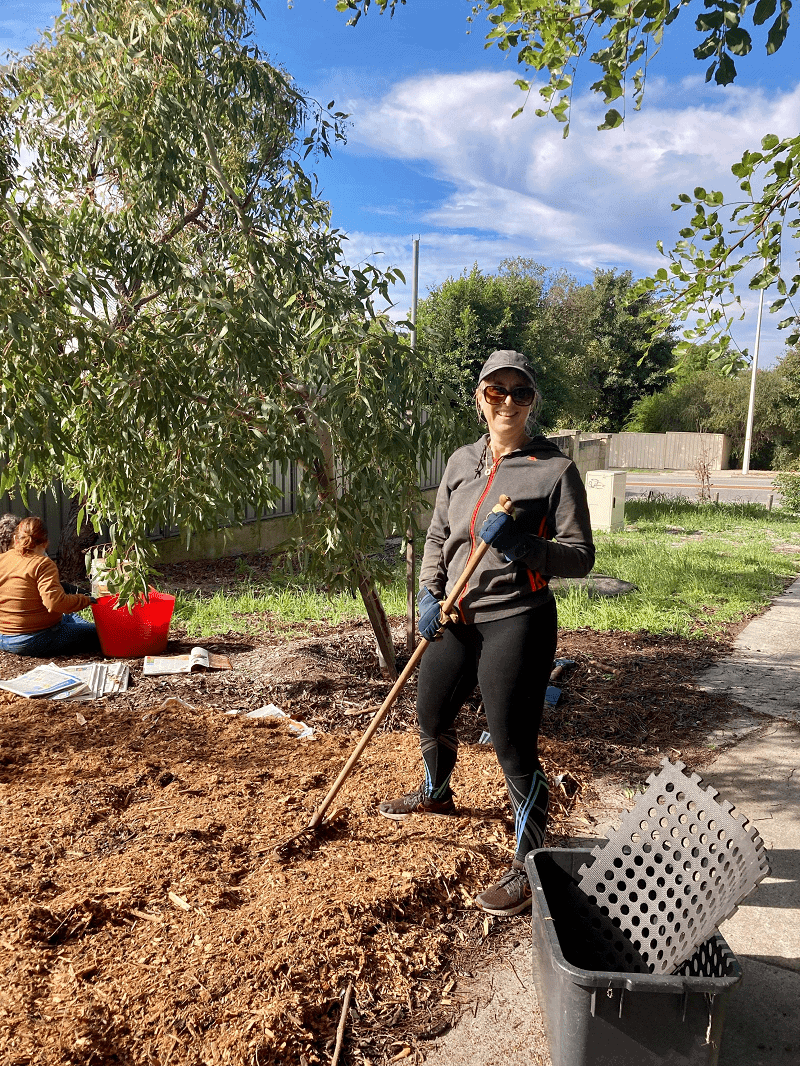
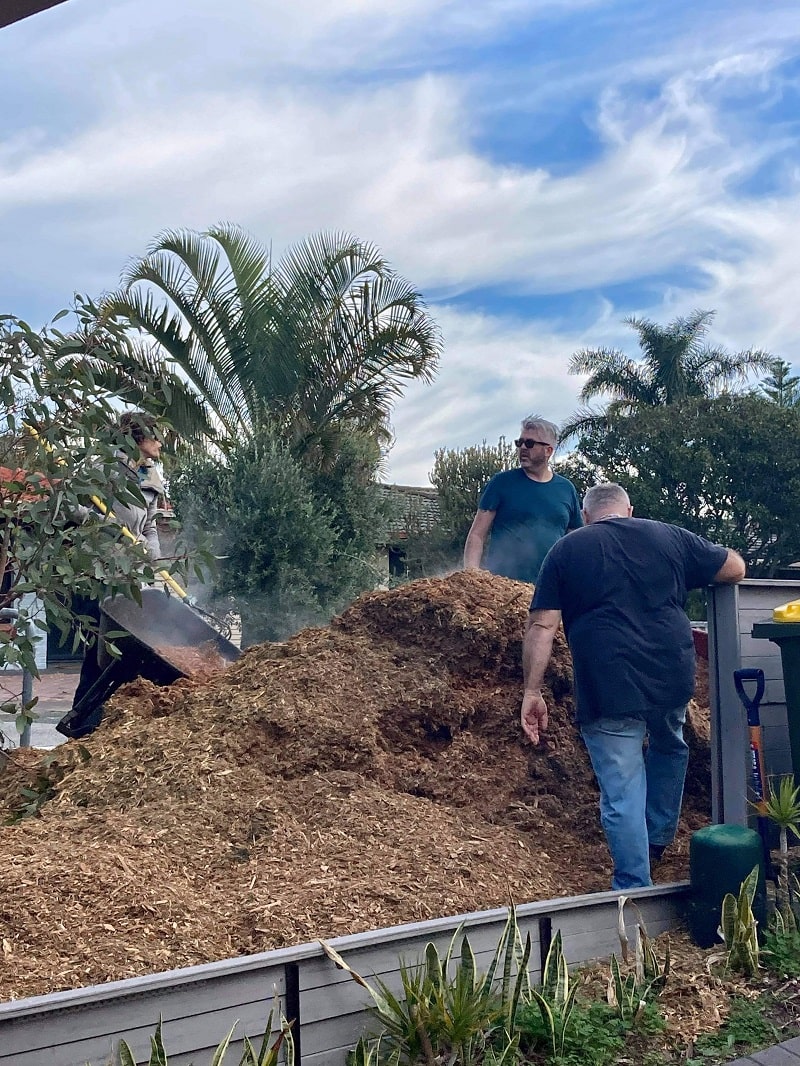
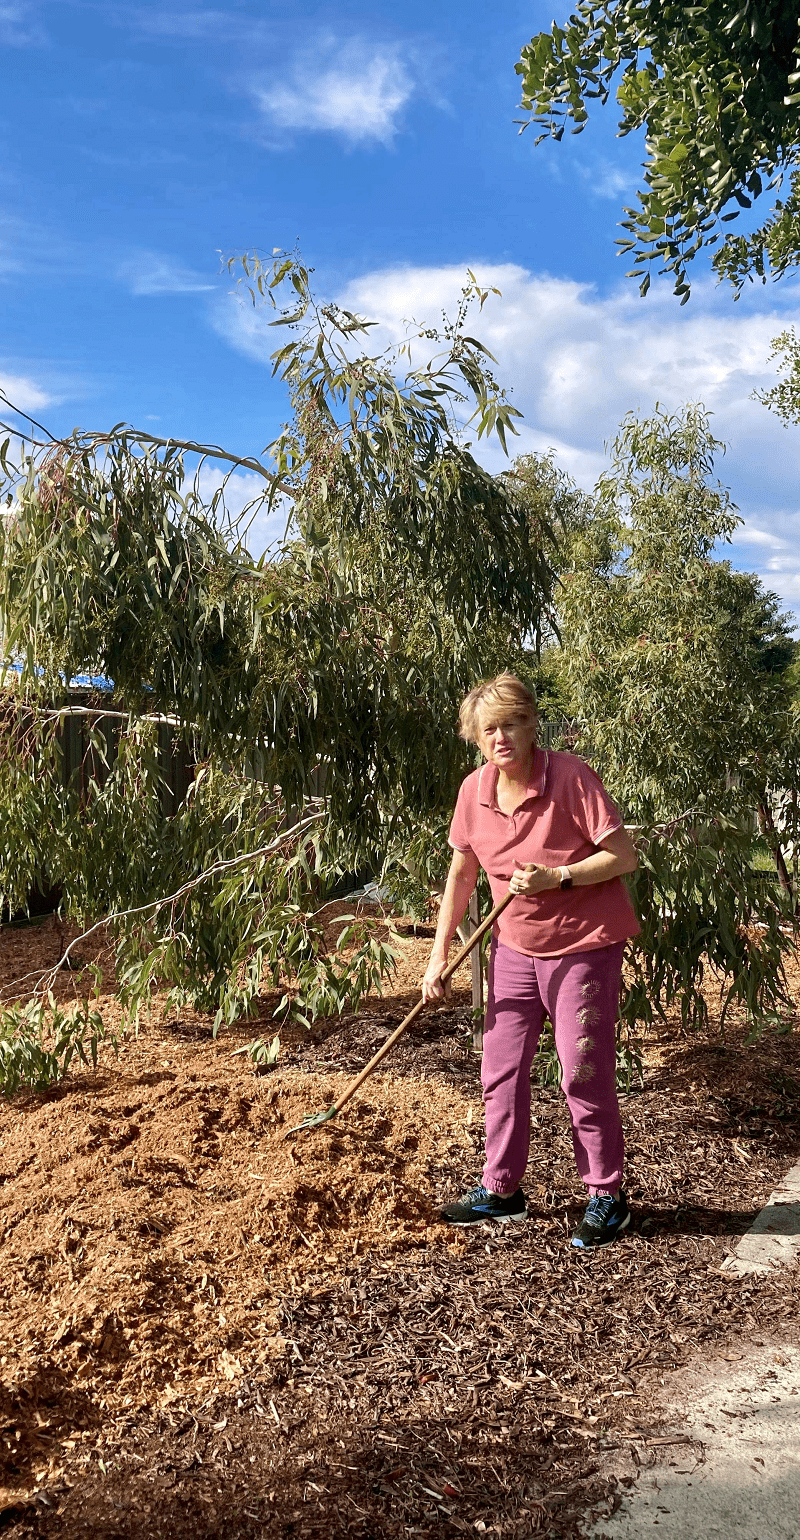
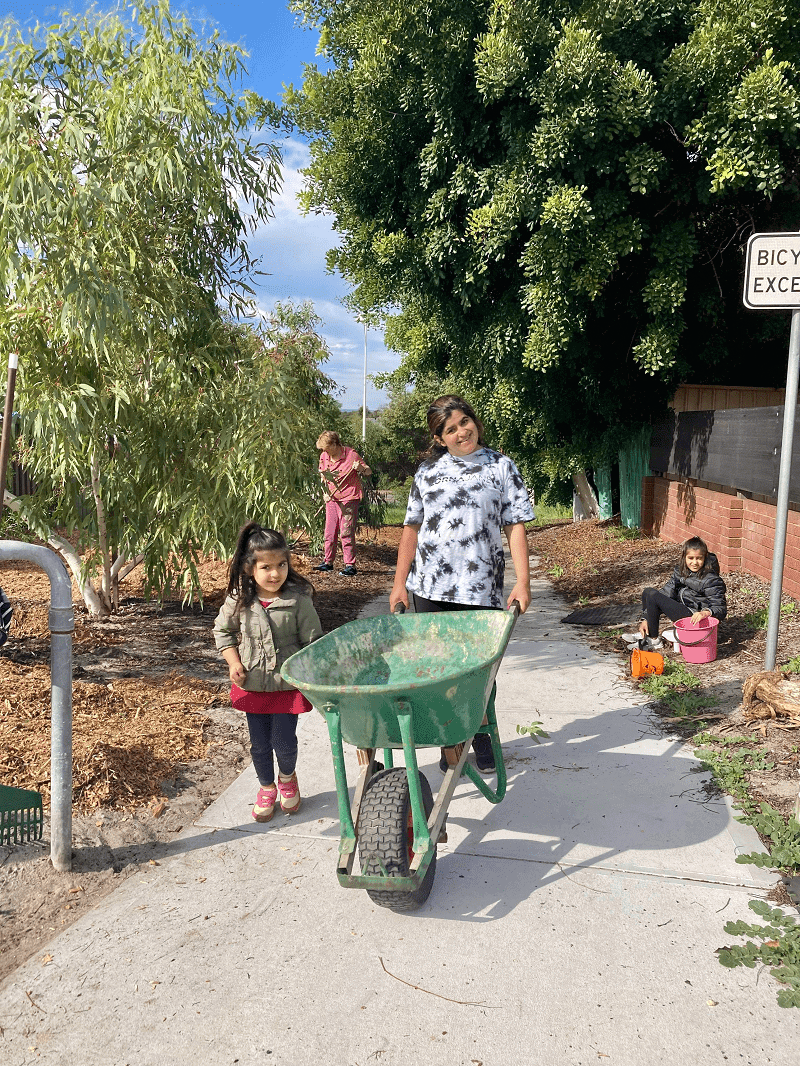
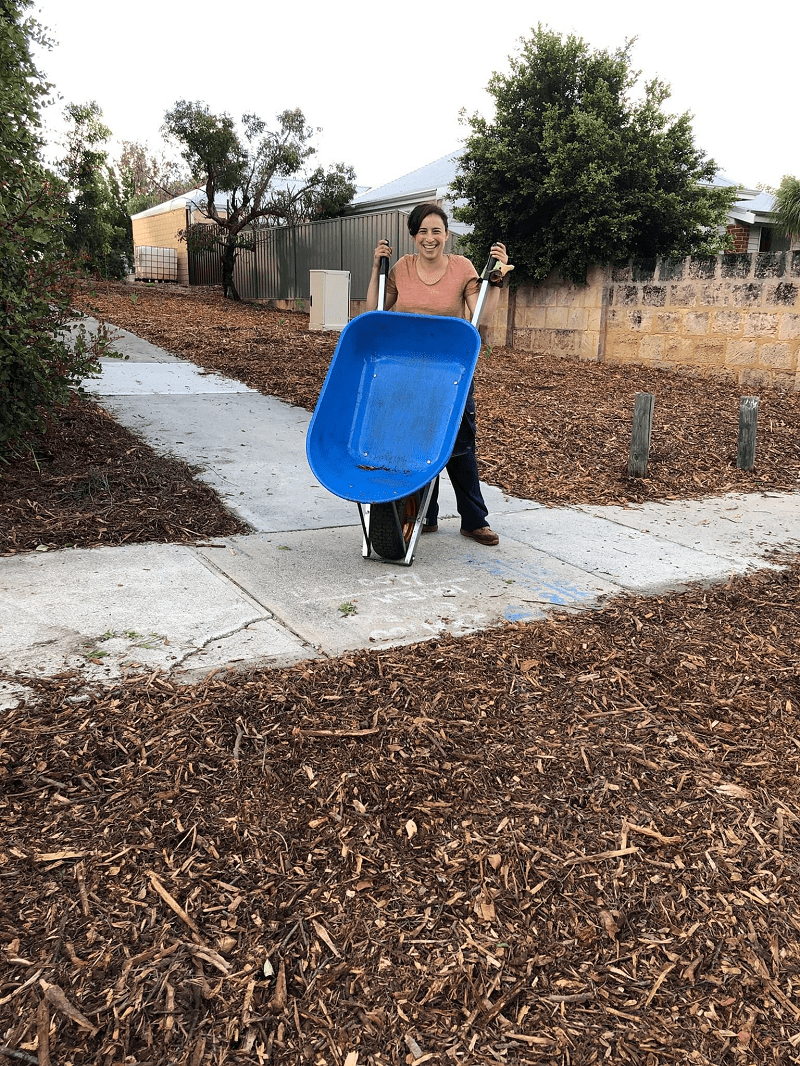
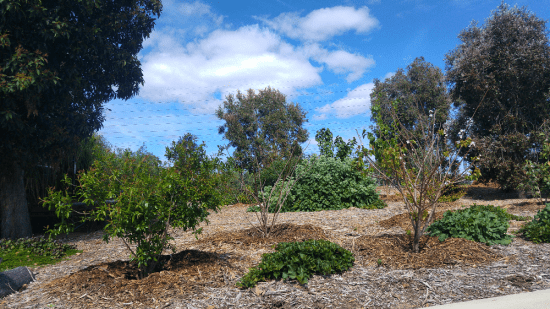
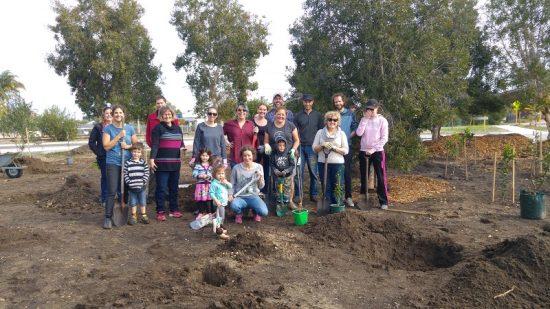
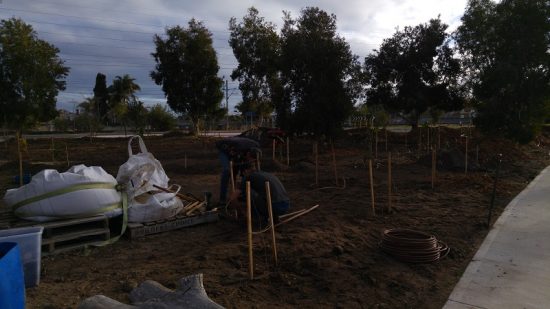
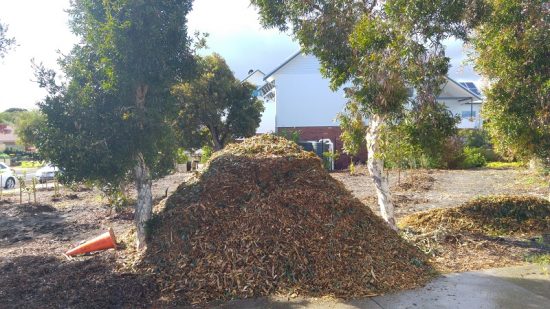
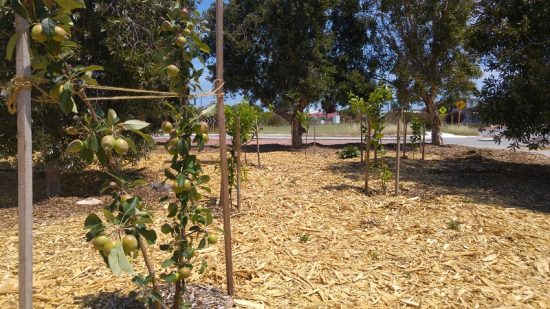
And now, with the plan in full swing, half the residents of the street involved, the land weeded, mulched, planted out and two-thirds of the tubestock we planted having survived the hottest and driest summer on record, I thought it was time to share.

As well as sharing some progress shots (it will still be a year or so for the truly glorious “after” pics!), I want to do is tell you about the project and the progress and the reasons behind some of the decisions that we made. Hopefully I can tell you about it in a way that will give you some ideas and direction if you’re wanting to tackle a project like this of your own.

Because the more guerilla planting, and making use of neglected urban spaces, the better!

Step 1, create a plan (even if it’s only in your head)

The first step was to figure out what would be the best and most practical way to transform the space.

I’m no stranger to projects like this, and I started a community fruit tree project at my old place, planting out 34 fruit trees on vacant land, which is still thriving even though I’ve moved away and don’t take an active role there any more.

But the two locations are a little different, and so there were different considerations.

One of the biggest limitations in Perth is the climate, in particular the harsh sun and the lack of rainfall all summer.

The reason the fruit trees worked at the other site was that they had access to water via the bore at the strata property next door (with agreement from the strata). So we installed reticulation at that site.

This site doesn’t have this option. There’s one adjacent neighbour and no bore. The current cluster of residents at the this end of the street have been generous with their loan of taps and hoses, but there is no guarantee they won’t move and the new residents won’t be keen.

Established fruit trees need some water, vegetable crops need heaps, but native plants can get by with minimal water, once established.

Water is one of the biggest limitations for garden design in Perth. But it isn’t the only limitation.

  • I had no idea how enthused people in the street would be about doing the work, so I wanted something that I knew we could do with a just a couple of people – or even myself.
  • I wanted a project that once it was planted out, was low-maintenance. No need to worry about pruning, or pests, or constantly replenishing the soil, or complex watering schedules (all things that need to be considered with fruit tree plantings or veggie gardens).
  • I wanted a project that was low cost and with low ongoing fees – maybe replacing a few plants here or there, but nothing more.

So that’s how the plan formed into this: native Australian plants with a few interesting bushtucker plants incorporated.

I toyed with the idea of a couple of olive trees because they are one of the few trees that will survive without to much water once established, but then I thought it would be more fun to keep it native.

And no olives means room for macadamias.

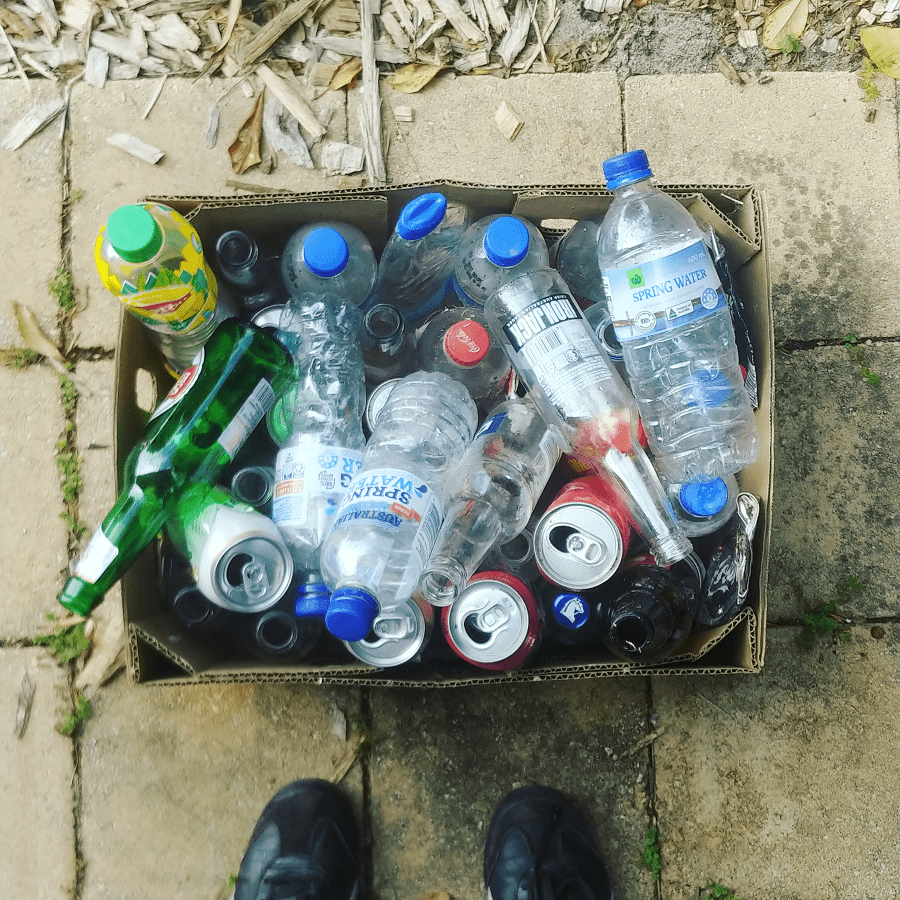
As for funding it, I came up with a brilliant (even if I do say so myself) idea – collect and cash in all the street’s beverage containers eligible for a 10c refund via Cash for Containers.

It also means that people who aren’t interested or physically able to do the gardening part can still contribute.

Step 2, tell everyone about your plan. More than once.

For the first year, whilst I was still forming the plan in my head, all I did was tell everyone in the street about the plan. At every opportunity.

Of course, no-one thought it was a bad idea. Even if they weren’t keen to do the actual work themselves, who is going to complain that you want to transform the weedy patch that gets sprayed twice a year with chemicals into something that is less of an eyesore?

But chewing people’s ears off about the project was a good way to get the idea cemented that it was going to happen, and give people time to warm to the idea of helping.

There were two main questions I was asked.

The first was, “are you going to ask the council?” to which the answer was “no”.

There were a few reasons.

I subscribe to the idea of “ask forgiveness not permission” when it comes to projects like this. Plus I knew the council had a formal Urban Forest Strategy in place. This was exactly the kind of project they were wanting more of.

Having worked with them on the fruit tree project and understanding the steps we needed to take with that, I was fairly confident they’d be happy with this one.

Worst case they could demand we pull the plants we planted out and let the weeds regrow so they could continue to spray them with glyphosate twice a year. This seemed unlikely.

The other sticking point is that it seems that it is not actually council land. Because it was once a road, it’s likely it is road reserve (land kept aside for potential future roads) and owned by the state government, not the council.

(Our last project was also on road reserve.)

Plus, I didn’t really need to ask the council, because I didn’t need anything from them. We had a plan, we had funds for plants, we had labour.

The next question I was asked was, “why don’t we ask the council and see if they will contribute anything?”

I didn’t really see why we needed to do this as we already had everything we needed (and I hate “free” stuff for the sake if it). And I soon realised “why don’t we” meant, “why don’t you” – as in me, Lindsay. And I could not be bothered with more emails.

So I said to a couple of people who raised it, that if they’d like to they were more than welcome to.

No-one ever did.

Step 3, choose an action, set a date, tell everyone about it… and stick to it.

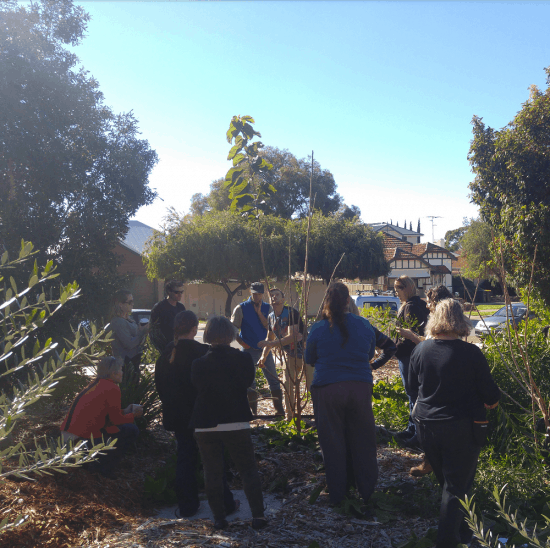
The first action we really needed to do was weed. It’s not everyone’s favourite job, but I quite enjoy it. So I chose a date, told everyone, and then showed up on the day. I was fully prepared to be the only one, but a good handful of neighbours turned out.

Progress had begun.

(I think if you’re the ringleader of a project, it’s important that you chose a date/time that you know you can make, that you turn up first and you stay until the end of the time you said you’d be there until, even if you’re the only one. Turning up yourself is the single best way to get others to turn up next time.)

Step 4, keep momentum going.

As soon as the first action was taken, the second one was arranged, for a couple of weeks time.

We have a street Facebook group which makes it easier to keep everyone updated, share progress pictures and create events.

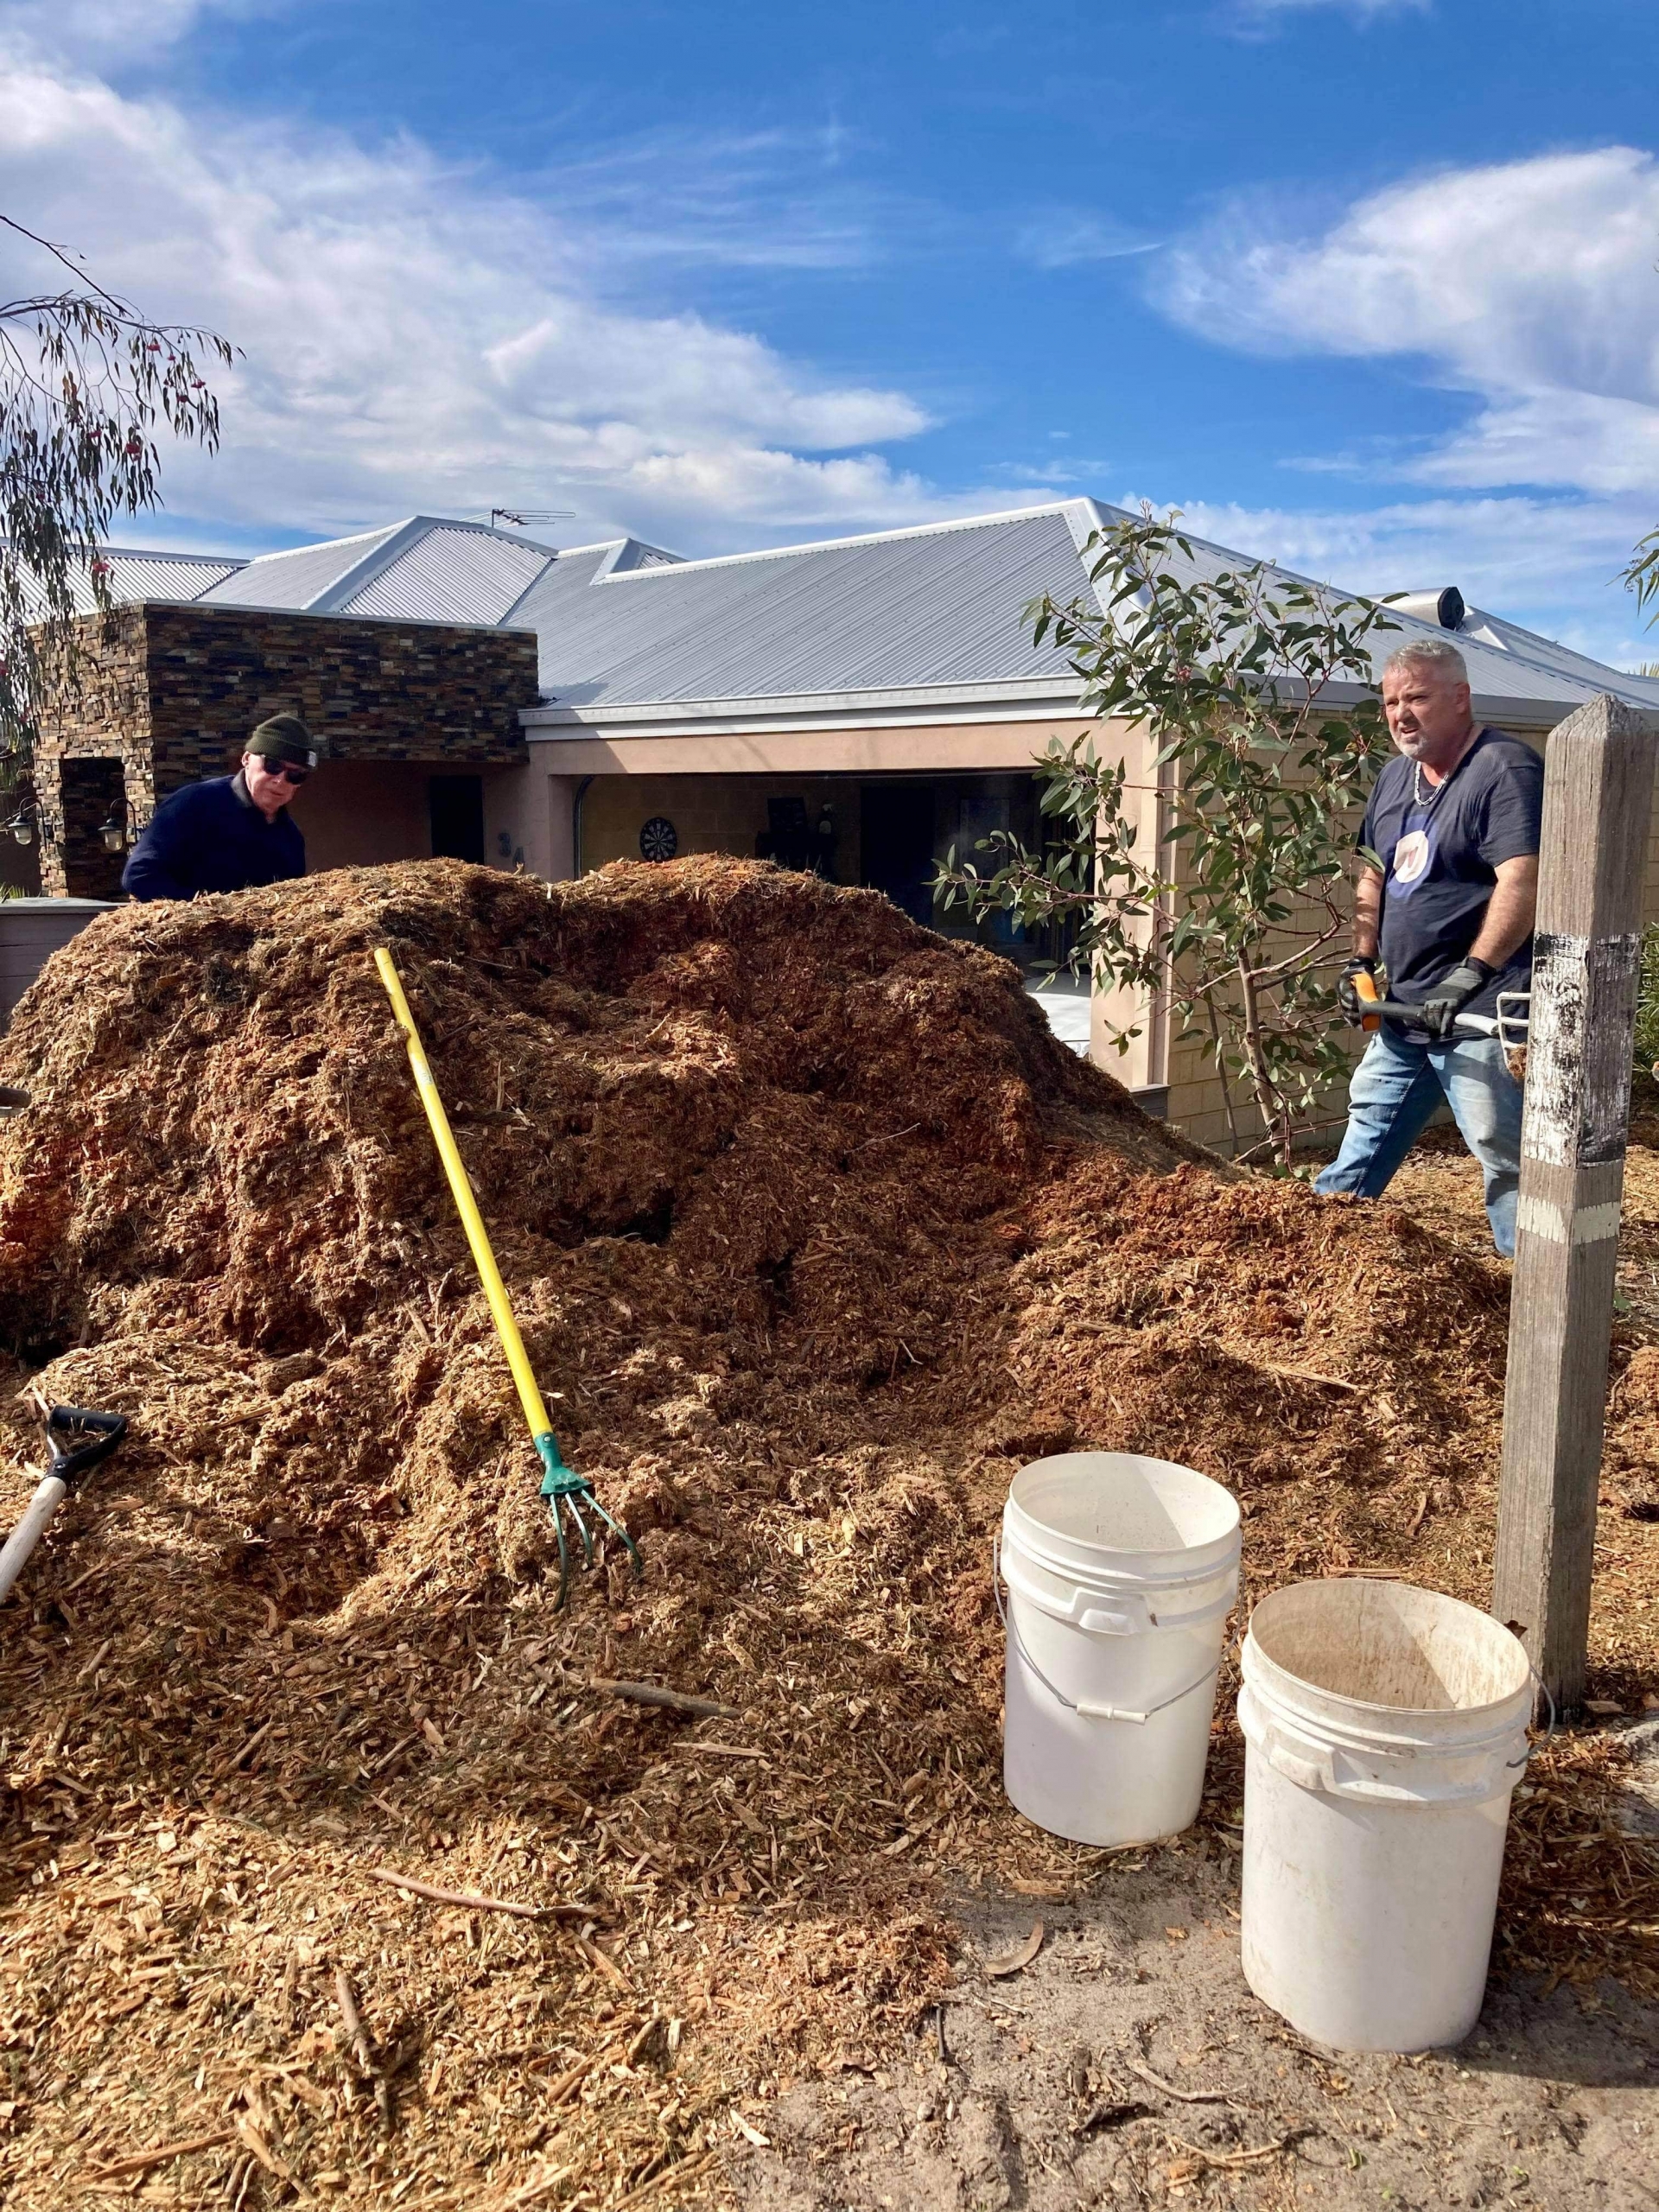
I ordered some mulch (via mulchnet.com – it’s free but you never know when it’s going to be delivered) and it arrived almost instantly.

And from there, things just snowballed.

We organised a day to finish weeding, and get the weeded areas mulched.

People who couldn’t make the planned days did some weeding and mulching in their free time.

We ran out of mulch! So I ordered a second pile – which came as quickly as the first!

Next it was time to plant.

Our local council gives out free native tubestock once a year to households that register, and a few households on our street signed up, and then donated the plants for our project. Topped up with the natives we purchased with the funds raised from the Containers for Change scheme (we’ve raised over $500 from this!), we had plenty of plants to start the planting.

The initial plan was to plant out one half of the space the first year, but we ended up with enough to plant about two-thirds of the area. (The council, when they found out about our project, donated some leftover tubestock from two of their planting days, which helped fill in some gaps).

Step 5, maintenance (the least fun but most important part)

The fun part is the action – getting everyone together and transforming the space, and planting plants. But maintenance is what keeps it all alive. In summer, the most important thing to do is water. And then water some more.

As the plants get more established, there will be less need for hand watering, but the first summer it’s critical to keep things watered.

As you might expect, there was less enthusiasm for the watering part. If it wasn’t for the next-door neighbours who donated their hose and tap, and ended up doing most of the watering, I think we’d have a much lower success rate with the plants.

(That’s not to say they were the only ones. I marched up there with the watering can plenty of times, and also did hose duty There were others who did their bit too! But we had such a hot and dry summer this year – we are talking record-breaking temps and lack of rain – and they really held the fort with it.)

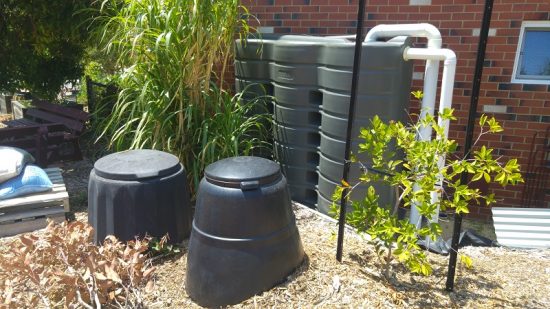
We have placed an empty IBC container on the space. Originally the plan was to connect to the neighbour’s downpipe, which would have helped in spring but would not have solved the summer watering problem – an IBC container holds 1000 litres, but that wouldn’t have lasted for six months of no rainfall.

The council have now offered to fill the tank with their watering trucks (the ones they use to water the street trees) which will mean it will be much easier to water in future years.

Step 6, plan the next steps

This winter, once the first proper rains start to fall, we will plant out the rest of the area, we will replace the tubestock that didn’t make it, we will order anther truckload of mulch to spread and we will keep on top of the weeding. (In summer there’s no weeds as it’s too dry. But once the rain starts…)

This will be when it really starts to take off, as the plants from last year will come into their own and it will be more plant cover and less woodchip cover.

And you might be wondering how the council are suddenly contributing, when I said at the start that we hadn’t contacted them?

We didn’t need them to start the project. But once the project was underway (and we had something to show them) we invited them to take a look.

And that was when we were offered the excess plants, and later on the agreement to fill the water tank. And they are looking into sourcing a couple of macadamia trees for us!

Of course we welcome their contribution, and are grateful for everything they’ve been able to offer us. But I’m still glad we didn’t speak to them before starting the project. It might have slowed things down. And it’s better that the people of our street feel ownership over the project.

It’s worked out well this way.

It’s now been almost a year since we first began the project. With the winter rains coming the transformation is really going to happen in the next few months.

This year I’m going to do a similar thing with my own verge (plant out with native waterwise species). Maybe it seems strange that I decided to tackle the community project first before my own back (well technically front) yard.

But there’s just something immensely satisfying in getting a group of people together and achieving something collectively as a community.

5 ways you can give back to your community (even under lockdown)

Something I’m working to do more of this year is contribute more to my local community and those with less. If 2020 taught me anything, it was that local resilient communities are so important for those that live in them, and the support networks that a good community can offer are priceless.

The other lesson was that, no matter how hard you think you’ve got it, someone else has got it worse, and almost all of us have privilege that we can use to benefit those with less.

(Privilege, incidentally, doesn’t just mean the more obvious things like time or money or power. It can mean white privilege, male privilege, cisgender privilege, able-bodied privilege, educational privilege, mental health privilege, and so on. We might not have them all, but even having one or two makes life easier for us than those who lack them.)

What this ‘contributing’ looks like will vary from person to person – it depends on our privilege, after all. But there are lots of ways we can benefit others and support our community. It doesn’t need to be big or grandiose. Small actions are just as important.

Something so small it only makes a difference to one person still makes a difference to that person.

Here are five ways I’m trying to give back to my community, and contribute more.

Picking up litter

It might seem small, but litter (or lack of it) has such an impact on a community. Rubbish strewn across a park or in waterways is unsightly and harms wildlife but it also gives the impression that no-one cares about the area. And if somewhere is already covered in trash, it almost gives the go-ahead for more trash to be added.

If you want to instantly improve your local community, commit to picking up litter.

It might be that you just try to pick up three items every time you leave the house. Or you might join an organised clean-up event once a month, or even just once a year, where you collect rubbish as part of a group. Or you might decide to ‘adopt a spot’ and keep that one area trash-free.

In Western Australia our container deposit scheme launched at the end of 2020. This means most beverage containers can be returned to receive a 10c refund. Whenever I’m out on my bike, I pledge to pick up every container I see. I’d say on most trips I find 2-3 containers. The funds are going towards a community replanting project in the local area.

And yes, I feel guilty about all the other litter I see and leave when I’m out on my bike. But the reality is, if I stopped to pick up everything, I’d never reach my destination. So I focus on the containers (which is more than I used to do) and accept that I can’t do everything.

In March every year there is a national ‘Clean Up Australia Day’ event. So this year I got together with some like-minded neighbours and we organised a Clean Up Carlisle event, picking up litter along the train line. It’s the first time I’ve ever organised a clean-up like this myself – so it was pretty exciting that people outside of our group turned up!

When I was talking to my neighbours about the event afterwards, they were annoyed that we hadn’t decided to choose one of the main roads in the area, which also has a litter problem. And so I suggested another event, to come soon. When people take pride in their community, these things start to happen…

Donating what you no longer need

I’m a huge fan of donating stuff we no longer need – or more accurately, finding new owners and homes for our old things. It’s one of the things I talk about in a lot of detail in my book Less Stuff.

I have mixed feelings about donating to the charity shop. Too many people use charity shops as a dumping ground for stuff they feel guilty about throwing away. Charity shops are overwhelmed with stuff, only selling about 15% of everything that gets donated.

If you’re going to donate to the charity shop, ensure it’s your best stuff, its clean and not broken, and it’s appropriate for the time of year (charity shops don’t want Christmas decorations in January, or ski ware in summer). You can even call before you drop off to check it’s stuff they actually need right now.

Charity shops are an easier option, but there are lots of other places to donate items to people who need them.

Try your local Buy Nothing group.

Ask on a local community Facebook group for ideas of local places to drop things off (such as homeless shelters or refuges, community projects, schools or playgroups).

If you have excess food (even if it’s open or past its expiry) try Olio. They’ve recently expanded into non-food items, too.

Givit is an online Australian platform which lists items needed by individuals or organisations.

Supporting a local food bank

Food banks often have specific needs and won’t accept items that are open or past their use-by (use Olio for these things). You might have items in your cupboard to donate, or you might decide to make a donation by buying extra groceries.

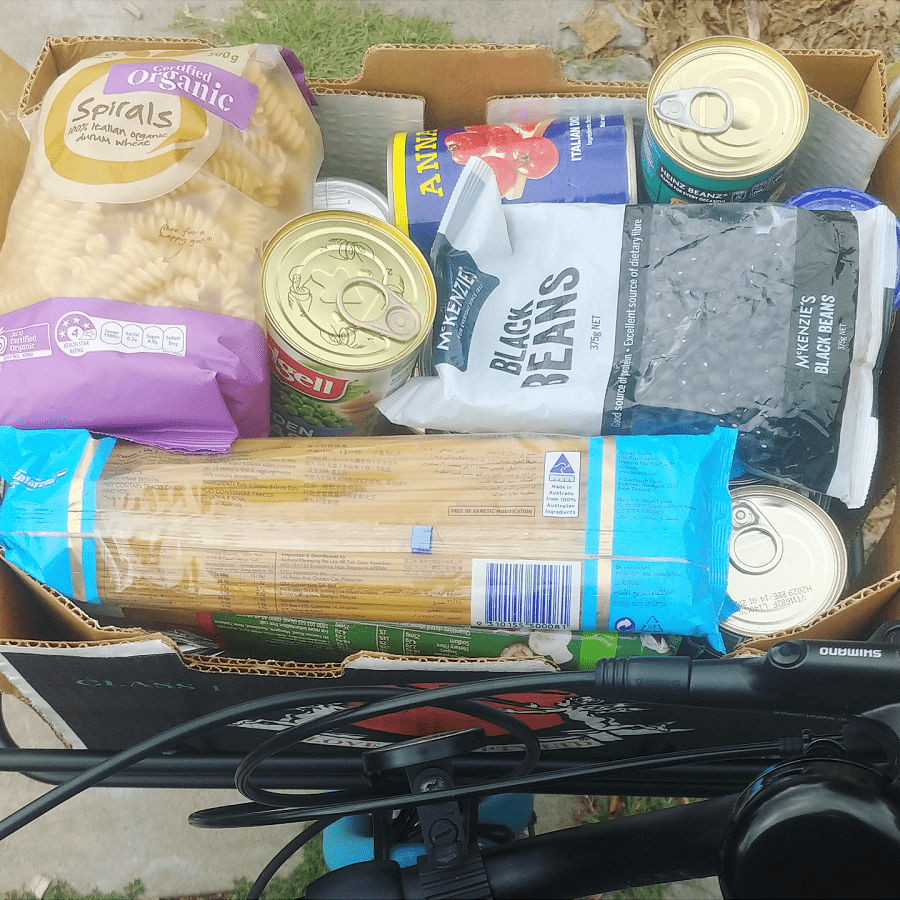
I found a local food bank run by church just two streets away from me, and I started the habit of making a monthly donation box at the end of last year. Being local I like that it benefits people in my area. Every time I got to the shops I’ll buy a few things to add to the box, and then once a month I make a delivery.

It felt strange to me to buy items in packaging at first, but I feel better about supporting the food bank than I would if I avoided the groceries and didn’t contribute. I still try to keep to my values where I can – buying Fairtrade coffee and locally grown tinned vegetables.

Something else I’ve been able to do, and this might work for you if you don’t have the budget to contribute financially, is take food that’s been offered up on the Buy Nothing group to the food bank on behalf of others.

(The drop off hours are quite specific, being Wednesday and Friday mornings only, so not everyone can get there. I have flexible working hours and can pick things up and drop them off.)

I want to add, that the very fact that food banks need to exist at all is quite outrageous. In a world where 1/3 of all food grown is thrown away, the fact that millions of people go hungry in countries like the UK, Australia and the USA (so called ‘developed’ countries) every day is quite unbelievable.

Our food system is in crisis, and there is a lot of work to be done by corporations and governments to stop allowing this waste on this scale and to redistribute resources more fairly. In the meantime, people need to eat and donating to food banks is one way to share our resources with others.

Making a monetary donation

The obvious one, possibly. But making monetary donations to organizations you believe in and/or whose work you value – whether it’s a regular donation or a one-off, whether it’s a small or large amount, whether it’s a big organisation or a small community project – is always going to be of value to them.

I want to get better at this. It’s easy to get stuck the rabbithole of where’s best to donate, which type of organisation, how do I know my donation will be effective, am I making the best choice etc etc.

To get unstuck, I’m learning to let this whole idea of ‘best’ go. Donations are more than money, anyway. They are a show of support and belief in the work.

My new rule is, don’t fixate on what’s ‘best’. If a donation drive crosses your path and it’s something you believe in and you can spare a few (or many) dollars, make a donation.

You might not be able to spend that money on cupcakes any more, but that wasn’t going to make the world a better place either.

I make a monthly donation to IndigenousX, who fund and give a platform to Aboriginal and Torres Strait Islander voices across Australia. I’ve learned so much through their writing.

Because I’m self-employed and my income isn’t regular, I don’t commit to regular monthly donations other than this – although I have plans to when I can. I made a donation to the Indigenous Literacy Foundation on my birthday, I made a donation to Boorloo Justice (Boorloo is the Whadjuk name for Perth) for their Decolonise Pride fundraiser, I supported the Learn Our Truth crowdfunding campaign organised by the National Indigenous Youth Education Coalition and In My Blood It Runs.

I also purchased a photo print that was a fundraiser for the National Suicide Prevention and Trauma Recovery Project. (Does that count?)

And at the other end of the scale, I supported a local community garden in their fundraiser to get new chickens.

Making an in-kind donation

You might not have money to donate, but you might have a product or service you can donate. I’ve donated copies of my books to the Hilton Harvest community garden, and Free the Hounds (a greyhound charity) simply because they reached out to ask me – and I like gardening and greyhounds!

If you’re a writer, needleworker, an artist or some other creator, maybe you can offer your creations to organisations to help them with their fundraising efforts.

Volunteering your time

If you don’t have money but you do have time, maybe volunteering is for you. Volunteering can mean so many things, from getting out and about and hands-on to helping with social media. It can be a regular commitment, or one-off jobs as required.

It can be helping an established organisation, an informal local group or even helping one person (for example, with their weekly shopping).

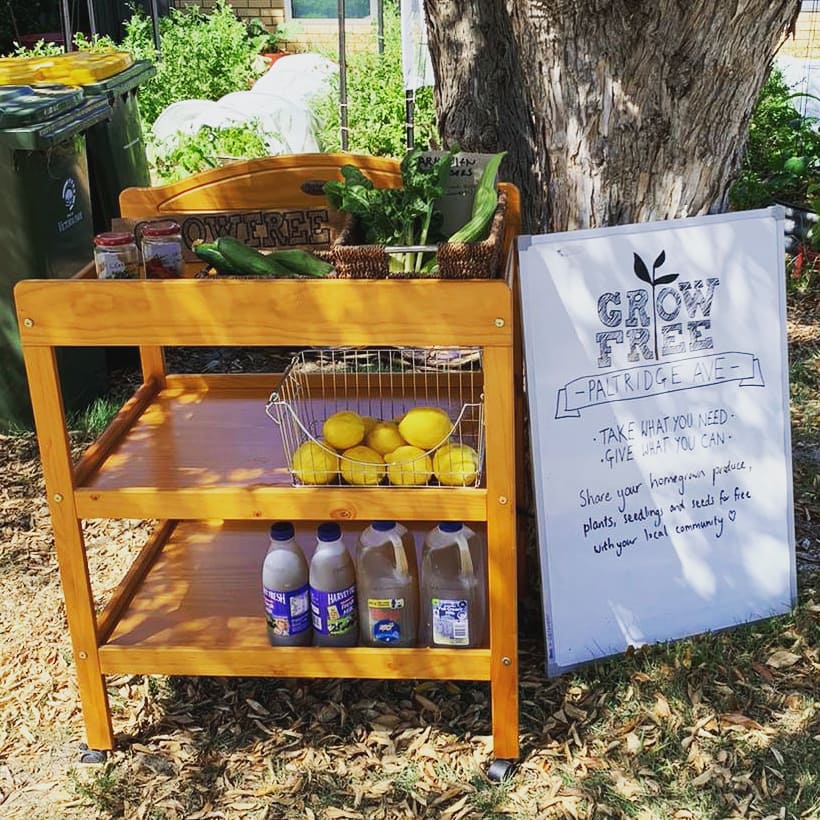
In the past I’ve volunteered for not-for-profit organizations, but currently my focus is on much more local activities – such as hosting the community Grow Free cart and helping get our new community Street Activators group up and running.

I also admin a couple of zero waste Facebook groups.

My energy, enthusiasm and time for volunteering ebbs and flows, and right now this is all I have the capacity to do. But I’d love to volunteer at the Food Rescue place sometime in the future.

2020 (and 2021) have left me feeling a little bit ‘stuck’. Unsure where I want to concentrate my focus, and unsettled by all of the change. Simple acts like picking up litter, buying some (plastic-free) teabags at the grocery store to give to the food bank or making a donation to a group whose request popped up in my feed are tangible things that I can do, today, in the moment, to help make things a little bit better.

As Anne Frank said, no-one has ever become poor by giving.

Caring for Country: Aboriginal and Torres Strait Islander organisations working in the sustainability space

Something I often think about, when it comes to reducing waste and sustainable living, is ‘what else can I do?’ Not in a fitting-my-trash-in-a-mason-jar kind of way – I find this way too simplistic and too focused on the individual at the expense of the broader community.

If I can fit my waste in a jam jar but the rest of my street (or suburb, or town, or country) are filling their bins to the top each week, that’s not really a reason to celebrate. Clearly there is still work to be done!

To me, ‘what else can I do’ means thinking about how can I spread the message, influence my friends, family and those in my community, and help others to take action.

The place where it’s easiest for me to take action, outside of my own home, is in my local community. But – thinking about the jam jar analogy again – it’s a hollow victory if my community does a fantastic job, whilst other communities are struggling, and don’t have access to the resources to create change.

The good news is, there are plenty of people working in their local communities to create positive change. Those of us with more resources can offer support to those with less.

We don’t need to live in or travel to those communities to support them and assist them to do their work.

Aboriginal and Torres Strait Islander people have lived sustainably on the land that is now called Australia for 60,000 years, and they have knowledge and experience of caring for Country that 250 years of white occupation can’t even begin to comprehend.

If we want to live sustainably, we have to listen to the voices of Indigenous peoples, trust their knowledge, and learn from their experiences.

In Australia, there are a number of Aboriginal and Torres Strait Islander organisations focused on sustainability, and sharing knowledge and stories in their own voices. If you’re wondering how you can support Indigenous voices and experiences in this space, I’ve put together a list of the ones I know about – you might find it useful.

Support might mean sharing their work, making a donation, volunteering time, making a purchase, asking your local library or school to stock a book, or something else.

(I have no doubt that this list is incomplete, and if you know of any other Indigenous-owned or Indigenous-led organisations working in this space in Australia, let me know and I will add them to the list.)

Aboriginal / Torres Strait Islander led organisations working in the sustainability space

Seed Indigenous Youth Climate Network

A branch of the Australian Youth Climate Coalition (AYCC), Seed is Australia’s first Indigenous youth climate network. Their vision is for a just and sustainable future with strong cultures and communities, powered by renewable energy. Climate change is one of the greatest threats facing humanity, and it is also an opportunity to create a more just and sustainable world.

W: seedmob.org.au

Firesticks

Firesticks Alliance Indigenous Corporation is an Indigenous-led network and aims to re-invigorate the use of cultural burning by facilitating cultural learning pathways to fire and land management. It is an initiative for Indigenous and non- Indigenous people to look after Country, share their experiences and collectively explore ways to achieve their goals.

W: firesticks.org.au

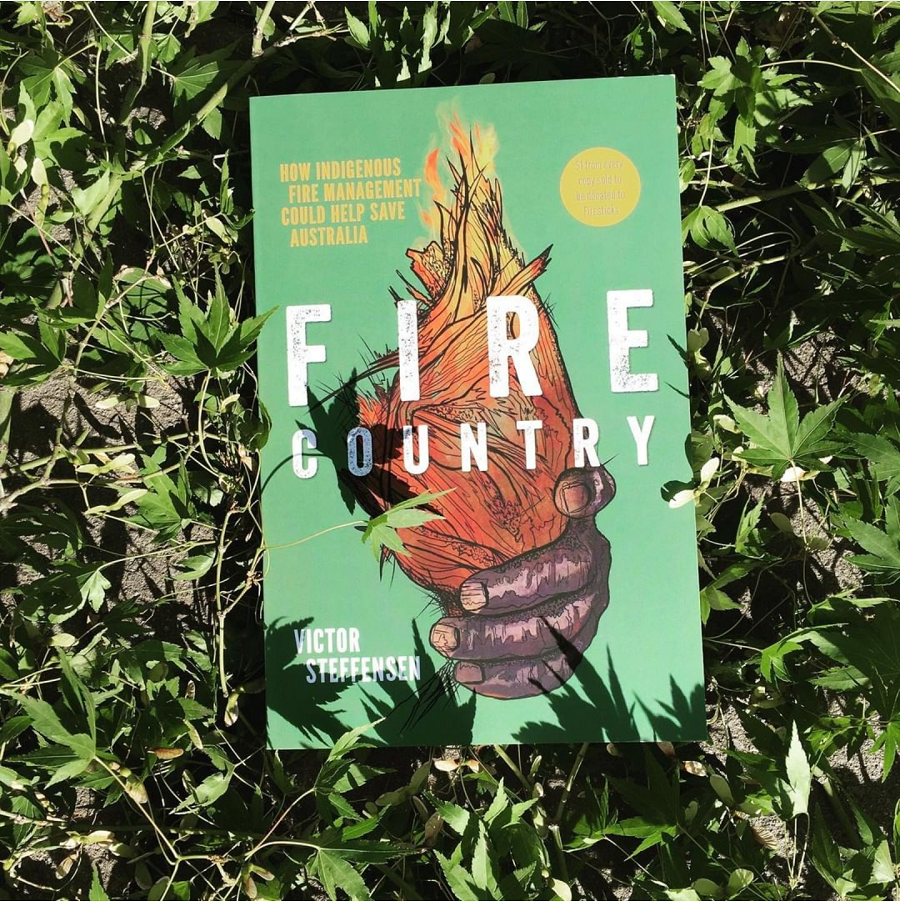
Victor Steffensen is a co-founder of the Firesticks Alliance Indigenous Corporation, and sits on the Board of Directors. His book, Fire Country – how Indigenous fire management could help save Australia was published in February 2020. $1 from each purchase goes to the Firesticks Alliance.

Community First Development (formerly Indigenous Community Volunteers)

Working with First Nations communities is based on the principle of self-determination; creating partnerships with them so that they can achieve great things for their communities. Projects are always determined and led by community. Driven by the need for a better world for all First Nations people; to work with all cultures for recognition, respect, and the right to be treated and valued with equality.

W: communityfirstvolunteers.org.au

Deadly Science

An initiative that aims to provide science books and easy reading material to remote schools in Australia. (It is also helping restocking books and resources to schools destroyed in the 2020 bush fires). It was started when founder Corey Tutt, a Kamilaroi man who is the 2020 NSW Young Australian of the Year, discovered that an Australian school he was talking to had just 15 books in their entire library.

W: deadlyscience.icu

Common Ground

Founded by Kaytetye woman Rona Glynn-McDonald to build a foundational level of knowledge for all Australians, and be a go to resource for those wanting to learn more and connect with our First Peoples. To help Australians see the value of Aboriginal and Torres Strait Islander cultures through providing access to engaging and authentic content that will help bridge gaps in knowledge.

W: www.commonground.org.au

First Nations publishing houses – publishing Aboriginal and Torres Strait Islander stories and voices

Magaala books (based in Broome, WA)

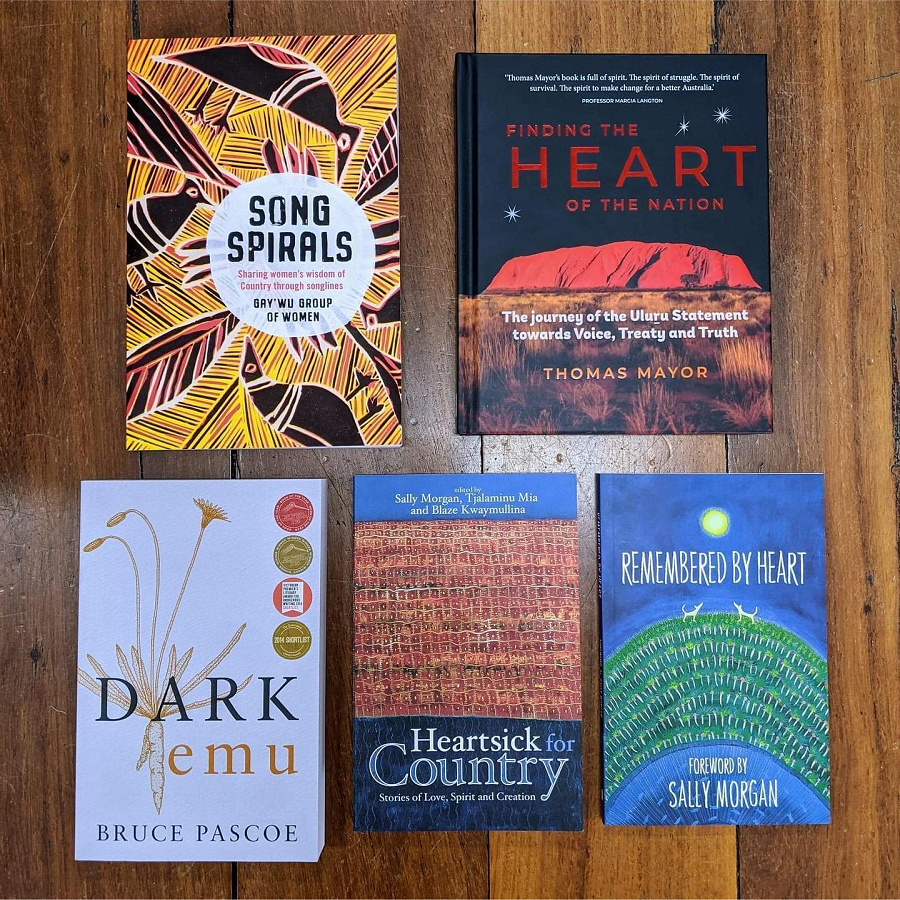
They published the award-winning Dark Emu by Bruce Pascoe, which looks at the historical evidence to challenge the commonly-held views of pre-colonial Australia and “Terra Nullius”.

W: magabala.com

Keeaira press

Established in 1996 with the purpose of recording Aboriginal history and culture.

W: kpress.com.au

Black Inc Press (Condon, QLD)

An Indigenous community-based publishing venture based in North Queensland, and specialising in illustrated books for young readers.

W: blackinkpress.wixsite.com/blackinkpress

Aboriginal Studies press

Publishing arm of the Australian Institute of Aboriginal and Torres Strait Islander Studies (AIATSIS) and publisher of Australian Indigenous studies. They publish scholarly works, children’s books, biographies, research papers and monographs across a broad range of topics.

W: aiatsis.gov.au/aboriginal-studies-press

Indij readers (Fountaindale, NSW)

An Aboriginal charity registered as a not-for-profit organisation, selling Indigenous children’s books.

W: indijreaders.com.au

Batchelor press (NT)

The publishing arm of Batchelor Institute of Indigenous Tertiary Education, Northern Territory, Australia. The teaching and learning resources are produced primarily for Indigenous students living in remote communities, the majority of whom have English as a second or third language.

W: batchelorpress.com

There are also non-Indigenous publishers who are putting out great work by Aboriginal and Torres Strait Islander writers and illustrators, and those books definitely still need reading too.

Non-Indigenous Not-for-Profit Organisations

Two non-Indigenous not-for-profit organizations worth mentioning for their work in Aboriginal and Torres Strait island communities.

Indigenous Literacy Foundation

A national not-for-profit charity focused on improving literacy levels in very remote Aboriginal and Torres Strait Islander communities, with Aboriginal board and staff members.

W: indigenousliteracyfoundation.org.au

Waste Aid

Waste Aid Australia works with Aboriginal and Torres Strait Island communities to create long-term sustainable solutions to address inadequate waste management. Waste Aid works alongside communities to leverage their own skills and expertise to co-design and deliver waste solutions on their own land.

W: wasteaid.org.au

Sometimes it feels hard to know what to do to support others who aren’t in our immediate circle of friends, or our local community. I hope this list has given you some inspiration.

Now I’d love to hear from you! Do you know of any other Aboriginal or Torres Strait Islander people or organisations doing great work in the sustainability space? Any books you’ve read that you recommend? Any other thoughts? Please share in the comments below!

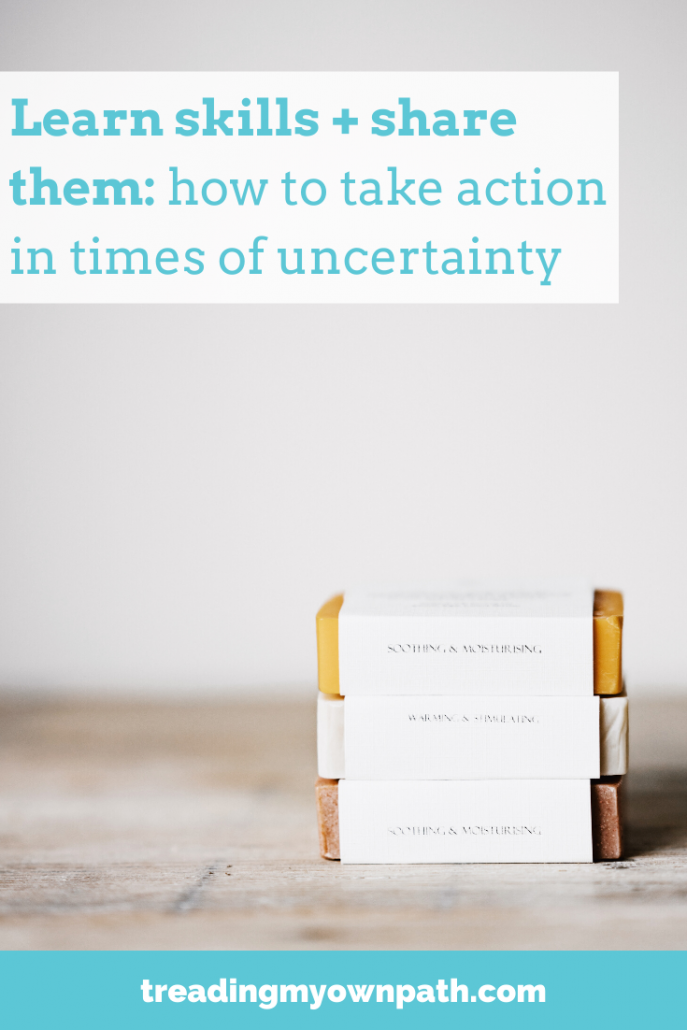
Learn skills + share them: how to take action in times of uncertainty

I’ve always been fascinated by skills. Particularly hands-on ones. I’m in awe of people who have skills that I do not – like the shoe man (not a sexist gender assign – the two brothers who run the shoe repair place at my local shopping centre call their business ‘The Shoe Man’), or people who know how to sew, or make things with wood or clay, can fix things, or weave, or, or…

The more turmoil there is in the world, the more I’m drawn to learning skills. Knowing how to do things, even simply understanding how things work, gives me a sense of control (and comfort) in times of uncertainty.

I’m not trying to be completely self-sufficient – in fact, I don’t believe that’s a thing. I know that us humans need each other way more than we’d like to admit. No-one can excel at all the things. Having skills is not about self-sufficiency but self-reliance and community resilience: we need to share the skills we have with others and look after one another.

One of the best things about my zero waste journey has been learning new skills. There are still so many I’d like to tackle (weaving! basket making! grafting!) but I’ve definitely added a few to the toolbox over the years.

I’m grateful that I’ve had the opportunity, and comforted that I can draw on them now.

I wanted to share the skills I have not to blow my own trumpet (I can’t play the trumpet! Not a skill I have!) but to get you thinking about the skills you have, and the skills you want to have.

And then, I want to persuade you to share them (but we’ll get to that at the end).

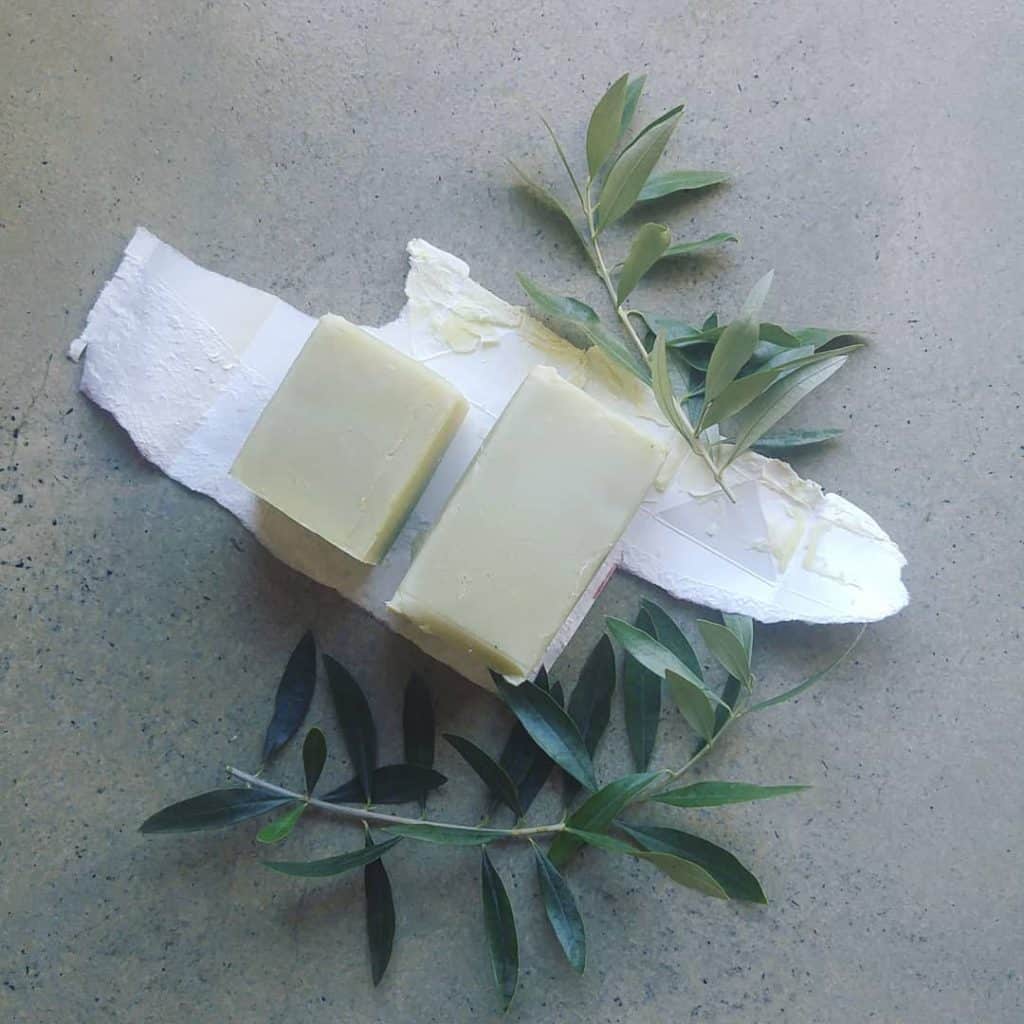
Soap making

This is one of my newer skills (not shared on the blog yet as I’m still at the learning stage) but it’s what inspired me to write this post. With the coronavirus pandemic, a few things have been consistently selling out at the stores – tinned tomatoes, rice, pasta, toilet paper… and soap.

I’ve needed to make a batch for a while, but it takes a few weeks to cure (and harden – which makes it last longer) – and before the making happened, I ran out. So I asked my friend (who is a prolific soap maker) if she had any spare from her previous batch, and she did.

Three bars of soap, no need to go to the shop, no panic rushing around because everywhere was sold out.

Soon I’ll schedule myself a soap making weekend – and one batch will last me most of the year. (If you want some motivation to give it a go, good old-fashioned soap kills coronavirus. Here’s the science.)

DIY skincare

I make a few of my own products from scratch. I’m a big fan of simple, no fuss, easy recipes that require no specialist equipment and ideally use edible ingredients (meaning I can raid my pantry).

I don’t make everything from scratch all of the time. Recently I purchased some toothpaste because I just couldn’t bring myself to make it – even though it’s a two-minute job. (It’s just that there are always a hundred two-minute jobs that need doing, and this one never got higher up the list.)

But if toothpaste runs out at the store, I won’t panic – I’ll make my own.

I you’re interested, these are the things I make and recipes I use:

DIY toothpaste recipe

DIY deodorant recipe

Alternative deodorant recipe (sodium bicarbonate/baking soda free)

Cold cream moisturiser (can also be used as eye make-up remover and cleanser)

DIY zinc cream (used as sunscreen)

I use a shampoo soap bar (which I buy) and a vinegar rinse to wash my hair; prior to this I used bicarb or rye flour in place of shampoo, and it worked well. I’d happily switch back if I couldn’t buy the soap.

If you’re curious, find out how washing your hair with bicarb and vinegar works.

(Oh, and I use white vinegar, which I buy, but I could easily switch to apple cider vinegar, which I make. It’s super easy and you just need apple cores, a bit of sugar and a jar. Link to DIY apple cider vinegar recipe here.)

Learning to cook

I think knowing how to cook is a really underrated skill. I’ve learned to cook over time (because nobody is born with this knowledge!), but going zero waste really next-levelled my cooking game, because I no longer wanted to buy those pre-packaged and convenience foods in plastic – and so I had to learn how to make my own, from scratch.

I don’t think I’d ever cooked a dry lentil or bean before starting out on this zero waste adventure. Turns out, if you can boil water, you can cook lentils. They are cheap, nutritious and delicious. They also expand up to three times when soaked and cooked (both economical and space-saving – a single packet of lentils takes up much less space in the pantry than the equivalent in cans).

Despite knowing how to cook most of the things, there are still days when dinner consists of toast (I’m not proud) or a bowl of pasta with lemon juice, lemon zest, capers, olive oil and parsley. But importantly, the skills to make things are there.

And there’s always more to learn. I’m keen to try making tofu and tempeh. I said that last year. (Oh, and the year before…) Slowly, slowly.

Learning to grow food

I’ve been growing some of my own food for 10+ years (not all of my own food, not even close!) although I had to relearn much of what I knew when I moved from the UK – where I started out – to Perth, which has a completely different climate.

From an allotment to a small balcony, to a bigger balcony, to community gardens and a community orchard, and now my own back yard, there have been lots of lessons.

With the space to now grow fruit trees, I’m excited for the next stage.

But even in the days with the smallest balcony, there were a few herbs. Something alive and edible. Even without land of our own, it’s usually possible to grow something. Microgreens are another good place to start.

Learning to forage

Another useful aspect of growing food is learning to recognise plants, as there are a surprising number of edible plants and fruit trees on public land. Within walking distance of my place there’s an almond tree and a pecan tree (although good luck beating the birds to those), a fig tree, and several lilli pillies. There are also several overhanging fruit trees – lemons, macadamias and mangoes.

If there’s a black stain on the pavement, there will be a mulberry tree above your head.

(When I was in the UK, brambles – which grow blackberries – were in hedgerows everywhere. There were some apple trees in the square next to where I worked. And mushroom gathering is a growing pastime – one I sadly didn’t embrace before I left.)

Plus, wherever you are… a lot of edible weeds. Which is a whole other food source – and one that grows rather prolifically! Maybe this is a skill reserved for the zombie apocalypse… but you never know, and it’s good to be prepared ;)

Learning to preserve

I learned to preserve when I first got my allotment, because if you grow food you will grow more than you can eat. Things only last so long in the fridge, and there is only so much space in the freezer. Plus freezing vegetables doesn’t do much for them.

Preserving is a way of making things last much longer – often without the need to refrigerate (although some preserves are better refrigerated). Many preserves will last upwards of a year – right around until the next harvest.

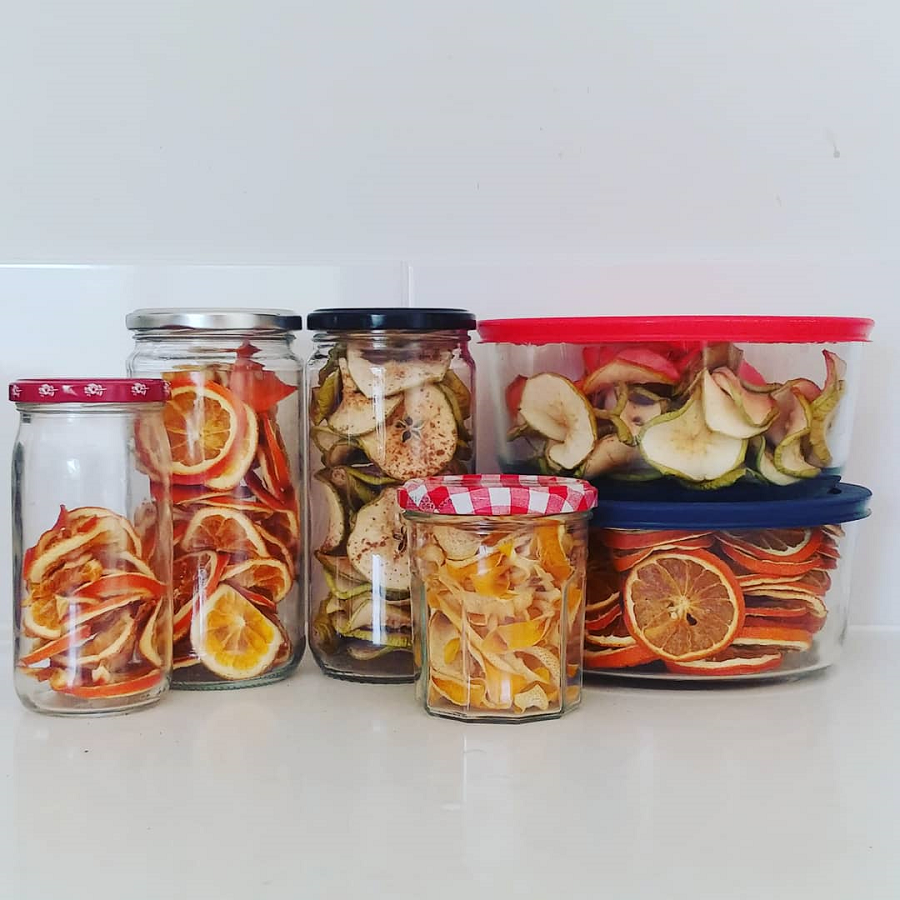
I started out learning how to make jams, pickles and chutneys. When I moved to Australia I learned to ferment (sourdough, yoghurt, vegan cheese and vegetables), and more recently got started with dehydrating.

When my fruit trees are cranking (well my future fruit trees – I don’t have many yet) I plan to get into canning – which requires some specialist equipment.

Learning to mend

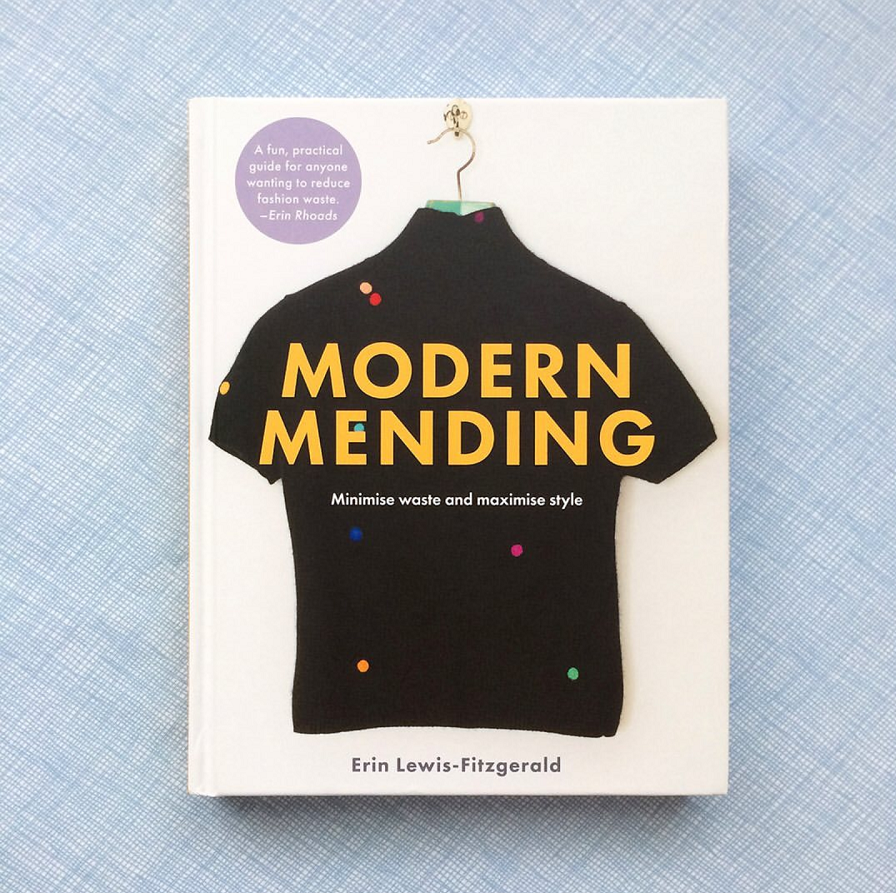
I can sew a button back on. I can darn holes in my socks. My mending knowledge is no way near extensive (in fact, I’ve pretty much shared my arsenal of expertise) but I’m keen how to learn more about how to mend. Making things last is an excellent skill to have.

(My friend Erin, who is a marvellous mender, has just published her first book Modern Mending, pictured above. Reading and then trying out some of the techniques in this book is one of my goals for the year.)

Learning to share

I truly believe that this is the most important skill of all. Because setting yourself up for ‘self-sufficiency’ by keeping all your skills (and products of those skills) to yourself, and sitting back smugly whilst the world outside – and your neighbours – are struggling is a false victory indeed.

There’s some stuff I’m never going to make. No-one (or very few at least) has time to make all the things. Plus some stuff I find fun to make, other things I find useful to make, and yet more things I just don’t feel that need.

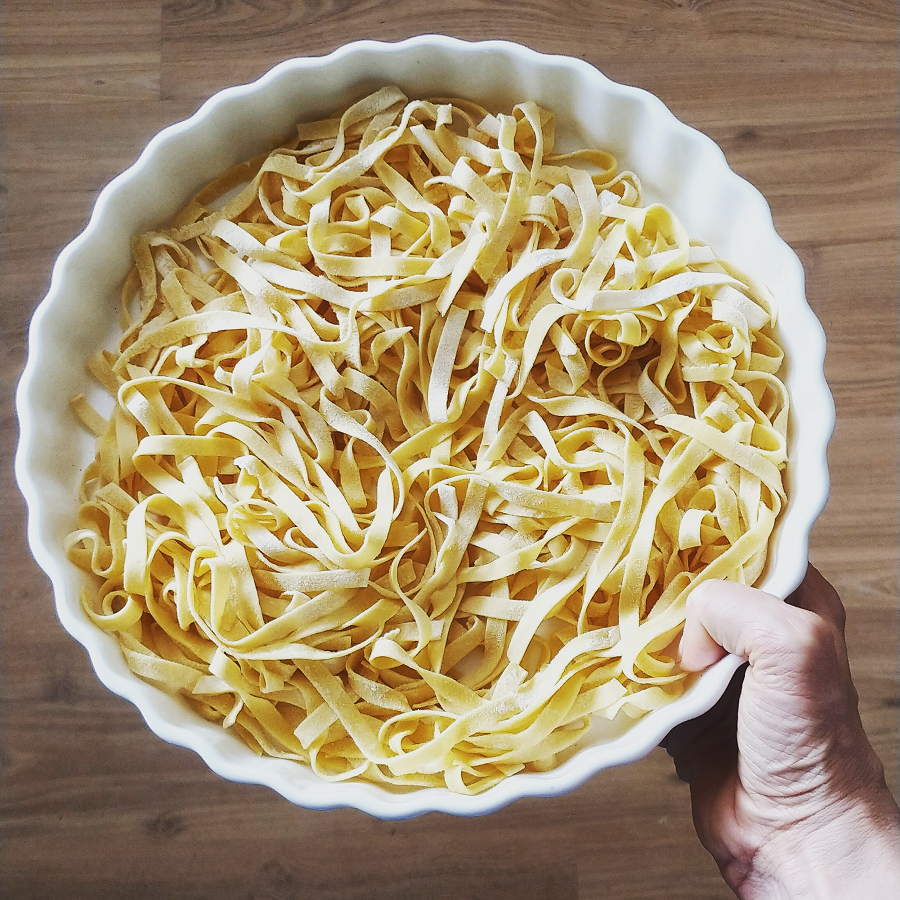
A week ago I gave my neighbour some eggs. A few day later there’s a knock on my door – she has made fresh pasta and has some for me! Pasta isn’t a thing I’d make, and chickens aren’t a thing she’d keep. Sharing skills (and the product of those skills) helped both of us.

(Oh, and she also made pasta for her neighbours on the other side, and the ones next to them.)

Other friends make kimchi, have DIY skills, own tools, can mend, and the list goes on.

Sharing is a skill I definitely want to work on more. I have some incredible generous friends, and neighbours, who give freely – and who inspire me to do more. It’s something I really want to focus on this year.

You’d think sharing might encourage others to take advantage, but I find the opposite happens. Sharing breeds generosity.

I’m offering this up as a solution because it’s worked for me. It’s something practical (and positive) that we can do with our energy and time. If you’re feeling anxious about the way the world is going, or you’re wondering what to do as we’re advised to stay home more, perhaps learning a new skill is a way to put that nervous energy into something productive.

And sharing (be it knowledge, or physical stuff) is a way to help others benefit from what you’ve learned.

Now I’d love to hear from you! What skills do you have, and what skills do you want to learn? Have you been able to share your skills with family, friends, colleagues or your wider comunity? Do you have any other ideas for building resilience in our communities? Any other thoughts? Please share in the comments below!

The Australian Bushfire Crisis and How You Can Help

I’m sure this wasn’t how most of us imagined the new year would begin. There’s been a lot of talk of the climate crisis over the last 12 months, and of a climate emergency about to unfold, but I don’t think many of us expected it to arrive so soon and with so much intensity. Australia is on fire.

This is what the climate emergency looks like. And it’s not pretty.

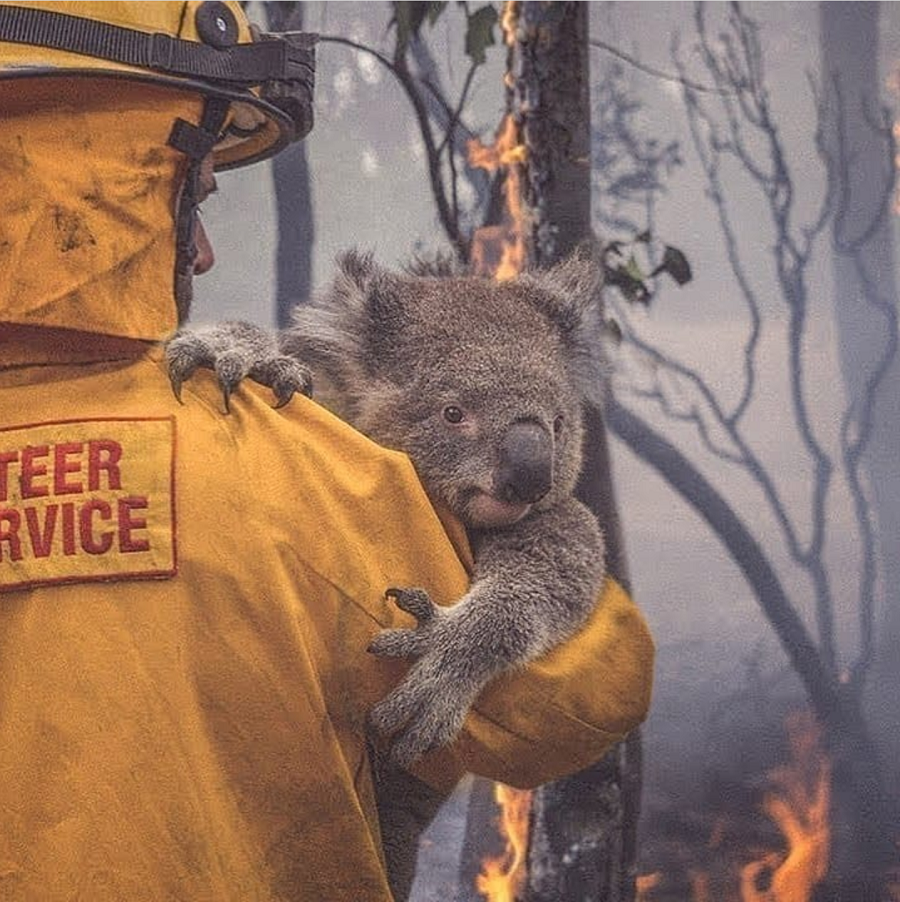
10.3 million hectares have reportedly already burned (that’s an area bigger than Scotland), an estimated 1 billion animals killed, 25 people have been killed (including three volunteer firefighters, all with young families) and thousands of homes have been destroyed.

The fires may not have reached the cities, but the smoke has. Sydney and Canberra have been suffering for months. For context: air quality index readings over 200 are considered hazardous to health. Canberra’s air quality was reported to hit 7,700. That’s worse than Beijing and Delhi – notoriously polluted cities.

Remember the Amazon fires of 2019? These fires have burned 46% more land than those. And this is the start of a fire season that may continue for another 3 months.

You’re probably thinking that the government should step in and do something about it. You’d expect them to, right? However our Prime Minister has been lacking in any leadership in these issues.

And in the absence of any empathy, support or leadership from government, it has fallen to us to do something about it. Australia might seem far away, but the planet is our collective home. We might not be powerful, but there are many of us who care, who are angry, and who want to do something positive – turn our anger into action.

I put this together to help you choose how.

Let’s turn our heartache and pain and frustration into action.

Donating to the firefighters

The majority of firefighters in Australia are volunteers. The New South Wales Rural Fire Service (NSW RFS), which covers 95% of NSW, is the largest volunteer fire service in the world, with more than 70,000 volunteers.

These volunteers are unpaid and they are exhausted. (In most cases they also don’t get paid time off to fight fires and have to use annual leave.)

New South Wales: donate to the NSW Rural Fire Service website (with details for credit card donations, direct deposits and international bank transfers)

The Australian comedian Celeste Barber set up a Facebook fundraising page for the NSW Rural Fire Service and Brigades Donation Fund, and has currently raised $48 million in donations (yes, you read that right: forty-eight million dollars). Facebook fundraisers make it easy for those overseas to donate and this one has been super successful, which is great! Just bear in mind that this fundraiser only covers NSW and there are other fire services (Australia has six states and two territories) that also need support.

South Australia: donate to the South Australia (SA) CFA via cfsfoundation.org.au/donate (donations are made by bank or credit card).

Victoria: The Country Fire Authority has options to donate to either specific CFA brigade of your choice, or to the CFA general public fund via their website: payments can be made by bank transfer, or cheques and money orders can be sent by post.

A Facebook fundraiser has also been set up for the CFA Brigades Donation Fund.

The Volunteer Fire Brigades Victoria (VFBV) also has a Volunteer Welfare Fund which makes small grants on a needs basis to CFA volunteers and their families – designed to alleviate stresses that can affect an individual’s ability to continue as a volunteer. These donations can be made by credit card via the GiveNow platform (unlike the CFA donations, these are not tax deductible).

Donating to affected communities

South Australia: The State Emergency Relief Fund directs funds directly to those affected by bushfires in South Australia. It’s possible to donate by electronic funds transfer, credit card or cheque via the SA Bushfire Appeal.

Donations to the Kangaroo Island community can be made directly (by bank transfer only, international donations accepted) to the Kangaroo Island Mayoral Relief and Recovery Bushfire Fund.

Victoria: if you heard the stories of 4,000 people in Mallacoota being evacuated to the beach and rescued by the navy, that was East Gippsland. It’s possible to donate to the Gippsland Emergency Relief Fund by bank deposit (via any branch of NAB) or via credit card (Paypal) via gerf.com.au/donate.

The Victorian government has partnered with Bendigo Bank and the Salvation Army to establish the Victorian Bushfire Appeal, with 100% of donated funds going directly to communities in need. It is possible to donate from overseas. Due to a glitch in the system it does not allow overseas addresses, so please use the Foundation address –  PO Box 480 BENDIGO VICTORIA 3555 – to override the system and allow your donation to be made. Website: vic.gov.au/bushfireappeal

First Nations Communities: if you would like to donate to fire-affected First Nations communities (including those in Gippsland and the south coast of NSW) , this Fire Relief Fund GoFundMe page has been set up by a Yorta Yorta man. The fundraiser offers culturally sensitive, specific direct support to those affected.

Firesticks Alliance: are delivering an Indigenous led Cultural Fire program to support affected communities and countries to heal after the devastating fire crisis. Currently fundraising via Chuffed (a for-purpose crowdfunding platform.

The Foundation for Rural & Regional Renewal (FRRR) make grants to local not-for-profit groups for community-led projects that address the most pressing needs that emerge 12-18 months after a disaster event. Donations can be made to their Disaster Resilience and Recovery Fund (you can find the donation page here).

Donating to humanitarian charities

Australian Red Cross: supporting people in evacuation centres and recovery hubs across Australia. Donations: fundraise.redcross.org.au/drr (donations by credit card)

Salvation Army: providing meals to evacuees and frontline responders, and other support. Donations within Australia: salvationarmy.org.au (donations by bank transfer, credit card or Paypal). Donations from overseas: donate.everydayhero.com

Save the Children: are raising funds to help support children affected by the bushfires crisis. If in Australia, it is possible to donate via their website savethechildren.org.au If outside Australia, you can donate via their Facebook Fundraiser.

St Vincent de Paul Society (Vinnies): providing bushfire relief efforts across all states. Donations here: donate.vinnies.org.au

Donating to wildlife organisations

Adelaide Koala Rescue (SA): helping koalas affected by the fires in South Australia. Donations can be made via their website: akr.org.au

Kangaroo Island Wildlife Park (SA): raising funds to help koalas and other wildlife via a GoFundMe page.

Koala Hospital Port Macquarie (NSW): rescuing and rehabilitating koalas injured and made homeless by the bushfires. Their website koalahospital.org.au is struggling to deal with the surge in traffic but donations can also be made via their GoFundMe page.

NSW Wildlife Information Rescue and Education Service (WIRES): provide wildlife education, rescue and care for animals in NSW. Donations can be made via their website wires.org.au or via their Facebook Fundraiser page.

The Rescue Collective (Queensland): based in Brisbane but supporting wildlife organisations throughout the east coast. Their bushfire appeal is raising funds to provide food, water and medication to wildlife in need. Donations via the website mkc.org.au.

Wildlife Victoria: a not-for-profit organisation rescuing, rehabilitating and rehoming Victorian wildlife. Donations can be made via their website wildlifevictoria.org.au, and they also have a Facebook Fundraiser page and a GoFundMe page.

WWF Australia: are running an appeal to replant trees to restore habitat for extinction-threatened koalas in NSW and southern Queensland. Donations can be made via their website: donate.wwf.org.au

Donating things that aren’t money

Money is really the best thing you can donate, if you’re able. It means organisations can spend the money on exactly what they need in that moment. If you don’t want to give cash, donations of fuel cards or supermarket vouchers are most useful.

A lot of organisations have been overwhelmed with donations and are now respectfully declining offers due to the issues with storage and logistics with distribution. If you’ve been told second-hand about a request by an organisation for items, please check that the request is still current.

If you’re overseas, please also take into account the length of delivery time between sending your items and them arriving – they may no longer be required by then, so check with the organisation before sending.

If you’re not able to donate money, here are some ways to donate.

Donating accommodation: if you have extra space in NSW, you can offer it for free (to people who’ve been impacted by the fires, or to relief workers) via Airbnb’s Open Homes Disaster Relief (click the link and scroll half way down the page).

Other options include registering with findabed.info , which is supporting people across the east coast; or signing up with helpinghomes.com.au (as well as for humans, “room” can also be for pets and livestock).

Giving blood: the Red Cross’s blood donation service Lifeblood says they will need more donations in the coming weeks. You can find out if you’re eligible and find out how and where to give blood via donateblood.com.au.

Giving ‘stuff’: GIVIT – Goods for Good Causes is coordinating donations of items – you can either browse the list of items required, or submit what you have via the form on their website givit.org.au/give-items

Knitting and sewing pouches for orphaned joeys (baby kangaroos) and other marsupials: Young wombats, kangaroos, wallabies, bandicoots, gliders and possums all need pouches. Different animals need different sizes. WIRES has written an excellent guide if you’re keen to contribute in this way.

The Animal Rescue Collective Craft Guild has an even more comprehensive guide for stitchers, knitters and crocheters with all kinds of patterns for pouches, wraps and other needs. You can find them on Facebook – the pinned post has their current most needed items.

Writing a Letter

If you’ve been meaning to write to your local politician urging action on climate change, now is that time. If you’re in Australia, great, but even if you are overseas, the climate emergency is a worldwide issue.

In Australia I’m told that the most effective way to communicate is by email rather than post.

First, you need to find your local MP and their contact details – just ask the internet. (In Australia you will have both a State and Federal MP and I would suggest writing to both.)

Next, you’ll need to know what you’re going to say.

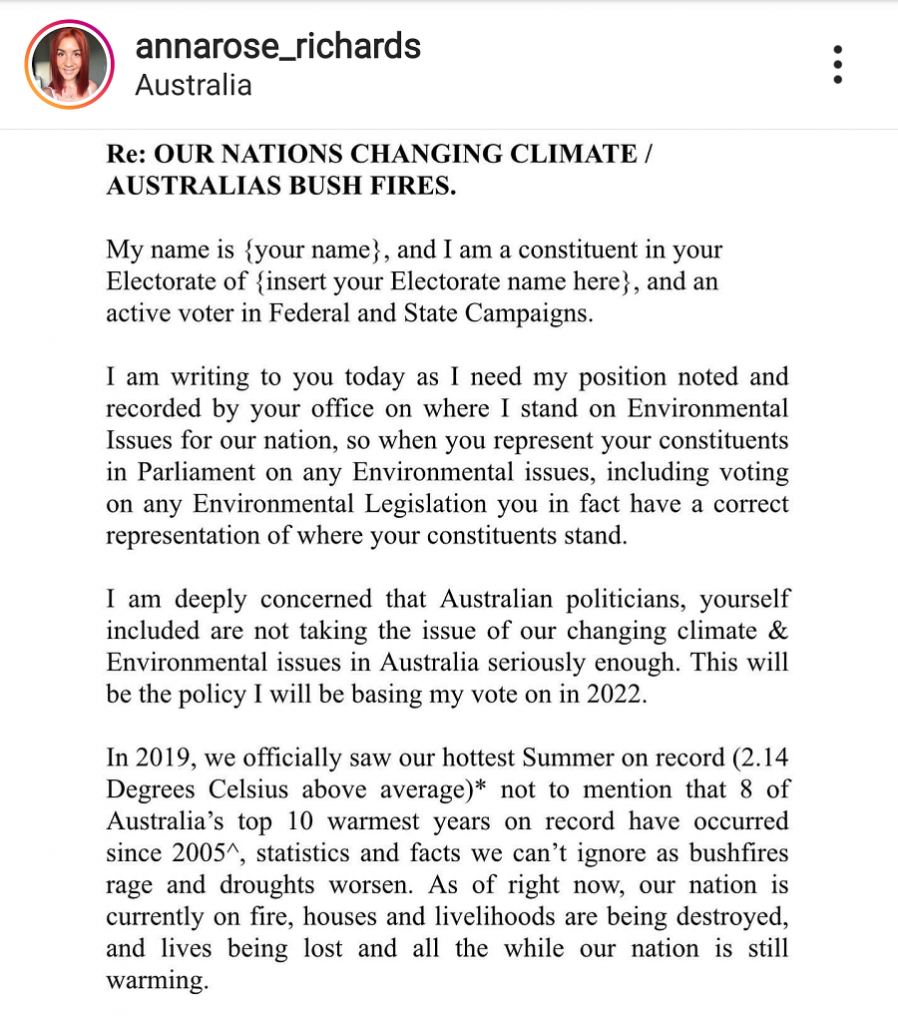
I came across a letter by Anna Richards (via Instagram) which she sent to her local MP and I think it is a good template (it’s downloadable) if you’d like to write but are at a loss for what to say.

Joining a Protest

Protests are happening across Australia on Friday afternoon (January 10th). You might not be a protester. I’m not a protester, either. The September climate strike of 2019 was my second march ever… and my first was in 2001 (for student tuition fees).

I’m not a protester, but I’ll be there. Because it’s important. And I’m furious that it’s come to this. And I want our government to know. I want to be counted.

Hopefully you’ll be there too.

Sydney: 5.30pm Town Hall

Melbourne: 6pm State Library

Brisbane: 5pm King George Square

Canberra: 530pm Garema Place

Adelaide: 5pm Parliament

Perth: 5.30pm Forrest Place

Newcastle: 5.30pm City Hall

Geelong: Little Mallop Street Mall

Woolongong: 6pm Arts Precinct

If there’s one good* thing (* well, sorta) that has come out of the bushfire crisis, it’s the way that people have banded together, supported one another, donated and volunteered and taken action. Whilst I’d love you to share this, what I’d love you to do even more is to do something on this list. Take action, in whatever way you can. No matter how small. We’re in this together.

Now I’d love to hear from you! If there’s any good fundraising drives, interesting ways to donate or volunteer or anything else you think we need to know about, please share. And if you take an action, let us know what you did. As always, please share any other thoughts in the comments!

Community Dishes (to Borrow and Bring Back)

I love it when a plan comes together. This one has taken rather longer than I intended, but finally, it is ready to go. Which means, I can tell you all about it. Introducing the Community Dishes, a set of reusable crockery, cutlery and glassware to borrow and bring back, free of charge.

Why? Because…

It means less waste. Less plastic wrap, less plastic utensils, less single-use disposables, less stuff in the garbage and less litter.

It means less stuff. Less people nipping off to the Swedish furniture store to purchase a huge set of glassware / plates for a one-off event that then languish in the sideboard for years until they are horribly out of fashion and can’t be given away.

It means growing community. Helping people connect with their neighbours, share what they have and consider re-use before purchasing new.

I thought I’d tell you a little bit about the project, and how it works.

The Community Dishes Project – Who, What and Why

Have you ever been to an event where the cutlery was plastic, the plates were disposable and the coffee cups were non-recyclable takeaway cups? Me too. Yes, it is frustrating. Yes, I wish they used reusables too.

The Community Dishes project aims to make this easier for event organizers and hosts to choose the reusable option.

There are plenty of reasons why people choose disposables. Sure, laziness might be true in some cases and lack of knowledge around the plastics issue might be true in others, but I believe most people want to do the right thing. Sometimes, the limiting factors are time and money.

Solutions need to be convenient.

Borrowing large numbers of items is tricky. Most people don’t own party-sized amounts of crockery and cutlery, and borrowing a handful here and a handful there is a logistical (and time-consuming) nightmare.

Hiring is an option but small organizations and community groups can be priced out of this.

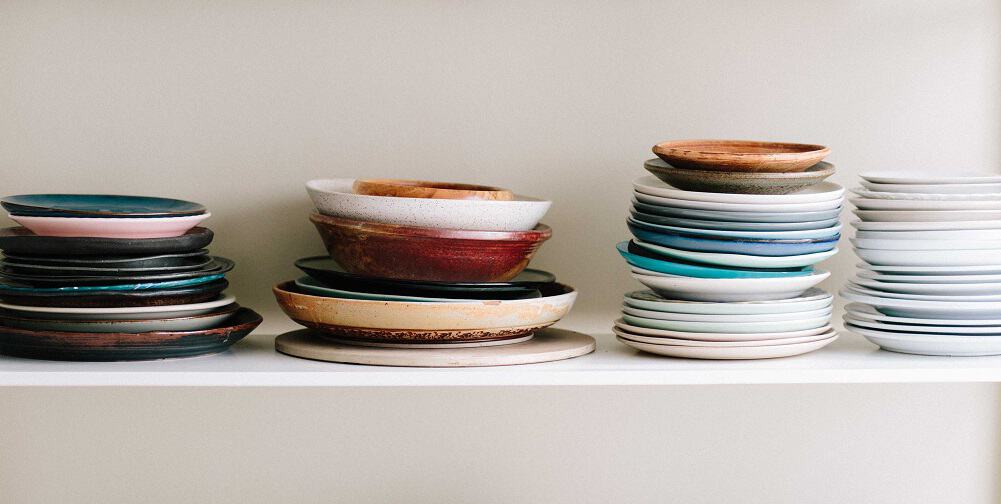
I wanted to find a solution, and the Community Dishes project is exactly that. A kit of crockery, cutlery and glassware that can be borrowed for free.

Disposables are viewed as cheap and convenient, so for a solution to be workable it needs to be cheap and convenient too. The Community Dishes kit is free to borrow. Yes, it does need to be washed up and returned clean, but the goal is to make everything else (the borrowing, using and returning) as convenient as possible.

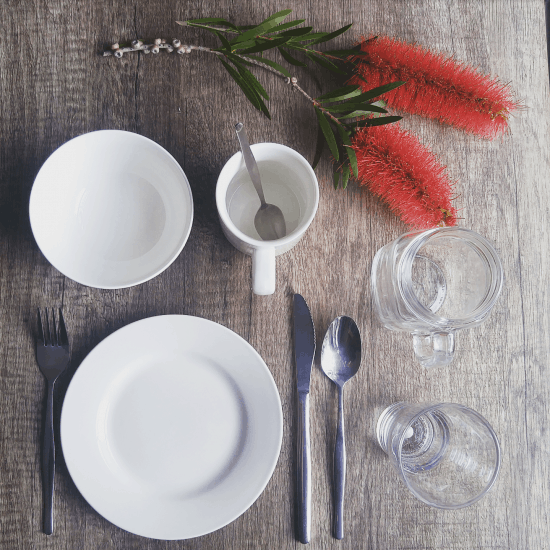
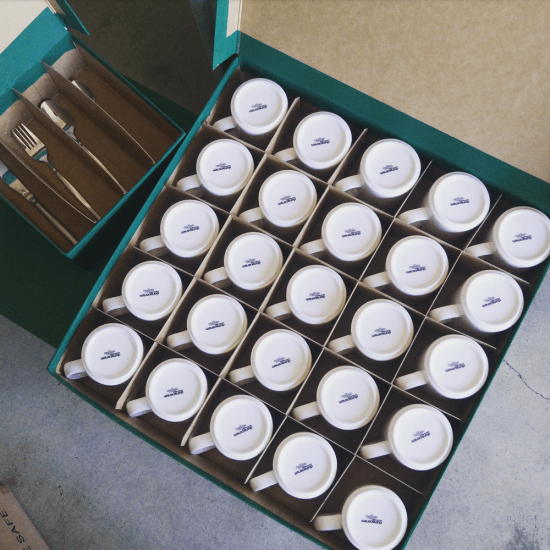
There’s 50 each of cutlery, side plates, bowls, mugs, water glasses and large drinking jars. (There are no wine glasses as wine and liquor stores often provide free glass borrowing services.) The kit is packed into boxes similar to those used by hire companies for ease of transport and storage.

The crockery, cutlery and glassware is catering standard, white, and matching. Catering quality is slightly more expensive upfront, but less prone to chip, crack or break – and doesn’t change style or colour with the seasons as high street homewares brands do.

Whilst it might have been lower waste to fossick through charity shops, experience has shown me that caterers and coffee vans prefer to use standard vessels whose volume they know, and finding matching sets would be a struggle. Also, I wanted it to be as easy as possible for breakages to be replaced with matching stuff.

The funds to establish the kit were provided thanks to a Keep Australia Beautiful (WA), Community Litter Grant.

Community Dishes – How Will It Work?

In theory, anyone can borrow the Community Dishes kit. In practice, because it relies on trust and goodwill to ensure the items are returned (and clean), it needs to stay local and with a community focus. To begin, the word is being spread via the local Buy Nothing Groups, and also the various Perth Transition Town Network groups.

The administration of the kit is run by volunteers (me).

The plan is to record all the borrowing, and count the number of items reused and disposables avoided. In this way, we can measure the impact.

The plan is also to learn from the wins and successes and mistakes of this project, and use this knowledge to create a simple project template, so other people might be able to replicate the idea in their own communities.

It’s hard to talk too much about how it will play out as it’s early days, but by Christmas day 490 items will have been used and reused. That’s potentially 490 pieces of single-use and disposable packaging refused. By this time next year, the numbers should be well into their thousands.

I’ve put together a simple website (which I published yesterday) with some more info about how the kit works and what the project hopes to achieve. You can find out more at communitydishes.org.

There’s still some fine tuning to do, in particular with signage, record keeping, and logistics. The important thing though, is that the dishes are out there, being borrowed and reducing single-use disposables and litter.

I’m excited about the potential, and look forward to sharing more as the project finds its feet. I’d love to see other projects like this one spring up, and hope that the lessons I learn will help others.

Less waste, less stuff, and growing community.

Now I’d love to hear from you! Is there anything else you’d like to know about the project? Do you have your own experience with similar projects? Would you use something like this, if it was available? Anything else that you’d like to add? Please share your thoughts in the comments below!
How Getting to Know Your Neighbours Helps With Zero Waste Living

It’s easy to reduce the idea of zero waste living to thinking about the products we buy (or don’t buy) and the choices we make as individuals. But zero waste (and living with less waste) is a movement, and movements need people. We can only do so much when we act on our own.

Sure, zero waste living can mean shopping at bulk stores and making our own skincare products. That’s part of the story, but it is not the whole story. Ultimately zero waste about consuming less and buying less, and that means rethinking the way we use resources: reusing, making do, borrowing and repairing.

We think of bulk stores and libraries and Farmer’s Markets as great resources for living with less waste, and they are, but there’s a much less talked about asset almost all of us have access to: our local community.

It’s mentioned far less but is equally (and possibly more) valuable for zero waste living.

One of the most valuable assets for my zero waste journey has been my neighbours. I thought I’d share some of the ways we’ve helped each other reduce our waste, and hopefully give you some ideas for how you might be able to get involved with your own community.

What My Neighbourhood Looks Like

Just as a bit of background, let me tell you a little about where I live. I moved into my current suburb in 2016 from the other side of Perth – so I haven’t lived here for very long. My neighbours from four doors down built the property where I live, and I met them through that process back in 2014. I didn’t know anyone else when I moved in.

There’s 7 properties on my block, some rented and some owned, and residents have come and gone in the two years I’ve lived here. Our suburb is close to the city but not densely populated – there’s about 2,500 residents, with 28,000 in the local government area.

In short, I live in a city but it isn’t an urban metropolis: it has quite a suburban feel.

How I Met My Neighbours

There are probably three ways I met my neighbours. The first (and perhaps most obvious one) is seeing them at their front doors, in the garden, in the street etc, and saying hello.

The second is by neighbours introducing other neighbours they knew and I didn’t. This is both in passing and at various events in the town. Slowly the network spreads.

The third way (oh, how 21st century) is via the internet. One of the best tools has been our local Buy Nothing group, which operates using the Facebook groups function (more on that in a sec).

How My Neighbours Help With Zero Waste Living

Sharing Ideas

Sharing ideas has ranged from the big to the minuscule, and all are important. On the far end of the scale, my neighbour and I hatched a plan to turn the disused patch of land next to my block into a community fruit tree project.

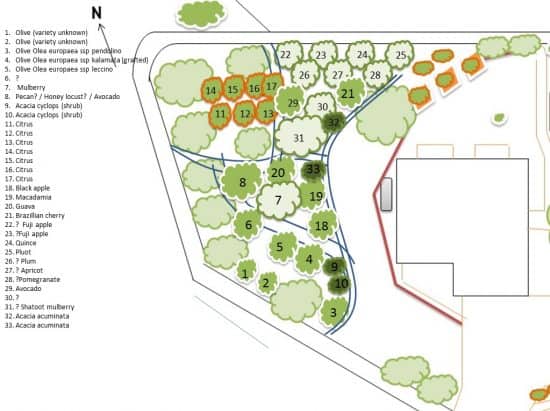
I’d had the idea, and he’d the same idea, and once we got together and realised we both had the shared vision we started to make it happen. (You can read more about how we started our community food tree project here.)

We’ve planted around 24 fruit trees, and they should keep our neighbourhood in plastic-free locally grown produce once they’re a little bit bigger :)

From that, we decided we needed a little help with the tree pruning this spring, and invited the neighbours along so they could benefit from the knowledge.

Lathlain is now sporting the best pruned fruit trees in Perth, not just here but also in all the gardens of the people who came along!

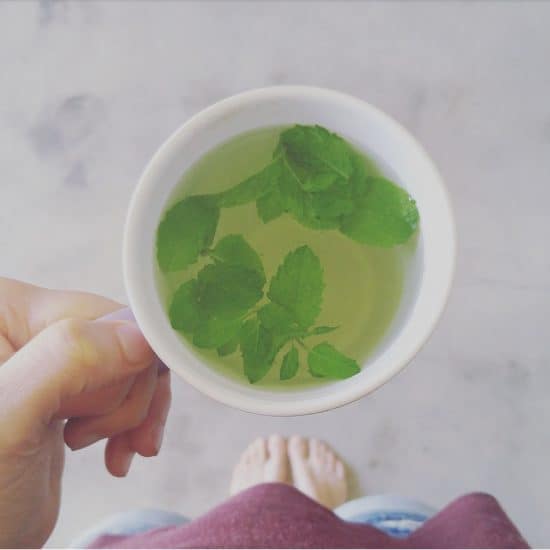
On the other end of the scale, I showed my next-door neighbour how to make mint tea with fresh mint leaves. (It’s super simple – you literally steep fresh mint leaves in hot water. Taste sensation.) Now she does that rather than buy teabags.

She made the most delicious nettle soup I have ever eaten from stinging nettles from her garden. (Not something I’d ever have tried before, but definitely something I’ll try now.)

We’ve also had some good discussions about the in’s and out’s of establishing a functioning worm farm, what actually goes in the recycling bin and some of my neighbours are currently organising a street get-together.

Sometimes it just takes a conversation to spark a new idea or go one step further to changing a habit.

Sharing Resources

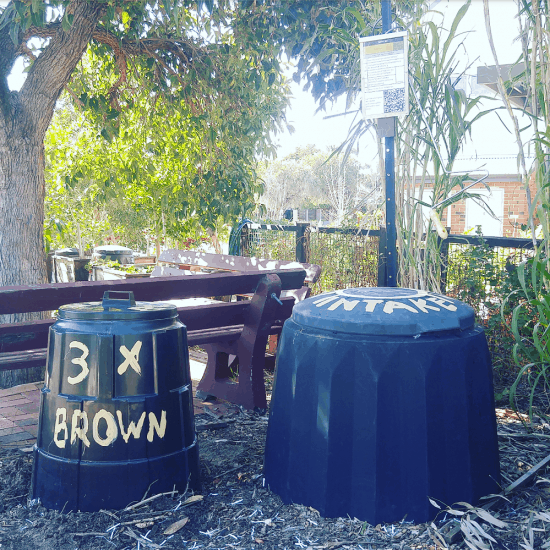
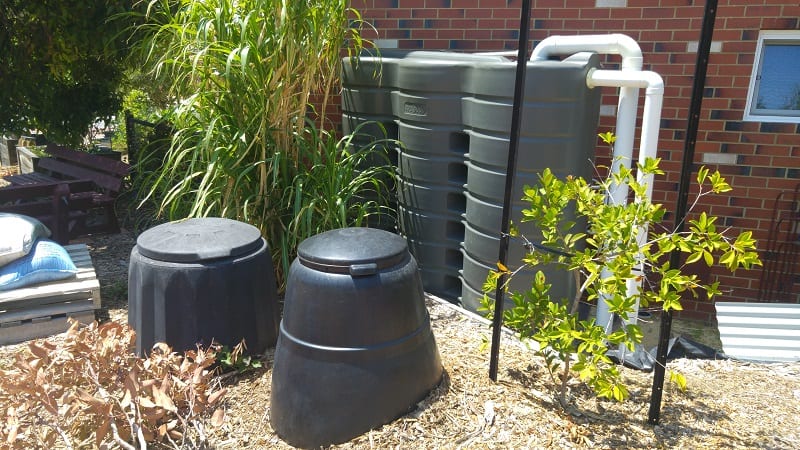
A spin-off from the food tree project has been our community composting bank. We share our compost bins with the neighbours, which means lots of food scraps diverted from landfill, and lots of compost we’d otherwise need to purchase. Most of our neighbours have found us through sharewaste.com.

Sharing the Work

The thing about projects led by a single person, is that when that person gets tired, sick, overwhelmed or otherwise occupied, the project tends to fall over.

One of the best things about our Food Tree Project is that there’s multiple people invested, so if one person is too busy, others can step up to keep it going. I’ve taken a step back this year as I’ve had too many other things going on. My neighbour, however, is taking a year off from work and has extra time to keep things going. Consequently the fruit trees look better than ever.

Sharing Stuff

With my closest neighbours, who I know by name, it’s easy enough to knock on the door and ask to borrow something. And I do, regularly. Garden tools, kitchen gadgets, ingredients when I realise I’m out of something mid-way through a recipe and the shops are shut.

Most recently I borrowed a coffee grinder after mine bust, and lent a book to the same neighbour who’d been contemplating buying one and seen (via social media) that I’d already bought it.

I also passed on the magazine to a different neighbour. Things are for sharing!

But when you don’t actually know someone, it’s a little bit harder to borrow something – and possibly a little bit weird to just bang on the door.

Thankfully, the internet can help us out.

There are plenty of online groups and platforms that allow neighbours to connect with each other, firstly on line, and then perhaps in person. The two groups that I use are my local Buy Nothing Group, and my local Swap Share group.

The Buy Nothing Project is a network of hyper-local community groups where people can give, borrow and accept items ,but no money changes hands. People are only allowed to join one group: the one where they live. Consequently the members are all neighbours.

The Buy Nothing group has been a great way to find second-hand items. I tend to give more than I take because I generally don’t need much stuff, but I have scored a few useful items. My two best finds: a pair of almost new trainers in my size, and a computer monitor to use with my (tiny screen) laptop.

Another great win via the Buy Nothing Group was borrowing a screwdriver to enable me to change the damaged/worn seal on my coffee machine. The guy I borrowed the screwdriver from was also kind enough to help me take it apart and gave it a good clean with an air pressure thing.

I purchased a new seal, and the machine is as good as new. The screwdriver was duly returned.

There’s plenty of other donating and lending/borrowing of things via the group. It means resources are much better used (things languishing in cupboards are being wasted) and it means people not buying new stuff.

If you’re not a member of your local buy Nothing group I’d suggest joining, and if you don’t have one, I’d recommend beginning your own!

The Swap Share group meets once a month, and is for people to donate and swap excess garden produce. There’s also been a great deal of swapping recipes and other goods: pickles, preserves, DIY cleaning products and more.

I had no idea pickled radishes were so delicious until I picked some up from a Swap Share get-together!

Without my neighbourhood network there’s no doubt I’d have purchased a lot more things and wasted far more time looking for solutions. Worst of all, I’d have missed the opportunity to get to know and help out the great people who live in my suburb.

Local solutions are almost always the lowest waste solutions. If we’re passionate about reducing our waste, getting to know our neighbours and exploring our neighbourhoods is definitely something to embrace.

Now I’d love to hear from you! Have you embraced any neighbourhood community groups or hyper-local networks? What have been your experiences? How have you met your neighbours and the people in your suburb – or do you not know them? Anything else to add? Please share your thoughts in the comments below!
Community Composting (+ Tips For Better Compost)

One of my favourite things about living with less waste is that there is never a single solution. There are always lots of solutions. Different options work better for different people and different situations, but there will always be a way.

In Australia, 40% of our landfill bins consist of food waste. Trimmed off bits, peels, skins, seeds, cores, outer leaves, shells, things we left in the fridge a little too long, bad bits, leftovers.

We toss this stuff in the general waste bin, and off it heads to landfill. Which, contrary to what many people believe, isn’t a giant compost heap. It’s a tomb of waste, sealed by layers of rocks (or sometimes layers of plastic) in between the layers of rubbish, and slowly releasing methane into the environment.

At the same time as we throw our food scraps in the bin, we head to the garden centre to buy plastic bags of compost to help our plants grow better.

We’ve got it all wrong!

So what can we do with our food scraps instead?

Before I moved to Australia, I lived in Bristol (in the UK), and I was fortunate enough to have my organic waste collected by the council every week and taken to an industrial composter. This isn’t an option where I live now (although some councils are currently trialing it).

Even if it was, I wouldn’t use that service now. I would rather keep my food waste (it is a valuable resource!) and turn it into something I can use – or donate it to someone else who can use it instead.

I’ve talked about some different ways of dealing with food waste before: DIY worm farms, done-for-you worm farms and bokashi bins. If you’re just starting out on the living-with-less-waste journey, setting up systems at home can take a bit of time.

As always, there’s a solution. Community composting!

For anyone wanting an easy beginner’s solution, or for anyone without the time or space to set up their own systems, community composting banks are perfect.

What Is A Community Composting Bank?

A community composting bank is simply a location where members of the community can go to deposit their food scraps.

(They are not necessarily called “banks”. I was thinking about this word, and whether it was better to use the word “hub”, “centre” or “facility”. A phrase popped into my head that I’ve heard many times before: “growing your own food is like printing your own money”. If compost is what helps us to grow food, then I think bank is the best word after all.)

The best composting banks are those with capacity to handle the scraps they receive; those with unrestricted access; and those that are managed/overseen by someone to check they are working properly, not contaminated or full of pests.

By “best”, I really mean “easiest to use”. That’s not to say others don’t work well too. Given the choice, I’d prefer to turn out to a facility that is open/accessible, has space to take my scraps, and isn’t infected with cockroaches.

I’d still come back if I turned up to find the place was locked, or the bins were full, but not everyone will. To reach the maximum number of people, things need to be as easy as possible.

The other important consideration is location. A 24 hour access composting hub on the other side of town is less practical than the restricted access compost bins just down the road.

As with most community initiatives, the more local, the more useful and likely to be used.

How We Set Up Our Community Composting Bank

I run a community composting hub together with my friend and neighbour. Originally, both of us listed our home compost bins on the awesome website sharewaste.com, a free-to-use service connecting people with food scraps with people with compost bins.

Around the same time, we started a Food Tree project on the land next to my house, planting 34 food trees for our community. We realised that these trees are going to need a fair bit of compost.

We had space for compost bins and we knew plenty of people in our community would be eager to donate their food scraps to our bins.

We started with two bins, and have now increased to five (all donated or sourced second-hand).

As people contact us via Sharewaste, we ask them to bring their food scraps here, and started making compost.

Managing A Community Composting Hub

As with everything, the more people who get involved with something, the more likely it is that things will go awry. With about 20 families currently emptying their food scraps into our bins, we started noticing more and more that things weren’t quite as they should be.

I should add that this is not the fault of the people donating their scraps. As the managers, it is our responsibility to make sure it is all working.

If people haven’t had compost bins before, there is no reason why they would know what is good and what is not.

There were a few problems that we had in particular.

Fresh food scraps going in whichever bin.

This meant all five bins would have fresh food scraps mixed into varying degrees of compost – frustrating when we wanted to dig out the ready compost and there’s a bunch of veggies in there too.

We realised that whilst it might be totally obvious to us which bin was the one for new food scraps, it certainly wasn’t clear to everyone!

Too many veggies scraps (too much nitrogen).

Compost bins need a balance of nitrogen and carbon. Nitrogen-rich scraps are anything green and fresh; carbon scraps are anything brown or dead. Veggie scraps are high in nitrogen. If the only thing being added is fresh green nitrogen-rich scraps, the bin will get stinky and attract flies and other pests pretty quickly.

For all of the green scraps added, some browns (carbon) need to be added too.

Food scraps not being mixed in.

A big mound of fresh veggies sitting on top of the compost pile will not break down nearly as well as those food scraps stirred in, because that is where the microbes are – inside, not on top! Not to mention that food on top will attract pests.

Too much carbon.

Less of an issue as most people are donating food scraps (nitrogen), but we did find one compost bin completely filled with shredded paper – and nothing else. Without anything else, that would have sat there probably for years, breaking down ever so slowly. In the same way as there can’t be too much green, there definitely can’t be too much brown.

Setting Up a Composting System That Works

My neighbour and I talked about all the issues, and how to reduce them in future. Community things need to be easy, and we felt a big list of rules would be overwhelming and put people off – which is the last thing we want!

We worked through the issues one by one, and have implemented a system.

Firstly, we decided that it was too difficult to expect people to figure out which bin was the one to add their scraps to simply by looking.

We decided instead to implement a linear system, where the scraps always go into one designated bin, and then we will move into other bins along the line manually.

(This means we can also check there’s nothing strange being added.)

We also decided that to make it easy for people to add carbon to their food scraps, we’d set up a bin solely with carbon so they could simply scoop some in afterwards.

Then, we added some signage and labels.

We wrote up the basics on a sign, weatherproofed it and secured it to a post.

We wrote a document with more tips and tricks (the stuff that we’d like people to know) and added a QR code to the sign, so if they have a question, they can check.

We’ve also secured the aerator/composting fork to the signpost (and explained in the sign what it is for) so that it is easy for people to mix their food scraps into the existing compost.

We painted labels on the two bins that people need to use. When in doubt, always label.

In short, we’ve tried to predict in advance what could go wrong, and then solve it before it happens. So far, it seems to be working well.

Looking for a Community Composting Hub?

If you’re feeling inspired to hook into an existing hub or maybe start your own, my first suggestion would be see who else is in your area via sharewaste.com. My second suggestion would be to contact your nearest community garden.

If both of these fail, consider whether you could set up a mini hub at your place. Even if you only have capacity to take a couple of household’s food scraps, it all helps!

Now I’d love to hear from you! How do you currently deal with your food scraps? Do you like your current system or would you prefer something different? Have you any experiences with community composting hubs – both good and not-so good? Anything other questions? Please share your thoughts in the comments below!
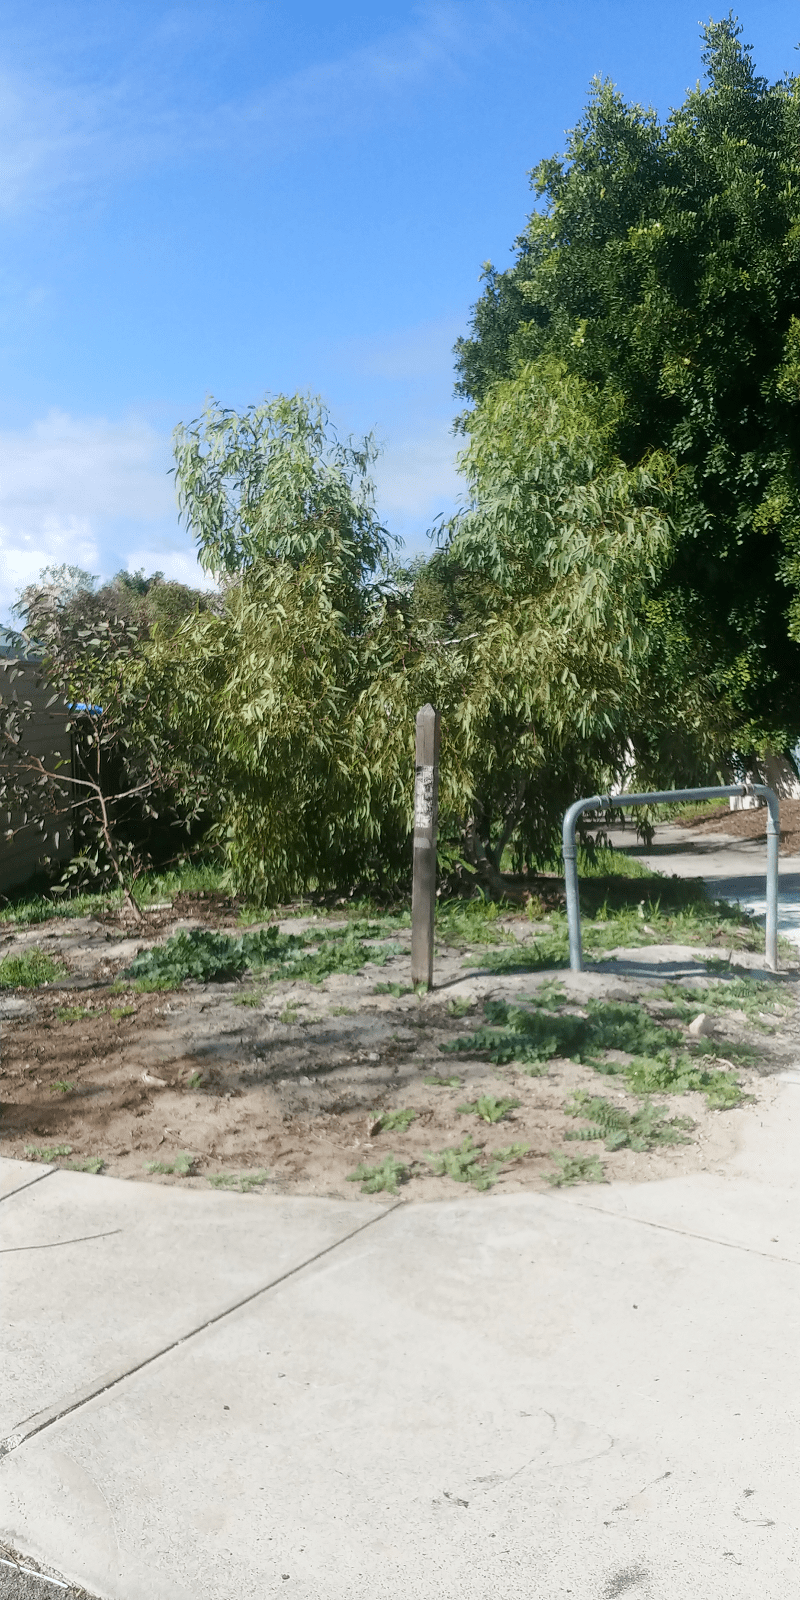
How We Started an Urban Food Tree Project

Ever since we first moved to our suburb 18 months ago, I had my eye on the rather sad looking patch of land at the corner of the street.  Despite the weeds and bare nothingness (excluding the few surviving melaleuca trees around the edge), all I could see was the epic potential.

Wouldn’t it be great if we could turn this barren, weedy patch of land into a thriving community orchard?

My neighbours, and one in particular, shared my enthusiasm and vision. Almost as soon as we moved in, the conversation began. At the start of this year, the actual work began, to turn the conversation into reality.

The Initial Idea: Creating a Food Tree Project

Rather than planting an orchard where the goal is to maximise production, we wanted a balance. Growing fruit trees alongside natives and groundcovers creates a more aesthetically pleasing, biodiverse and dynamic ecosystem that will be more interesting to walk through, creates more learning opportunities and is more resilient to pests.

The name “Food Tree Project” rather than an “Urban Orchard” reflects that our goals were broader than simply planting fruit-bearing trees and producing food. The permaculture concept of “Food Forest” didn’t really fit either, because although I followed permaculture principles in the designing, there are too many human inputs to be a true permaculture food forest.

Food Tree Project felt best.

Our Vision:

Community: to provide a space for collaboration, learning, volunteering and sharing; to encourage residents to learn more about growing food and have access to locally grown fruit; and create an attractive and sheltered resting spot close to the train station.

Environment: to increase tree coverage, canopy cover and greenery; to improve the streetscape close to the train station; and to increase biodiversity and provide habitat for birds.

The Plan:

The plan was to plant around 40 fruit trees of varying species on the unused space on the corner of two streets in our suburb, with wide pathways between the trees to allow and encourage public access for community members to see the trees and learn about them.

We also planned to plant native species on the border to encourage biodiversity, and interplant nitrogen-fixing acacias and other ground covers to create a green space between the trees.

The property next to the block has a bore, we are extending the reticulation so that the site will have water access in summer (this is essential in Perth – no water means no trees).

Goals of the Food Tree Project:

There are a number of goals we hope to achieve with this project.

  • Create a welcoming and shady community space by planting trees, and to provide access for residents to locally grown fruit.
  • Provide learning opportunities for interested residents on growing their own food and looking after fruit trees, and to provide volunteering opportunities.
  • To provide a demonstration project and framework that other volunteer groups can take to their local council to plant more trees on underutilised spaces in their urban environment.

The First Step: Getting Council Approval

The scariest step is probably asking for permission. Have you ever heard the expression “ask for forgiveness, not permission?” If we asked the council for permission and they said no, it would be hard to go ahead and do it anyway.

Should we ask for permission, or just do it and hope they didn’t mind?

However, we want this project to be an example of what can be done, a demonstration project to encourage others to approach their councils to plant on underutilized spaces. That meant going through the official channels. So we put together our vision and arranged to meet a council member on the site to discuss our plans.

We met on the site and talked through our ideas. We asked what restrictions they had (for example, banned or unwanted species) and were willing to listen to any needs that they had. I’d recommend meeting in person rather than chatting via email. It’s so much easier to connect with someone when you are face-to-face.

We agreed to put together a plan of the site detailing the trees to formalise the project. I took a screenshot of the Google arial view of the block, then pasted that into Powerpoint. I drew lines over the roads, paths and boundaries, and put cloud shapes over the trees, then deleted the photograph to keep the outline.

The initial outline drawn using Google Arial View and Powerpoint…

…and one of the working drafts (of which there were several!)

On one hand, we were lucky that the council were so supportive. But on the other hand, it wasn’t really luck. My co-conspirator neighbour had been working with the council on a community sump revegetation project for a couple of years prior to this, and had been able to build the relationship with the people there. He had demonstrated his ability to listen, to work together with them to resolve disputes, and show responsibility.

Although it felt like we got approval very quickly, my neighbour joked that the work actually began in 2012. In truth, it probably did.

Step 2: Formalising The Project

As well as submitting a plan for the tree planting, we also had to submit a pest control plan detailing how we would manage the site and deal with pest issues. For this, I referred to the council website and Department of Agriculture website to find out current recommended procedures.

Initially, the plan was to lease the site from the council. This would have required insurance, which we were planning to get through the local community garden (of which both my neighbour and I are members). There would have been a small annual cost for this.

In the end, the plans changed and there is no lease: the land remains under responsibility of the council. Whilst this may seem less secure, there are advantages. The site actually had a road running through it prior to 1990 before the road layouts were changed, and there was road base right through the land. The council came with a bobcat to dig out the road base, which might not have happened had there been a lease in place.

Funding Opportunities

Needing funds to purchase the trees and the reticulation, we approached the local football team (the West Coast Eagles). They have just moved to our suburb and are constructing a new training ground and stadium, and in the process angered the community greatly by chopping down 100 mature native trees.

As they emphasize their commitment to community in their media releases we thought it might be a project they would like to support.

Initially they seemed keen to sponsor our trees, but over time it became apparent that they had ulterior motives. The council had stipulated that all trees removed whilst building the training grounds must be replaced and maintained, and the Eagles were hoping that they could fund our trees as a cost cutting measure. (Funding a few $30 fruit trees would have saved them the cost of sourcing, planting and maintaining mature native trees.)

Without going into details, the Eagles were not transparent with us about this. When we realised (several months later) that, rather than supporting our project because they saw the value in investing in community, they were trying to get out of their responsibilities (clearly a small citrus tree is no replacement for a large gum tree), we decided not to pursue this further.

All the messing around meant time was ticking. It was now the start of winter and we urgently needed to plant the trees if they were to survive the summer.

Preparing the Site, Tree Purchasing and Getting the Community On Board

In short, we didn’t receive funding, and decided we would have to buy the trees, reticulation and soil amendments ourselves. We’d decided that the upcoming weekend would be perfect tree planting weather, and we began sourcing trees. My neighbour purchased seven citrus trees and I purchased another six trees, and we began setting the foundations for the project.

We planted the first few trees ourselves to get an idea of time and how best to do it all.

Next we put it out on the Buy Nothing Group that we were beginning a Food Tree Project in the area, and would anyone like to come and help us weed and plant?

And something wonderful happened.

People said yes, but many also asked us if they could donate a tree, or provide funding to purchase a tree. We hadn’t asked for money, but it was so humbling (and immensely appreciated) that our neighbours wanted to contribute financially.

One tree is not expensive (the costs varied from $20 to $70 depending on the species) but 40 trees adds up. Not to mention the reticulation costs, which my neighbour funded himself. When there’s a whole community on board, that changes things considerably. After our initial tree purchases, the others were paid for by the community.

It also showed us that people valued what we were doing, and wanted to be a part of it. (Thanks to Jayne, Deb, Miranda, Kath, Marisa, Lindi, Kate, Lana and Toni for your contributions.)

Just as importantly, people came to our busy bees. We weeded the rest of the site, dug holes, spread clay and compost and planted trees. Then we installed reticulation, and mulched the entire site. What could have taken us months was finished in a three weekends.

We now have most of the trees planted.

(If you’d like to know more about the project, I recorded a 20 minute video with some details of how we got the project going, and also a walk through of the site and the different trees that we have planted. You’ll find it on my Patreon page.)

What’s Next for the Urban Food Tree Project

Our biggest job is to ensure that the trees survive their first year in the hot Perth summer. With the reticulation in place, this shouldn’t be a big job, but it is a job nonetheless.

One thing we are doing now is establishing a community composting bank. We’ve put two huge compost bins on the site and plan to add to this as we find more suitable bins on Gumtree. If we can get all of our neighbours dropping good scraps off, we will have a rich supply of compost to feed the trees with. Plus it is another way to involve our neighbours with the project.

When autumn comes round I’m keen to work on the shrub layer and groundcover. Having sunk a lot into the project this year, we didn’t have the funds or the time to do this before now, and summer is not the time to start. We are keen to plant herbs and natives, and as the canopy layer grows these plants will have more chance of success.

At the moment the site looks a little barren, but by next year it should be completely transformed.

Now I’d love to hear from you! There’s so much more I could share about the project, so do you have any questions? Is there anything you’d like me to explain in more detail? Do you have any tips or suggestions for me, or experience with projects of your own? Please tell me your thoughts in the comments below :)