• Link to X
  • Link to Youtube
  • Link to Instagram
  • Link to Mail
  • Link to Facebook
Join the community and receive a free EBOOK
Treading My Own Path | Less waste, less stuff, sustainable living
  • ⌂
  • About
  • Work with me
  • Upcoming events
  • Books
    • The Less Waste No Fuss Kitchen
    • Less Stuff
  • Resources
    • Printables
    • Infographics
    • Quotes and facts
  • Explore
    • Minimalism
    • Plastic-free living
    • Real Food and Recipes
    • Zero Waste
  • Blog
  • Click to open the search input field Click to open the search input field Search
  • Menu Menu

The Definitive Guide to Storing Food without Plastic

96 Comments/in Plastic Free Living, Zero Waste/by Lindsay (Treading My Own Path)

Taking reusable bags to the store is a great way to reduce unnecessary plastic. Bringing reusable produce bags and selecting products without packaging is another way to reduce waste. Choosing to shop at bulk stores is a fantastic option, if we have the choice.

But what about when we get all of our food shopping home? What then? Is it possible to store food without plastic?

What about leftovers, and freezing food? How about packing lunches?

What are the plastic-free options?

Of course, plastic-free is possible. There are plenty of options to avoid using plastic containers, gladwrap/clingwrap and zip-lock bags. From choosing plastic-free containers to freezing in glass (yes, it’s possible), here’s the lowdown on how we avoid using plastic in our home when storing food.
Food Storage without Plastic – the Pantry

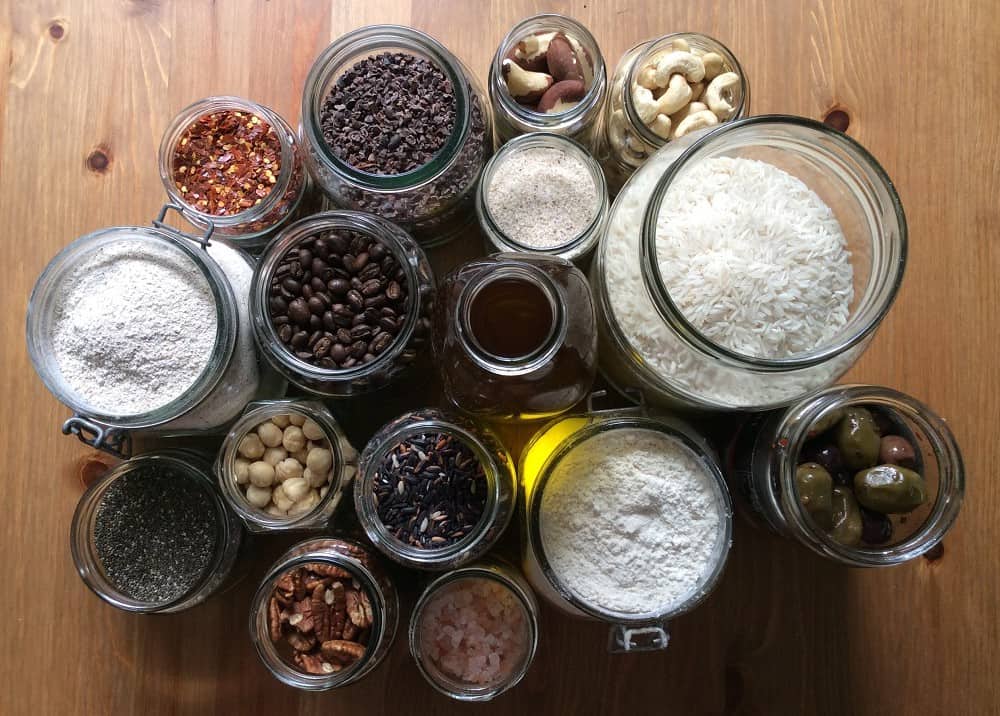
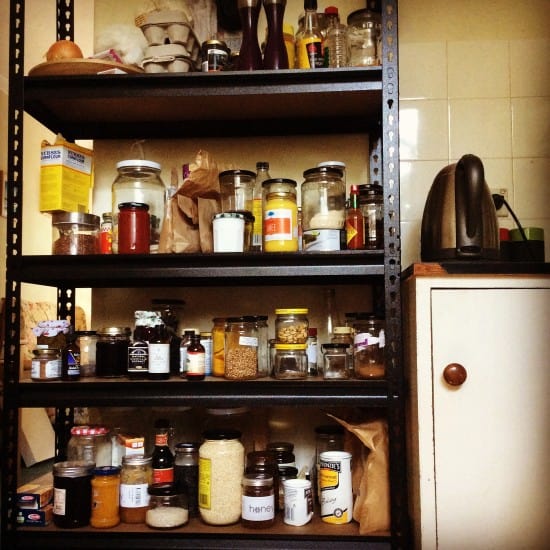
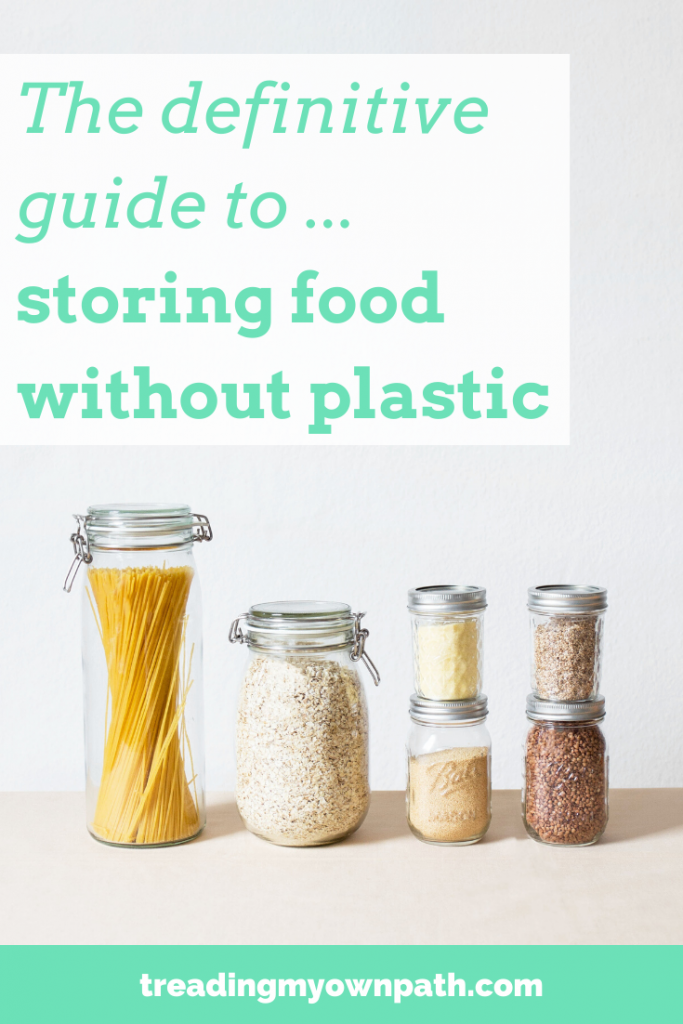
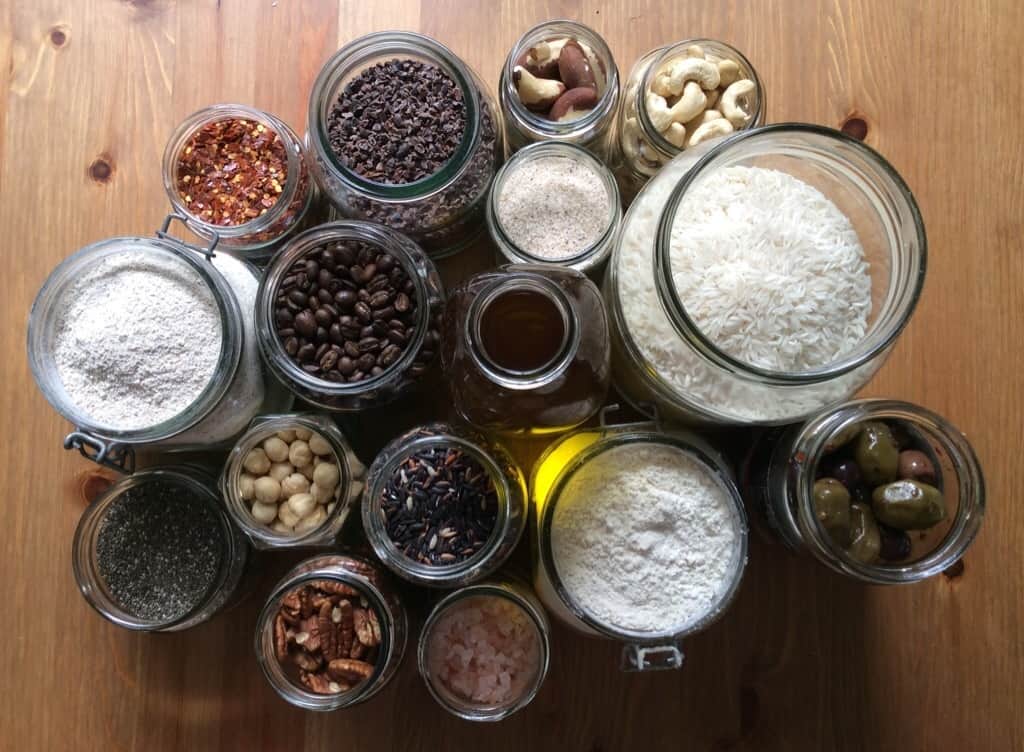
I buy all of our dry goods from bulk stores, and I store in the pantry in glass jars. Sometimes I take the jars to the bulk stores and weigh them before filling them, but more often I take reusable produce bags and decant when I get home.

Glass jars are heavy, and I find taking reusable produce bags is more practical for me.
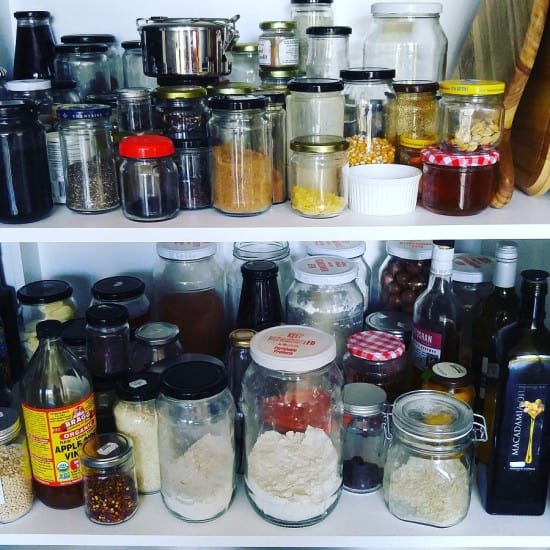
Zero Waste Plastic Free Pantry

Whilst I love the idea of a pantry full of matching glass jars, the reality is, there are plenty of glass jars in the world begging to be re-used. It makes no sense to me to buy new when I can re-use. I’ve reused old jars that I own, and friends and family have given me their spares. I sourced some big glass jars from a local cafe.

I generally find that a good soak will get the old labels off. If they are particularly stubborn, I use eucalyptus oil and give them a scrub, and that usually works. Removing the label means I can see what’s inside, and there’s no confusion as to the contents.
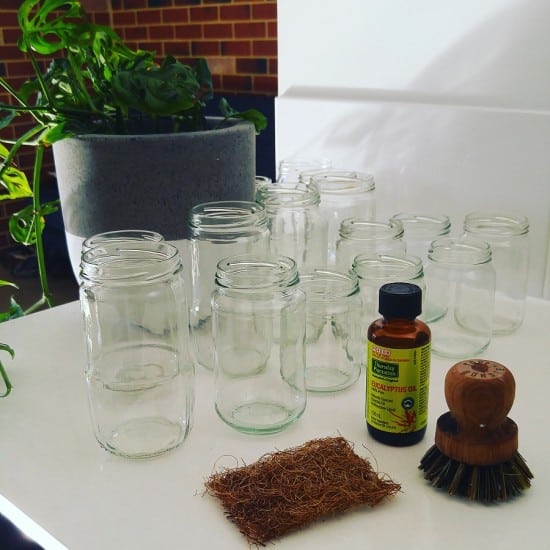
Removing Jar Labels with Eucalyptus Oil Zero Waste

I have needed to buy a few new jar lids – kitchen shops sell these, or you can find them online.

It’s not always clear how long dry goods have been stored at the bulk shops, and the last thing we want is weevils or pantry moths, or other pests. If I think something has been at the store a while, or if it’s been in my own pantry a little longer than planned, I pop the jar into the freezer for 24 hours. This kills any eggs. After 24 hours I remove the jar from the freezer and place back in the pantry.
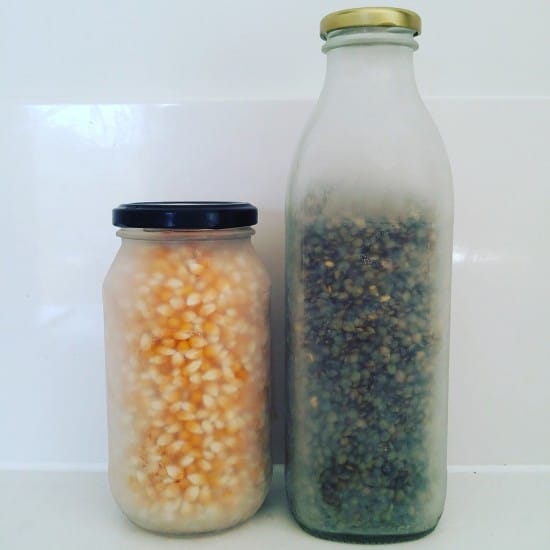
Freezing pulses and grains to prevent weevils

I have a terrible habit of not labeling my jars. I have a good memory and generally remember what I’ve bought, and if I forget I can usually figure it out by the smell. My husband has no idea what I’ve bought and has a terrible sense of smell, so whilst it might work for me, it doesn’t work for him! I’m planning to get a greaseproof pencil/chinograph so I can label the jars without needing to buy sticky labels or mark them permanently. If I was more crafty, I could paint blackboard paint on them, or even mark the lids.

Food storage without plastic – on the counter

I keep a fruit bowl on the counter which in addition to fruit, contains onions. I also keep fresh tomatoes here as I find they taste better than when stored in the fridge, and avocados whilst they ripen.

I often keep cut leaves such as beetroot leaves or silverbeet in glass jars on the counter rather than in the fridge as I find they keep better. Parsley and some other herbs also keep better this way. If the water is changed regularly, parsley will last on the counter for up to two weeks.
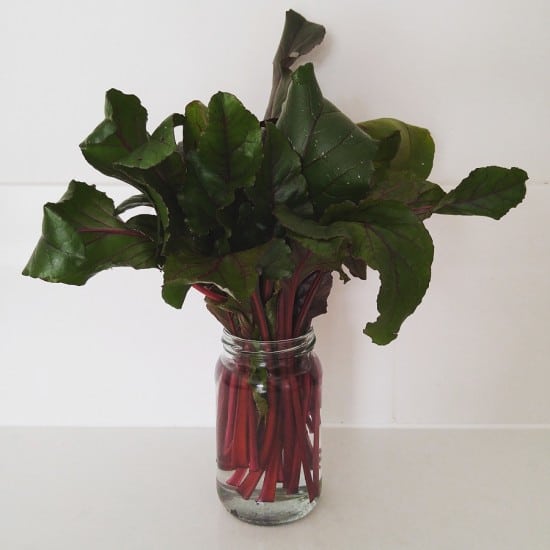
Beetroot Leaves in a Jam Jar

I store my bread in a cloth bag inside a wooden bread bin. The cloth bag helps absorb any moisture that might cause the bread to go moldy. Over time it begins to harden, and when I notice it’s becoming hard to cut I pre-cut the rest of the loaf. If there is more than I can eat in the next day or so, I pop it in the freezer.

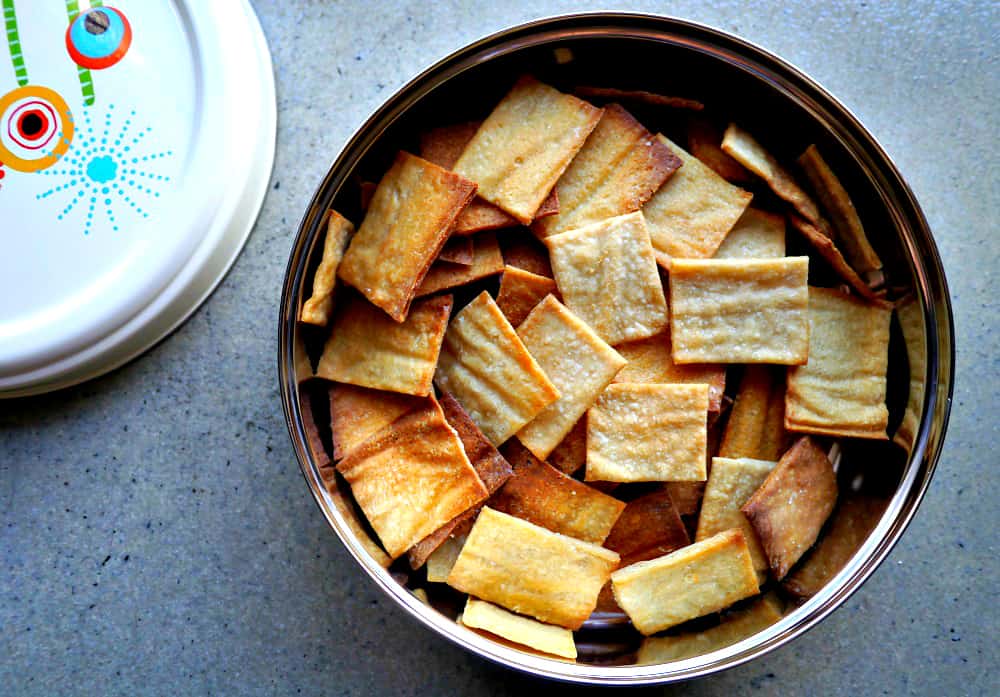
For things like crackers, baked goods and other dry food, I use tins. I have some that I purchased in my pre- zero waste days, and some that I’ve been given (they often seem to appear around Christmas time as “presentation” boxes for biscuits and confectionery). I’ve been able to choose ones that are a good size for my needs, and that I can store easily.
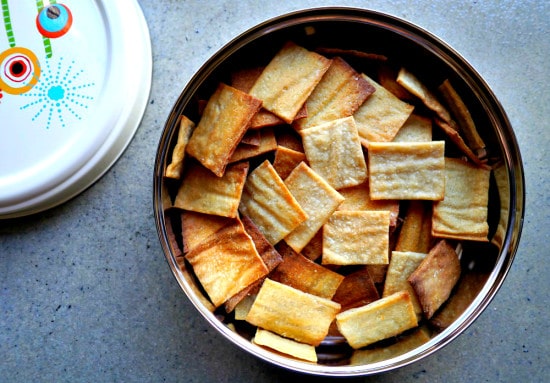
Sourdough Zero Waste Crackers FINAL

Food storage without plastic – the fridge

I store most of my fruit and vegetable items in the crisper. Some veggies, such as carrots, courgettes and cucumbers have a tendency to go floppy, so I store these in a rectangular glass Pyrex container with a lid. I also find delicate fresh herbs like coriander and basil store better in a container with a lid, as do salad leaves.
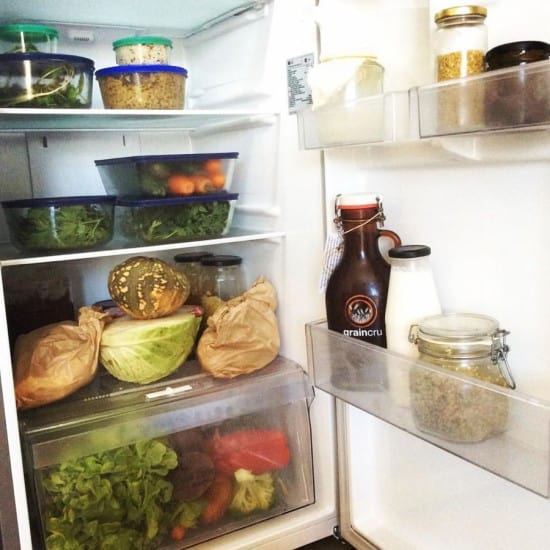
Zero Waste Plastic Free Fridge

I’ve also tried storing them in glasses or bowls of water in the fridge and this works well, but I don’t own enough glassware for this to be practical.
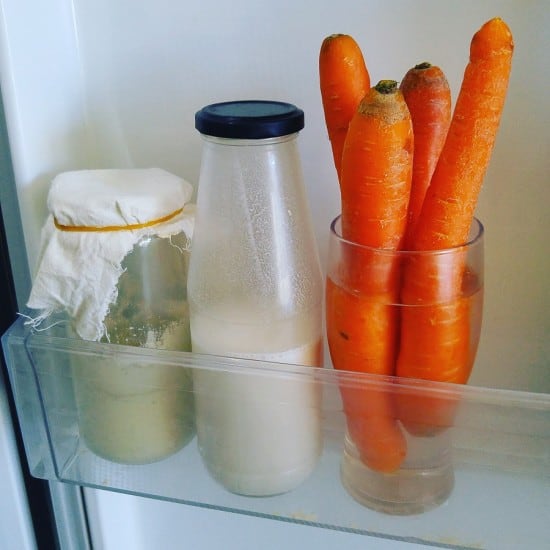
Storing Veggies in Water in the Fridge

Another alternative to using glass containers is to use a damp tea towel to wrap your veggies. This works particularly well for larger items like bunches of celery or leafy greens that don’t fit in containers. Beeswax wraps are also useful if you’re not vegan – they are cloth squares that have beeswax melted onto them to create a waterproof wrap. They are very easy to make yourself (you can find a DIY beeswax wrap tutorial here) and making your own means you can choose sizes that work for your needs.

For storing leftovers, there are a number of solutions. Personally I was never a fan of gladwrap/clingfilm.  Some is ridiculously sticky and will stick to everything except the bowl in question (this type of clingwrap usually contains phthalates – not what we want to be wrapping food in). The phthalate-free type never seems to want to stick to anything at all. I find it far simpler simply to put a plate on top of the bowl in question.

I also have some silicone covers for bowls that were a gift that have been very useful. Beeswax wraps can be used for this, too. Glass jars are a great option for decanting small amounts of leftovers (and I have plenty of glass jars to hand), and Pyrex storage or stainless steel work if you want to decant into something bigger. Sometimes I even keep the food in the saucepan, pop the lid on and pop that in the fridge.

For some items, such as half a lemon or half an avocado, I find that placing it face down on a plate is enough. If I’ve roasted veggies or baked a sweet potato, I find it keeps well in the fridge uncovered for a few days. So long as it’s not got a strong smell, it works fine.

Food storage without plastic – the freezer (yes, you can freeze food in glass)

I store most of my food in the freezer in glass jars. I’ve been doing it for 10 years. Jars are a great size for one or two portions, and they fill the space well. I’ve only ever had one breakage. Freezing in glass is perfectly safe, but there are some rules to follow.

Freezing in Glass Jars in the Freezer

Firstly, choose good quality jars, with thick glass. Repurposed jars are fine. I tend to choose ones that have previously had jam or tomato sauce in them, as I know they will withstand changes in temperature. Buying poor quality jars from reject shops will likely lead to breakages.

Wider jars work better, and avoid any that taper inwards at the top (tapering outwards is fine). When filling, never fill all the way to the top – make sure the food is sitting at the widest point of the jar. Don’t screw the lid on until the contents have completely frozen. The food will expand when frozen – the higher the water content the more it will expand – so leave room for this to happen. Once it’s frozen you can screw on the lid.

Never put hot jars in the freezer, and try to chill them before you freeze them. This is important if what you’re freezing has a high water content, like stock. I find for foods like chickpeas, which don’t have a high water content, freezing from room temperature works fine.

If you’re worried about freezing in jars, you can also use freezer-safe Pyrex, or stainless steel containers, which won’t break.
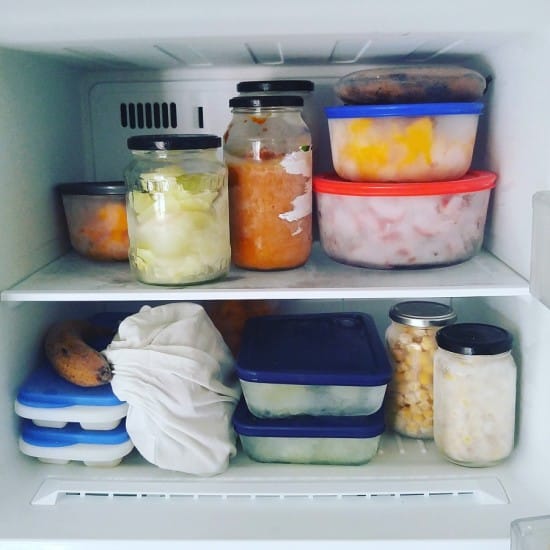
Zero Waste Freezer Glass Jar Storage

I use an ice cube tray for freezing liquids and also fresh herbs. I find that the cubes make good portion sizes. I store the cubes in jars once they are frozen. To freeze herbs I add a little oil to the ice cube tray -they seem to freeze better. I have just upgraded to a stainless steel one, and you can also find aluminium ones second-hand if you’d like to avoid plastic.
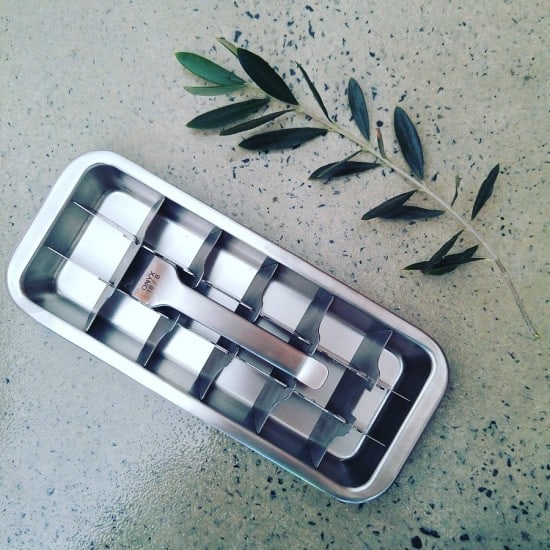
Onyx Stainless Steel Ice Cube Tray

To avoid freezing a big mass of fruit, I lay out on on a tray (I line a baking tray with a tea towel) and pop in the freezer. Oonce frozen, I put in a container. This allows me to use a handful at a time, rather than needing to defrost the whole thing.
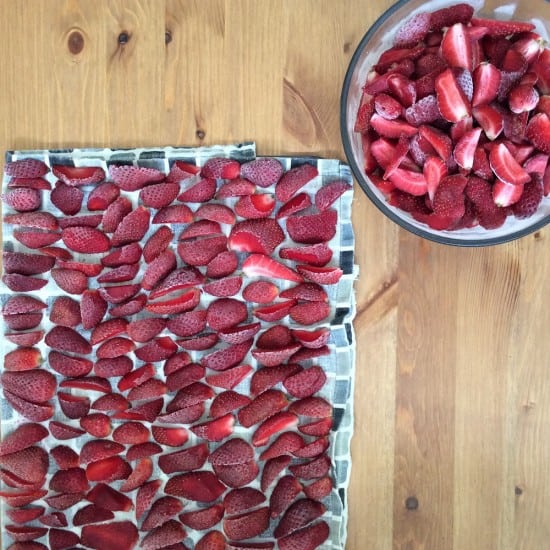
Preparing Strawberries for the Freezer

I don’t freeze everything in glass. I freeze bread wrapped in a cloth bag, and I leave bananas in their skins.

Food storage – out and about

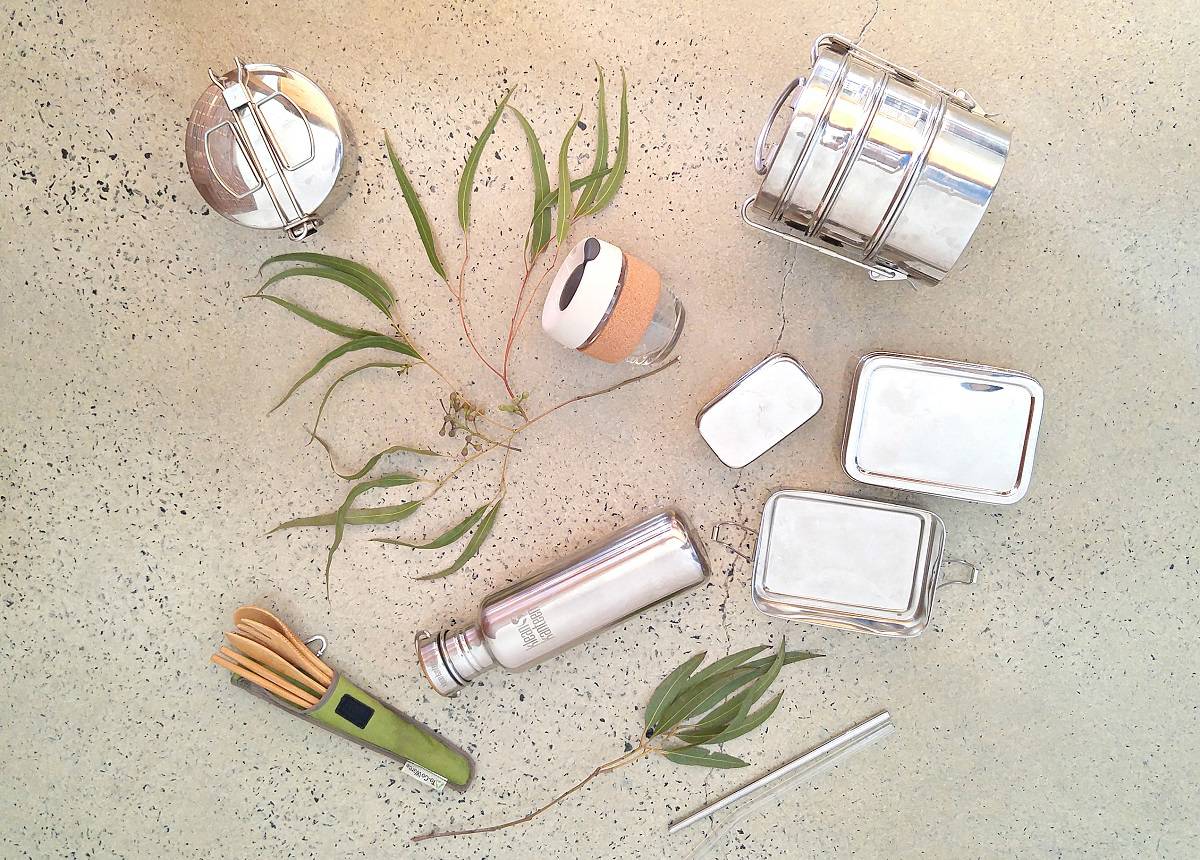
Both my husband and I have stainless steel lunchboxes, which we use for food on the go. I always take my glass KeepCup with me as I find it great as an impromptu storage container. Being glass, it’s easy to clean. I have a set of reusable, washable wraps for sandwiches, baked goods and snacks which are handy as they fold up. If we’re taking food to friends’ houses, we either use tins or we have a stainless steel tiffin.

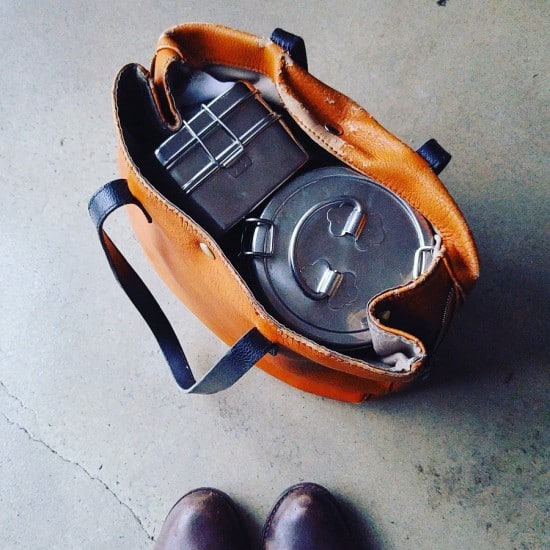
Zero Waste Lunchbox Stainless Steel Stainless Steel Tiffin and Lunchbox Zero Waste Plastic Free

Food storage – choosing containers

When I first started out with living plastic-free, I had a lot of plastic reusable containers. I didn’t want to waste them, so I continued to use them whilst I transitioned to other things. Because I was concerned with the health implications of using plastic for food storage, I used them only for dried food, before giving them away or using them for non-food items.

Zero Waste Week 2015 Reusable Containers

Whatever you decide to use, know that there’s no need to immediately rush out and buy new stuff. Glass jars are an obvious one to start with, and they are free. It’s possible to find good quality glass, tins and even Pyrex at the charity shops.

I chose to use Pyrex with the plastic lids, because I couldn’t find any without plastic, and they were affordable for me. Stainless steel containers come completely plastic-free, but they are an investment. They are expensive but should last forever, so it is important to know exactly what you want before you make the purchase. Slowly I’ve built up a small collection of stainless steel, and the pieces I have I use often and I love.

When choosing containers, think about how you’ll use them. If you’re looking for a lunchbox, think about the kinds of things you eat for lunch. What size and shape will be most useful? Planet Box make great compartmentalised lunch boxes for kids. Cloth wraps and reusable sandwich bags might be a better alternative. It’s possible to buy refillable food packs. Think about your needs and choose products that work for you.

It is possible to store food at home without using plastic, and you can make it as simple or as complicated (or as cheap or expensive) as you like. The most important thing is to make conscious choices. Look at your options, and decide what is practical and within your budget. There’s no need to buy new things straightaway. Take your time. Choose well.

Now I’d love to hear from you! Tell me, how do you store your food without using plastic? What are your favourite tips? Is there anything you tried that didn’t work? What purchases have you made that have been great investments? Any that turned out to be duds? Do you have any tips to add? Or any “not-to-do”s to share? Is there anything that you are still searching for a solution for? Any questions? Tell me your thoughts in the comments below!

[leadpages_leadbox leadbox_id=123a865e9839c5] [/leadpages_leadbox]
https://treadingmyownpath.com/wp-content/uploads/2016/08/Treading-My-Own-Path-Zero-Waste-Kitchen-Plastic-Free.jpg 579 1000 Lindsay (Treading My Own Path) https://treadingmyownpath.com/wp-content/uploads/2019/06/logo.png Lindsay (Treading My Own Path)2016-08-04 14:01:312020-05-08 19:13:12The Definitive Guide to Storing Food without Plastic

Can You Live Plastic-Free without Bulk Stores?

48 Comments/in Plastic Free July, Plastic Free Living, Zero Waste/by Lindsay (Treading My Own Path)

One of the most common challenges I hear from people who would like to embrace plastic-free or zero waste living, is that they don’t live near a bulk store. Access to bulk stores definitely makes plastic-free living infinitely easier – but that doesn’t mean that without them, it’s impossible.

In fact, there are still plenty of things that you can do to reduce your plastic footprint, wherever you live, wherever you shop and however busy you are.

Here’s a list of my top 8 (as always, feel free to add your own ideas to the comments below).

Don’t make the mistake of doing nothing because you cannot do everything.

This is so important! Just because there isn’t a bulk store near you, that doesn’t mean that you should give up before you begin.

Remember that every single piece of plastic that has ever been made is still in existence today, so every single piece of plastic you refuse is one less piece entering our environment.

We just need to start where we are, with what we have, and do what we can. Even if you can only refuse a few things, or make a couple of changes, it all counts. If we all did the best we could, think how much better the world would be!

Don’t stress about what you can’t change, look for what you can change.

Eat more fresh vegetables!

Apologies for sounding like your Nan here, but seriously – food packaging accounts for such a significant amount of the waste we produce, and one of the easiest ways to reduce this is to eat more fresh fruit and vegetables.

Look for unpackaged fruits and vegetables, or if you still need to buy in packaging, try to choose the bigger packs (there will be less plastic overall).

Potatoes and sweet potatoes are a great high-carb alternative to pasta and rice, and are easy to find plastic-free.

If you don’t know how to cook something, look on the internet for simple recipes. This is where I’m going to offer different advice from your Nan – you do not need to boil everything for 30+ minutes! Plenty of veggies can be roasted (try carrots, broccoli and cauliflower), stir-fried, broiled, baked, sautéed – or eaten raw.

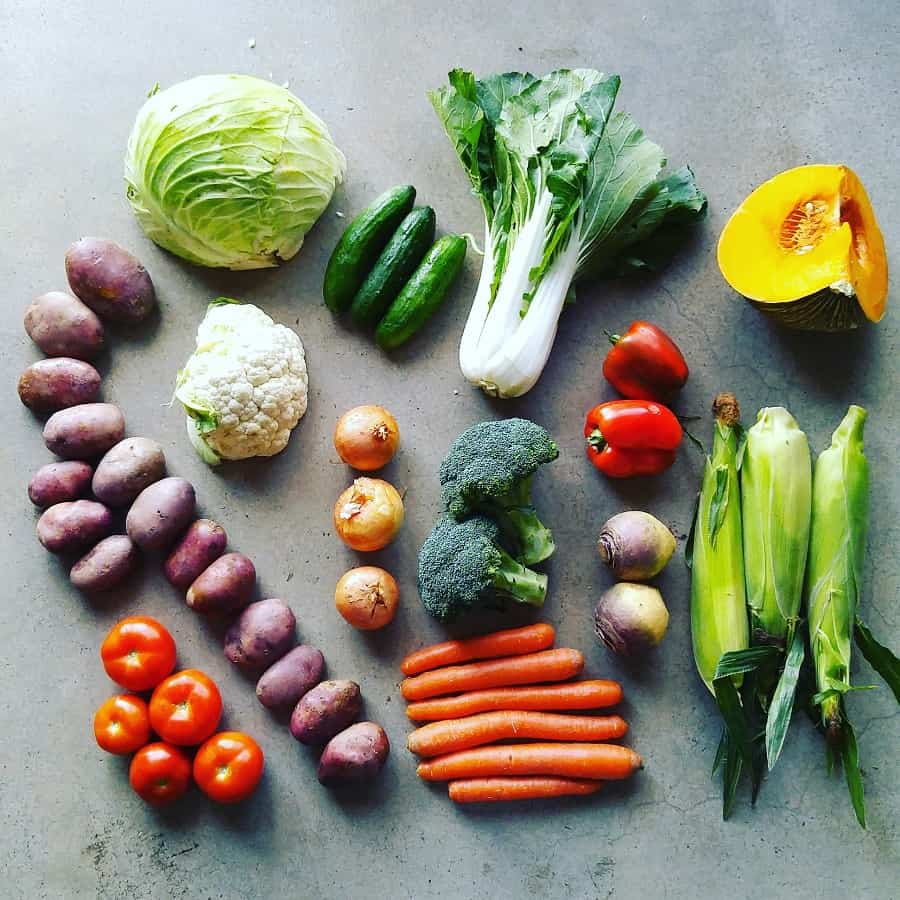
Zero Waste Vegetables Plastic Free July Treading My Own Path

My local veg box delivery comes mid-week and direct to my door (convenience shopping with a difference) and it’s an easy way for me to get produce that’s plastic-free and locally grown.

Also, many veggies can be frozen once cooked. If you live in a small household and don’t want to eat an entire pumpkin this week, chop into cubes, roast it as usual and freeze what you don’t need. Other vegetables, such as leeks and broccoli, can be blanched for 1-3 minutes, and then frozen.

This guide lists how to freeze a number of vegetables and might be a helpful starting point.

Bring your own reusable bags – not just your main shopping bags

As well as your own shopping bags, bring reusable produce bags for all your loose produce items, and a cloth bag for any bread you need.

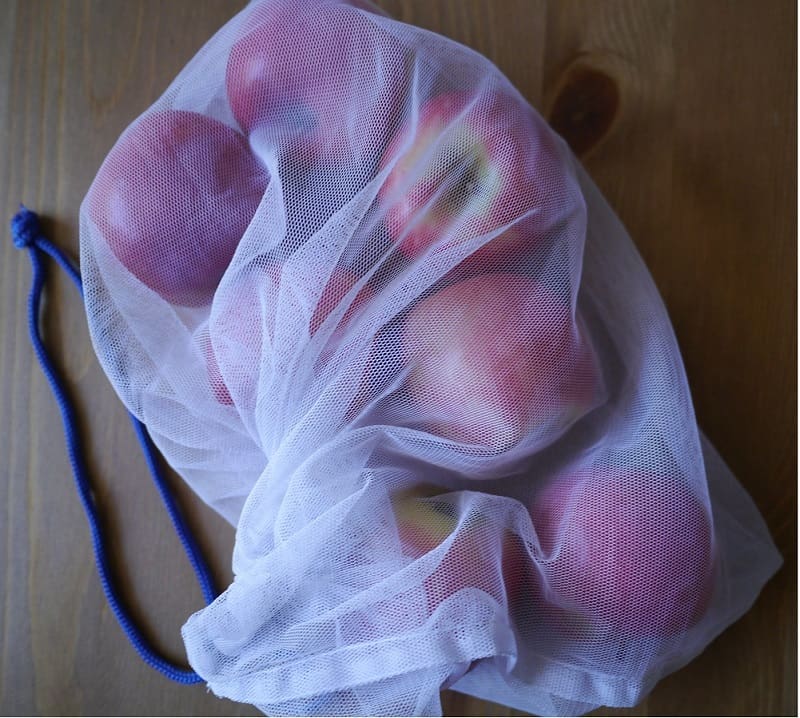
You can find produce bags available for sale online (made of cloth or mesh, some pre-labelled and others plain) – or you can make your own using your own fabric or even old net curtains!

Fruit and Veggie Produce Bags Treading My Own Path

Reusable produce bags are a great way to buy loose products at the store without needing to take those pesky plastic bags!

If you forget, and you’re buying too many items to simply pop them in your trolley loose, you can often find paper mushroom or potato bags so use these as an alternative to plastic.

Look for packaging in glass, cardboard and paper, and adapt where you can

When I first started out with plastic-free living, I continued to shop at the supermarket. Whilst I found most of the pre-prepared products were packaged in plastic, I found many wholefoods and single ingredients that were packaged in glass and cardboard. For example, in my local store I could buy pasta and couscous in cardboard packaging, as well as oats and rice, but I could not buy quinoa or bulgar wheat.

I began buying more oats over breakfast cereal; eating porridge for breakfast and using more oats in baking. In glass jars I found passata so I began to buy this rather than chopped tomatoes in Tetra-Paks (which are difficult to recycle) or tins (which are plastic-lined and contain BPA).

After all, passata is just chopped tomatoes that have been blended! (Later I discovered that simply using fresh tomatoes and quickly chopping saved packaging dilemmas altogether.)

How far you take this will depend on whether you have dietary restrictions or fussy eaters in your household, but even one change is a step in the right direction.

Remember, you can still buy bulk within the store

I’m not talking about buying huge quantities of food you probably won’t eat here, I‘m referring to choosing one product over individual portions and single serves. Even if the bigger one still comes in packaging, it will be far less than all those individual portions added together.

Rather than buying individual pots of yoghurt, buy a 1kg tub (or bigger) and split into smaller containers at home.

Rather than snack portions of raisins or crackers, buy a big pack and divide up yourself.

Rather than buying individual slices of cheese, or grated cheese, buy a big block and chop or grate at home (tip – you can freeze cheese so there’s no reason why you can’t buy a big block and freeze what you won’t use straightaway for later).

Aside from saving the plastic, you’ll save a huge amount on your grocery bill. Check the price per kilo of the bulk items versus the “convenience” items and you’ll find that convenience comes at a price – and you won’t just be saving the environment with these choices!

Supermarket or not – bring your own containers!

It’s possible to take your own containers to the counters at the supermarket or your local stores: the butcher, fishmonger, cheese shop or deli. Make sure they are clean, and explain why you’re doing it as you hand your containers over.

Confidence is everything – act like you’ve done it a million times before, and it is the most normal thing to do in the world!

If you’re unsure that they will be accepted, or feel really nervous, you can always phone the store in advance and ask if they’d be happy to take your own clean containers (be sure to tell them why).

You may find the odd place that isn’t willing to help, but most are happy to support this kind of shopping. If they have restrictions, find out what they are. (They may be happy to use containers for pre-cooked products, but not raw, for example. They may be happy to fill your own containers, but only if you drop them off by a certain time, or on a certain day.)

Reusable containers. Simply take to the shop and ask the server to put your goodies directly inside!

Reusable containers. Simply take to the shop and ask the server to put your goodies directly inside!

If a staff member is unwilling to comply, it may be that you simply need to check with the manager (they may be fearful of losing their job, and a quick conversation can sort this out).

If the store is definitely against it, you could push higher up if they are a chain or have a Head Office, or simply take your business elsewhere. If you do receive a “no”, keep it in mind and try again in a few months – something may have changed!

If places aren’t willing to comply, there may be the option of the staff wrapping your item in paper and you putting the paper-wrapped product into your sealed container yourself. It’s always worth asking if they have paper behind the counter.

Refuse single-serve and single-use items

“Refusing” is such a big part of the plastic-free living journey, and we can remove so much plastic from the environment just by making this simple choice. Refusing bottled water and carrying our own bottle and refilling from the tap; choosing to dine in rather than get takeaway or bringing our own containers; refusing straws; refusing individual sachets of sauce, butter or those tiny little portions of milk… it all makes a difference.

Carrying your own water bottle or coffee cup and a reusable straw is a great alternative if you’re often out, and a great way to start conversations. Simply asking at the cafe if you can have a splash of milk directly into your tea or a little bit of butter cut directly from the block rather than the single-serve portions is a surprisingly easy way to avoid plastic and make a point.

Go outside and pick up litter

No matter where you live, what shops are available to you or what your budget is, or how much time you have to spare, you can do this. Simply go out of your front door and onto your street with a bag, and pick up all the plastic litter you come across.

You may prefer to go to the beach or alongside a river, if you have one close by, but wherever you choose to go, I guarantee there will be some litter. Whether you opt for a 2 minute beach clean, simply commit to pick up 3 things, or decide to take a 30 minute walk and see what you come across, it all makes a difference.

Pick up any plastic items that you find, and then dispose of them responsibly. You’ll be stopping that plastic getting ingested by wildlife or making its way to the ocean, and making your local environment a more pleasant place to be. You’ll probably feel a lot more determined to avoid single-use items afterwards, too!

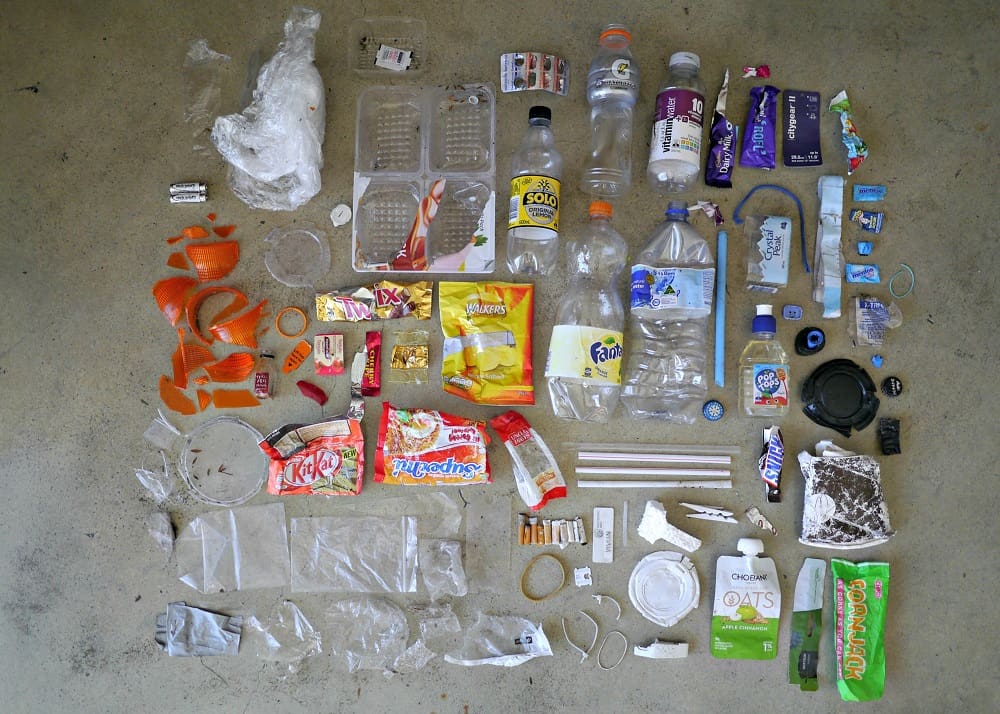
Treading My Own Path 30 Minute Litter Pick Up Litterati Take3 July 2016

I picked this up in 30 minutes simply by walking around my local streets.

Whatever you can do, you really must know that what you do makes a difference. The smallest actions can have the biggest impacts, and choosing just one thing to change is better than changing nothing at all.

The planet, the turtles and the plastic-free community; we will all thank you for it. Don’t let a lack of local bulk stores stand in your way. It really doesn’t matter how far you take this.

What matters is that you try.

Now I’d love to hear from you! Are you struggling to find bulk stores near you? What items do you struggle to find without plastic packaging? What have been your biggest dilemmas and challenges? What have been your best successes and greatest a-ha moments? What are you currently working towards changing? Any other suggestions for those who live far from bulk options? If you are lucky enough to have bulk options near you, are there still items that you struggle with? Do you have any others that you’d add to this list? Any other thoughts or comments? Please tell me what you think in the comments below!

https://treadingmyownpath.com/wp-content/uploads/2016/07/Plastic-Free-July-Treading-My-Own-Path.jpg 752 1024 Lindsay (Treading My Own Path) https://treadingmyownpath.com/wp-content/uploads/2019/06/logo.png Lindsay (Treading My Own Path)2016-07-07 12:00:242022-07-08 11:24:42Can You Live Plastic-Free without Bulk Stores?

Plastic Free {Bicarb Free} DIY Deodorant – for Sensitive Skin

20 Comments/in Chemical-Free Living, Plastic Free Living, Zero Waste/by Lindsay (Treading My Own Path)

I love my homemade deodorant. I first tried it back in 2012 when I was still a little skeptical about DIY concoctions (if I’m honest, I thought they were just for hippies). What made me convert?

The fact it actually worked.

That’s all we want from a deodorant, really. Sure, we don’t want chemicals and excess packaging – but it has to work, right?! There are plenty of natural deodorants on the market, but most are very expensive, don’t smell great and don’t actually work against body odour very effectively, either.

Plus very few have completely plastic-free packaging.

The deodorant I’ve been using since 2012 is a super simple recipe, and all the ingredients are edible (except the essential oil). There’s no heating or melting involved, just a little mixing, which suits my laziness when it comes to these things.

The ingredients are 1 tbsp bicarb, 4 tbsp cornflour (or arrowroot / tapioca flour) and 2-3 tbsp coconut oil. The coconut oil depends on the ambient temperature – you’ll need less in summer and more in winter. You want a paste. Mix in a jar and add a few drops of your favourite essential oil. To apply, get a small amount on your fingertips and rub in. (You can find the recipe here.)

This recipe has been serving me well for 4 years, but bicarb can be a skin irritant for some. It’s fine for me, but my husband reacts to it. I tried changing the ratio from 1:4 to 1:6 and even 1:8 bicarb:flour (note – the more you dilute it, the less effective it is) but the issue was the same. His skin became red, inflamed and sore and it took a few months for it to settle back down again.

Ever since then I’ve said I’ll experiment with a DIY non-bicarb deodorant. I don’t move very fast it seems!

But the good news is I have finally kept my word and made a bicarb free deodorant. Not only that, but I (and my husband) have tested it and can confirm that a) it works (hurrah!) and b) there have been no adverse skin reactions. Phew! I can also buy all the ingredients completely packaging-free.

For anyone else out there who struggles with super sensitive skin and cannot use bicarb deodorants, this recipe is for you. Give it a go.

It’s not quite as simple as just mixing some ingredients in a jar but it’s really not that much harder, promise. There’s some melting involved. Nothing complex – I like to keep things as simple as I can!

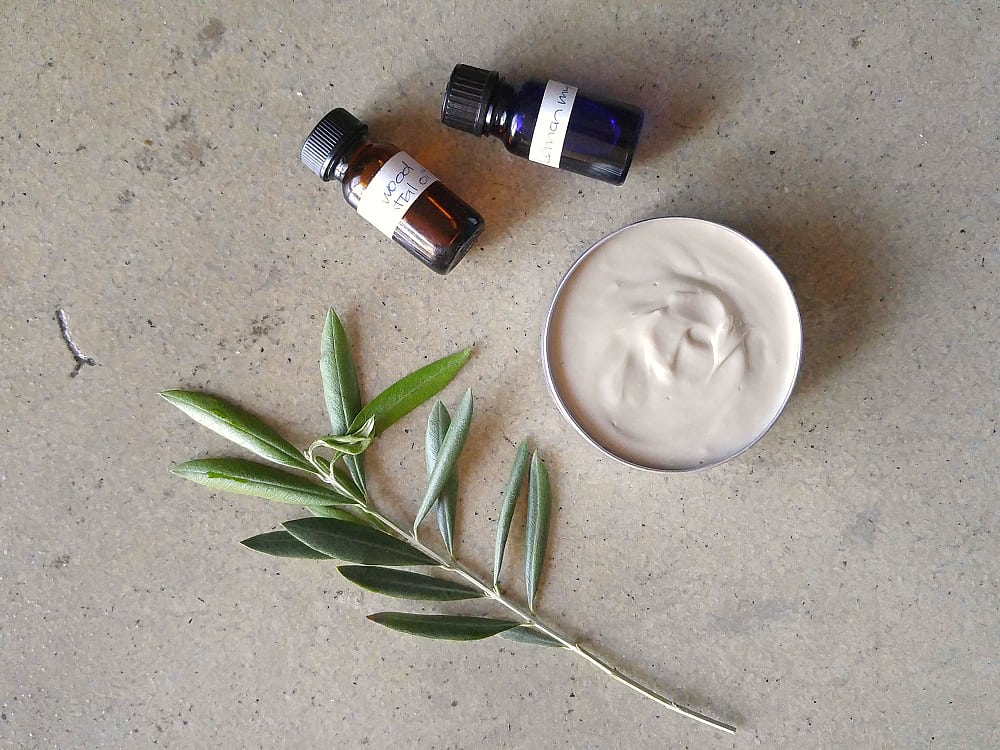
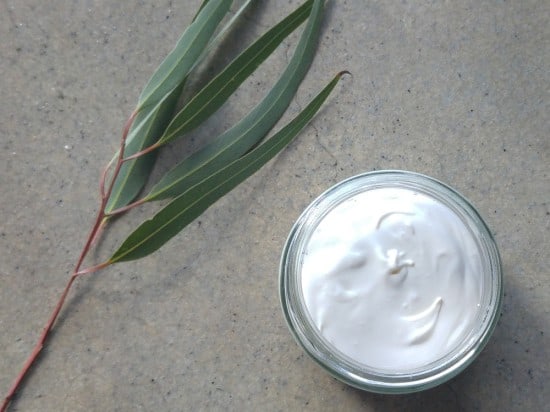
Final product: bicarb free DIY deodorant.

Bicarb free DIY deodorant.

TIP: I would also add: it’s not quite as effective as the bicarb version I use, and it works best applied to clean skin. Whilst the bicarb one can mask smells if reapplied, this one won’t!

Bicarb Free DIY Deodorant: Recipe

Ingredients:

1.5 tbsp grated beeswax
1 tbsp shea butter
4 tbsp coconut oil
4 tsp white kaolin clay
8 drops tea tree essential oil
8 drops cedarwood essential oil
10 drops lemon myrtle essential oil

A note about the ingredients:

Beeswax: beeswax is solid at room temperature (it melts at 62°C) so helps make the mix firmer. I used beeswax as it’s really local (my neighbour who lives 4 doors away produced this). The only other solid subsititue I can think of would be cacao butter so maybe next time I’ll give this a go as it would be a great alternative for vegans.

Shea butter: shea butter melts at 38°C so is more solid than coconut oil. It’s very moisturising and is thought be anti-inflammatory – which is good news for sensitive skin.

Coconut oil: this is a soft oil that melts at 25°C. It helps keep the deodorant soft so it can be rubbed into the skin. Coconut oil is also thought to have anti-bacterial properties.

Kaolin clay: kaolin clay is a white clay (bentonite clay has similar properties) that replaces bicarb and does a similar job. It absorbs liquid and neutralises bad smells. Clumping kitty litter is actually made of bentonite clay! There are other types of clay available but these are more expensive. I’ve heard that green clay is the most absorbant of them all so at some stage I’d like to try this… it’s in the queue ; )

Essential oils: I’m lucky enough to be able to buy refills (packaging free) so I have some flexibility with my choice. I chose tea tree oil as it is anti-bacterial and cedarwood as it is anti-inflammatory. Both also have strong smells and are often used in commercial natural deodorant recipes. I find both scents quite overpowering and not hugely pleasant so I used lemon myrtle (which I love!) to mask them. Lemon myrtle is an Australian bush scent with the most amazing smell! If you have limited choice, go for a single oil and choose one that you can use elsewhere. Tree tree oil is affordable, available in larger sizes (meaning less packaging overall) and great for cleaning too. (When choosing essential oils, it is important to read up on the properties, particularly if you are pregnant.)

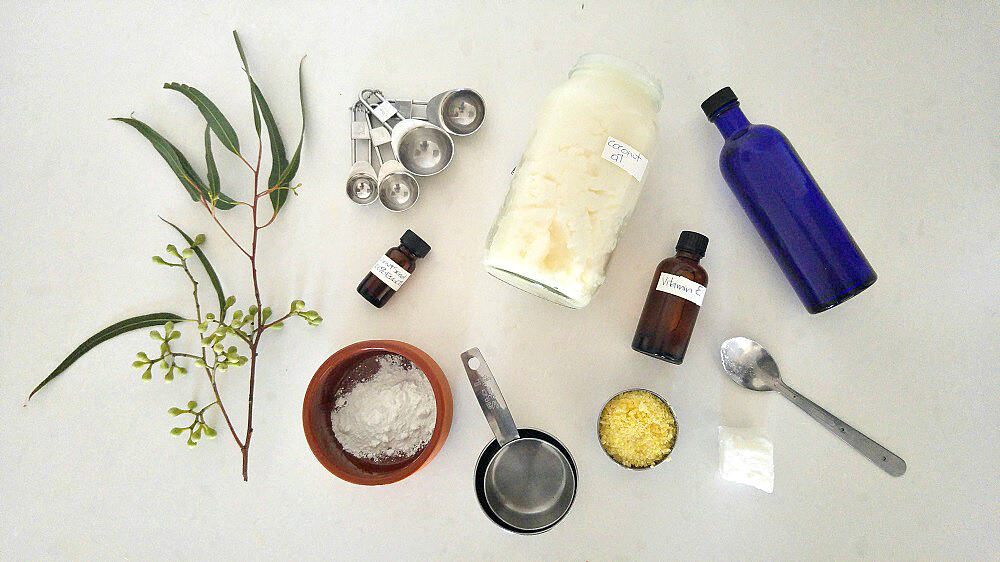
Ingredients for making bicarb-free deodorant (for sensitive skin).

Ingredients for making bicarb-free deodorant (for sensitive skin).

Method:

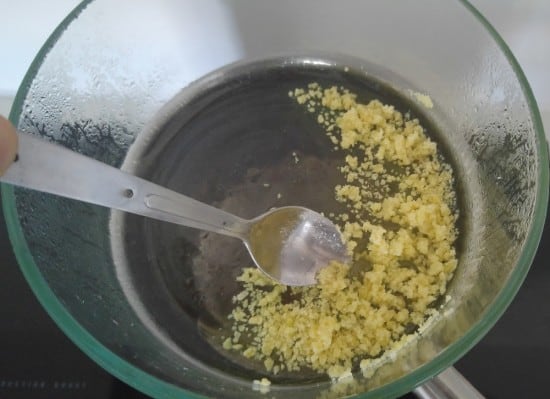
Heat some water in a pan on the stove, and place a glass bowl over the pan. You don’t want to heat the oils directly as you’ll damage them. Add the beeswax to the bowl and stir until melted (I used a metal spoon as it’s easier to clean than wood).

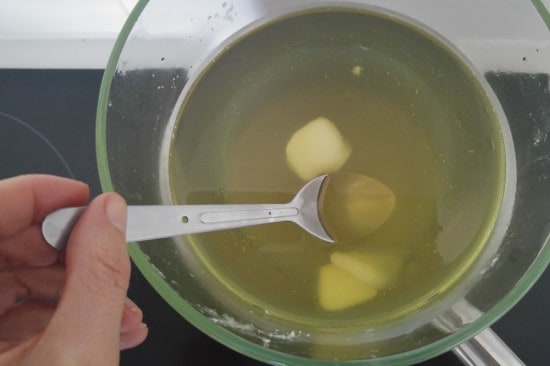
Add the coconut oil and continue to melt, stirring occasionally. Once both are melted, add the shea butter and remove the bowl from the heat.

The shea butter should melt with the heat of the other two ingredients. You can place back on the heat if it needs some help but be careful of overheating shea butter as it can turn grainy. Stir to aid the melting process and to combine.

Add the clay 1 tsp at a time and whisk to incorporate. Once all 4 tsp have been added, leave to cool, whisking occasionally. It will begin to thicken after only a few minutes (less if your room is cold). Once you notice the thickening and there is no head radiating from the mix, add your essential oils to the mix and whisk in. If you add them when it’s still hot, you will lose all their beneficial properties!

Final product: bicarb free DIY deodorant.

Final product: bicarb free DIY deodorant.

Pour into a shallow jar with a wide neck or a tin, and leave to set. It will set into a paste that feels tacky and is easy to scoop with your fingers. (If you live in a very cold climate and find it too hard, you may like to add more coconut oil or less beeswax next time to get the right consistency, but it will soften with the warmth of your skin.)

Store with the lid on in a dark place. To apply, take a small amount with your fingertips and rub into your skin. will keep for ages.

Now tell me…are you going to make it?! If yes, I want to hear what you think! If not, why not? Have you ever tried making DIY deodorant before? What ingredients did you use and what success did you have (or not have)? What about other DIY skincare products – are you a fan or do you tend to put them in the “too-hard” basket? What are your simplest solutions to bathroom essentials? I love hearing your thoughts so please leave me a comment below!

[leadpages_leadbox leadbox_id=1429a0746639c5] [/leadpages_leadbox]

https://treadingmyownpath.com/wp-content/uploads/2016/06/Treading-My-Own-Path-Bicarb-Free-Deodorant-Plastic-Free-Zero-Waste-PFJ.jpg 748 1000 Lindsay (Treading My Own Path) https://treadingmyownpath.com/wp-content/uploads/2019/06/logo.png Lindsay (Treading My Own Path)2016-06-23 12:00:482017-03-10 15:03:29Plastic Free {Bicarb Free} DIY Deodorant – for Sensitive Skin

5 Tips for Getting Started with Plastic-Free Living

35 Comments/in Plastic Free July, Plastic Free Living/by Lindsay (Treading My Own Path)

Could you live your life without plastic? Your answer to this will depend on your lifestyle, where you live and the kinds of things you like to do, the places available to you to shop and how much time you have. Whatever your situation is, I guarantee that you will be able to live with a little less plastic!

How much you choose to eliminate is up to you, but it all makes a difference.

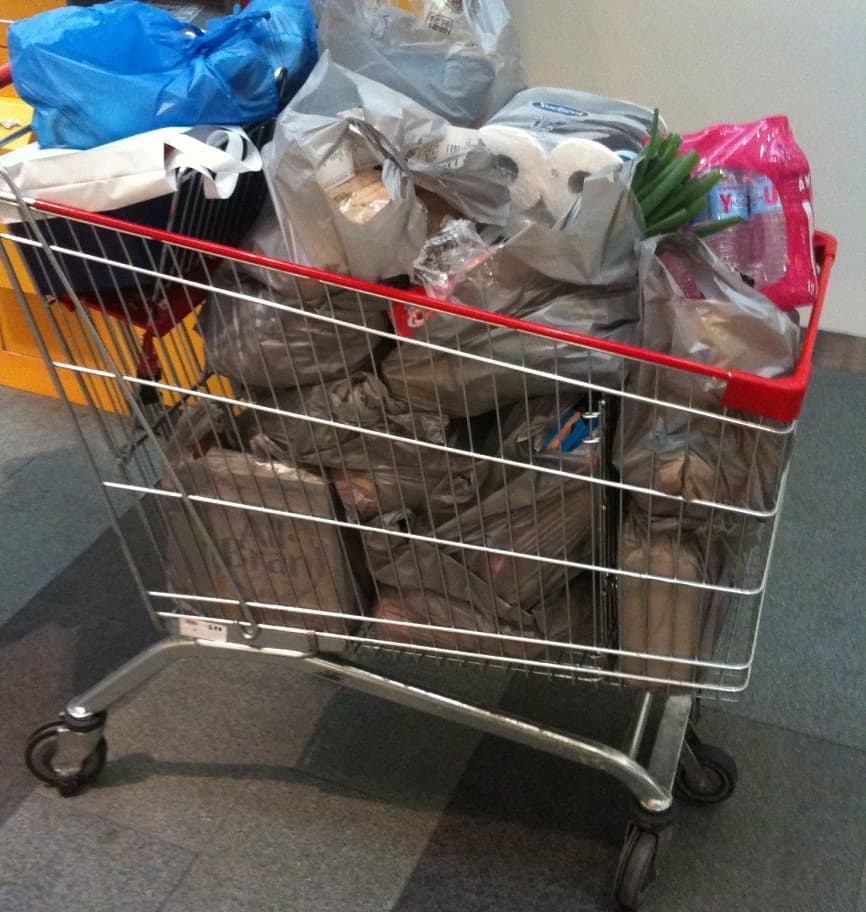
shopping trolley with plastic bags

If your grocery shopping looks like this, then just a few minor changes will make a huge difference!

Many people feel overwhelmed before they even start… and so they don’t start. Or they make a mistake early on and give up, deciding that plastic-free living is something for the “too hard” basket.

The truth is, there is no need to panic, or to feel overwhelmed, or to do nothing simply because we can’t do everything. Change takes time: months, or even years. There is no rule that says everything must be successful on the first day!

There is no all-or-nothing approach to living without plastic: it is a sliding scale, and we just need to find out where we are personally comfortable to sit on the scale. We need to find our happy place: where we’ve made changes we’re comfortable with.

With Plastic Free July approaching, I like to spend time reflecting on my journey and the lessons I learned. This year is my 5th year of supporting the challenge, and I love to share what I’ve experienced with those that are just starting out, or taking it to the next level. If that’s you, read on!

1. Don’t try to make ALL the changes on the first day

It’s unlikely that you are beginning your plastic-free living challenge with a completely empty pantry, fridge and bathroom cabinets. It’s far more likely that you’ll already have food in the cupboard and toiletries in the shower.

Even if they are overpackaged in plastic, this is a good thing (for now!). It means that you can make changes slowly, one by one: as items are used up you can replace them with plastic-free alternatives.

When I signed up to Plastic Free July in 2012, the first things I had to buy were milk, bread, fresh fruit and vegetables. Cheese and yoghurt came later. Pantry staples like pasta and rice came later again. Condiments and specialist ingredients were further down the track.

I had so many products stockpiled in the bathroom (that I hadn’t really been aware of) that I didn’t replace anything here for a few weeks. In fact, it took me 18 months to use up every plastic-packaged item in my bathroom. Plastic-free living is a marathon, not a sprint.

2. Don’t think about the money – for now

If you’ve signed up to Plastic Free July, then you’ve committed to 31 days of living without plastic. I’m going to challenge you for those 31 days, not to think about the money you spend on groceries or toiletries.

Or not to stress about it, at least – there’s enough to worry about for now without having extra stress!

Plastic-free living can seem expensive at first, because buying food from deli counters or Farmers markets or in glass often does cost more than their cheap, lesser quality, plastic-packaged supermarket counterparts. Wholefoods and vegetables are more expensive than processed junk food, but they are also far better for us.

For these 31 days, give yourself a free pass. Open your mind to the possibilities. If your budget is small, maybe tighten the belt somewhere else – reduce how much you spend on alcohol, movie tickets, eating out or takeaway coffee for the month.

The truth is, in time, you’ll decide which things are worth spending the extra money on, and which things you’re happier without. The things you buy will change as you start to find new places to shop with different products on offer.

You’ll adjust your shopping and eating habits, and most people who live plastic-free and zero waste lifestyles find they actually spend less. But again, it takes time: I think it took us around 6 months to notice that our food bill had reduced.

3. There’s no need to rush out and buy anything new

There’s something about starting a new challenge that makes us want to rush out and buy new “stuff”. It’s because changing habits is hard, and buying stuff is easy… and by making a new purchase, we can feel that we’ve started on the journey.

There are a few things in the plastic-free living “toolkit” that make things easier, but you do not need to go out and make a purchase on the first day. Or even the first week. Or even at all!

Before you buy anything, you need to figure out if you are going to use it, and if you have something suitable at home already that you can use or repurpose. Take your time so that you can make the best choices. (This especially applies if you are concerned about your groceries budget.)

Plastic Free Living Zero Waste

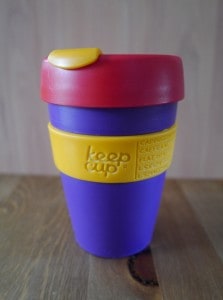
The only thing I purchased during my first Plastic Free July was a KeepCup (a reusable coffee cup), made from plastic.

A few weeks later I began to wonder whether buying a plastic cup for a plastic-free living challenge actually made sense (of course it doesn’t). I started thinking about combining plastic with hot liquids. I noticed the plastic started to absorb the coffee flavour.

Eventually I decided to replace it with a glass one (which I still have). Had I taken my time to think about it, I could have saved myself a wasted purchase.

4. Life from scratch…or not?

Homemade Sourdough Loaf Zero Waste Plastic Free Treading My Own Path

When I started down the plastic-free path, I had no intention of making my own bread or yoghurt or pickles. However, I began making all of these things, and for different reasons.

I used to buy bread at the Farmers Market, which meant I had to purchase my bread between 8am and 12noon on Saturdays. This meant that the rest of Saturday was put on hold until I’d secured the golden loaf of sourdough. Freshly baked artisan sourdough is delicious, but it’s also expensive. The Saturday morning stress and the money led me to ask myself the question – could I bake my own?

Once I tried baking sourdough for the first time, I was smitten. Freshly baked bread straight from the oven – there is no comparison. Now I have freshly baked bread whenever I need it, rather than just on Saturdays.

I started making yoghurt when I realised how simple it was. It involves heating up milk, cooling again, adding a small amount of culture (meaning old yoghurt) and placing somewhere warm for 12 hours (you can find yoghurt-making instructions here). Why was I buying it, carrying it home and taking the empty glass jars back when it took less time just to make my own?

I really enjoy cooking ,and baking, and making stuff from scratch. The more I’ve tried, the more I’ve got into it. But I don’t have time to do everything.

I don’t make my own pasta, for example. We can buy pasta from the bulk store, so why would I make my own? I tried making passata once, but it was so laborious I declared never again (or not for a long time). I don’t can my own tomatoes. I use the lazy person alternative – chopping up and using fresh tomatoes instead. It works well enough for me.

If something is impossible to find without plastic, or too expensive to buy, then I consider that I have three choices. Number 1: make my own. Number 2: find an alternative that I’m happy with. Number 3: go without.

Of course there is a fourth option – compromise – but I prefer to stick to one of the first three. That is enough choice for me.

5. The 80/20 Rule

I have a theory that 80% of everyday plastic is easy to eliminate, and the other 20% is the hard stuff. The easy things like plastic bags, plastic straws, takeaway packaging, disposable coffee cups, water and soft drinks bottles, multipacks, individual portions and serves can all be removed from our lives without too much stress.

It just takes a little bit of remembering, and maybe some practice, but not too much change.

The other 20% is the stuff that requires compromise, or bigger changes. Don’t worry about the hard 20%, at least not at first, and don’t give up on reducing the easy stuff just because you know the hard stuff will probably elude you.

Focus on the easy changes that have big wins.

Zero Waste Week Treading My Own Path Reuse 2015

There will always be people ahead of us on the journey, who have achieved things that we can only dream about. We can learn from them, and speed up our own journeys. The truth is, they all started at the same place.

They all started at the beginning.

They chose to make one change, and purchase one less plastic item, and then one more, and they just kept on going. Small steps, in the right direction. That is all it takes.

As always, now I’d love to hear your thoughts! Are you someone who has been on the plastic-free living or zero waste journey for a while, and if so, what tips would you give to someone starting out? Are you embracing the Plastic Free July challenge for the first time this year, and if so, do you have any concerns or questions? Which one of these lessons stands out most for you? Do you disagree with anything? Are there any other lessons that you’d like to add? Any other thoughts about plastic-free living or zero waste living, or the Plastic Free July challenge? I’d love to hear from you so please leave a comment below!

[leadpages_leadbox leadbox_id=140b48fc6639c5] [/leadpages_leadbox]

https://treadingmyownpath.com/wp-content/uploads/2016/06/Plastic-Free-Living-Plastic-Free-July-Treading-My-Own-Path-1200px.jpg 860 1200 Lindsay (Treading My Own Path) https://treadingmyownpath.com/wp-content/uploads/2019/06/logo.png Lindsay (Treading My Own Path)2016-06-16 12:00:372019-06-15 19:28:035 Tips for Getting Started with Plastic-Free Living

Why Plastic Free July is Just as Important 5 Years On

10 Comments/in Plastic Free July, Plastic Free Living/by Lindsay (Treading My Own Path)

Plastic Free July changed my life. A grand statement I know, but completely true. When I first signed up to the challenge of using no plastic in the month of July back in 2012, it was the start of a journey that I could never have imagined. (You can read about my experience after one year of plastic-free living here.)

From the very beginning it was about understanding that if I wanted the world to change for the better, I had to do something about it.

Not only that, but Plastic Free July showed me that this was possible: change was something that I could do. That we all can do. Starting today.

We all have the power to make a difference, and these little actions, repeated by millions of people, add up to mean real change. That’s why when July 2012 was over, I had to keep on going. There was no turning back.

Four years later, I’ve feel like I’ve got living plastic-free down to a fine art. It’s not something I really have to think about any more. Those new habits have become second nature.

I don’t have the dilemmas of the early days… I have new routines, and I’ve found solutions that I’m happy with. It’s taken time, and there have been many frustrations and learning opportunities along the way, but plastic-free is a way of life for me now.

Yet this year’s Plastic Free July challenge is just as important to be as it was back in 2012. Maybe even more so. Here’s why.

Plastic Free July 2016 Plastic Free Living Treading My Own Path

Plastic Free July is definitely about inspiring change on the individual level, but it is about far more than just us and our shopping habits. It about encouraging us to see things differently, to ask questions, to challenge ourselves (and others), and to find new ways of doing things.

It is about inspiring all of us, together, and creating a movement. That’s where the real change happens. Plastic Free July is the chance to get involved with something bigger than ourselves.

It is the chance to become part of a community with a united voice, saying that we want things to be different…and demanding change. Not only that, but demonstrating what that change looks like, and how it can be done.

I’m still very much a part of this movement, and every year, as July comes around again, I feel my excitement growing. I love the swell of energy that starts to build each June, as more people hear about Plastic Free July (and the idea of living plastic-free) for the first time, and latch onto the idea that they really can make a difference.

In 2012 I was there, feeling that it was possible but full of questions about where to start, or what to do, or how to do it. Now I feel like I’ve come through the other side, and I can share my story. So that’s what I do – I share my story. (I’ll be speaking at 6 events in Perth over the next month about plasitc-free living, so if you’re local please come and say hi! Details to follow.)

My message: yes, plastic-free living is possible, and you can do it do. I was just the same as you. There is nothing special or different about me. I simply believed in the ideals enough to work at it, and make it happen. It didn’t all happen at once; just one change at time. That’s all it takes.

You can share your story or your experiences too. Don’t feel like you don’t have a story to share, or that you’re just one person. That’s all any of us are.

There are many voices in the sphere, but that doesn’t mean there isn’t room for more. There’s plenty of room, and we want to hear you! You don’t have to be a blogger, writer or public speaker. You don’t need a website or a social media feed. You just need a voice…and you already have one.

Talk to friends. Talk to family. Talk to work colleagues. Talk to your local newspaper.

What can you do this Plastic Free July? Can you bring people together and start the conversation? Do you have useful or relevant information that you can share? Is there a local event that you can get involved in?  Can you even organize your own – a plastic-free morning tea, or a beach or river clean?

Plastic Free July starts with making personal changes, but that is only the beginning. Let’s not stop there. We all care about the world we live in – that’s what inspired us to make changes in the first place.

We start with us, but let’s not stop with us. Let’s make this about more than ourselves. This Plastic Free July, wherever you are in your journey, can you do one thing that helps spread the word, or starts the conversation, or builds momentum in your community? Can you add another voice to the movement?

Jane Goodall said it best: what you do makes a difference, and you have to decide what kind of difference you want to make.

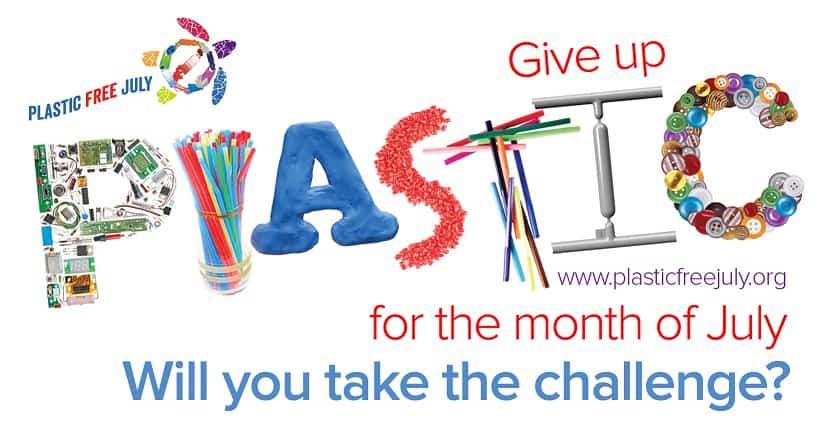
You can find more information about Plastic Free July at their website: www.plasticfreejuly.org

Now I’d love to hear from you! Have you been involved with Plastic Free July from the early days, or have you come on board more recently… or is this the first time you’ve heard of it? How has your involvement changed throughout the years? Are you still finding your way with making personal changes, or are you getting out into your community and sharing your story and spreading the word? What projects have you been involved with, and what positive impacts are they having? Are you thinking about the next steps, but are yet to take action? How has Plastic Free July (or living without plastic generally) changed the way you live? I’d love to hear your thoughts so please leave me a comment below!

[leadpages_leadbox leadbox_id=1429a0746639c5] [/leadpages_leadbox]

https://treadingmyownpath.com/wp-content/uploads/2015/06/Top-4-Plastic-Bags-Disposable-Cups-Straws-Plastic-Water-Bottles.jpg 279 1024 Lindsay (Treading My Own Path) https://treadingmyownpath.com/wp-content/uploads/2019/06/logo.png Lindsay (Treading My Own Path)2016-06-02 15:15:272017-03-10 15:15:50Why Plastic Free July is Just as Important 5 Years On

Plastic Free Zero Waste Natural Sun Cream

22 Comments/in Chemical-Free Living, Plastic Free Living, Zero Waste/by Lindsay (Treading My Own Path)

I’m a fan of sun hats. I’m a fan of long sleeves. I’m a fan of staying in the shade. When it comes to facing the sun, I’d much rather do any (all) of these than apply sunscreen.

I can’t bear the thought of all those chemicals in store-bought sunscreen being absorbed through my skin, and for the longest time, I’ve played Russian roulette with the sun. I didn’t apply sunscreen, and I tried to avoid getting burned. This means all of the above, and trying to dodge the sun between 10am and 4pm.

The truth is, that’s not always possible – when the weather is beautiful, I want to be outside!

Living in Australia with its fierce sun and hole in the ozone layer is very different to living in rainy England… and it means if I do get caught out and I’m not wearing sunscreen, I get burned.

Getting sunburned is not clever. Two in three Australians will be diagnosed with skin cancer by the time they are 70, and skin cancer accounts for 80% of newly diagnosed cancers every year. After being caught out and sunburned one too many times, I realised that I needed to embrace using sunscreen.

I still advocate the hat, the long sleeves and the shade, but in the times when that isn’t enough, sunscreen is better than sunburn. Chemicals aren’t good for us, but sunburn is definitely not either!

I wondered, is there a way to protect ourselves from the sun without all the chemicals… or the packaging?

Chemical Blockers versus Physical Blockers

There is a huge difference between the regular “conventional” sunscreens, which use physical and chemical blockers (and are a cocktail of synthetic chemicals), and the “natural” alternatives, which use only physical blockers.

The physical blockers used in sun cream are zinc oxide and titanium oxide. Zinc oxide blocks both UVA rays (these are the deep-penetrating rays that cause skin cancer) and UVB rays (these are the ones that cause redness and sunburn, and are the ones that SPFs are rated against). Titanium oxide is a good UVB sunblock but is not as effective as zinc oxide in blocking UVA rays.

Conventional sunscreens may also use zinc or titanium oxide as a physical blocker, but use chemical blockers too. Most chemical blockers only protect against UVB rays. These chemicals don’t sound natural or healthy, and in many cases, they’re not. Some chemicals in sunscreen are hormone disruptors, for example.

We’re not just exposing ourselves to these chemicals either – these sunscreens wash off and the chemicals enter our waterways and the ocean.

Treading My Own Path Zero Waste Plastic Free Sunscreen Alex Blajan

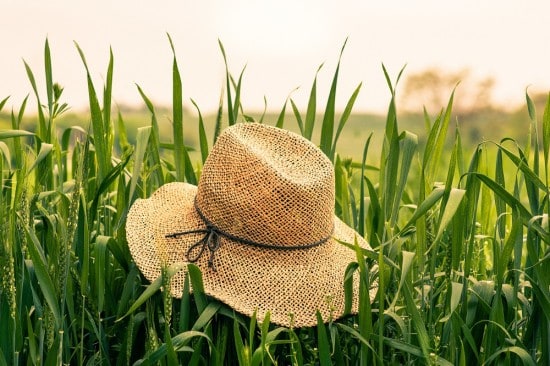
Hats are an awesome physical blocker for sun protection – but even the widest brimmed hat can’t cover everything!

Sunscreen and Nano Particles

Traditionally zinc oxide creams were very thick and created a white barrier on the skin, meaning they were hard to apply (and looked a bit silly).  By making the zinc particles smaller, newer creams have come onto the market which absorb more easily and don’t leave white residue. These creams contain smaller zinc nanoparticles (classed as particles smaller than 100nm or 0.1 micron) and microfine particles (usually ranging from 0.1 micron to 2.5microns (100nm – 2500nm).

The concern with these is that they can be absorbed through the skin, and the smaller the particles, the more easily they are absorbed.

Suncreams containing zinc oxide usually state that they are “nano” or “non-nano”. Studies show that zinc oxide particles between 4nm and 20nm have the potential to be absorbed into the skin, and will be absorbed through damaged skin.

Anything smaller than 4nm will definitely be absorbed, and anything bigger than 45nm will not be absorbed. (You can read this study here.)

Conventional sunscreens use nano particles sized between 5 – 20nm – small enough to be absorbed through the skin. Non nano zinc oxide particles are larger than this and fall outside the absorption range, although some nano particles may still be present.

Most eco and natural brands use non-nano particles in their sunscreen.

Can I Buy Zero Waste Sunscreen?

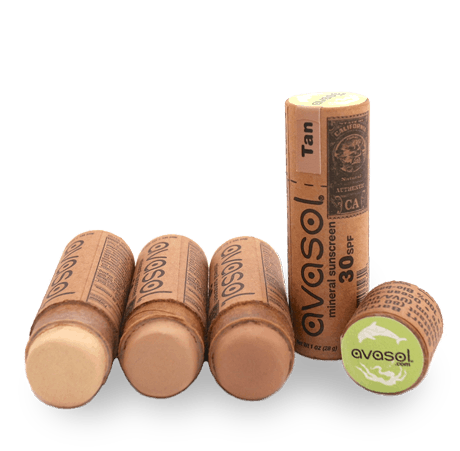
Because sunscreen is heavily regulated and each batch requires testing, most small producers shy away from making their own. This makes it hard to find locally produced sunscreens that avoid the excess packaging. There is an American brand called Avasol who make a natural, non nano sunscreen packaged only in cardboard, with an SPF of 30. This is the best zero waste alternative I’ve come across. I don’t use it myself but I have friends who do.

Avasol Plastic-Free Sunscreen

Avasol sunscreen is an American brand that comes packaged in a cardboard tube.

What About DIY Alternatives (and how do I know the SPF)?

Yes, it is possible to make your own, but there are two things you need to know.

  1. You will not be able to calculate the SPF. SPF stands for Sun Protection Factor: it is a  measure of the effectiveness of sunscreen against UVB rays. The higher the SPF, the more protection against sunburn the sunscreen offers. The number (SPF 20, SPF 30 etc) means how many times longer a person can stay out in the sun without getting burned relative to how long they can stay out with no sunscreen assuming 2mg per cm² is applied. Sunscreen is tested in vivo by volunteers who apply sunscreen to their skin and see how long it takes to burn (ouch). In vitro tests use a spectrometer. It is not a case of adding up the SPFs of various ingredients. The only way to find out how long homemade sunscreen will protect you for is to test it yourself.
  2. You will need to use a physical barrier – either zinc oxide or titanium oxide – for it to work effectively. Many plant oils have low SPFs (coconut oil and olive oil have a natural SPF of up to 7, and other plant oils have SPF properties) and applying these to the skin may help you avoid burning if you have olive skin, don’t burn and only expose skin to sun outside of the 10am – 4pm (and you live outside of Australia). Combining ingredients does not increase the overall SPF, and there is no magical high SPF plant oil. Also, their effectiveness against UVA rays (the ones that cause DNA damage and cancer) are unknown.

Zero Waste Plastic Free Sunscreen: My Recipe

Zero Waste Plastic Free Sun Cream Sunscreen in Jar
My solution to the issues of chemicals, packaging and sourcing products locally was to make my own. I’ve been able to source all of these ingredients without packaging, but I realise that this may not be possible for everyone. If you can’t find ingredients sold without packaging in stores, find out if there are any local skincare producers or soap makers close to you who may be able to sell you some ingredients without packaging (that’s what I do).

You can also try switching up some of the ingredients if you have other options available to you. Whilst some ingredients can be subbed, zinc oxide is a non-negotiable – that’s what makes it sunscreen! If you need to buy ingredients in packaging, look for one that is recyclable, and remember – one container of zinc oxide will create many containers of zero waste sunscreen.

Important: this sunscreen has worked for me, and I am sharing my personal experiences. Do a small patch test when using for the first time. Avoid going in the sun at peak times and wear a hat and long sleeves. Sunscreen is a last resort, not an excuse to lay in the sun for 8 hours!

Zero Waste Plastic Free Sunscreen Ingredients Treading My Own Path Plastic Free July

Ingredients for zero waste plastic free natural DIY sunscreen.

Ingredients:

1/2 cup almond oil (or olive oil)
1/4 cup coconut oil
1/4 cup beeswax
2 tbsp (27g) shea butter
2 tbsp non-nano zinc oxide powder
1 tsp vitamin E oil

OPTIONAL: 20 drops of essential oil (check this list first as some essential oils are phototoxic and can assist burning!)

More info on the ingredients:

Almond oil – I used sweet almond oil as that is what I use as my standard moisturizer. It is a great oil for the skin. However, it’s also far more expensive than olive oil (and according to in vitro tests, has a lower SPF of 4.7 versus the olive oil SPF of 7.5) so next time, I’ll be using olive oil.

Coconut oil – this oil is solid at less than 25°C and helps the lotion hold its form. It is very moisturising and has a natural SPF of around 7 – two properties that make it a great oil to include in sunscreen.

Beeswax – beeswax helps make this into a lotion at room temperature. This means no need to store in the fridge – handy if you want to take your sunscreen with you! It also helps make the sunscreen waterproof. Even if we’re not going in the water,the sun makes us sweat and we don’t want the sunscreen to wash off.

Shea Butter – is highly moisturising and good for dry and aging skin. It is a solid at room temperature but melts on contact with the skin, making it a good base for lotions. Look for shea butter that has been naturally processed rather than refined with hexane (a solvent).

Zinc Oxide Powder – this is the active ingredient. Zinc oxide is a physical blocker that works by reflecting / scattering UV light. It is non-irritating and suitable for sensitive skin. Zinc oxide sunscreens leave a white tinge on the skin – the bigger the zinc particles, the whiter this will be. The zinc oxide powder I used was 0.3 – 0.85 microns.

Vitamin E – this vitamin is often found in skincare products and is believed to have antioxidant and skin-healing properties, although evidence is limited and studies are ongoing. It helps prolong the shelf life of the other oils in the lotion. I used it because I have it, but you could do without.

Method:

Overheating oils can damage their properties, so I tend to melt mine one by one, starting with the most heat-resistant and working down to the least.

  • Place a glass bowl over a pan of boiling water (a double burner) and add the beeswax. Stir until melted, and add the coconut oil. (If your coconut oil is solid, the beeswax may solidify again on contact, but continue to heat and it will melt.)
  • Turn the heat off, and add the almond oil (or olive oil), using a whisk to combine. Once this is mixed in, remove the bowl from the heat.
  • Add the shea butter to the bowl and stir to combine. Once it has melted, whisk the mixture. Continue to whisk until you notice the mix beginning to cool, lose transparency and change to a golden colour.
  • Once the bowl feels cool and the mixture looks golden and opaque, add the zinc oxide powder using a whisk to combine.
  • Add the vitamin E and essential oils, if you are using.
  • Pour into a clean and dry glass jar, and seal with a lid.
Melting beeswax in a double boiler

Melting the beeswax over a double boiler (a glass bowl on top of a saucepan with water in it – the water is heated and that is what warms the oils)

Melting oils in a double boiler

Melting the shea butter. (The beeswax, coconut oil and almond oil have already been added.) The oils look golden and transparent. Once they begin to cool, they lose the transparency and begin to look opaque.

Melted oils before adding zinc oxide powder

Once removed from the heat, the oils will cool and lose their transparency. Keep whisking to keep everything combined.

Zero Waste Plastic Free Sunscreen Mixing Zinc Powder into Oils

Once it’s cloudy and does not feel hot, add the zinc oxide powder. Stir in with a spoon and then whisk to combine. The powder will mix but will not dissolve so there will be some white specks.

Melted oils before after adding zinc oxide powder

Cream after adding the zinc oxide powder and whisking.

Zero waste plastic free sunscreen Whisking ingredients together

Now add the vitamin E and any essential oils, and whisk to distribute thoroughly. Pout into a clean glass jar and leave to cool completely.

Rubbing Non Nano Zinc Oxide Sunscreen into the Skin

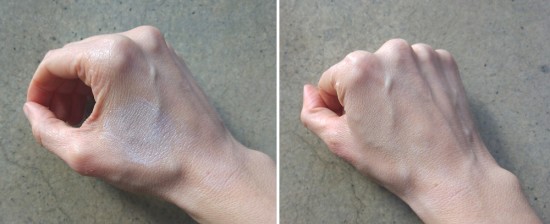
When applying to the skin, it appears white. The more it’s rubbed in, the less white it appears. I like the white sheen that remains as it helps me see where I’ve applied the cream and which bits I’ve missed!

Zero Waste Plastic Free Sun Cream Sunscreen in Jar

Zero waste plastic free sunscreen: the finished product.

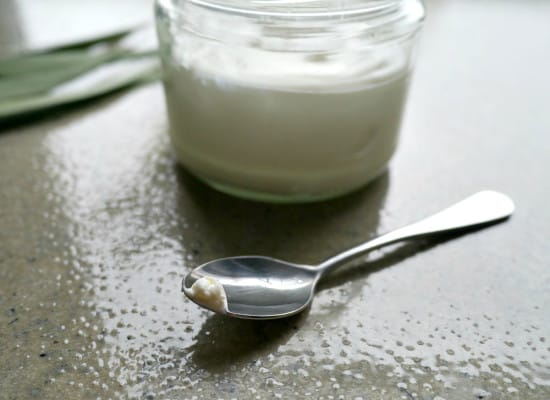
Zero Waste Plastic Free Sun Cream Sunscreen on a teaspoon Plastic Free July

You can see from the spoon that the consistency is fairly thick. Changing the oil and wax combinations will change the consistency.

If you think this seems a bit complex (and I’d love to simplify it at some stage) then there is an even simpler solution. Simply mix some zinc oxide powder into your regular moisturiser. Job done ; )

Now I’d love to hear from you! Have you made sunscreen? Do you have a recipe you’d recommend, or any great ingredients you think should be included? Have you had any recipe fails, or do have any important “do-nots” to share? Are you unsure about making your own? Have you found any great zero waste or plastic free sunscreens available for purchase that you’d like to share? Have you tried Avasol and what did you think? Anything else that you’d like to add? Please tell me your thoughts in the comments below!

[leadpages_leadbox leadbox_id=1429a0746639c5] [/leadpages_leadbox]

https://treadingmyownpath.com/wp-content/uploads/2016/05/Treading-My-Own-Path-Zero-Waste-Plastic-Free-Sunscreen-Sun-Cream-Mario-Trunz.jpg 750 1000 Lindsay (Treading My Own Path) https://treadingmyownpath.com/wp-content/uploads/2019/06/logo.png Lindsay (Treading My Own Path)2016-05-19 13:10:032019-12-23 10:11:30Plastic Free Zero Waste Natural Sun Cream

Local Zero Waste Living (+ How to Shop at Bulk Stores)

22 Comments/in Plastic Free Living, Zero Waste/by Lindsay (Treading My Own Path)

A couple of months ago I was at an event, and a friend came bounding up to tell me she had someone she wanted me to meet – a lady who’d recently moved from Sydney to Perth who was passionate about plastic-free living. I went over and introduced myself, and told her that if she had questions for plastic-free shopping, I would be happy to help.

She asked me if I had a list of all the places to shop in bulk. Awkward silence. No, I don’t have a list. It’s all in my head!

I realise that storing all this useful information about local zero waste stores in my head is really not the best place for it, but I wasn’t entirely sure where to share it.

I didn’t think this website was the best place, as I talk about other things besides waste and also, my audience is global. It needs to be accessible to people who live locally without boring everyone who isn’t. I’m pretty sure for those of you who don’t live nearby, hearing about where to buy bulk oats or olive oil in Perth on a weekly basis would get very tiresome!

The other issue is that compiling a list like that and keeping it updated is a big job. Perth doesn’t have a huge population (1.3 million) but it does occupy a rather large area – the same size as Greater London. That means that there are actually quite a lot of bulk stores scattered about the place.

Whilst I know about a lot of them, I clearly don’t know them all. A collaborative approach would be much better, allowing people to add the info that they know… but was that getting a little complicated?

In the end, there was a simple solution. Facebook Groups. After all, pretty much everyone uses Facebook, it’s free to set up a group, it’s possible to upload files and create documents, and anyone who’s a member can edit them.

Plus there’s an opportunity to share images, ask questions, post useful links and connect with others. Perfect!

So I’d like to introduce Zero Waste + Plastic free Living, Perth, Western Australia (the Facebook Group):Zero Waste + Plastic Free Living, Perth, Western AustraliaEverything (pretty much) that is stored in my head regarding shopping plastic-free and zero waste in Perth has been added to this page. I’ll also be hanging out there if people have questions or want help. So if you live in Perth, join us!

I’d absolutely love it if you can add your own nuggets of wisdom and pieces of knowledge to make this page really comprehensive and useful to our community : )

Most of this information is about stores that sell in bulk. Just in case you’re not sure how shopping this way actually works, I thought I’d give a brief rundown on the “how to” of bulk shopping.

How to Shop at Bulk Stores

  • The first thing to know is that zero waste shopping is about shopping “from bulk” rather than “in bulk”. It’s not about buying 60kg of oats at a time. Zero waste bulk stores are those that sell their products loose, usually in barrels, drums, plastic containers or sacks. With zero waste bulk stores, there may be a minimum weight for purchases, but that is usually so that the products register on the scale.
  • Bulk stores are not packaging free themselves: they buy products in packaging, but in large quantities. Their customers don’t contribute further to packaging waste if they bring their own bags and containers. The amount of packaging required for one bulk sack is far less than if that product was split into several thousand small packages, each with their own label.
  • You are more than welcome (and usually encouraged) to bring your own bags to fill, although often bulk stores will have paper and even plastic bags available. Container are more suitable for some products (think oils, pastes and anything very fine). If you bring your own jars or containers, you should ask someone at the cash register to weigh your container before you fill it. You should also know the volume of your container as some products are sold by volume rather than weight. Measure it out before you get to the store.
  • Don’t mix products in bags, even if they are the same price unless there is a sign that tells you it is okay to do so. Stores need to keep track of what they sell to order more and avoid running out, so putting 3 different products into one bag isn’t helpful!
  • Some stores will ask you to write the products or stock numbers on bags. If you have your own bags, you can write these on your phone or shopping list as you go round to keep track.
  • At the checkout, be as helpful as possible. Tell the shop assistant what is in each bag, especially if they aren’t see-through!
  • When you get home, it can be helpful to pop any grains, pulses and beans (and any flours from these) into the freezer for 24 hours to kill any weevils or eggs that might be in your products. Whether you do this depends on how fresh you think the items are, how quickly you intend to use them up… and how bothered you are by extra protein ; )
  • Whilst bulk stores are set up for people bringing their own containers, many other places are actually open to the idea – they probably haven’t thought of it before. Butchers, fishmongers, cafes and delis are places where you can bring your own containers. You just need to explain clearly what you’re doing (can you put the product directly in my container?) and why (I’m trying to avoid using any plastic or disposable packaging) before you hand over your container. The why is important if you don’t want your glass container popped in a plastic bag or sealing with cling wrap once it’s filled! Tips: If you’re nervous or worried you’ll be rejected, avoid busy periods and if there’s anyone waiting, let them go first. Smile, act like it’s the most normal thing in the world to be doing and go for it!

Now I’d love to hear from you! Do you have any tips to add? Anything I’ve missed off the list? Any facepalm moments you’d like to share about your experiences of trying to buy groceries without packaging? Any lessons learned or benefit of hindsight moments? Please leave me a comment telling me your thoughts below!

[leadpages_leadbox leadbox_id=1429a0746639c5] [/leadpages_leadbox]

https://treadingmyownpath.com/wp-content/uploads/2015/04/Bulk-food.jpg 675 900 Lindsay (Treading My Own Path) https://treadingmyownpath.com/wp-content/uploads/2019/06/logo.png Lindsay (Treading My Own Path)2016-05-12 12:00:322017-03-10 15:31:55Local Zero Waste Living (+ How to Shop at Bulk Stores)

DIY Sourdough Starter + Zero Waste Crackers

27 Comments/in Living With Less Waste, Plastic Free Living, Recipes/by Lindsay (Treading My Own Path)

Making a sourdough starter from scratch is one of the easiest things you can do, and it doesn’t need any special ingredients. Literally all that is required is flour, water, a bowl, a spoon, and a little bit of patience. Even if you’re not sure you want to start baking sourdough every week (although I assure you, once you start, you won’t want to stop!) the sourdough starter can be used to make sourdough crackers.

Crackers are far quicker and simpler to make than sourdough bread, but equally delicious… plus crackers are one of those things that are impossible to find zero waste or plastic-free in my experience. Homemade, simple, delicious, waste-free… what’s not to love?!

To make a sourdough starter from scratch, we utilize the natural yeasts and lactic acid bacteria present on the flour. Another term for it is wild fermentation – how cool does that sound?! That’s how people made bread and other fermented products for thousands of years, before commercial yeasts were available. They harnessed the power of nature.

If we’re going to use the natural yeasts and bacteria present on the flour, then I recommend buying the best flour that you can find. Once your sourdough culture is established you can relax a little, although I’d always recommend buying the best ingredients that you can afford. If your tap water is chlorinated, fill a bottle and leave at room temperature or in a sunny place for a few hours to let the chlorine gas dissipate – you don’t want to kill the starter before it’s started!

How to Start your Sourdough Starter

Mix together 50g flour with 50g water in a bowl (1 gram of water is the same as 1 ml water). You can use more but don’t use too much less as it will be much harder to work with. However much you use, you want the flour:water ratio to be 1:1.

At this point it will look like a dough, and it will smell like wet flour. Cover the bowl with a tea towel and leave on the side at room temperature (if you’re home is cold or it is winter, a warmer place will help get it going faster). Stir every few hours. If a skin forms on top, simply stir it in.

It may not seem like much is happening at the start, but if you pay attention to the smell you will notice that it starts to smell less like flour and has developed a sour smell. This is a sign that it is working. Hurrah! Look out for bubbles forming in the dough. In the beginning there will only be a couple, but it’s another sign that your starter is beginning to do its thing.

After a couple of days of stirring, you will need to feed your starter. Even if you’re only noticing a couple of bubbles, the starter will dry out over time, and as it sticks to the side of the bowl and hardens the volume tends to decrease, so feeding helps refresh it. Take another bowl, add 10g of your starter to it, and then add 50g flour and 50g water to this (you can use other volumes, but the ratio should be 1:5:5 starter:flour:water). Stir thoroughly, and cover with the tea towel.

Leave the remaining leftover starter in the original bowl, cover with a plate and store in the fridge. This will be used for making the sourdough crackers later.

Keep stirring the new starter every few hours (this doesn’t need to be exact, just whenever you remember). You should notice that the bubbles are becoming more frequent (you may not see a lot, but more than you saw at the start). Depending on how active your starter is getting, you can either feed again in 24 hours, or leave for a couple of days.

To feed, repeat as before. Take 10g of your active starter and add to a new bowl with 50g flour and 50g water, and stir well. Any leftover starter can be poured into that bowl sitting in the fridge with the original starter.

Each time you feed, you should notice your starter getting a little more active. You’ll want to feed it at least 5 times, once a day (timing is not that important) before it’s ready – and by ready, I mean active.

Sourdough Starter from Scratch Treading My Own Path

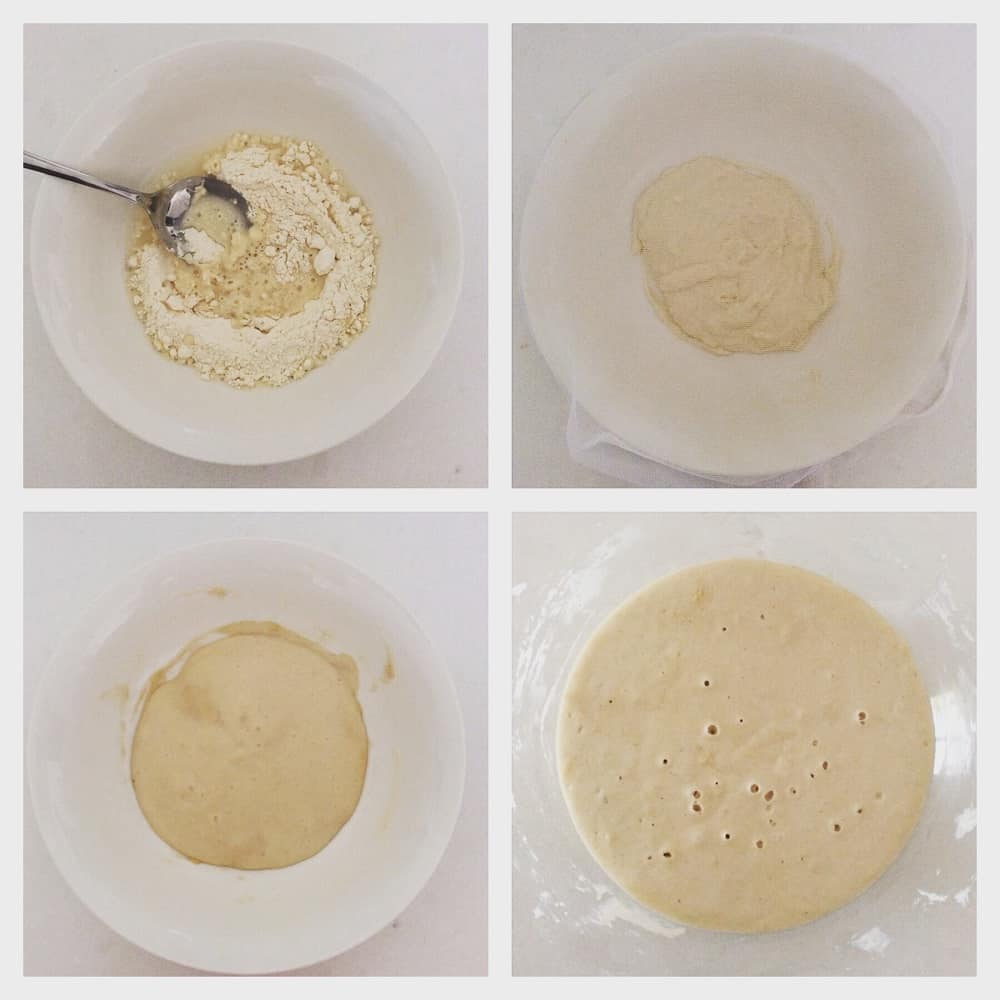
The four stages of starting your own sourdough starter from scratch. Stage 1: mix flour with water. Stage 2: cover with a tea towel or gauze – you want air to get in, but nothing nasty! You will need to stir every few hours. Stage 3: you will notice bubbles begin to appear. Your starter will begin to dry out a little. Stir the drier parts in, but as it gets drier you’ll need to feed it. That means taking a small part of this and mixing with fresh water and fresh flour (save the discard to make crackers). Step 4: after a week and a few feeds, your starter should be bubbling away quite happily.

Maintaining Your Sourdough Starter

Once your sourdough starter is ready, you can either store on the kitchen counter, or in the fridge. Store in a jar with a loose-fitting lid, or with a fabric circle secured with an elastic band. You want air to get in, but no creepy-crawlies. If you keep it on the kitchen counter you’ll need to feed it every day. If you keep it in the fridge you can feed every 1-3 weeks (once a week is best, but it will be fine if you feed it every three or so). I keep mine in the fridge.

When you want to feed your starter,  allow to return to room temperature if it has been in the fridge. Keep the ratio the same 1:5:5. Keep the discard in the fridge until you are ready to make crackers.

Zero Waste Sourdough Crackers

Sourdough Crackers Treading My Own Path

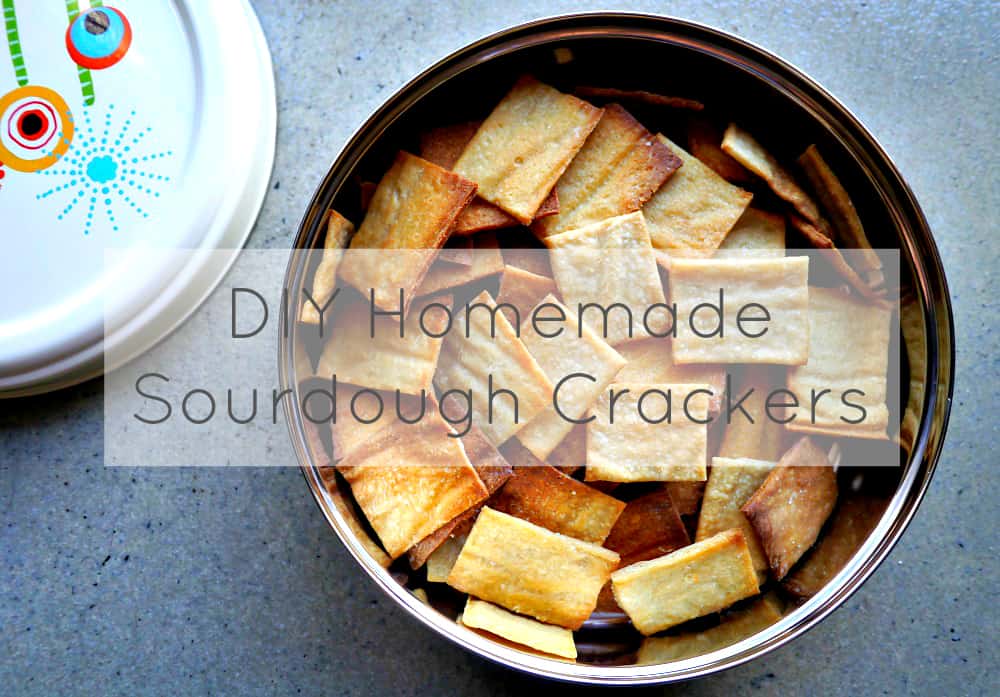
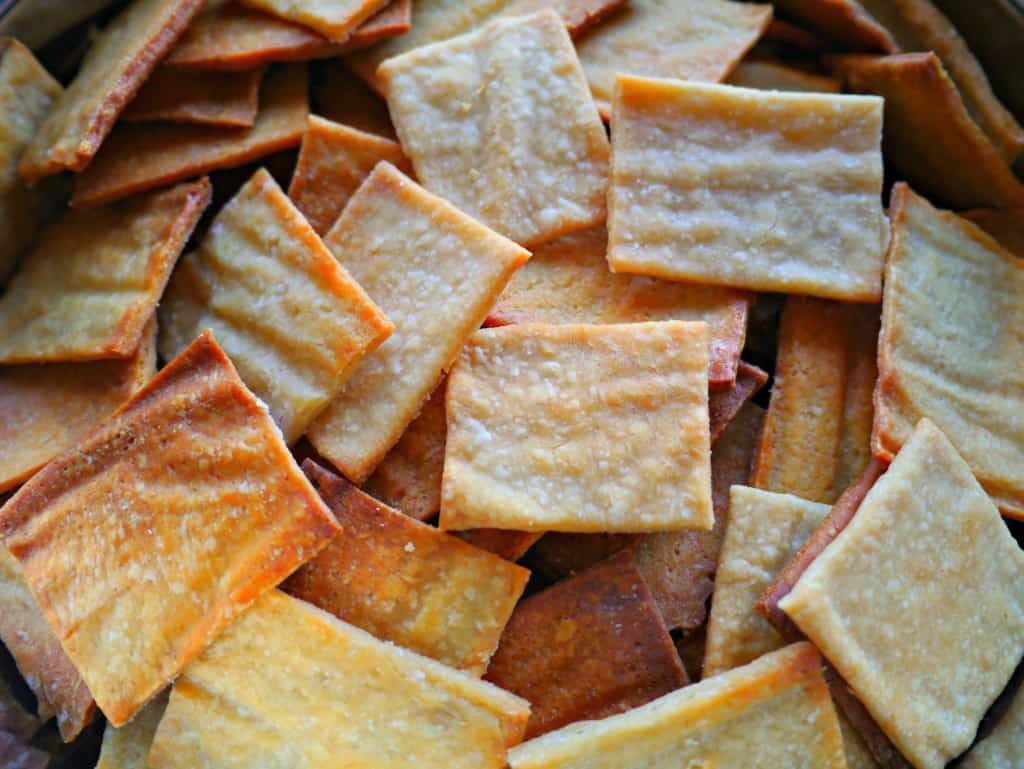
Homemade sourdough crackers – simple to make, zero waste, plastic-free and no nasty additives. What’s not to love?!

Once you’ve made your sourdough starter you should have a bowl of discarded starter sitting in your fridge, waiting to be made into crackers. I have to thank the Zero Waste Chef for this idea, as previously when I had excess sourdough starter I’d throw it away. It felt so wrong, but that’s what all the recipes tell you to do. Turns out, they are all wrong! Throw nothing away, and make crackers instead. Thanks Anne-Marie!

This recipe is a combination of the one by the Zero Waste Chef, and also some notes I have from a Plastic Free July workshop back in 2012 which has no references except a comment that the writer was called Katie.

Ingredients:

215g discarded sourdough starter
3 tbsp olive oil (30g)
100g plain flour
1/2 tsp salt
1/4 tsp bicarb soda

Extra olive oil and salt to top.

I found that when I made a starter from scratch, feeding every day for 5 days left me with 215g starter. But you change change the quantities of flour to starter, they don’t need to be exact – just remember it’s approximately twice the starter to flour. You want to make a dough, so if it is too sticky add more flour.

The moisture in the starter also varies depending on how fresh it is. If you need to add more flour, do so!

Method:

Mix the olive oil with the starter and stir until combined. Add the dry ingredients to the starter / oil mix and combine first with a spoon, and then with your hands. If it is still sticky, add flour in small quantities until you have a dough. Knead to ensure it is smooth.

Place in a glass bowl, cover with a tea towel or a plate (or both!) and leave to rest at room temperature for 8 hours (or overnight). This allows the dough to sour and develop flavour.

After 8 hours, divide the dough into 4. One at a time, roll the ball out onto a baking sheet lined with baking paper using a rolling pin (yes, my zero waste kitchen contains baking paper. I re-use each piece several times. You can read more here). The reason for the paper? After waiting 8 hours, I don’t want to take the risk that my crackers will stick to the metal tray and burn.

Roll the dough out to between 3 – 5mm thickness, trying to ensure it is even. Trim the edges, and cut into rectangles with  sharp knife.

Brush with olive oil, and then sprinkle salt on the top.

Bake in an oven at 150°C (350°F) for 8 minutes, then turn over and bake for another 8 minutes. You will find that the crackers on the edge cook a lot faster than those in the middle, so if you want to remove those sooner you’ll avoid them over-cooking. You want them to look golden but not too brown.

Cool on a wire rack and store in an airtight container.

TIPS:

  • 8 hours in the ideal, but this recipe is really flexible. You can make the crackers after only leaving the dough for 30 minutes (but longer is better). If you forget and leave them longer, you will still have good crackers.
  • The dough can be frozen or refrigerated if you want to make a big batch of dough and keep some for later.
  • I would guess they would last a week, but I’ve never been able to find out as they all get eaten long before! They don’t lose their crunch after storing so they are definitely something that can be made ahead.
Sourdough Zero Waste Crackers FINAL

Zero Waste Sourdough Crackers

As always, I’d love to hear from you! Do you make your own sourdough, and have I tempted you to give it a go? Do you already make your own crackers? Do you have any recipes and tips you’d like to share? What toppings and flavours do you think would work best? Please tell me your thought in the comments below!

[leadpages_leadbox leadbox_id=123a865e9839c5] [/leadpages_leadbox]

https://treadingmyownpath.com/wp-content/uploads/2016/03/Sourdough-Zero-Waste-Crackers-Treading-My-Own-Path.jpg 697 1000 Lindsay (Treading My Own Path) https://treadingmyownpath.com/wp-content/uploads/2019/06/logo.png Lindsay (Treading My Own Path)2016-04-07 12:00:512020-05-08 18:48:21DIY Sourdough Starter + Zero Waste Crackers

8 Lessons Learned from 4 Years of Zero Waste Living

42 Comments/in Plastic Free Living, Zero Waste/by Lindsay (Treading My Own Path)

If you speak to any zero waste or plastic-free living advocate, and ask them about their experiences and their journey, at some point in the conversation they will say to you: with hindsight, I would have done things differently. Oh, the benefit of hindsight! As someone who has been living plastic-free for almost four years, and working towards zero waste for most of that time, I can tell you that the mistakes I have made and the lessons I have learned have been many!

It’s very easy, four years down the track, to make it sound like the journey has been effortless and the changes have been seamless. That’s not deliberate: there’s plenty of journey behind me for me to pick out the good bits. Plus I like to focus on what has worked for me and the successes I’ve had rather than dwelling on the struggles. I want to inspire others to make changes, not put their heads in their hands and declare it all to be far too hard! (It’s not, and if you keep going you will get closer, I promise.)

Then again, I never want to give the impression that I haven’t had my moments or my challenges along the way. Of course I have! I still make mistakes now. Nobody is perfect. We’re all trying to do the best we can. That’s all we can ever do, after all.

Here’s some of the lessons I’ve learned in my first four years of zero waste living. No doubt there are plenty more lessons to come in the next four years!

1. The first solution is not always the final one

You won’t get it all right first time round. Some things will work perfectly for you, and others, not so much. Different solutions will present themselves, and you will find better ways of doing things that fit with your lifestyle.

When I first stopped buying shampoo and conditioner, I found a health store that sold bulk products where I could refill my jars. The products were bright green, and when I first used them, the smell was so overwhelming that I was convinced I’d accidentally bought toilet cleaner. (I even went back to the shop to double-check I hadn’t bought toilet cleaner.)

Could they have mis-labelled their bulk containers?

Unlikely, but I did not enjoy using those products one little bit. Needless to say, I used them up (probably far more liberally than usual) and never went back there again.

I found another retailer whose refills had a smell I could stomach. Eventually the effort of going back and forth to refill my jars made me revisit this, and I tried using bicarb and vinegar. This worked well for my hair, and was easier than getting the refills.

One more change from bicarb to rye flour, and I’m content with this.

Rye Flour Shampoo Zero Waste Treading My Own Path

Rye flour is now what I use instead of shampoo… but there have been a few changes along the way!

2. You don’t have to do what everyone else is doing (especially if it doesn’t feel right for you).

There are two iconic items of the zero waste and plastic-free movements: the glass mason jar and the bamboo toothbrush. Glass jars, I love. They come in all sorts of sizes, they are easy to store, easy to clean and you can see what’s inside them when you use them as storage.

The bamboo toothbrush, however, I struggled with. It was one of the first switches I made when going plastic-free, but I couldn’t bear the bristles coming loose in my mouth or worse, being washed down the sink. The brushes never seemed to last more than a few weeks.

When it came to disposal, I didn’t want those bristles ending up in my compost, ether. The bristles for many bamboo toothbrushes are currently plastic (despite what the companies might lead you to believe).

I came across another brand, with a conventional plastic handle but with reusable heads that need replacing every 6 months. The heads can currently be recycled by Terracycle, along with the packaging, so I’m not adding anything to landfill. This seemed far less wasteful than the bamboo forests I felt like I was chopping down to clean my teeth (I was constantly buying replacement brushes).

Bamboo toothbrush parts

Gah! More plastic bristles in my mouth and washed down the drain! Plus these bristles are plastic and I don’t want that in my compost.

SilverCare Toothbrushes with Replaceable Heads Treading My Own Path

These toothbrushes have replaceable heads (and it is literally just the head) that need replacing every 6 months. The packaging is minimal. It may not look as trendy as a bamboo toothbrush, but it’s working much better for me. And at least I can recycle these used heads responsibly.

Of course, my bathroom would look much prettier if I used bamboo toothbrushes. Ultimately though, what matters is whether my teeth are clean, and that I can dispose of the product I’m using responsibly. My toothbrush may be plastic but my conscience is clear.

3. You will make mistakes (and that’s okay, it’s all part of change)

One of the first things I bought in 2012 (the year I went plastic-free) was a reusable KeepCup – made of plastic. I didn’t think about the fact that plastic doesn’t really last, whether it’s labelled as reusable or not; nor did it occur to me that it isn’t healthy to use plastic with hot liquids like coffee.

I also learned through using it that over time, the plastic becomes tainted with whatever you put inside in a way that glass and stainless steel never do.

I bought a glass KeepCup in 2014. I wish I’d gone straight for glass and never bought the plastic one, and now I wonder how I ever came to that decision, but that’s all part of the journey.

keepcupjpg

Plastic KeepCup, purchased 2012. Oh, the benefit of hindsight…

Glass KeepCup Treading My Own Path

This is my replacement, purchased 2014. It’s made of glass and has a cork band. It’s far more versatile and easier to clean, and 2 years on it still looks as good as new – unlike the plastic one.

4. You don’t need to buy a brand new toolkit on the first day

To go completely zero waste, there are a few things you need. A water bottle, some reusable produce bags, reusable shopping bags, some kind of lunchbox, maybe some sandwich wraps, a reusable coffee cup – this all depends on your situation and your lifestyle.

The most common mistake that people make when embarking on the zero waste lifestyle is buying all of this stuff brand new on the first day, without thinking first whether they already own something appropriate, whether they really need it at all, and whether these products are built to last – and if they’re not, how they will be disposed of.

Zero Waste Week Treading My Own Path Reuse 2015

This zero waste kit was built up over a number of years as I realised what my needs were. The water bottle and reusable produce bags came first; other things came later as I realised they would be useful – and well used.

It’s an easy mistake to make – after all, we’re excited about making changes to our lives, and there’s not much we can do on day one except buy stuff. Changing habits needs time and shopping doesn’t; buying stuff feels like we are taking steps towards our goal.

If you can, hold back from buying anything new. Get a feel for what you might need, and make do with what you have. Give it time. That way, when you come to buy the things you do need, you will make better choices.

5. Do not get rid of perfectly good things for “better” things

Zero waste is all about not wasting stuff, right? So replacing stuff that you already have with stuff that’s a little bit “more” zero waste really doesn’t make any sense. I’m talking about replacing old jars that you already have in the cupboard (the ones with the store labels still attached) with brand new jars with metal lids; replacing plastic laundry pegs with wooden ones; that kind of thing.

If there’s a safety issue (and I personally do not use plastic for food preparation or storage for health reasons) or it’s broken and can’t be fixed, then it’s completely reasonable to get a replacement. Otherwise, can you really justify the waste you’re creating?

If your passionate about zero waste, then your goal should not be to have your home looking like a magazine cover, your goal should be to reuse what you have, repurpose what you can and to buy as little as you can – and second hand, if possible. Don’t get swept up in the beautiful “zero waste” things for sale on the eco websites.

IMG_0360

Possibly not Pinterest-worthy, but a far better use of resources ; )

6. You get to set your own rules

The great thing about your life is that you get to make the rules. How you live your plastic-free or zero waste life is unique to you, and the rules you decide to live by are up to you too. There’s no specific rules that are set in stone that you have to follow; there’s no membership or entry rules. Entry to this way of living is free!

The only thing you need is the desire and passion to do what you can to make a difference.

For me, zero waste is about sending nothing to landfill. I buy everything I can without packaging – food and toiletries in bulk, other items second hand. I would love to create no recycling either, but at this stage in my life, it isn’t possible.  I try to keep my recycling to a minimum: my husband and I fill a bin about the size of a wastepaper basket (well actually it is an old wastepaper basket) with recycling about once a fortnight. Mostly that’s paper and card, with the occasional beer or wine bottle.

Of course I could compost my paper and card, but it’s a better use of resources to recycle it. I don’t burn any of my waste.

That works for me, and also my husband, who always tells me that whilst he was happy to sign up for plastic-free living, he’s fully on-board with and enjoys living plastic-free, he doesn’t remember agreeing to the zero waste “thing”… Those few extra recyclables are our compromise.

7. There may be exceptions to your rules

When I say I buy everything I can in bulk, I must confess that there is a food item that I choose to buy in packaging. Chocolate. I do buy bulk chocolate sometimes, but it is simply not as good as the bars of deliciousness that come pre-packaged. I’ve tried to give it up, but I can’t.

I can recycle the foil and the paper/card (I’d never buy chocolate wrapped in plastic) but it isn’t quite zero waste living. This is my work in progress.

chocolate

Chocolate bars are my zero waste work-in-progress. I buy chocolate in bulk, of course, but I just can’t quite shake the chocolate bar habit…

8. You don’t have to keep your waste in a mason jar

There’s no rule for keeping your waste in a mason jar. I resisted this for ages, because I felt like it was gimmicky and unnecessary. I’m meant to be a minimalist! Storing a jar of rubbish is definitely not a minimalist thing to do.

In the end, I changed my mind. It was a conversation with a journalist that made me look at it from a different perspective. She was asking about how much waste I produced, as I don’t have a bin, and I realised that it is a hard thing to explain. Saying “nothing” isn’t quite the same as being able to see what “nothing” is!

She suggested that having a jar is a really good way for people to visualize what zero waste is. As I do run workshops and give talks, this is a valid point, and the jar collecting began.

If you want to collect your waste, if it works for you, if you enjoy looking at it and seeing your progress, of course collect your waste. If you just think it’s another chore, and you really can’t be bothered, then there’s no need.

After some initial reluctance, my waste now goes in a jar. Can you believe it, the very day after I began I had something to go in it?! Not the best start!

After some initial reluctance, my waste now goes in a jar. Can you believe it, the very day after I began I had something to go in it?! Not the best start!

Now I’d love to hear from you! What lessons have you learned on your zero waste or plastic-free journey that you want to share? Do you have some new ones to add to the list? Do you disagree with any of these, and if so why? Are there any favourites that stand out for you? Do you have any exceptions to your rules, as if so, what? (Please don’t tell me I’m the only one…) I really want to hear your thoughts so please leave me a comment below!

[leadpages_leadbox leadbox_id=1429a0746639c5] [/leadpages_leadbox]
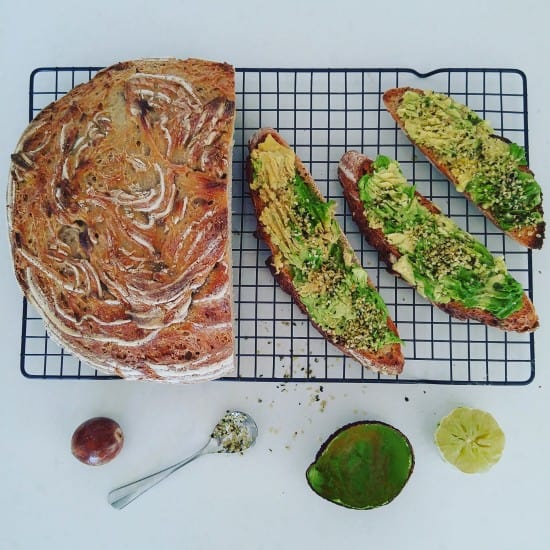
https://treadingmyownpath.com/wp-content/uploads/2015/04/Bulk-Produce-in-Glass-Jars-e1429180613733.jpg 716 1000 Lindsay (Treading My Own Path) https://treadingmyownpath.com/wp-content/uploads/2019/06/logo.png Lindsay (Treading My Own Path)2016-03-17 13:59:352018-07-27 20:50:488 Lessons Learned from 4 Years of Zero Waste Living

From Near-O to Zero: How I Got Rid of My Bin

41 Comments/in Living With Less Waste, Plastic Free Living, Zero Waste/by Lindsay (Treading My Own Path)

We are moving out of our flat this week, and our rubbish bin won’t be coming with us. We won’t be replacing it either. The reason? We simply don’t create enough rubbish to fill it.

I realised a few months ago that I was spending more time taking things out of the rubbish bin than putting things in it. The odd tissue. Sweepings from the kitchen floor. Onion peelings and spent corn-on-the-cobs (we had an incident with the bokashi bin where we ran out of bran, and it grew moldy and very smelly, and my husband was afraid to take the lid off. With reason – it stank).

All of these things could go in the worm farm, but it was almost a reflex to empty the dustpan or drop things into the bin. (Hence then having to take them back out.) There was also the odd non-recycable thing of course, but not enough to justify keeping a bin in our fairly small kitchen.

As a test, we moved the bin outside onto the balcony to see if we missed it.

We didn’t.

This is a long way to come since 2012, when I first heard of Plastic Free July and began my plastic-free living adventure. Back then I thought I was being a responsible consumer by purchasing eco-friendly washing-up liquid in a recyclable plastic bottle (and then recycling it), and taking my own bags to the shops. I thought that filling my recycling bin up to the brim every week was a good thing.

Little did I realise that this was just the beginning of what I could be doing.

I’d never heard of zero waste back then, or even being plastic-free, yet something about the idea of giving up plastic for a month stirred my consciousness….and my conscience! Deep down, I knew that plastic was a problem. I knew there was too much of it in our environment; I knew a lot of it was completely unnecessary; I knew it was a waste of resources.

Yet somehow I’d never made the connection that I was part of the problem. I was directly contributing to these issues by the way I shopped and the packaging I bought; I was also supporting this system and saying “this is okay”.

I was part of the problem, and I could be part of the solution. I could do things a different way. I could ditch the disposables, reuse what I had and refuse new plastic altogether. I decided then, in June 2012, that I wasn’t just giving up plastic for a month.

I was giving up plastic forever.

With no real idea of what to do, but with complete conviction in my heart that this was the right path to be following, and all the enthusiasm and determination that comes with embracing a new challenge, I set out changing my habits.

First up, I started switching my packaging to paper, card and glass. Most fruits and vegetables were easy to find loose, and those that only came in plastic, I simply didn’t buy. I found pasta in cardboard, chocolate in foil and paper, and toiletries in glass bottles.

Not having a car, I carried my shopping home. I noticed how heavy my shopping had become now I wasn’t buying plastic. I also noticed how bulky the glass jars were, and the cardboard boxes. I became aware of packaging – how much of it I was using – for the first time. When everything was in plastic, I hadn’t noticed. It was so light and stealthy!

Around the same time, about two months in to my plastic-free living adventure, I discovered glass isn’t even recyclable in the state we lived in. It has to be trucked to the next state, some 1500km away. Not all glass collected from recycling bins is trucked there either; some is sent to landfill as it is more cost-effective. Some glass was crushed and used as road base – not quite the virtuous cycle we’re sold!

This discovery totally shattered my presumption that glass was a responsible alternative to plastic. It felt just as wasteful as using plastic. I decided that no packaging at all was the best option, and began to work towards that.

Bulk Produce in Glass Jars

I reconnected with Farmers Markets, and tracked down the local bulk stores to buy my groceries without packaging. I found soap and liquid cleaning products in bulk. I took my own containers to local delis and to my delight, found that they were accepted everywhere I went.

One ingredient or product at a time, I worked on finding a packaging free solution.

It wasn’t a quick process; it took me 18 months to eliminate most of the packaging from my home. I didn’t tackle everything at once – as things ran out I’d look to replace them.

Some things were stubbornly difficult to find, and so I learned to make my own, find an alternative…or simply go without. We looked beyond food and toiletries to other areas of the house, borrowing rather than buying, or shopping second-hand if we really needed something.

It’s surprising, but the less you have, the less you realise you need.

The hardest thing for me was figuring out what to do with all the food waste. Eating lots of vegetables and making lots of things from scratch left us with lots of compostable waste…but no compost bin. Living in an upstairs flat, there wasn’t anywhere to set up a compost bin, and we don’t have any local collection points. Without a car it wasn’t practical to drop it off anywhere.

We have two worm farms but they can’t eat everything that we produce. Eventually, after a couple of false starts, we finally embraced using a bokashi bin for all the food scraps that can’t go in the worm farm – onion peels, lemon skins, spent corn cobs and avocado skins, for example – and this reduced our throwaway food waste to zero.

As the contents of our bin dwindled more and more, I became more and more determined to eliminate the final bits and pieces – however small! We have a junk mail sticker on our mail box but the odd thing sneaks through – I became militant in returning to sender. No free plastic pens required here! We check the fruit and veg we buy doesn’t have plastic stickers on it before we get it home.

If we’re offered any packaging, we decline; if we’re given it, we hand it straight back. We refuse receipts. All little things, but little things add up.

Looking into Empty Bin again Lindsay Miles Looking Into Empty Bin Zero Waste Treading My Own Path

I’m not the first person to give up my rubbish bin (I’m pretty sure that was Bea Johnson, who started her zero waste journey way back in 2008). The great thing is, I know I won’t be the last, either.

Choosing a lifestyle that’s healthier, with food that’s fresh, natural and seasonal, that embraces community and supports local, that teaches new skills and encourages creativity, and that doesn’t harm the planet… what’s not to love? No wonder the zero waste movement is growing every day.

For me, getting rid of my bin means I’ve reached the tipping point. We are creating so little rubbish that it no longer makes sense to keep a container in the house specifically for storing it. Despite giving the bin up, I am sure I will still create waste in the future. I’m not perfect. I have things in my house that I purchased long before I began to think about what would happen to them at the end of their lives; things that aren’t recyclable, or compostable. Clothes that aren’t biodegradable. I choose to keep them until they are used up, life expired, but eventually I will need to dispose of them.

I intend to choose differently next time around. After all, we can’t worry abut or dwell on the choices we made in the past; but we can concentrate on making better choices in the future.

Now I’d love to hear from you! Have you embarked on a zero waste journey of your own? Are you planning on getting rid of your bin, or do you have another goal in mind? What have been your biggest challenges and greatest successes? Are you yet to try the plastic-free or zero waste path, and is the new year tempting you to give it a go? If not, what is holding you back?! What compromises have you had to make along the way? Please tell me your thoughts in the comments below!

[leadpages_leadbox leadbox_id=1429a0746639c5] [/leadpages_leadbox]

https://treadingmyownpath.com/wp-content/uploads/2015/12/From-NearO-to-Zero-Banner-Treading-My-Own-Path-1000px.jpg 677 1000 Lindsay (Treading My Own Path) https://treadingmyownpath.com/wp-content/uploads/2019/06/logo.png Lindsay (Treading My Own Path)2015-12-22 13:52:112018-07-28 10:37:26From Near-O to Zero: How I Got Rid of My Bin
Page 6 of 13«‹45678›»

Pages

  • 9-tips
  • Birthday book reviews
  • Books
  • Cheatsheets and checklists
  • Every Blog Post I’ve Ever Written
  • Food Waste Challenge
  • Hoarder Minimalist Progress Tracker
  • Instagram
  • Join the mailing list
  • One More Step…
  • Real Food and Recipes
  • Thank you – 3 day food waste challenge
  • Thanks for joining!
  • The Less Waste No Fuss Kitchen Bonus Vault
  • Treading My Own Path Gift Voucher
  • Zero Waste + Plastic Free Living in Perth, Western Australia
  • Home
  • Quotes and facts
  • Resources
  • About
  • Infographics
  • Work with me
  • Minimalism / Simple Living
  • Plastic-free living
  • Upcoming events
  • Zero Waste
  • Explore
  • Blog
  • Less Stuff Book
  • The Less Waste No Fuss Kitchen
  • Thank You
  • Disclaimer & Copyright
  • Privacy Policy

Categories

  • About Me
  • Changemaking
  • Chemical-Free Living
  • Climate action
  • Community
  • Decluttering
  • DIY Skincare
  • Energy
  • environmental guilt
  • Ethical Living
  • Garden
  • growing food
  • Health & Wellness
  • How to…
  • Less Stuff
  • Living With Less Waste
  • Minimalism
  • Money-Saving
  • Musings
  • Out & About
  • Permaculture Gardening
  • Plastic Free July
  • Plastic Free Living
  • Real Food
  • Recipes
  • Simple Living
  • Sustainable Food
  • Thrift
  • Transport
  • Uncategorized
  • urban permaculture
  • Water
  • Zero Waste

Archive

  • November 2022
  • July 2022
  • April 2022
  • March 2022
  • February 2022
  • March 2021
  • February 2021
  • January 2021
  • December 2020
  • November 2020
  • October 2020
  • September 2020
  • August 2020
  • July 2020
  • June 2020
  • May 2020
  • April 2020
  • March 2020
  • February 2020
  • January 2020
  • December 2019
  • November 2019
  • October 2019
  • September 2019
  • August 2019
  • July 2019
  • June 2019
  • May 2019
  • April 2019
  • March 2019
  • February 2019
  • January 2019
  • December 2018
  • November 2018
  • October 2018
  • September 2018
  • August 2018
  • July 2018
  • June 2018
  • April 2018
  • March 2018
  • February 2018
  • January 2018
  • December 2017
  • November 2017
  • October 2017
  • September 2017
  • August 2017
  • July 2017
  • June 2017
  • May 2017
  • April 2017
  • March 2017
  • February 2017
  • January 2017
  • December 2016
  • November 2016
  • October 2016
  • September 2016
  • August 2016
  • July 2016
  • June 2016
  • May 2016
  • April 2016
  • March 2016
  • February 2016
  • January 2016
  • December 2015
  • November 2015
  • October 2015
  • September 2015
  • August 2015
  • July 2015
  • June 2015
  • May 2015
  • April 2015
  • March 2015
  • February 2015
  • January 2015
  • December 2014
  • October 2014
  • September 2014
  • August 2014
  • July 2014
  • June 2014
  • May 2014
  • April 2014
  • March 2014
  • February 2014
  • January 2014
  • December 2013
  • November 2013
  • October 2013
  • September 2013
  • August 2013
  • July 2013
  • June 2013
  • May 2013
  • April 2013
  • March 2013

Treading My Own Path

Privacy / Disclaimer

Sign up to the newsletter

Website by Órla Larkin

Lindsay Miles is an educator, speaker, author and passionate zero waste/plastic-free living advocate helping others live more meaningful lives with less waste and less stuff. She has been sharing ideas, tips, tricks and strategies on her website Treading My Own Path since 2013. Her first book, Less Stuff, was published in 2019 and her second, The Less Waste No Fuss Kitchen was published in June 2020. Originally from the UK, Lindsay now lives in Perth, Western Australia.

Lindsay Miles
© 2024 Lindsay Miles | ABN 84 679 541 090
  • Link to X
  • Link to Youtube
  • Link to Instagram
  • Link to Mail
  • Link to Facebook
Scroll to top Scroll to top Scroll to top

This site uses cookies. Cookies enable me to personalise your experience on this site so I can improve my content and communications.

I'm okay with that

Cookie and Privacy Settings


How we use cookies

We may request cookies to be set on your device. We use cookies to let us know when you visit our websites, how you interact with us, to enrich your user experience, and to customize your relationship with our website.

Click on the different category headings to find out more. You can also change some of your preferences. Note that blocking some types of cookies may impact your experience on our websites and the services we are able to offer.

Essential Website Cookies

These cookies are strictly necessary to provide you with services available through our website and to use some of its features.

Because these cookies are strictly necessary to deliver the website, refusing them will have impact how our site functions. You always can block or delete cookies by changing your browser settings and force blocking all cookies on this website. But this will always prompt you to accept/refuse cookies when revisiting our site.

We fully respect if you want to refuse cookies but to avoid asking you again and again kindly allow us to store a cookie for that. You are free to opt out any time or opt in for other cookies to get a better experience. If you refuse cookies we will remove all set cookies in our domain.

We provide you with a list of stored cookies on your computer in our domain so you can check what we stored. Due to security reasons we are not able to show or modify cookies from other domains. You can check these in your browser security settings.

Other external services

We also use different external services like Google Webfonts, Google Maps, and external Video providers. Since these providers may collect personal data like your IP address we allow you to block them here. Please be aware that this might heavily reduce the functionality and appearance of our site. Changes will take effect once you reload the page.

Google Webfont Settings:

Google Map Settings:

Google reCaptcha Settings:

Vimeo and Youtube video embeds:

Privacy Policy

You can read about our cookies and privacy settings in detail on our Privacy Policy Page.

Privacy Policy
Enough is Enough Free ebook for Subscribers front cover

Join our community and you’ll receive free new content every week and a downloadable eBook “Enough is Enough” to help you take the next steps!

Enough is Enough eBook

Please send me the eBook!

Send my eBook link to:

By downloading the eBook you agree to my Privacy Policy.

I hate spam as much as you do, and I promise to keep your email address safe. I will not share or sell your personal information, ever. You can unsubscribe at any time.

This form collects information I will use to send out the free eBook, new content once a week and an occasional newsletter (with other stuff I think you’ll find useful such as events).

Loading Comments...