Tag Archive for: permaculture

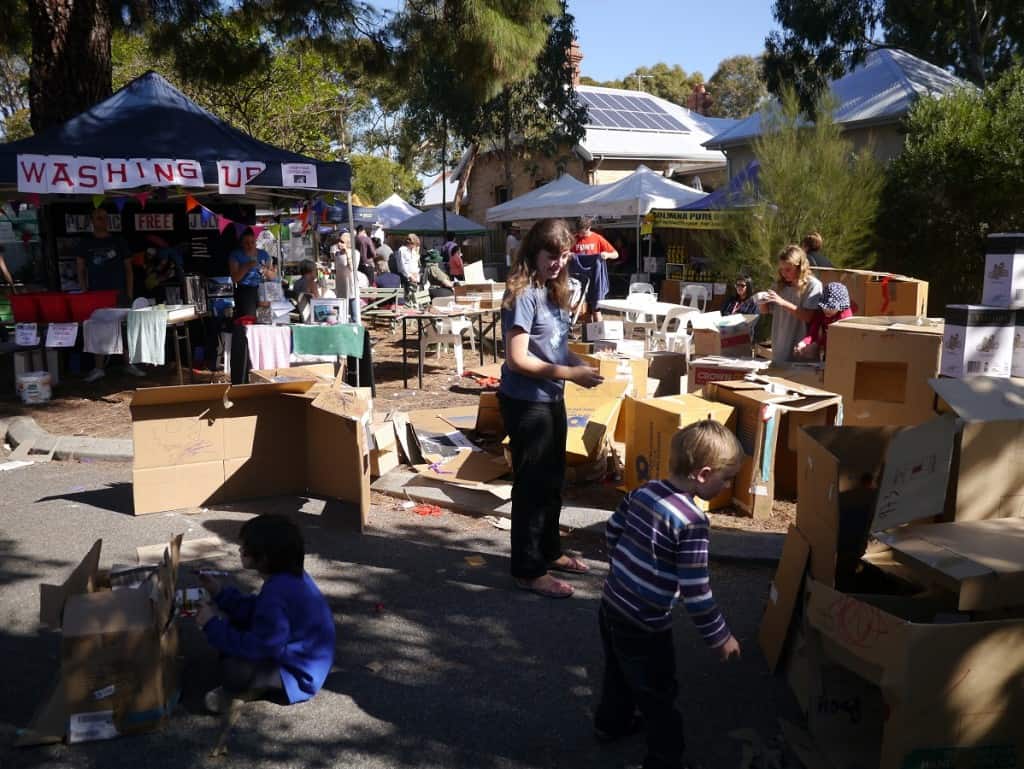
Community Composting (+ Tips For Better Compost)

One of my favourite things about living with less waste is that there is never a single solution. There are always lots of solutions. Different options work better for different people and different situations, but there will always be a way.

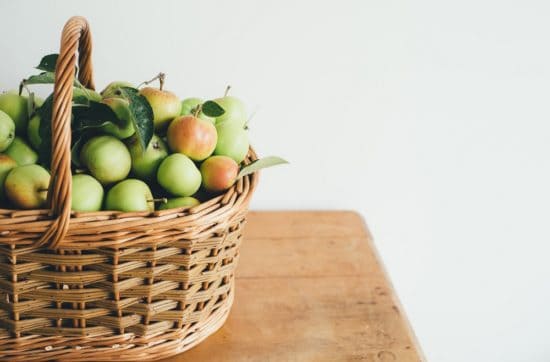
In Australia, 40% of our landfill bins consist of food waste. Trimmed off bits, peels, skins, seeds, cores, outer leaves, shells, things we left in the fridge a little too long, bad bits, leftovers.

We toss this stuff in the general waste bin, and off it heads to landfill. Which, contrary to what many people believe, isn’t a giant compost heap. It’s a tomb of waste, sealed by layers of rocks (or sometimes layers of plastic) in between the layers of rubbish, and slowly releasing methane into the environment.

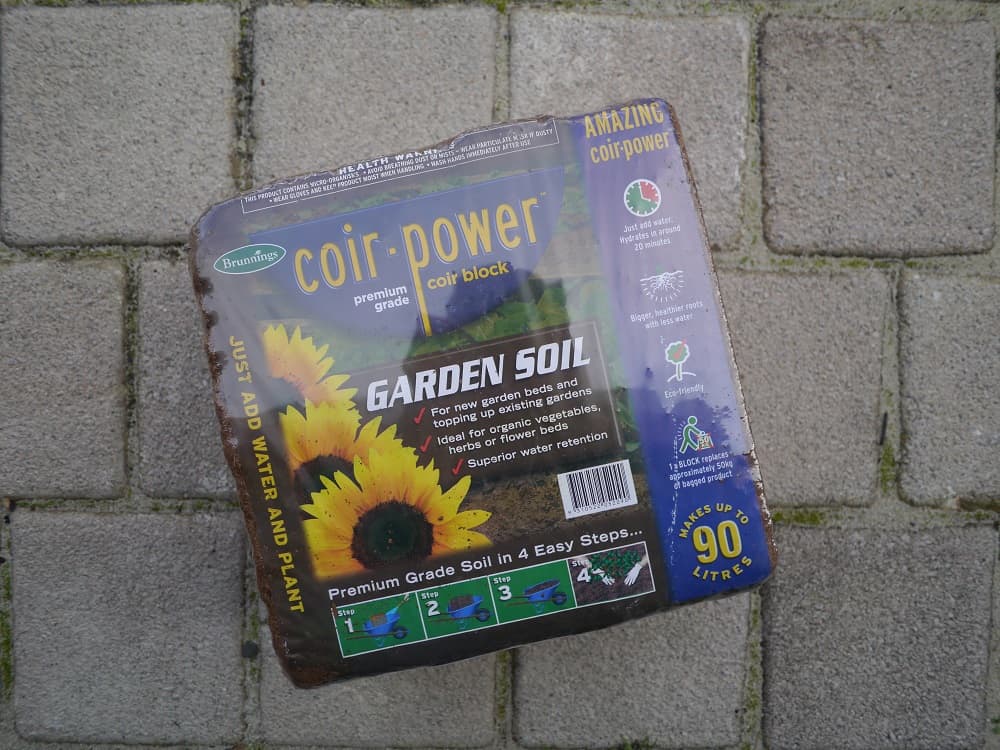
At the same time as we throw our food scraps in the bin, we head to the garden centre to buy plastic bags of compost to help our plants grow better.

We’ve got it all wrong!

So what can we do with our food scraps instead?

Before I moved to Australia, I lived in Bristol (in the UK), and I was fortunate enough to have my organic waste collected by the council every week and taken to an industrial composter. This isn’t an option where I live now (although some councils are currently trialing it).

Even if it was, I wouldn’t use that service now. I would rather keep my food waste (it is a valuable resource!) and turn it into something I can use – or donate it to someone else who can use it instead.

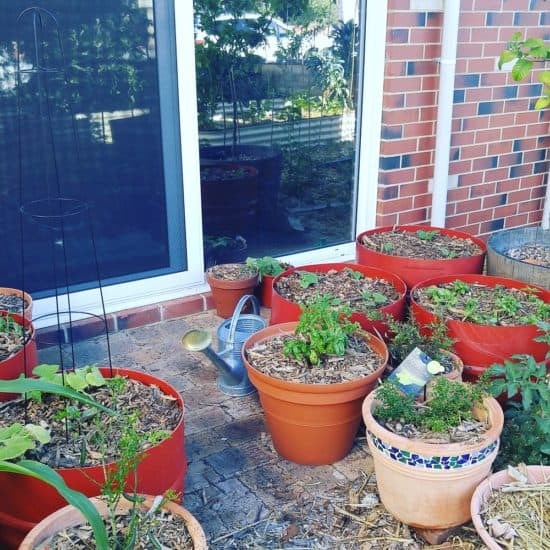
I’ve talked about some different ways of dealing with food waste before: DIY worm farms, done-for-you worm farms and bokashi bins. If you’re just starting out on the living-with-less-waste journey, setting up systems at home can take a bit of time.

As always, there’s a solution. Community composting!

For anyone wanting an easy beginner’s solution, or for anyone without the time or space to set up their own systems, community composting banks are perfect.

What Is A Community Composting Bank?

A community composting bank is simply a location where members of the community can go to deposit their food scraps.

(They are not necessarily called “banks”. I was thinking about this word, and whether it was better to use the word “hub”, “centre” or “facility”. A phrase popped into my head that I’ve heard many times before: “growing your own food is like printing your own money”. If compost is what helps us to grow food, then I think bank is the best word after all.)

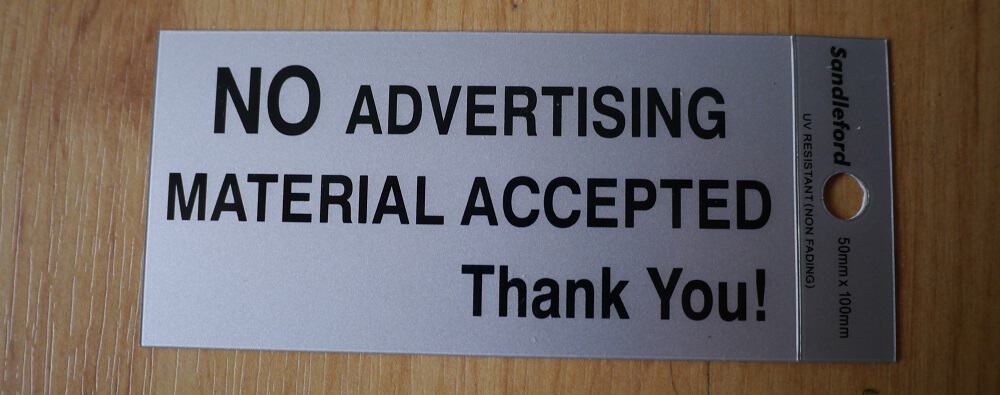
The best composting banks are those with capacity to handle the scraps they receive; those with unrestricted access; and those that are managed/overseen by someone to check they are working properly, not contaminated or full of pests.

By “best”, I really mean “easiest to use”. That’s not to say others don’t work well too. Given the choice, I’d prefer to turn out to a facility that is open/accessible, has space to take my scraps, and isn’t infected with cockroaches.

I’d still come back if I turned up to find the place was locked, or the bins were full, but not everyone will. To reach the maximum number of people, things need to be as easy as possible.

The other important consideration is location. A 24 hour access composting hub on the other side of town is less practical than the restricted access compost bins just down the road.

As with most community initiatives, the more local, the more useful and likely to be used.

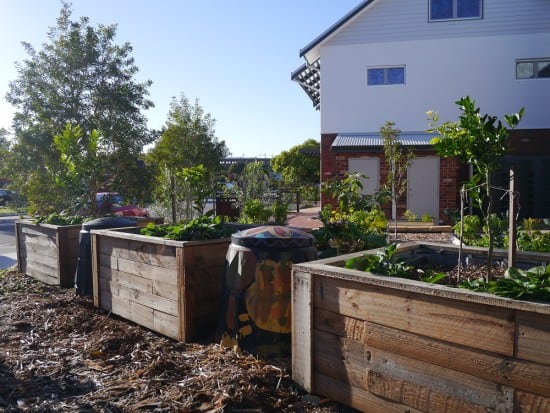
How We Set Up Our Community Composting Bank

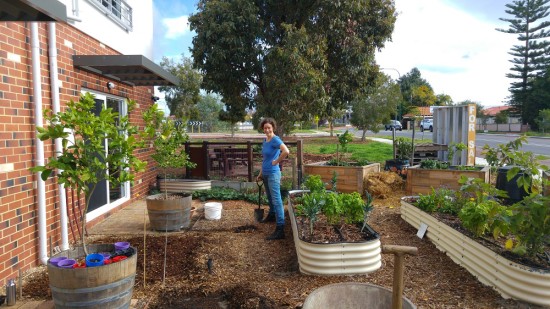
I run a community composting hub together with my friend and neighbour. Originally, both of us listed our home compost bins on the awesome website sharewaste.com, a free-to-use service connecting people with food scraps with people with compost bins.

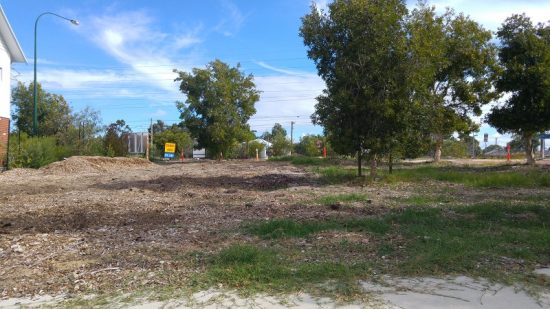
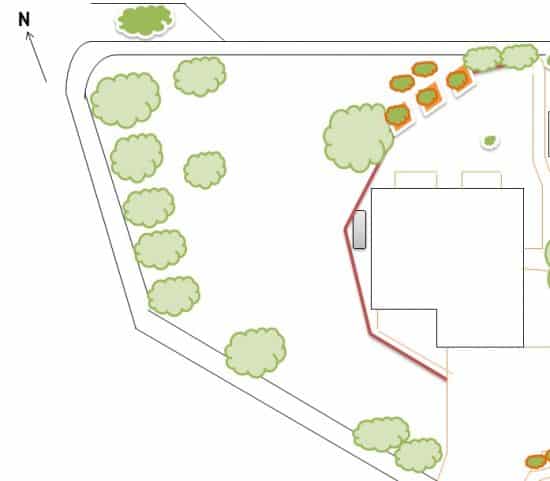
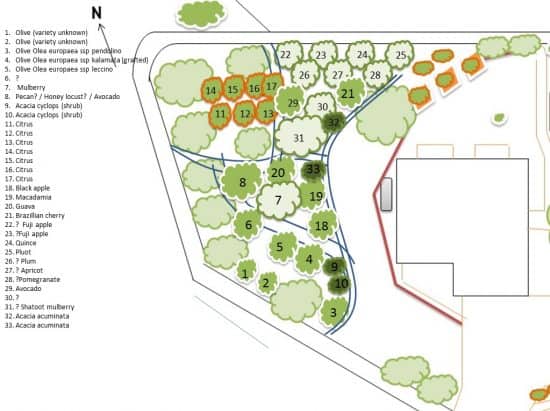
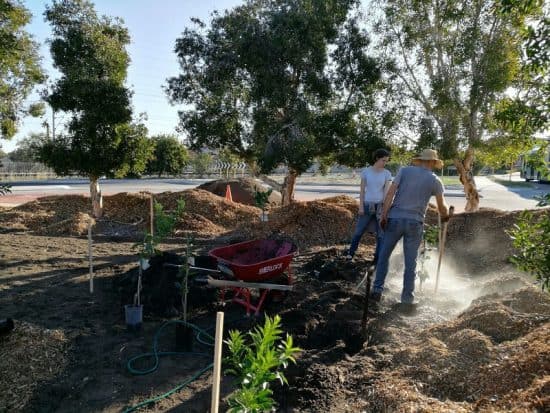
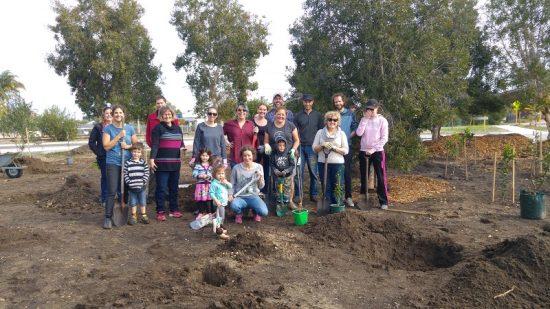
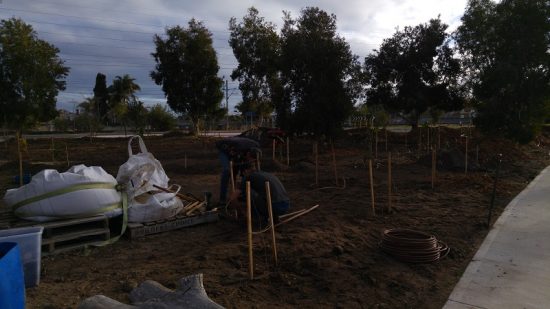
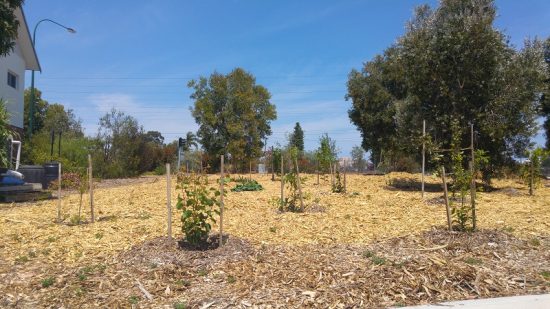
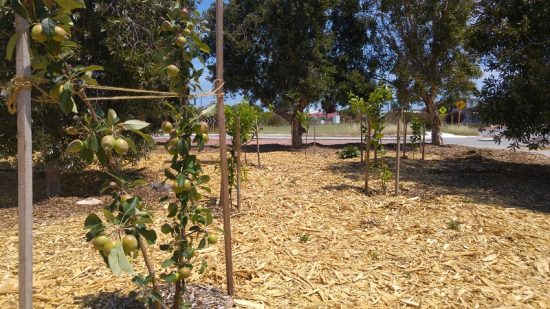
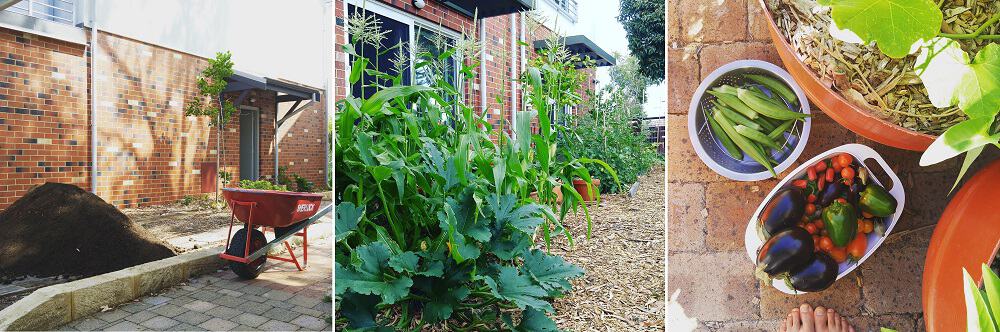
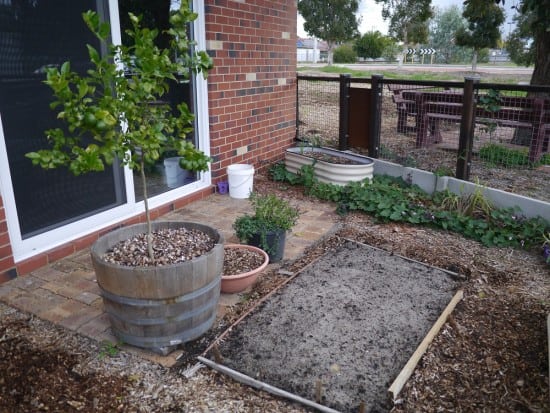
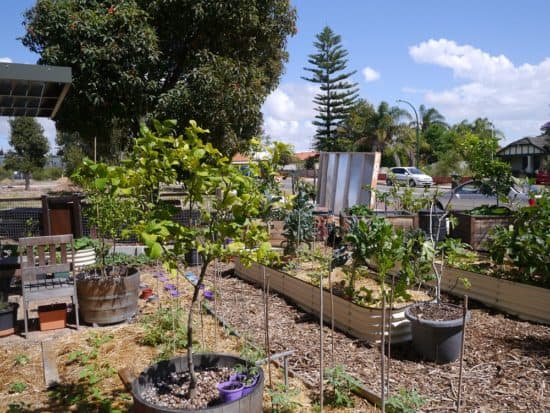
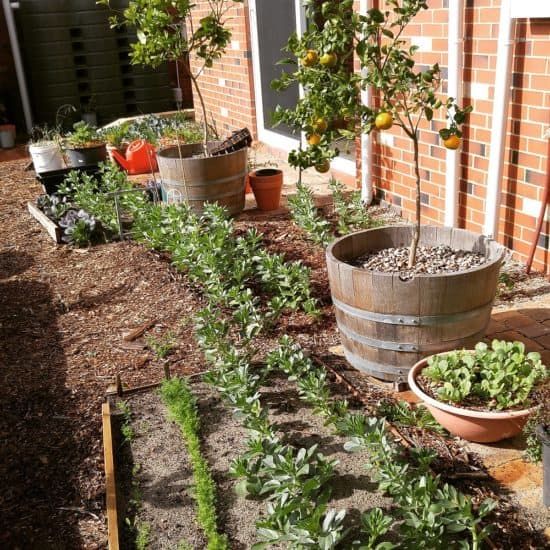
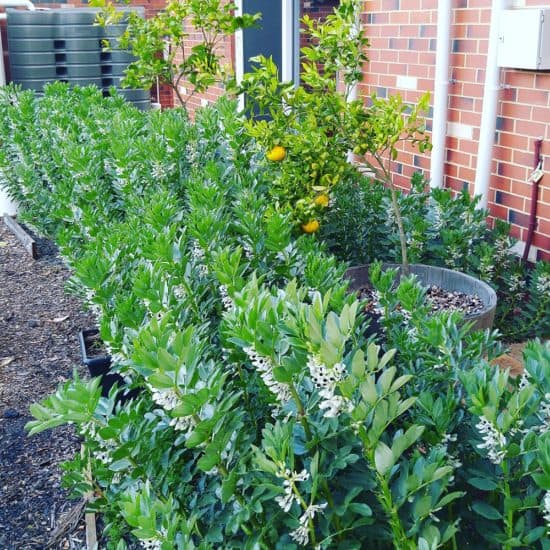
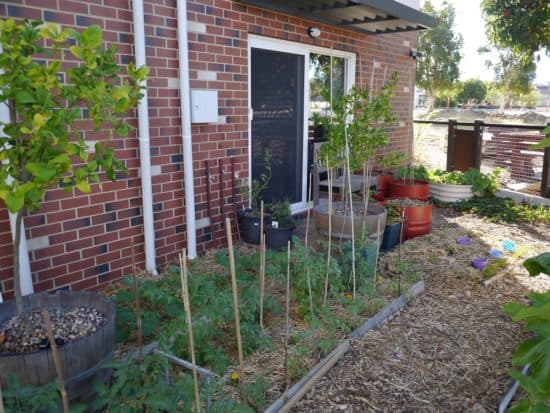
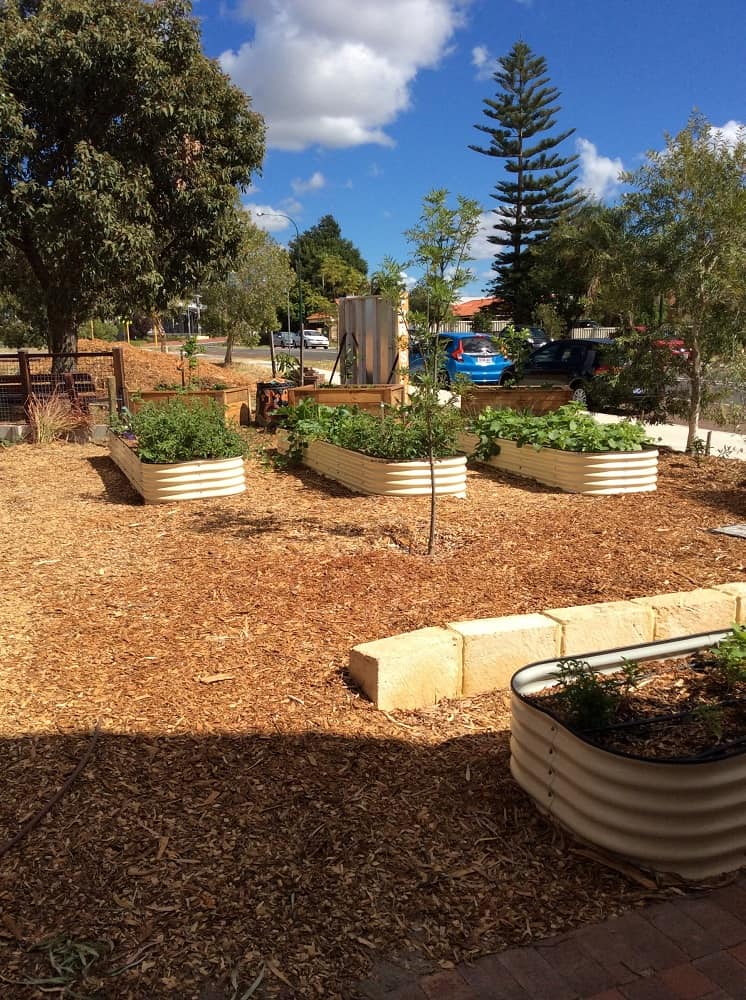
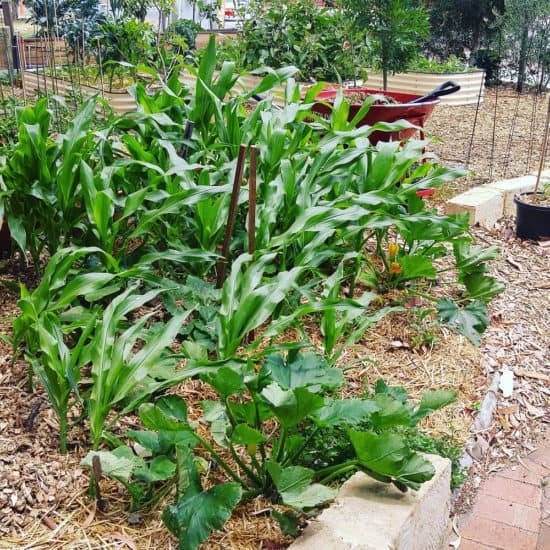
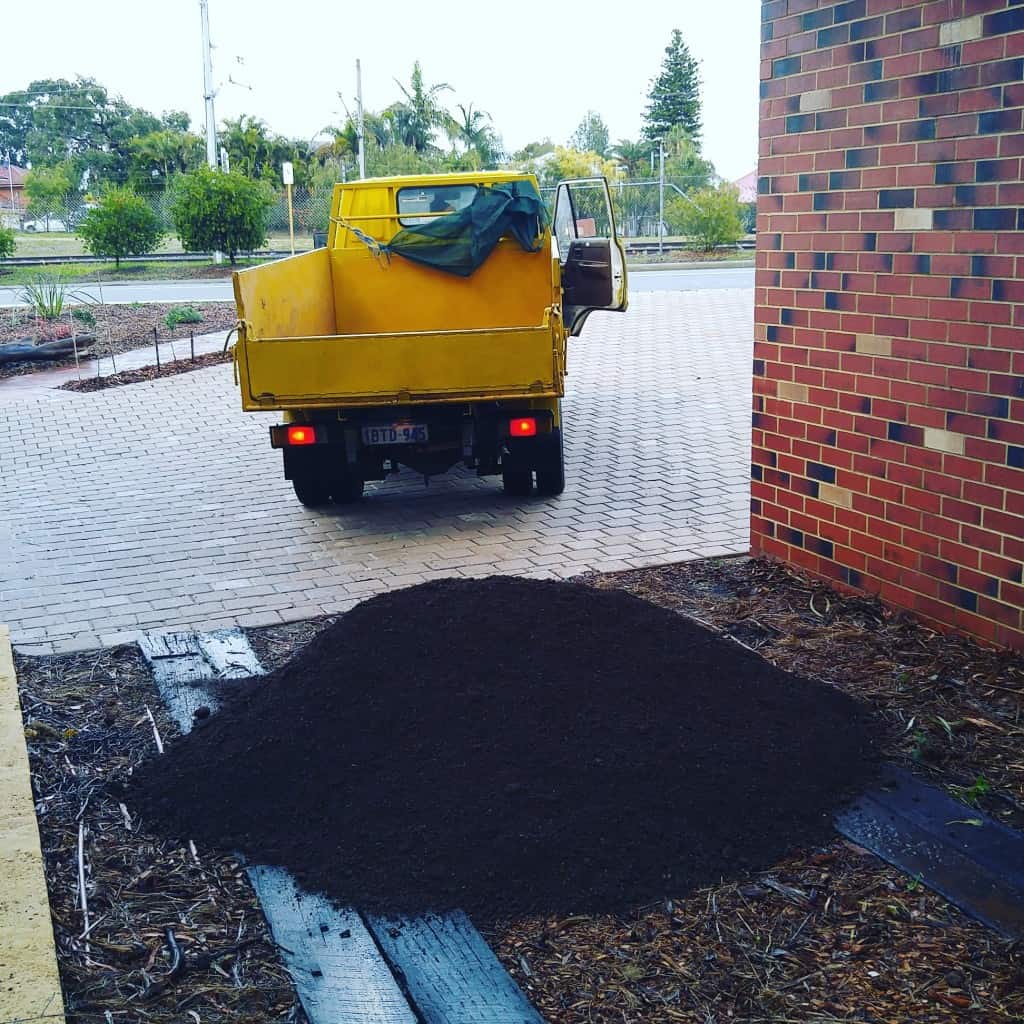
Around the same time, we started a Food Tree project on the land next to my house, planting 34 food trees for our community. We realised that these trees are going to need a fair bit of compost.

We had space for compost bins and we knew plenty of people in our community would be eager to donate their food scraps to our bins.

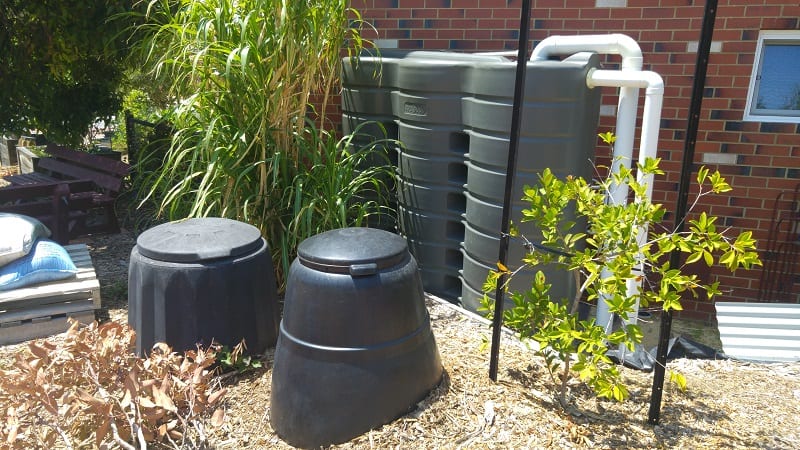
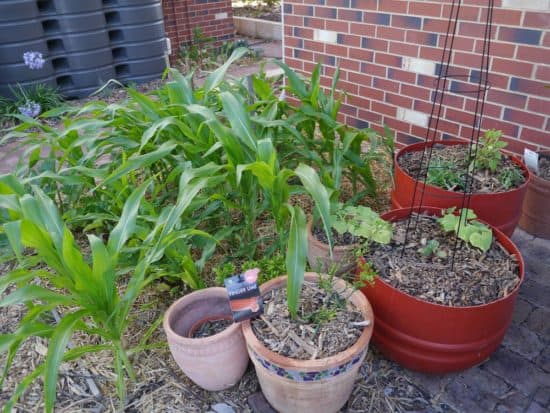
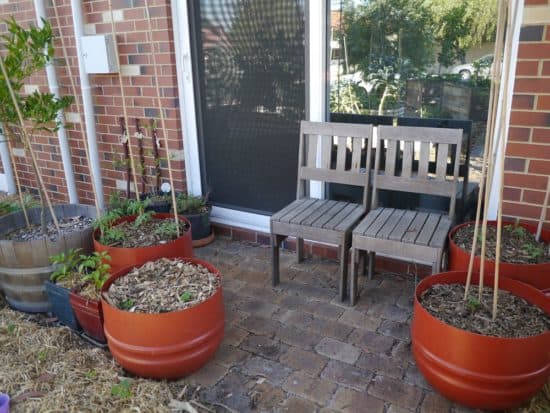
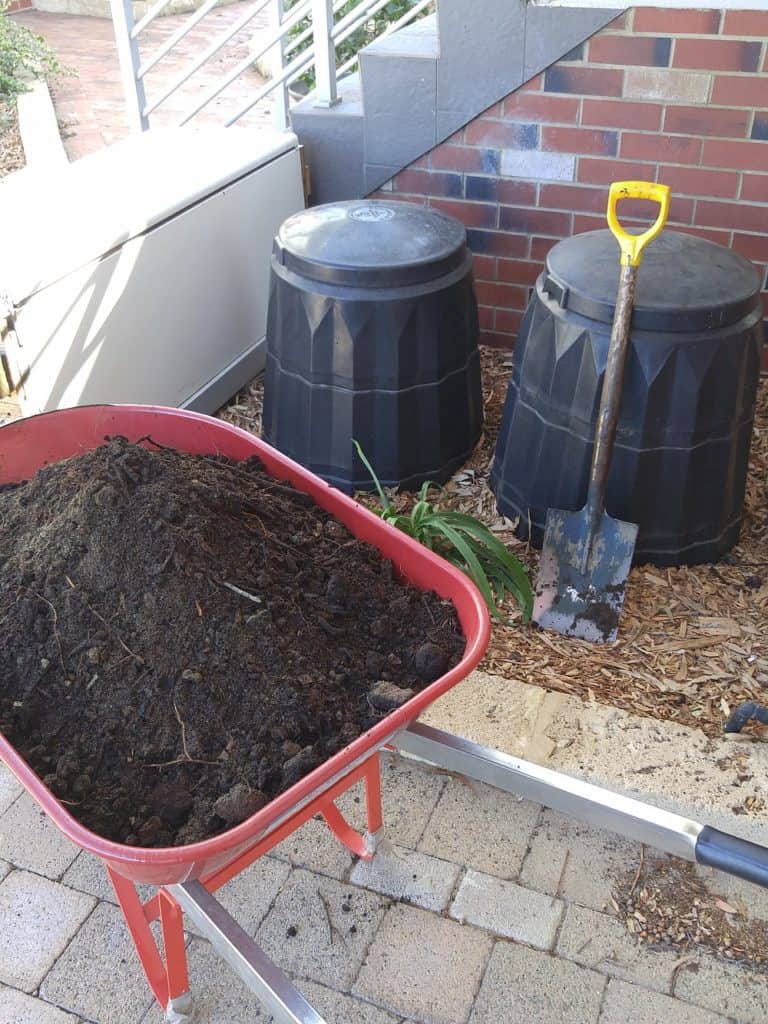
We started with two bins, and have now increased to five (all donated or sourced second-hand).

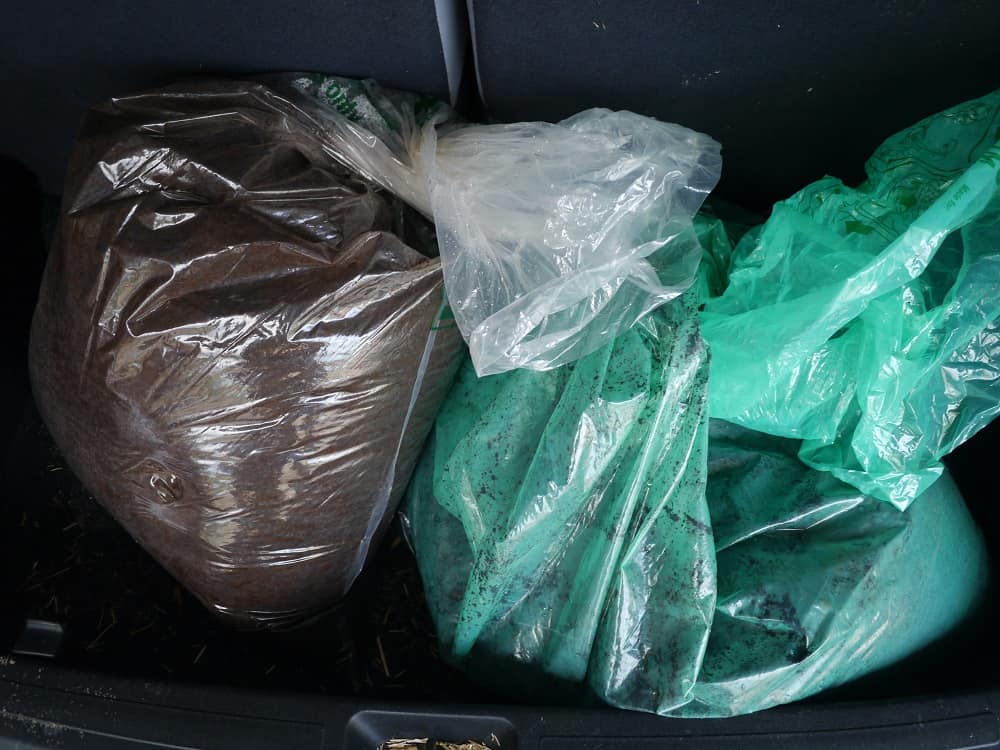
As people contact us via Sharewaste, we ask them to bring their food scraps here, and started making compost.

Managing A Community Composting Hub

As with everything, the more people who get involved with something, the more likely it is that things will go awry. With about 20 families currently emptying their food scraps into our bins, we started noticing more and more that things weren’t quite as they should be.

I should add that this is not the fault of the people donating their scraps. As the managers, it is our responsibility to make sure it is all working.

If people haven’t had compost bins before, there is no reason why they would know what is good and what is not.

There were a few problems that we had in particular.

Fresh food scraps going in whichever bin.

This meant all five bins would have fresh food scraps mixed into varying degrees of compost – frustrating when we wanted to dig out the ready compost and there’s a bunch of veggies in there too.

We realised that whilst it might be totally obvious to us which bin was the one for new food scraps, it certainly wasn’t clear to everyone!

Too many veggies scraps (too much nitrogen).

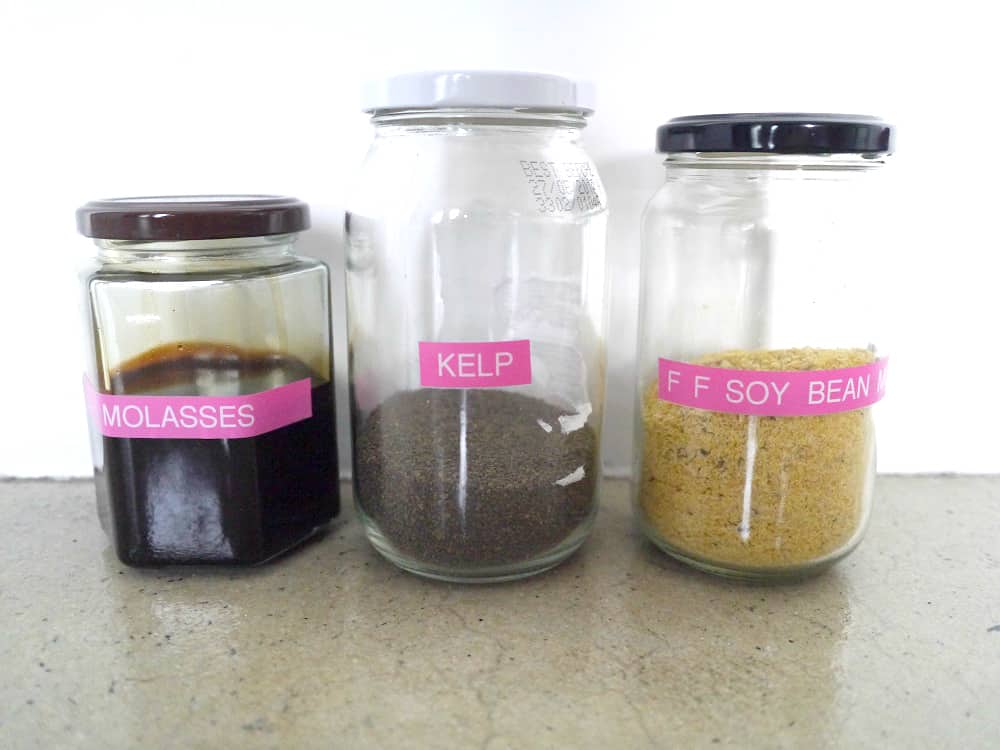
Compost bins need a balance of nitrogen and carbon. Nitrogen-rich scraps are anything green and fresh; carbon scraps are anything brown or dead. Veggie scraps are high in nitrogen. If the only thing being added is fresh green nitrogen-rich scraps, the bin will get stinky and attract flies and other pests pretty quickly.

For all of the green scraps added, some browns (carbon) need to be added too.

Food scraps not being mixed in.

A big mound of fresh veggies sitting on top of the compost pile will not break down nearly as well as those food scraps stirred in, because that is where the microbes are – inside, not on top! Not to mention that food on top will attract pests.

Too much carbon.

Less of an issue as most people are donating food scraps (nitrogen), but we did find one compost bin completely filled with shredded paper – and nothing else. Without anything else, that would have sat there probably for years, breaking down ever so slowly. In the same way as there can’t be too much green, there definitely can’t be too much brown.

Setting Up a Composting System That Works

My neighbour and I talked about all the issues, and how to reduce them in future. Community things need to be easy, and we felt a big list of rules would be overwhelming and put people off – which is the last thing we want!

We worked through the issues one by one, and have implemented a system.

Firstly, we decided that it was too difficult to expect people to figure out which bin was the one to add their scraps to simply by looking.

We decided instead to implement a linear system, where the scraps always go into one designated bin, and then we will move into other bins along the line manually.

(This means we can also check there’s nothing strange being added.)

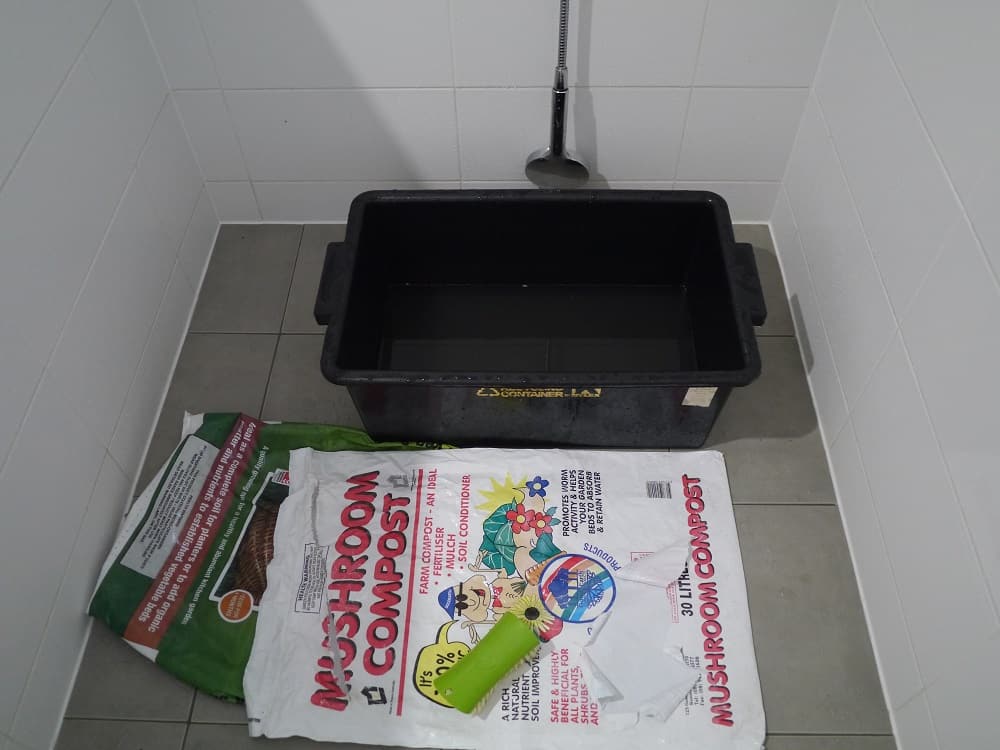
We also decided that to make it easy for people to add carbon to their food scraps, we’d set up a bin solely with carbon so they could simply scoop some in afterwards.

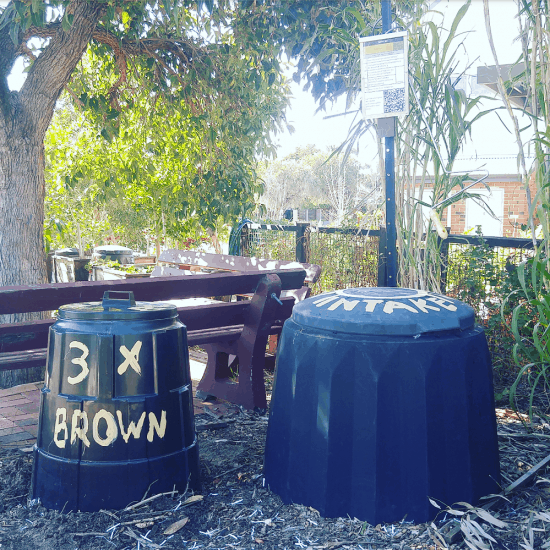
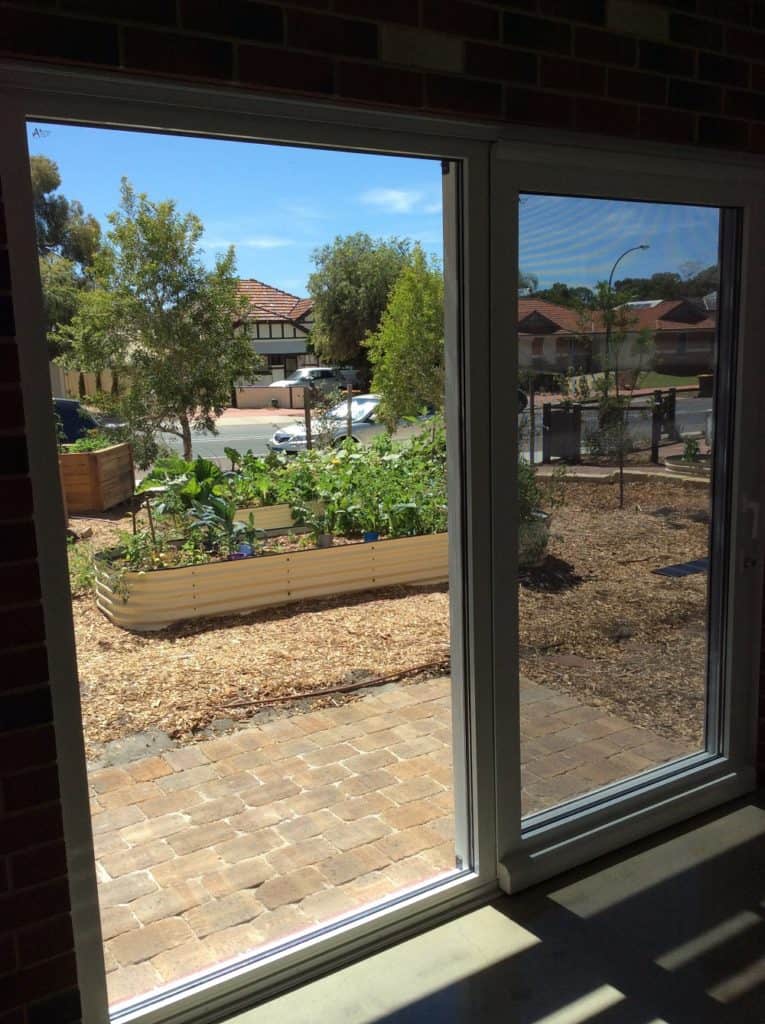
Then, we added some signage and labels.

We wrote up the basics on a sign, weatherproofed it and secured it to a post.

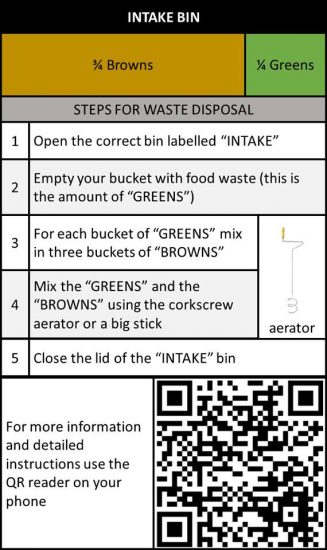
We wrote a document with more tips and tricks (the stuff that we’d like people to know) and added a QR code to the sign, so if they have a question, they can check.

We’ve also secured the aerator/composting fork to the signpost (and explained in the sign what it is for) so that it is easy for people to mix their food scraps into the existing compost.

We painted labels on the two bins that people need to use. When in doubt, always label.

In short, we’ve tried to predict in advance what could go wrong, and then solve it before it happens. So far, it seems to be working well.

Looking for a Community Composting Hub?

If you’re feeling inspired to hook into an existing hub or maybe start your own, my first suggestion would be see who else is in your area via sharewaste.com. My second suggestion would be to contact your nearest community garden.

If both of these fail, consider whether you could set up a mini hub at your place. Even if you only have capacity to take a couple of household’s food scraps, it all helps!

Now I’d love to hear from you! How do you currently deal with your food scraps? Do you like your current system or would you prefer something different? Have you any experiences with community composting hubs – both good and not-so good? Anything other questions? Please share your thoughts in the comments below!

[leadpages_leadbox leadbox_id=123a865e9839c5] [/leadpages_leadbox]

How We Started an Urban Food Tree Project

Ever since we first moved to our suburb 18 months ago, I had my eye on the rather sad looking patch of land at the corner of the street.  Despite the weeds and bare nothingness (excluding the few surviving melaleuca trees around the edge), all I could see was the epic potential.

Wouldn’t it be great if we could turn this barren, weedy patch of land into a thriving community orchard?

My neighbours, and one in particular, shared my enthusiasm and vision. Almost as soon as we moved in, the conversation began. At the start of this year, the actual work began, to turn the conversation into reality.

The Initial Idea: Creating a Food Tree Project

Rather than planting an orchard where the goal is to maximise production, we wanted a balance. Growing fruit trees alongside natives and groundcovers creates a more aesthetically pleasing, biodiverse and dynamic ecosystem that will be more interesting to walk through, creates more learning opportunities and is more resilient to pests.

The name “Food Tree Project” rather than an “Urban Orchard” reflects that our goals were broader than simply planting fruit-bearing trees and producing food. The permaculture concept of “Food Forest” didn’t really fit either, because although I followed permaculture principles in the designing, there are too many human inputs to be a true permaculture food forest.

Food Tree Project felt best.

Our Vision:

Community: to provide a space for collaboration, learning, volunteering and sharing; to encourage residents to learn more about growing food and have access to locally grown fruit; and create an attractive and sheltered resting spot close to the train station.

Environment: to increase tree coverage, canopy cover and greenery; to improve the streetscape close to the train station; and to increase biodiversity and provide habitat for birds.

The Plan:

The plan was to plant around 40 fruit trees of varying species on the unused space on the corner of two streets in our suburb, with wide pathways between the trees to allow and encourage public access for community members to see the trees and learn about them.

We also planned to plant native species on the border to encourage biodiversity, and interplant nitrogen-fixing acacias and other ground covers to create a green space between the trees.

The property next to the block has a bore, we are extending the reticulation so that the site will have water access in summer (this is essential in Perth – no water means no trees).

Goals of the Food Tree Project:

There are a number of goals we hope to achieve with this project.

  • Create a welcoming and shady community space by planting trees, and to provide access for residents to locally grown fruit.
  • Provide learning opportunities for interested residents on growing their own food and looking after fruit trees, and to provide volunteering opportunities.
  • To provide a demonstration project and framework that other volunteer groups can take to their local council to plant more trees on underutilised spaces in their urban environment.

The First Step: Getting Council Approval

The scariest step is probably asking for permission. Have you ever heard the expression “ask for forgiveness, not permission?” If we asked the council for permission and they said no, it would be hard to go ahead and do it anyway.

Should we ask for permission, or just do it and hope they didn’t mind?

However, we want this project to be an example of what can be done, a demonstration project to encourage others to approach their councils to plant on underutilized spaces. That meant going through the official channels. So we put together our vision and arranged to meet a council member on the site to discuss our plans.

We met on the site and talked through our ideas. We asked what restrictions they had (for example, banned or unwanted species) and were willing to listen to any needs that they had. I’d recommend meeting in person rather than chatting via email. It’s so much easier to connect with someone when you are face-to-face.

We agreed to put together a plan of the site detailing the trees to formalise the project. I took a screenshot of the Google arial view of the block, then pasted that into Powerpoint. I drew lines over the roads, paths and boundaries, and put cloud shapes over the trees, then deleted the photograph to keep the outline.

The initial outline drawn using Google Arial View and Powerpoint…

…and one of the working drafts (of which there were several!)

On one hand, we were lucky that the council were so supportive. But on the other hand, it wasn’t really luck. My co-conspirator neighbour had been working with the council on a community sump revegetation project for a couple of years prior to this, and had been able to build the relationship with the people there. He had demonstrated his ability to listen, to work together with them to resolve disputes, and show responsibility.

Although it felt like we got approval very quickly, my neighbour joked that the work actually began in 2012. In truth, it probably did.

Step 2: Formalising The Project

As well as submitting a plan for the tree planting, we also had to submit a pest control plan detailing how we would manage the site and deal with pest issues. For this, I referred to the council website and Department of Agriculture website to find out current recommended procedures.

Initially, the plan was to lease the site from the council. This would have required insurance, which we were planning to get through the local community garden (of which both my neighbour and I are members). There would have been a small annual cost for this.

In the end, the plans changed and there is no lease: the land remains under responsibility of the council. Whilst this may seem less secure, there are advantages. The site actually had a road running through it prior to 1990 before the road layouts were changed, and there was road base right through the land. The council came with a bobcat to dig out the road base, which might not have happened had there been a lease in place.

Funding Opportunities

Needing funds to purchase the trees and the reticulation, we approached the local football team (the West Coast Eagles). They have just moved to our suburb and are constructing a new training ground and stadium, and in the process angered the community greatly by chopping down 100 mature native trees.

As they emphasize their commitment to community in their media releases we thought it might be a project they would like to support.

Initially they seemed keen to sponsor our trees, but over time it became apparent that they had ulterior motives. The council had stipulated that all trees removed whilst building the training grounds must be replaced and maintained, and the Eagles were hoping that they could fund our trees as a cost cutting measure. (Funding a few $30 fruit trees would have saved them the cost of sourcing, planting and maintaining mature native trees.)

Without going into details, the Eagles were not transparent with us about this. When we realised (several months later) that, rather than supporting our project because they saw the value in investing in community, they were trying to get out of their responsibilities (clearly a small citrus tree is no replacement for a large gum tree), we decided not to pursue this further.

All the messing around meant time was ticking. It was now the start of winter and we urgently needed to plant the trees if they were to survive the summer.

Preparing the Site, Tree Purchasing and Getting the Community On Board

In short, we didn’t receive funding, and decided we would have to buy the trees, reticulation and soil amendments ourselves. We’d decided that the upcoming weekend would be perfect tree planting weather, and we began sourcing trees. My neighbour purchased seven citrus trees and I purchased another six trees, and we began setting the foundations for the project.

We planted the first few trees ourselves to get an idea of time and how best to do it all.

Next we put it out on the Buy Nothing Group that we were beginning a Food Tree Project in the area, and would anyone like to come and help us weed and plant?

And something wonderful happened.

People said yes, but many also asked us if they could donate a tree, or provide funding to purchase a tree. We hadn’t asked for money, but it was so humbling (and immensely appreciated) that our neighbours wanted to contribute financially.

One tree is not expensive (the costs varied from $20 to $70 depending on the species) but 40 trees adds up. Not to mention the reticulation costs, which my neighbour funded himself. When there’s a whole community on board, that changes things considerably. After our initial tree purchases, the others were paid for by the community.

It also showed us that people valued what we were doing, and wanted to be a part of it. (Thanks to Jayne, Deb, Miranda, Kath, Marisa, Lindi, Kate, Lana and Toni for your contributions.)

Just as importantly, people came to our busy bees. We weeded the rest of the site, dug holes, spread clay and compost and planted trees. Then we installed reticulation, and mulched the entire site. What could have taken us months was finished in a three weekends.

We now have most of the trees planted.

(If you’d like to know more about the project, I recorded a 20 minute video with some details of how we got the project going, and also a walk through of the site and the different trees that we have planted. You’ll find it on my Patreon page.)

What’s Next for the Urban Food Tree Project

Our biggest job is to ensure that the trees survive their first year in the hot Perth summer. With the reticulation in place, this shouldn’t be a big job, but it is a job nonetheless.

One thing we are doing now is establishing a community composting bank. We’ve put two huge compost bins on the site and plan to add to this as we find more suitable bins on Gumtree. If we can get all of our neighbours dropping good scraps off, we will have a rich supply of compost to feed the trees with. Plus it is another way to involve our neighbours with the project.

When autumn comes round I’m keen to work on the shrub layer and groundcover. Having sunk a lot into the project this year, we didn’t have the funds or the time to do this before now, and summer is not the time to start. We are keen to plant herbs and natives, and as the canopy layer grows these plants will have more chance of success.

At the moment the site looks a little barren, but by next year it should be completely transformed.

Now I’d love to hear from you! There’s so much more I could share about the project, so do you have any questions? Is there anything you’d like me to explain in more detail? Do you have any tips or suggestions for me, or experience with projects of your own? Please tell me your thoughts in the comments below :)

[leadpages_leadbox leadbox_id=1429a0746639c5] [/leadpages_leadbox]

10+ Practical Ideas for Eco-Friendly Plant Pots

I started my plastic-free life back in 2012 and my gardening life long before that. When it comes to plastic-free gardening, though, I’m still a relative newbie. I lived in an upstairs apartment for my first few zero waste years, so there was no garden to practice with.

I’ve been living in our new place, complete with garden, for over a year now, and there’s been plenty of opportunity to learn. I’ve come to realise that whilst plastic-free might be the goal, there is so much “waste” plastic that can be reused in the garden, that I’m more focused on zero waste (and reusing) than plastic-free.

I’d rather use what exists than purchase new “zero waste” items.

I thought I’d share some of my plastic-free and zero waste gardening tips, beginning with eco-friendly plant pots.

Choosing Eco-Friendly Plant Pots when Growing from Seed

The best way to avoid waste is to grow from seed. Saving your own seeds, and swapping seeds with others, is the best way to source seeds. However, it isn’t always practical. If you’re establishing a new garden, like I was, you’ll probably need to buy seeds.

However, before you go shopping, I’d recommend looking for local gardening groups and seed swaps, just in case. A few of our local libraries even offer seeds to “borrow” – the idea is that once you’ve planted them and have your own seeds, you return these to the library.

Some seeds can be sown directly in the ground, but most need planting into trays or pots before planting out.

Toilet rolls

Toilet rolls are the perfect size for seedlings, and you can fold one end over to make a base. However, if you have a productive garden, getting enough can be a challenge!

If you need more, Buy Nothing groups and Gumtree are a great way to find them. Similarly, if you don’t need your own, they are a great way to offload them to someone who does. Save them up until you have enough to entice someone to make the trip, and give them away.

It sounds bizarre, but if you look you’ll see that old toilet roll tube trading is a real thing! ;)

Newspaper Pots

My favourite way to make seedling pots is folding them, origami-style, using old newspaper (you can find DIY instructions for making seedling newspaper pots here). There’s no tape and no glue, no tools required and it takes less than a minute to make one.

I love these as, unlike toilet rolls, there’s no need to store them. Grab a couple of old newspapers and make everything you need in half an hour.

You can buy tools to make newspaper pots. They are usually made of wood, and to make the pot the newspaper is wrapped around a cylinder and pressing into an indented base (here’s an example of a wooden paper potter). Personally I think they are unnecessary, and as a minimalist I like to keep my tools to essentials only.

Wooden Seedling Flats

These are wooden boxes that are not compartmentalised, used for seed-raising. They are filled with soil and seeds sown, which can be transplanted once they’ve germinated.

Seedling flats can be made from softwood (like pine) or hardwood. If looked after properly and maintained, they can last several years. The most eco-friendly option are those made from reclaimed timber and offcuts.

Soil Blockers

Soil blockers are metal presses that allow you to press soil together to make cells to plant seeds without any other material. I first heard of soil blockers via Milkwood, and whilst I love the idea, I’m yet to give them a go. A friend has recently purchased one so I’m keen to test it out and will keep you posted.

Purpose-Bought Compostable Pots

It’s worth noting that ‘compostable’ is not the same as ‘biodegradable’. Compostable means it will break down in a compost bin or soil into humus (natural material) with no toxic residue. Biodegradable means it will be broken down by bacteria under certain conditions (often tested in a lab).

A ‘biodegradable’ label does not guarantee it will be broken down into constituent parts, only that it will break down small enough that it cannot be seen. It does not guarantee there will be no toxic residue.

There are a lot of pots that fall under the “compostable” category. The most eco-friendly ones are natural and made of waste materials like coconut coir or aged cow manure. Less environmentally sound ones are made with brand new wood fibre, and/or peat moss (removal of peat moss has been linked to global warming).

Whatever they are made from, they are designed to be single-use. They require energy to manufacture, package and transport. If we can use what we already have, that is a more eco-friendly option.

They are more durable than newspaper or toilet rolls, so are a good option for growing seedlings to sell or where they need to look more professional.

Purpose-bought Biodegradable Pots

Biodegradable (but not compostable) pots are often made with PLA plastic, also called corn starch or plant-based plastic. This is a polyester made from plant material rather than fossil fuels like traditional polyester.

Some PLA pots will state that they are compostable, but this will usually refer to composting under controlled conditions. They should state the test standard used and be “certified compostable.” Without the certification, the claim is meaningless.

These pots are a more eco-friendly alternative to traditional fossil-fuel based plastic pots. It should be possible to reuse them a few times before they begin to break down.

Personally, if a pot says biodegradable but does not say compostable, or is made of PLA plastic, I would avoid it unless absolutely necessary.

Things I don’t recommend:

Eggshells might look cute, but they are ridiculously impractical to fill. I found the same with egg boxes, and they are so absorbent they dry out the soil, but if you don’t live in a hot climate, they might work. On the downside, too cold and damp and they will encourage mold growth.

Terracotta pots aren’t great for seedlings as the roots can attach to the clay and get damaged in transplanting. Brand new compostable seedling punnets might sound green, but they seem a waste of resources when there are so many other options to use.

Transplanting Seedlings to Bigger Pots

Sometimes seedlings need to be transplanted into bigger pots before heading out to the veggie patch.

Reusing Seedling Trays/Plastic Pots

I’m a big fan of re-using what we have. We don’t use plastic at home, but I often find plastic plant pots thrown out on verge collection day, and I collect them to re-use. Plastic yoghurt pots, milk bottles and other plastic containers that can all be re-used to make plant pots.

Plastic that has been used with soil is difficult to clean and won’t be recycled. That’s fine if you intend to reuse the plastic as plant pots again and again. If there’s a choice, it is better to choose plastic that isn’t recyclable over plastic that is, and aim for as many re-uses as possible.

Plastic that is left in the sun will also begin to photo-degrade (break down into smaller pieces). They will last better in cooler, shadier conditions.

Potting On (Transferring Plants from Small Plant Pots to Bigger Plant Pots)

Seedlings eventually grow up, and either go into the garden or need bigger, more permanent homes. Whilst it’s easy to find small pots in various sizes, as the size goes up the opportunities become more limited. Here I’ve focussed on some of the biggest options, which are big enough to plant a small tree.

Terracotta Pots

I’ve found that terracotta pots aren’t great for small plants that I intend to repot as the roots get damaged, but they are a great plastic-free option for bigger plants, bulbs or annuals. We got these pots from the verge when our neighbours moved to Queensland.

One thing to note about terracotta – it is porous, which means in hot summers it can wick moisture out of the soil. One solution is to paint or glaze on the outside or the inside, to maintain the moisture of the soil, or choose pots that are already glazed.

Wine Barrels

I love wine barrels. They look beautiful and rustic, and are a waste product of the wine industry, but they are also very expensive to buy. These two wine barrels were purchased several years ago, but now they’d cost more than $100 each. Great for a feature, but not practical if you are on a budget or need more than one.

Wine barrels can be stained or varnished to help protect them from the weather, but ultimately the wood will break down. In Perth with its long dry summers, a wine barrel receiving haphazard (or no) care should last several years. In wetter climates I’d expect they’d need more management.

Olive Barrels

Olive barrels are big 190 litre food-grade plastic barrels that olives are imported in. They cannot be re-used by the import/export industry, so they are a waste product. Yes they are plastic, but they are second-hand. Much as I hate plastic, I love re-use,. Most terracotta pots for sale in WA are imported from Italy, whereas these barrels are already here. They are also extremely low cost – one barrel costs around $25 and can be cut in half to make two pots.

I would always choose the orange barrels, which are food grade. The blue ones are chemical barrels and most originally contained pesticides and fungicides, or other chemicals. They also tend to buckle in full sun, whereas the orange ones do not.

I’ve made all my olive barrels into wicking beds, meaning they have a hole at the side rather than the bottom, and a reservoir below the soil to hold water. This means the soil can wick water from the reservoir in summer, so the plants need less watering. Because a container needs to be fully waterproof to do this, it is difficult to do without plastic.

Upcycled Things

Honestly, it is only your imagination that will restrict you when it comes to finding eco-friendly plant pots. I’ve seen garden beds and plant pots made of old toilets, sinks, bathtubs, metal tins, plastic clam-shells and much more.

Just because it isn’t round and sold in a garden centre, it doesn’t mean that you can’t grow something in it!

Now I’d love to hear from you! Do you have any other suggestions to add to this list? Do you have any “not-to-do”s or things to avoid? What’s the craziest thing you’ve ever seen used as a plant pot? And more importantly – did it work or was it a fail?! Please share your thoughts in the comments below!

[leadpages_leadbox leadbox_id=1429a0746639c5] [/leadpages_leadbox]

Permaculture Principles for Modern (Zero Waste) Living

Have you heard of permaculture? Founded by Bill Mollison and David Holmgren in the 1970s, permaculture was the development of agricultural ecosystems intended to be sustainable and self-sufficient. The term came from “permanent agriculture.”

Let me tell you, it’s actually about a lot more than gardening.

Since the 1970s, the idea has expanded and grown, as has the movement. At its core it is a ‘systems thinking’ approach, and the design principles can be applied to anywhere where sustainability is the focus.

But many people would describe permaculture as a “philosophy” – a set of guidelines to live by. Many people would describe zero waste in the same way. Both have the idea of fair share, not taking or using more than we need, not wasting resources or people.

Because of this, I think permaculture principles (and ethics) are just as relevant for plastic-free (and zero waste) living. They are relevant to people living within cities, and without so much as a pot plant to their name.

But many people without gardens simply don’t know enough (or anything!) about it.

Let’s change that! I’d like to introduce the permaculture principles, and their relevance (as I see it) to the zero waste movement.

Permaculture Living: The Three Ethics

At the centre of the movement are three ethics: people care; earth care; and fair share. I would argue that anybody who believes in sustainability believes in these three ethics.

Permaculture Living: The 12 Principles (And How They Relate To Zero Waste Living)

The 12 principles of permaculture, developed by David Holmgren in 2002, are described as “thinking tools”. Used together, they can enable us to re-design both our environment and our behavior in a world of less energy and resources.

They are guiding principles for an ethical lifestyle.

Observe and Interact.

To me, this is about taking the time to look around us, to explore our surroundings and learn from others. We often learn good habits from others, or we find answers simply by watching and thinking.

By asking questions, seeking out information and being open to learn, we can come up with solutions that work for us.

Catch and Store Energy.

To me, this is about efficiency. Making the most of things when they are abundant, and being able to use them when they are not.

We think of energy as electricity or power, but it’s just as true for water and food, and the energy embedded in resources. From a zero waste perspective, maximising the use of anything is encouraged.

I like to think of reusables as “caught and stored energy”. An item, build to last and used forever. Rather than single use items that require energy to make, energy to ship and then are gone from usefulness forever. Wasted energy.

Obtain a Yield.

In gardening terms, this principle is pretty obvious. Actually, it should apply to everything we do. Money is another obvious yield, but it goes deeper. We don’t have to be paid for something to get pleasure from it. Yield can also mean enjoyment, satisfaction, motivation, and fulfillment.

When we love to do something, the pleasure of simply doing it can be its own reward.

There is a danger of doing things that bring us no pleasure, satisfaction nor other reward: they ultimately leave us burned-out, demotivated, resentful and frustrated.

That’s not sustainable.

Apply Self Regulation and Accept Feedback.

Permaculture looks at this from a systems perspective, but I think it’s just as relevant for individuals.

None of us are perfect. We strive to do the best we can. When we receive feedback telling us there is a better way, or pointing out something we hadn’t thought of before, we can begrudge and feel judged and not take action; or we can embrace the challenge to improve ourselves a little more.

Use and Value Renewable Resources and Services.

This is definitely a principle that underpins both the plastic-free and zero waste movements. Most plastic is made from non-renewable fossil fuels, and recycling options for all plastics are limited (and result in downcycling).

The zero waste movement embraces a circular economy, and aims to see nothing sent to landfill.

Both movements value choosing materials that are natural, renewable, reusable, recyclable and biodegradable.

Produce No Waste.

My favourite principle! Clearly the zero waste movement is built around “produce no waste”, but permaculture has a different (broader) perspective.

Whilst permaculture recognizes there is a bigger system, the zero waste movement can lean towards individualism.

In permaculture, reusing and repurposing other people’s waste is a huge part of reducing our impact and use of resources. The zero waste movement celebrates individual action and achievement: it focuses on reducing personal landfill waste, but doesn’t always recognize that waste is still produced upstream.

Personally, I think they both have a place, and I think both ideals can learn from the other.

Design From Patterns to Details.

This principle recognises the value in observing before doing, and the importance at looking at the bigger picture before making choices.

From a zero waste/plastic-free perspective, I see the patterns as “habits” and details as “stuff”. Rather than deciding to embrace a low-waste lifestyle and then spending hours choosing the best mason jars to equip the pantry with, it is better to look at our habits first.

Take time to look for the patterns, and then decide what fits best.

It’s another way of saying: take time, observe first, and do second.

Integrate Rather Than Segregate.

Integration is important for any community. It’s what glues community together, and it’s what creates a movement. To get the best outcomes, we need to work together.

There is no ‘them’ and ‘us’. There is only ‘us’.

Whether we teach, motivate, encourage or provide support, communities are best when we embrace networks, share freely and collaborate.

Community is strong in both permaculture and zero waste, and for many of us, that’s the best part.

Use Small and Slow Solutions.

Bigger isn’t always better. Small and slow solutions are at the heart of the zero waste movement. Taking time, making do, thinking creatively; embracing local and seasonal.

Use and Value Diversity.

There is never a “one-size-fits-all” approach. There is rarely a single way to do anything. There are different voices and different perspectives, and different ways of doing things, even when the outcomes are similar.

We connect with different stories, and everyone has something to add.

Use Edges and Value the Margins.

In permaculture, we talk about the interfaces between things being where the most valuable, diverse and productive elements lie. The edge of a pond, lake or river; or the edge of the forest where the trees meet the grassland.

In zero waste, I think of these “edges” and “margins” as the parts that are often seen as waste – things like offcuts or scraps. Yet they have just as much potential and are just as valuable – it often just takes a little creative thinking.

Creatively Use and Respond to Change.

“Vision is not seeing things as they are but as they will be.” Both the permaculture and zero waste movements are build around a desire to do things differently; to do things better than the “status quo” of overconsumption and exploitation.

Both embrace creativity, not at an artistic level but at a solutions-based, practical and ideas level. Looking at the system, and creating new ways to do things better. Seeing things that aren’t working, and coming up with better ways.

It isn’t about having all the answers, or creating change on a global scale. It’s about being creative with what we know and what we see, and doing things differently.

For me, both permaculture and zero waste living offer practical solutions for those of us that feel dissatisfied with the current ways of the world, and want to  create a more positive future. Neither are perfect, but they enable us to do things differently, and encourage those that follow to go one step further.

Now I’d love to hear from you! Is permaculture new to you or old news? How do you think the permaculture principles compare to zero waste living? Which principles do you personally see as the most important – or do you think all of them? Do you have any personal principles that you live by? Anything else to add? Please share your thoughts in the comments below!

[leadpages_leadbox leadbox_id=1429a0746639c5] [/leadpages_leadbox]

Establishing an Organic Vegetable Garden (Progress in Pictures)

It’s no secret that I love food, and I love growing my own food even more. There’s nothing more satisfying than eating something freshly picked; there’s no unnecessary single-use plastic packaging when we grow our own; and we can’t get more local than our own back yards.

Not everyone has a garden, true. When I moved to Perth from the UK, I swapped my beautiful and much-loved allotment for an upstairs apartment with a dark balcony. That didn’t stop me having a few pots outside the front door with herbs, though. Then we moved to another upstairs apartment with a bigger balcony, and I got a few more things growing.

Even the darkest, smallest balcony can grow microherbs!

Now I’ve moved to a development with 7 dwellings and a community garden, I finally have the space and the opportunity to plant more. And believe me, I’m making the most of it!

We’ve lived here for just over a year, and I thought I’d share how our garden has evolved over the time. Although there are 7 dwellings, some are still empty and others have been rented to tenants with no interest in gardening. To date, my husband and I have had the garden pretty much to ourselves. Two sets of neighbours have their own garden bed spaces, but other than that, we have free reign.

Honestly, we love having the space to ourselves, but we’re looking forward to more garden enthusiasts moving in. There’s so much wasted opportunity as we don’t have the time to turn over the beds as quickly as we should, or succession plant as regularly as we could. There are plenty of other tasks that get neglected, too.

Whilst the garden produces a lot of food, it could be so much more productive with just a little extra work.

Take the tour of my organic veggie patch (and permaculture garden in the making), Perth Australia

We own and occupy the ground floor flat, and the communal garden backs straight onto our home. We have two sets of big sliding doors, so the garden is an extension of our living space.

This is what it looked like when we moved in:

When we moved in the metal garden beds were in place, and reticulation had been installed, which definitively gave us a head start. ~April 2016

For 1 household, it’s a lot of space, but for 7 households it will be quite small. There’s also a huge amount of wasted space/growing potential, so we’ve been working hard to develop this and improve the soil and increase productivity.

We’ve also added a lot of pots, which is a great way to decide which things work best where before digging them into the ground. The two wine barrels contain the citrus trees we had on our balcony in our previous place. All the other pots are new additions.

Creating New Veggie Beds

If you’re thinking that the soil looks really sandy, you’d be right. It is really sandy. The grey sands of the Perth Swan coastal plain (where I live) are considered to be the worst in the world. I don’t mean by disgruntled Perth gardeners, either. It’s a fact.

It means that we’ve dug in heaps of compost, veggie concentrate and clay into the sand to create soil. It might not look like it, but we have! The wood chip mulch breaks down over time to add carbon to the soil, too.

We bought a cubic metre of veggie concentrate from our soil yard and it was delivered via a tipping truck, so without packaging. It isn’t the cheapest option (we could have built up nitrogen using nitrogen-fixing plants or green manures, carbon using mulch and the soil web over time), but it meant we could plant veggies in the sand straightaway rather than waiting several months. It contains all the nutrients and minerals needed to grow veggies.

Creating Our Own Compost

We have four compost bins and create as much of our own compost as we can. We don’t turn it as often as we should so it isn’t breaking down as quickly as it could be.

If the whole complex got involved we’d have compost coming out of our ears! The reality is, many of the tenants live on a diet of junk food (fried chicken and other fast food is delivered almost daily – I kid you not) and they don’t even compost the paper food packaging – it goes in the landfill bin. Sigh.

To top up our compost my husband brings food scraps home from his work every week (in a big 20 litre bucket), and we collect coffee grounds from a local cafe every month or so.

It’s pretty amazing that we can add stinky food scraps and a few handfuls of dried leaves to a compost bin and be rewarded with beautiful soil-like compost!

This is what your food scraps can be turned into. Beautiful compost!

Planting in Pots (and Wicking Pots)

To maximise the use of the patio area without ripping out the paving, we’ve planted a lot of things in pots. Our garden is north-facing, and the patio is one of the best spots to grow (we’re in the southern hemisphere – its the opposite for those in the north). The space is sheltered by the house by the hot summer afternoon sun, and gets full winter sun because the sun is lower in the sky.

To ignore this is a missed opportunity!

Wicking beds are self-watering pots. Not something I needed to worry about in the UK, but in Perth it is a different story. We’ve used old olive export barrels to make wicking beds – they have a hole at the side rather than at the bottom, so a reservoir can hold water for the plants.

Greening the Garden: Progress in the First Year

I’ve taken a few images from the same spots over time, and I’ve included a few below so you can see how things have changed in the first year.

The View from the Office Window:

April 2016

November 2016

February 2017

The Patio Space:

April 2016

November 2016

March 2017

The Ground Dug-In Beds:

July 2016

November 2016

The Veggie Beds:

July 2016

December 2016

February 2017

April 2017

The Raised Garden Beds:

April 2016

Feb 2017

A Glimpse of the Harvest

We definitely aren’t growing all our own vegetables, but I do think we have the space. Unfortunately space isn’t the only constraint; the other is time! We did manage to produce a lot of our own vegetables over summer. Here’s a glimpse:

Perth has a warm enough climate to garden all year round, and in many ways summer presents more challenges than winter. We’re currently in the process of planting our winter veggies. By the start of next summer we’re expecting to have new neighbours, so it will be interesting to find out how the garden evolves. I’m looking forward to more hands!

Now I’d love to hear from you! Did you enjoy the garden tour? Did you have any questions? Is there anything you’d like me to write about in more detail? Do you have your own garden, and what tips do you have to share? Anything else you’d like to add? Please leave your thoughts in the comments below!

[leadpages_leadbox leadbox_id=1429a0746639c5] [/leadpages_leadbox]

How to Make Zero Waste DIY Newspaper Pots

I’m all for small and low cost (or free!) solutions, particularly when they mean zero waste. We’re in the midst of sowing our autumn and winter seeds for our vegetable garden right now, which means we need lots of seedling pots. (Sowing seeds directly into the ground tends to mean the little seedlings get munched by pests before they have the chance to grow big.)

I don’t want to buy new. I’ve learned (the hard way) that reusing the tiny plastic cells from the garden centre (the ones they sell punnets of seedlings in) doesn’t work too well. They are too small and they dry out too fast. We don’t have enough of the bigger plastic pots to use those…plus they take up a lot more space.

Instead, I’m making my own zero waste seedling pots out of newspaper.

You don’t need any fancy gadgets for this. Even the pair of scissors is optional. You just need two hands, and a bit of patience.

Even though I can make these without thinking now, I’ll admit that when my friend (who is a very good teacher) first showed me how to make these, I had a full-on tantrum! (How embarrassing.) If you get frustrated the first few times, just remember it’s only newspaper, and no-one has died. You’ll grasp it soon enough!

If you don’t read the newspaper, I guarantee that your neighbour does, or someone at work, or a family member. Maybe  a local cafe will have a mangled, well-read one.

The other great thing with these is that newspaper breaks down easily, so they can be planted directly into garden beds. No need to disturb the plant roots by removing from the paper. You can always tear the base before planting if you’re worried it will restrict growth.

How to Make DIY Zero Waste Seedling Pots (With Pictures)

Start with a single sheet of newspaper. For seedling pots, I cut a double sheet like this in half.

All you need to start with: a sheet of newspaper, and some scissors. Although you could do without the scissors, if you can tear neatly ;)

Cut the newspaper sheet in half along the fold. Put the sheet to the left to one side. We will only be working with one sheet at a time.

Turn the sheet of paper so that the longest side is horizontal.

Fold the newspaper in half from left to right (the fold is on the left hand side).

Fold the sheet again from bottom to top (the new fold is on the bottom).

Fold the newspaper one more time from left to right.

The paper in front of you will be folded a bit like a book, and each flap has a front and a back. You want to take the right-hand corner of the front flap, and fold it towards you, pulling it open as you do so to make a triangle shape along the “spine” of the “book”.

You can see (marked by the blue spot) that the bottom right hand corner has moved to where the spine was, and is opened to form a triangle.

Now that you’ve folded this side, turn the newspaper over (180°) and do the same on the other side. It will be mirrored, so the corner will be on the left hand side.

Once both sides have been folded, your newspaper will look like this. There will be a triangle-shaped pocket on the front and the back, and a gap in the centre seam above the two triangles.  Now turn the right hand side of the paper, like the page of a book, to the left (180°) so that you can see one continuous triangle.

Flip the newspaper over and repeat with the other side so that both sides now look like this.

If it is correct, the paper will look like this from above.

Lay the paper down flat, and fold each of the front flaps into the centre fold.

Fold these two flaps in half again, into the centre fold. (Don’t worry if it’s very flappy when you remove your fingers, that is absolutely fine.)

Now flip the newspaper over, and do repeat on the other side.

Fold the flaps into the centre…

And then fold these flaps inwards again…

Your newspaper now looks like this. Fold the top flap down towards you along the newspaper line.

Repeat on the other side.

Now you can gently pull the two flaps outwards and open your pot!

Push your fingers inside to straighten out (and flatten out the bottom).

Ta-da! A zero waste newspaper seedling pot.

The flaps can be useful for lifting the pots, or labelling what you’ve planted inside the pot. If you don’t like them you can fold them inside. Once the pot of filled with soil they won’t flap about. I wouldn’t recommend cutting them off as the folding is what keeps it all in place.

Next step… to go forth and plant things!

Now I’ love to hear from you! Have you ever made these before? Do you have a different method? Are you feeling inspired to grow stuff? Do you want to make some and then share a photo with me so I can admire your handiwork? (Answer – yes you do!) Anything else you’d like to add? Please share your thoughts in the comments below!

[leadpages_leadbox leadbox_id=1429a0746639c5] [/leadpages_leadbox]

How to Make (Scrappy) Apple Cider Vinegar from Scratch

I love knowing how stuff works. Even though I can buy apple cider vinegar  from bulk stores locally, I want to know how to make my own. Not because I’m a glutton for punishment who wants to make everything from scratch ‘just because’. I think its important to understand where our food comes from and how its made. Making actual food out of “waste” food appeals to my love of avoiding waste. Plus of course, my inner chemist likes to play with her food.

Once I know how to make something, then I decide whether it’s worth the effort involved to keep on doing it, and how easy/affordable it is to buy. I don’t have time to make everything. I buy my pasta, and laundry powder. I make pesto and crackers and peanut butter.

Apple scraps/cider vinegar is such an easy and low effort thing to make that there’s just no reason not to.

Apple cider vinegar is made from the apple pulp left from making cider, which uses whole apples. Apple scraps vinegar is pretty much the same thing, but only uses the cores and skin of apples rather than the whole thing. The end product is pretty much the same.

Unless you’re making cider, I wouldn’t recommend using whole apples to make apple cider/scraps vinegar. It works just as well with the cores and peels, and you can use those apples for something else delicious. Making apple cider/scraps vinegar from the waste bits is much more satisfying!

I’ve made apple scraps vinegar a couple of ways, and I’ve included both methods below. One uses the cores and peels only, and the second uses the leftover pulp from juicing apples.

Frozen apple cores ready to go, and a previous batch of finished apple scraps vinegar.

 Apple Scrap Vinegar from Apple Scraps

Although I’ve given you quantities, they don’t really matter all that much. More apples will work more quickly, and make a darker vinegar than less, but don’t sweat it if you have different amounts. Try and see!

A couple of pointers before we start:

  • If you don’t eat a lot of apples, pop the cores (and peels, if you like to peel your apples) in a jar in the freezer, and wait until you fill the jar.
  • The sugar is to kick-start the fermenting process so don’t leave it out! 1 tbsp is adequate but I find it works faster with 2 tbsp. Honey should also work if you’d like a more natural alternative to sugar but I haven’t tried it.

Ingredients:

Apple peels and/or cores from 6-8 large apples (around 300g)
1.5 litres water (rainwater or filtered water if possible)
2 tbsp sugar

Method:

Part 1:

Pop the apple cores and peels in a clean glass jar with a wide neck, add the water and sugar and stir. Cover with a clean tea towel. The secret now is to keep stirring, whenever you remember. Any time you walk into the kitchen, give your jar a stir. First thing in the morning, last thing at night – stir!

You want to stir to keep it aerated, and to stop any mold growing on the surface. Fermentation works because the good bacteria/yeast/microorganisms win against the bad ones, so we need to keep conditions favourable for the good guys! With most ferments the aim is to exclude oxygen, but not this time. To make cider, the oxygen is excluded, but to make vinegar it is not.

Keep stirring your jar over a few days and start to notice how it changes. It may start to smell like cider, or like vinegar, or both. Bubbles will appear on the surface and maybe froth or scum. All of this is good! Once any trace of alcohol smell has gone, there are less bubbles,  and the apple pieces begin to settle and the vinegar will be ready for the next step.

Part 2:

Strain the contents of your jar into another clean jar (or a bottle) using a fine sieve or cheesecloth. Squeeze out the liquid from the pulp. (If you taste the pulp, you will find that it is completely flavourless.)

Now there are two options.

Option 1: Put a lid on your jar, and leave on the kitchen counter for a few days, opening the lid every day to release any pressure. If there’s any fermentation still happening, the pressure could build up and the jar might explode in your kitchen cupboard, so this is a safe option.

Option 2: If you can’t keep an eye on your vinegar, or you want a break, pop the bottle in the fridge to slow down the fermentation. I’d recommend loosening the lid so any gas can escape. It will ferment very, very slowly. When you’re ready, bring it back to room temperature to continue the fermentation.

Straining the spent apples from the vinegar. Cheesecloth is the best option but muslin or a fine sieve will also work – you’ll just end up with slightly more sediment in the vinegar.

After a week, taste your vinegar. If you find it sweet, leave on the counter to continue fermenting. Once you’re happy with the way it tastes, secure the lid and store in a dark cupboard.

Apple Cider Vinegar from Apple Juice Pulp

This is a great way to use up pulp from juicers. Unlike the first recipe, this contains all the fibre and flesh of the apples, but with the water (juice) squeezed out. This means it looks totally different – but it produces the same result.

Ingredients:

Leftover juice pulp of 6 apples (around 300g)
1.5 litres water (rainwater or filtered water if possible)
2 tbsp sugar

The apple pulp from juicing 6 small apples. Don’t worry about the brown colour, it is simply the apples oxidising.

Method:

Pop the apple pulp in a large 2 litre jar, and add the water and sugar. The pulp will expand and absorb all of the water, and will look totally crazy and you’ll be sure you’ve done it wrong. In fact, I currently don’t have photos of this because when I tried it, I was sure it was going to fail! If it looks wrong, it’s right!

Stir. As above, stir, stir, stir. When not stirring, keep covered with a tea towel. Because the pulp is so fine, it is hard to see bubbles developing, but you will notice the smell changing to cider and then vinegar. Keep stirring. After 4-5 days (longer if the room is cold) you will notice the pulp start to rise and clear liquid will be visable at the bottom of the jar. Keep stirring to push the pulp down. Because the pulp floats, it may get pushed up out of the jar if you don’t stir.

Once the pulp is consistently floating, strain the contents of the jar into another clean jar using cheesecloth (or an old tea towel).

Leave the jar on the counter with the lid loosely fastened until content with the taste, secure the lid and store in a dark cupboard.

A note about colour:

The colour will vary with each batch made, dependent on how many apples you use and how brown they are. I tend to find that using apple pulp makes a darker vinegar than using apple scraps; and that fresh apple scraps make a lighter colour vinegar than frozen apple scraps. Rather than use the colour as a guide, go by taste. You’ll be eating it, after all!

Now I’d love to hear from you! Have you ever made apple scraps vinegar? Have you ever made cider? Do you have any tips to add? Did you struggle, and what went wrong? Are there any other pantry staples that you currently buy that you’d like to make? Are there any that you make already that you’d like to share? Have you ever tried any other fermentation? Leave your thoughts in the comments below!

Zero Waste (+ Plastic-Free) Gardening

I may have got to grips with plastic-free living and the zero waste lifestyle when it comes to inside the home, but when it comes to the garden, I’m a plastic-free newbie. Having lived in an upstairs apartment with little more than a balcony for the last four years, I haven’t really needed to think about it.

Now we’ve moved and I finally have the garden space I’ve been dreaming about all that time, I’m really keen to keep up with the plastic-free lifestyle and avoid using plastic in the garden where I can. (Spoiler alert – there have been compromises!)

Of course, paving or wood chip mulch would solve the waste problem straightaway, but I’m keen to grow as much food as I can, so no easy options for me!

Starting from scratch with anything can be daunting, and the hardware stores seem to have more plastic packaging in them than the supermarkets! I do not have all the answers – we have only been living here for three months, after all – but I’m beginning to find zero waste solutions and plastic-free alternatives that work for me.

No doubt in another three months I’ll have far more answers (and if you have any tips of your own, please share them!) but I thought I’d share my plastic-free and zero waste gardening solutions so far.

Starting with the Soil

We were lucky enough that when we moved, the four garden beds were pre-filled with soil (and pre-planted with seedings). However, there is still plenty of space for planting additional things, and empty pots need soil to fill them. Perth doesn’t have soil: it is a city build on grey sand, with no nutrient content or water-holding capacity whatsoever. I

t’s not possible to scoop up some soil from the ground and put it in a pot. You have to source it from somewhere.

We’d been given some potting mix in 25 litre plastic bags (the only size available where I live) but the bags seemed so wasteful that I didn’t want to buy any myself. Instead I found a compromise: coconut coir.

It’s a waste product from coconut growing areas. It comes as a dry, lightweight block wrapped in a very thin plastic layer. Once added to water it expands: this block will make enough to fill a wheelbarrow (90 litres).

To buy this much potting mix would require four bags, and heaps more plastic.

Peat-free potting mix made from a waste product: coconut coir.

Peat-free potting mix made from a waste product: coconut coir.

Coconut coir itself does not have any nutritional value, but can be mixed with worm castings, compost or other fertilisers to add nutrients.

Repurposed Polystyrene Box Plastic Free Gardening Zero Waste Gardening

Coconut coir once water has been added. This old polystyrene box is our old worm farm. Despite hating plastic and especially polystyrene, I couldn’t throw it out knowing it still had (some) use. It’s good for mixing up potting mix and saves me from buying a new container.

Coconut coir is great for raising seedlings, but to top up the garden beds (and create new garden beds) we needed soil. After a couple of phone calls, I found a local soil company that could deliver a trailer load of soil to us. This tiny looking pile is half a cubic litre (500l), which is the equivalent of 40 bags.

Whilst we didn’t need it all, we have been able to store what we didn’t use in our wheelie bin (we don’t use it for rubbish, after all) until we can use it.

Plastic Free Zero Waste Bulk Soil Delivery Treading My Own Path

Plastic-free zero waste soil delivery.

Compost, Worm Castings and Manure

In the beginning, we decided to buy a few bags (in plastic – shudder) of mushroom compost and animal manure, to get things started. We have two compost bins, but they are yet to crank out any compost. In future I hope to make all of our compost at home. (We also plan to get more bins.)

Zero Waste Plastic Free Gardening Homemade Compost Treading My Own Path

Our two compost bins. We hope to get more so that we can produce all of our own compost at home.

Clearly, if we plan to produce all of our own compost at home we will need more plant matter and food waste to compost! We’ve probably got enough weeds on the verge to provide all the nitrogen we could ever want, but compost needs both carbon and nitrogen. Our solution is to collect excess coffee grounds from the local cafe. We’ll also go leaf collecting to gather some extra carbon for the pot.

Repurposing Cafe Coffee Grounds Zero Waste Gardening Treading My Own Path

Coffee grounds from a local cafe (they were pre-packaged in plastic). We may have been a little over-eager… I could not lift these bags, they were so heavy! Coffee grounds are a great compost additive though, and we could never drink this much coffee!

Our solution for animal manure was simple. Our friends own a cow, and offered us their “spare” manure! We can provide our own containers and fill them up. Sounds stinky, but it’s plastic-free at least!

On top of this, we still have our worm farm, and can use the castings to enrich the soil.

Adding Nutrients to the Soil

We’d rather not buy plastic bottles of plant food because aside from the waste, we prefer to feed our plants natural ingredients and these pre-packaged feeds are high in salts and urea. The most natural options recommended seem to be kelp, soy bean meal (an alternative to blood and bone), blood and bone, rock dust, fish hydrolysate and pelletized chicken manure.

The soil company who delivered our soil also sell these in bulk, so we can refill our own containers when we need to.

Another, more cost-effective place to source these products is a stock feed place. We didn’t need the huge quantities, but a local lady purchased some and split the bags into smaller amounts for us. If that hadn’t been an option, these ingredients all have a long shelf life.

Zero Waste Gardening Kelp Soybean Meal Molasses Treading My Own Path

A local lady purchased these in bulk, and split into containers for a group of us. (She added the plastic jar labels – it’s not something I would have done!)

Seedlings and Seeds

To start with, we purchased a few seedling punnets. I’ve begun to plant seeds in the repurposed punnets and hope that I will be able to grow everything from seed in the future. Even seed packets sometimes contain tiny little ziplock bags.

Much further down the track I hope to be able to save my own seeds. Right now we are at the beginning of our journey. I need to learn what grows well and what we like to eat before I even think about saving seeds! I’m not worrying about the tiny little ziplock bags – for now ; )

We have swapped seeds with our neighbours which has worked well, as most seed packs seem to expire before all the seeds have been planted. This way we double our selection (and they do too) and the seeds are fresher – hopefully meaning that more germinate!

Seed Saving and Seed Sharing Zero Waste Gardening Treading My Own Path

Seeds on the left are our neighbours’; seeds on the right are ours. Seeds in the middle are saved from the beans that were growing in the garden. No idea what the different types are, though!

Repurposing

We’ve been able to find heaps of plant pots for free on the verge, which has been great for growing seedlings. Alongside the few seedling punnets we’ve bought, we now have enough to pot on our seedlings to beef them up before they go in the beds.

Reusing old plastic plant pots zero waste gardening Treading My Own Path

Gardening in containers Zero Waste Gardening Treading My Own Path

Plastic Plant Pots Zero Waste Gardening Treading My Own Path

Repurposing Plastic Plant Pots Zero Waste Gardening Treading My Own Path

What about the plastic so far?

There is no way I’m throwing any of the plastic we’ve used so far in the bin. Not a chance! But clearly, plastic bags that contained sheep manure and compost are not suitable for recycling as they are. They need to be clean. Such is my dedication that I cleaned them!

I would have just put them all in the washing machine out of laziness but my husband would have killed me (and I didn’t really want to wreck the washing machine). So I washed them all off as best I could outside (in a tub of water which I used in the garden), and then brought them in and scrubbed them in the shower with an old brush.

Cleaning old plastic bags Zero Waste Gardening Treading My Own Path

True story. I washed out my soil bags so I could recycle them properly.

Cleaning plastic potting mix bags Treading My Own Path

Hanging on the washing line to dry.

The only real waste item we’ve generated so far is the plastic labels that come attached to the seedling punnets. Most of them are currently in the garden reminding us what is planted where, but when the season is finished we may not have another use for them. Still, if we can reduce our garden waste to just a few seedling labels then I will be very happy!

Lindsay Miles Treading My Own Path Zero Waste Gardening

Plastic-free zero waste gardening in action : )

Now I’d love to hear from you! Do you have a garden? Do you have any tips for reducing waste and cutting down on plastic? Do you have any suggestions for how I might improve things further, or notice anything I’ll need to think about in the future? Is there anything you’ve struggled with? Do these struggles remain or have you managed to overcome them? Are there any compromises you make that you think are worthwhile? Are you put off gardening because of all the plastic packaging and chemicals? I’d really like to hear your thoughts so please leave me a comment below!

[leadpages_leadbox leadbox_id=1429a0746639c5] [/leadpages_leadbox]

Cardboard Castles, Celebrity Coffee and Social Contracts

I had a busy, productive and inspiring weekend. Don’t you just love those weekends? It nearly didn’t happen – I’d been brewing a cold/virus for the previous few days – but in the end the sun was shining and it all worked out perfectly.

Here’s a quick rundown of the highlights.

The Celebrity Photo Shoot

Well, not exactly “celebrity”, but my boyfriend has been asked to be one of the faces for the new Plastic Free July campaign, which meant a photoshoot at 9.30am on Saturday morning along the main shopping strip where we live. So Glen spent 30 minutes pacing up and down past the shops, whilst a guy with the longest camera lens I’ve ever seen snapped pictures, and Rebecca (from the Plastic Free July campaign) and I looked on. As did a few other Saturday morning shoppers; it’s interesting how people are drawn to the camera.

No-one asked for his autograph though, which I found disappointing.

Annoyingly, I forgot to take my camera, so I’m going to have to wait for the official ones to be ready before I can share them. Hopefully not too long to wait!

The Mosman Park Eco Fair

The Mosman Park Eco Fair is a glorious day out; set in the beautiful community gardens at St Luke’s Church in Mosman Park, featuring all things green, including sustainability workshops, ethical and environmental stalls and with a real focus on reducing waste.

There are plenty of opportunities to volunteer, but after organising the Less is More Festival not too long before, it’s nice to go to an event as a punter and be able to enjoy everything that’s on offer.

The Earth Carers have a big presence as always. In addition to running their Washing Up Station to reduce disposable cups at the event, they also ran a children’s activity – make cardboard castles!

CardboardBoxes

EcoFair2

I wrote about the Washing Up Station at last year’s event (and why I think it’s so important here), but the castle-building was a new activity and a very popular one!

It was really great to catch up with so many people I know, as well as learn about all of the interesting projects that people are involved in, and hear about their latest achievements. Personally, I find it really inspiring and motivating reconnect with people from my community, and I always feel like my passion is re-ignited afterwards.

Permaculture Day

Sunday was International Permaculture Day, and there were some workshops at one of the local Farmer’s markets. I’ve been wanting to learn about beekeeping for ages, and made the effort to trek across town on a rather chilly morning for the 8.30am workshop. It was so interesting! Something to save for another blog post, but I felt a real sense of achievement in having taken a step closer.

My Glass Jar Trade

A few weeks ago I nearly put some of my glass jars into the recycling. In fact I did put them in, but then I took them out again. Most glass in Perth isn’t actually recycled (it’s trucked to Adelaide, turned into road base or landfilled) and I was sure that someone could use those jars. Just after I retrieved them, a friend requested jars for bottling her honey. I exchanged several of my finest jars in exchange for one jar of her finest honey. An awesome trade! I wouldn’t have got that from the recycling peeps!

Honey

Even better, once home I turned the honey into a delicious cake. Yum!

CakeThe cake is a chocolate pear rosemary cake that’s gluten- and dairy-free. You can find the recipe here; I used honey rather than sugar and it was perfect!

The Social Contract

In my last blog post I mentioned that I didn’t have a “no junk mail” sticker on my mail box. I know I needed one, I’ve been talking about it for months, but I could never quite get round to getting one. In fact, I didn’t just mention it once, I mentioned it 3 times. I didn’t want anyone to miss it.

Why? Because if you have an intention, there is nothing better than to tell EVERYONE your intention. Comments were made to me both on the blog and on Facebook about how should get a “junk mail” sticker. People taking an interest not only reinforces what I already know (that I need to get a sticker), but also makes me feel guilt and shame for not getting on with it. I don’t want to be asked by these same people over the next few months whether I’ve got one and have to say no – so this is a great way to force yourself into action!

I’m pleased to say I’ve been and got a new sticker. No more junk mail for me! Except, it still needs to be stuck on. A minor detail!

JunkMail

So that was my weekend. How was yours?!

[leadpages_leadbox leadbox_id=1429a0746639c5] [/leadpages_leadbox]

Worm Farms…Tips and Tricks

After writing my post yesterday on how to build a DIY worm farm, I thought it might be useful to write another post explaining how to look after your worms, and also provide some reasons why you might consider worm farming in the first place.

In their National Waste Policy fact sheet, the Australian Government estimate that two-thirds of waste sent to landfill is organic. If you’re not sure what I mean by organic, it’s the waste that originally came from plants and animals which can be broken down. As well as the obvious grass clippings, food scraps and bones, this includes cardboard, paper and wood. In 2006-2007, Australians landfilled almost 14 million TONNES of organic waste. A full garbage truck holds 10 tonnes. Sending all that organic waste to landfill meant an extra 1.4 million garbage trucks on our roads. Even if you think Australia’s got the space, that’s a lot of unnecessary heavy road traffic, not to mention fossil fuel burning and airborne pollutants via vehicle emissions.

Next up, soil quality. Australia has some of the oldest land masses on Earth, and consequently they are nutrient-poor and with little organic matter. Perth has some of the worst agricultural soils in the world. (Someone once told me that it was officially the poorest soil in the world, but I can’t find anything that confirms it. However, ask anyone who ever tried to grow anything in the soil in Perth, and they’ll confirm it for you!) The sandy soil repels water and also nutrients. If you want to grow plants in Australia, you need to improve your soil by adding organic matter. And this is where the worms come in!

Image

Worms and their castings. Castings are the product created when worms break down organic matter, and contain nutrients that plants can uptake easily.

Worms eat organic waste and break into down into a product called castings. These castings contain beneficial nutrients that can easily be absorbed by plants. Their texture also enables them to retain water and so they are great for improving soil structure. And they won’t burn plants, as some chemical fertilizers do. Castings are also suitable for seedlings. Worms also produce a liquid that needs to be drained – worm wee! (Or more technically, leachate.) Some tips on using worm wee are provided below.

And keeping worms is fun! It’s free, they require very little maintenance, meaning you can go on holiday for weeks and they will still be alive on your return – how many pets can you say that about?

Tips & Tricks

So I’ve made the case for reducing fossil fuels, reducing landfill, improving your garden and having fun…so what’s keeping you from getting your own worm farm? Is it any of these?

1. Worm Farms smell.

Actually, they don’t smell if you look after them properly. Castings have an organic smell similar to the earthly smell of soil. The main cause of smelliness is too much food. It can be tempting once you set up your worm farm to add every single scrap of food to it immediately, but worms only eat their body weight in food every day, so you need to start small and increase the food once the worm numbers build up.

2. I don’t have a garden.

Neither do I! The worm farm takes up only a very small amount of space, and it will take several months to fill up the worm farm with castings. You can use them with house plants or pot plants and even if you don’t garden, you are bound to know someone who does so just give them the box of castings once it is full.

3. I don’t have time.

Seriously, how much time do you think you need?! Once the worm farm is set up, all you do is empty your food scraps that you would have thrown in the bin into the worm farm. It helps to have the worm farm nearby – if it’s located at the bottom of the garden you are far less likely to make the trip.

Problem-Solving

This is by no means an exhaustive list, but hopefully covers some of the more common problems that you might encounter.

My worm farm smells

Likely cause: too much food

Solution: STOP ADDING FOOD! Give the worms a chance to eat what they already have. Anaerobic conditions (no oxygen) can also cause this so give the top layer a stir to aerate.

My worms are escaping

Likely cause: If it is only a couple of worms, there is probably not an issue. If there is a mass exodus, then there may be too much moisture or too much food.

Solution: Add newspaper to reduce the moisture levels, and stop feeding if there are large amounts of uneaten food.

I have other pesties in my worm farm

Likely cause: Not all insects in your worm farm are problems, and you should expect to find other creatures making their home here. But some pests indicate problems.

Solution: Burying food should keep unwanted pests at bay. Flies indicate there is too much food, so reduce the feeding. Ants indicate that the conditions are too dry, so add water.

Other Things to Know

  • You need to use composting worms for your worm farm – varieties such as red worms or tiger worms, as these are adapted to the conditions of a worm farm, whereas ordinary earthworms are not.
  • Worms prefer cooler conditions so on a very hot day, add an ice pack above the worm blanket to keep the inside of the worm farm cool. However, freezing will kill them! (This is not a problem we have here in Perth but may be an issue in cooler climates.) If you are expecting a frost, bring the worm farm indoors.
  • Worms do not have teeth, but suck in food. The smaller the food particles are, the more they can eat. Blending or chopping helps, but if you can’t be bothered, freezing the food then allowing to thaw will help break down the cell walls and make it easier for your worms. And if you can’t manage that, just try to bury your food so it doesn’t attract pests.
  • Worms don’t like acidic conditions and don’t like acidic food such an onions and citrus. Avoid giving these to your worms.

Worm Wee vs Worm Tea

You may come across references on the internet to both worm wee (leachate), and worm tea. The two names are often mistakenly used interchangeably, but they refer to different products. Leachate is what drains from the worm farm. Worm tea is a product made using castings, water and molasses, which are “brewed” for 24-48 hours. The main difference is that worm tea is aerobic, and so great for plants, whereas leachate can be anaerobic.

Leachate is fine to add to compost, but if your leachate is anaerobic it may harm your plants. I learnt this the hard way, diluting my leachate to a 1:10 ratio (1 part leachate for 10 parts water) and pouring on my seedlings, which caused them all to go yellow and die.

The way my worm farm is designed, my leachate does not have much contact with air and so will always be anaerobic. If your leachate drains freely into an open container it will probably be aerobic. You can try to aerate your leachate by diluting and exposing to air for a couple of days before using. However, always exercise caution when using on plants. Make sure you dilute 1:10 with water, and avoid using on seedlings, house plants or other temperamental plants.

[leadpages_leadbox leadbox_id=1429a0746639c5] [/leadpages_leadbox]