Tag Archive for: gluten free

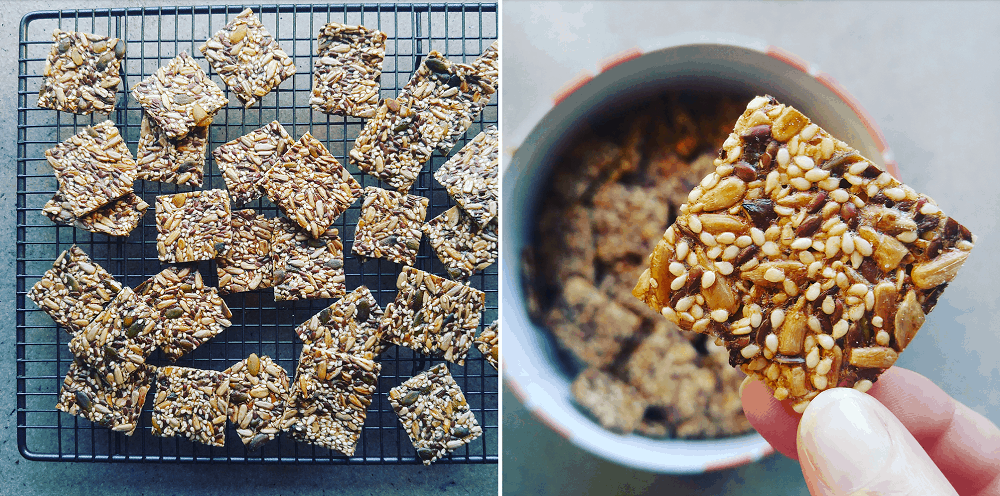
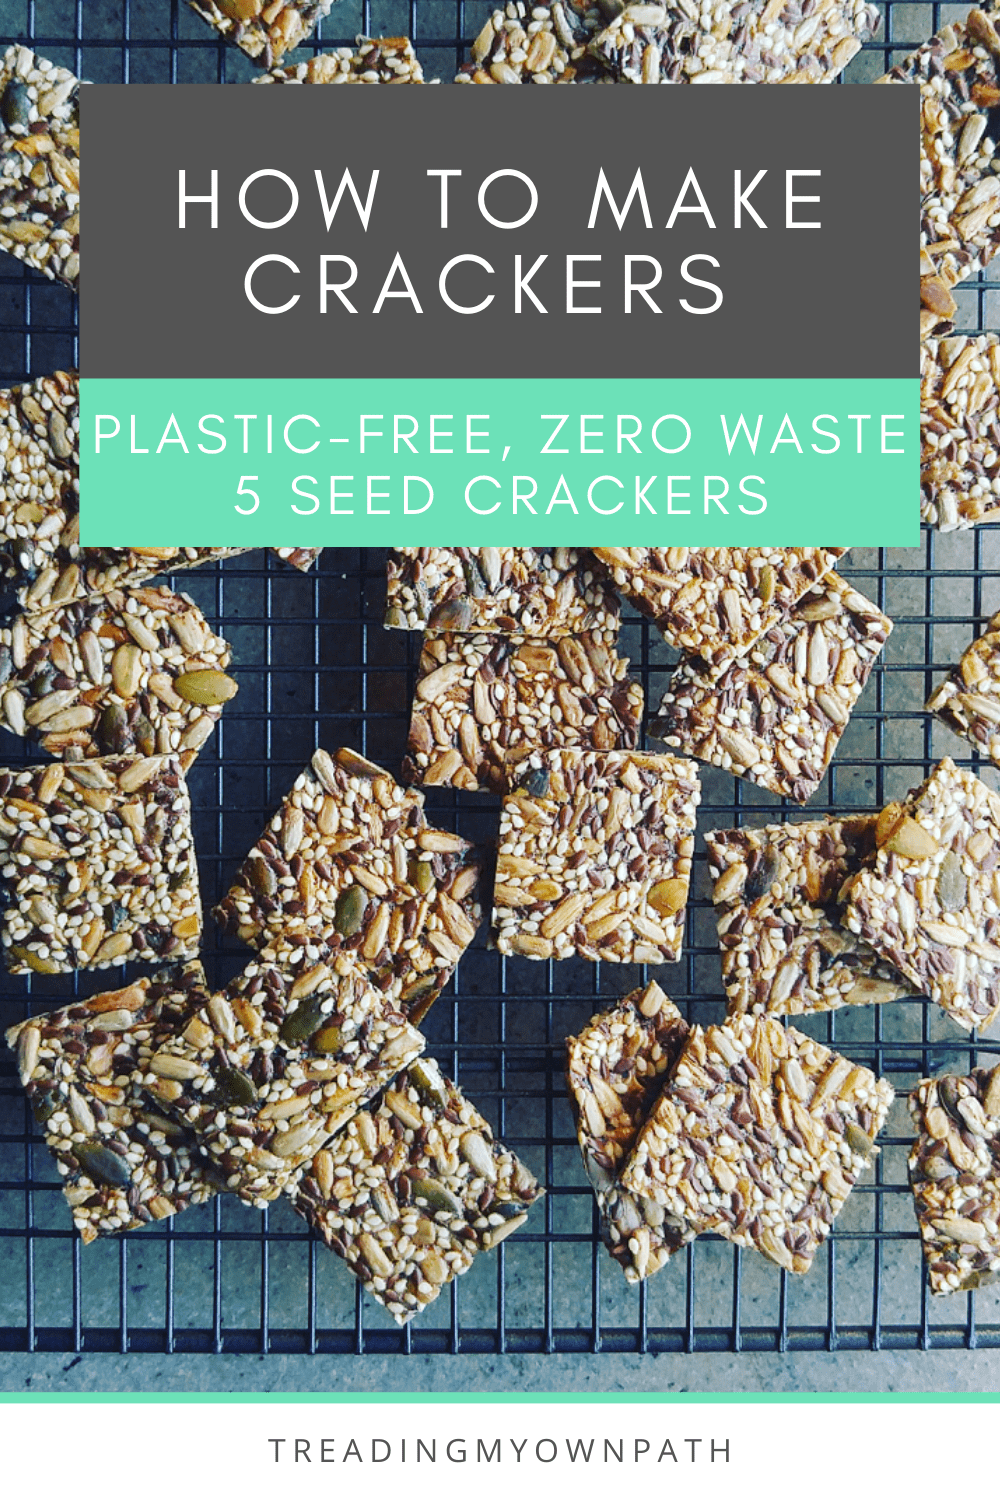
Recipe: how to make (plastic free + zero waste) seed crackers

If there’s one thing that is next to impossible to find without plastic, it’s crackers. Before I went plastic-free, I’d buy packet upon packet of crackers – usually with the plastic tray, then wrapped in plastic and with a final plastic or cardboard outer. Packaging overload!

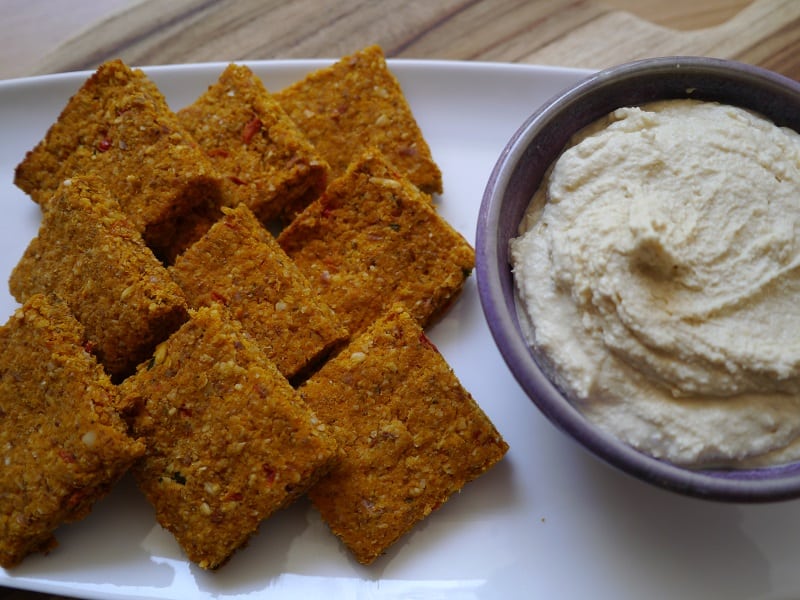
These days I do things very differently. I either skip the crackers entirely, and make crudites (fancy term for vegetable sticks – carrot, cucumber and capsicum/pepper) or use bread; or I make my own crackers.

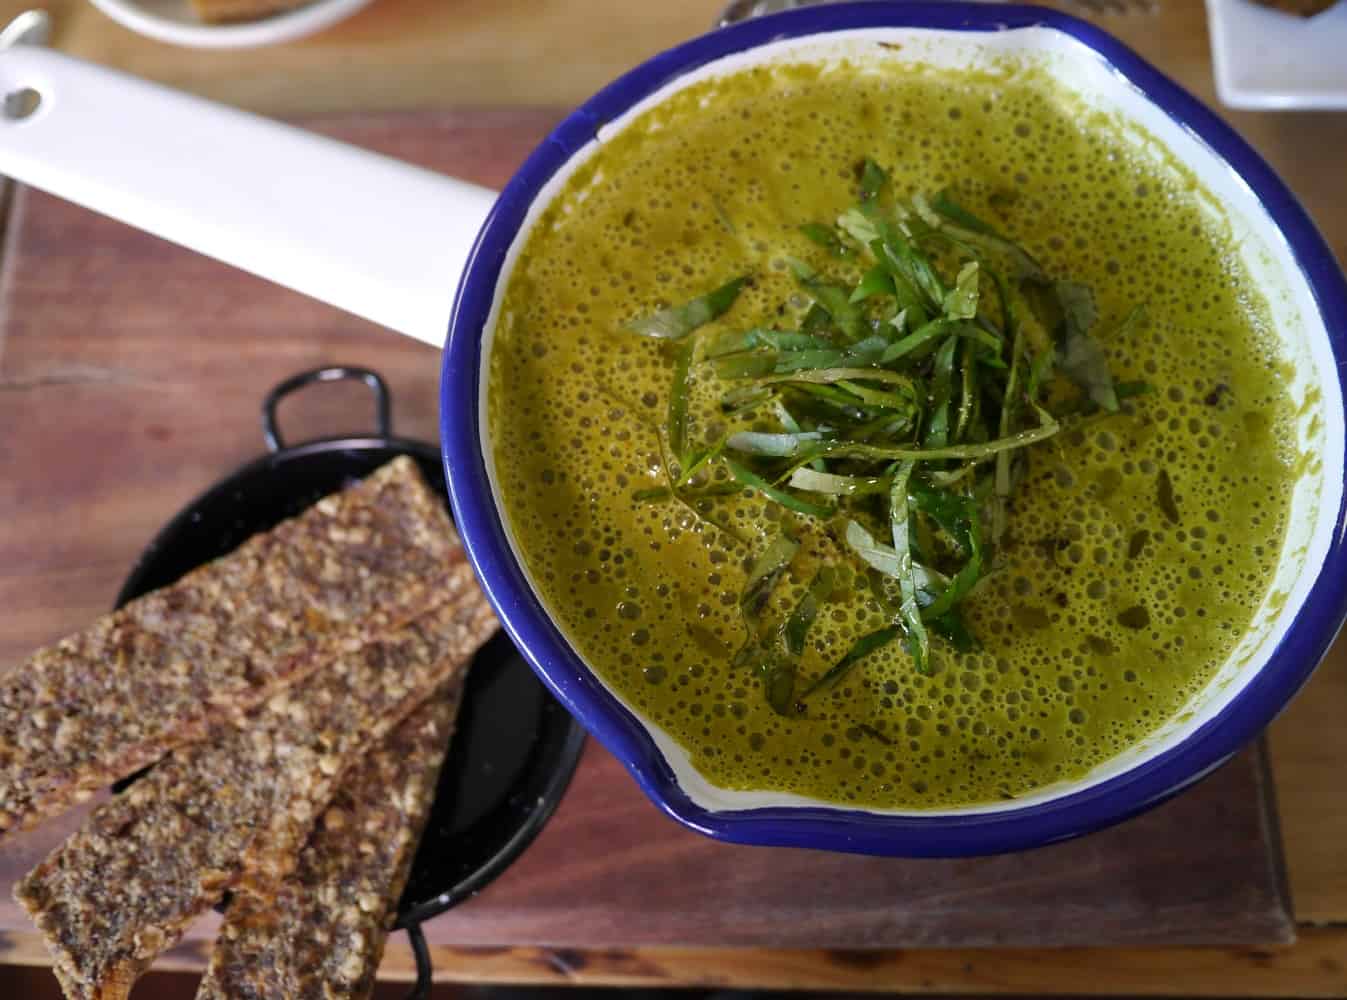
I’ve shared in the past how I make sourdough crackers and carrot pulp flatbreads, and today I’ve got another recipe for you: 4 seed crackers.

I actually found the recipe via my local Source Bulk Foods store, who sell the ingredients ready-weighed in a little pack. I bought all the ingredients separately in bulk as I wanted to avoid the packaging but if you were short on time or didn’t want random amounts of seeds left in the pantry, the pack would be a shortcut.

Being made almost entirely of seeds, these crackers and gluten-free, dairy free and vegan.

The magic ingredient binding the seeds together is psyllium husk: it’s the husk of a seed that’s high in soluble fibre, and binds with water to form a slippery gel. It’s often used in raw and vegan recipes for its binding properties.  It’s pretty readily available at bulk stores. If that’s not an option, chia seeds might be an alternative to experiment with but it’s not something I’ve yet tried.

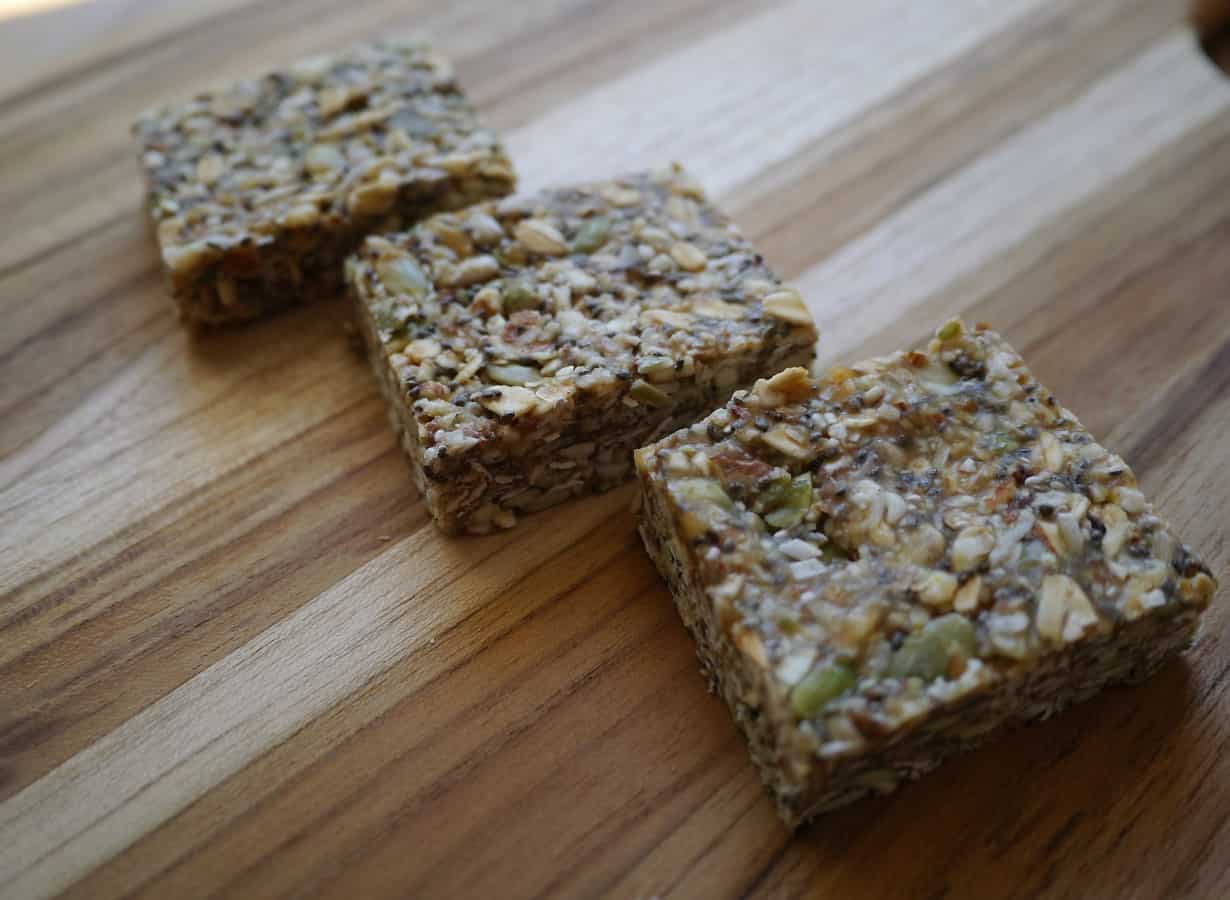
Recipe: Zero Waste 4 Seed Crackers

I chose raw seeds rather than roasted ones, as the crackers are baked in the oven. If raw seeds aren’t an option, try with roasted ones but bear in mind you might need to add a little more water to the mix.

Preheat the oven to 160°C, line three trays with baking paper or use silicone baking mats.
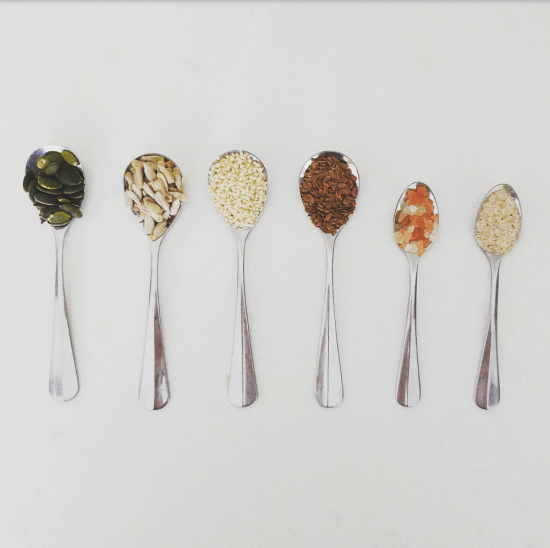
Ingredients:

490ml water
200g sunflower seeds
100g sesame seeds
60g pumpkin seeds (pepitas)
60g linseed (flax seed)
15g psyllium husk
5g salt

Method:

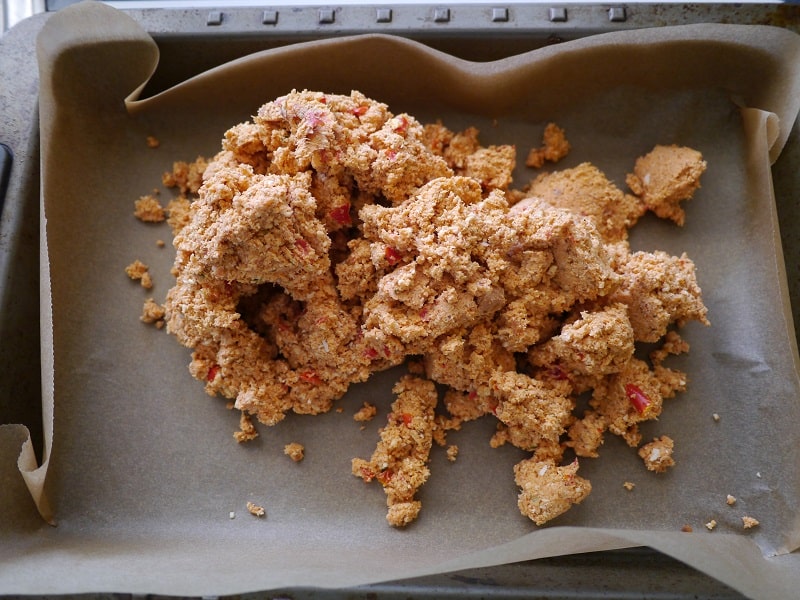
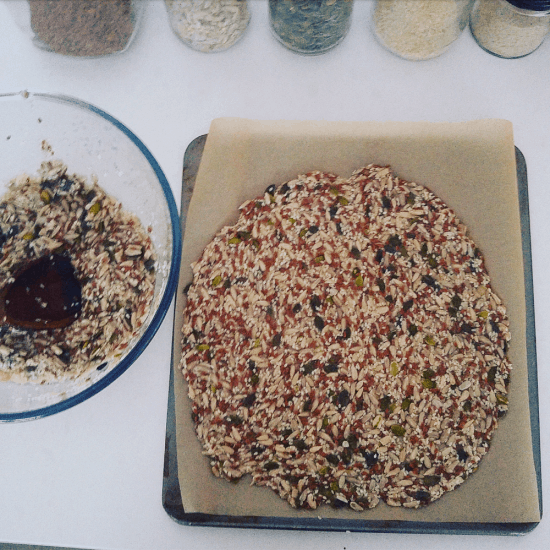
Mix all the seeds, husks and salt together in a bowl and pour in the water. Leave to stand for 30 minutes until the mixture has a gloopy consistency.

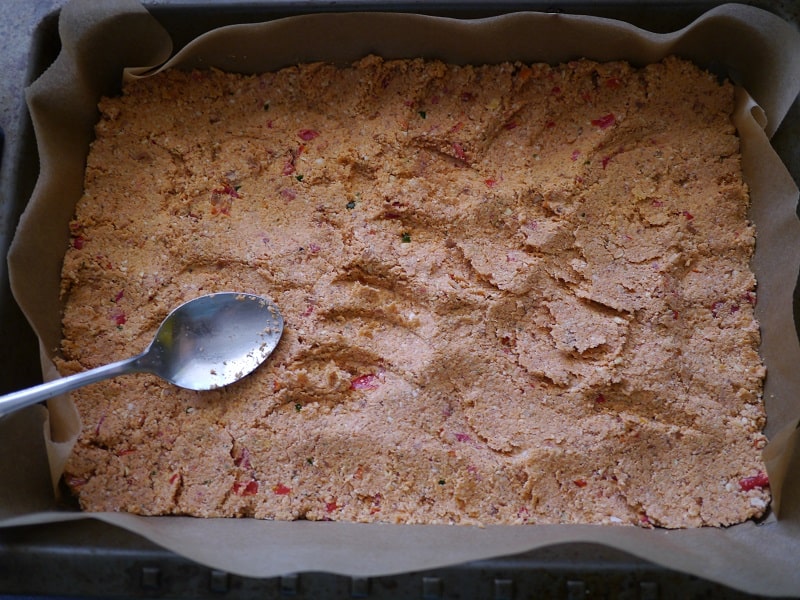
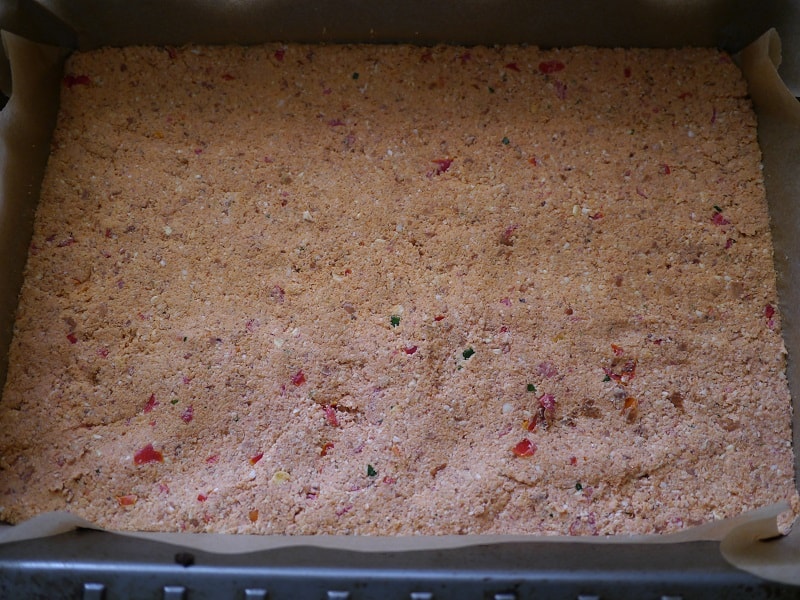
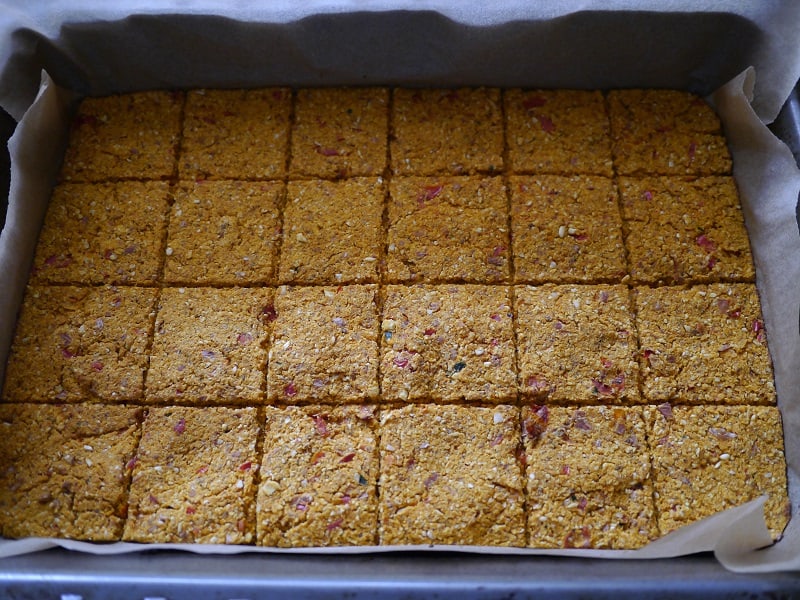
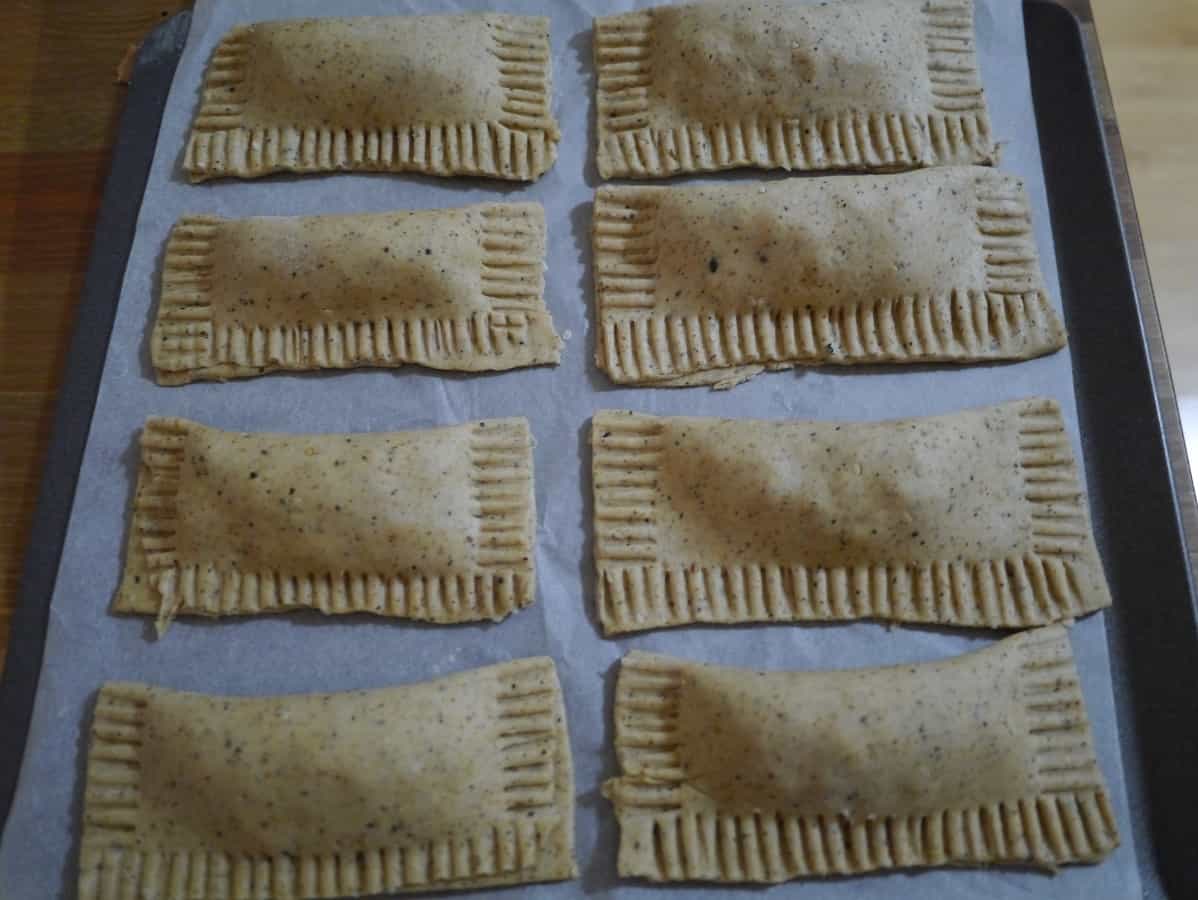
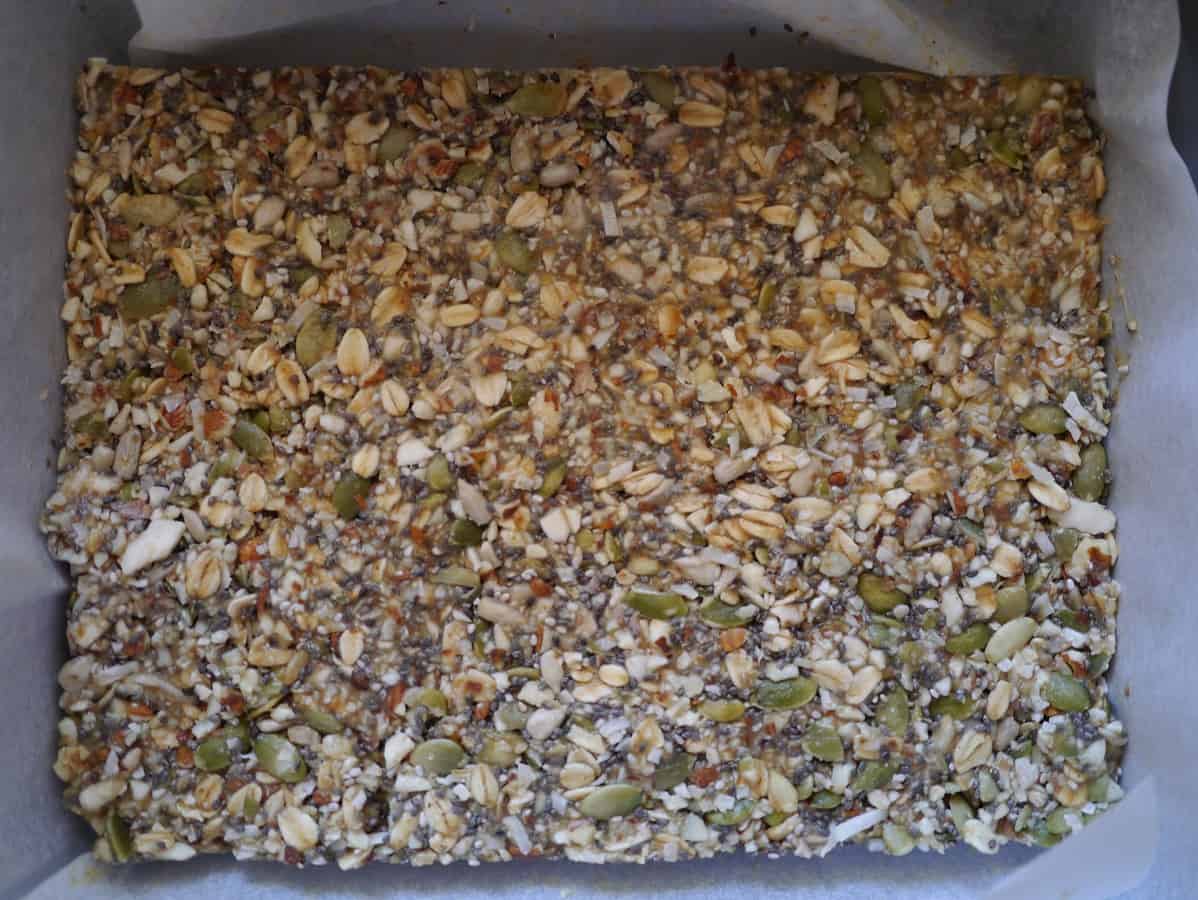
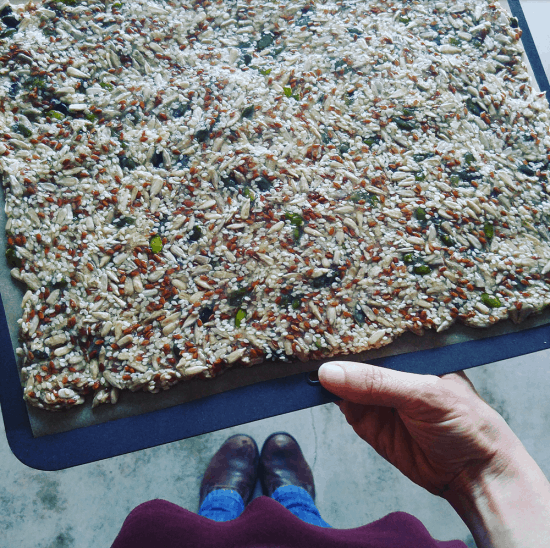
Empty a third of the mix on each baking tray and spread out thinly and evenly using the back of a spoon. Try to make the mixture as thin as possible. (but be careful of creating holes).

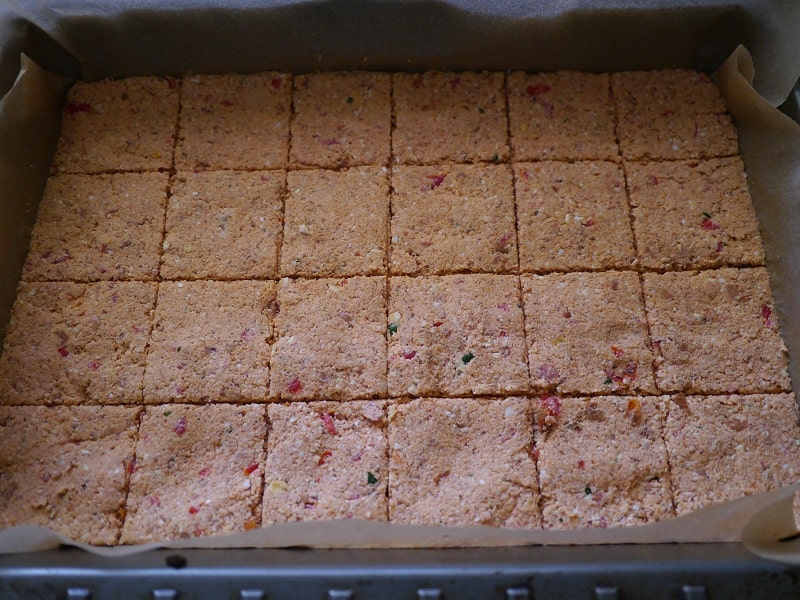
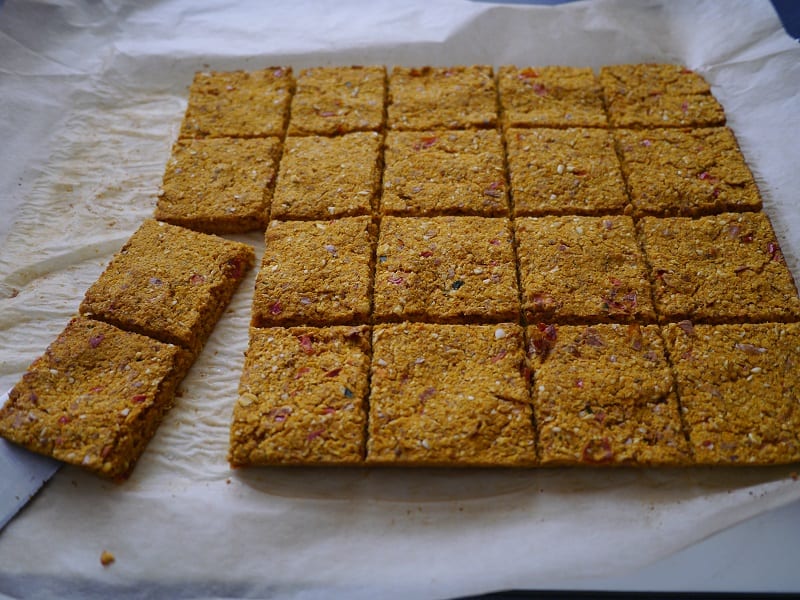
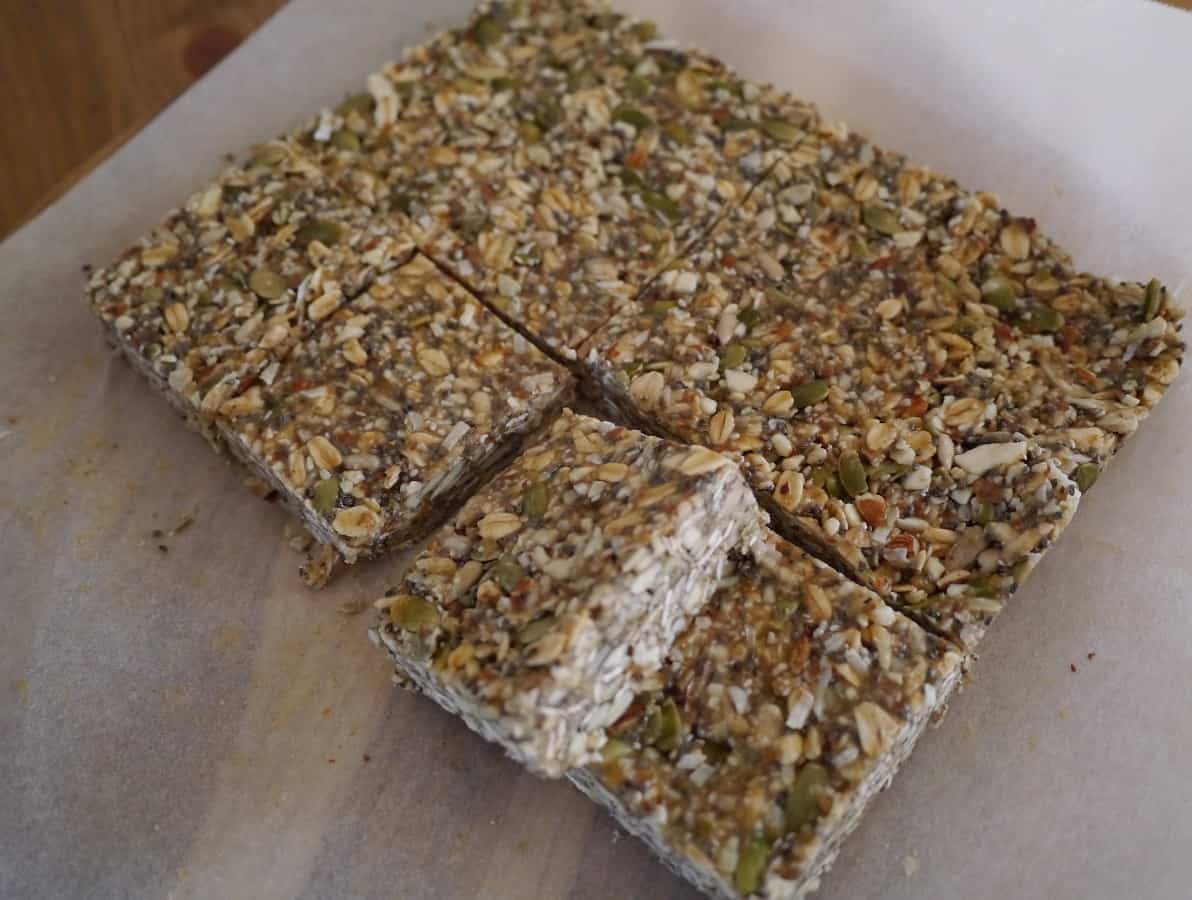
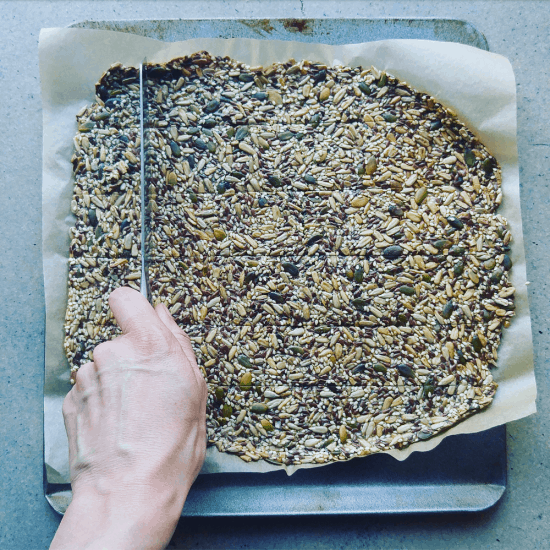
Bake in the oven for 1 hour, then remove from the oven and using a knife, score the cracker lines in the mix. Once they are fully baked they will not cut without shattering, so the lines need to be marked whilst the mixture is still soft.

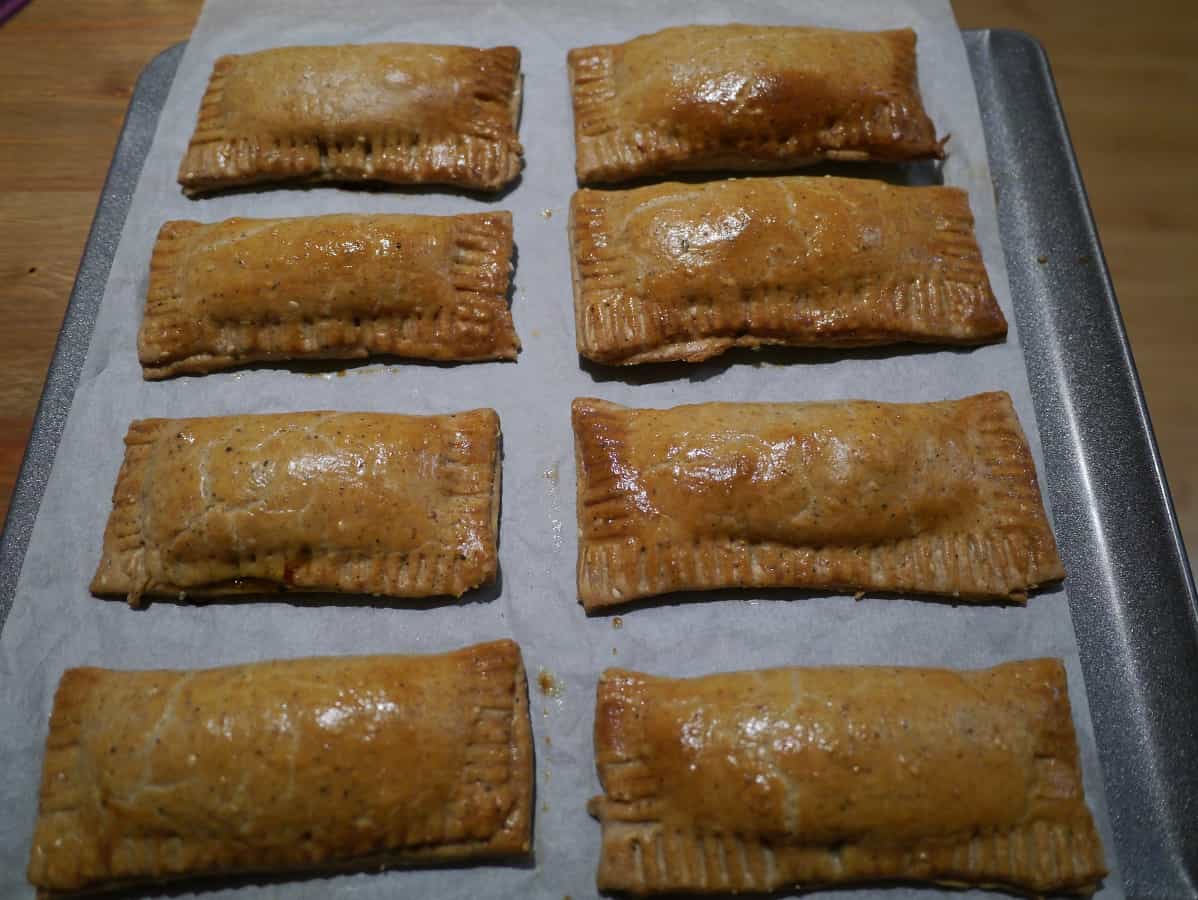
Return to the oven for 30 minutes. Check the crackers and remove any that are cooked (the middle will take longer than the edges). If possible, separate the crackers and return to the baking tray to speed up final cooking.

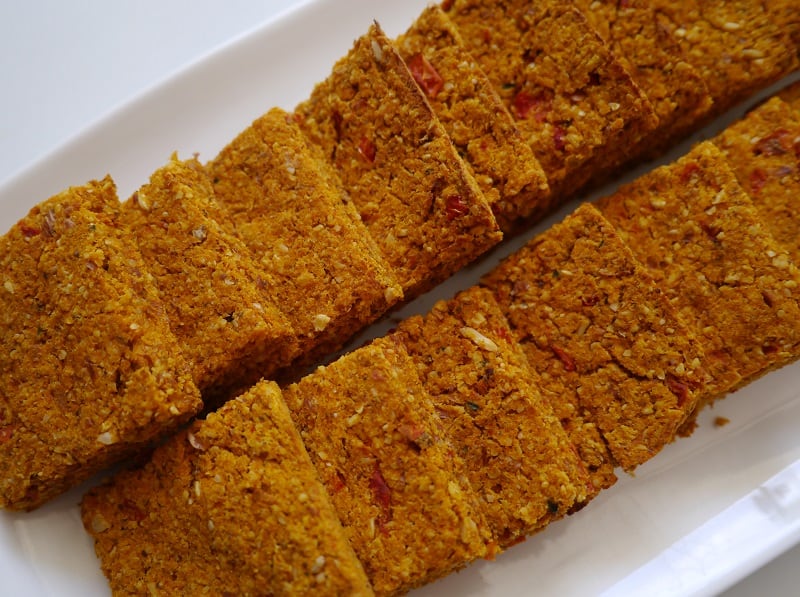
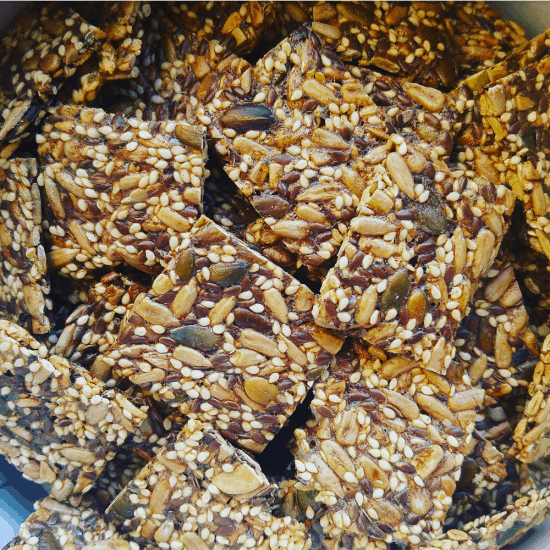
Return any uncooked crackers to the oven. Cook for another 30 minutes or until the crackers are completely dry, crisp and crunchy. To dry out further, the crackers can be left in the warm oven once it is turned off. Remove from oven and cook completely on a rack.

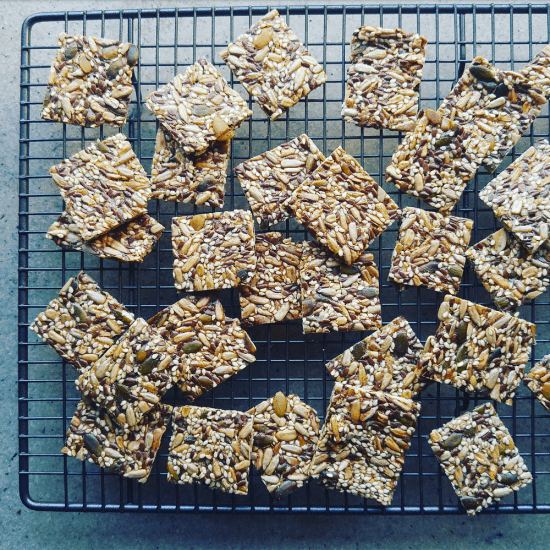
Store in an airtight tin. They will keep for at least a week.

Possible Variations

There are plenty of other seeds to experiment with: hemp seeds, poppy seeds, chia seeds, or even chopped nuts. You could try adding cumin, nigella or fennel seeds; or herbs and spices such rosemary or thyme, paprika or ground coriander. Recipes are there to be played with!

Now I’d love to hear from you! Do make your own crackers? Has it been on the to-do list since forever but you’re yet to get round to it? Or is it something you’ve put in the too-hard basket for now? I’m always interested in hearing new cracker recipe ideas so if you have any favourites – or favourite flavour combinations – share below, along with anything else you’d like to add!

[leadpages_leadbox leadbox_id=123a865e9839c5] [/leadpages_leadbox]

Recipe: Carrot Pulp Cracker Flatbreads

This super-simple recipe tackles two dilemmas I face when trying to live plastic-free and with zero waste – how to make your own plastic-free crackers, and what to do with leftover carrot pulp (from juicing carrots). I came up with this recipe after realising that if I wanted plastic-free snacks, I was going to have to make my own. I am yet to find crackers in plastic-free packaging.

I went through a phase of drinking carrot juice a couple of times a week, and decided to experiment with using the pulp to make my own crackers. After countless experiments, I am happy with this recipe, but I must point out that they are not crunchy. Making them crunchy just meant I had to drink a gallon of water every time I ate one, because they were so dry. This was my happy spot. They are still soft on the inside, which makes them more of a bread than a cracker – except they are nothing like bread either. I’ve called them cracker flatbreads because I have no idea what else to call them. Crackerbreads? Anyway, if you make them and think of a better name, please let me know!

If you don’t have carrot pulp, you can use grated carrot instead. The mixture will be a lot more watery, so will need longer to cook (still at the same temperatures), but will still work. You could try squeezing the juice out of the grated carrot, but then you’d be wasting delicious carrot juice!

Recipe: Carrot Pulp Cracker Flatbreads

This recipe is for a 33cm x 23cm tin.

Ingredients:

Approx 200g-250g carrot pulp
1/2 cup almonds, soaked overnight, rinsed and drained
1/2 cup oats (for gluten-free, use gluten-free oats; or replace with 1/2 cup almonds for completely grain-free)
2tbsp flaxseeds, ground
2 small tomatoes, chopped
1 tbsp olive oil
Salt and pepper
Optional: 1/2 tbsp fresh rosemary, finely chopped, or other herbs or spices depending on your taste

Method:

Preheat the oven to 170ºC.

Line a baking tin with greaseproof paper.

In a blender, grind the soaked and rinsed almonds until small pieces. Add the oats and grind to a coarse mixture. Add the carrot pulp and blitz to combine. Add the tomatoes, oil and flax seed and blend until combined. Add the salt, pepper and nay herbs or spices that you want to add and blitz again to ensure everything is mixed together.

Tip the mix into the lined baking tray. It will look sticky. Press into the tin with a spoon.

It may seem like there isn’t enough mixture for the tin, but you want a fairly thin layer. Push right up into the edges and corners, and press the edges down firmly. You can use your hand to firmly pack the mix into the tin once it’s all spread evenly.

Mark out the cracker shapes using a knife.

raw carrot pulp mix

Empty the carrot pulp cracker mix from the blender into a tin lined with baking parchment…

raw carrot pulp cracker mix with spoon

Use a spoon to press the raw carrot pulp cracker mix into the edges of the tin…

raw carrot pulp mix squished

Compact the carrot pulp cracker mix down using your hand, and use a spoon to make sure the edges are neat…

raw carrot pulp mix with squares cut

Use a knife to mark out the carrot pulp cracker squares before they go into the oven.

Place in the oven, and leave for 30 minutes.

After 30 minutes, see if you can lift the baking paper lining out of the tin without breaking the crackers. If they are still too soft, pop them back into the oven for another 5 minutes or so, and keep trying until they are firm enough to handle. Lift firmly and quickly.

Lower the oven to 100ºC and put the crackers (still on the baking paper) on a grill tray in for another 15 minutes (do not wait for the oven to drop to temperature; they will be fine).

Remove from the oven, and carefully separate the crackers. You may need to use a knife to cut them. Put each one upside down on a grill tray (to aid air circulation), and return to the oven for 15 minutes to cook the other side.

carrot pulp crackers in baking tin

Golden carrot pulp crackers out of the oven…

carrot pulp crackers baked once

The underside will still be moist, so separate the crackers carefully to avoid breaking them…

Carrot pulp crackers other batch

Pop back into the oven with the damp underside facing up. Use a grill pan or rack to enure the air can get between them and they don’t burn!

Once they are ready they will be a golden colour and be dry to touch.

Remove and enjoy!

carrot pulp crackers on a plate

Carrot pulp crackers and hummus

These carrot pulp cracker flatbreads are perfect with hummus!

Tips:

  • This recipe is extremely forgiving, so feel free to change quantities, cook for longer to make them crunchier or modify however you think best. Just let me know in the comments!
  • Feel free to miss out the middle step. Cook in the oven for 30+ minutes, then take out, separate straightaway and put back in the oven for the last 15 minutes. The crackers will be more moist and harder to separate, but if you’re patient enough it will work fine!
  • If you don’t want to make crackers immediately after juicing carrots, store the pulp in a sealed container in the fridge. It will last for a couple of days.
  • The tomatoes provide the moisture. If you don’t like tomatoes, you could swap with a small courgette.
  • Brazil nuts make a great alternative to almonds. They make a much crunchier cracker. Cashew nuts don’t work as well – the crackers tend to discolour and not look as appealing.

These crackers are delicious with hummus! Follow the link to find my super-simple plastic-free hummus recipe.

[leadpages_leadbox leadbox_id=1429a0746639c5] [/leadpages_leadbox]

A Recipe: Plant-Based Banana Chocolate Muffins (Gluten-Free)

These muffins may look plain on the outside, but there’s a decadent rich chocolatey centre hiding inconspicuously inside each one. Because chocolate makes everything better, don’t you think?!

They’re great for people with allergies, being vegan and dairy-free, paleo-friendly and gluten-free. They are also full of nutritional goodness; rather than flour and dairy they’re packed with bananas, almonds and flax seeds. Bananas are packed with potassium, magnesium and manganese, and B vitamins including B6 and folate. Almonds are a great source of magnesium, calcium and zinc (as well as many other minerals) and are also high in vitamin E. Flax seeds are super high in omega-3s, B vitamins and minerals including magnesium and selenium.

Did I mention that they’re super tasty too?

pic4 pic9 pic8 pic7 pic11

Recipe: Chocolate Surprise Banana Muffins

Makes 10 muffins.

Ingredients

3 bananas (about 300g)
1/4 cup nut milk (I use cashew nut milk – you can make it yourself; it’s super simple)
2 tbsp maple syrup (or other liquid sweetener)
50g macadamia oil (or other high quality flavourless oil)
175g ground almonds
30g ground flax seeds
1.5 tsp baking powder
1 tbsp chia seeds

For the chocolate filling:
30g macadamia oil
20g cacao powder
20g maple syrup

What To Do

Preheat your oven to 170ºC.

Blend bananas, maple syrup, cashew nut milk and oil together until smooth. Add the ground almonds, ground flaxseeds and baking powder and mix well.

Put the 1 tbsp chia seeds in a bowl and add 3 tbsp water, stirring well. Leave for 10 minutes or so until the chia has formed a gel.

Separate 1/4 of the cake mixure and place in a separate bowl. If you want to be accurate, use scales. Otherwise guesswork is fine! Stir the chia gel into the larger cake mix portion.

To the 1/4 mixture in the separate bowl add 20g cacao powder, 20g maple syrup and 30g oil and stir until combined.

Put a heaped dessertspoon of cake mix into 10 muffin cases. You should be left with a small amount of cake mix. Using a teaspoon, make a well in the centre of each muffin.

Divide the chocolate mix between the 10 muffins, carefully filling the well in the centre using a teaspoon.

Top each muffin with a thin layer of the remaining cake mix, using a spoon to seal the gaps. You shouldn’t be able to see any of the chocolate mix.
pic12premuffin1 premuffin2 premuffin3 premuffin4 premuffin6Place in a pre-heated oven and bake for 25 minutes until golden.

Enjoy!

pic2

Tips:

  • I used chia seeds to help bind them together as these muffins don’t contain egg. Flax seeds and bananas are also great binders though, so if you can’t find chia seeds just leave this step out.
  • If you think the assembly sounds like too much hassle, don’t stress. Just fill the cake cases with half of the plain mix, add a spoonful of the chocolate one and then top with remaining plain mix. They might not look quite so neat but they’ll still taste amazing!

[leadpages_leadbox leadbox_id=1429a0746639c5] [/leadpages_leadbox]

5 Ingredient Chocolate Brownie Recipe (No Baking Required)

This is my new favourite thing to make. Aside from the fact that it tastes amazing, it is also super simple to assemble.

Now I love a cooked brownie, when the edges are crispy and the middle is molten, but there’s a bit of an art to it. Knowing your oven well and being super accurate with timings is the only way to catch the brownie in that tiny window between still-raw-and-gloopy-and-dissintegrates-upon-touch and overcooked-and-crunchy-and-dry-all-the-way-through. There’s also a lot more mess generated, and washing-up, with cooked brownies, and you need more time. Luckily, his cousin, the raw brownie, means none of this to worry about!

With this brownie, there’s no cooking. Hurrah! You can’t over- or under-cook it, and you don’t have to wait ages for it to be ready. Also, you only need 4 ingredients (plus salt). How awesome is that?! The other great thing is you can make this in small batches rather than having to make a tray full. If you’re greedy like me and can eat 24 brownies in 24 hours, this is a great way to exercise some restraint – just make less!

I also imagine that these would keep much longer than normal brownies which dry out over time, but I’ve not been able to resist eating them long enough to find out. They will definitely keep for a week in the fridge or freezer in an airtight container, and I can’t see any reason why they wouldn’t last longer if you have more willpower than me.

This recipe makes enough for 6 pieces. You will need a food processor or high powered blender.

Ingredients

100g walnuts (approx 1 cup)
60g macadamias (a very full half cup)
10 medjool dates, stones removed
1/2 cup cacao powder
1/4 teaspoon salt (recommended but optional)

Method

Grind the walnuts and salt into a flour. Add the cacao and mix well. Blend the dates in a few at a time until the mixture has formed small crumbs.

Roughly chop the macadamias by hand. Stir into the mix.

Line a container with baking paper. Tip the mix into the container and press down firmly. Place in the freezer before cutting into pieces (it will cut into pieces better if it is cold).

brown1

Store in the fridge or freezer.

You can eat straight from the freezer, or allow to warm to room temperature. I dust extra cacao powder on the top to serve but this is optional.

brown2 brown3 brown4 brown5

Yum!

[leadpages_leadbox leadbox_id=1429a0746639c5] [/leadpages_leadbox]

How to make your own baking powder

I started making my own baking powder when I heard that some baking powders contain aluminium. I didn’t want to be eating that. Also, baking powder contains gluten in the form of wheaten cornflour. Some of my family members are coeliac and I like to bake for them, so I need a gluten-free baking powder. That is also aluminium free. And ideally doesn’t come in plastic.

Turns out, baking powder is the easiest thing to make in the world. You need just two ingredients, cream of tartar and bicarbonate of soda.  The ratio is 2:1 so 2 teaspoons of cream of tartar needs 1 teaspoon of bicarb.

Mix them together and voila! You have super easy baking powder. Store in a jar in the cupboard until needed.

Some recipes also add 1 part cornstarch too, which means cornflour, but as cornflour is actually made of wheat and not corn (bizarrely) I don’t add this. I have seen a gluten-free cornflour available that is actually made with corn so at some point I might try it, but I think it works fine without.

What else do you need to know? It has a slight tendency to clump because it hasn’t got caking agents added. This isn’t a problem of course, just give the mix a good stir before you use it.

The other great thing is that you can make small batches as you need it, so it doesn’t sit in the cupboard slowly going out of date. No matter how much baking I do, I’ve never been able to use up an entire container of baking powder before I exceed the expiry date, so this suits me much better.

My weekend baking extravaganza

I set myself a challenge this weekend. I decided to try three new recipes of things that I’ve never made before. I love food and I love cooking (which if you read this blog you’ll probably have noticed) but I often feel like I’m making the same things over and over again. That’s partly true because I get a seasonal veg box delivered, and the contents don’t vary much week to week – especially in winter. I consider myself pretty good at knocking something nutritious and tasty up out of whatever is in the fridge and in the pantry, and I love making recipes up, but when I have the same ingredients I tend to make the same kinds of things.

I was feeling a bit stifled, creatively speaking. I don’t tend to use cookbooks and recipes much apart from special occasions, but I decided maybe this was what I needed to re-spark my culinary inspiration. I decided I’d find three recipes that looked great and that I’d never made before, go shopping for any new ingredients that weren’t already hanging about, and get baking.

I had such a fun time! It was great to make things with new ingredients, and follow other people’s recipes rather than tinkering for hours with my own. I used spelt flour for the first time, made raw vegan chocolate brownies and learned about wakame gomasio. It’s definitely re-sparked my creativity again; I’ve been thinking up new ideas and I’m already planning some variations and new recipes.

Here’s a mini showcase of my weekend (I’m so proud of my efforts I thought I’d take the opportunity to show off!):

rawpasty cookedpasty pasty rawbrowniejpg brownie2 brownie3 brownie4 bars2 slicej bars3 So I have a challenge for you. This weekend, make a recipe that you’ve never made before. Maybe something you’ve been meaning to make for a while. Maybe just flick through some cook books for inspiration. You’ve got a week to find a recipe and make sure you’ve got all the ingredients to hand. Good luck!

In addition to my renewed passion for cooking, the other great thing about the challenge was that I started my week with a fridge full of delicious things to eat. How awesome is that?!

What ‘raw food’ actually is (it’s not just about salad!)

Yesterday was July 11th, and also (you probably didn’t know) International Raw Food Day (I didn’t know either, until Google told me). When I first heard about raw food I have to admit I was seriously uninspired. I imagined cold unappetising plates of salad for meal after meal, and never bothered to look any further into it.

I’d probably never have changed my mind if I hadn’t stumbled across a cafe in Fremantle called the Raw Kitchen about 9 months ago. The food at this cafe is truly delicious, and the continuous queues outside and the difficulty in finding a table at the weekends is testament to how good everyone else thinks it is too. As soon as I ate there, I was hooked. It really opened my eyes to just how tasty raw food can be.

What does ‘Raw Food’ mean?

Put simply, raw food is food that has not been heated above 46°C (115°F). As heat destroys nutrients and enzymes, keeping food below this temperature is thought to keep the food at its optimal nutritional levels, and preserve its life-force. Raw food is sometimes referred to as living food. If you’ve ever seen a plate of over-boiled, grey, lifeless and limp vegetables, you should be able to understand this premise.

Often raw food is also free from dairy, eggs, wheat and gluten. Ingredients used are unrefined and as close to their natural state as possible. To get a variety of textures, forms and flavours, techniques such as dehydrating, blending, soaking and freezing are used.

There can be lot of effort required in preparing raw food. Cooking often makes food easier to digest, so if it’s going to be eaten raw then often it needs to be prepared in some other way to make it more digestible. Raw nuts, legumes and wholegrains contain high levels of phytic acid (phytate), which is the molecule plants use to store phosphorus. Humans cannot digest phytic acid, and it binds to minerals such as calcium, iron, zinc and magnesium, preventing us from absorbing them. To make them easier to digest, there’s a lot of soaking involved (sprouting reduces phytic acid without reducing the nutritional content), and this takes time (often upwards of a few hours). Then, to dry the food again, it needs to be dehydrated, which means using a dehydrator, which run at 46°C and have a fan for air movement, for 8 hours or longer in order to remove moisture. Dehydrators are also used to create the texture of oven-baked food.

My take on Raw Food

I would never eat an entirely raw diet because I love cooked food: I love the comfort of a bowl of piping hot soup on a chilly day, there is a huge space in my life for oven-roasted vegetables and eggs for breakfast on Sunday mornings has to be one of my all-time favourites. Plus, from a sustainability point-of-view, I believe we need to eat according to the seasons, and that means we need to freeze, pickle and preserve. I don’t think it’s possible to eat fresh food every day of the year without importing some of it, and it’s not sustainable to fly fresh produce around the globe.

An entirely or high raw food diet would also put a bit of a strain on the financial budgets of most people, me included. When you try to buy organic, local, free-range and fairtrade it already adds a lot to your weekly shopping basket. To me these are non-negotiable, because the cost of not doing them is far worse. So being able to supplement these with grains helps keep the overall cost of my weekly shop down. Pasta, bread and rice may not have much nutritional value but they’re cheap, filling, and help offset the price of expensive vegetables and other ingredients.

Whilst I understand the principles of dehydrating food, for me, cooking something in the oven at 200ºC for 2 hours makes far more sense. We don’t have solar panels and I don’t think I could justify running a dehydrator for lengthy periods on fossil fuels.

However, there’s definitely a space in my diet for raw food. Particularly raw dessert. There’s no doubt that refined foods have little (or no) nutrition. White flour and white sugar offer nothing but empty calories. So what could be better than a dessert that removes the nutritionally devoid parts and replaces them with ingredients that are super nutritious and tasty?! Yes, raw desserts cost considerably more to make, but our bodies weren’t designed to eat sugary, fatty, carbohydrate-loaded desserts every day (or multiple times a day).

What does raw food look like?

I want to share with you some of the photos I’ve taken from my many visits to the Raw Kitchen. It inspired me to investigate raw food, so maybe it will convince some of you doubter out there that it’s not all lettuce and carrot sticks!

rawmacaroonsjpg falafels cherrycheesecake rawsoupjpg rawcheesecakejpg rawpizzajpg caramelslicejpg

Even the doubters must have thought some of this looks pretty tasty!

[leadpages_leadbox leadbox_id=1429a0746639c5] [/leadpages_leadbox]

Raw Chocolate Nut Butter Cups: A Recipe

These are my new favourite thing to make! They’re inspired by Reece’s Peanut Butter Cups, except they’re made with real ingredients, not artificial ones, and of course they’re free from preservatives, additives and other nastiness.

I’ve been delaying writing this post whilst I try to perfect them, but I’ve decided I’m gonna share the recipe as it is. They’re pretty damn good as they are, but if I do make them even better I’ll be sure to let you know!

I’ve made my own chocolate from raw ingredients but if you don’t have these ingredients or aren’t fussed about making them raw or vegan you can use melted store-bought chocolate. I reckon you’d need about 1 1/2 cups, which I’d guess would be 250g. (If this number is waaaay out maybe someone could let me know in the comments and I’ll adjust the post!)

I’ve tried making these with brazil nut butter and almond butter, and I loved both, and next on my list is hazelnut butter. You can make your own nut butters for a fraction of the shop price if you have a food processor – find my instructions for making almond butter here.)

buttercups2jpg buttercups3bjpg buttercups5jpg buttercups56jpg buttercups7jpg buttercups1jpg

Raw Chocolate Nut Butter Cups

This will make 12 (if using cucpcake-sized paper or silicone cases)

Prep time 20 minutes, chilling time 30 minutes: that means they are ready to eat in under an hour!

Ingredients:

1/2 cup coconut oil (100g)
35g cacao butter (about 3 tbsp when melted)
55g raw cacao powder (3/4 cup)
80ml maple syrup or agave nectar (1/3 cup)
2 tbsp maca powder (if you don’t have this add 2 tbsp extra cacao instead)

For the filling:

1/2 cup nut butter
1 tsp maple syrup or agave nectar
1/2 teaspoon sea salt

Method:

Melt the coconut oil and cacao butter in a bowl over a pan of steaming water.

Add maple syrup/agave and stir until combined.

Add cacao and maca and mix well.

Line a muffin or cucpcake tin with 12 paper cases. Spoon 1 dessertspoon in each of the paper/silicone cases. (This should use 1/3 of the mixture – keep the rest).

butterbups9jpgbuttercups11jpg

Put the tray into the fridge to set (about 15 minutes).

Whilst the chocolate sets, make the filling. Mix 1/2 cup nut butter with the sweetener to form a dough.

buttercups16jpg

Divide the dough into 12 balls.

Take the tray out of the fridge. One at a time, roll a ball of dough and place on top of the chocolate in the cases, pressing down so the dough almost (but not quite) covers the chocolate. Repeat for all. (If you find the nut butter is sticky, put in the fridge for a few minutes to chill before pressing down).

buttercups12jpg

Take the remaining chocolate mix (if it has cooled and hardened, simply warm again as before to soften) and spoon two dessertspoons into each case. This should completely cover the dough centres.

If there is any chocolate left over, share amongst the cases.

buttercups10jpg buttercups14jpg

Pop back in the fridge to set. This will take another 15 minutes.

Before serving, top with ground sea salt or cacao nibs, or leave plain if you prefer.

Enjoy!

buttercupsbmpjpg

These need to be kept in the fridge, in an airtight container so they don’t absorb all the other fridge smells.

Enjoy!

[leadpages_leadbox leadbox_id=1429a0746639c5] [/leadpages_leadbox]

Ingredients I love…Coconut Oil

Coconut oil is a relatively new addition to my grocery cupboard. When I was growing up coconut oil (and coconut products in general) were considered unhealthy because of their high fat content, in particular their saturated fat content. (Avocados and coconuts are unique among fruit and vegetables for containing saturated fat.) Saturated fat has been linked to heat disease. However coconut oil is now becoming popular again as its properties and their benefits are more widely understood.

It’s worth noting that the coconut oil I’m talking about here is virgin cold-pressed. Virgin cold-pressed coconut oil is produced from fresh coconut meat, which is dried and then pressed to extract the oil, usually within hours of harvesting.

Oh, and one more thing before I begin my list. All things in moderation. Coconut oil might have some amazing properties and health benefits, but eating an entire jar in one sitting isn’t going to do you any favours! Limiting consumption to only a few tablespoons a day is recommended.

Six reasons why I love coconut oil

  1. It’s tasty…and better for you!

Let’s face it, things full of fat always taste much better, and coconut oil is composed of 92% saturated fat. But don’t panic! Not all saturated fats are equal. There are 34 different saturated fatty acids, and of the four found in coconut oil, lauric acid accounts for almost 50%. Lauric acid is a medium-chain fatty acid, and medium-chain fatty acids are metabolised differently to other saturated fats.

Medium chain fatty acids tend to be used by the body to provide energy soon after they are consumed, rather than being stored as fat. If fatty acids are used this way they cannot contribute to weight gain. Lauric acid has a particularly high rate of oxidation compared to other fats, meaning it is burned off, making it a valuable source of energy.

  1. It has anti-microbial properties

Lauric acid has antibacterial properties, but can also be converted in the body into monolaurin (glycerol monolaurate), which has even greater anti-microbial properties. In lab tests both lauric acid and monolaurin have been demonstrated to be effective against viruses and pathogenic (disease-causing) bacteria including Staphylococcus aureus, E. coli and Salmonella (research here, here, here and here).

  1. It’s good for the heart

There are two types of cholesterol, LDL (‘bad’ cholesterol) and HDL (‘good’ cholesterol). High levels of HDL are thought to protect against heart attacks and strokes (see reports here, here, here and here). The lauric acid in coconut oil greatly increases HDL cholesterol in the blood (analysis here) and decreases the total cholesterol to HDL ratio.

  1. It has a long shelf life

Because it is high in saturated fat, coconut oil is resistant to oxidation. (Oxidation is what makes oils rancid, breaking fatty acids down into aldehydes, ketones and alcohol.) Oils high in unsaturated fat are much less stable and prone to going rancid. Some particularly susceptible oils (such as flaxseed oil) will go rancid within weeks; coconut oil can last years. This is great if you’ve bought a jar because you needed 2 teaspoons for a recipe, as it will sit happily in the cupboard until you’re ready to use it again.

  1. It’s not just for eating

Coconut oil is also a great base for beauty products because it is solid at room temperature, has a long shelf life and is easily absorbed by the skin. If you want to make your own beauty products then coconut oil is an essential; I use coconut oil for making my own deodorant and toothpaste. It’s a key oil for making soap and also has great moisturising properties. The anti-bacterial properties of lauric acid have been shown to be effective in treating acne.

  1. It’s a great natural alternative to butter

Because it’s solid at room temperature (it melts at 25ºC) it’s great as a butter replacement in recipes for people who can’t/won’t eat dairy products, or want to cut down. Now I’m not a vegan but I am a fan of the raw vegan treat. Coconut oil is often found in such delights as a substitute for dairy products. What could be better than snacking on food that tastes delicious and is packed full of goodness? What, you don’t believe me that raw vegan treats taste delicious?! Try this recipe and see for yourself!

Raw chocolate

(This recipe is adapted from another recipe I found online – I used to link back to it bu as the link no longer works so it’s been removed.)

Ingredients:
170g coconut oil
110g raw almonds
60ml maple syrup (1/4 cup)
10 – 12 medjool dates
4 tbsp cacao powder

rawchoc1jpg

Method:

Line a 20cm by 25cm tray with greaseproof paper.

Chop the dates finely using a knife. (Don’t attempt to do this in a food processor or you will end up with a big sticky lump attached to the blades)

rawchoc2jpg

Chop the almonds in a food processor until they resemble small nibs, but not so fine that you get a powder. (If you don’t have a food processor then you could use a coffee grinder of chop by hand using a sharp knife)

rawchoc3jpg

Heat the coconut oil in a saucepan on an extremely low heat until it is liquid (it will melt at 25ºC). Add the maple syrup and cacao to the pan and stir.

rawchoc6jpg

Add the chopped dates and nuts and mix well.

rawchoc7jpg

Pour into the lined tin, using a fork to make sure the fruit and nuts are distributed evenly.

rawchoc8jpg

Place in the freezer (make sure the tray is flat) and leave for at least 30 mins until solid. Chop into squares and store in a container in the freezer. (You eat it straight from frozen.) If it doesn’t get eaten immediately, it will last for a month.

rawchoc10jpg

rawchoc11jpg

Notes:

Maple syrup is not raw, as it is made from the heated and reduced sap of the maple tree. If you want a raw sweetener then replace the maple syrup with raw honey (which is not suitable for vegans) or raw agave nectar.

Raw cacao is preferable as it is higher in nutrients. If you cannot find it, then I recommend an organic product such as Green & Blacks cocoa powder. Don’t use Cadbury’s as it contains extra ‘flavours’!

[leadpages_leadbox leadbox_id=1429a0746639c5] [/leadpages_leadbox]