How to Make DIY Nut Butters + Homemade Nutella (Chocolate Hazelnut Spread)
If there’s one gadget that I’d recommend for even the most minimalist zero waste kitchen, it’s a food processor/high power blender. They are just so useful for so many things. I use mine daily. I make nut milk, mix cake batter, make dips, puree veg, chop tomatoes, blend smoothies, and grind things up.
Ah, I could wax lyrical all day about how useful they are.
But today I’m just going to talk about two things I make. Two things that usually come pre-packaged, and that are so easy to make yourself that you’ll wonder why you ever purchased the bought stuff.
DIY nut butters, and chocolate hazelnut spread – which is a Nutella-like spread that you make from hazelnut butter.
How to Make DIY Nut Butter and Chocolate Hazelnut Spread
Almost all the nut butters that you buy are made with roasted nuts and for good reason – they are much, much easier to blend than raw nuts, and the flavour is infinitely better.
Don’t even think about blending raw nuts (or seeds) unless you have a super-duper high powered blender, and be prepared to be disappointed with the resulting butter – it will be pallid in colour, the texture will be much more dough-y, and it will taste meh.
But hey, if that’s your thing and you do have suitable equipment, give it a go! Just don’t say I didn’t warn you…
How to Roast Nuts
You can buy roasted nuts, or you can roast your own. If you buy pre-roasted buts, try to find the ones without salt added.
I tend to roast my own as they taste much fresher, and raw nuts are usually slightly cheaper than their roasted counterparts.
To roast nuts, spread out on a large roasting tray and place in the oven on a medium heat. You want the nuts to dry out slightly, and change colour slightly. The aim is lightly coloured and golden, not dark brown or black, and they should smell and taste nutty and aromatic – not burned.
I roast my nuts at 160°C (320°F) for around 15-20 minutes, opening the oven every 5 minutes or so to give them a shake and check on their progress. If they ready sooner, remove from the oven. Softer nuts like pecans take less time and burn more easily.
Better to keep the oven temperature low and roast a little longer than scorch them.
Once they are roasted, allow to cool completely before making nut butter.
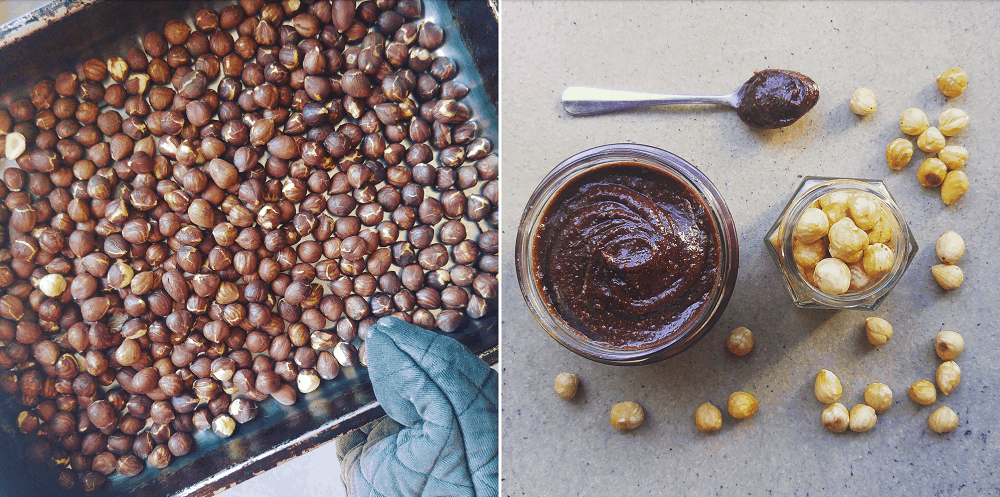
Removing the Skins (Hazelnuts Only)
Hazelnut skins are quite bitter, so they need to be removed before making hazelnut butter. (This isn’t an issue with other nuts, and I leave the skins on my almonds, pecans etc.)
Place raw hazelnuts in a roasting tin and put in the oven at 160°C (320°F) for around 20 minutes.

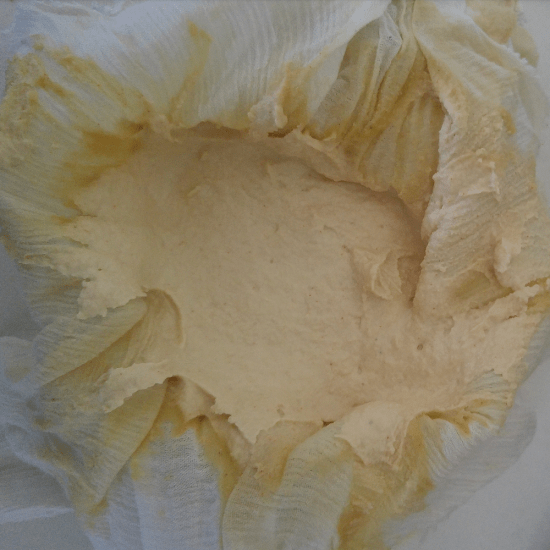
Take out of the oven and tip onto a clean tea towel, then fold the tea towel over so no hazelnuts can escape, and rub together. This will remove the skins. 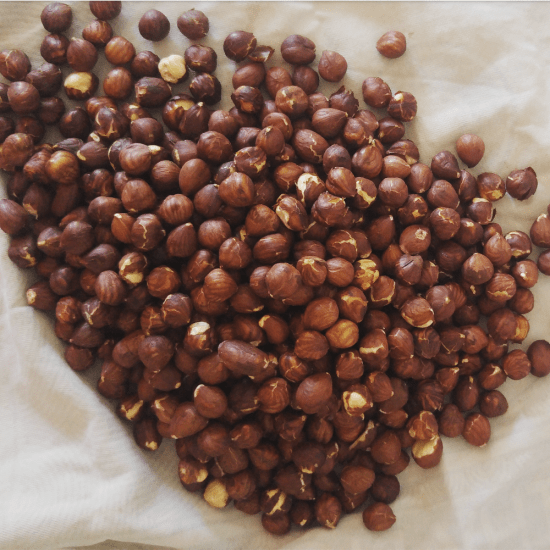
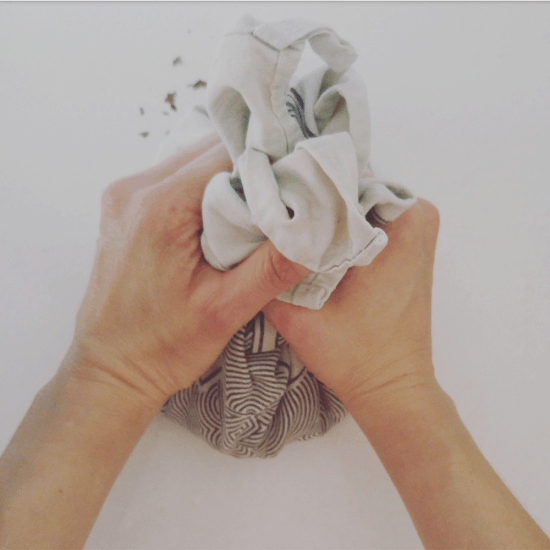
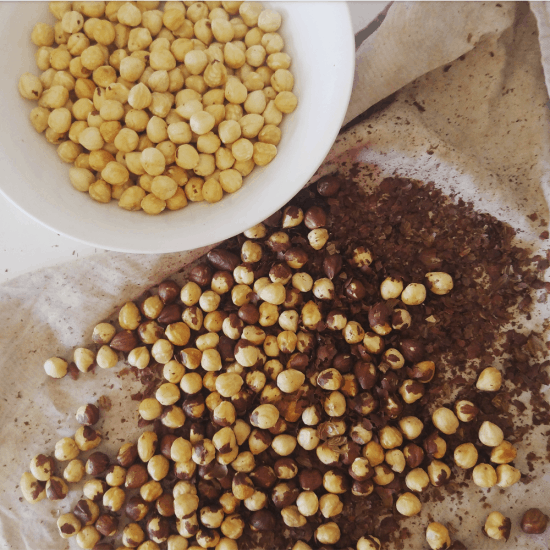
If they don’t all come off first time, put the stubborn ones back in the oven for a few more minutes. A few skins won’t hurt so it doesn’t need to be perfect, but the more removed the better.
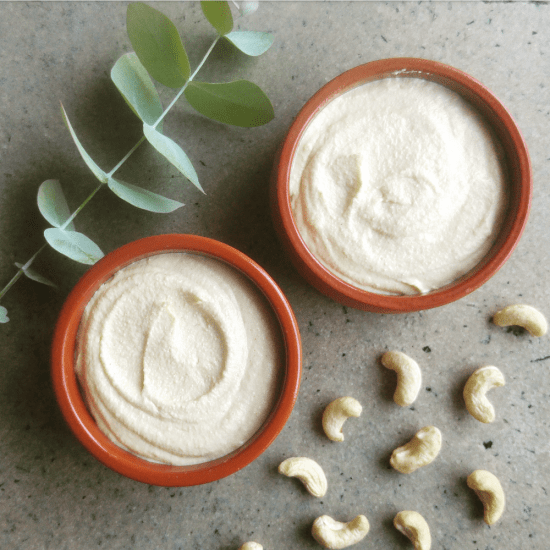
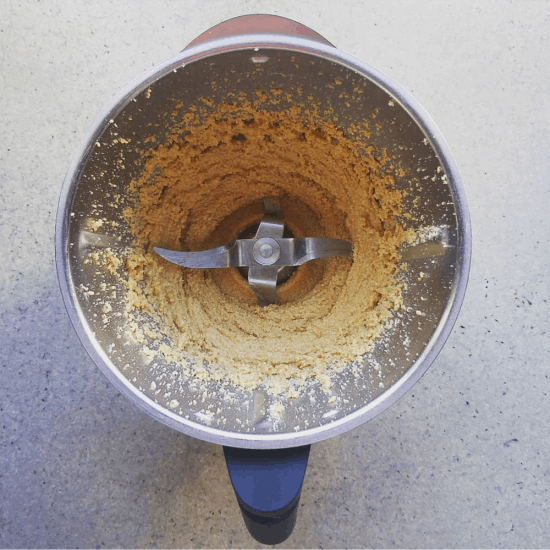
How to Make DIY Nut Butter
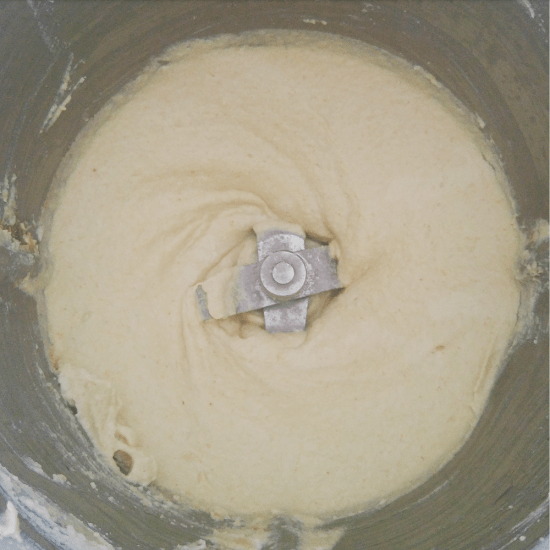
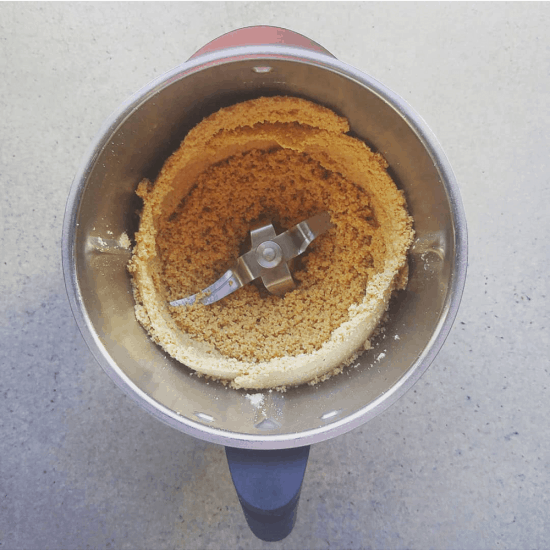
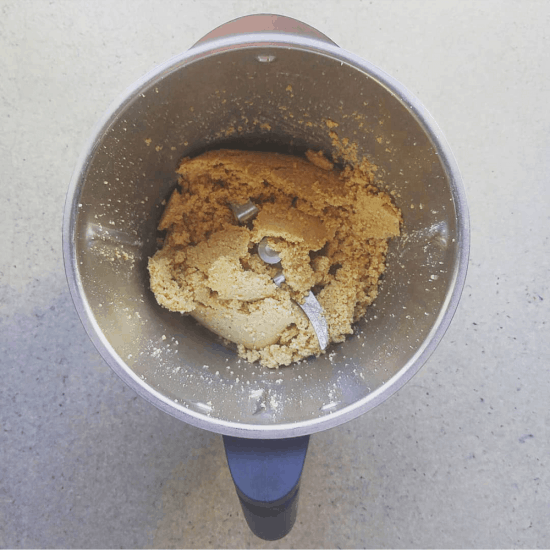
Nut butter is literally roasted nuts, blended. We tend to think of peanut butter or perhaps almond butter, but almost all nuts can be blended, as can seeds. Pistachio butter and pumpkin seed butter are both possible!
The nuts/seeds go through a few stages, from whole nuts to coarse crumbs, to finer crumbs, to a rough dough-y paste, to a glossy fully blended nut butter.
The friction from the blades warms the nuts up, helping the oils release.
Blend on the highest speed, and stop intermittently to check on progress (and to ensure your blender is not overheating).
If you’d like to make chocolate hazelnut spread, the first step is to make hazelnut butter.


High-speed blenders will work much faster than food processors. Be patient! You don’t want the nut butter to overheat, so if your food processor or blender is not the fanciest, you may find it helpful to pause part way through and allow everything to cool down.
I keep hazelnut butter and almond butter (this link has the in-progress pictures for almond butter) in the pantry and it keeps for 2-3 months, but you might prefer to keep in the fridge. When I make cashew or macadamia butter I always keep these in the fridge as the nuts are much more prone to going rancid.
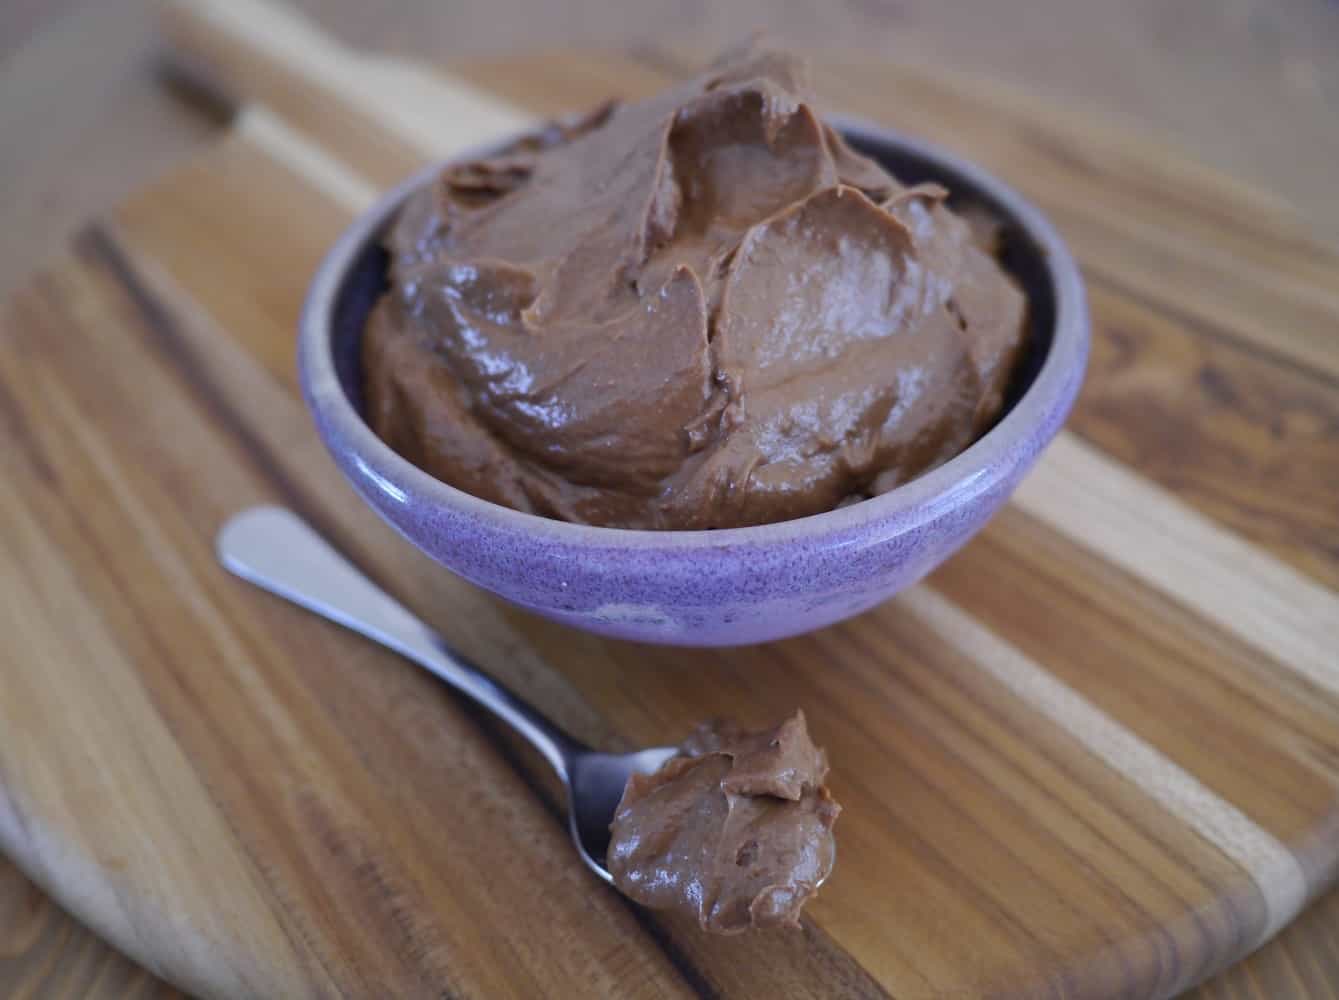
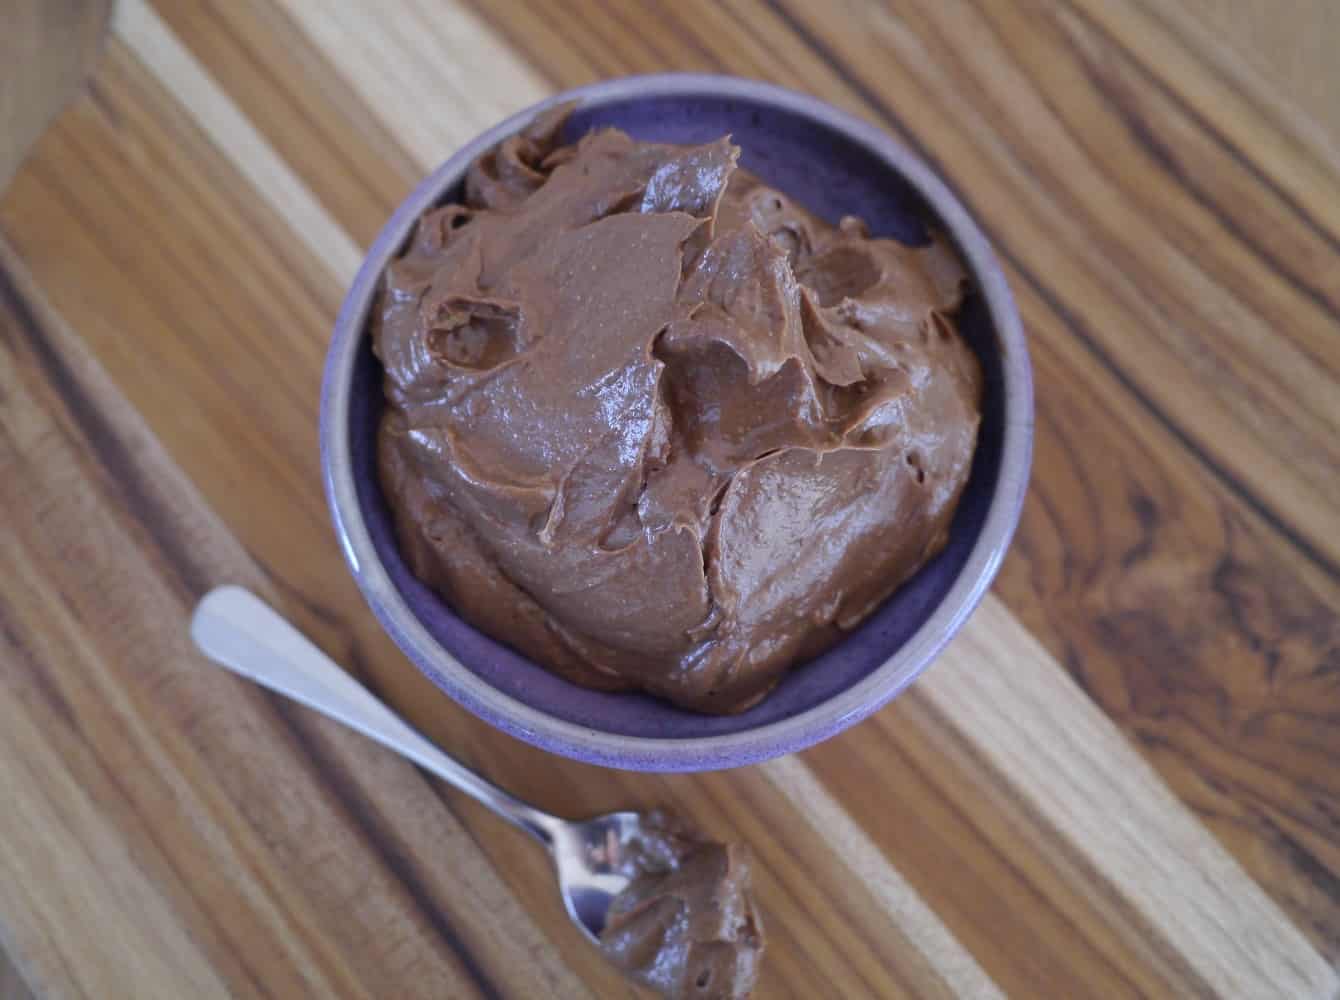
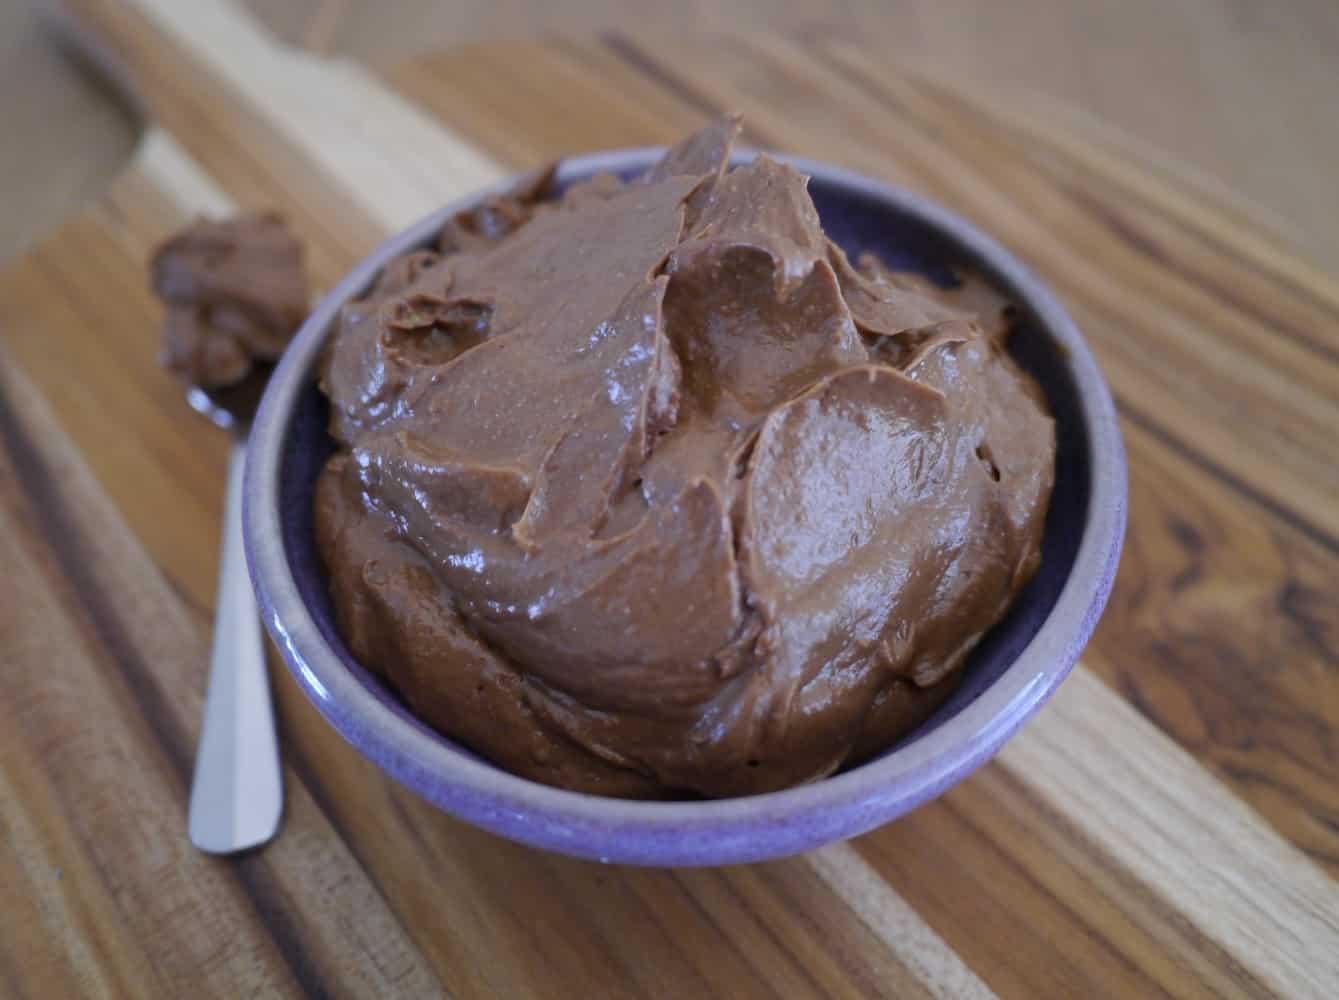
How to Make DIY Chocolate Hazelnut Spread (Nutella-style)
Ingredients:
250g (2 cups) roasted hazelnuts, skins removed
3 tbsp (15g) cacao powder or 3tbsp (20g) cocoa powder
1/3 cup (100g) rice malt syrup/honey
1/3 cup cashew or other milk (I use cashew milk as that is what I have in the fridge, but other milks will work, or you could try with water)
A pinch of salt.
Method:
If you’re using raw hazelnuts, you’ll need to roast and remove the skins. If you’re using pre-roasted hazelnuts without the skins, pop into the oven for 5-10 mins on a medium heat to make more crisp.
Allow the hazelnuts to cool completely, then blend into a nut butter (instructions above).
Once you have hazelnut butter, add the rice malt syrup/honey, pinch of salt and the cacao/cocoa powder and blend again until combined and smooth.
Finally add the milk slowly until you reach the consistency that you desire. (Remember, it will thicken once refrigerated.) Add more sweetener, if necessary.
Raw cacao is lighter in colour and slightly bitter. Roasted cocoa (also called Dutched cocoa) is much darker in colour and has a richer, smooth flavour. If you use raw cacao you might find you need extra sweetener. I use the minimum sweetness I can so if you have a sweet tooth, adjust until you like the flavour.
Below: the top picture is with raw cacao (it has a lighter, slightly redder colour) and the bottom picture is with dutched cocoa (a darker colour).
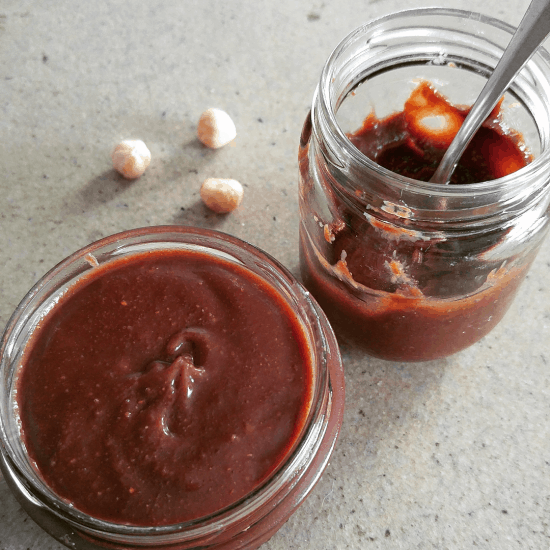

Store in a glass jar in the fridge. The version I make with cashew milk lasts up to three weeks. If using dairy, use within a week.
Uses: use in baking as a filling or icing, slather on slices of apple or pear, sandwich between two rounds of banana, add to a smoothie, spread on some toast or pancakes, or just eat outta the jar.
Now I’d love to hear from you! Do you make nut butters or do you buy them? Have you ever tried (either tasted or made yourself) any gloriously exciting or interesting versions? What do you do with nut butter (aside from eating straight out of the jar with a spoon)? Any other thoughts? Share your ideas in the comments below!