Seven ways I’m retrofitting my house for energy efficiency in a changing climate
Where I live, it’s getting hotter. This summer we’ve just seen a record-breaking heatwave of six days above 40°C. There’s been a few other records broken, too. Including, the highest number of days over 40°C between December and February – and we are not yet even through January.
Every year we seem to be* (*we are) breaking records.
The climate is changing. And even if we stop global warming in its tracks, the changes that have happened are here to stay, at least in our lifetimes. Zero net zero emissions isn’t going to reverse anything, just slow change down.
Yes, we can write to politicians and march and protest, and we can boycott and change our habits.
But we also need to adapt.
You might have heard talk about “climate resilience”, which is the ability to prepare for and recover from climate-related events such as extreme weather.
Climate resilience needs to happen at all levels, from international treaties to national policy, to local government laws and neighbourhoods and communities working together.
And on a micro level, we need to adapt to become more resilient, too. (Although what that looks like will be different for all of us.)
Retrofitting a 1970s house for energy efficiency (heating and cooling)
I don’t have the option to move to a different climate, and I don’t have the funds to build a Grand Designs style solar passive house. (Not that I’d want to, and anyways, new houses might be energy efficient but building them has a big carbon footprint.)
But I own where I live (well technically the bank does, until I repay the mortgage) which means I can make modifications that make my home more energy-efficient and more comfortable to live in.
The changes I’m talking about here are to the building itself, but if you’re a renter, don’t despair. You could ask your landlord if they’d consider making some improvements. If they say no, it’s worth keeping these in mind for your next move so you know what to look out for. Importantly, there are still modifications possible for renters too – I’ll talk about these in another post.
How houses lose and gain heat
Put simply, this is where an average home with no insulation gains/loses heat:
- Ceiling: 25 – 35%
- Floor: 10 – 20%
- Air leaks and draughts: 5 – 15%
- Walls: 10 – 20% loss in winter; 15 – 25% gain in summer
- Windows: 10 – 20% loss in winter; 25 – 35% gain in summer
(Source: yourhome.gov.au )
West Australian houses are particularly leaky. They have little insulation, there are gaps in the door and window frames, they are rarely double or triple-glazed, and are not oriented or designed in a way that suits the climate. Which means they are freezing cold in winter and boiling in summer.
They tend not to have a central heating or cooling system either either. Many houses install split-systems, but usually where its easiest to install rather than where it would be most effective.
Plus, when a house is leaky, you’re paying to heat or cool air that just leaves as soon as it can. Which makes running them inefficient and expensive.
Retrofitting a 1970s house: where I started
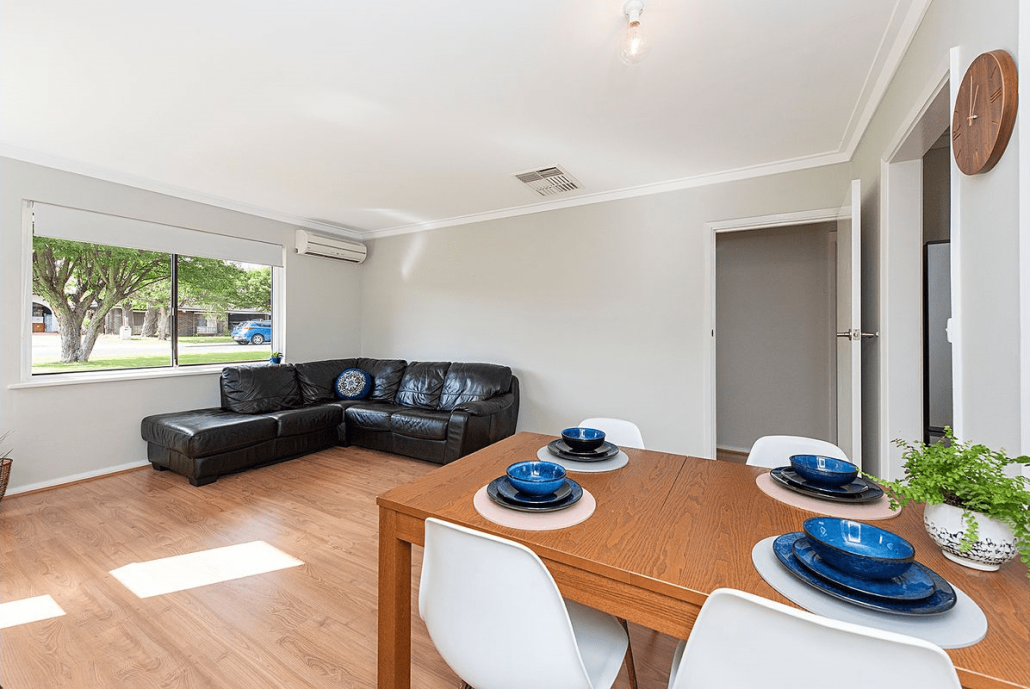
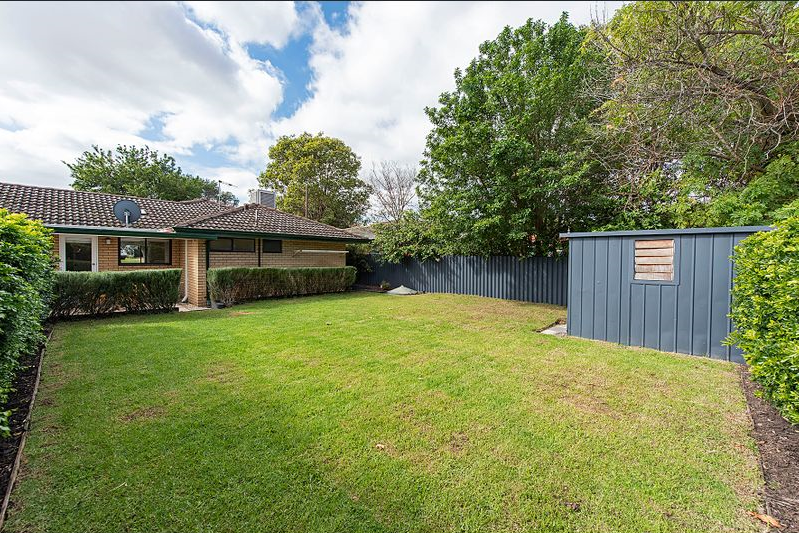
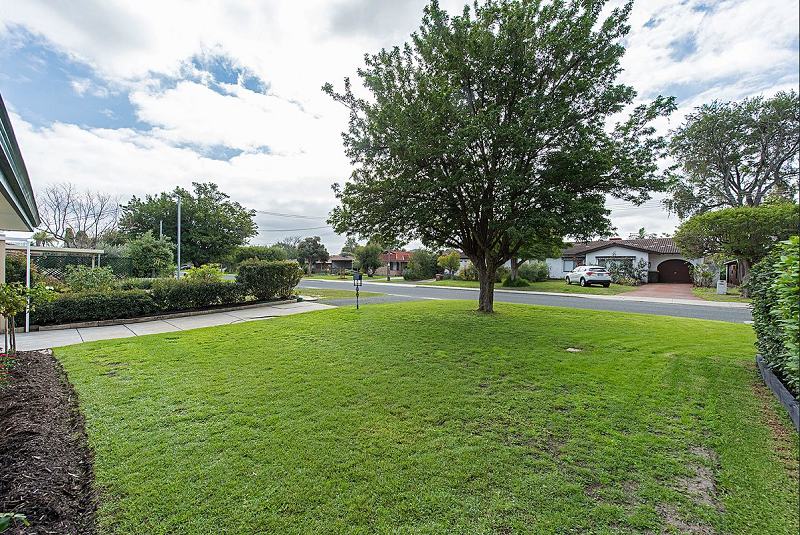
This is my home, as I bought it in 2019 (these are the real estate photos – the lawn is long gone!). The house faces north-west. In Perth, the hottest part of the the day is the afternoon (when the sun is to the west), and any windows and walls on the west side will get the hottest.
My house is a duplex (semi-detached) which means the western side is mostly insulated by the other dwelling – and this was a deliberate choice on my part. The one window I have on the north-west side is next to the front door, and is shaded by the garage and other house.
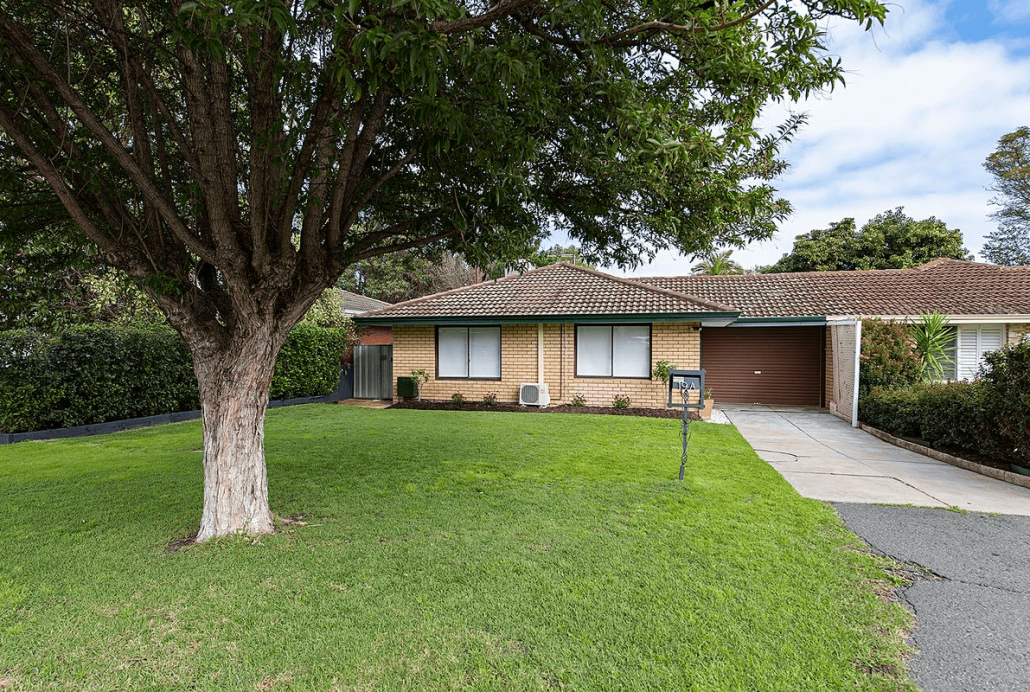

The less windows on the western side, the better.
The three on the south-west side (pictured above) are the kitchen window, which is protected by the patio roof, and the bathroom and toilet windows, which are both small (the less glass, the better).
All of the windows were single-glazed, and the brown frames are aluminium, which is a terrible material for window frames as it conducts heat. The metal gets hot in summer and cold in winter, and allows the heat to enter or leave.
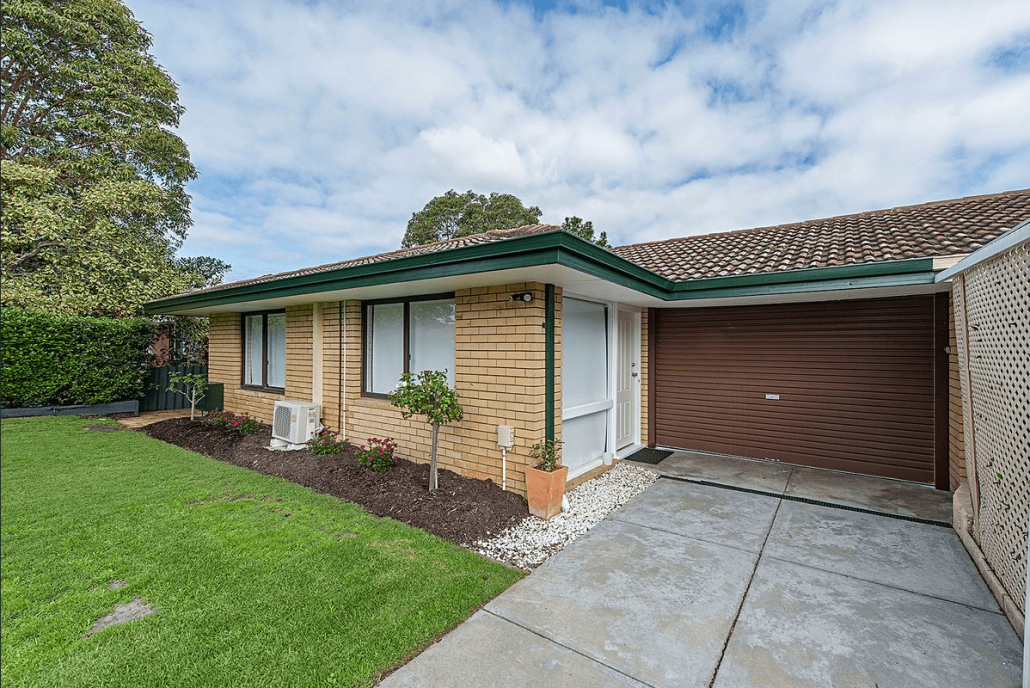
You can’t tell from the picture, but the glass pane of the toilet window was only 3/4. Meaning, there was a gap of a few inches along the top with no glass at all. It’s fairly common in older houses here. This made the toilet freezing in winter and boiling in summer. In fact, that whole half of the house was pretty unbearable on the hottest and coldest days.
You can just make out in the first picture an old metal evaporative air conditioner on the roof. It had been disconnected from the electricity, but the ducting from the roof to the three rooms (living room and two bedrooms) remained.
In hot weather you could stand underneath the vents and feel the heat funnelling in from outside.
And in winter, the heat disappeared through these vents in the ceiling.
1. Installing solar panels
The very first thing I did when I moved in was install solar panels. And I mean literally: I got the keys on the Friday, and I was getting quotes on Monday morning. One month after I moved in, there were solar panels on the roof.
I’ve talked about installing solar before, so I won’t go into it again in detail, but I now have a 3kW system that faces north-west. My roof is too small for anything bigger, but I don’t really need anything bigger.
Although it’s not strictly retrofitting, I knew that my old house would be leaky (leaking heat) and I wanted solar as soon as possible, so I felt less guilty about using the air con and heating.
Solar panels also help insulate the roof by covering the tiles. It’s probably less useful with metal roofs as metal conducts heat, so the whole thing will heat up, but my tiles are concrete. They absorb heat during the day when exposed to the sun, and radiate it out at night. With solar panels, the tiles under the panels are shaded and protected.

2. Installing ceiling fans
The second thing I did was install ceiling fans in the living room and two bedrooms. My previous house had ceiling fans and they are such an underrated addition to a house – the air movement makes everything feel cooler even without any cooling. And when the windows are open at night or the air con is on, it helps spread the cool air throughout the house.
It’s also a fairly cheap thing to do. I had to pay an electrician to install them, and because there weren’t fans there originally he had to install supports in the roof, but it was a straightforward job. I opted for fans with lights, and just replaced the existing light fittings with the fans/lights so I didn’t end up with holes in the ceiling.
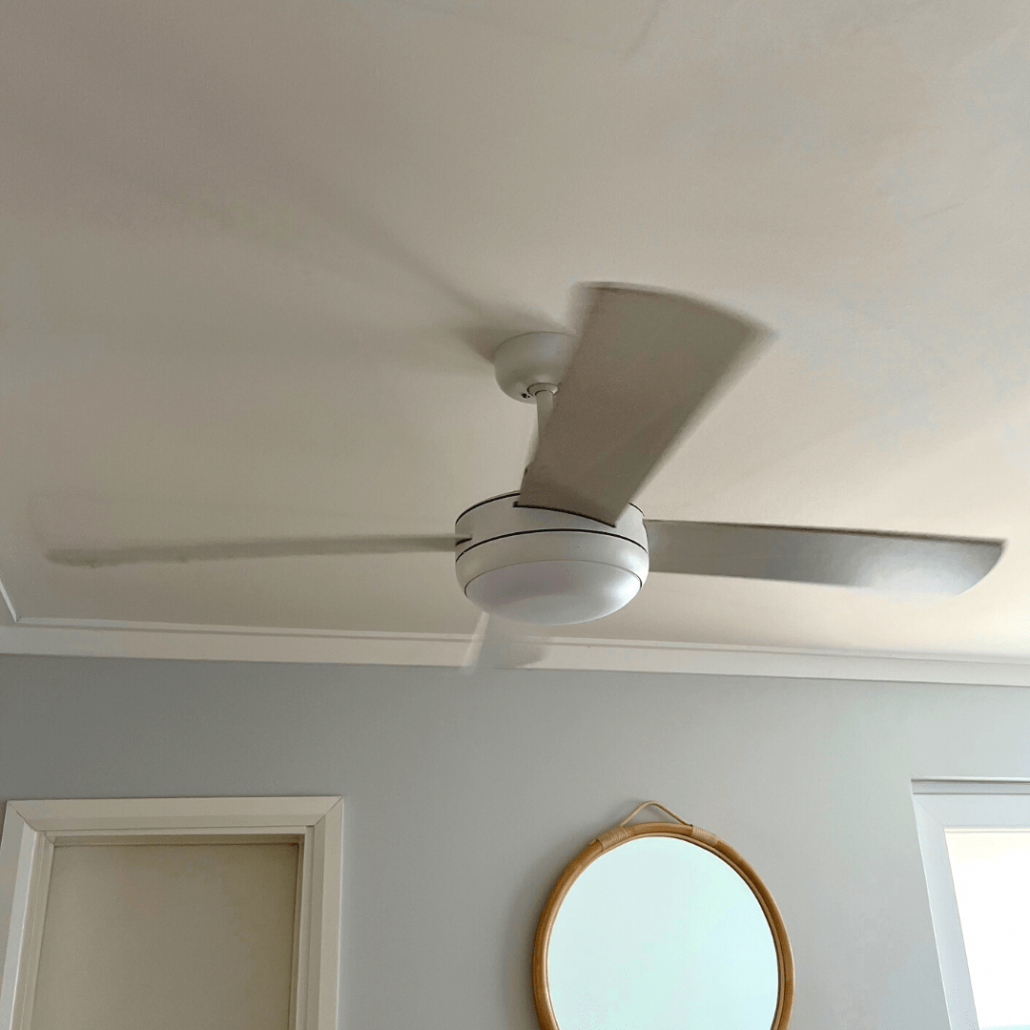
If you don’t have high ceilings (I don’t), just make sure you choose a fan with a shorter drop, as they vary and those few cm will make a difference.
And if you choose fans with lights, make sure you can replace the globes, as some have unchangeable globes – meaning if the bulb blows you need to replace the whole unit, and you will need an electrician to replace it for you. This is both wasteful and expensive!
Ceiling fans are also incredibly cheap to run, because they don’t actually heat or cool. A ceiling fan typically costs the same to run as a single light bulb.
3. Installing double glazing
This was the big one, both in terms of cost and the difference it made to the house. It was installed one year after we moved in, so I had one summer and one winter with the existing windows before the change.
In the summer prior, with both air con units running, it was manageable at the front, and unbearably hot at the back of the house (where the hot western sun beats in the afternoon, and where the toilet window with 3/4 glass and 1/4 gap was located).
In the winter, I had to use a portable heater in the bedroom at the back (the office).
The double glazing replaced all the existing windows except the one in the kitchen (which one day I’d like to knock through into a door – it is very frustrating having to walk through the laundry and around half the building to get to the patio in front of the kitchen window).
Both the external doors (the front door and the laundry door, which was rotten) were also replaced.
There is a door onto the patio from the garage, which has also been left for now.
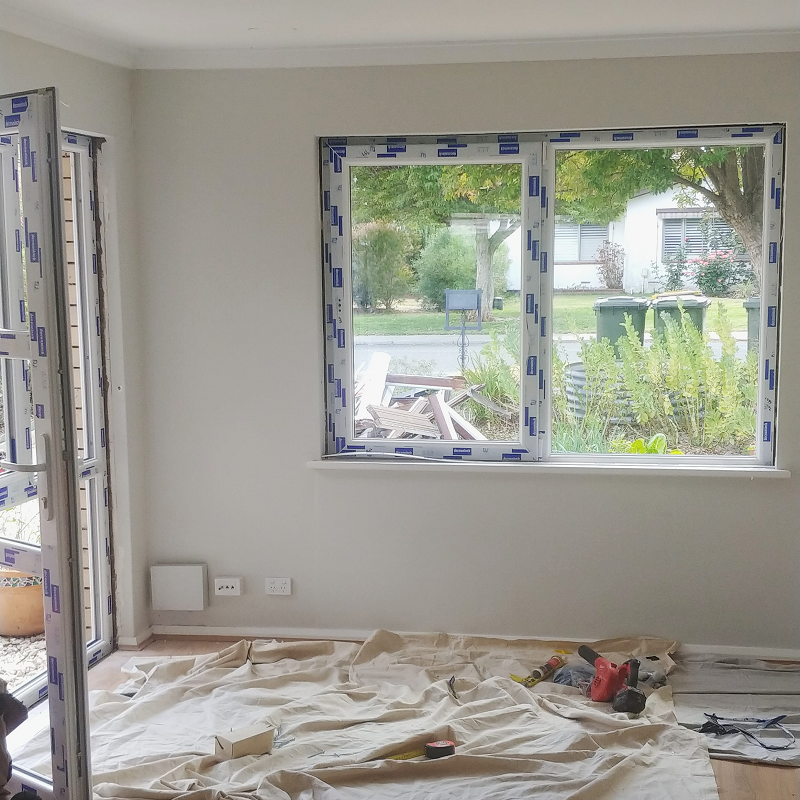
Whilst I’d have loved wooden frames, they don’t seem to be an option in Perth, so the frames I have are PVC. (There is no point choosing aluminium if you want energy efficiency as the frames conduct heat very well – either into or out of the house depending on what you don’t want.)
The glass is Low-E, meaning it’s coated to reduce the amount of infrared and ultraviolet light that enters and performs better than regular glass.
I was planning on triple glazing for the toilet and bathroom because they get so hot, but was talked out of it by the salesperson who said it makes more difference for noise and I wouldn’t need it.
She was right – the double glazing is enough.
With the double glazing installed, the change is amazing. Before, on a 40°C day I’d need the air con running for most of the day. Now, the cool (or in winter, the heat) doesn’t escape, so I can mostly restrict their use to when the solar panels are cranking.
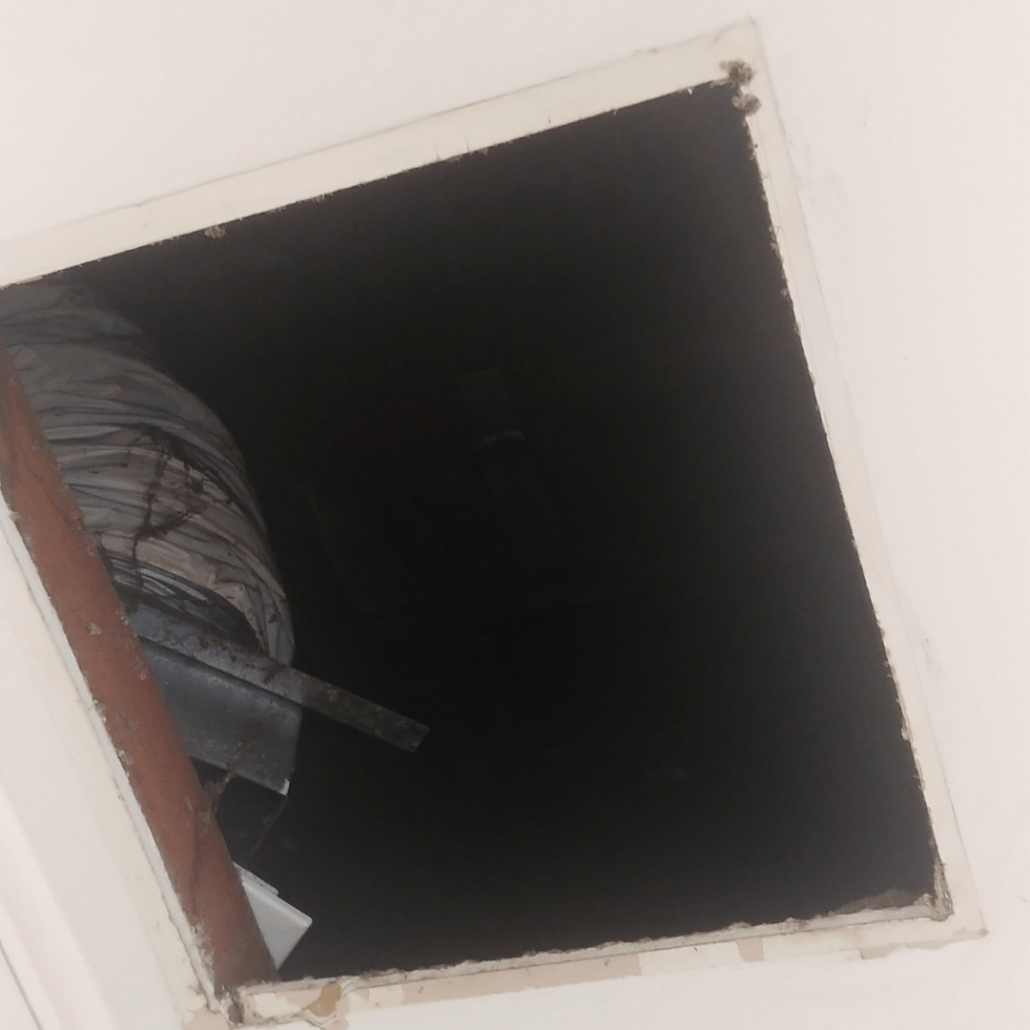
4. Blocking up the ceiling vents
The double glazing stopped a lot of air leaks, which made those that were left all the more noticeable. In particular, the three ceiling vents from the disconnected evaporative cooling system were literal tunnels from the roof, and if you stood underneath them you would feel a blast of hot air coming down.
And of course in winter they let all the heat up and out into the sky.
Did I mention they were also broken, rusted and ugly?
A temporary fix would have been to put cardboard (or something more solid) inside the vents to block them up. The permanent solution was to block them with gyprock and remove the ducting.
And then repaint the ceilings.
It’s hard to measure the difference this made, but for a fairly inexpensive job it was worth it.
5. Insulating the roof space
The first winter it was so cold in the house I assumed we didn’t actually have any insulation at all. Turns out we did, but it was old (probably 50 years old), and very thin and tired.
When I first moved in, insulation was on my to-do list, but I couldn’t find anyone willing to quote. It was 18 months later when I called some pest people in because I thought we had possums in the roof, that they suggested changing the insulation because it was soiled and to deter future rodents (by using a less nest-friendly material).
It was a service they offered, so I went with them.
The main decision with insulation is the R value rating, which is a measure of the ability to resist heat flow. (You also see it referenced with double glazing and window materials.) R values for insulation range from 1.5 to 7, with the higher number being better.
In Perth, Brisbane and NSW it’s recommended to use a minimum R4.0 in the ceiling.
In Melbourne, Sydney and Adelaide it’s recommended to use a minimum R6.0 in the ceiling.
The more Rs you use, the more material you use and the more expensive it is.
I went with R5.0. (I got a quote for 4.1 and 5.0, and the difference in price was smaller than I expected. I didn’t get a quote for R6.0, but I half wish I had.)
The installers did a great job, removing all the old stuff (and the old air con ducts), vacuuming the roof space and laying the new insulation. I have to say though, I was expecting a more noticeable difference in winter. However, it’s hard to compare as the first winter (with no double glazing or insulation) was fairly mild, and the recent winter (with double glazing and replaced insulation) was much colder and for much longer, so comparing bills isn’t especially useful.
I do wonder if I should have gone with R6.0….
Although I didn’t use the plug-in heater in the office the second year, despite the colder outside temperature, so there was definitely some benefit.
6. Painting the roof white
Both the colour and the material of a roof can affect the energy efficiency of a house.
My home had dark concrete roof tiles. Concrete absorbs heat, and the dark colour increases this. (Studies have shown that dark tiles can increase the air temperature of a roof space by 9°C compared to light tiles.) This means my roof space got very hot, particularly in the early evening as the heat is released into the house.
I can’t change the material the roof is made from (aside from the huge cost, my house is a duplex/semi-detached, so my neighbour would have to want to change her roof too).
But I can change the colour.
You can buy reflective paints for roofs, which are meant to reflect heat. My painter – who definitely had a few opinions on things – ranted that these were a big con and didn’t work and wouldn’t use them.
So I used regular external paint. I wanted to paint the roof white, but the painter suggested an off-white colour. I went with Taubmans ‘martini’, which in the brochure looked kind of beige, but on my roof appears pretty much white.

7. Installing a whirlybird
A whirlybird, also known as a turbine vent, is a cyclindrical dome that spins in the wind, which creates a vacuum that extracts warm air from the roof cavity. They don’t need a lot of wind to spin; even when it appears still outside, the whirlybird still whirls.
Because I have concrete roof tiles that absorb heat during the hot days and release it into my roof space in the evening, the house gets hotter even as the air outside cools. The whirlybird releases this heat outside. If I had a metal roof it would possibly be less effective than with tiles, as metal doesn’t hold heat in the same way.
They are best for hot climates as they also release heat from the roof space in winter. (With good insulation, hopefully the heat from the house is not escaping into the roof space, though.)
They are not expensive to buy (around $100 AUD) and are installed by just placing under the tiles, no special tools required.

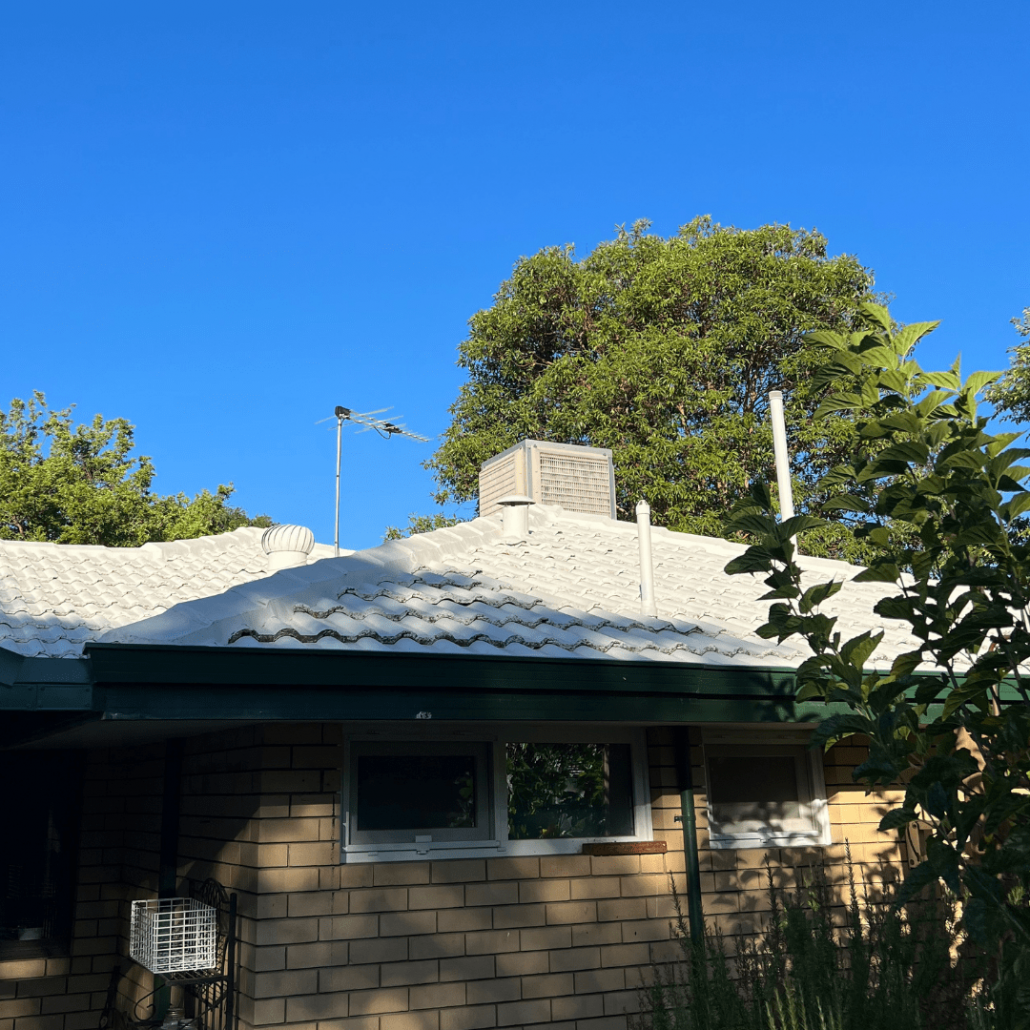
When I painted my roof, the painter also installed the whirlybird for me or no extra charge.
What’s next?
There are a few improvements still to be made, when I have the time and money:
Curtains. I have blinds on most of the windows, but I want to replace them with proper curtains that will do a much better job of keeping the heat in during the winter months.
The kitchen window. This is still the original single glazed glass with an aluminium frame. Knocking through a door into the garden (and renovating the original 1970s kitchen) will be a big and expensive job, so it’s not happening any time soon. But once it’s done it will really make a difference.
The kitchen skylight. The kitchen also has an original skylight that funnels heat in from outside, and it’s placed where the afternoon sun hits for extra heat.
The floors. Something I’m still thinking about, is changing the kitchen floor from laminate to tiles. Tiles have good thermal mass, so absorb heat, whereas laminate does nothing to assist with the room temperature. Thar’s why floors in hot countries are often finished with tiles.
Kitchen benchtop. I have a laminate benchtop, but switching this to stone or concrete will add more thermal mass to the room and help absorb the extra heat.
The garage. This was semi-converted to a room by the previous owners (by which I mean, they painted the walls and laid carpet). But it still has a single glazed glass door with an inch gap at the bottom, and the original metal garage door which incinerates the space in summer (and also has an inch gap at the bottom). I’m not sure what to do with the garage yet – whether to convert it properly into a room (which would be expensive and need planning approval), or simply change all the doors. But because there is an internal door from the garage into the house, the temperature of the garage influences the temperature of the house, so it will definitely need modifying in some way.
…
As for the costs, and the savings? That’s another whole conversation, which I’m saving for another day sometime soon. Plus I’ll talk about what you can do if you rent or are on a tight budget that doesn’t allow for big changes like double glazing. Trust me, you still have options!
As I said at the start, adapting will look different for all of us.
Now I’d love to hear from you! Is the climate changing where you live, and have you been able to make adaptions to better ‘weather’ it? Or do you have plans to do so? Perhaps you’d like to but not sure where to start? Any tips you’d like to add to this? Please share your thoughts in the comments below!


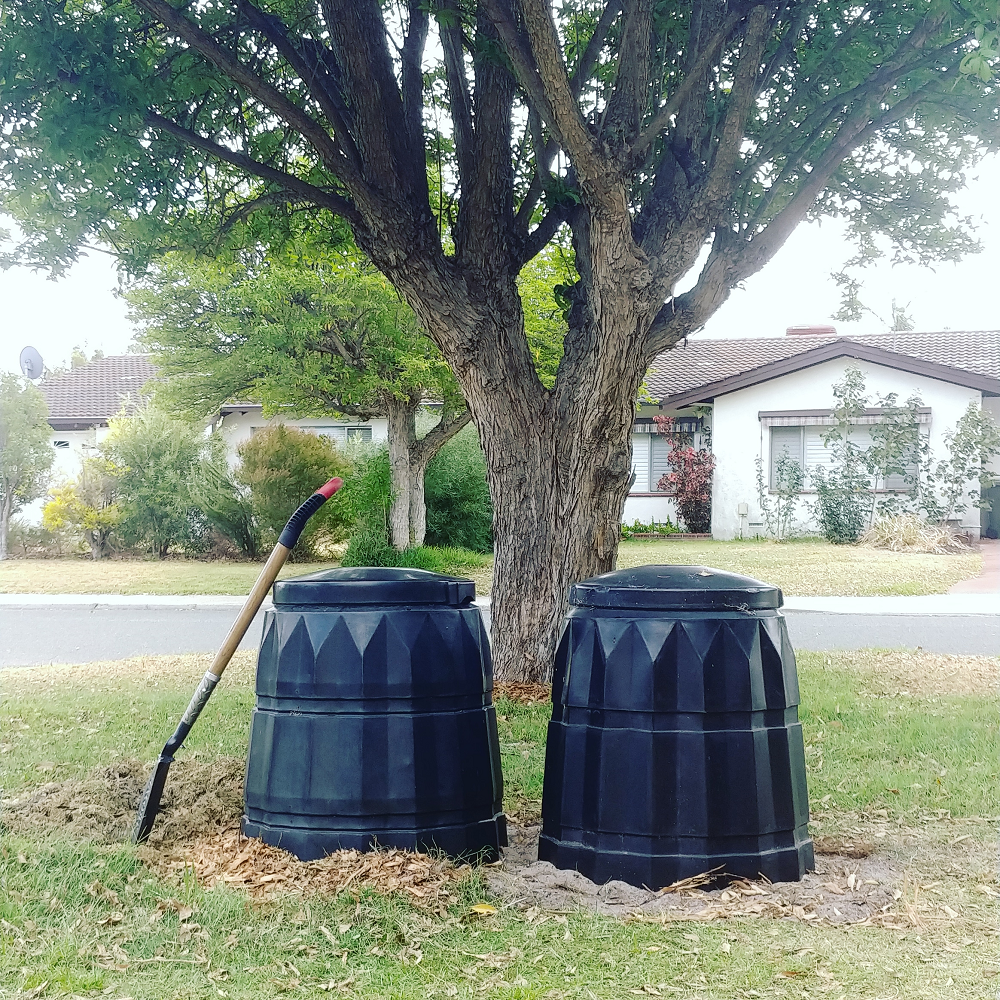
 The thing about creating good soil is that you need a lot of compost.