A Beginner’s Guide To Aquafaba
You know when you cook chickpeas (or other beans and pulses) from scratch? You boil them on the stove top for an hour or two, and then you drain off the cooking liquid? You gotta stop throwing that golden cooking liquid down the drain!
I’m serious. Yes, I’m talking about that stinky, kinda slimy, smells-a-bit-like-old-trainers liquid that disappears down the plughole when you strain your freshly cooked chickpeas. Because it is a magical ingredient. I kid you not.
It turns out that chickpea water (chickpea brine), which alternatively and rather more glamorously is also referred to as aquafaba, is a miracle ingredient… something that isn’t waste at all, but is actually very useful! You can whisk it up like egg whites and use it in baking to make cakes, icing, macaroons and meringues.
It’s taking the vegan world by storm because it’s making the impossible possible, but even if you’re not vegan and you eat eggs, the chance to use a waste product to make something edible and delicious can’t be scoffed at!
I first heard about aquafaba when I posted a picture on Instagram of a big batch of chickpeas I’d cooked, and somebody asked if I was saving the liquid to make meringues. It sounded crazy (and unfortunately I’d just tipped 2 litres of it down the drain) but after seeing some pictures suggesting it could actually be done, and in spectacular style, I was sold.
There might be a lot of beautiful images out there showcasing the miraculous things that can be done with aquafaba, but as a beginner, I had absolutely no idea where to start. Lots of the recipes refer to using the aquafaba from tinned chickpeas, but I cook my own chickpeas, so I wanted to know how to use this kind of aquafaba.
Not being able to find this information on the internet, I spent an entire weekend whisking and testing this chickpea water (and eating far more meringues than I care to remember) and as a result, I think I’ve mastered the basics.
First Up – Cooking Your Chickpeas
If you’re still buying chickpeas (or other pulses) in tins, you are seriously missing a trick. Pulses are super cheap to buy, you can find them in bulk (so packaging free), they take up hardly any space in the pantry and they last forever. You can cook them up in bulk and they freeze really well. Cans are bulky, BPA-lined (meaning chemicals leaching from the plastic into your food), the brine often contain added salt and sugar, plus they are pretty resource-heavy being made from metal, and use a lot more fuel to transport than their dried counterparts. Make your own – it’s easy!
Ingredients: dry chickpeas, water
Soak your chickpeas in water, ensuring they are in a big bowl with enough water covering them as they will expand (depending on the variety, up to three times the original size). Soak for a minimum of 8 hours (overnight). I tend to soak mine for 24 hours or more (changing the water every 8 hours or so) until white bubbles appear in the water. Be sure to throw this water away – it is not the aquafaba!
To cook, place in a large pan and cover with fresh water. Bring to the boil and cook for 1.5 hours. You want to ensure the chickpeas remain covered (you can top up with a little extra water, and keeping a lid on the pan will stop as much evaporation) but try to ensure there isn’t too much extra water. As you cook, white scum will come to the surface. Scoop this off and discard.
After 1.5 hours, drain the chickpeas ensuring you keep the cooking liquid – this is the aquafaba!
I usually cook dry chickpeas 1.5 kg at a time, meaning I end up with about 4 kg cooked chickpeas, and this makes around 2 litres of aquafaba. Chickpeas freeze really well. Decant into glass jars and once completely cool pop into the freezer. Wait until completely frozen until sealing with lids. I use regular glass jars and I have never had one crack.
Aquafaba will keep in the fridge for up to a week so don’t feel like you have to use it straightaway. If you don’t want to use all the aquafaba at once, this freezes really well too. Pour into an ice cube tray and once completely frozen decant into a glass storage container and keep in the freezer.
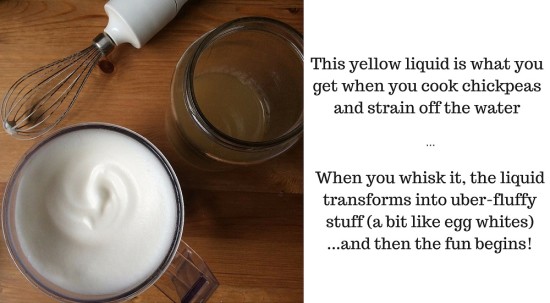
Aquafaba: How to Turn the Yellow Liquid into White Fluffy Stuff
What you’ll need: a good whisk, and a big bowl…plus a little patience ; )
Pour the yellow chickpea liquid into a big bowl, and start whisking. The bowl needs to be big because as it fluffs up, it will expand to more than 5 times its original volume – so be prepared! You will also need a good whisk. A hand whisk isn’t going to cut it. Neither is a food processor or blender, even a high powered one (I tried). I have a stick blender with a 700W motor, 5 speeds and an additional turbo button, and this just about managed, although the motor did get uncomfortably hot. I would recommend a hand held whisk with two beaters, or a mixmaster or something with a little more power.
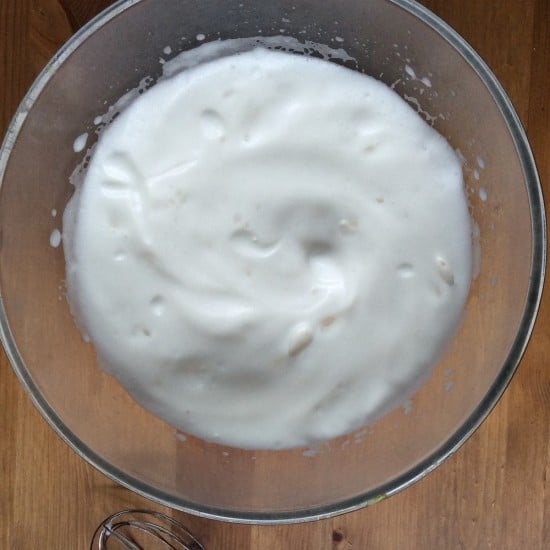
This is my aquafaba before adding cream of tartar. Because I don’t have a super powerful whisk, I found cream of tartar helped form the stiff peaks you need for meringues.
Chickpea water needs to be whisked for a long time. (Long being relative of course, but in the age of electric gadgets we expect instant results, so be warned!) You will need 10 – 15 minutes of constant whisking to get the aquafaba to full fluffiness and stiff peaks. On the plus side, you don’t seem to be able to overwhisk aquafaba like you can egg whites, and if you need a break from holding the hand whisk (or like me, are worried about burning out a stick blender), it seems fairly forgiving to stop-starting.
Lastly, don’t be too worried about how concentrated your chickpea water is. Remember, egg whites are fairly runny before you whisk them, and aquafaba is the same. If you think your liquid is really watery you can reduce it a little in a pan, but don’t be too worried about this. I reduced 2 cups of aquafaba to 1 cup in a saucepan by simmering, and then whisked, and actually found it fluffed ever so slightly less than the original non-reduced aquafaba. The main thing will be a good whisk, and enough time.
How to Make Aquafaba Meringues
I based my experiments on this basic aqaufaba meringue recipe. Far more meringues than I actually wanted to eat later, I think I’ve mastered the basics. My next challenge is to improve the shape – something I think I will achieve with a slightly better whisk, and probably a little more patience!
Ingredients: 1 cup aquafaba; 1.5 cups granulated sugar, ground into powdered sugar; 1 tsp vanilla essence and 1/2 tsp cream of tartar.
Whisk the aquafaba into stiff peaks. Ideally you want a mixture so stiff that if you turn the bowl upside down, the aquafaba won’t fall out, but my hand whisk isn’t up to beating quite that well. (If yours is, you may not need to cream of tartar.)
Once the peaks are as stiff as you can get them, add the cream of tartar, still whisking. This will help firm up the peaks. Next, add the sugar slowly. This is important… you don’t want to deflate the bubbles you’ve created. Add 1 tbsp powdered sugar at a time, whisking continuously to incorporate. Yes, it takes ages, but rush and you’ll flatten your meringues.
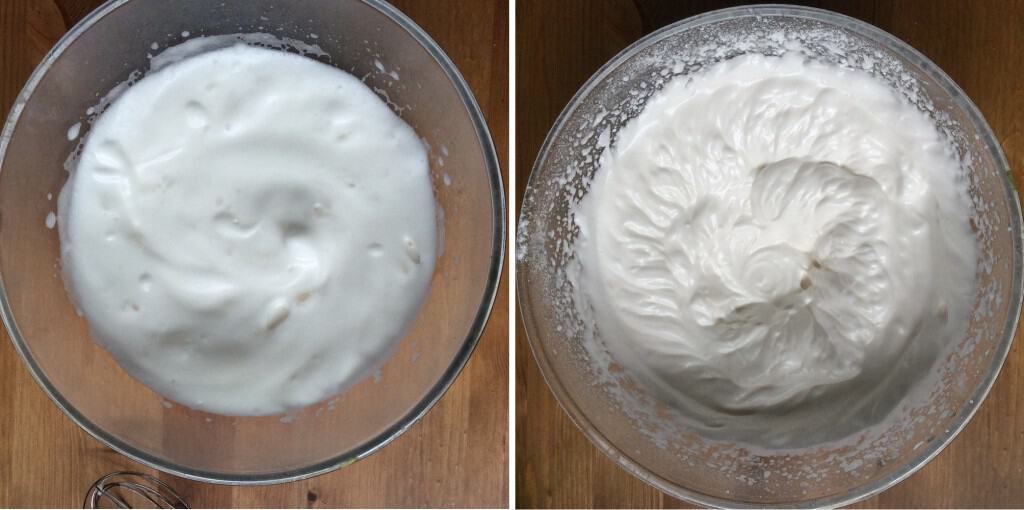
The bowl on the right is the aquafaba once the cream of tartar and sugar have been added. The sugar gives a shiny gloss to the aquafaba.
When all the sugar is incorporated, add the vanilla essence.
Turn your oven on to the lowest temp. Recipes state the temperature needs to be between 80 – 110°C. My gas oven actually doesn’t go below 120°C but as it never seems to get to temperature anyway, it didn’t matter. Line baking trays with baking paper, and blob the meringue mix onto the paper (I used a soup spoon, and the blobs were about 4cm diameter).
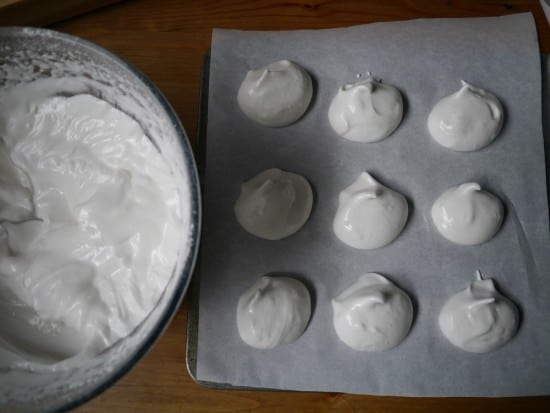
Aquafaba meringues about to go in the oven. I still haven’t mastered how to keep the shape once they go in the oven…that’s the next challenge!
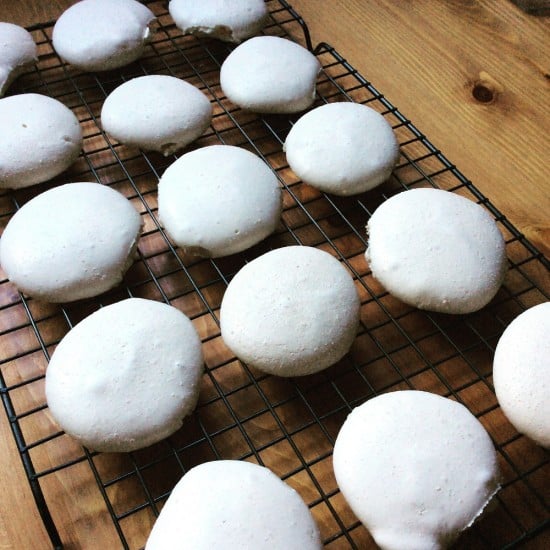
Pop the meringues into the oven, and leave for 1.5 hours minimum. You aren’t actually trying to cook the meringues but dry them out. If they go brown, your oven is probably on too high.
To test if they are ready, see if you can remove one from the baking paper (ideally without taking the tray out of the oven). If it still sticks, leave in the oven. Keep testing until the meringues can be removed cleanly from the paper. When they are ready, turn the oven off, open the door slightly and leave to cool completely before removing. You’re better off leaving to cool in the oven overnight rather than putting them in a container whilst still slightly warm.
Store in an airtight container if not eating immediately.
What’s Next – Aquafaba in Baking
If you’re interested in seeing more amazing creations with aquafaba, there is a great Facebook group called Vegan Meringue – Hits and Misses with lots of recipes to try when you’ve mastered the basics. It’s also a great community and a brilliant source of inspiration!
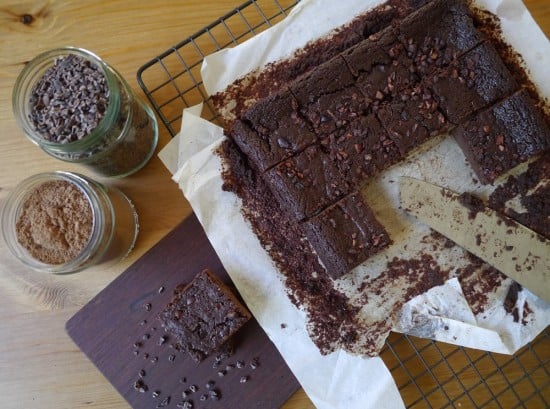
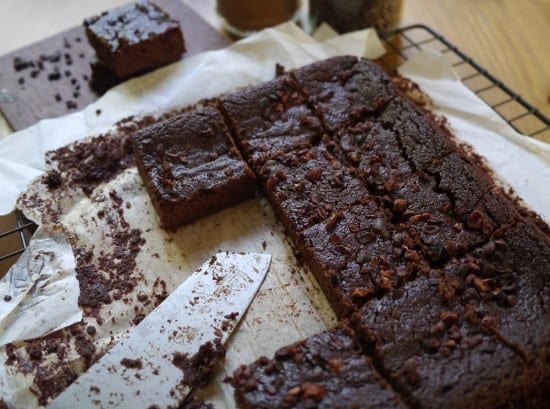
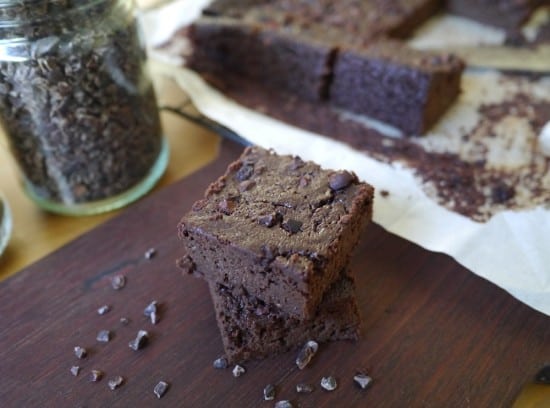
I’m hoping to spend plenty more time in the kitchen experimenting with this stuff! I’ve already attempted making chocolate brownies using aquafaba and was really pleased with the result (especially as it was a first attempt), and with a few more tweaks I’m hoping to perfect this (update! Recipe for aquafaba chocolate brownies has now been added.).
I’m also keen to try macaroons. Playing with aquafaba is so much fun!
Now it’s your turn to join in! Tell me, have you heard of aquafaba before? Are you tempted to give it a go, or is something holding you back? Have you already experimented with it? Have you created aquafaba masterpieces or struggled with a sticky mess? If you’re a pro, do you have any advice or tips? Do you have any questions or need any beginners tips…especially in what NOT to do? (I’m no expert, but I’ve had my fair amount of failures in the last couple of weeks!) Or are you totally grossed out by the whole thing?! I’d love to hear your thoughts so please leave a comment below!
[leadpages_leadbox leadbox_id=123a865e9839c5] [/leadpages_leadbox]

