DIY Sourdough Starter + Zero Waste Crackers
Making a sourdough starter from scratch is one of the easiest things you can do, and it doesn’t need any special ingredients. Literally all that is required is flour, water, a bowl, a spoon, and a little bit of patience. Even if you’re not sure you want to start baking sourdough every week (although I assure you, once you start, you won’t want to stop!) the sourdough starter can be used to make sourdough crackers.
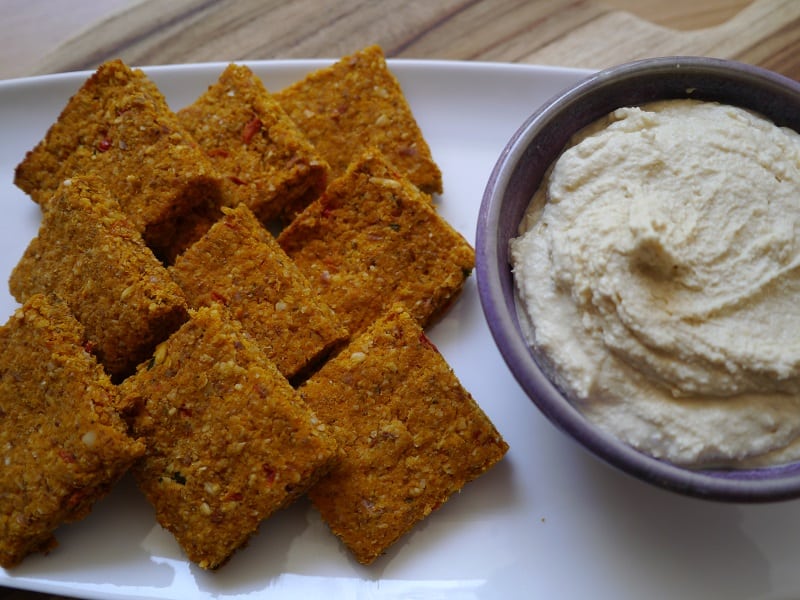
Crackers are far quicker and simpler to make than sourdough bread, but equally delicious… plus crackers are one of those things that are impossible to find zero waste or plastic-free in my experience. Homemade, simple, delicious, waste-free… what’s not to love?!
To make a sourdough starter from scratch, we utilize the natural yeasts and lactic acid bacteria present on the flour. Another term for it is wild fermentation – how cool does that sound?! That’s how people made bread and other fermented products for thousands of years, before commercial yeasts were available. They harnessed the power of nature.
If we’re going to use the natural yeasts and bacteria present on the flour, then I recommend buying the best flour that you can find. Once your sourdough culture is established you can relax a little, although I’d always recommend buying the best ingredients that you can afford. If your tap water is chlorinated, fill a bottle and leave at room temperature or in a sunny place for a few hours to let the chlorine gas dissipate – you don’t want to kill the starter before it’s started!
How to Start your Sourdough Starter
Mix together 50g flour with 50g water in a bowl (1 gram of water is the same as 1 ml water). You can use more but don’t use too much less as it will be much harder to work with. However much you use, you want the flour:water ratio to be 1:1.
At this point it will look like a dough, and it will smell like wet flour. Cover the bowl with a tea towel and leave on the side at room temperature (if you’re home is cold or it is winter, a warmer place will help get it going faster). Stir every few hours. If a skin forms on top, simply stir it in.
It may not seem like much is happening at the start, but if you pay attention to the smell you will notice that it starts to smell less like flour and has developed a sour smell. This is a sign that it is working. Hurrah! Look out for bubbles forming in the dough. In the beginning there will only be a couple, but it’s another sign that your starter is beginning to do its thing.
After a couple of days of stirring, you will need to feed your starter. Even if you’re only noticing a couple of bubbles, the starter will dry out over time, and as it sticks to the side of the bowl and hardens the volume tends to decrease, so feeding helps refresh it. Take another bowl, add 10g of your starter to it, and then add 50g flour and 50g water to this (you can use other volumes, but the ratio should be 1:5:5 starter:flour:water). Stir thoroughly, and cover with the tea towel.
Leave the remaining leftover starter in the original bowl, cover with a plate and store in the fridge. This will be used for making the sourdough crackers later.
Keep stirring the new starter every few hours (this doesn’t need to be exact, just whenever you remember). You should notice that the bubbles are becoming more frequent (you may not see a lot, but more than you saw at the start). Depending on how active your starter is getting, you can either feed again in 24 hours, or leave for a couple of days.
To feed, repeat as before. Take 10g of your active starter and add to a new bowl with 50g flour and 50g water, and stir well. Any leftover starter can be poured into that bowl sitting in the fridge with the original starter.
Each time you feed, you should notice your starter getting a little more active. You’ll want to feed it at least 5 times, once a day (timing is not that important) before it’s ready – and by ready, I mean active.
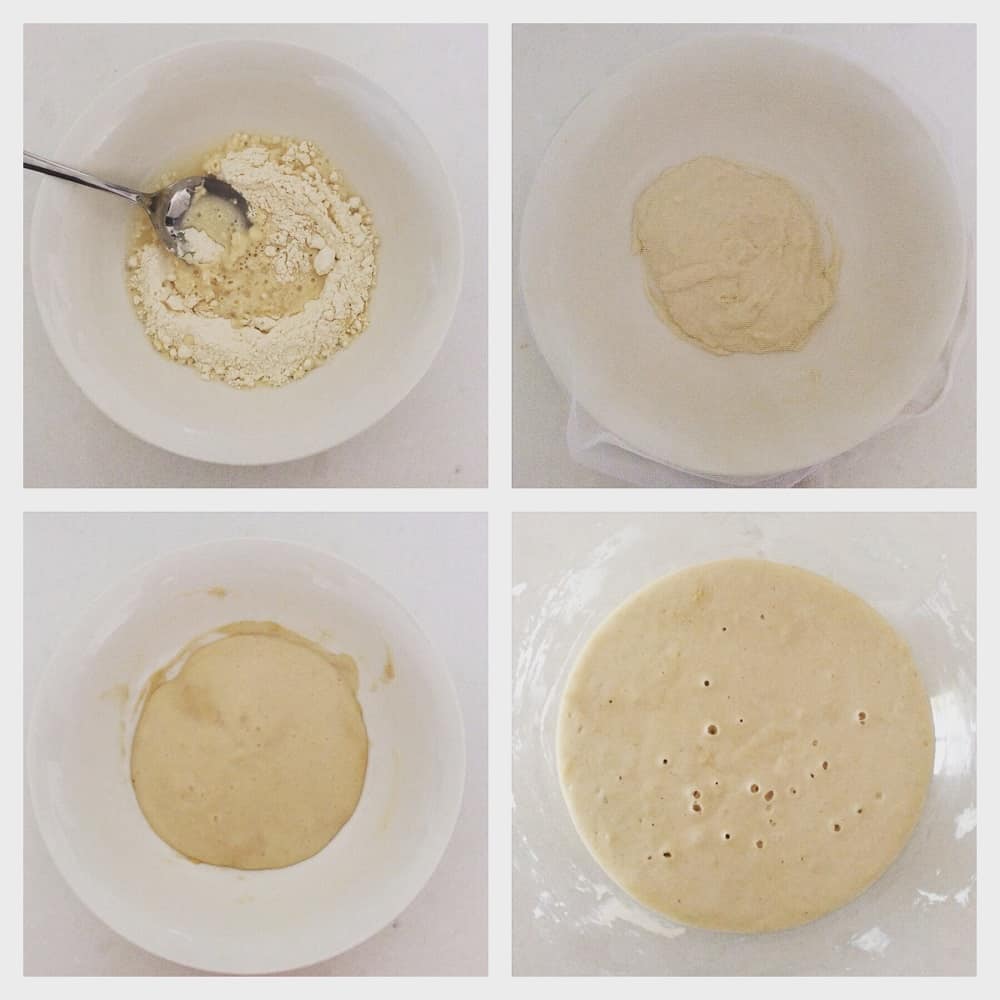
The four stages of starting your own sourdough starter from scratch. Stage 1: mix flour with water. Stage 2: cover with a tea towel or gauze – you want air to get in, but nothing nasty! You will need to stir every few hours. Stage 3: you will notice bubbles begin to appear. Your starter will begin to dry out a little. Stir the drier parts in, but as it gets drier you’ll need to feed it. That means taking a small part of this and mixing with fresh water and fresh flour (save the discard to make crackers). Step 4: after a week and a few feeds, your starter should be bubbling away quite happily.
Maintaining Your Sourdough Starter
Once your sourdough starter is ready, you can either store on the kitchen counter, or in the fridge. Store in a jar with a loose-fitting lid, or with a fabric circle secured with an elastic band. You want air to get in, but no creepy-crawlies. If you keep it on the kitchen counter you’ll need to feed it every day. If you keep it in the fridge you can feed every 1-3 weeks (once a week is best, but it will be fine if you feed it every three or so). I keep mine in the fridge.
When you want to feed your starter, allow to return to room temperature if it has been in the fridge. Keep the ratio the same 1:5:5. Keep the discard in the fridge until you are ready to make crackers.

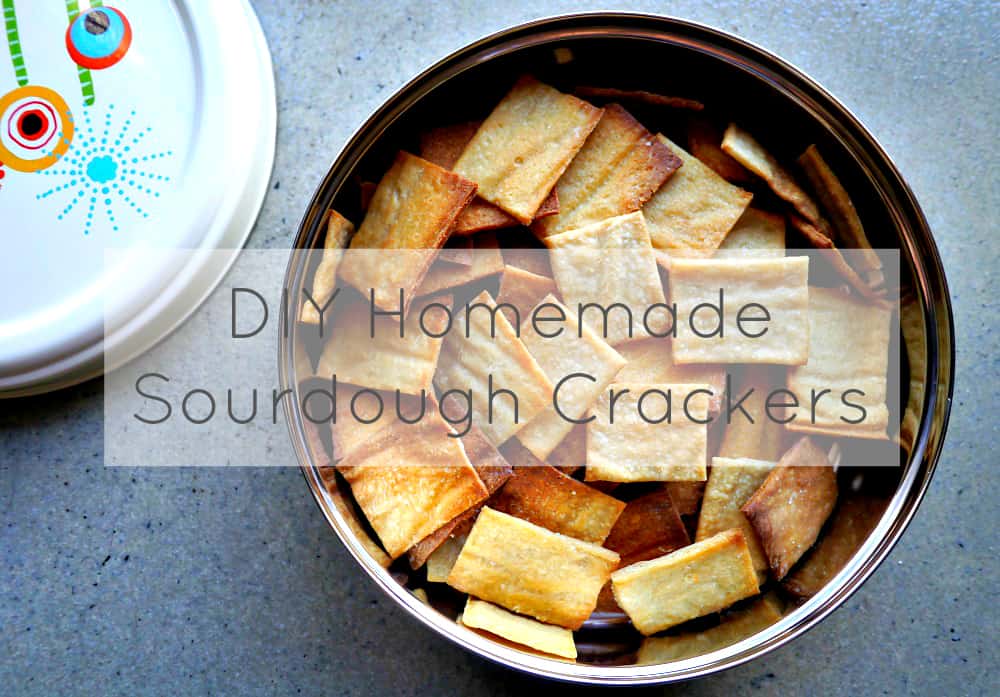
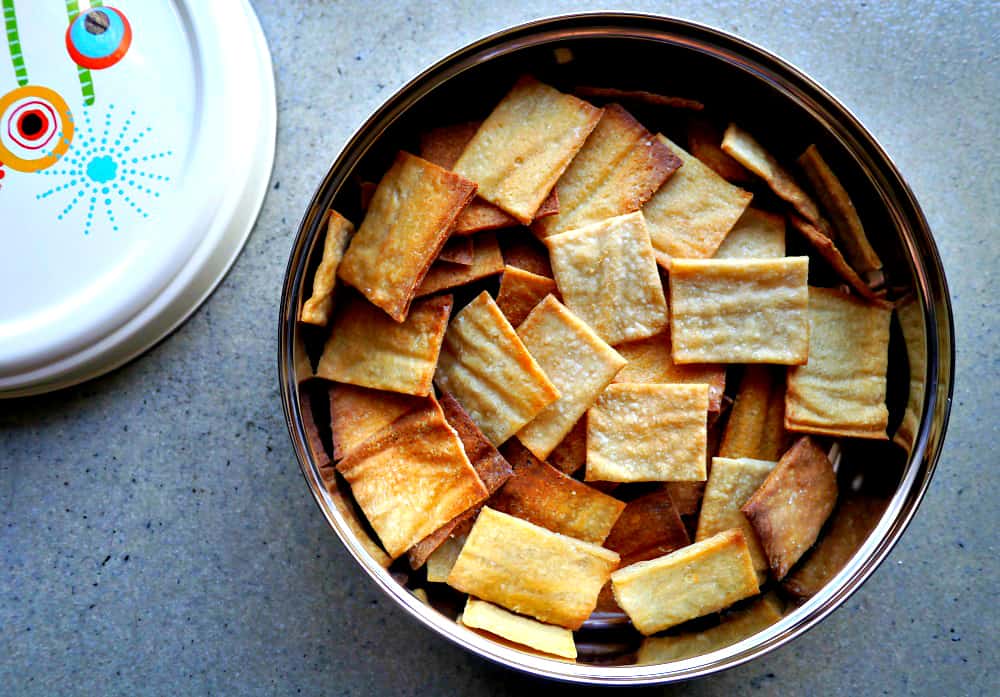
Zero Waste Sourdough Crackers

Homemade sourdough crackers – simple to make, zero waste, plastic-free and no nasty additives. What’s not to love?!
Once you’ve made your sourdough starter you should have a bowl of discarded starter sitting in your fridge, waiting to be made into crackers. I have to thank the Zero Waste Chef for this idea, as previously when I had excess sourdough starter I’d throw it away. It felt so wrong, but that’s what all the recipes tell you to do. Turns out, they are all wrong! Throw nothing away, and make crackers instead. Thanks Anne-Marie!
This recipe is a combination of the one by the Zero Waste Chef, and also some notes I have from a Plastic Free July workshop back in 2012 which has no references except a comment that the writer was called Katie.
Ingredients:
215g discarded sourdough starter
3 tbsp olive oil (30g)
100g plain flour
1/2 tsp salt
1/4 tsp bicarb soda
Extra olive oil and salt to top.
I found that when I made a starter from scratch, feeding every day for 5 days left me with 215g starter. But you change change the quantities of flour to starter, they don’t need to be exact – just remember it’s approximately twice the starter to flour. You want to make a dough, so if it is too sticky add more flour.
The moisture in the starter also varies depending on how fresh it is. If you need to add more flour, do so!
Method:
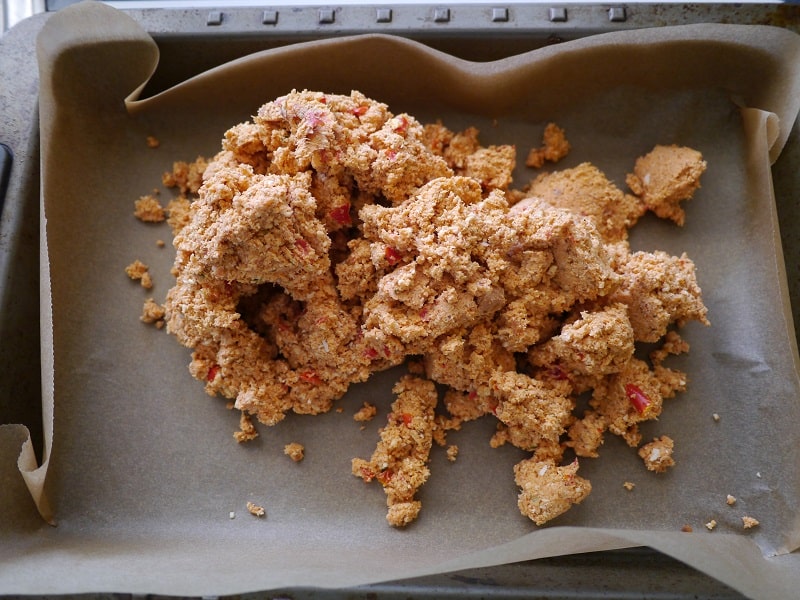
Mix the olive oil with the starter and stir until combined. Add the dry ingredients to the starter / oil mix and combine first with a spoon, and then with your hands. If it is still sticky, add flour in small quantities until you have a dough. Knead to ensure it is smooth.
Place in a glass bowl, cover with a tea towel or a plate (or both!) and leave to rest at room temperature for 8 hours (or overnight). This allows the dough to sour and develop flavour.
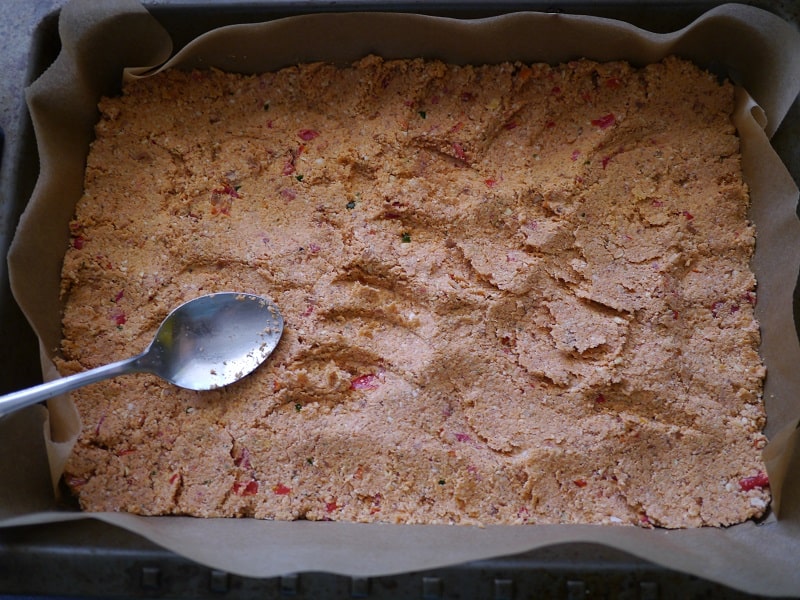
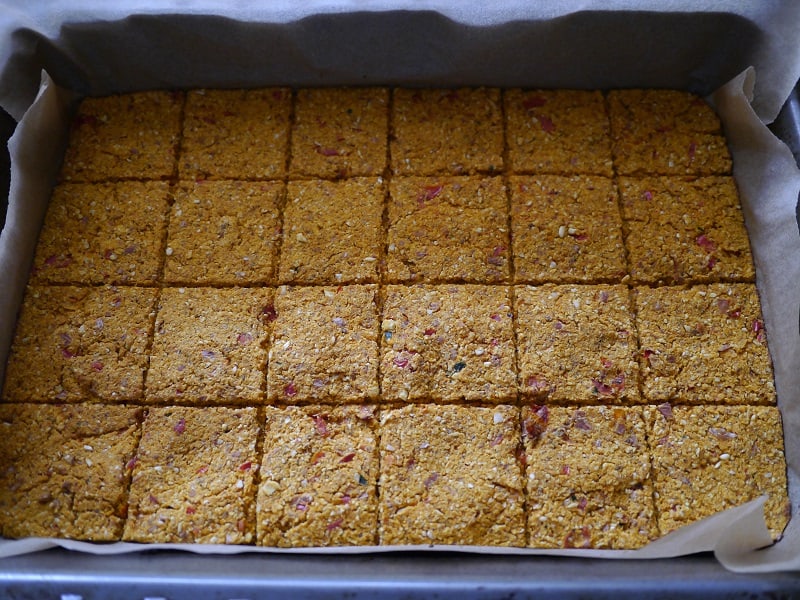
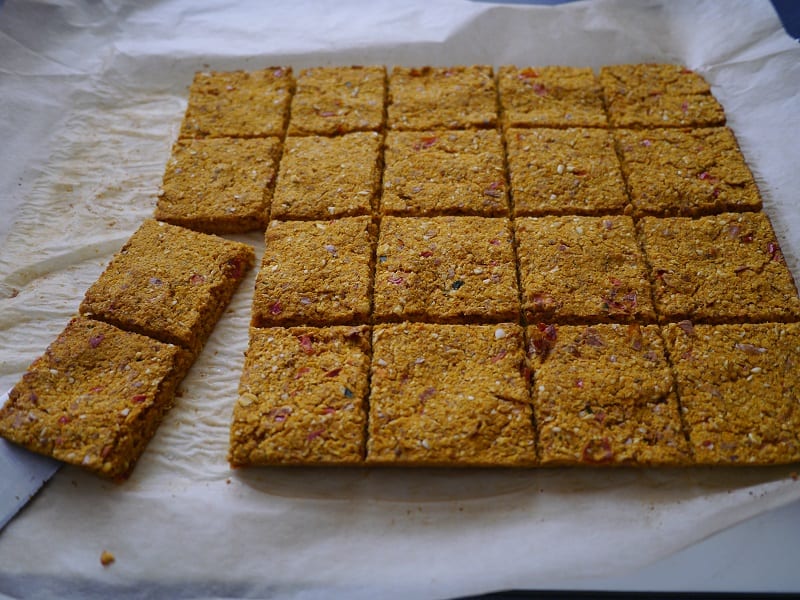
After 8 hours, divide the dough into 4. One at a time, roll the ball out onto a baking sheet lined with baking paper using a rolling pin (yes, my zero waste kitchen contains baking paper. I re-use each piece several times. You can read more here). The reason for the paper? After waiting 8 hours, I don’t want to take the risk that my crackers will stick to the metal tray and burn.
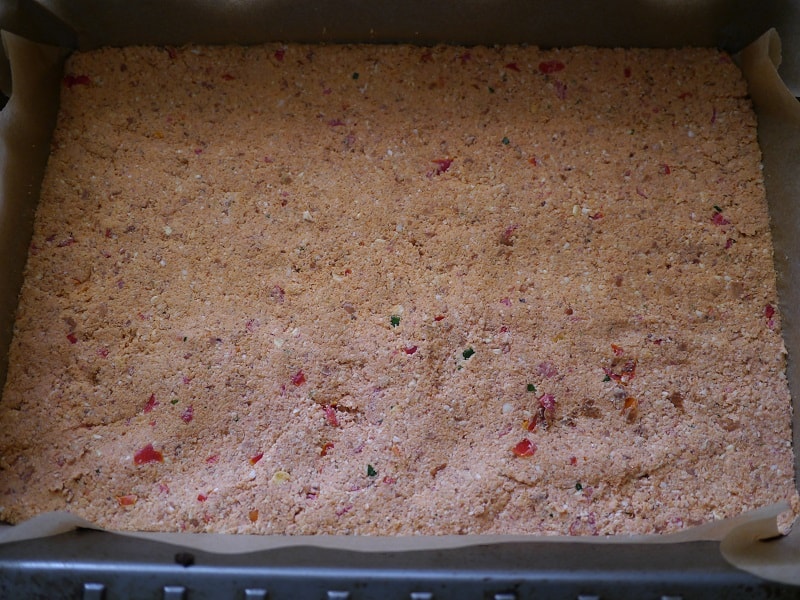
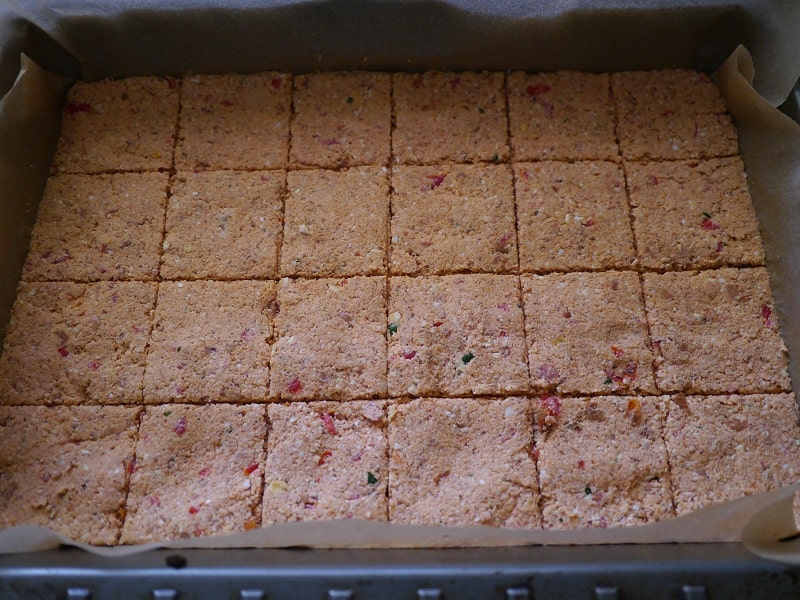
Roll the dough out to between 3 – 5mm thickness, trying to ensure it is even. Trim the edges, and cut into rectangles with sharp knife.
Brush with olive oil, and then sprinkle salt on the top.
Bake in an oven at 150°C (350°F) for 8 minutes, then turn over and bake for another 8 minutes. You will find that the crackers on the edge cook a lot faster than those in the middle, so if you want to remove those sooner you’ll avoid them over-cooking. You want them to look golden but not too brown.
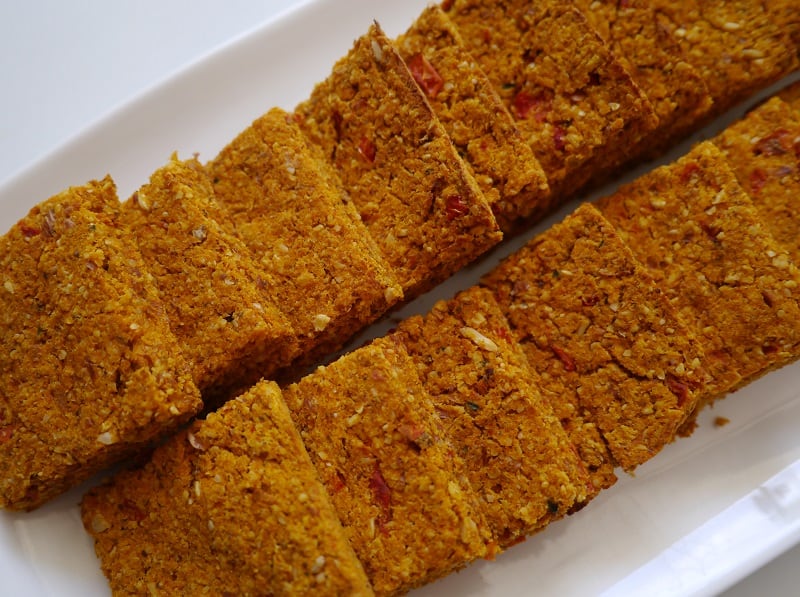
Cool on a wire rack and store in an airtight container.
TIPS:
- 8 hours in the ideal, but this recipe is really flexible. You can make the crackers after only leaving the dough for 30 minutes (but longer is better). If you forget and leave them longer, you will still have good crackers.
- The dough can be frozen or refrigerated if you want to make a big batch of dough and keep some for later.
- I would guess they would last a week, but I’ve never been able to find out as they all get eaten long before! They don’t lose their crunch after storing so they are definitely something that can be made ahead.
Zero Waste Sourdough Crackers
As always, I’d love to hear from you! Do you make your own sourdough, and have I tempted you to give it a go? Do you already make your own crackers? Do you have any recipes and tips you’d like to share? What toppings and flavours do you think would work best? Please tell me your thought in the comments below!
[leadpages_leadbox leadbox_id=123a865e9839c5] [/leadpages_leadbox]