How to Make (Scrappy) Apple Cider Vinegar from Scratch
I love knowing how stuff works. Even though I can buy apple cider vinegar from bulk stores locally, I want to know how to make my own. Not because I’m a glutton for punishment who wants to make everything from scratch ‘just because’. I think its important to understand where our food comes from and how its made. Making actual food out of “waste” food appeals to my love of avoiding waste. Plus of course, my inner chemist likes to play with her food.
Once I know how to make something, then I decide whether it’s worth the effort involved to keep on doing it, and how easy/affordable it is to buy. I don’t have time to make everything. I buy my pasta, and laundry powder. I make pesto and crackers and peanut butter.
Apple scraps/cider vinegar is such an easy and low effort thing to make that there’s just no reason not to.
Apple cider vinegar is made from the apple pulp left from making cider, which uses whole apples. Apple scraps vinegar is pretty much the same thing, but only uses the cores and skin of apples rather than the whole thing. The end product is pretty much the same.
Unless you’re making cider, I wouldn’t recommend using whole apples to make apple cider/scraps vinegar. It works just as well with the cores and peels, and you can use those apples for something else delicious. Making apple cider/scraps vinegar from the waste bits is much more satisfying!
I’ve made apple scraps vinegar a couple of ways, and I’ve included both methods below. One uses the cores and peels only, and the second uses the leftover pulp from juicing apples.
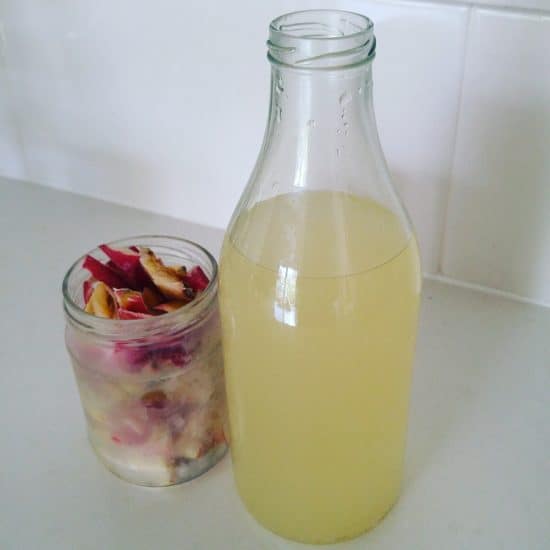
Frozen apple cores ready to go, and a previous batch of finished apple scraps vinegar.
Apple Scrap Vinegar from Apple Scraps
Although I’ve given you quantities, they don’t really matter all that much. More apples will work more quickly, and make a darker vinegar than less, but don’t sweat it if you have different amounts. Try and see!
A couple of pointers before we start:
- If you don’t eat a lot of apples, pop the cores (and peels, if you like to peel your apples) in a jar in the freezer, and wait until you fill the jar.
- The sugar is to kick-start the fermenting process so don’t leave it out! 1 tbsp is adequate but I find it works faster with 2 tbsp. Honey should also work if you’d like a more natural alternative to sugar but I haven’t tried it.
Ingredients:
Apple peels and/or cores from 6-8 large apples (around 300g)
1.5 litres water (rainwater or filtered water if possible)
2 tbsp sugar
Method:
Part 1:
Pop the apple cores and peels in a clean glass jar with a wide neck, add the water and sugar and stir. Cover with a clean tea towel. The secret now is to keep stirring, whenever you remember. Any time you walk into the kitchen, give your jar a stir. First thing in the morning, last thing at night – stir!
You want to stir to keep it aerated, and to stop any mold growing on the surface. Fermentation works because the good bacteria/yeast/microorganisms win against the bad ones, so we need to keep conditions favourable for the good guys! With most ferments the aim is to exclude oxygen, but not this time. To make cider, the oxygen is excluded, but to make vinegar it is not.
Keep stirring your jar over a few days and start to notice how it changes. It may start to smell like cider, or like vinegar, or both. Bubbles will appear on the surface and maybe froth or scum. All of this is good! Once any trace of alcohol smell has gone, there are less bubbles, and the apple pieces begin to settle and the vinegar will be ready for the next step.
Part 2:
Strain the contents of your jar into another clean jar (or a bottle) using a fine sieve or cheesecloth. Squeeze out the liquid from the pulp. (If you taste the pulp, you will find that it is completely flavourless.)
Now there are two options.
Option 1: Put a lid on your jar, and leave on the kitchen counter for a few days, opening the lid every day to release any pressure. If there’s any fermentation still happening, the pressure could build up and the jar might explode in your kitchen cupboard, so this is a safe option.
Option 2: If you can’t keep an eye on your vinegar, or you want a break, pop the bottle in the fridge to slow down the fermentation. I’d recommend loosening the lid so any gas can escape. It will ferment very, very slowly. When you’re ready, bring it back to room temperature to continue the fermentation.

Straining the spent apples from the vinegar. Cheesecloth is the best option but muslin or a fine sieve will also work – you’ll just end up with slightly more sediment in the vinegar.
After a week, taste your vinegar. If you find it sweet, leave on the counter to continue fermenting. Once you’re happy with the way it tastes, secure the lid and store in a dark cupboard.
Apple Cider Vinegar from Apple Juice Pulp
This is a great way to use up pulp from juicers. Unlike the first recipe, this contains all the fibre and flesh of the apples, but with the water (juice) squeezed out. This means it looks totally different – but it produces the same result.
Ingredients:
Leftover juice pulp of 6 apples (around 300g)
1.5 litres water (rainwater or filtered water if possible)
2 tbsp sugar
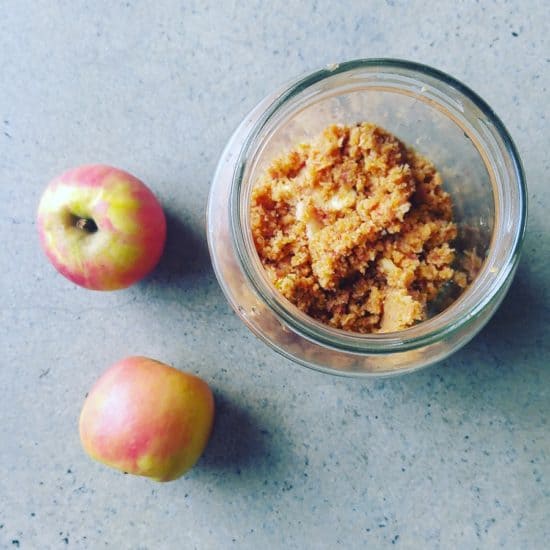
The apple pulp from juicing 6 small apples. Don’t worry about the brown colour, it is simply the apples oxidising.
Method:
Pop the apple pulp in a large 2 litre jar, and add the water and sugar. The pulp will expand and absorb all of the water, and will look totally crazy and you’ll be sure you’ve done it wrong. In fact, I currently don’t have photos of this because when I tried it, I was sure it was going to fail! If it looks wrong, it’s right!
Stir. As above, stir, stir, stir. When not stirring, keep covered with a tea towel. Because the pulp is so fine, it is hard to see bubbles developing, but you will notice the smell changing to cider and then vinegar. Keep stirring. After 4-5 days (longer if the room is cold) you will notice the pulp start to rise and clear liquid will be visable at the bottom of the jar. Keep stirring to push the pulp down. Because the pulp floats, it may get pushed up out of the jar if you don’t stir.
Once the pulp is consistently floating, strain the contents of the jar into another clean jar using cheesecloth (or an old tea towel).
Leave the jar on the counter with the lid loosely fastened until content with the taste, secure the lid and store in a dark cupboard.
A note about colour:
The colour will vary with each batch made, dependent on how many apples you use and how brown they are. I tend to find that using apple pulp makes a darker vinegar than using apple scraps; and that fresh apple scraps make a lighter colour vinegar than frozen apple scraps. Rather than use the colour as a guide, go by taste. You’ll be eating it, after all!
Now I’d love to hear from you! Have you ever made apple scraps vinegar? Have you ever made cider? Do you have any tips to add? Did you struggle, and what went wrong? Are there any other pantry staples that you currently buy that you’d like to make? Are there any that you make already that you’d like to share? Have you ever tried any other fermentation? Leave your thoughts in the comments below!



I did try making the scrap vinegar. I couldn’t tell when it was ready, then I think I left it too long. It wasn’t great. Maybe I’ll try again!
Every batch I’ve made has been different. I should have added, worst case and you don’t want to drink it/add to food, you can always use it for cleaning. Toilet or drain cleaner if it’s that bad – all those good bacteria will have a field day! ;)
Yay, I’ve been looking forward to this!
Apologies it took so long Rebekah – I have been promising it for a while!
No apologies necessary, we’re all lucky that you share so much of your experience.
I THINK I’ve succeeded in making homemade ACV. At first I thought it didn’t smell vinegar-y enough, then I sniffed my store-made ACV and it smells about the same. Whoo hoo! I eat at least one apple every day, so it’s nice having a way to make use of all those cores.
Ah, thank you Rebekah! :)
Glad you had success! I always find it smells slightly different, but always vinegar-y. I have to make a special effort to buy apples when I want vinegar ;)
Thank you for the helpful tutorial, Lindsay. Now I can squeeze out an extra use for my organic apples. I do feel a bit nervous about using apple cores, specifically their seeds and their relation to cyanide. Do you mind sharing your thoughts about this concern? I guess I can use the resulting vinegar to clean my home so I likely will try it at least once. It seems fun, making something useful out of “nothing”! :)
Hi Natalie! I wouldn’t worry too much about the seeds. My understanding is that apples don’t actually contain cyanide, they contain amygdalin which releases cyanide on contact with digestive enzymes. So the straining will remove the seeds. Apple cider is made using whole apples which contain seeds, and is strained at the end. I generally bang my cores so any loose seeds fall out, but if you were really particular you could pick them all out by hand.
Hope that helps!
I’ve been doing an ACV rinse after I wash my hair with a shampoo bar. I can’t get the vinegar in bulk so I’m anxious to make my own. Thanks for this tutorial!
Hi Julie, let me know how you get on! :)
Thank you so much for posting this Lindsay! Talk about great timing-just this morning I noticed that I’ve almost run out of apple cider vinegar. I’m looking forward to starting the process this weekend :D
Pleasure Bhaval – let me know how you go! :)
Hi Lindsay, thanks for sharing this recipe! Where I live it’s not easy to find vinegar on jars, so making my own it’s the easiest way to avoid the plastic bottle. Do you think the scrap recipe it’s good for cleaning purposes vinegar? And how many days is a few, for the first part?
Hi Filipa, my pleasure! Yes I think it is great for cleaning. I tend to use it in the bathroom and toilet. How many days depends on the room temp and other things, but I just timed my last batch and it was exactly 10 days. It is pretty hot here at the moment, so in cooler climates in may be 2-3 weeks.
Please let me know if you have any more questions!
Thanks Lindsay, I’ll give it a try and let you know how it worked. xx
Hi Lindsay, I am just about to have gathered enough apple cores to follow your recipe :) Apple vinegar is only sold in plastic in Hungary, but I really want to use it on my hair as a rinser, so this post has the perfect timing :)
One question I have that I ate a pear today and thought that the core from that would be suitable as well, what do you think?
Hi Dori, yes I absolutely think you should add the pear in too. Pears and apples are quite similar, and they make pear cider, so I definitely think it will work! Someone on Instagram told me they were making pineapple vinegar, so I think most fruits can be used. Let me know how you get on!
Well, I didn’t had a big enough jar when the apples were in the water as well, so I used a bowl and covered it with a cloth and after it didn’t smell like alcohol, I drained it into a jar. But it continued fermenting for at least 2 weeks. Now I store it in a smaller jar in the dark but just noticed that some white stuff is starting to gather on the surface.. maybe mold?
When I tasted it a week ago, I felt that it’s not too sour, not like the apple vinegar I can buy in the shops, but I don’t know what I did wrong.. maybe too little sugar or apple?
Hi Dori, thanks for the update! If the white stuff is like a thin film, and not fluffy, it’s probably yeast. Kahm yeast forms on ferments sometimes if they are exposed to oxygen, not acidic enough, the temperature is warm. It isn’t dangerous or bad. You can just skim it off, it won’t affect the vinegar. One batch of vinegar I made had this, but the others haven’t.
Your homemade stuff won’t taste like the shops without a lot of experimenting as you don’t know what apples they used, how they made cider, what sugar they used etc. The best way to find what you like best is to keep experimenting.
if you don’t like the taste or don’t trust it, you can always use it for cleaning and make notes ready for the next batch :) But don’t chuck it away!
Ok, thanks for the info, good to know :) Do you have any tips on how to make it more acidic? Maybe a bit more sugar at the beginning?
That could be true Dori, I was a bit stingy with sugar at the start and I do think it tastes better (but not sweeter) with more…
Hi! I’m a bit confused about the instructions. You say after straining to seal it, but open it every day so it doesn’t explode, but then whenever you think it’s done you seal it and leave it in the cupboard? Does it eventually stop fermenting? How do I know when it is safe to leave in the cupboard?
Hi Candra! I’m not seeing where I’ve written seal after straining it, but let me explain anyways :) After you’ve strained it, the theory is that it has stopped fermenting, but there might be some residual fermentation going on. Rather than bottle straightaway, you can leave on the counter for a day or two with the lid loosely fitted, or you can unscrew every day, to ensure any gas can escape. If you notice any fizzing when you unscrew the lid, it needs more time. If you can taste any sugar it will probably need more time to ferment.
The more you do it, the easier it gets and you can tell if it’s ready or not. I just don’t want to be responsible for any exploding jars in pantries! ;) So it’s just to be safe, keep an eye on it for an extra couple of days and when you’re sure nothing is going on, pop in the pantry. It will be fine. (If you’re the distrusting type, you can always burp the bottle after a week or so, just in case!)
Hope that helps!
Do you know if you can make pear vinegar in the same way?
Hi Rosie, yes you can! A reader of mine tried it and had good success :)
Hi, just a question – why does this fermentation process end up as vinegar and not an alcoholic beverage?? Doesn’t a vinegar require a vinegar “mother”??
Cider is anaerobic fermentation. Vinegar is aerobic, requires oxygen. To make cider you need airlocks to exclude oxygen but release carbon dioxide. That’s why people talk about opened bottles of wine turning to vinegar – it’s the air exposure!
The “mother” is just a colony of beneficial bacteria. You don’t need one to start vinegar, lots of things can be made using the naturally present microbes – sourdough, vinegar and sauerkraut are all examples. Although if you wanted to make a batch of vinegar from scratch and added mother from a previous batch, it would speed things up. Sometimes people do this with sauerkraut too, but I don’t. It still works.
Hi Lindsay, thanks for your vinegar making instructions. Very clear and concise. More comprehensive than any other instructions I have found, especially when it comes to learning from the jar of gunk what stage it is up to. Mine has been fermenting for over a week and still bubbling a bit, and tasting a bit appley, with the cool weather we have had in the wheatbelt. Still a few days of stage 1 to go. I am confident about where it is up to. Looking forward to tasting it after ageing.
Lindsay,
You haven’t mentioned how long this should take.
I’ve had a jar of this going for around three weeks now, and it still smells a little ‘pongy’ but the pulp is settling and the amount of bubbles has decreased. Should I keep going, or is it ready to go on to step 2?
Appreciate your help!
Hi. Im making this! I had the apple in the jar with water and sugar for about 5 days we livr in a pretty hot area. The apples had settled floated to top and i thiught it was ready for step two. I had seen bubbles only small but then they kinda went. I strained it and bow three days later its getting more strong smell and lots of bubbles and a bit of white fluffy ontop. Did i strain too early or is this ment to happen?
Thanks for the recipe
Hi Shelley! I would say yes I think you did strain too early. It’s pretty hot here and it takes me 2 weeks. The apples eventually sink and that is when I know it’s ready. It isn’t gradual either, on day 9 they’ll be floating then day 10 they’ve sunk completely. That’s how I usually tell. Hope that helps :) (Saying that, if it looks and smells good then I’d still use it the way you have it)
I’ve been juicing on and off for ages and have used the pulp to make ..pardon the gross name …compost muffins!! This works when juicing fruit or vegetables to make savoury or sweet muffins…you just add your preferred flour, milk, butter, honey, egg or seasoning depending on vegan or gluten free options.
I am so excited to try the pulp vinegar .. thanks for your easy to follow instructions…. ……and also the suggested uses if it “fails” …
Lindsay, you’re an unsung hero of mine! Plastic Free July shared that they made your recipe here and I had to look it up, since I’m making applesauce and have cores-galore. Your attention to detail, getting back to almost every comment posted, thorough explanations trying to answer questions by providing asditioaddinfo beyond a short yes or no… Your passion and care to others doesn’t go unnoticed. Your website is the dream I’d hoped to find! So many of my own experiences are here in one place! Thank you for all you do for our world and spreading the knowledge and hope!
Hi Kala, thank you so much for your lovely comment! Ah, I do try to get back to all my comments, but sometimes (particularly around July time) they do get away from me a little! I lvoe the discussions we have here, all the different ideas and thoughts and queries and experiences of others – so much learning to be had from everyone :) I’m glad you found my website useful and hope you continue to do so!
If I have already some mother vinegar when do I add it? from the beginning? after the straining?
Hi Irene! The “mother” is basically the live cultures – you don’t need it as such, but it will speed things up. You add when you mix the sugar, water and apple cores together. It’s like a microbial kickstart!
Thankyou for that recipe. I usually make in bulk this time my soaked apples turned the water cloudy and glutinous I’m not sure it’s ok to proceed with adding sugar etc. Some of the apples had a clear texture and think this may b the reason. ……any thoughts.
Thanku Suzi
I’m on day 18 of my ACV and the apples have begun to sink but it smells like alcohol. There are also bubbles. I have not seen and thing that looks like mold. So do I just keep going until the alcohol smell goes away?
Lindsay, just a quick question: do I need to defrost the apple scraps or can I just pour water over the frozen ones?
Hello, I made the ACV about a year ago, it is stored in a dark cook space. Looks good and smells good. This week I used my homemade ACV in a recipe for pickling garlic scapes. I followed a recipe, and now my jars are bubbling. I was informed that my homemade ACV wasn’t fully created? The person said it was a scrap vinegar and not a 2 step apple cider vinegar? They also mentioned that because the jars are bubbling it is contaminated and gone bad. Please, can you offer any insight?