Tag Archive for: zero waste kitchen

Plastic-Free Living: 10 Foods I Make From Scratch

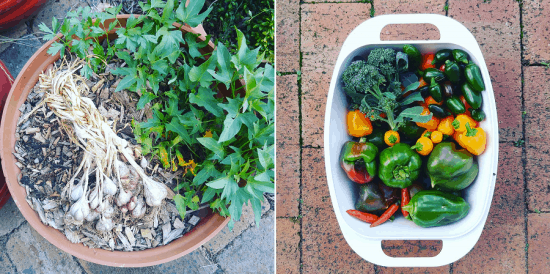
Reducing plastic and living with less waste means ditching the plastic wrap and other single-use packaging, and some foods are hard to come by without packaging. Either that, or they are very expensive to buy plastic-free.

As I’ve gone down the path of waste-free living, I’ve tried making various things, mostly for these two reasons.

Some things, I have discovered, are well worth spending the extra money on to buy the package-free version and not have to make your own! Others turned out to be either so simple, so tasty, or so much less expensive to make from scratch that I really have no reason to ever go back to the pre-bought versions.

This isn’t about being a slave to your kitchen. I do enjoy making things, but I appreciate it isn’t everyone’s idea of fun, so I’ve focused on the quick, the easy and the satisfying. I’ve put together a list of foods I make that are less waste and low fuss. You’re welcome.
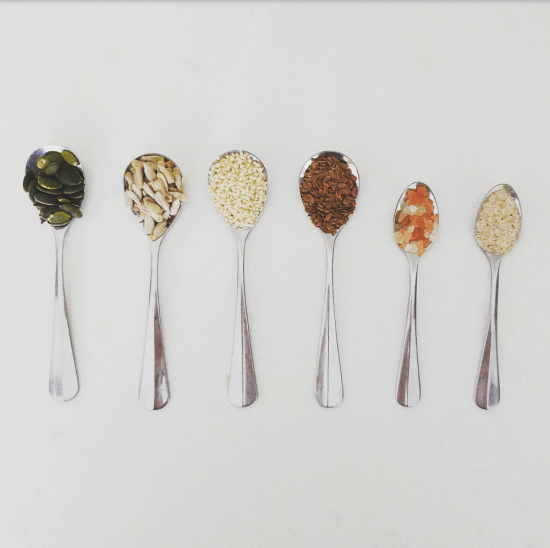
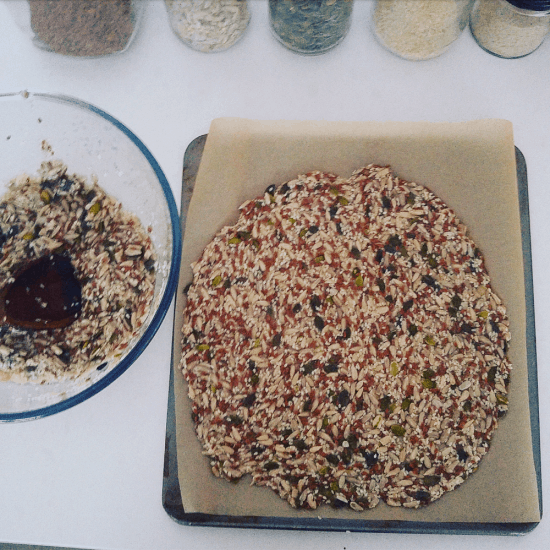
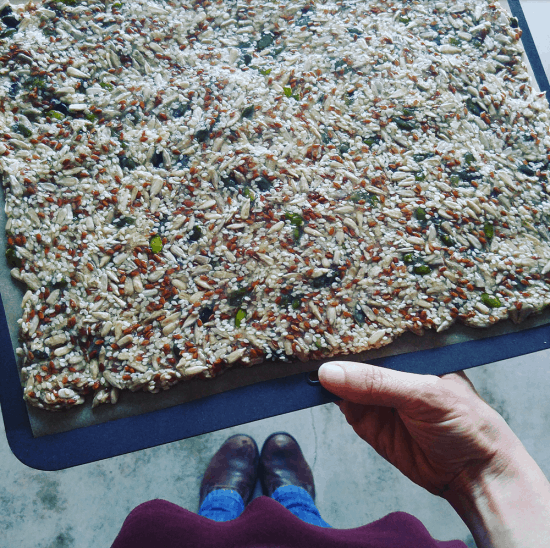
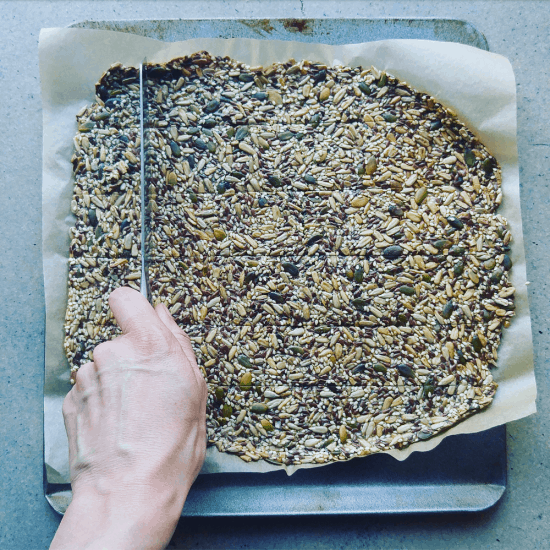
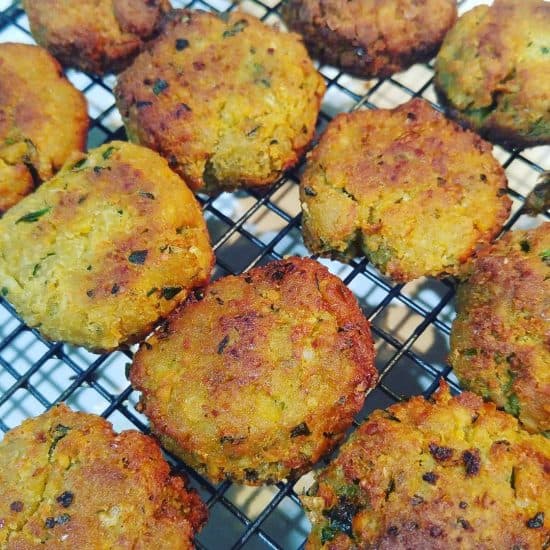
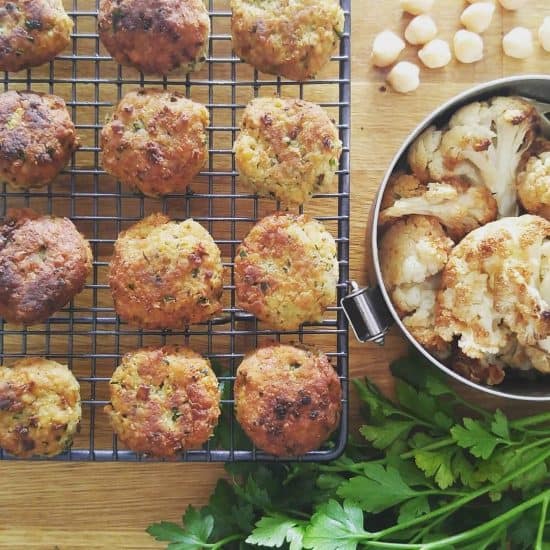
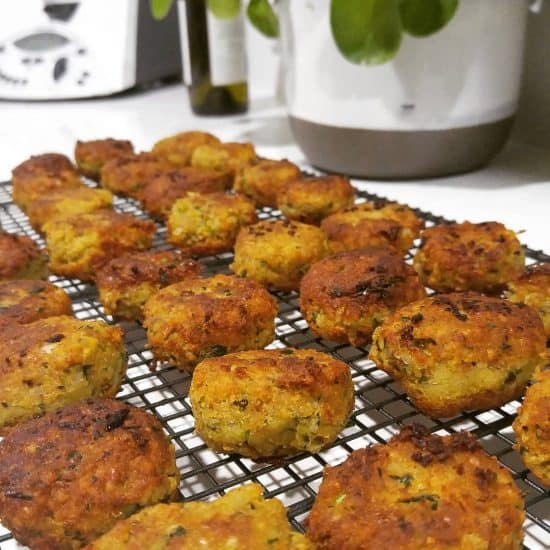
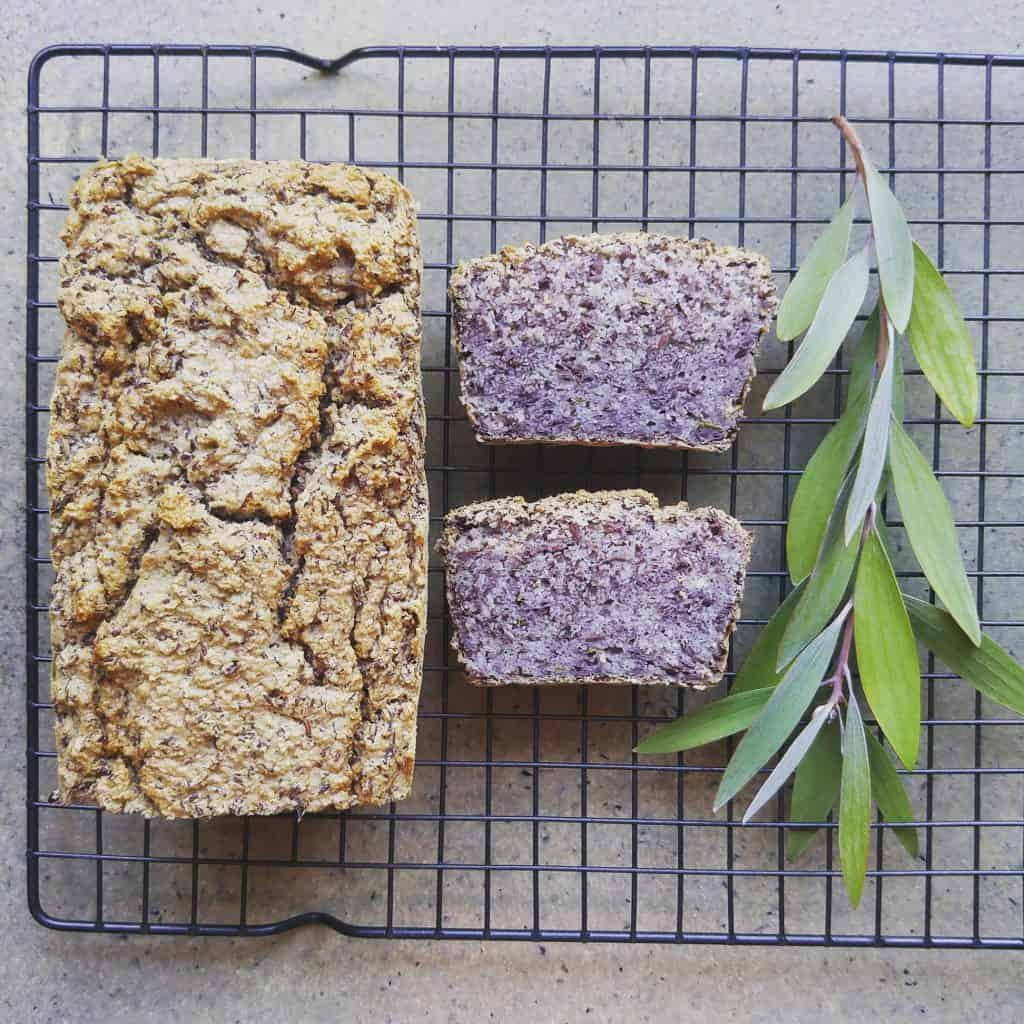
DIY Crackers

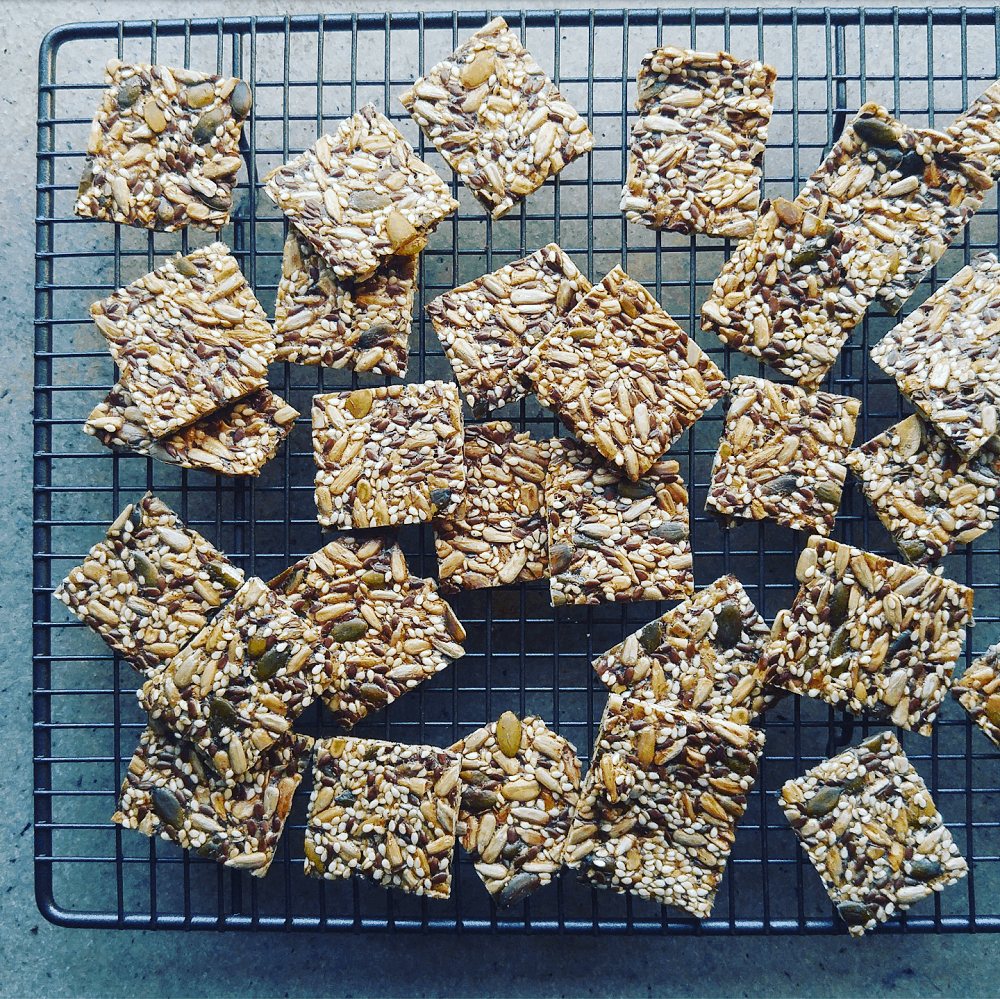
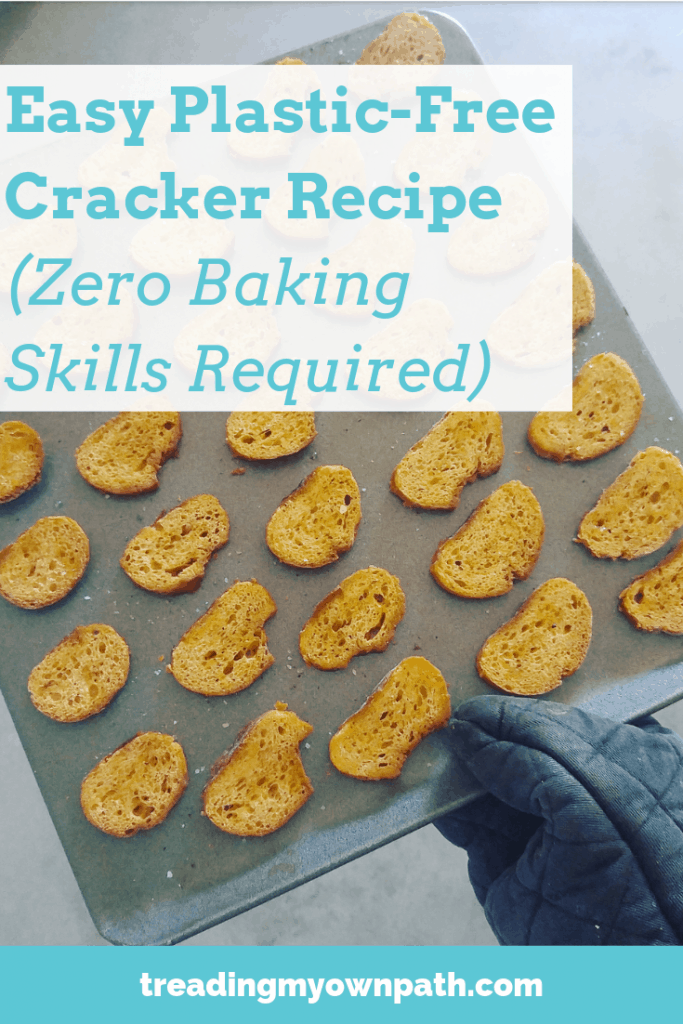
If there’s one thing that’s impossible to buy plastic-free or zero waste, it’s crackers! I tried making crudites (fancy word for vegetable sticks) and slicing fresh bread in place of crackers, but they lack that lovely crunch which makes crackers so desirable to eat.

I’ve tried a few different recipes. The ones that get made the most are the seed crackers. They are simple to make; all they require is soaking the seeds in water, then spreading out on a baking sheet and slowly drying in the oven. You can find the recipe here.

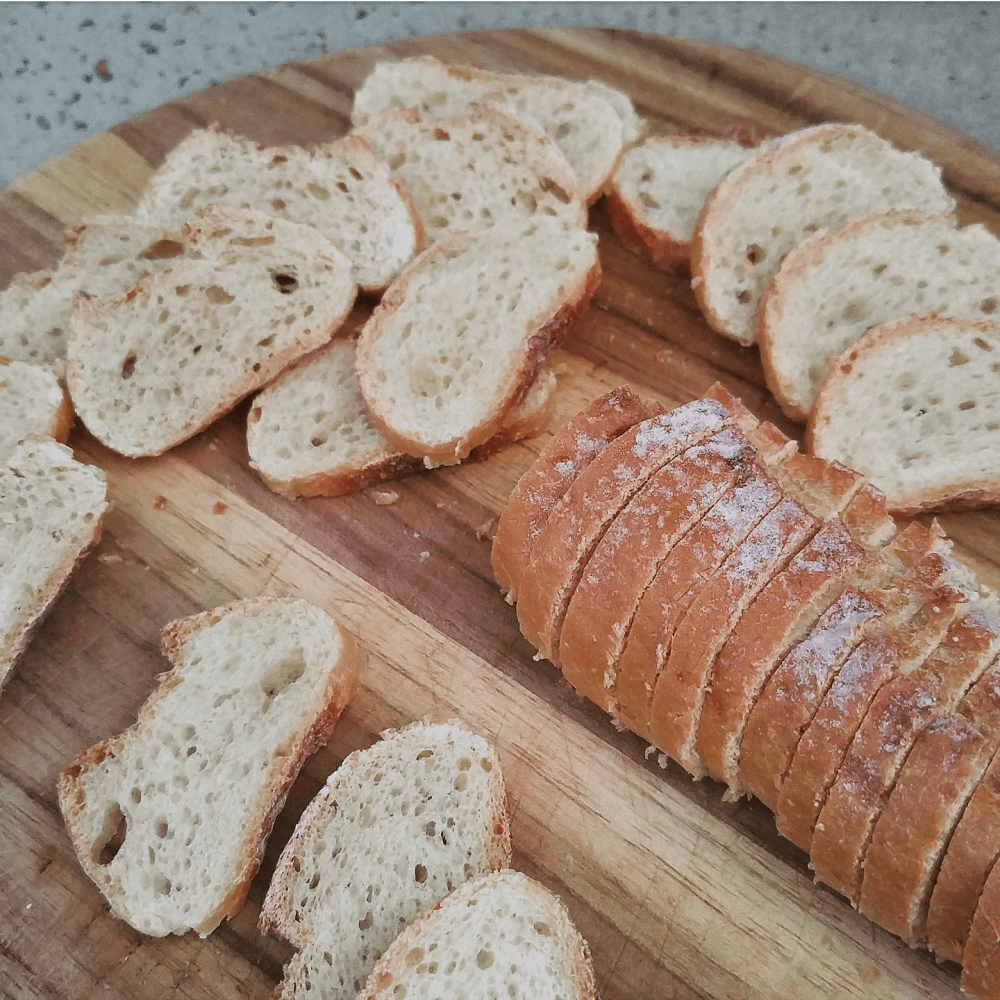
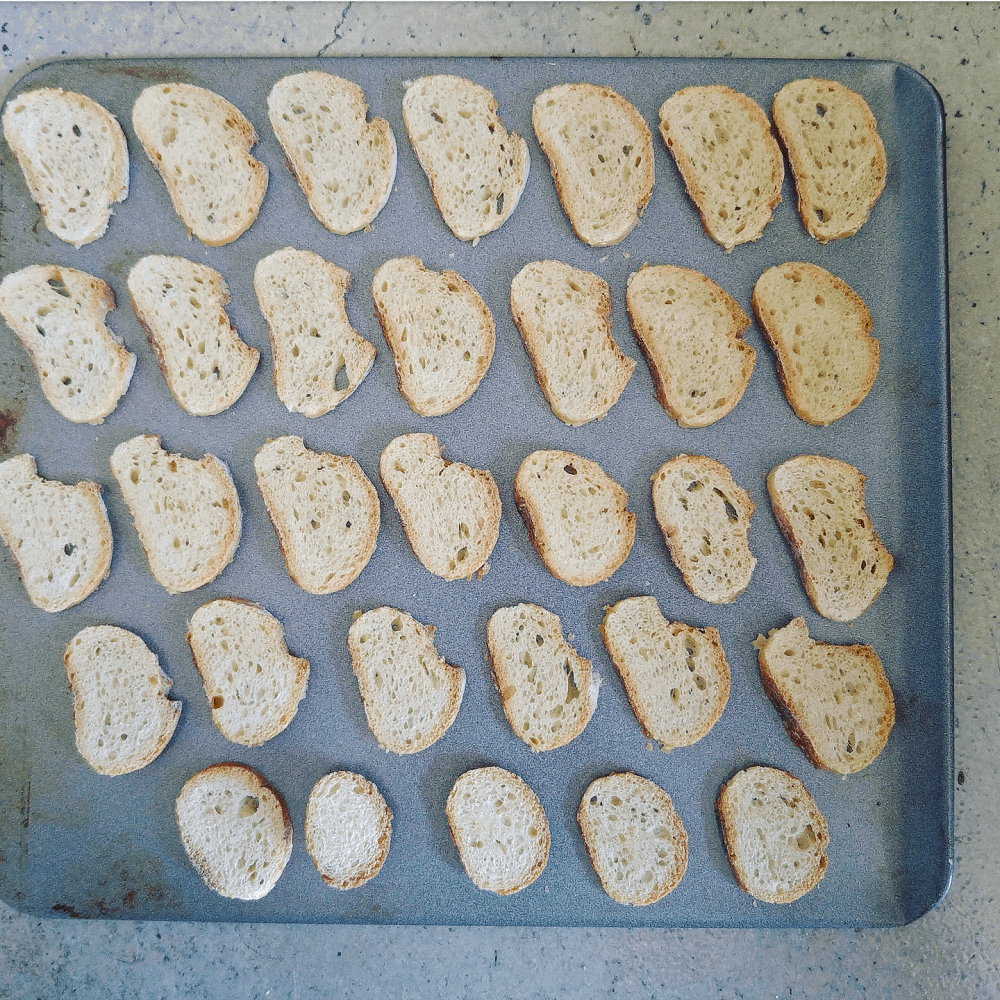
If already you’ve decided that this is a step too far, another super easy way to make crackers is to thinly slice a baguette, drizzle with oil and bake in the oven, turning once half way through.

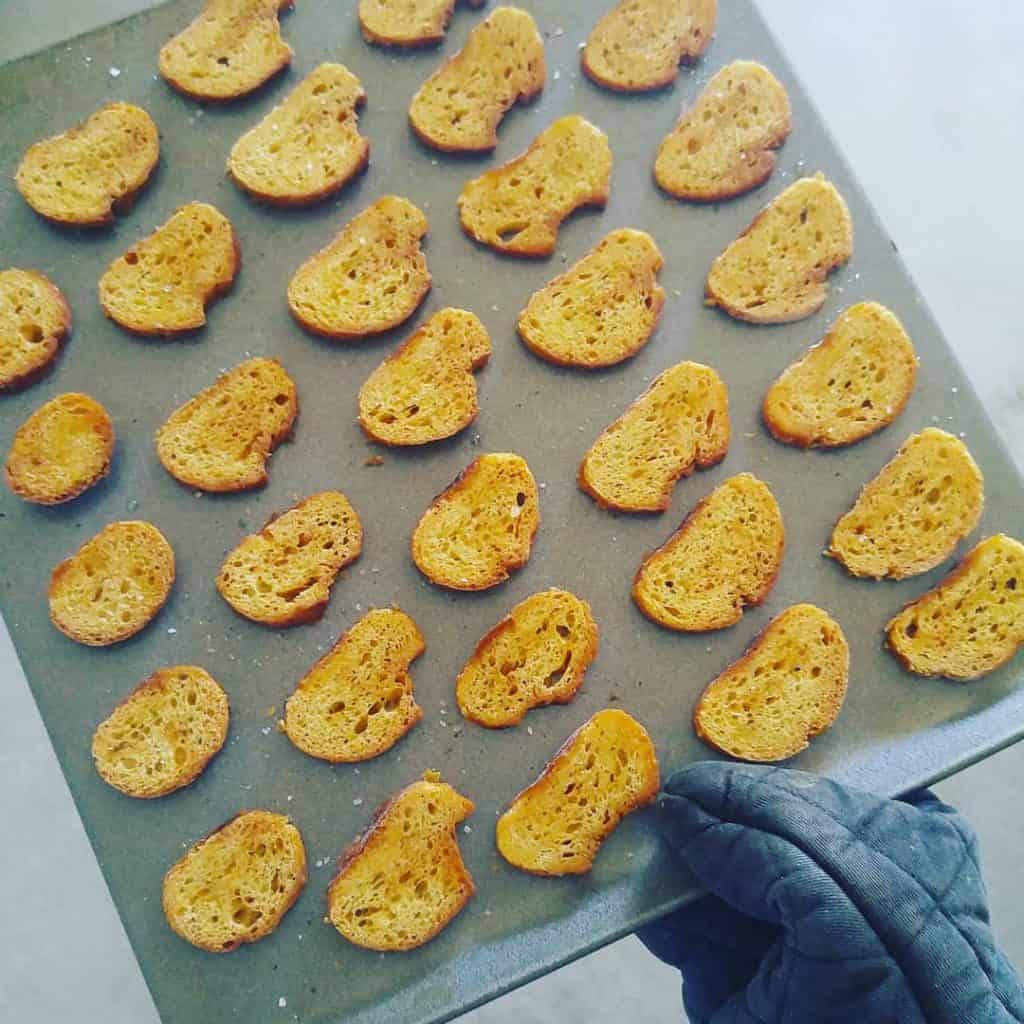
These are so simple to make and require only 25 minutes in the oven, that they probably don’t even require a recipe, but here is the recipe if you’d like to see the steps.
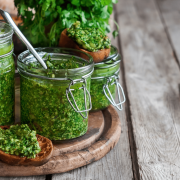
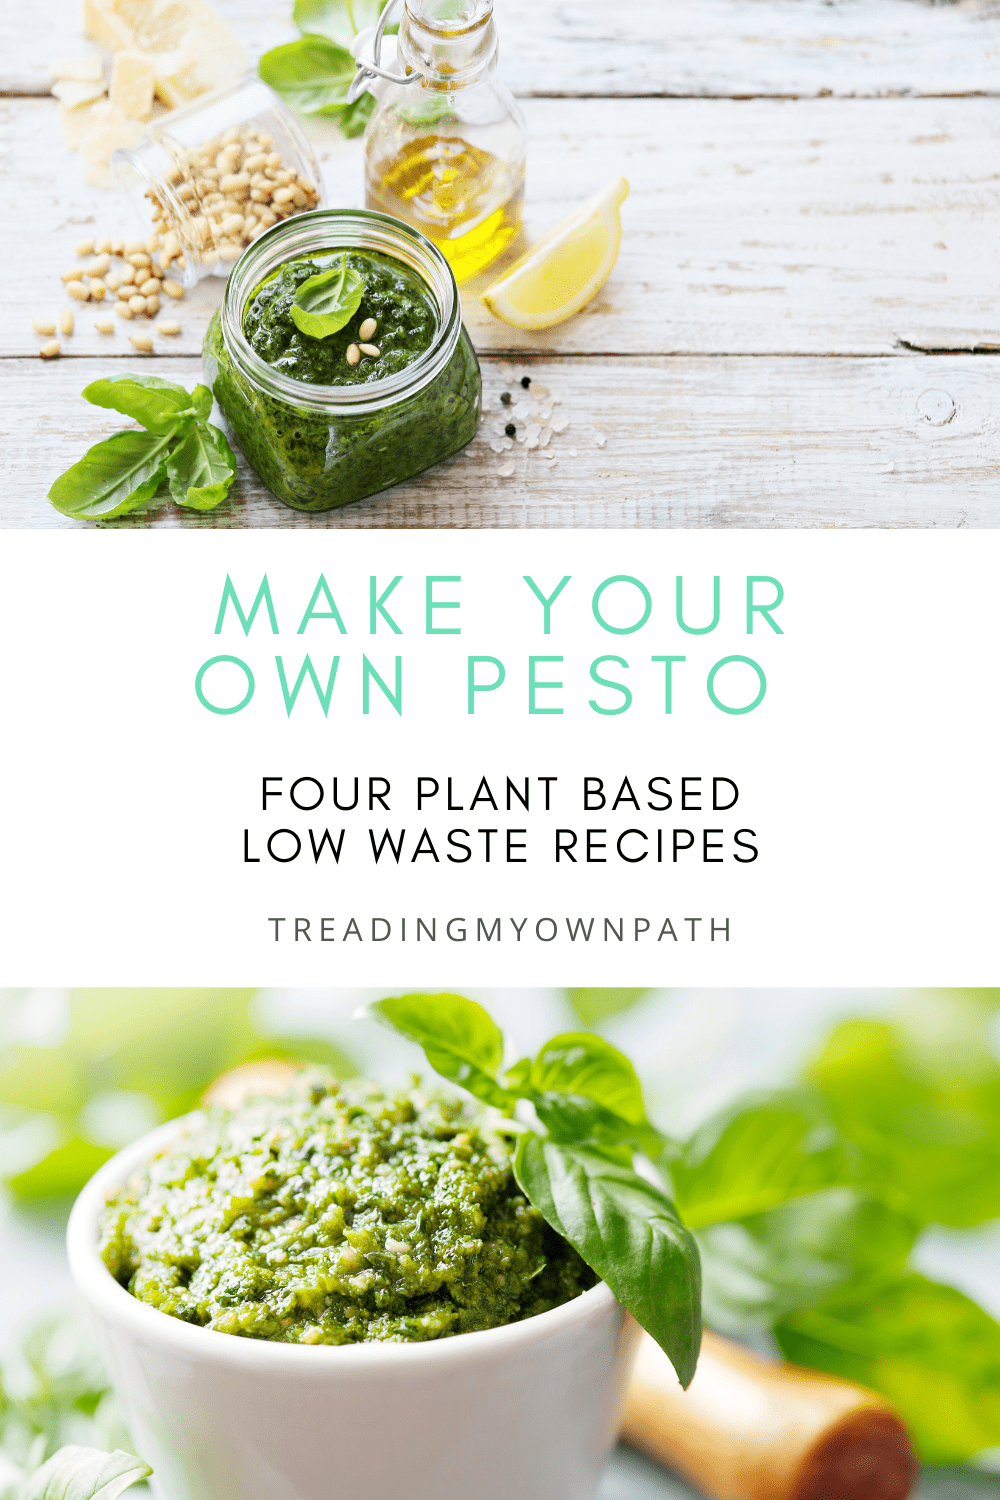
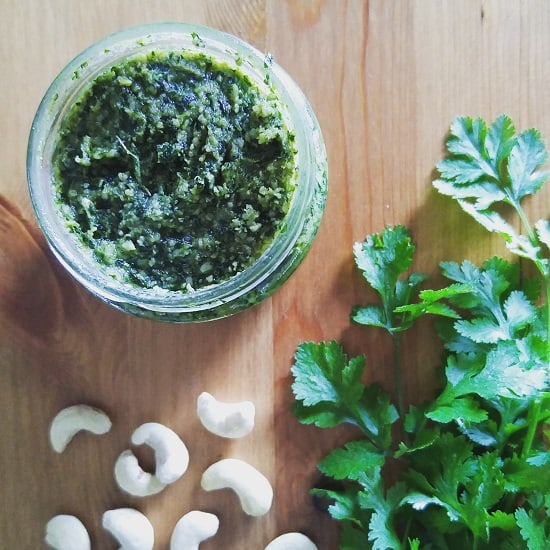
DIY Pesto

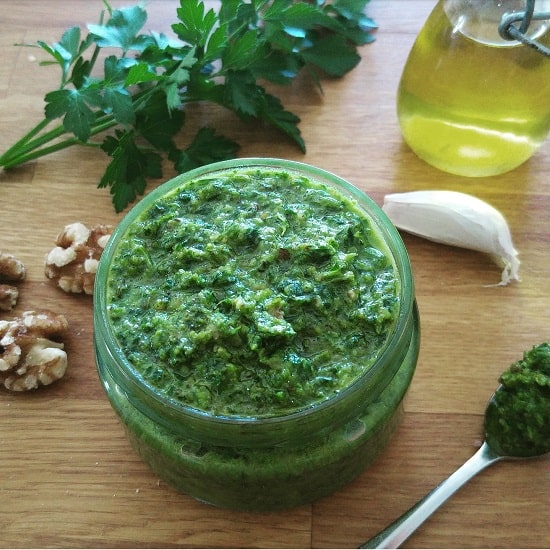
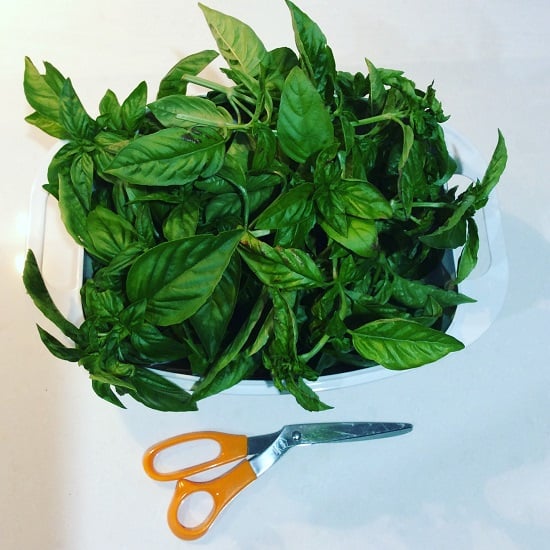
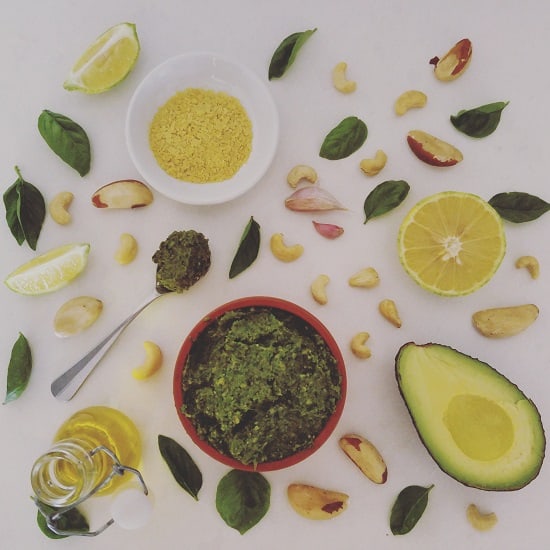
I make pesto all the time, with whatever greens I have to hand. Basil pesto is a summer classic but in winter when the parsley, coriander and nasturtiums are growing, I use these instead.

The basic formula is garlic, two large handfuls of greens, 1/2 cup of nuts and some oil (avocado sometimes to add smoothness and thicken, and nutritional yeast for cheesy flavour if required). You can also sneak in wilted salad leaves to reduce waste.

A blender is ideal, a herb chopper will also work and so will a pestle and mortar. Most pesto will keep in the fridge for at least a week, and it freezes really well. Four zero waste pesto recipes here.

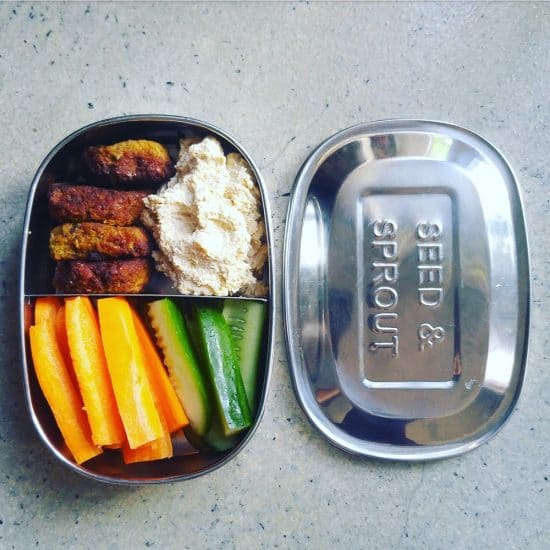
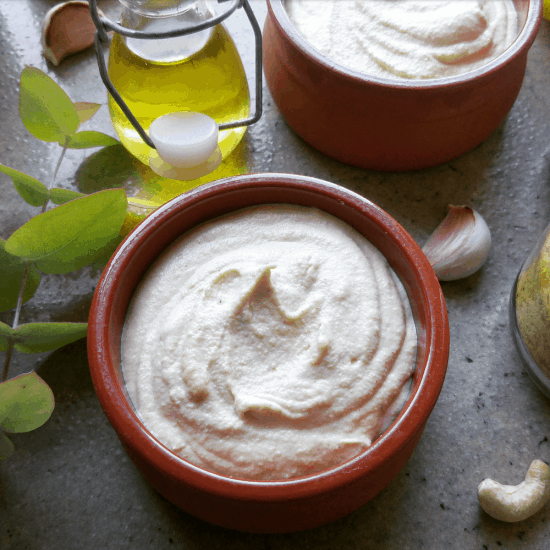
DIY Dips (Hummus, etc)

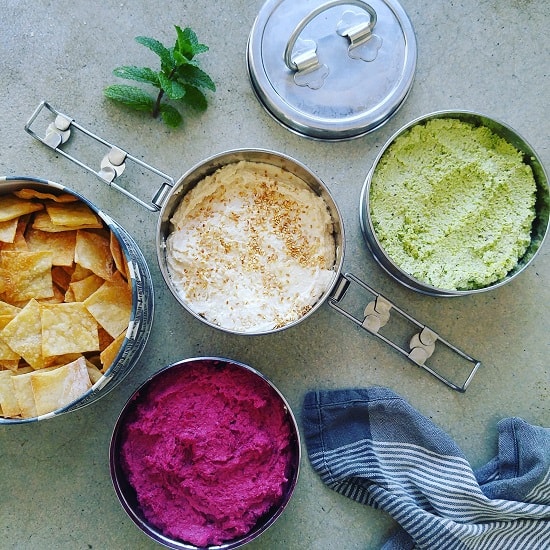
Have you ever noticed that the more natural ingredients (and therefore ‘fancy’) a store-bought dip is, the more packaging is included? There’s the tub, the foil lid, the plastic lid to go over the foil lid, the cardboard sleeve and then the tray it’s displayed on in store.

Rather than pay for all that packaging, I make my own. They taste much better anyway. I mostly use a food processor, but you can also use the herb chopper attachment with a stick blender, a stick blender itself if you’re making large quantities, a pestle and mortar if you don’t have gadgets, and even a fork if you like a more textured dip (I always use a fork when making guacamole).

My staple dip is hummus (you can find the recipe here). If I’m being fancy (well, if I need to use up old veg and want to disguise them in something tasty) I’ll add beetroot (raw or cooked) to the mix, or roasted sweet potato. When fresh broad beans are in season I use those in place of chickpeas, without the tahini and a lot more lemon juice.

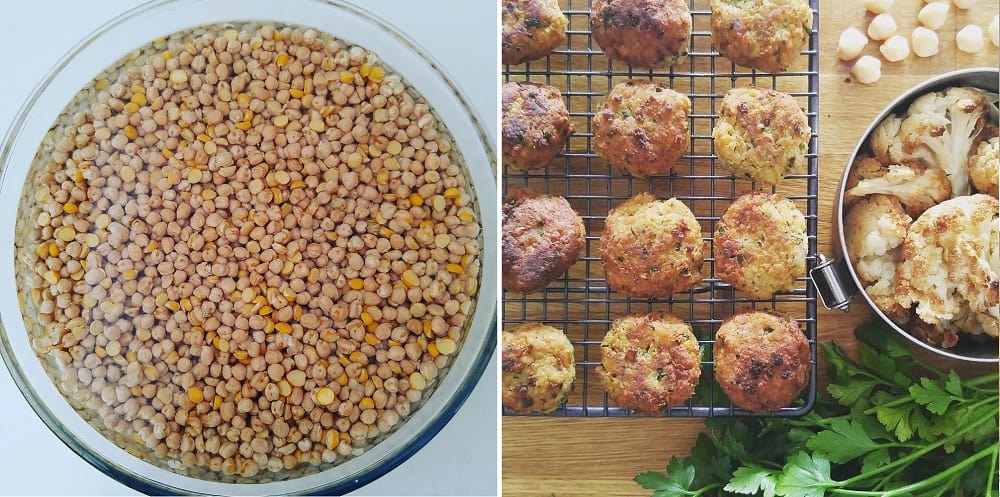
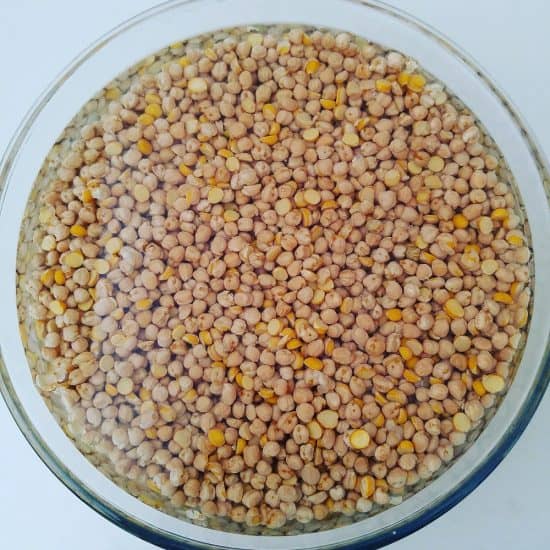
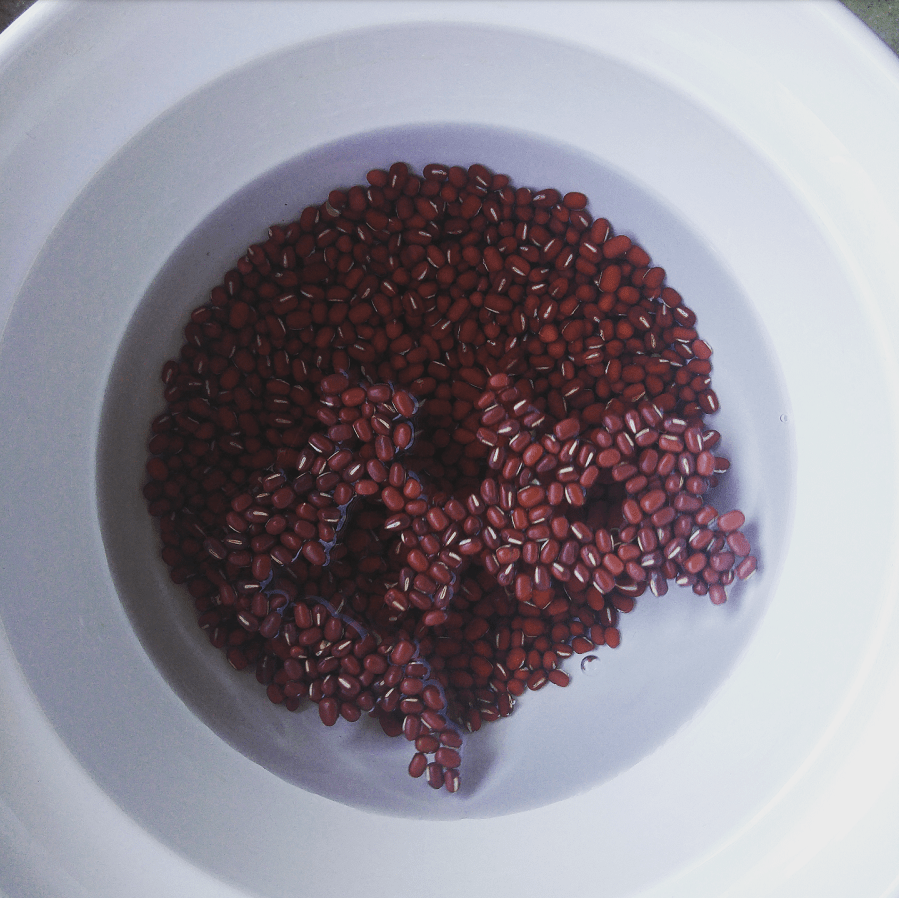
DIY Legumes (beans, pulses, lentils)

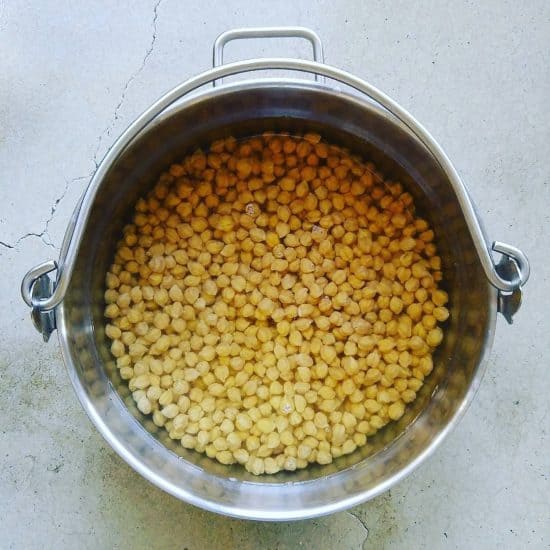
I don’t buy chickpeas (garbanzo beans), lentils or any other legume in a tin, I make my own by cooking the dried beans.

Lentils are really easy because they just need a quick wash and then can be thrown into soups, stews, dahls as is, and will cook in the pan.

Beans and chickpeas need soaking first. They all vary slightly but the longer the better. If you change the water every 8 hours you can keep them soaking for days (they won’t go bad, but eventually they will sprout!) and you can pop the still-soaking beans in the fridge to bide some extra time before you’re ready to cook them.

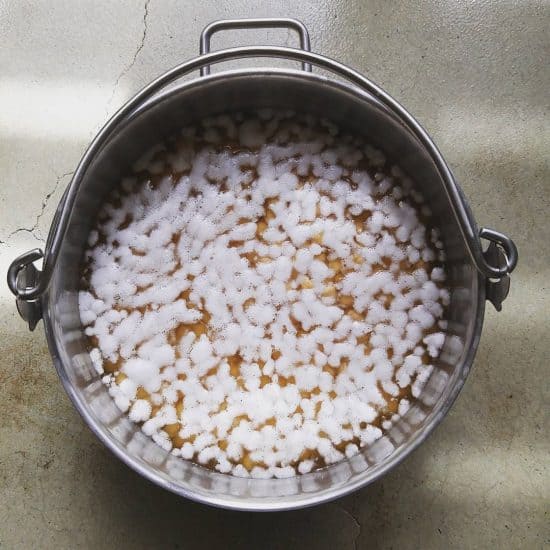
I soak my chickpeas for a couple of days, then boil in water for about an hour, maybe an hour and a half. (If you have a pressure cooker you can reduce the cooking time to minutes).

They store really well, in the fridge for at least a week, or you can store in glass jars (just chickpeas, no liquid) in the freezer. They fit really well in my freezer door.

DIY Sprouts

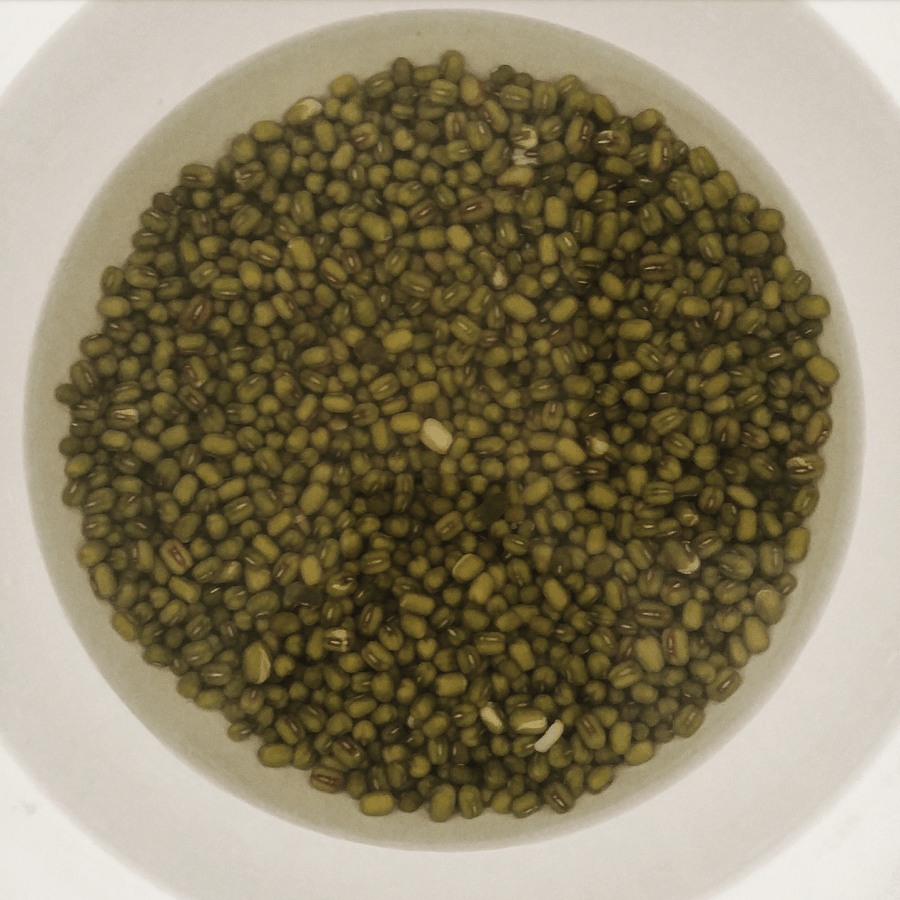
I’m counting these as ‘making’ and not ‘growing’: soak most seeds and smaller lentils and beans (chickpeas also work) and they will sprout a root, making beansprouts.

They don’t look the same as the ones you buy in the store: they are not as elongated (expect a length 1-2 times the length of the original seed/lentil) but they are so much tastier.

You don’t need any equipment for this, just a glass jar (or a colander if you want to make heaps). Soak and drain the sprouts but keep moist, cover jar with cloth or colander with a plate, rinse and drain morning and evening. In 2-7 days you’ll have sprouts (depending on the lentil/seed type – mung beans are very quick, and you’ll need a week for chickpeas). Full instructions here.

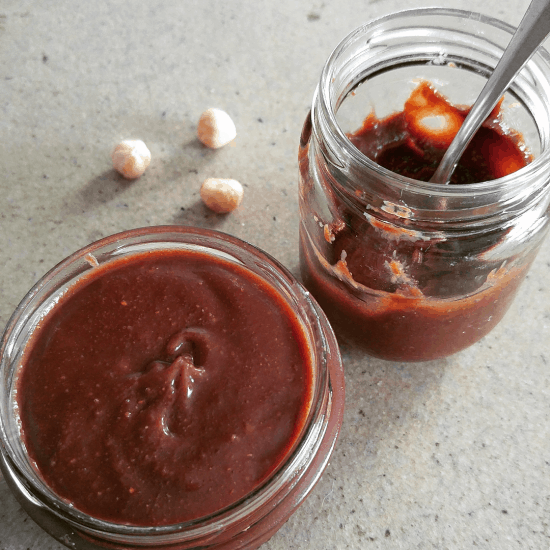
DIY Apple Cider Vinegar

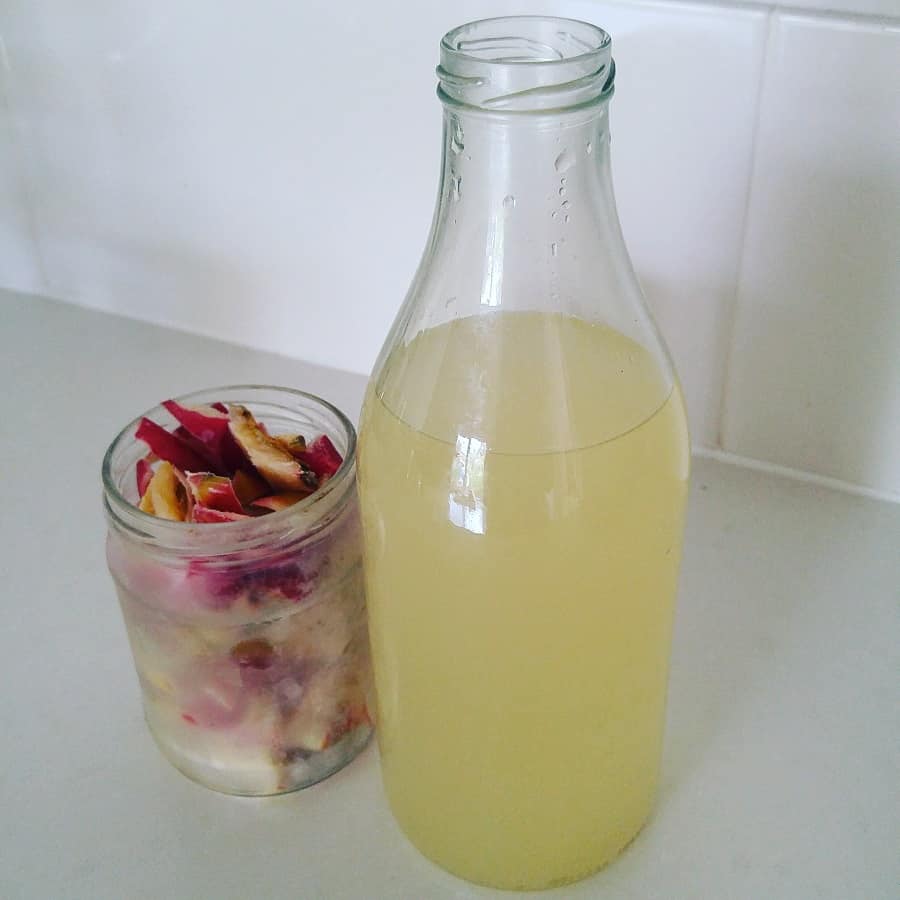
This is one of my favourite things to make because it ticks all the boxes: it is low effort and super simple and it can be made for (almost) free! Bought apple cider vinegar , on the other hand, is expensive.

All you need is some apple cores, stems and peels (you can use whole apples, but I prefer to eat the actual apple and just use the waste bits), some water and a spoonful of sugar, all mixed together in a glass jar. The natural yeast in the apple will ferment the sugar first to alcohol (you’ll smell cider) and then to vinegar (which is what happens when alcohol is exposed to air).

It takes about a week to finish fermenting, and only requires the occasional stir during this time. Stores for months. Recipe here.
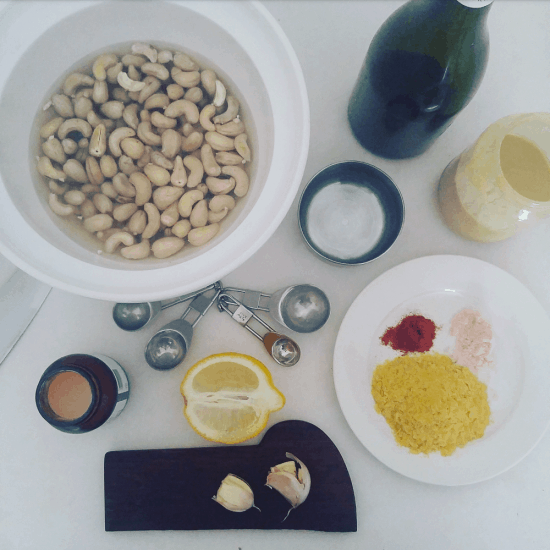
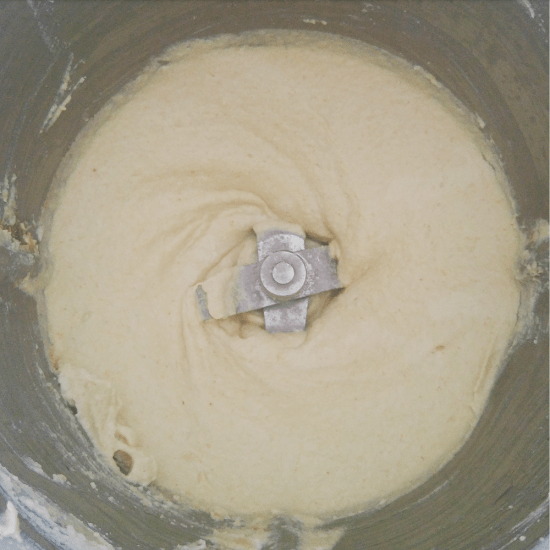
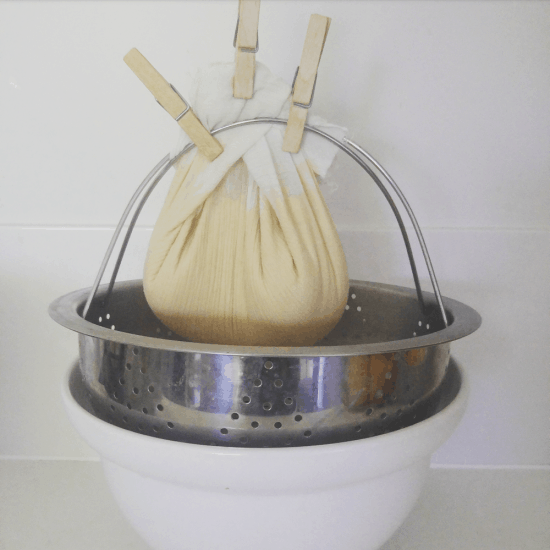
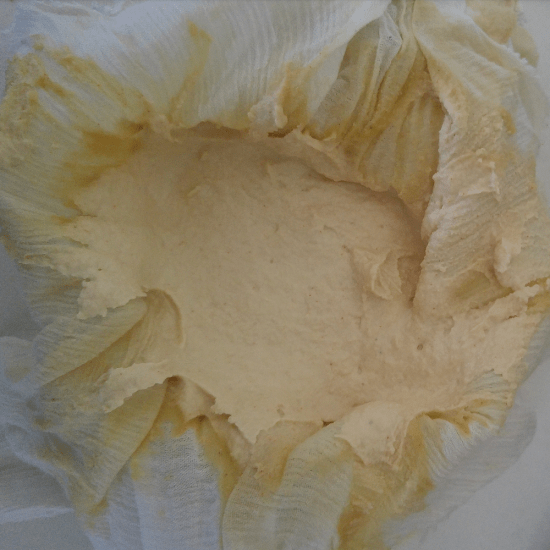
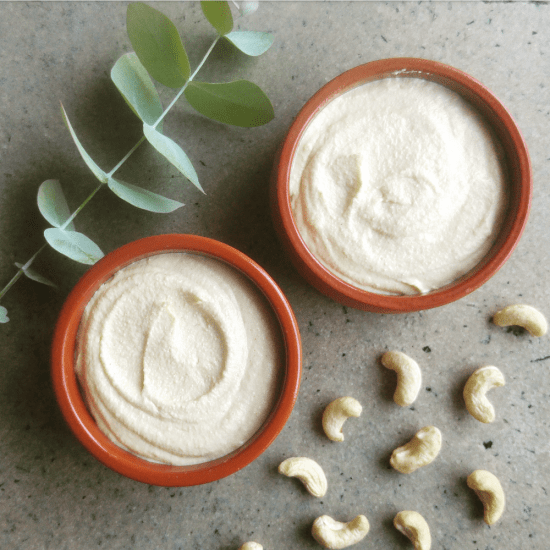
DIY Nut Milk

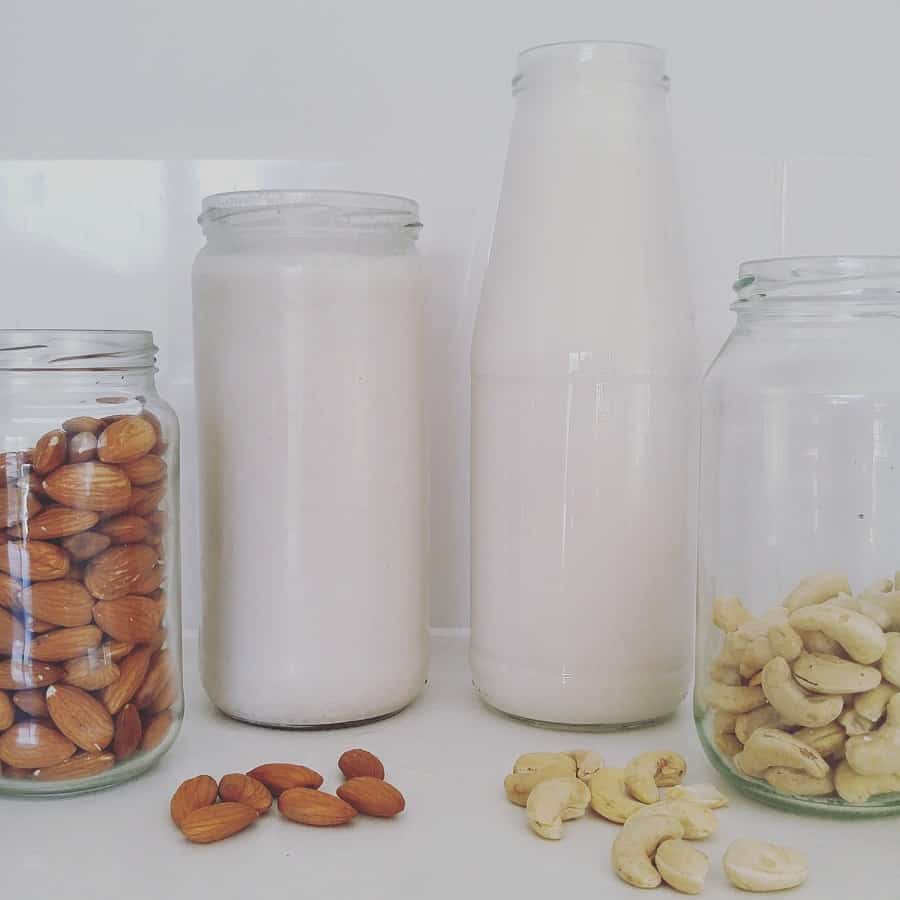
Nut milks (and their cousins seed milks) are really easy to make from scratch. Soak 1 cup of nuts (or seeds) overnight, then rinse and blend with 4-5 cups water. If you have a cheap blender, add the water one up at a time rather than all at once for a smoother result.

With some nuts, like almonds, you might like to strain (I use cheesecloth) because there is a lot of pulp. Other nuts like cashews don’t need straining at all.

Cashew milk is one of my favourites as it also lasts well, around 7-10 days in the fridge. Homemade almond milk lasts 3-4 days. Recipes for cashew and almond milk here.
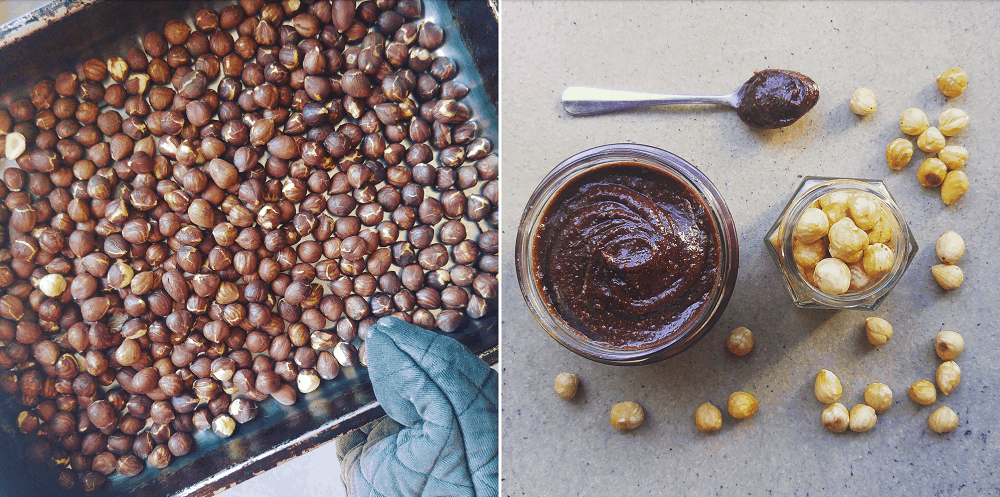
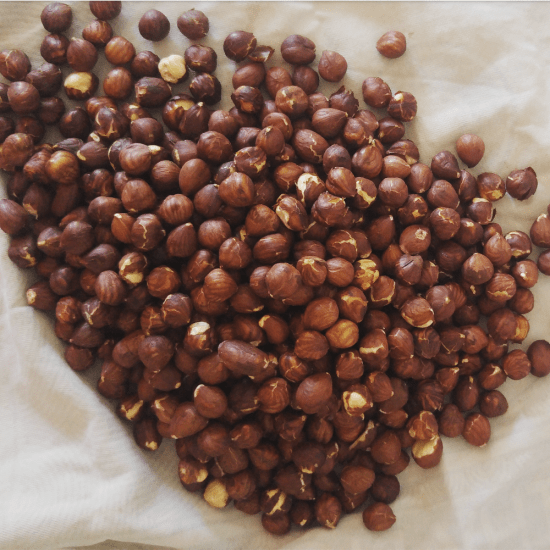
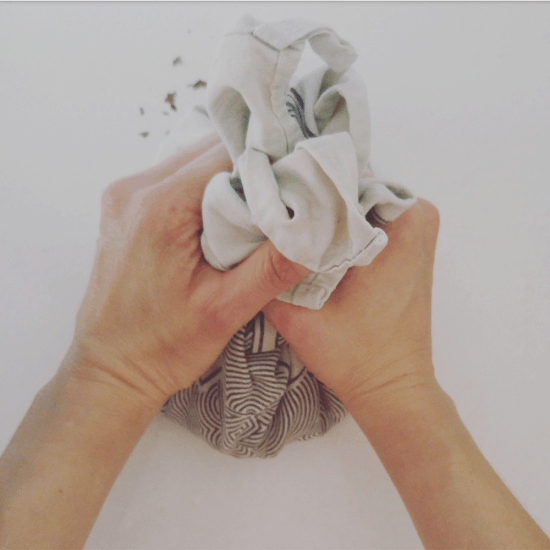
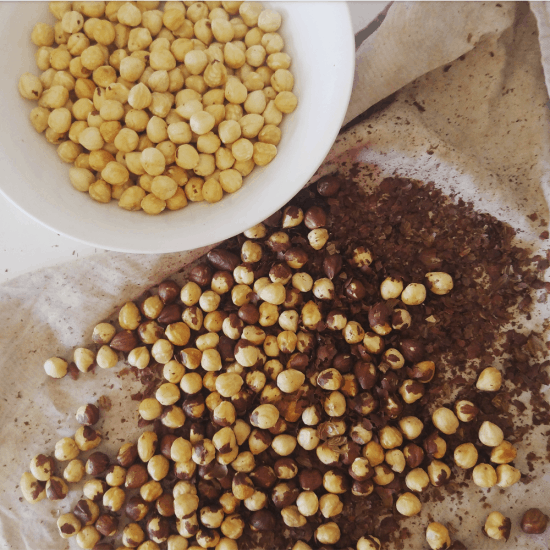
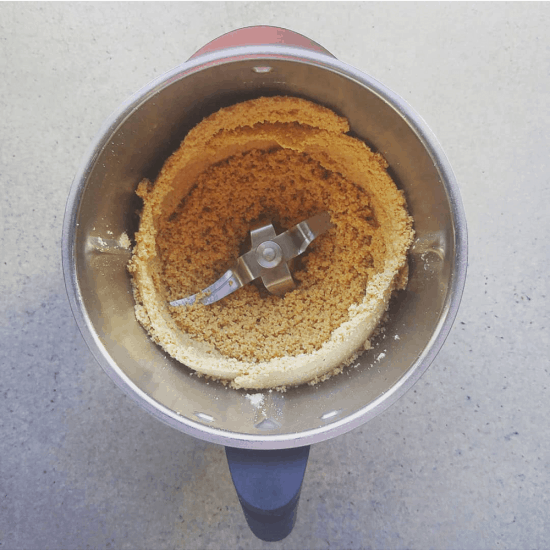
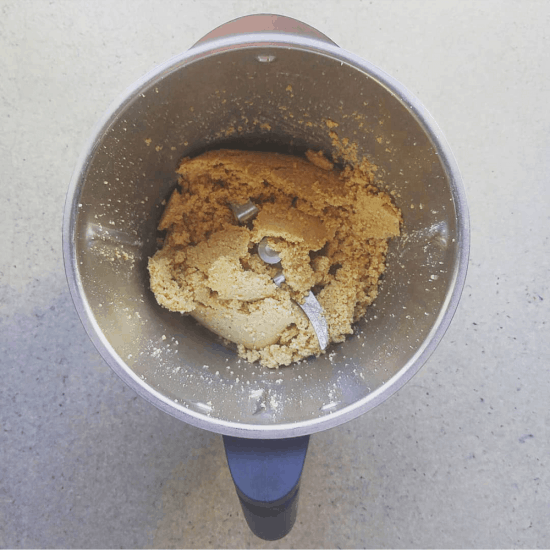
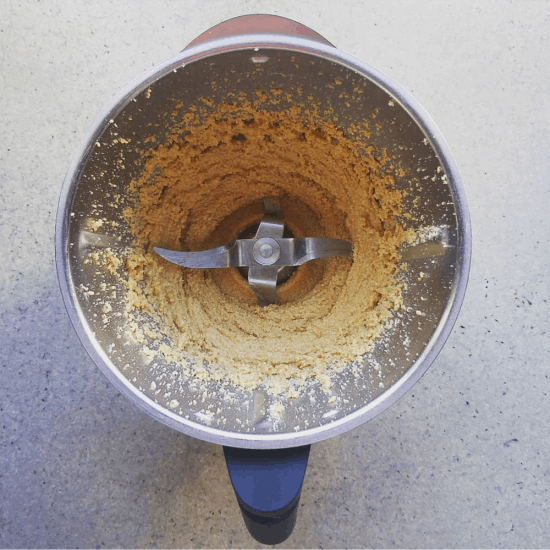
DIY Nut Butter

An easy thing to make and a great way to avoid palm oil, added sugar and salt and of course, packaging. Peanut butter is the one we always think of but you can make any type of nut butter. Cashew and macadamia butter are light and sweeter, and of course, hazelnut butter pairs best with chocolate.

You’ll need a food processor or a high power blender (most blenders are designed for liquids, not solids). Roasted nuts blend much more quickly and easily than raw ones (and taste better, generally). It will take about 5 minutes to make your own. Full nut butter instructions here.

DIY Stock

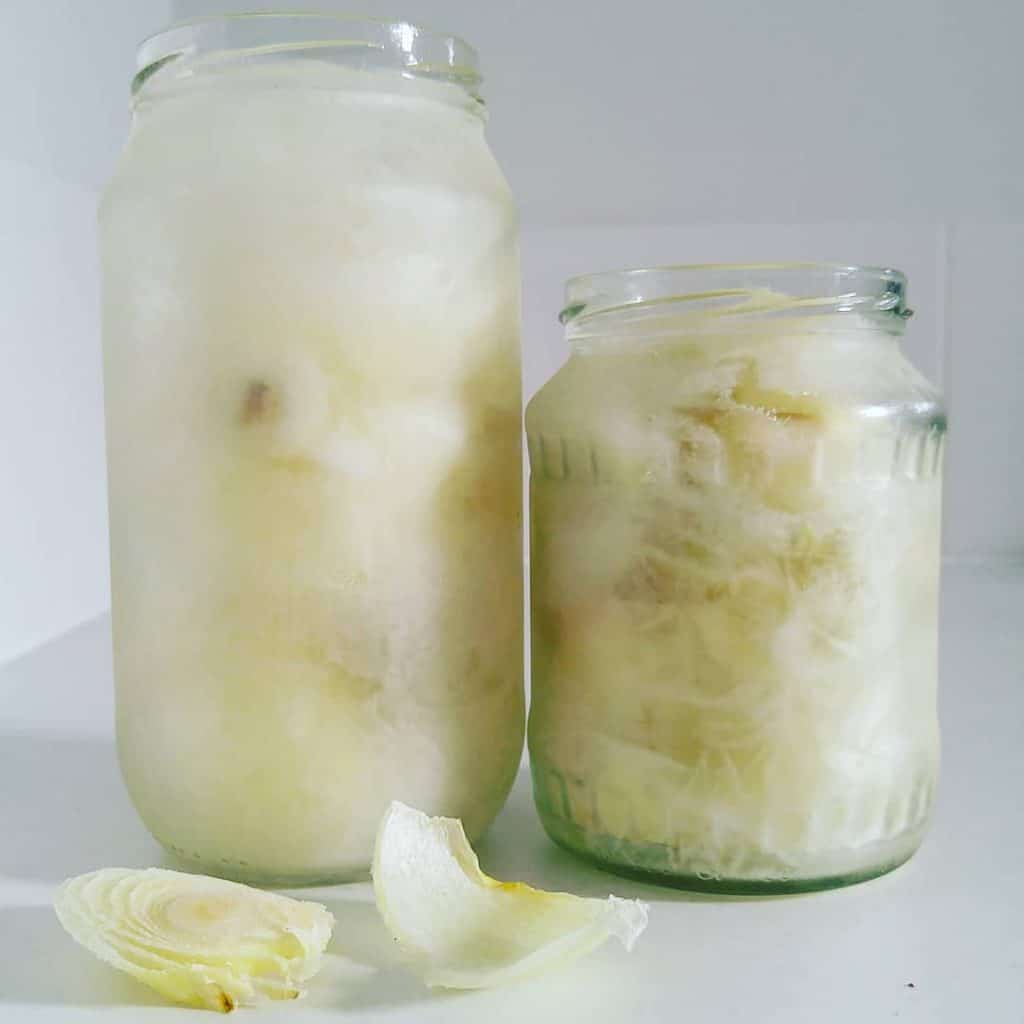
Rather than buying stock powder, I make my own using vegetable scraps. I save onion peels, leek tips, garlic skins and any other bits I don’t eat (except kale stalks, I did that once and never again), filling a jar in the freezer a I go until it’s full.

If I peeled carrots and potatoes I’d save these scraps too, but I prefer not to peel and eat the scraps as they come!

Then, I boil the scraps in a pan of water for an hour with some bay leaves, strain off the scraps, cool down and freeze in a wide-neck jar or ice cube molds, and use as I need.

DIY Frozen Sweetcorn

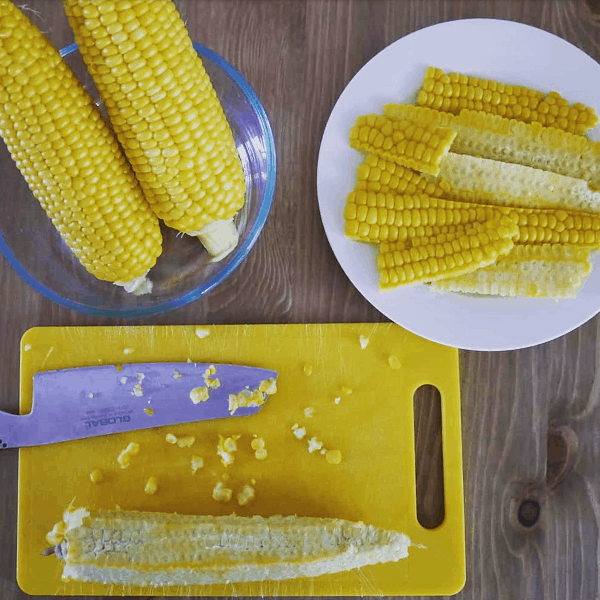
Before I went plastic-free, I’d buy bags of frozen sweetcorn. I’ve never liked the canned stuff, so I didn’t want to switch to that, but I like the ease of having it in the frezzer. So I make my own.

I buy fresh corn cobs, boil, drain and cut the kernels off. One cob has about 150g kernels. Then I pack tightly in a glass jar and freeze until I need. Step-by-step instructions here.

I don’t believe that the zero waste lifestyle or going plastic-free means making everything from scratch. There are a lot of things I don’t make from scratch, or only make sometimes. But when it’s quick, easy and low fuss, you save on all the single-use packaging and you get to eat the results of your creations, why wouldn’t you at least give things a try?

You may find it fun, you may wonder why you haven’t been doing this your whole life already, or you may decide it is an experience never to be repeated. But you’ll never know if you don’t try. Whatever happens, you’ll definitely have a new-found appreciation for the things you eat – whether it’s something homemade or something you’re extremely glad someone else is making so that you don’t have to.

Now I’d love to hear from you! Do you have any favourite from-scratch recipes? Are their any foods you can’t find in packaging that you’re yet to successfully DIY? How do you balance making your own with buying ready-made? Any other thoughts? Please share in the comments below!

How to Make DIY Crackers, Zero Baking Skills Required

This recipe feels like such a non-recipe, I wondered about making it into a post at all. But then again, the reason it feels like a non-recipe is because it is so simple and easy – and who wouldn’t want to know about something simple and easy? I know I would.

Plus when I consider all of the crackers completely overpackaged in plastic being purchased every day, I think – we need to be talking about zero waste crackers every chance we get!

For the purists amongst us, these technically aren’t a cracker. The Italian name is crostino/crostini and in Australia we like to call them “crustini”. These names sound so much more exotic and exciting than calling them pieces-of-stale-bread-baked-in-the-oven, which is what, in fact, they are.

I told you they were simple.

Correct nomenclature considered, I still refer to them as a cracker. They pretty much serve the purpose of a cracker, whose entire function is to be able to carry as much topping from the dip bowl into the mouth without causing spillage.

If toppings can be piled on the vessel and the vessel can be eaten, it is a cracker.

To make these crostini/crustini/crackers, you will need a French stick/ baguette. Of course you can make your own from scratch, but that is a whole other post.

Often baguettes can be purchased plastic-free from bakeries (a pillow case makes an excellent bread bag because these guys are loooong). If your local bakery still packages them up in plastic, consider if making crackers this way will reduce the amount of plastic you use overall. Crackers use a lot of packaging.

How to Make Crackers from a Baguette/French Stick

What You’ll Need

  • A baguette, ideally 1-2 days old so that it is slightly dried out
  • Olive oil
  • Salt and pepper

Method:

Slice the bread into thins 1/2 cm thick using a bread knife. If the bread is fresh (you’ll know because it will squish easily as you cut it), it will benefit from being placed in the oven for a few minutes on a low temperature to help it dry out a little.

Lay the sliced thins out on a baking tray, drizzle with olive oil and grind a little salt and pepper over the top. The oil doesn’t need to be spread evenly, so don’t panic about being neat.

Bake in the oven at 160-180°C (350°F) for 15 minutes, then remove from the oven, flip over and bake on the other side for a further 10 minutes.

Cool on a cooling rack, then store in an airtight container (I use a tin).

They should last for a few weeks, but I’ve never been able to test this as they get eaten long before that.

Zero Waste Kitchen: A Recipe for (Don’t Laugh) Mung Bean Bread

Have we got all of the sniggers out of the way? Great. Yes, mung bean bread sounds a little… well, silly. It was my sister who first raved about it to me, and what can I say? I laughed and dismissed it. Mung bean bread?

Then, several months later, as I was lamenting what to do with all the mung beans in the pantry, she said again – make mung bean bread.

And I did, and it was delicious. So delicious that it has now become a staple, in fact.

I wanted to share the recipe with you because not only is it delicious (and good for you, and very affordable – mung beans are one of the cheapest legumes), but because it is always fun to do interesting things with regular ingredients.

Food is always an education. There’s always something new to learn. And when we learn, it is always fun to share.

The bulk stores are packed full of curious ingredients, which we often don’t buy because we have no idea how to cook them. Or we buy, and make the one recipe we know.

I’ve actually never cooked with mung beans before this. I sprout them, to make beansprouts. So making bread from mung beans was a revelation to me.

I think it serves as a great reminder to never judge food by its appearance (or a recipe by its name), and to always be willing to try new things.

And with that… mung bean bread!

Mung Bean Bread: A Recipe

This recipe is adapted from one by Jasmine Hemsley from her cookbook (which my sister owns and loves). I’ve chosen fresh ingredients over dried, missed out a few things with unpronounceable names – I decided if I didn’t know what they were, they weren’t worth including! – and tweaked how I prep it.

You’ll need to soak the mung beans for a good while before you make the bread (I’ll cover this in a sec), but once the soaking is done it’s pretty quick from there.

Ingredients:

  • 250g mung beans (sometimes called moong beans)
  • 1 small clove garlic, finely chopped
  • 1 tbsp chopped rosemary
  • 2 tbsp olive oil
  • 120ml warm water
  • 1/2 tsp bicarb/sodium bicarbonate/baking soda
  • 1/2 tsp salt
  • Juice of 1 lemon

Method:

First, place the mung beans in a bowl and cover with plenty of water, and leave at room temperature. They will start to swell pretty quickly. Soak the mung beans like this for at least 24 hours – when you start to notice little bubbles of gas, change the water. I soak mine for closer to 48 hours.

Next, drain and rinse and then place is a blender. Bonus points for picking out the unsprouted still-hard beans – there will be a few. Add finely chopped garlic and rosemary, and blend until a paste.

Now pre-heat the oven to 180°C. I use a silicone loaf tin and muffin cases which don’t need lining or greasing, but if you’re using regular bakeware (a round 20 cm tin or a loaf tin are ideal) line with paper or grease to the max.

In a separate bowl, mix together the warm water, olive oil, salt and bicarb. Finally, add the lemon juice – it will fizz as soon as it is added. Stir quickly, pour into the blender and mix with the mung bean paste. Pour the mix into the prepared baking tins and pop in the oven.

Bake for 30 minutes or until the top is golden.

This bread tastes best straight from the oven and within the first 24 hours, but will keep for 3-4 days. Serve warm, but store in fridge after the first day.

A Variation: Adzuki Bean Bread

I pretty much believe that recipes exist to be tweaked and experimented on. I was really keen to see if something similar to mung bean bread can be made with other types of beans.

Adzuki beans are little red beans a bit larger than mung beans. It turns out, they take far, far longer to soak. Mine took 4 days to sprout. On the plus side, their sprout success rate is was 100%, so no picking the hard ones out.

Aside from increasing the soaking time, the other ingredients and timings were unchanged. The resulting bread had a glorious purple hue.

As with mung bean bread, tastes best on the first day, but will keep for up to four days.

Now I’d love to hear from you! Do you have any go-to mung bean recipes? If so, I’d love to hear them! What about any – it-doesn’t-sound-like-it-should-work-but-it-does recipes? Hit me with the weirdest (in a good way) things you’ve come across. Or, if your stuck with an ingredient, let’s see if we can come up with some ideas. Share your thoughts below!

How to Make DIY Nut Butters + Homemade Nutella (Chocolate Hazelnut Spread)

If there’s one gadget that I’d recommend for even the most minimalist zero waste kitchen, it’s a food processor/high power blender. They are just so useful for so many things. I use mine daily. I make nut milk, mix cake batter, make dips, puree veg, chop tomatoes, blend smoothies, and grind things up.

Ah, I could wax lyrical all day about how useful they are.

But today I’m just going to talk about two things I make. Two things that usually come pre-packaged, and that are so easy to make yourself that you’ll wonder why you ever purchased the bought stuff.

DIY nut butters, and chocolate hazelnut spread – which is a Nutella-like spread that you make from hazelnut butter.

How to Make DIY Nut Butter and Chocolate Hazelnut Spread

Almost all the nut butters that you buy are made with roasted nuts and for good reason – they are much, much easier to blend than raw nuts, and the flavour is infinitely better.

Don’t even think about blending raw nuts (or seeds) unless you have a super-duper high powered blender, and be prepared to be disappointed with the resulting butter – it will be pallid in colour, the texture will be much more dough-y, and it will taste meh.

But hey, if that’s your thing and you do have suitable equipment, give it a go! Just don’t say I didn’t warn you…

How to Roast Nuts

You can buy roasted nuts, or you can roast your own. If you buy pre-roasted buts, try to find the ones without salt added.

I tend to roast my own as they taste much fresher, and raw nuts are usually slightly cheaper than their roasted counterparts.

To roast nuts, spread out on a large roasting tray and place in the oven on a medium heat. You want the nuts to dry out slightly, and change colour slightly. The aim is lightly coloured and golden, not dark brown or black, and they should smell and taste nutty and aromatic – not burned.

I roast my nuts at 160°C (320°F) for around 15-20 minutes, opening the oven every 5 minutes or so to give them a shake and check on their progress. If they ready sooner, remove from the oven. Softer nuts like pecans take less time and burn more easily.

Better to keep the oven temperature low and roast a little longer than scorch them.

Once they are roasted, allow to cool completely before making nut butter.

Removing the Skins (Hazelnuts Only)

Hazelnut skins are quite bitter, so they need to be removed before making hazelnut butter. (This isn’t an issue with other nuts, and I leave the skins on my almonds, pecans etc.)

Place raw hazelnuts in a roasting tin and put in the oven at 160°C (320°F) for around 20 minutes.

Take out of the oven and tip onto a clean tea towel, then fold the tea towel over so no hazelnuts can escape, and rub together. This will remove the skins.

If they don’t all come off first time, put the stubborn ones back in the oven for a few more minutes. A few skins won’t hurt so it doesn’t need to be perfect, but the more removed the better.

How to Make DIY Nut Butter

Nut butter is literally roasted nuts, blended. We tend to think of peanut butter or perhaps almond butter, but almost all nuts can be blended, as can seeds. Pistachio butter and pumpkin seed butter are both possible!

The nuts/seeds go through a few stages, from whole nuts to coarse crumbs, to finer crumbs, to a rough dough-y paste, to a glossy fully blended nut butter.

The friction from the blades warms the nuts up, helping the oils release.

Blend on the highest speed, and stop intermittently to check on progress (and to ensure your blender is not overheating).

If you’d like to make chocolate hazelnut spread, the first step is to make hazelnut butter.

High-speed blenders will work much faster than food processors. Be patient! You don’t want the nut butter to overheat, so if your food processor or blender is not the fanciest, you may find it helpful to pause part way through and allow everything to cool down.

I keep hazelnut butter and almond butter (this link has the in-progress pictures for almond butter) in the pantry and it keeps for 2-3 months, but you might prefer to keep in the fridge. When I make cashew or macadamia butter I always keep these in the fridge as the nuts are much more prone to going rancid.

How to Make DIY Chocolate Hazelnut Spread (Nutella-style)

Ingredients:

250g (2 cups) roasted hazelnuts, skins removed
3 tbsp (15g) cacao powder or 3tbsp (20g) cocoa powder
1/3 cup (100g) rice malt syrup/honey
1/3 cup cashew or other milk (I use cashew milk as that is what I have in the fridge, but other milks will work, or you could try with water)
A pinch of salt.

Method:

If you’re using raw hazelnuts, you’ll need to roast and remove the skins. If you’re using pre-roasted hazelnuts without the skins, pop into the oven for 5-10 mins on a medium heat to make more crisp.

Allow the hazelnuts to cool completely, then blend into a nut butter (instructions above).

Once you have hazelnut butter, add the rice malt syrup/honey, pinch of salt and the cacao/cocoa powder and blend again until combined and smooth.

Finally add the milk slowly until you reach the consistency that you desire. (Remember, it will thicken once refrigerated.) Add more sweetener, if necessary.

Raw cacao is lighter in colour and slightly bitter. Roasted cocoa (also called Dutched cocoa) is much darker in colour and has a richer, smooth flavour. If you use raw cacao you might find you need extra sweetener. I use the minimum sweetness I can so if you have a sweet tooth, adjust until you like the flavour.

Below: the top picture is with raw cacao (it has a lighter, slightly redder colour) and the bottom picture is with dutched cocoa (a darker colour).

Store in a glass jar in the fridge. The version I make with cashew milk lasts up to three weeks. If using dairy, use within a week.

Uses: use in baking as a filling or icing, slather on slices of apple or pear, sandwich between two rounds of banana, add to a smoothie, spread on some toast or pancakes, or just eat outta the jar.

Now I’d love to hear from you! Do you make nut butters or do you buy them? Have you ever tried (either tasted or made yourself) any gloriously exciting or interesting versions? What do you do with nut butter (aside from eating straight out of the jar with a spoon)? Any other thoughts? Share your ideas in the comments below!

DIY Recipe: Spreadable Soft Cashew Cheese

It is rare that I make something once and share it straight away, but I was so impressed by this recipe that I simply had to. Soft, spreadable and cheesy tasting, this simple blend of cashews and a few other things is a taste explosion, I promise.

If you’ve avoiding dairy, want to eat more plants or like trying new things in the kitchen, this is for you.

I’ve been wanting to experiment with making plant-based cheeses for a while, and I actually decided to go to a workshop to get started. (I went to one of the workshops at the Raw Kitchen in Freo.) Whilst I’m not afraid to experiment, plant-based cheese uses big quantities of nuts and I am afraid of buying ingredients and then throwing them in the compost.

The workshop allowed me to taste and smell and feel the texture of the different things we made – something I’d never glean from a recipe. Definitely worthwhile.

This cheese recipe is a slightly-tweaked-but-mostly-intact recipe from that workshop.

You’ll need to allow a couple of days from start to finish (but don’t panic, the actual making time is about 5 minutes. The rest is waiting around). You’ll also need a high powered blender or a food processor for best results, but it should still work without.

How to Make Cashew Cheese

Ingredients:

2 cups cashews, soaked overnight and then rinsed
2 cloves garlic, crushed
1/2 cup cold water
Juice of 1/2 lemon
2 tbsp olive oil
2 tbsp hulled tahini
4 tbsp nutritional yeast (nooch)
1/2 tsp smoked paprika
1 tsp salt
1 tsp probiotic powder (I used Inner Health Dairy Free Powder – I prefer powder to capsules as there is more ingredient for my money, and less waste/packaging)

A few notes on the ingredients:

Cashews are smooth, creamy and do not have a strong flavour or colour, making them ideal for plant-based cheese. Other nuts will also work but the result will be less smooth, more fibrous and they will have the flavour and colour of the nut used. They will still taste delicious though!

The nutritional yeast adds a cheesy flavour to the mix, and some yellow colour. It will definitely taste less cheesy without this, but a small amount of turmeric will add some of the yellow colour. 

Paprika adds some colour and also smokiness to the mix.

Probiotic powder is what ferments the cheese and gives it a unique tangy flavour, and probiotics are great for the gut. Honestly though, it is still super tasty without the probiotics, so if you don’t have, it is still worth making. You will be able to use straightaway as there is no need to wait for fermentation to occur.

Method:

Blend the soaked, rinsed cashews briefly until they resemble crumbs (this helps ensure it is smooth). Add everything except the probiotic powder, and blend until smooth. Try to avoid overheating the mixture – it is better to stop and allow to cool before blending again if it is taking a while to become smooth rather than running the blender continuously.

Add the probiotic powder and whizz briefly to combine.

Scrape the blender contents onto cheesecloth or into a nut milk bag, twist into a ball and suspend over a bowl to allow to drain. You could place in a sieve and suspend this over a bowl, or hang. Do not let the cheese ball sit in the draining liquid.

Leave at room temperature for 24+ hours to ferment. (My house is warm, and 24 hours works for me. If yours is colder, allow 48 – 72 hours.

Open the cheesecloth / nut milk bag and scrape the cheese into sealable containers (or a dish covered with wax wrap) and store in the fridge. The cheese will continue to ferment in the fridge, but much more slowly – you will notice the flavour getting more sour over time. Keeps for 5 – 7 days in the fridge.

Soft Cashew Cheese Recipe Suggestions

Spread on toast, use as a dip, or roll into balls or a log shape (roll in nuts, herbs, spices or dukkah for extra flavour) and serve on a cheeseboard. It also works really well stirred through pasta and – hurrah – it doesn’t separate. Cook the pasta and veggies first and stir the cheese through just before serving.

Now I’d love to hear from you! Have you experimented with making vegan plant-based cheese? Any recipes you’d recommend? Have you been able to find the ingredients in bulk? Any other thoughts? Please share in the comments below!

Recipe: how to make (plastic free + zero waste) seed crackers

If there’s one thing that is next to impossible to find without plastic, it’s crackers. Before I went plastic-free, I’d buy packet upon packet of crackers – usually with the plastic tray, then wrapped in plastic and with a final plastic or cardboard outer. Packaging overload!

These days I do things very differently. I either skip the crackers entirely, and make crudites (fancy term for vegetable sticks – carrot, cucumber and capsicum/pepper) or use bread; or I make my own crackers.

I’ve shared in the past how I make sourdough crackers and carrot pulp flatbreads, and today I’ve got another recipe for you: 4 seed crackers.

I actually found the recipe via my local Source Bulk Foods store, who sell the ingredients ready-weighed in a little pack. I bought all the ingredients separately in bulk as I wanted to avoid the packaging but if you were short on time or didn’t want random amounts of seeds left in the pantry, the pack would be a shortcut.

Being made almost entirely of seeds, these crackers and gluten-free, dairy free and vegan.

The magic ingredient binding the seeds together is psyllium husk: it’s the husk of a seed that’s high in soluble fibre, and binds with water to form a slippery gel. It’s often used in raw and vegan recipes for its binding properties.  It’s pretty readily available at bulk stores. If that’s not an option, chia seeds might be an alternative to experiment with but it’s not something I’ve yet tried.

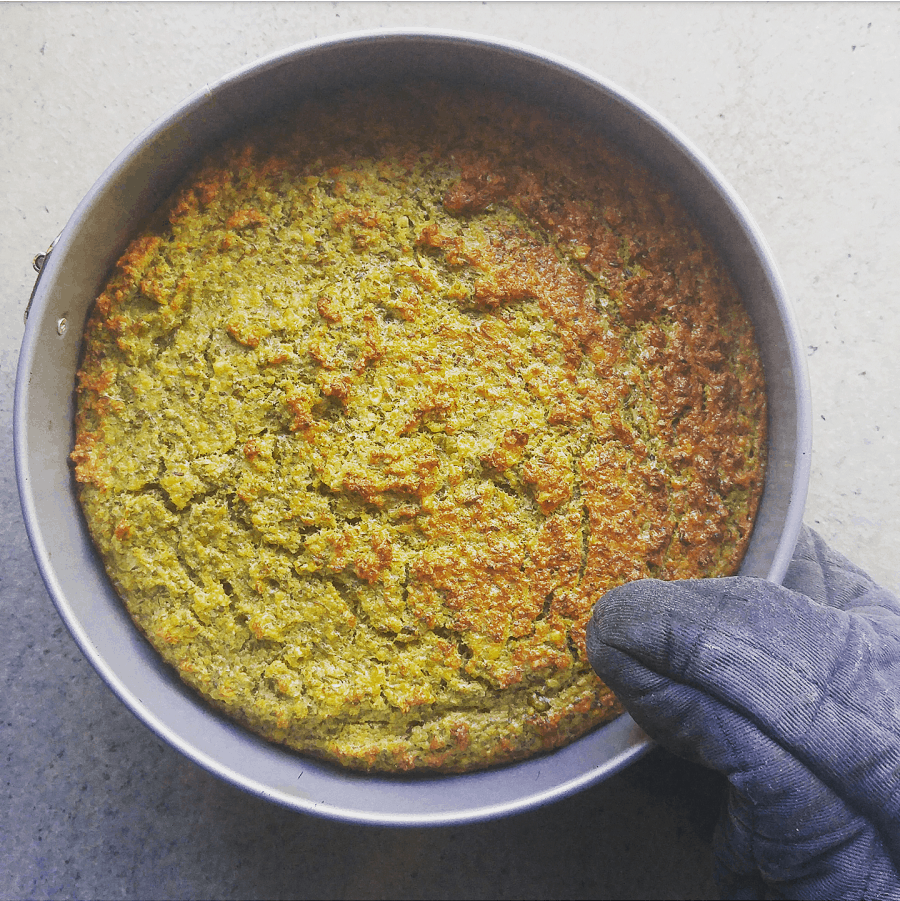
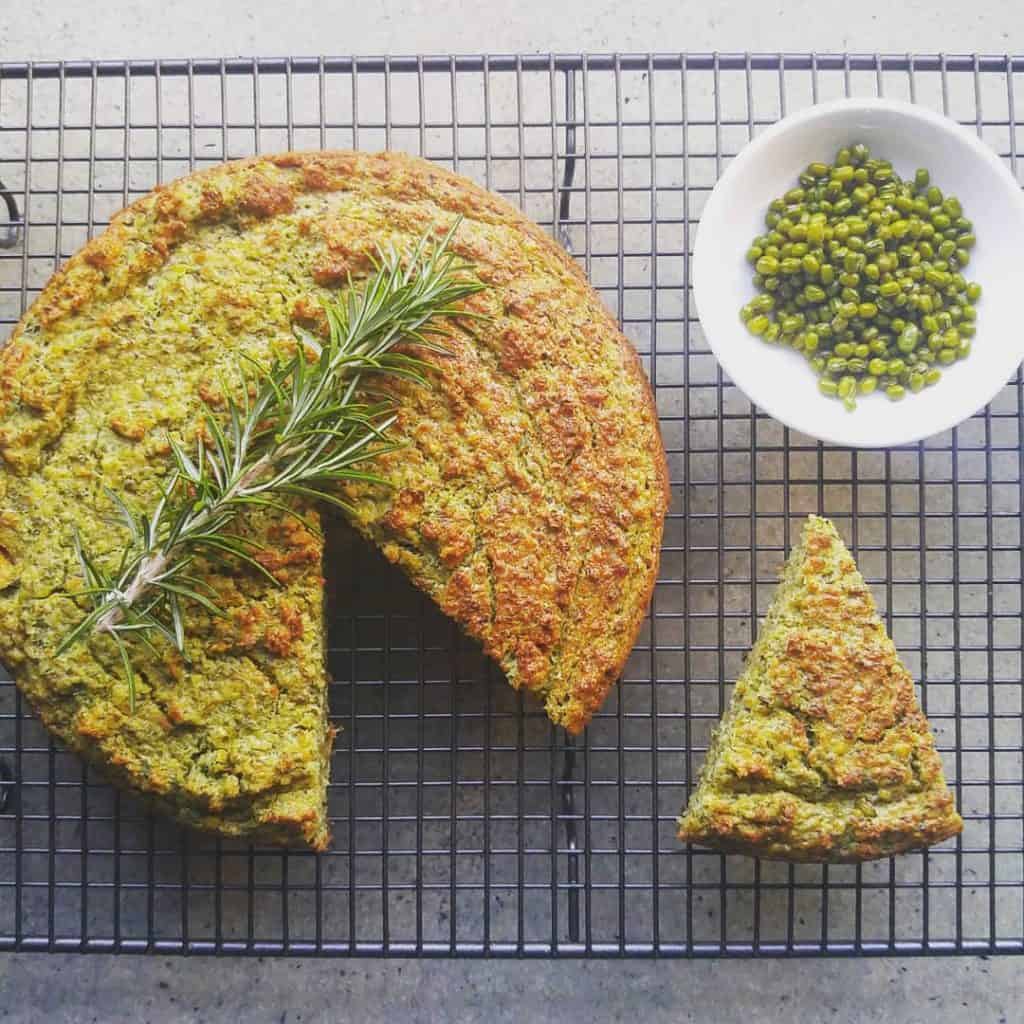
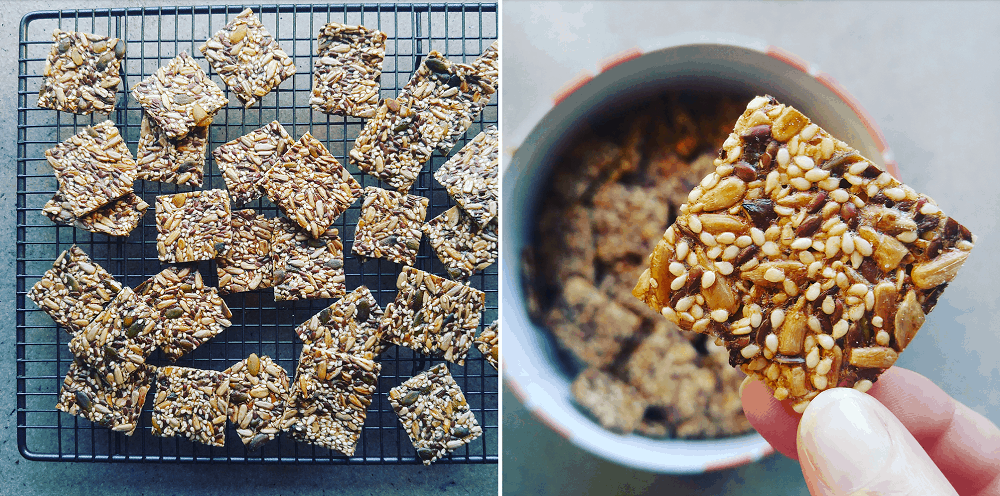
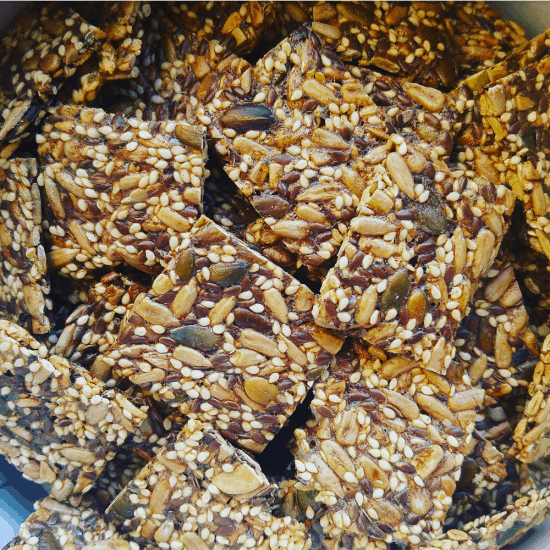
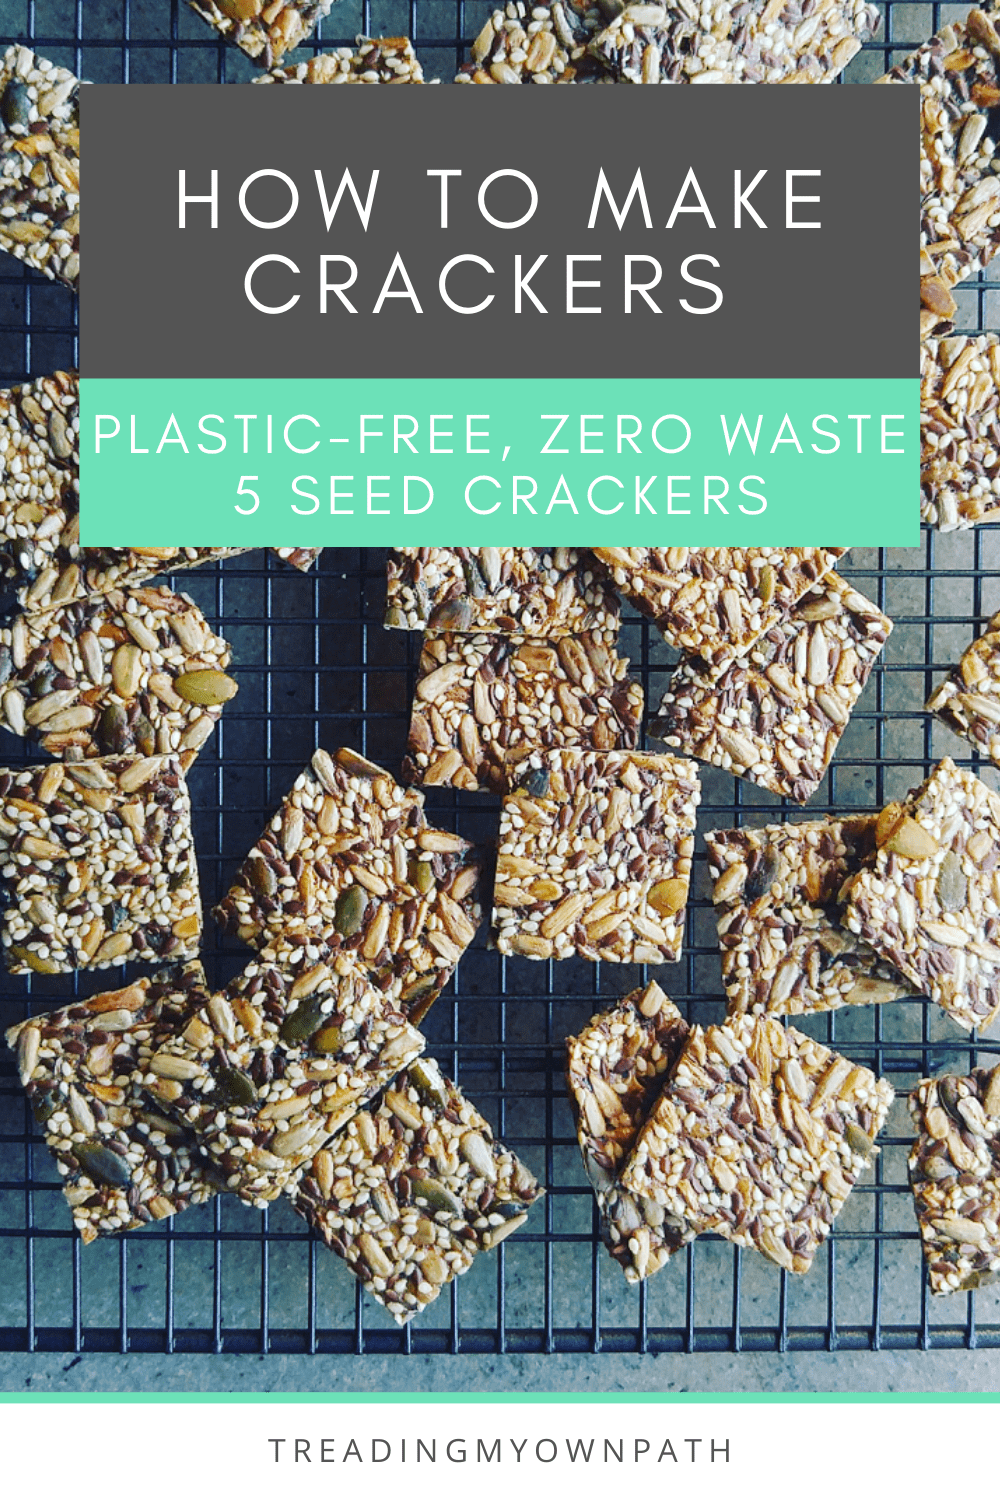
Recipe: Zero Waste 4 Seed Crackers

I chose raw seeds rather than roasted ones, as the crackers are baked in the oven. If raw seeds aren’t an option, try with roasted ones but bear in mind you might need to add a little more water to the mix.

Preheat the oven to 160°C, line three trays with baking paper or use silicone baking mats.

Ingredients:

490ml water
200g sunflower seeds
100g sesame seeds
60g pumpkin seeds (pepitas)
60g linseed (flax seed)
15g psyllium husk
5g salt

Method:

Mix all the seeds, husks and salt together in a bowl and pour in the water. Leave to stand for 30 minutes until the mixture has a gloopy consistency.

Empty a third of the mix on each baking tray and spread out thinly and evenly using the back of a spoon. Try to make the mixture as thin as possible. (but be careful of creating holes).

Bake in the oven for 1 hour, then remove from the oven and using a knife, score the cracker lines in the mix. Once they are fully baked they will not cut without shattering, so the lines need to be marked whilst the mixture is still soft.

Return to the oven for 30 minutes. Check the crackers and remove any that are cooked (the middle will take longer than the edges). If possible, separate the crackers and return to the baking tray to speed up final cooking.

Return any uncooked crackers to the oven. Cook for another 30 minutes or until the crackers are completely dry, crisp and crunchy. To dry out further, the crackers can be left in the warm oven once it is turned off. Remove from oven and cook completely on a rack.

Store in an airtight tin. They will keep for at least a week.

Possible Variations

There are plenty of other seeds to experiment with: hemp seeds, poppy seeds, chia seeds, or even chopped nuts. You could try adding cumin, nigella or fennel seeds; or herbs and spices such rosemary or thyme, paprika or ground coriander. Recipes are there to be played with!

Now I’d love to hear from you! Do make your own crackers? Has it been on the to-do list since forever but you’re yet to get round to it? Or is it something you’ve put in the too-hard basket for now? I’m always interested in hearing new cracker recipe ideas so if you have any favourites – or favourite flavour combinations – share below, along with anything else you’d like to add!

Where I Find My Zero Waste Consumables (Groceries and Food)

This week I headed off on my six-monthly journey up to the Swan Valley, which is the other side of Perth, to stock up on some bulk products that I simply can’t get anywhere else.

It made me think: there’s plenty of places I talk about often, because I use them often (such as my local bulk store, or my local veg box delivery).

But there are other places where I source zero waste items that I talk about less often.

If I’m going to paint a complete picture, I thought it might be helpful to explain where I source ALL the things I use.

Of course, if you live in Perth, these lists will probably be extra useful! If you’re not in Perth, hopefully it will give you some ideas about the kinds of places you might be able to source products in your own area.

At the very least, it might open your mind to new alternatives.

There’s a lot to say, so rather than overwhelm you, I’ve divided it up into sections. Today I’m talking about zero waste consumables (food and grocery items).

I’ll follow up next week with a post about consumable personal and cleaning products, and then with non-consumables (the buy-me-once type items) in the coming weeks, so stay tuned.

Where I Source Zero Waste Consumables

By consumables, I mean things that run out, get used up and need replacing. Things like food, personal care products, and cleaning products.

Whilst I source things from a number of different places, I’m not going to all the places all of the time. Some places I only visit twice a year. Others I visit weekly. Over time I’ve established a routine that works for me.

Zero Waste Grocery Shopping: Dry Goods

This is the one that gets talked about all the time, because food runs out more quickly than anything else (well, it does in my household)!

Bulk food stores are where I source all of my dry goods (pantry staples like rice, flour, lentils, pulses) and my liquid products (tahini, soy sauce, macadamia oil).

Specifically, I purchase about 95% of my bulk goods from The Source Bulk Foods (my local store is in Victoria Park, about 5 minutes from my house). They have a great range, the store is spotless and they stock a lot of local produce (I particularly like the Australian-grown nuts and quinoa, but plenty of their products are also home grown).

There are a few groceries I don’t buy from the Source Whole Foods:

I buy vermicelli pasta nests from Swansea Street Markets in East Victoria Park (The Source Bulk Foods don’t stock regular pasta, only the gluten-free kind).

I buy wakame seaweed (a bit of an obscure ingredient) and white vinegar for pickling from Manna Whole Foods in South Fremantle (the only place I’ve ever seen them both).

I occasionally have a moment of weakness and buy a bar of good quality dark chocolate wrapped in foil and paper from a local grocer, or even (if I’m desperate! It happens!) from the supermarket.

I buy coffee from local coffee place Antz Inya Pantz in East Victoria Park, who roast their own beans.

I source honey from my neighbour, who keeps bees.

I collect olives from public trees with a group of friends every April, and press them locally to get a year’s supply of olive oil.

Zero Waste Grocery Shopping: Fresh Produce

The fresh produce that buy is fruit and vegetables, bread, and deli items like olives.

I no longer buy fish, meat or dairy products for my personal consumption. I do buy pet mince, chicken necks and chicken frames for my greyhound from The Butcher Shop in the Park Centre, East Victoria Park. This butcher (like many independently owned businesses) is happy to accept and fill my own containers. I use old yoghurt tubs I sourced from my local Buy Nothing group as I don’t mind if these get lost. I usually drop the containers off and they will call me once they have been able to fill them for me to collect.

I have a homegrown veggie patch, which provides some of my fruit and veg – dependent on how much time I have and how much I can put into it. I’ve always got herbs (mint, parsley, oregano, thyme, coriander in winter and basil in summer), there’s always some kind of greens, capsicums, chillis and sweet potato.

There’s also a few fruit trees. Lemons are available almost all year round, there’s a passion fruit vine and at the moment, guavas and kumquats.

I order a veg box once a fortnight from The Organic Collective, based in Hamilton Hill, which is delivered direct to my doorstep.

I top my veg box up with fruit and veg shopping at Swansea Street Markets in East Victoria Park, who have an excellent range of loose produce (including fresh herbs, peas and beans, salad leaves and other harder-to-find items).

They also stock a lot of West Australian and Australian produce, and label their Country of Origins properly.

My friends have a market garden and fruit orchard, and run the Guildford Food Hub (in Guildford) on Saturday mornings. I sometimes get fruit from them.

I occasionally pop into the supermarket to top up things like onions, avocados and mushrooms.

Swansea Street Markets also has a great deli counter. I occasionally buy olives and other antipasto type things from here, using my own jars (which they happily weigh before they fill). They also sell cheese and cold cut meats.

If I’m in Fremantle, Kakulas Sister has an excellent deli counter also, and are happy to tare and fill containers.

I don’t go to the Farmers Market regularly, but when I do I look out for what’s in season: boxes of strawberries, boxes of tomatoes, loose cherry tomatoes and other hard-to-find-without-packaging items.

My two favourite markets are the Subiaco Farmers Market (open on Saturday mornings) and the Growers Green Farmers Market in Beaconsfield/South Fremantle (open on Sunday mornings.

If I’m at the Farmers Market, I always buy bread. My favourite Wild Bakery has a stall at both Subiaco and Growers Green. Otherwise their actual bakery is located in South Fremantle. I pop in when I’m in the area, or ask my friend who lives around the corner to pick up a loaf for me if we are planning to meet.

I also buy bread from my other favourite bakery Bread in Common (in Pakenham Street, Fremantle).

As neither are local to me, I tend to buy two loaves at a time and freeze one. If I run out, I don’t eat bread until I stock up again. There are other bakeries close to me, but I really like good bread, and the others just don’t compare.

I also make my own bread, but that tends to be a little seasonal.

Something that I buy as a treat occasionally is ice-cream. There’s an amazing ice-cream shop in Victoria Park called Pietro Gelateria, with a small-but-mighty vegan ice cream selection (most of their offering is traditional dairy ice cream).

One of my favourite things is the plastic-free ice creams on sticks, mostly for the novelty. I take a Pyrex to the store, they pop two in, and I bring them home for later.

 Zero Waste Groceries: Things I Make

I tend to make things if they are easy, far more delicious when made from scratch, and/or unavailable without plastic or excessive packaging.

Some of the simplest things I make are apple cider/apple scraps vinegar (literally an apple core, some water, a bit of sugar and some stirring), refrigerator pickles (a 10-minute job), pesto and hummus.

Back when I ate dairy, I’d make my own yoghurt (another ridiculously simple thing to make).

Things that take a little longer (but are oh-so worth it) are sourdough crackers and chickpea falafels. With falafels, I make a huge batch and freeze at least three-quarters. This also stops me eating the entire lot in one day.

Zero Waste Food: Takeaway

I rarely get takeaway. I prefer to eat in, and use real plates and metal reusable cutlery. I’m more likely to take home leftovers than actually order takeaway, and I always pack a reusable container when I head out, just in case.

I hope that’s given you some insight into the kinds of things I buy, and where from, and maybe some ideas for things you could incorporate into your own life. If you’re in Perth you might like to visit some of the places I’ve listed. If you’re not, maybe there’s something similar close to you.

In my experience, when it comes to plastic-free and zero waste living, there’s always a lot more options than we first expect.

Now I’d love to hear from you! Is there anything you’re trying to source that I haven’t covered? Anything you’ve had success with that you’d like to share? Anything that needs more explanation, or any tips you can add? Any other questions? Please share your thoughts in the comments below!

Fight Food Waste: How to Make Refrigerator Pickles

I’m heading overseas in less than a week, and in a moment of memory loss I forgot to cancel this week’s veg box. Needless to say I now have a fridge packed full of fresh organic vegetables, when really I need to be using stuff up, not buying more.

Whilst I don’t really have the time to be food prepping, I do have the time to make refrigerator pickles. It’s a simple way to preserve things like cucumbers, chillies and cabbage in just a few minutes and store them in the fridge until they are ready to be eaten.

Pickling (and preserving in general) is not just for homesteaders, or people with gardens full of fresh produce. It’s for anyone who appreciates the value of good food and doesn’t want to chuck stuff in the bin.

If you’ve ever been faced with more food in your fridge than you can actually eat fresh, you might find this useful.

Refrigerator Pickles versus Canning

Refrigerator pickles is a quick and easy way to preserve vegetables, but it is not the same as canning. Canning involves more processing, much more care, boiling the jars to ensure sterilization – and it means that the resulting cans can be stored at room temperature.

Refrigerator pickles need to be kept in the fridge. It’s a way of prolonging the life of fresh veggies using salt, sugar and vinegar to deter bacterial growth and spoilage, but also relying on the cool temperature of the refrigerator to slow it down rather than using heat and sterile techniques (which is canning).

Refrigerator pickles are easier, quicker and more forgiving. People choose to can when they don’t have the fridge space, and are storing big quantities. Most of us have the fridge space for a few jars of pickled cucumbers.

Refrigerator Pickles – Preparation

Unlike canning, it’s not necessary to sterilize your equipment, but it is good practice. Refrigeration slows down spoilage but doesn’t kill bacteria, so doing all we can to keep things clean will increase the shelf life.

Wash glass jars with hot, soapy water, then place on a baking tray and heat in the oven at 160°C for 10-15 minutes. Place the lids (and any spoons) in a pan of boiling water for 5 minutes.

Salt, sugar and vinegar are all preservatives so avoid reducing these. There’s no hard and fast rules about spices used, or quantities, so feel free to adjust according to what you have and taste preferences.

Fresh dill is great with cucumbers, if you have it.

If you run out of brine after filling the jars, simple heat a little extra vinegar and pour on top.

I usually decide what size jars I need by packing the sliced produce into jars before making the brine. Then I clean and sterilize the jars before refilling.

Cucumber Pickles (Bread and Butter Pickles)

Ingredients:

600g cucumber (3 Lebanese cucumbers), sliced into thin rounds
1 white onion, thinly sliced
250ml (1 cup) white vinegar / apple cider vinegar
250ml (1 cup) water
60g (1/4 cup) sugar
1 tbsp salt
1 tsp mustard seeds
1 tsp black peppercorns
1 tsp fennel seeds
Pinch of turmeric

Method:

Place the sliced cucumber and sliced onion in a bowl and sprinkle with salt. Leave for a couple of hours to draw out the water, then drain well in a colander.

Pour the water and vinegar into a saucepan, and add the sugar and spices. Bring to the boil, ensuring the sugar has dissolved. Simmer for 5 minutes, then add the cucumber and onion, and turn off the heat.

Place the cucumber and onion into the glass jars using tongs, then pour the liquid over the top until completely submersed and with a 1cm gap at the top of the jar. Ensure there are no air bubbles (banging the jar gently on the counter, or stirring with a spoon handles will remove them).

Secure the lids, then pop in the fridge and store for up to 6 months. Can be eaten straightaway.

Jalapeno Pickles

Ingredients:

20 – 30 jalapeno (or other) chillies, sliced into rounds
185ml (3/4 cup) white vinegar
185ml (3/4 cup) water
1 tbsp sugar
1 tbsp salt
1 clove garlic, crushed
Optional: 1 tbsp fresh or 1 pinch dried oregano

Method:

Slice the chillies into rounds.

Pour the water and vinegar into a saucepan, and add the sugar, salt, garlic and oregano. Bring to the boil, ensuring the sugar has dissolved. Simmer for 5 minutes, then add the chilli, and turn off the heat. Leave to sit for 10 minutes.

Place the chillies into glass jars using tongs, then pour the liquid over the top until completely submersed and with a 1cm gap at the top of the jar. Ensure there are no air bubbles (banging the jar gently on the counter, or stirring with a spoon handles will remove them).

Secure the lids, then pop in the fridge and store for up to 6 months. Can be eaten straightaway.

TIP: Once in the fridge, the garlic may turn blue. This may seem like cause for concern but actually it’s completely safe. There’s a number of reasons why the garlic might turn blue: soil conditions, garlic type, metal traces in the water and enzyme content. It might look odd but it’s fine to eat.

Pickles are a great way to preserve food when it’s abundant (such as cucumbers and chillies in the summer) and store them for when they are out of season. Sure, they don’t taste exactly the same as the fresh versions, but it’s a great way of bringing a little sunshine into winter meals.

Now I’d love to hear from you! Do you make your own pickles? What flavour combinations do you like? What’s the most unusual thing you’ve ever pickled? If you’ve never pickled anything before, are you game to give it a try? Share your thoughts in the comments below!

Zero Waste Kitchen: DIY Chickpea Falafels Recipe

I buy dry chickpeas in bulk, a couple of kilos at a time. I soak them, then cook them, and then proceed to make every chickpea recipe I can think of. (I do freeze the spare for later, so it’s not about needing to use them up. More a celebration of this delicious and super versatile legume.)

One of my staples is chickpea falafels.

Falafels are actually only a recent staple. Well, the DIY version are. Back in 2011, before I left the UK, I’d buy little plastic tubs of falafels all the time. Plastic tub with plastic lid, and cardboard packaging outer – with 8 falafels inside. I could polish those off in one sitting! Oh, the single-use packaging waste! {Cringe.}

Then I went plastic-free, and falafels were no more.

I’ve tried making falafels many times over the years, but every attempt was a dismal failure. Dismal and messy, I should add. (Which is why I purchased the little tubs.)

I figured they were just too hard, until I went to a party where we had to bring a dish, and my friend brought homemade falafels. And they were ah-mazing! I demanded the recipe, and vowed that I would make them too.

Confession: the first time I made them, they were a disaster. But I knew that my friend had mastered it, so I knew it was possible. I stole all her secrets (we spent rather too much time discussing the finer details of falafel making), I tweaked the recipe a billion times to adjust to my taste and what was in my pantry, and now I have a recipe that works every time. Hurrah!

So if you’ve tried to make falafels before, and you’ve found that they’ve been a disaster, I want to encourage you to try again. Not all recipes are equal, and a homemade falafel is worth striving for, in my view!

But first, let me quickly talk about chickpeas.

How to Cook Chickpeas from Scratch

Tinned chickpeas tend to have added salt and sugar, not to mention come in a steel tin can that ends up in the recycling. Bulk dried chickpeas are a fraction of the price, and there’s no (or next-to-no) packaging or additives.

Plus fresh always tastes better.

I buy chickpeas a couple of kilos at a time, and cook a big batch. First, I soak.

I take my soaking very seriously. Soaking makes chickpeas and other pulses more digestable because they release anti-nutrients. It’s not just about reducing the cooking time.

I soak my chickpeas for 2 – 3 days, changing the water every 8 – 12 hours.

After the first couple of days, bubbles start to appear. Then I know that biology is happening and they are becoming more digestible. (They are actually gearing themselves up to sprout, which is what will happen if they get soaked for about 5 days.)

I usually change the water a couple of times after the bubbles start appearing, over the space of a day or so.

After the final rinse/water change, I cook on the stove for 1.5 hours.

Then they are drained (don’t forget to save the water! This rather murky looking liquid is actually the stuff of magic – aquababa!) and left to cool. After that, I pack the chickpeas into jars and containers. They will keep in the fridge for at least a week, and can be frozen.

Or, I make falafels! Here’s how.

Recipe: DIY Chickpea Falafels

You’ll need a food processor or stick blender with a chopper for this.

Ingredients:

4 cups chickpeas
1/2 cup coarsely ground oats
4 tbsp potato flour or tapioca flour
2 onions, chopped
3-4 garlic cloves, chopped
4 tsp ground cumin
4 tsp ground coriander
1/2 tsp cayenne pepper
1 tsp salt
2 big handfuls fresh coriander, finely chopped
2 big handfuls fresh parsley, finely chopped

Oil, for frying.

Method:

If you don’t already have coarsely ground oats, take regular oats (you’ll need slightly more than 1/2 cup oats, as you get more ground oats in a cup than you do whole oats!) and whizz them in a food processor until they resemble coarse breadcrumbs. Set aside.

Next, whizz the coriander, garlic and parsley together to make a green paste and set aside.

Add the chickpeas to the food processor and grind until coarse. Add the onion and blend again until combined. It’s fine to be a little chunky. You’ll continue to blend as you add other ingredients so it doesn’t need to be super smooth.

Add the flour, oats and spices, and mix again until combined.

Finally, add the green herb/garlic paste and stir to combine. I do this last as it’s easy to see when it has all combined evenly.

If the mixture feels hot and sticky, pop in the fridge for at least 30 minutes to chill.

Next, heat up the oil (enough to fill the base about 1/2 inch deep) in a shallow pan.  Take the chickpea mix, and roll into balls, then press down to flatten slightly. Mine tend to be an inch or so across, and a cm or two thick.

The oil needs to be hot or the falafels will disintegrate when they are added to the oil (learned from experience). My hot plate has a range from 1 – 9, and I use setting 7. Put one in the oil to test, it should bubble immediately. If not, wait until it does before adding any more to the oil.

Add the falafels a few at a time, and after a minute or two turn over to cook the other side.I use a fork to flip rather than tongs.

I tend to roll a few, then add them to the oil, roll another few, then turn the first ones over to cook the other side, add the newly rolled ones to the oil, roll a few more then remove the first ones from the oil, turn the second, add the third to keep things moving. If it’s your first time, you might find it easier to have them all rolled in advance – this will take longer.

Once they are done, place on a cooling rack to drain the excess oil.

Store in the fridge, or can be frozen.

Troubleshooting:

If they start to disintegrate, stop. Drain the oil into a bowl using a tea strainer to remove all the bits, then put back in the pan and try again. It might have been that the oil wasn’t hot enough first time.

If disintegrating is still a problem, consider baking in the oven. You’ll need to brush with olive oil. They won’t taste exactly the same but they will still taste good.

If they don’t taste completely cooked all the way through, finish them off in the oven for a few minutes on a medium setting.

Note about the Ingredients:

I’m a big believer that recipes are there to be broken. Meaning, try things out but then make them your own! Add extra spices, substitute ingredients you don’t have for those you do and try things out.

This recipe was originally given to me by a friend (a photograph out of a cookery cook she had) but I’ve changed pretty much every ingredient. The original recipe used breadcrumbs and I changed to oats as I always have oats and don’t always have breadcrumbs. The few times I’ve tried breadcrumbs, they tended to disintegrate. Now I stick to oats.

I used potato flour by mistake thinking it was regular flour (I really should label my jars) and it worked so well I stuck to it. Both potato flour and tapioca flour are great at binding, which is why I use them and it keeps them gluten-free.

Fresh herbs are great and I use parsley and coriander as I have both, but I’ve also made with just parsley. If you like other herbs, try those. I’ve heard that dill is also great.

After chatting on Instagram with an Egyptian lady who makes falafels every day, I tried using raw chickpeas (bear in mind I soak them for three days, so they are pre-sprouted). The mixture is much wetter, but actually they seem to cook even better and the resulting falafels are firmer. The taste is a little different but equally good. I make these if I’m a bit behind schedule and don’t have time to cook the chickpeas first.

Next spring I intend to try with fresh broad beans!

Now I’d love to hear from you! Have you made falafels? Are you game to try these? Any tips or “how-not-to-do-it”s that you’d like to share? Any other chickpea recipes that you love? Leave a comment below!

Zero Waste Pesto, Four Ways (4 Plant Based Recipes)

Pasta and pesto is one of those go-to meals when you need to whip something up in minutes rather than hours. Before I went zero waste, I’d make my own pesto sometimes, but I’d also buy those “convenient” jars.

No more! Being zero waste means I avoid buying jars of anything. Pesto is such an easy DIY, and so delicious, that there’s no reason not to make it.

Once you begin making your own pesto, honestly, there is no going back. It’s so fresh and so much tastier, and you can control how much oil and salt you are adding. Plus of course… zero waste!

Vegan recipes use nuts and/or nutritional yeast in place of the parmesan. Nutritional yeast (sometimes called nooch) is a deactivated yeast typically sold as yellow flakes or a powder. It’s most commonly found at health food stores or bulk stores with a health focus (I get mine from The Source Bulk Foods).

If you are vegan but can’t find nutritional yeast, you can omit – the recipes will still taste good, just not quite as cheesy. The nuts will add some of the texture and flavour. If you’re not vegan, you can simply use parmesan where I’ve suggested to use nutritional yeast.

I use a food processor to make pesto. A pestle and mortar will also work, but requires more effort and patience. A herb chopper attachment on a stick blender should work too, but be careful not to overheat the motor, especially when chopping nuts.

Italians look away now! Some pesto tips for non-Italians

Italians take their culinary heritage very seriously, and some of the suggestions I’m going to make here will be considered sacrilege by Italians. But if you’re not Italian, and are happy to be flexible with your ingredients in order to keep them local, use less packaging or make them more budget-friendly, here’s some tips.

Don’t feel limited by pine nuts. Although they are the traditional nut of pesto, plenty of others will work well too. Macadamias, almonds, cashews and brazil nuts all make great pesto. If you’re allergic to nuts or prefer a budget option, sunflower and pumpkin seeds will work too.

If you’d like to give your pesto a health boost, consider omitting some of the oil and adding avocado instead. Pesto with avocado won’t keep as well, and is more sensitive to cooking than regular pesto, but it’s a healthier choice. I always use avocado in my carrot top pesto.

Finally, experiment with mixing up your greens! Generally I stick to one herb which gives the signature flavour, but often add in small amounts of other leafy greens if I have them to hand. Don’t be afraid to add a little spinach or kale to your basil, or blend in a few beetroot leaves or wilted lettuce.

Regular (Plant-Based) Basil Pesto

I add avocado to my basil pesto to make it more nutritious and less oily. If that seems strange to you, omit the avocado and add olive oil to taste. I’d start with 1/4 – 1/2 cup and go from there. If you’re mixing with pasta, add more oil. If you’re using as a spread, dip or marinade, less oil will make a thicker, more spreadable paste.

Ingredients:

3 cups / 3 large handfuls basil
1/3 cup cashew nuts
3 tbsp pine nuts / 9 brazil nuts
2 tbsp olive oil
1 large garlic clove
Juice of half a lemon
(1/3 cup nutritional yeast – optional)

Method:

Chop the pine nuts / brazil nuts (or blend in a food processor) until they resemble coarse breadbrumbs, and set aside. Do the same with the cashews.

Chop the garlic, then add the basil leaves and blend until fine. Add oil, lemon juice and blend again. Add cashews and blend to combine. Add brazils and nutritional yeast, if using, and stir to combine.

Add more oil to taste if required.

Notes:

Basil pesto has a tendency to discolour, and the lemon juice helps stop this. If not using immediately, store in a jar and pour olive oil on the top to create a seal, and store in the fridge and use within 5 days. Pesto can also be frozen.

Carrot Top Pesto

Carrot tops make great pesto. Carrot tops are slightly bitter, so I blend with 1/3 basil to keep the traditional pesto flavour.

Ingredients:

2 cups / 2 large handfuls carrot tops
1 cup / 1 large handful basil
1/3 cup cashew nuts
9 brazil nuts
2 tbsp olive oil
1 large garlic clove
1/2 avocado
(1/3 cup nutritional yeast – optional)

Method:

Chop the brazil nuts (or blend in a food processor) until they resemble coarse breadbrumbs, and set aside. Do the same with the cashews.

Chop the garlic, then add the basil leaves and carrot tops and blend until fine. Add oil and blend again. Add cashews and blend to combine. Add the brazil nuts and nutritional yeast, if using, and stir to combine.

Add more oil to taste if required.

Store in a glass jar in the fridge, and use within 5 days. Can be frozen.

Parsley and Walnut Pesto

Unlike basil pesto, parsley pesto does not discolour, making it a better option for dips.

Ingredients:

3 cups flat leaf / Italian parsley
1 cup walnuts
1 cup olive oil
3 cloves garlic
3 tbsp nutritional yeast

Makes 1 jar.

Method:

Chop the garlic, then add together with parsley and blend. Add walnuts and blitz, then add oil and combine. Finally, add nutritional yeast and stir through.

Store in a glass jar in the fridge, and use within 5 days. Can be frozen.

Coriander and Cashew Pesto

Coriander pesto has a distinctive Thai flavour and is recommended for rice or rice pasta rather than regular pasta. It is also great with vegetables (such as pumpkin, potatoes or mixed with stir-fried vegetables).

Ingredients:

4 cups coriander
1.5 cups cashew nuts
3/4 cup macadamia oil (or other flavourless oil)
1 – 2 cloves garlic

Method:

Chop the garlic, then add the coriander and blend to make a paste. Add the cashews and blitz to combine. Finally, add oil until you reach the consistency required.

Store in a glass jar in the fridge, and use within 5 days. Can be frozen.

Ideas for Using Pesto:

As much as pesto and pasta is a go-to meal, there are plenty more options with pesto.

Here’s a few ideas to get you started:

  • Pesto stuffed mushrooms. Remove the stalks of button or field mushrooms, place upturned on a baking tray and add a blob of pesto to the mushrooms. Top with breadcrumbs if you’d like a little extra crunch, and bake in the oven at a medium heat for 15-20 minutes until cooked.
  • Pesto pumpkin/squash. Thinly slice pumpkin or squash into wedges 1cm – 2 cm thick, and lay flat on a baking tray. Spread pesto on the side that is facing up, and bake in the oven for 20 minutes until cooked.
  • Pesto potatoes. Boil or roast some potatoes, place in a bowl and allow to cool, then stir pesto through.
  • Pesto dip. A classier version of “just eat outta the jar with a spoon”. Chop up veggies (carrot, cucumber, capsicum) or use crackers and dip them into the pesto. Mmm.
  • Pesto spread on toast and topped with mushrooms and/or tomatoes. Pesto is a great spread and combines very well with mushrooms, tomatoes or sauteed greens. Delicious on toast.

Now I’d love to hear from you! What is your favourite pesto recipe? What are you best recipes for using pesto once you’ve made it? Any flavour combinations you’ve tried that were a total disaster? Please share your thoughts in the comments below!