Tag Archive for: zero waste chef

Zero Waste Kitchen: DIY Chickpea Falafels Recipe

I buy dry chickpeas in bulk, a couple of kilos at a time. I soak them, then cook them, and then proceed to make every chickpea recipe I can think of. (I do freeze the spare for later, so it’s not about needing to use them up. More a celebration of this delicious and super versatile legume.)

One of my staples is chickpea falafels.
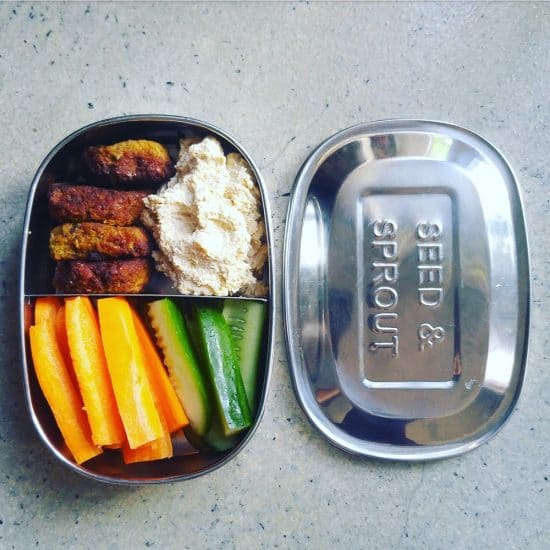
Falafels are actually only a recent staple. Well, the DIY version are. Back in 2011, before I left the UK, I’d buy little plastic tubs of falafels all the time. Plastic tub with plastic lid, and cardboard packaging outer – with 8 falafels inside. I could polish those off in one sitting! Oh, the single-use packaging waste! {Cringe.}

Then I went plastic-free, and falafels were no more.

I’ve tried making falafels many times over the years, but every attempt was a dismal failure. Dismal and messy, I should add. (Which is why I purchased the little tubs.)

I figured they were just too hard, until I went to a party where we had to bring a dish, and my friend brought homemade falafels. And they were ah-mazing! I demanded the recipe, and vowed that I would make them too.

Confession: the first time I made them, they were a disaster. But I knew that my friend had mastered it, so I knew it was possible. I stole all her secrets (we spent rather too much time discussing the finer details of falafel making), I tweaked the recipe a billion times to adjust to my taste and what was in my pantry, and now I have a recipe that works every time. Hurrah!

So if you’ve tried to make falafels before, and you’ve found that they’ve been a disaster, I want to encourage you to try again. Not all recipes are equal, and a homemade falafel is worth striving for, in my view!
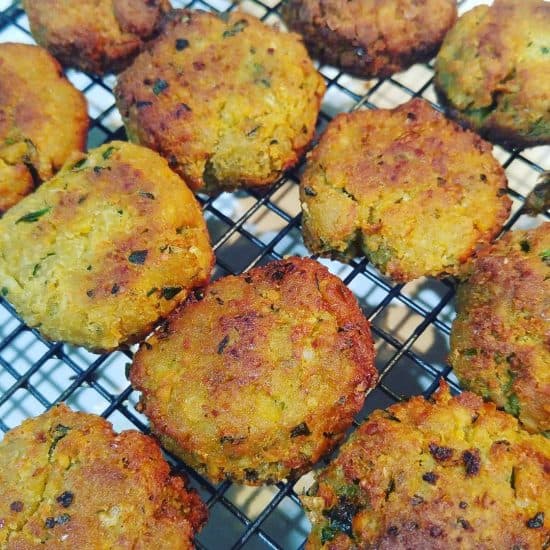
But first, let me quickly talk about chickpeas.

How to Cook Chickpeas from Scratch

Tinned chickpeas tend to have added salt and sugar, not to mention come in a steel tin can that ends up in the recycling. Bulk dried chickpeas are a fraction of the price, and there’s no (or next-to-no) packaging or additives.

Plus fresh always tastes better.

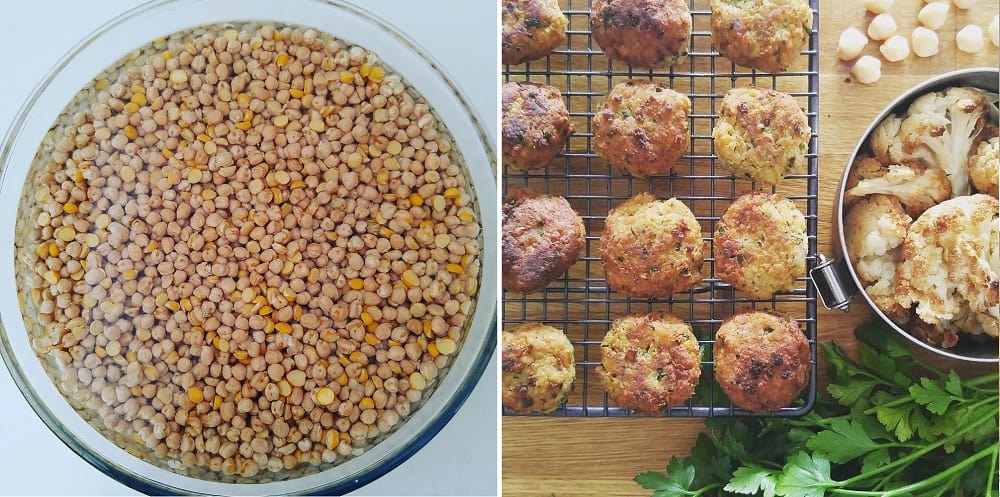
I buy chickpeas a couple of kilos at a time, and cook a big batch. First, I soak.
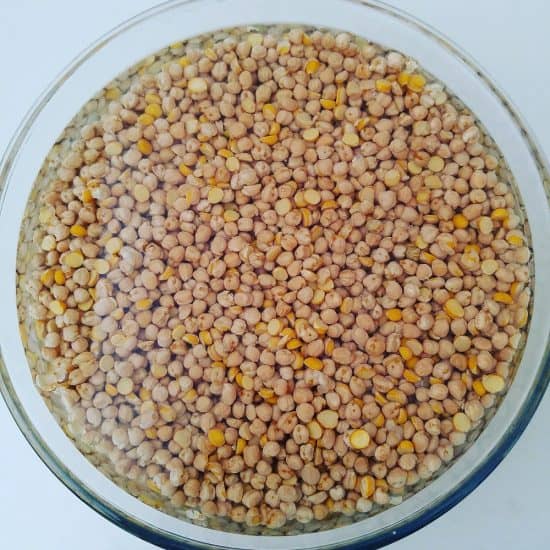
I take my soaking very seriously. Soaking makes chickpeas and other pulses more digestable because they release anti-nutrients. It’s not just about reducing the cooking time.

I soak my chickpeas for 2 – 3 days, changing the water every 8 – 12 hours.

After the first couple of days, bubbles start to appear. Then I know that biology is happening and they are becoming more digestible. (They are actually gearing themselves up to sprout, which is what will happen if they get soaked for about 5 days.)

I usually change the water a couple of times after the bubbles start appearing, over the space of a day or so.
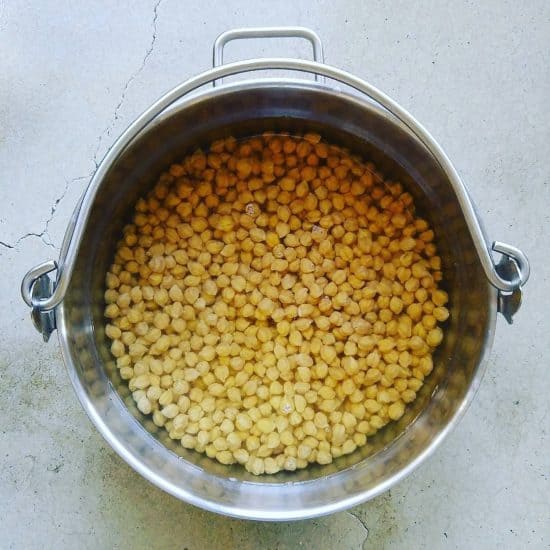
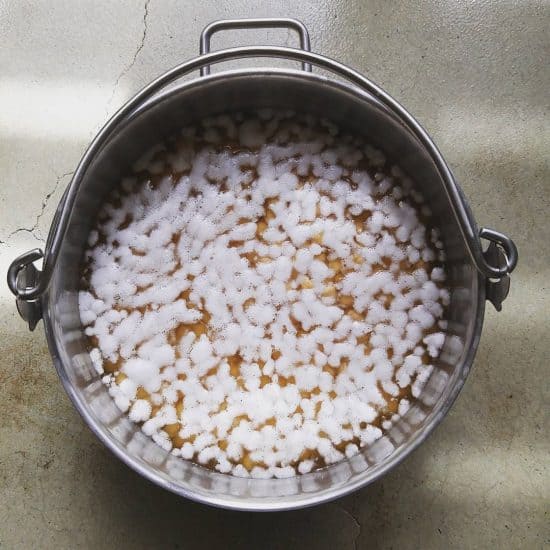
After the final rinse/water change, I cook on the stove for 1.5 hours.

Then they are drained (don’t forget to save the water! This rather murky looking liquid is actually the stuff of magic – aquababa!) and left to cool. After that, I pack the chickpeas into jars and containers. They will keep in the fridge for at least a week, and can be frozen.
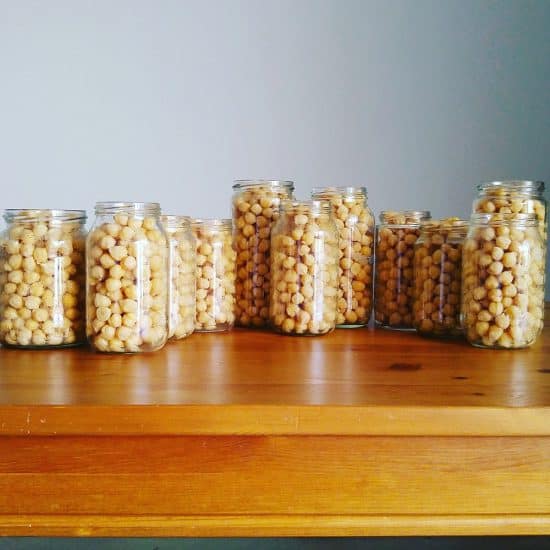
Or, I make falafels! Here’s how.

Recipe: DIY Chickpea Falafels
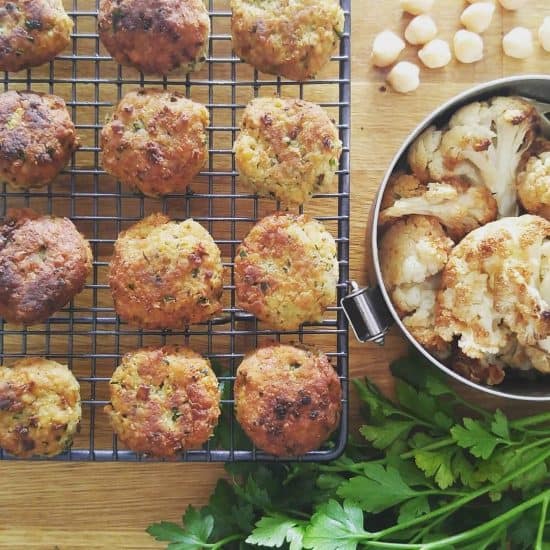
You’ll need a food processor or stick blender with a chopper for this.

Ingredients:

4 cups chickpeas
1/2 cup coarsely ground oats
4 tbsp potato flour or tapioca flour
2 onions, chopped
3-4 garlic cloves, chopped
4 tsp ground cumin
4 tsp ground coriander
1/2 tsp cayenne pepper
1 tsp salt
2 big handfuls fresh coriander, finely chopped
2 big handfuls fresh parsley, finely chopped

Oil, for frying.

Method:

If you don’t already have coarsely ground oats, take regular oats (you’ll need slightly more than 1/2 cup oats, as you get more ground oats in a cup than you do whole oats!) and whizz them in a food processor until they resemble coarse breadcrumbs. Set aside.

Next, whizz the coriander, garlic and parsley together to make a green paste and set aside.

Add the chickpeas to the food processor and grind until coarse. Add the onion and blend again until combined. It’s fine to be a little chunky. You’ll continue to blend as you add other ingredients so it doesn’t need to be super smooth.

Add the flour, oats and spices, and mix again until combined.

Finally, add the green herb/garlic paste and stir to combine. I do this last as it’s easy to see when it has all combined evenly.

If the mixture feels hot and sticky, pop in the fridge for at least 30 minutes to chill.

Next, heat up the oil (enough to fill the base about 1/2 inch deep) in a shallow pan.  Take the chickpea mix, and roll into balls, then press down to flatten slightly. Mine tend to be an inch or so across, and a cm or two thick.

The oil needs to be hot or the falafels will disintegrate when they are added to the oil (learned from experience). My hot plate has a range from 1 – 9, and I use setting 7. Put one in the oil to test, it should bubble immediately. If not, wait until it does before adding any more to the oil.

Add the falafels a few at a time, and after a minute or two turn over to cook the other side.I use a fork to flip rather than tongs.

I tend to roll a few, then add them to the oil, roll another few, then turn the first ones over to cook the other side, add the newly rolled ones to the oil, roll a few more then remove the first ones from the oil, turn the second, add the third to keep things moving. If it’s your first time, you might find it easier to have them all rolled in advance – this will take longer.

Once they are done, place on a cooling rack to drain the excess oil.
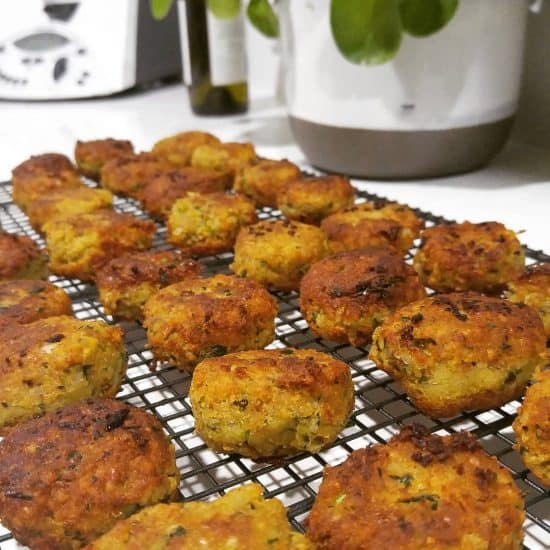
Store in the fridge, or can be frozen.

Troubleshooting:

If they start to disintegrate, stop. Drain the oil into a bowl using a tea strainer to remove all the bits, then put back in the pan and try again. It might have been that the oil wasn’t hot enough first time.

If disintegrating is still a problem, consider baking in the oven. You’ll need to brush with olive oil. They won’t taste exactly the same but they will still taste good.

If they don’t taste completely cooked all the way through, finish them off in the oven for a few minutes on a medium setting.
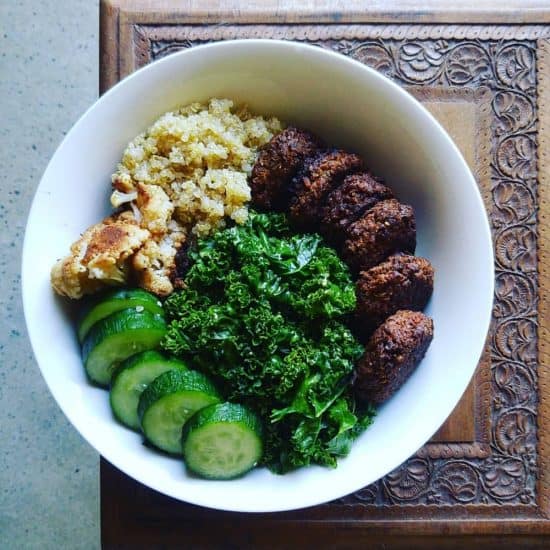
Note about the Ingredients:

I’m a big believer that recipes are there to be broken. Meaning, try things out but then make them your own! Add extra spices, substitute ingredients you don’t have for those you do and try things out.

This recipe was originally given to me by a friend (a photograph out of a cookery cook she had) but I’ve changed pretty much every ingredient. The original recipe used breadcrumbs and I changed to oats as I always have oats and don’t always have breadcrumbs. The few times I’ve tried breadcrumbs, they tended to disintegrate. Now I stick to oats.

I used potato flour by mistake thinking it was regular flour (I really should label my jars) and it worked so well I stuck to it. Both potato flour and tapioca flour are great at binding, which is why I use them and it keeps them gluten-free.

Fresh herbs are great and I use parsley and coriander as I have both, but I’ve also made with just parsley. If you like other herbs, try those. I’ve heard that dill is also great.

After chatting on Instagram with an Egyptian lady who makes falafels every day, I tried using raw chickpeas (bear in mind I soak them for three days, so they are pre-sprouted). The mixture is much wetter, but actually they seem to cook even better and the resulting falafels are firmer. The taste is a little different but equally good. I make these if I’m a bit behind schedule and don’t have time to cook the chickpeas first.

Next spring I intend to try with fresh broad beans!

Now I’d love to hear from you! Have you made falafels? Are you game to try these? Any tips or “how-not-to-do-it”s that you’d like to share? Any other chickpea recipes that you love? Leave a comment below!

[leadpages_leadbox leadbox_id=1429a0746639c5] [/leadpages_leadbox]

Zero Waste Pesto, Four Ways (4 Plant Based Recipes)

Pasta and pesto is one of those go-to meals when you need to whip something up in minutes rather than hours. Before I went zero waste, I’d make my own pesto sometimes, but I’d also buy those “convenient” jars.

No more! Being zero waste means I avoid buying jars of anything. Pesto is such an easy DIY, and so delicious, that there’s no reason not to make it.

Once you begin making your own pesto, honestly, there is no going back. It’s so fresh and so much tastier, and you can control how much oil and salt you are adding. Plus of course… zero waste!

Vegan recipes use nuts and/or nutritional yeast in place of the parmesan. Nutritional yeast (sometimes called nooch) is a deactivated yeast typically sold as yellow flakes or a powder. It’s most commonly found at health food stores or bulk stores with a health focus (I get mine from The Source Bulk Foods).

If you are vegan but can’t find nutritional yeast, you can omit – the recipes will still taste good, just not quite as cheesy. The nuts will add some of the texture and flavour. If you’re not vegan, you can simply use parmesan where I’ve suggested to use nutritional yeast.

I use a food processor to make pesto. A pestle and mortar will also work, but requires more effort and patience. A herb chopper attachment on a stick blender should work too, but be careful not to overheat the motor, especially when chopping nuts.

Italians look away now! Some pesto tips for non-Italians

Italians take their culinary heritage very seriously, and some of the suggestions I’m going to make here will be considered sacrilege by Italians. But if you’re not Italian, and are happy to be flexible with your ingredients in order to keep them local, use less packaging or make them more budget-friendly, here’s some tips.

Don’t feel limited by pine nuts. Although they are the traditional nut of pesto, plenty of others will work well too. Macadamias, almonds, cashews and brazil nuts all make great pesto. If you’re allergic to nuts or prefer a budget option, sunflower and pumpkin seeds will work too.

If you’d like to give your pesto a health boost, consider omitting some of the oil and adding avocado instead. Pesto with avocado won’t keep as well, and is more sensitive to cooking than regular pesto, but it’s a healthier choice. I always use avocado in my carrot top pesto.

Finally, experiment with mixing up your greens! Generally I stick to one herb which gives the signature flavour, but often add in small amounts of other leafy greens if I have them to hand. Don’t be afraid to add a little spinach or kale to your basil, or blend in a few beetroot leaves or wilted lettuce.

Regular (Plant-Based) Basil Pesto

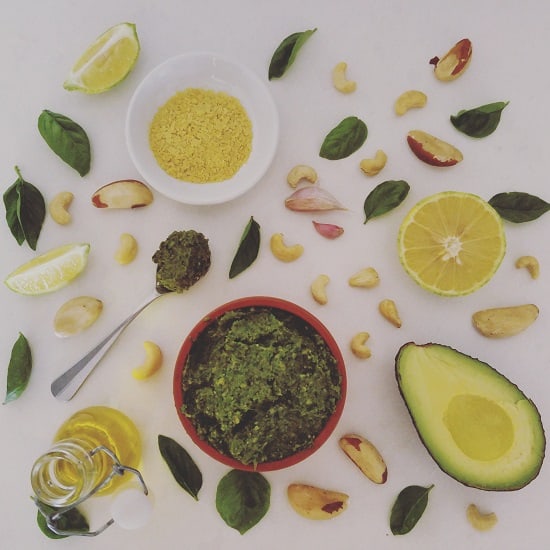
I add avocado to my basil pesto to make it more nutritious and less oily. If that seems strange to you, omit the avocado and add olive oil to taste. I’d start with 1/4 – 1/2 cup and go from there. If you’re mixing with pasta, add more oil. If you’re using as a spread, dip or marinade, less oil will make a thicker, more spreadable paste.

Ingredients:

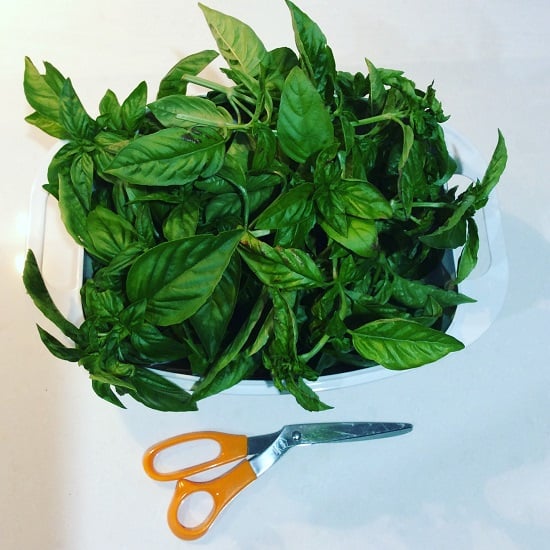
3 cups / 3 large handfuls basil
1/3 cup cashew nuts
3 tbsp pine nuts / 9 brazil nuts
2 tbsp olive oil
1 large garlic clove
Juice of half a lemon
(1/3 cup nutritional yeast – optional)

Method:

Chop the pine nuts / brazil nuts (or blend in a food processor) until they resemble coarse breadbrumbs, and set aside. Do the same with the cashews.

Chop the garlic, then add the basil leaves and blend until fine. Add oil, lemon juice and blend again. Add cashews and blend to combine. Add brazils and nutritional yeast, if using, and stir to combine.

Add more oil to taste if required.

Notes:

Basil pesto has a tendency to discolour, and the lemon juice helps stop this. If not using immediately, store in a jar and pour olive oil on the top to create a seal, and store in the fridge and use within 5 days. Pesto can also be frozen.

Carrot Top Pesto

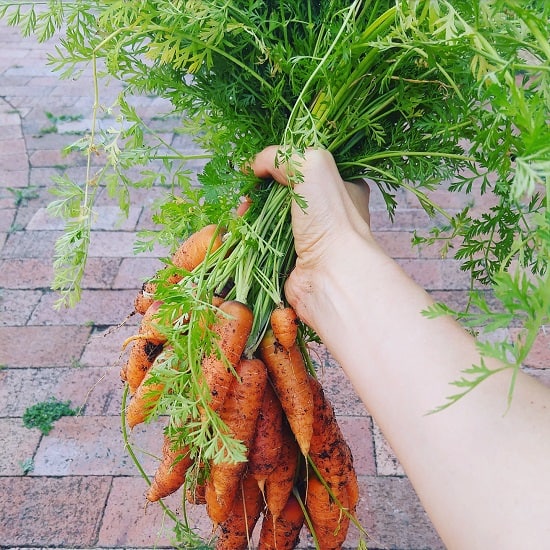
Carrot tops make great pesto. Carrot tops are slightly bitter, so I blend with 1/3 basil to keep the traditional pesto flavour.

Ingredients:

2 cups / 2 large handfuls carrot tops
1 cup / 1 large handful basil
1/3 cup cashew nuts
9 brazil nuts
2 tbsp olive oil
1 large garlic clove
1/2 avocado
(1/3 cup nutritional yeast – optional)

Method:

Chop the brazil nuts (or blend in a food processor) until they resemble coarse breadbrumbs, and set aside. Do the same with the cashews.

Chop the garlic, then add the basil leaves and carrot tops and blend until fine. Add oil and blend again. Add cashews and blend to combine. Add the brazil nuts and nutritional yeast, if using, and stir to combine.

Add more oil to taste if required.

Store in a glass jar in the fridge, and use within 5 days. Can be frozen.

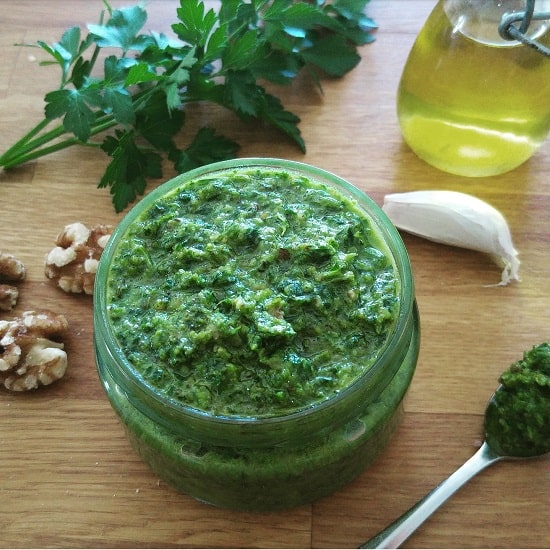
Parsley and Walnut Pesto

Unlike basil pesto, parsley pesto does not discolour, making it a better option for dips.

Ingredients:

3 cups flat leaf / Italian parsley
1 cup walnuts
1 cup olive oil
3 cloves garlic
3 tbsp nutritional yeast

Makes 1 jar.

Method:

Chop the garlic, then add together with parsley and blend. Add walnuts and blitz, then add oil and combine. Finally, add nutritional yeast and stir through.

Store in a glass jar in the fridge, and use within 5 days. Can be frozen.

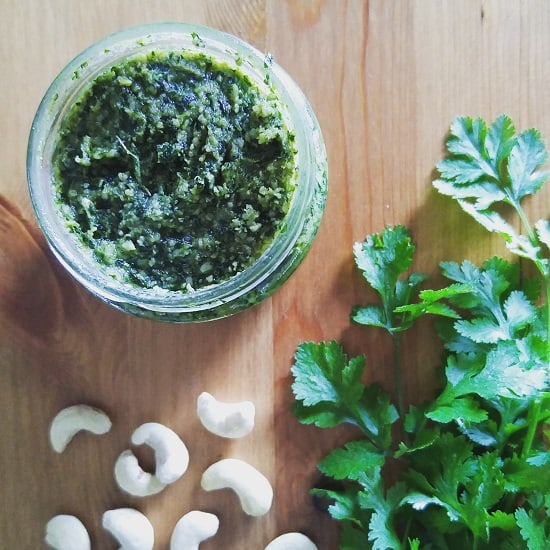
Coriander and Cashew Pesto

Coriander pesto has a distinctive Thai flavour and is recommended for rice or rice pasta rather than regular pasta. It is also great with vegetables (such as pumpkin, potatoes or mixed with stir-fried vegetables).

Ingredients:

4 cups coriander
1.5 cups cashew nuts
3/4 cup macadamia oil (or other flavourless oil)
1 – 2 cloves garlic

Method:

Chop the garlic, then add the coriander and blend to make a paste. Add the cashews and blitz to combine. Finally, add oil until you reach the consistency required.

Store in a glass jar in the fridge, and use within 5 days. Can be frozen.

Ideas for Using Pesto:

As much as pesto and pasta is a go-to meal, there are plenty more options with pesto.

Here’s a few ideas to get you started:

  • Pesto stuffed mushrooms. Remove the stalks of button or field mushrooms, place upturned on a baking tray and add a blob of pesto to the mushrooms. Top with breadcrumbs if you’d like a little extra crunch, and bake in the oven at a medium heat for 15-20 minutes until cooked.
  • Pesto pumpkin/squash. Thinly slice pumpkin or squash into wedges 1cm – 2 cm thick, and lay flat on a baking tray. Spread pesto on the side that is facing up, and bake in the oven for 20 minutes until cooked.
  • Pesto potatoes. Boil or roast some potatoes, place in a bowl and allow to cool, then stir pesto through.
  • Pesto dip. A classier version of “just eat outta the jar with a spoon”. Chop up veggies (carrot, cucumber, capsicum) or use crackers and dip them into the pesto. Mmm.
  • Pesto spread on toast and topped with mushrooms and/or tomatoes. Pesto is a great spread and combines very well with mushrooms, tomatoes or sauteed greens. Delicious on toast.

Now I’d love to hear from you! What is your favourite pesto recipe? What are you best recipes for using pesto once you’ve made it? Any flavour combinations you’ve tried that were a total disaster? Please share your thoughts in the comments below!

[leadpages_leadbox leadbox_id=1429a0746639c5] [/leadpages_leadbox]
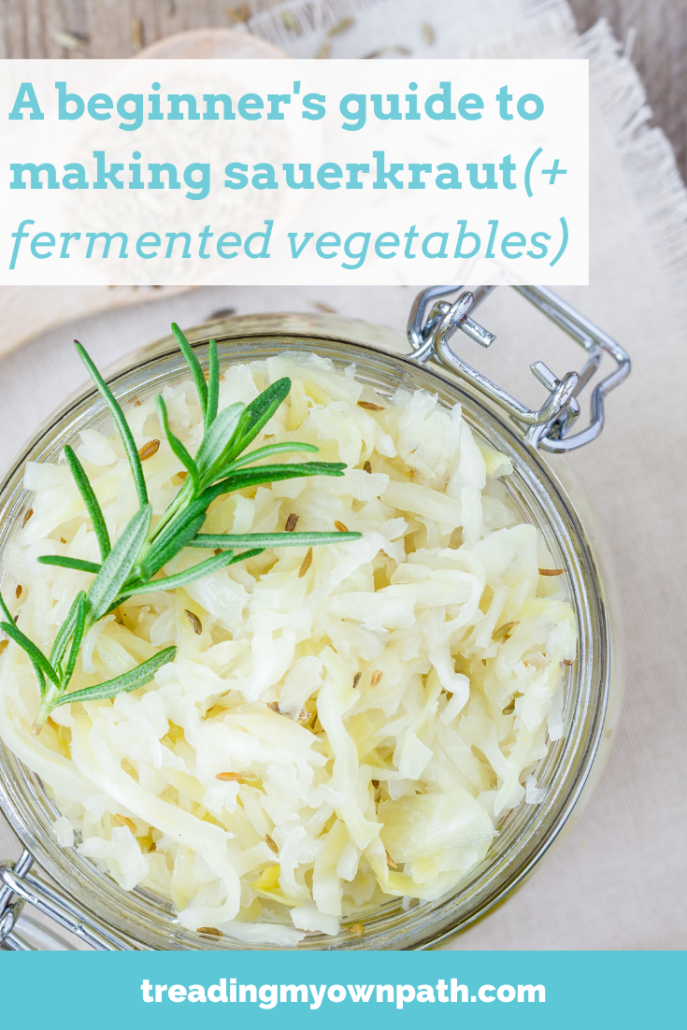
A Beginner’s Guide to Sauerkraut (+ Fermented Vegetables)

Today, I’m talking cabbage. (Stay with me…it gets better, I promise!) Now cabbage and I, we have a bit of a love-hate relationship. I like cabbage, but it arrives in the veg box every week, reminding me that there’s still last week’s cabbage in the fridge refusing to go bad.

(Of course, I can’t put a perfectly good cabbage in the compost. If it happened to accidentally go bad…well, maybe I could justify it, but cabbage is stubborn!)

In fact, cabbage simply refuses to go bad, which actually makes it a rather good zero waste vegetable. (It shrivels a little and the outer leaves go brown, but peel those leaves back and there’s still perfectly good cabbage underneath.) Plus it grows at a time of year when many other more delicious vegetables do not.

If you want to eat seasonal and you live anywhere except the tropics, cabbage is going to feature on your menu. But cabbage week in, week out; it can wear a bit thin.

That, my friends, is why we need to embrace sauerkraut.

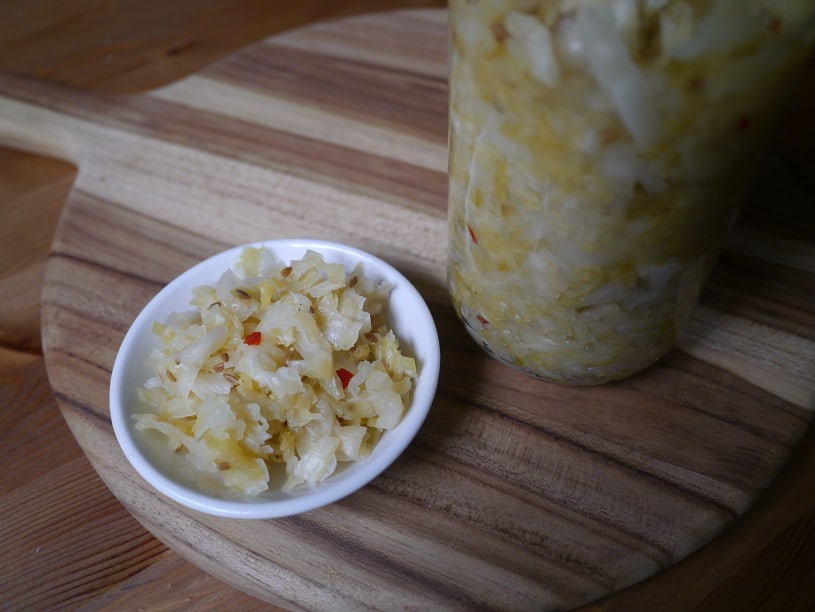
Sauerkraut is fermented cabbage. That might not sound delicious, but it’s a tangy, crunchy, super healthy vegetable that’s tastier than the name suggests. Sauerkraut contains millions of good bacteria, so is like taking probiotics, but without the packaging. Sauerkraut also lasts for ages in the fridge.

I’ve kept sauerkraut in the fridge for a year. Fresh cabbage might seem to last forever, but it won’t last a year.

The good news is, whilst fermenting sounds hard, it is actually very easy. Plus you don’t actually need any specialised equipment. Sure, there’s all kinds of fancy gadgets out there, but you can get going with a glass jar and a tea towel. Oh, and some cabbage ;)

That said, you don’t actually have to make sauerkraut with only cabbage. You can mix cabbage with other vegetables like onion, carrot and beetroot.

But let’s not get distracted thinking about all the wonderful potential! Let’s start at the beginning.

Some Fermentation Basics

Fermentation is a process that uses good bacteria and yeast to transform a product. By fermenting, we crowd out the bad bacteria with good bacteria, which changes the flavour and texture, but also helps lengthen the shelf life of the product. For example, yoghurt is fermented milk: whereas fresh milk will last in the fridge for up to a week, yoghurt might last a month.

Fermenting is anaerobic, meaning without oxygen. (Although confusingly, some foods are actually fermented with oxygen, such as vinegar.) In my experience of making sauerkraut, this “without oxygen” rule doesn’t need to be absolute. By removing oxygen we create conditions for the good bacteria to multiply, and these prevent the bad bacteria getting a hold and spoiling the food.

Fermentation has been used for centuries as a way of preserving food, prior to refrigeration. People were fermenting long before air-lock attachments and special fermentation jars were invented. This specialist equipment can help, but isn’t necessary.

I make sauerkraut a few times a year, and I simply don’t see the need to buy specialised equipment when it works without.

Because we are dealing with bacteria, we need to be careful not to be too over-zealous with the cleaning. I’d avoid using an anti-bacterial hand wash or chopping boards, for example. Clean is good, sterile not so much.

How to Make Sauerkraut (No Fancy Equipment Required)

I’m a big believer that you don’t need fancy equipment. I don’t use any, and I’ve been making sauerkraut and other fermented vegetables for over 4 years. If you’re a professional, that’s different, and with certain ferments, it can be crucial. But for sauerkraut, I personally don’t believe that it is.

Ingredients:

Cabbage;
1/100th weight of cabbage in salt.

So if the cabbage weighs 1 kg, use 10g salt. Basically, divide the weight by 100. (It is possible to eyeball it, but when starting out it helps to measure.)

Equipment:

A large bowl;
A glass jar that you can fit your fist into (or if you have large hands or small jars, you’ll also need a wooden rolling pin);
A weight that fits inside the glass jar (I use a smaller glass jar filled with water);
A tea towel.

Method:

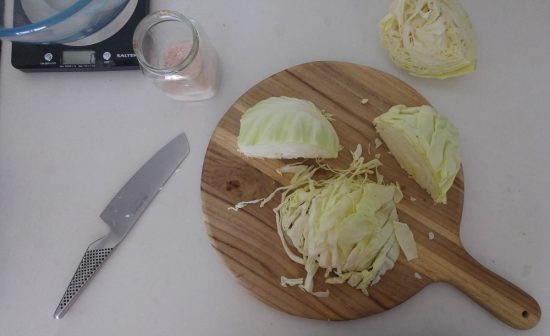
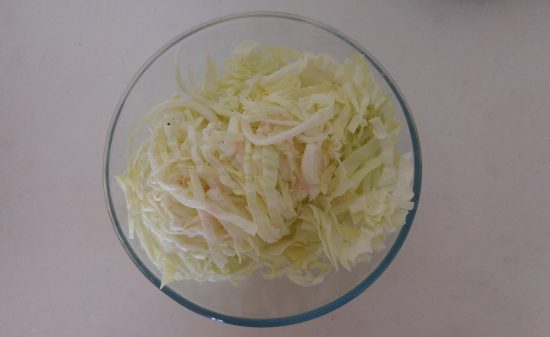
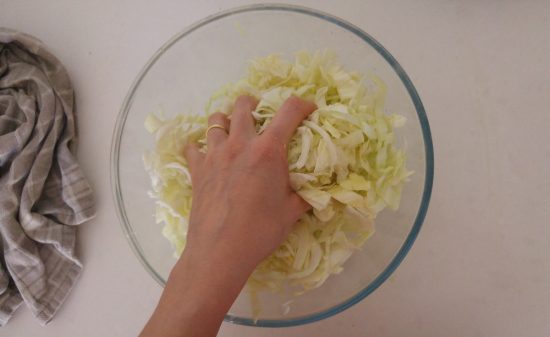
I’ve included a lot of photos before to give you a really clear idea of what each stage is meant to look like.

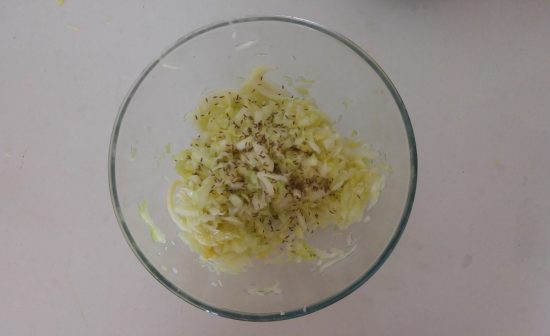
Remove the core of the cabbage (the stalky white bit), and chop the cabbage into strips. Weigh the cabbage, put into a large bowl and sprinkle the salt on top (the amount is calculated based on the weight of the cabbage – 1 kg cabbage equals 10g salt).

Massage the salt into the cabbage with your hands, and the salt will begin to draw the water out of the cabbage. This is what you want to happen. Massage for 10 – 15 minutes until the cabbage looks like it has shrunk.

At this stage I always add a tablespoon of cumin seeds. I love the flavour it gives. You can keep yours plain, add cumin or go crazy with the spices. At the beginning, I’d suggest keeping it plain until you learn what flavours you’re meant to be looking out for.

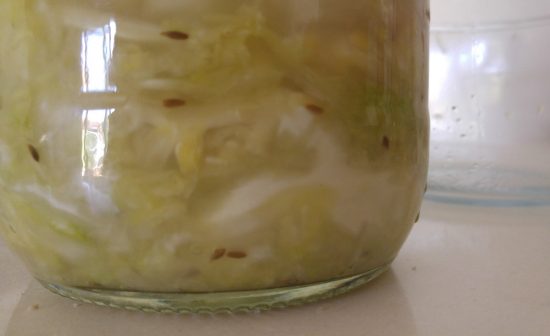
Notice how the cabbage appears to have shrunk. (If you taste it at this point, it will taste like salty cabbage, not sauerkraut.)

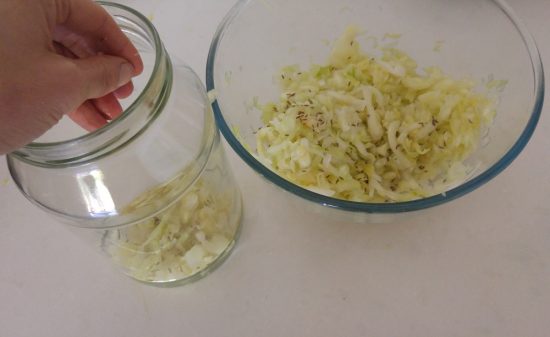
Next you need to start packing the cabbage into the jar. Choose a jar that’s going to have room for the juices to expand because they will. Ideally find one that you can fit your hands into, but if not, a rolling pin will work.

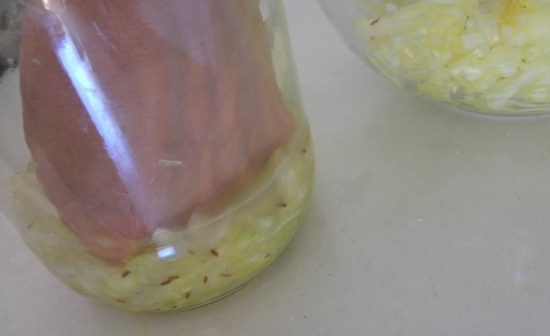
Put a few tablespoons of cabbage into the jar, and press down as hard as you can. You want to squeeze out any remaining liquid. Keep adding the cabbage and pressing, and you’ll start to see the liquid rising above the cabbage.

This is important as the liquid helps keep the oxygen away from the cabbage, and creates the right conditions for fermentation.

Once you’ve put all the cabbage in the jar, add any liquid remaining in the bowl into the jar. Do not add any other liquid.

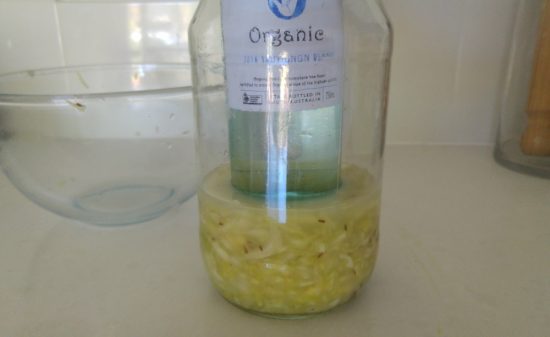
The cabbage will probably sitting slightly under the water level. To compact it down and thereby raise the liquid level, use a weight. I use a smaller jar that fits inside my large jar, or a bottle (I fill it with water to make it heavier).

If there’s any floating or escaped bits of cabbage, poke them under the liquid. Next, I cover with a tea towel.

The bottle on top is pressing the cabbage below the water line and excluding oxygen, and the bottle restricts the amount of jar entering through the lid. For me, this is enough.

If you’d like to put a lid on the jar (and it fits), this will exclude oxygen better. However, it has its own drawbacks. In the fermentation process, carbon dioxide gas will be released. Unless you remember to open the lid at intervals to allow the gas to escape (called “burping” the jar), your jar could explode. Won’t happen with a tea towel!

(That’s why you can buy fermentation valves that allow carbon dioxide to escape without letting in oxygen. For some things, like cider making, it is very important. For sauerkraut and lactic acid fermentation, it is less critical.)

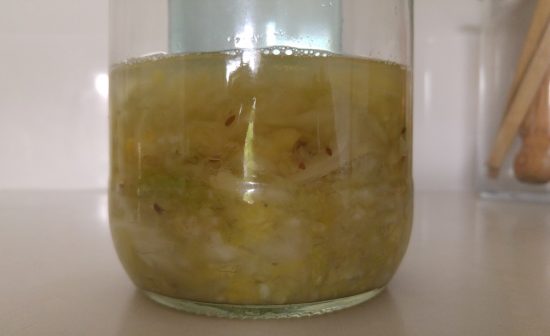
Every day, check your cabbage. You’ll start to notice bubbles forming. I tend to press the weight down to squeeze out the bubbles, and also check for any floating bits. If there’s cabbage floating on the surface, it is in contact with air (oxygen), so needs to be submerged or removed.

After 1 day (see the bubbles starting to form both on top, and within the cabbage layers):

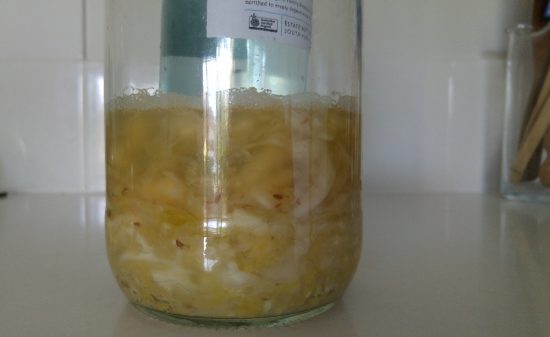
And after 3 days:

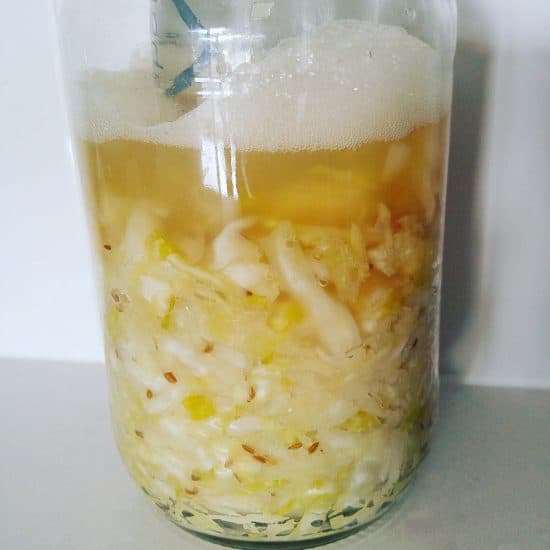
How quickly and how much it bubbles will depend a lot on room temperature. If your jar is narrow or filled to the top it can be helpful to place in a bowl as it might bubble over!

This is a different batch, but shows how much it can bubble (and I’ve seen more than this!):

I tend to keep my sauerkraut on the kitchen counter, covered with a tea towel (to also exclude light) until the bubbling subsides, which takes 1 – 2 weeks.

Some people like to leave their sauerkraut on the counter for several weeks or even months to increase the good bacteria (it will also taste more sour). In my view, it doesn’t really matter, and once in the fridge fermentation won’t stop, it will just continue very very slowly.

When the bubbling subsides, the sauerkraut should be crunchy and taste sour (but delicious). You may see a white film, this is kahm yeast and is harmless. I’ve never had an issue with mold, but if you see anything multi-coloured or blue, that batch might be better in the compost.

When you’re ready to place in the fridge, you can remove the cabbage/sauerkraut from big jar and put into something more practical. The less surface area the better, so choose a smaller jar. At this stage it is fine to place a lid on the jar.

Other Fermentation Ideas

You can ferment most veggies and even fruits, but they have varying levels of difficulty. If you’re a beginner, stick to hard veggies like beetroot and carrot, or use softer vegetables like onion as part of the vegetable mix, but not all of it.

That said, I’ve had success fermenting chillies, and I’m sure capsicums would work well also.

My personal favourites are carrot, onion and white cabbage with cumin seeds – taken from a South American ferment called curtido.

I also like beetroot and purple cabbage together because the colour is fantastic.

I made an amazing turmeric ginger sauerkraut once that tasted like piccalilli, but I’ve never been able to recreate the flavour combination since.

Fermentation is a great way to preserve vegetables, and it a healthier option than pickling: the food is literally “alive” with good bacteria (there’s not heat process to kill them) and there’s no added sugar.

Plus it means I get to keep my cabbage in the fridge for literally months, without feeling the slightest bit guilty about it!

Now I’d like to hear from you! Do you ferment vegetables? What are your favourite flavour combinations? Have you had any disasters? Are there any other tips you’d like to add? Are you tempted to give this a go, or does the idea still scare you a little? Please tell all in the comments below!

[leadpages_leadbox leadbox_id=123a865e9839c5] [/leadpages_leadbox]