Tag Archive for: Worm farm

Reducing Food Waste with Worm Farms: Trialing the Hungry Bin

Zero waste is all about circular living. It’s often talked about in terms of the circular economy (which is the ideal and the one we want to work towards) as opposed to the linear economy (which is the one we have now).

The idea is that materials and resources should cycle, being reused or repurposed or reshaped again and again.

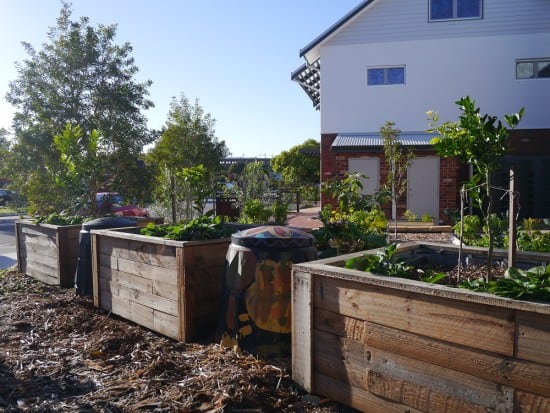
Circular living supports local solutions, which means less packaging, distribution costs and transport emissions; and more connection and resilience within our local communities.

Anything we can do at home, or within our street, or within our suburb, the better.

With this in mind, let’s talk about food waste.

In Australia almost 40% of everything we throw in our landfill bins in food waste. Even more scary, I think, is that 25% of what the average household throws away is food that could have been eaten.

Even if we are super diligent, there’s always going to be food waste that can’t be eaten. Onion peels, lemon skins, cores, seeds, pips, stalks, outer leaves, and general bad bits.

If we want to reduce our environmental impact, processing our food scraps at home is a great solution.

I love it when a problem has multiple solutions, and food waste is exactly that. There’s so many ways we can deal with food scraps at home. No “one size fits all solution” – different methods that work for different locations, spaces and households.

There’s composting (yes, regardless whether or not you have space for your own compost bin), there’s bokashi, and there’s worm farms.

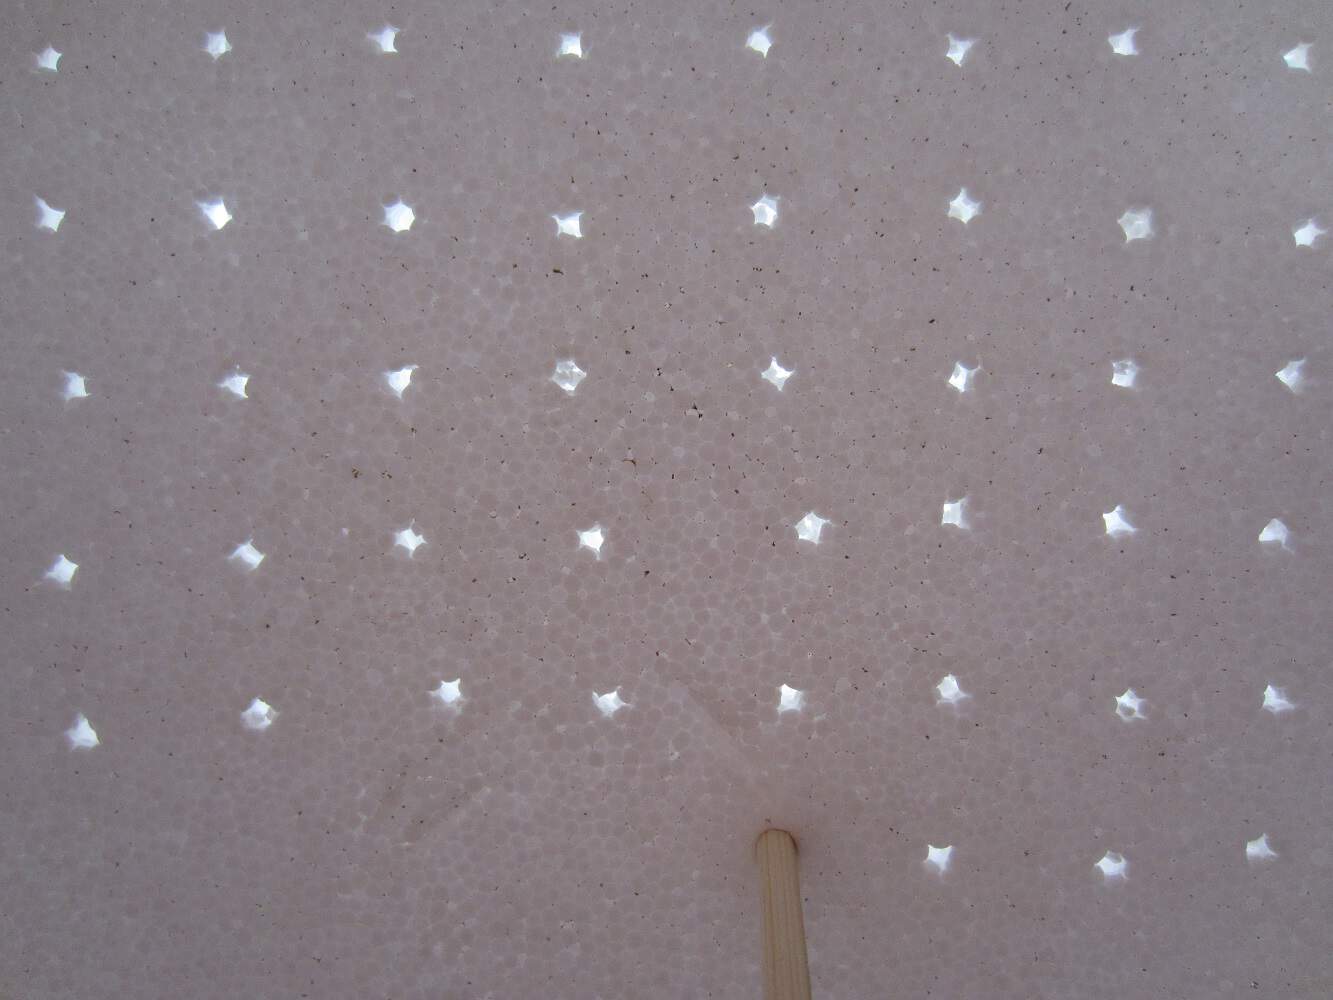
Worm farms were the first thing I tried when I went zero waste, and over the years I’ve successfully used a number of different worm farms: from polystyrene box worm farms that you can DIY yourself, and degassed fridge worm farms (which work like polystyrene box worm farms, but on a bigger scale) to the black plastic worm cafes that can be purchased from hardware stores (or even better, found on the verge).

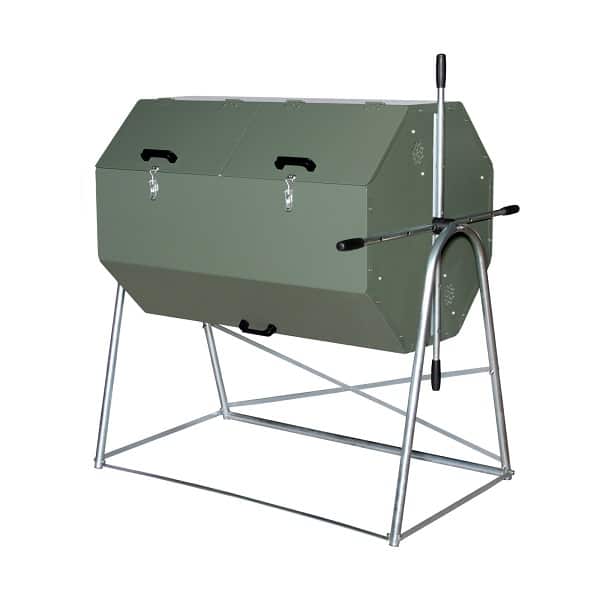
Over the last three months I’ve been trialing a new design of worm farm: the Hungry Bin, and it’s my favourite so far.

I came across the Hungry Bin worm farm because of my friend Josie (who came across them first). She was so impressed with it as a way to effectively process food scraps for her family of five, that she decided to distribute the Hungry Bins here in Western Australia. She set up her business Pearthworms selling the worms farms last year (in 2017).

Pearthworms were kind enough to loan me a Hungry Bin worm farm to test drive. I’m always keen to learn more about ways for households to reduce their own waste, and love innovative products that make it easier. Wins all round!

Here’s the lowdown.

The Hungry Bin Worm Farm: Composting Food Scraps at Home

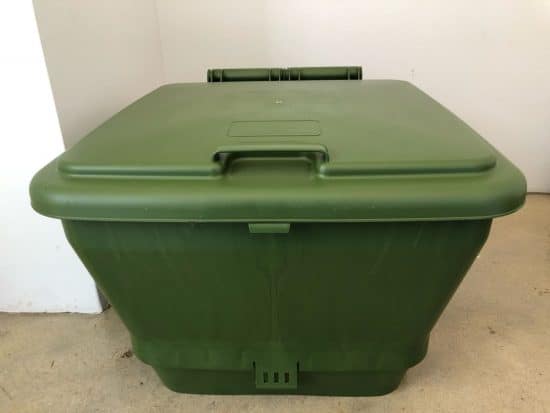
At first glance the Hungry Bin might look like a regular flip-top waste bin, but there’s actually a fair bit of thought and engineering that’s gone into the design. It is designed and made in New Zealand.

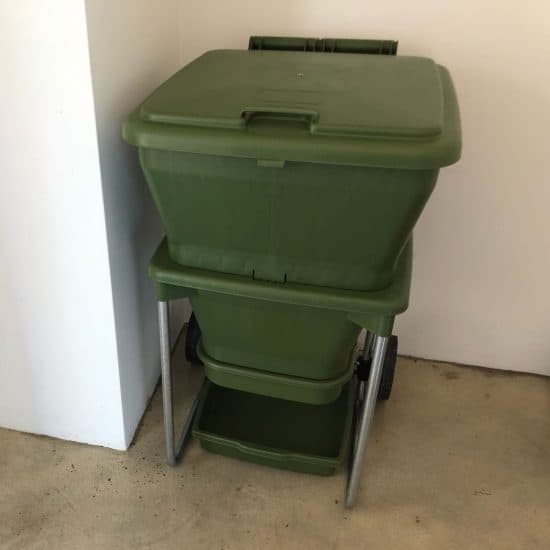
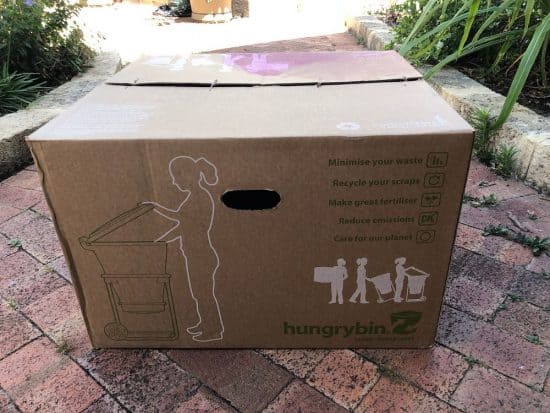
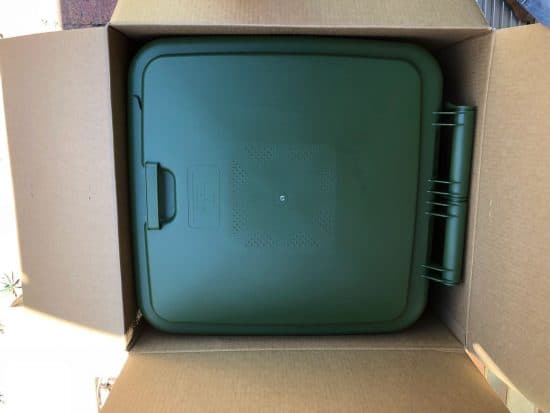
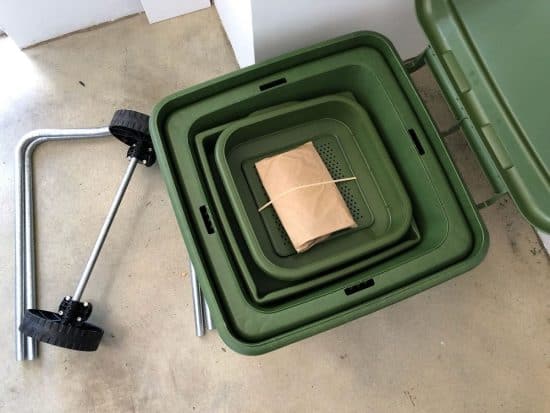
Firstly, it actually packs down pretty small. The bin is actually made of two parts that lock together, and one fits inside the other, making it a fairly small package. The bin itself is made from UV resistant plastic with recycled content, and is expected to last for 25 years. The packaging is minimal, with a cardboard outer, and none of the parts come packaged in additional plastic.

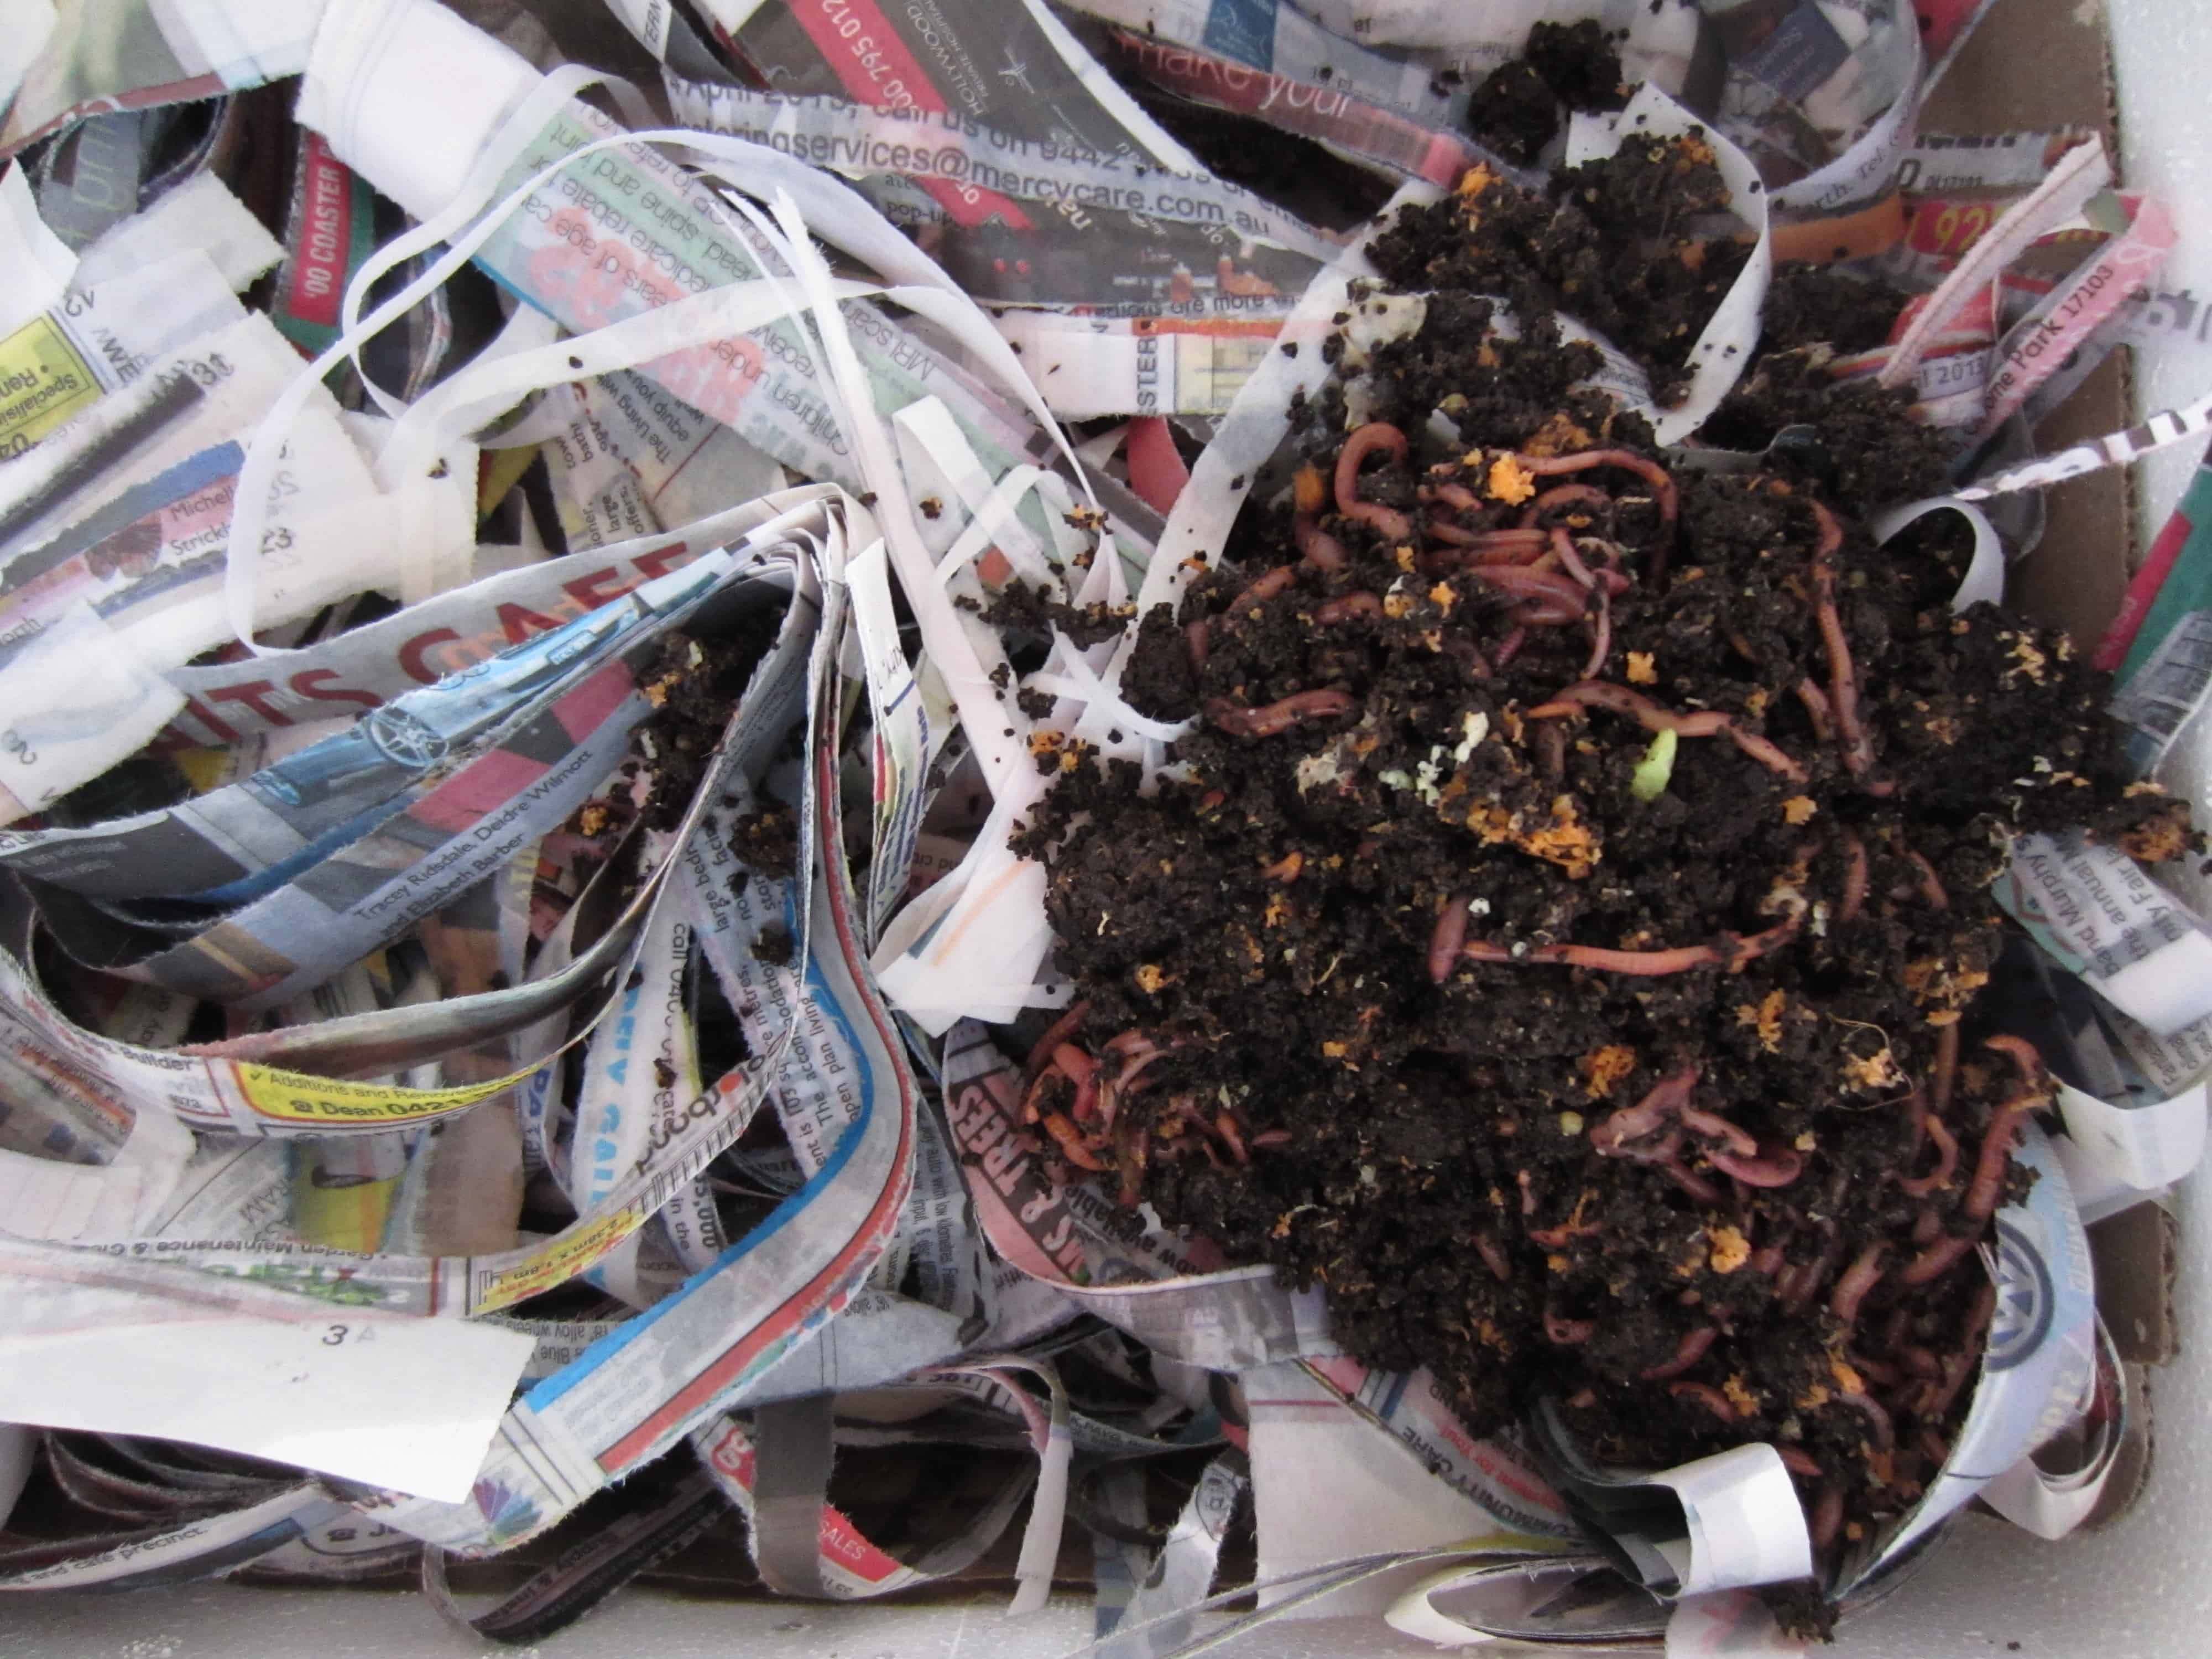
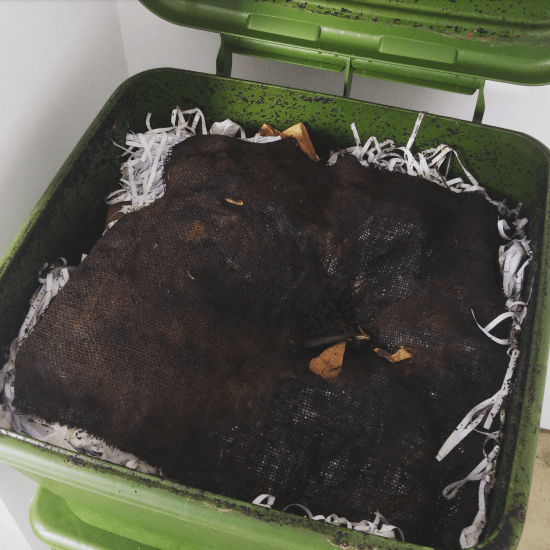
Once clipped together, the bin is filled with bedding, then food scraps and worms are added to the top. Worms remain near the top, gobbling up the food scraps and creating worm castings, a nutrient-rich medium. More food waste gets added on top, the worms move up to find them, and the castings naturally accumulate underneath.

The tapered design enhances the efficiency of the system. Composting worms are surface feeders, and food scraps are added at the top, so keeping the worms near the surface increases the efficiency. The top is the widest point of the whole bin, and the bin can hold 16,000 worms and process 2kg of food scraps per day.

Because the bin tapers, the worm castings naturally compress at the bottom. This encourages the worms to move to the surface and also ensures that when the bottom is removed, the entire contents don’t fall out.

The reason you’d want to remove the bottom is to get your hands on the worm castings. They can be used to grow seedlings, added to pots or to existing plants or dug into the garden. You simply unclip the tray, scoop out the worm castings and reattach.

The bin has a tray that sits underneath, that collects the worm juice. This can be used like a fertiliser.

I trialled mine indoors, but they are intended as much for outdoor use.

Pearthworms and the Hungry Bin

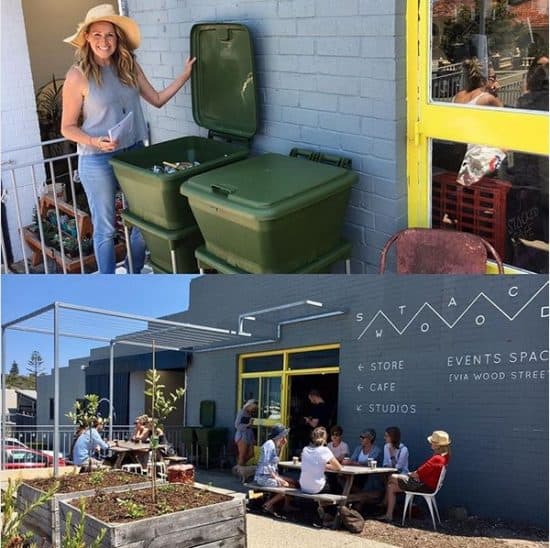
As I mentioned before, I’m a fan of local solutions. Pearthworms is a local, Perth-based business, and they intend to stay that way. They only supply Hungry Bins to people in Perth and Western Australia. With 1.3 million people living in Perth, and probably that same number of cafes and takeaway food outlets (okay, I’m kidding, but there’s a lot), there’s huge potential to make a massive difference without needing to look further afield.

Pearthworms are keen to focus not just on individual households, but also commercial venues: restaurants, cafes (the picture above is Josie with the two bins she has installed at Stackwood Cafe in Fremantle), businesses, community gardens – anywhere that is creating food waste.

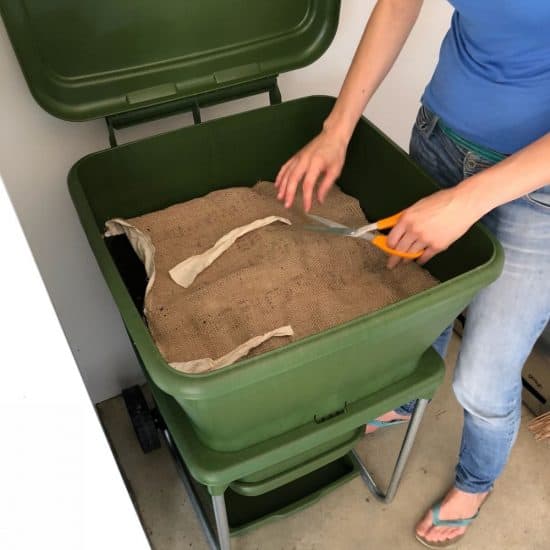
Pearthworms also supply happy, healthy worms with the Hungry Bin (Eisenia fetida worms, and 2000 of them, to be exact). It’s easy to imagine these worms would just come in a plastic bag, but no – they come in a natural hessian pouch sewn from an old coffee sack.

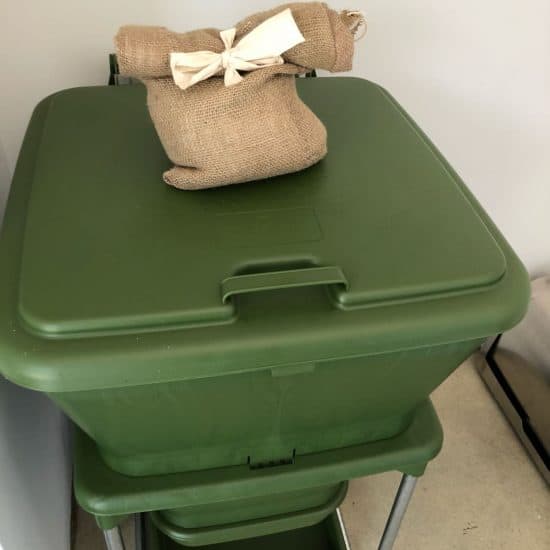
Even better, once the worms are added to the Hungry Bin, the sack can be cut in half along the seam to make a cover that perfectly fits the inside of the Hungry Bin. (The cover is important as worms don’t like light.)

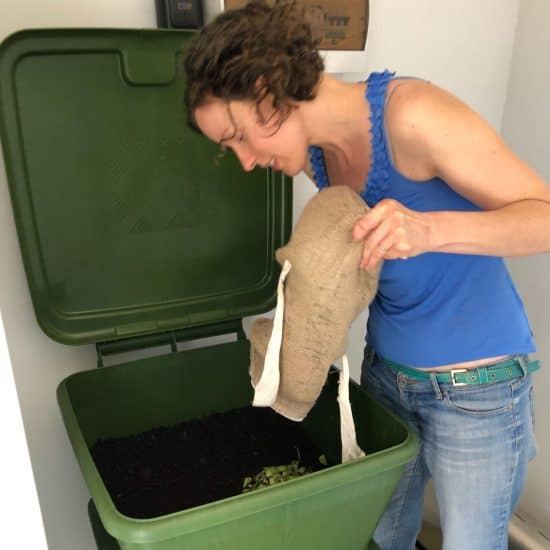
My experience with the Hungry Bin in the three months that I’ve had it has been great. It’s dealt with far more food scraps than my other worm farms can manage; it doesn’t smell; it’s so easy to use; it’s much less sensitive to extremes of temperature than other commercial worm farms; and once I get my first tray of castings, my garden is going to love me.

(Plus, this worm farm is going to churn out worm castings for 25 years. That’s an epic deal in the long run, if you think about how many trips to and from the hardware store that would be saving, buying plastic bags of seed raising mix and compost.)

It is a more expensive option (especially when compared to the DIY polystyrene box worm farm approach) but then again, DIY isn’t everyone’s thing. Different systems suit different households, different lifestyles, and different budgets.

The important thing is that we stop sending our food scraps to landfill. How we do it doesn’t really matter. There are plenty of solutions, we just need to find the one that works for us.

If you’d like to chat to Josie in person to find out more or see a Hungry Bin worm farm in action, Pearthworms currently have a stall every Saturday morning at the Subiaco Farmers Markets. Alternatively, their website is pearthworms.com.au.

[leadpages_leadbox leadbox_id=1429a0746639c5] [/leadpages_leadbox]

How to Compost for Zero Waste Living Without a Compost Bin

When I gave up plastic, I quickly noticed that the only thing going into my rubbish bin was food scraps. Take out the plastic, and food waste is pretty much all that’s left. Glass, paper, cardboard and metal are commonly recycled, so these would go in the recycling bin.

It’s not that I was throwing perfectly good food away. You wouldn’t catch me doing that! Food waste includes spoiled fruit and vegetables, the peels, the skins, the outer leaves, the cores, the husks, the seeds. The inedible bits.

Food waste makes up almost 40% of the average domestic rubbish bin. Without the plastic, it was nearly 100% of mine! I realised that if I could set up a system for dealing with food waste, my bin would be empty.

The thing was, when I began living zero waste, I lived in an upstairs flat without a garden. The good news is, we managed. There is always a way! There are actually plenty of ways to deal with food waste without having a garden or even a compost bin.

A Zero Waste Guide to Composting (No Garden? No Problem!)

1. Regular Composting

Zero Waste Plastic Free Gardening Homemade Compost Treading My Own Path

A standard compost bin requires a patch of soil or dirt about 1m² where it can be dug in. That isn’t a huge amount of space. Even if you don’t have your own garden, there might be a shared area where you can put one.

And if the reason you’re not composting is simply because you haven’t yet got yourself a compost bin yet… Well, get yourself on the local classifieds sites or Freecycle immediately! There is no time to lose ;)

Suitable for: anyone with a small patch of dirt.

Not suitable for: apartment dwellers, those with no outdoor green space.

2. A Rotary Composter

rotary-compost

A rotary composter is a compost bin suspended on a frame, making it useful for small spaces and paved surfaces. They are also called barrel composters and spinning composters. They are often more expensive than regular compost bins, and it is worth paying extra for one that is well designed and sturdy. They can be difficult to turn when full, particularly the larger ones, so bear that in mind before choosing the XL model. Read reviews to find a model that suits your needs.

Suitable for: anyone with a balcony, yard or space outdoors.

Not suitable for: people with back or strength issues (who may find turning it hard).

3. Neighbours with Compost Bins (or a Garden)

You might not have a garden, but what about your neighbours? Would they mind if you put a compost bin on their land? How about family and friends living locally? It doesn’t hurt to ask, and it’s a great way to build good relations with your neighbours.

Alternatively, check out this great site Sharewaste.com, which lets you either find places to take your compost, or offer your compost bin to others. I’ve registered my bins!

Suitable for: anyone with friendly neighbours or friends/family with a garden.

4. Council collections

When I lived in Bristol (UK) I was lucky enough that the council would collect food scraps from my door once a week for composting. If you live in an area with this service, make use of it! If you don’t live somewhere where this happens, contact your council and find out if there are any plans to launch it in the near future.

(If your friends or family have this service but you don’t, maybe you can make use of theirs!)

Suitable for: anyone with a council composting collection service.

5. Collected Compost

This is similar to the council composting scheme, except they are run privately. Food waste is collected from your door and taken away for composting. Unlike the council services, there may be a small charge for these services.

Sometimes Farmers Markets offer this service, so you can take your compost waste to the Farmers Market.

Suitable for: anyone living in the catchment of a private compost collecting company.

Not suitable for: anyone on a tight budget who doesn’t want to commit to weekly collection fees.

6. Community Garden Composting

If you don’t have space to compost at home, and you don’t have neighbours, friends or family who are able (or willing) to help you out, community gardens are a great place to take your compost. Many are willing to take food scraps without the need for you to be a member (although being a member is a great way to support a local organisation doing good in the community). Find out where the nearest community garden is to your home or your place of work, and get in touch to find out how you can connect your waste with their bins.

Suitable for: anyone living or working near a community garden with compost bins.

7. Worm Farm (Vermicomposting)

Build a DIY Worm Farm

A worm farm is typically a box with air holes, drainage and a lid, and worms. Worm farms (also called vermicomposting) uses composting worms, which are fast growing and fast eating, rather than earthworms that you might dig up from your garden. They eat food waste and turn it into rich worm castings that is a great soil additive.

They are available for purchase (often in the second-hand ads) or you can make your own using waste materials.

Worm farms can be kept indoors or outdoors dependent on climate (worms don’t like the cold). If looked after properly they do not smell.

Suitable for: everyone, but especially apartment dwellers and those without a garden.

8. Bokashi

Bokashi Bin

Bokashi bins ferment waste rather than breaking it down. They are an indoor home composting system and can deal with all types of waste, including cooked food and meat/fish products. Inoculated bran is added to the bin to kickstart the fermentation process. The bokashi bin is sealed and does not smell.

Once filled the contents need to be dug into a garden or added to a compost bin, so access to outside space is necessary.

Find out more about bokashi composting.

Suitable for: meat eaters who have waste unsuitable for composting.

Not suitable for: anyone without access to outdoor space.

When we began our zero waste lifestyle, we started out with a single worm farm. That grew to two worm farms, and we added a bokashi bin to the mix too. Now we have a garden we still have the worm farms and the bokashi bin (although this is not currently in use) and have established not one but four compost bins! This means we have space not only to compost our own food scraps, but other people’s too :)

Now I’d love to hear from you! How do you deal with your food waste? Do you compost, or have a worm farm, or a bokashi? Do you have all three?! Or none of them, and you do something completely different? Have you tried any of these and not got on with them? Do you need help or troubleshooting? Which one is your favourite? Any that you’d like to get started with? Tell me your thoughts in the comments below!

[leadpages_leadbox leadbox_id=123a865e9839c5] [/leadpages_leadbox]

Worm Farms…Tips and Tricks

After writing my post yesterday on how to build a DIY worm farm, I thought it might be useful to write another post explaining how to look after your worms, and also provide some reasons why you might consider worm farming in the first place.

In their National Waste Policy fact sheet, the Australian Government estimate that two-thirds of waste sent to landfill is organic. If you’re not sure what I mean by organic, it’s the waste that originally came from plants and animals which can be broken down. As well as the obvious grass clippings, food scraps and bones, this includes cardboard, paper and wood. In 2006-2007, Australians landfilled almost 14 million TONNES of organic waste. A full garbage truck holds 10 tonnes. Sending all that organic waste to landfill meant an extra 1.4 million garbage trucks on our roads. Even if you think Australia’s got the space, that’s a lot of unnecessary heavy road traffic, not to mention fossil fuel burning and airborne pollutants via vehicle emissions.

Next up, soil quality. Australia has some of the oldest land masses on Earth, and consequently they are nutrient-poor and with little organic matter. Perth has some of the worst agricultural soils in the world. (Someone once told me that it was officially the poorest soil in the world, but I can’t find anything that confirms it. However, ask anyone who ever tried to grow anything in the soil in Perth, and they’ll confirm it for you!) The sandy soil repels water and also nutrients. If you want to grow plants in Australia, you need to improve your soil by adding organic matter. And this is where the worms come in!

Image

Worms and their castings. Castings are the product created when worms break down organic matter, and contain nutrients that plants can uptake easily.

Worms eat organic waste and break into down into a product called castings. These castings contain beneficial nutrients that can easily be absorbed by plants. Their texture also enables them to retain water and so they are great for improving soil structure. And they won’t burn plants, as some chemical fertilizers do. Castings are also suitable for seedlings. Worms also produce a liquid that needs to be drained – worm wee! (Or more technically, leachate.) Some tips on using worm wee are provided below.

And keeping worms is fun! It’s free, they require very little maintenance, meaning you can go on holiday for weeks and they will still be alive on your return – how many pets can you say that about?

Tips & Tricks

So I’ve made the case for reducing fossil fuels, reducing landfill, improving your garden and having fun…so what’s keeping you from getting your own worm farm? Is it any of these?

1. Worm Farms smell.

Actually, they don’t smell if you look after them properly. Castings have an organic smell similar to the earthly smell of soil. The main cause of smelliness is too much food. It can be tempting once you set up your worm farm to add every single scrap of food to it immediately, but worms only eat their body weight in food every day, so you need to start small and increase the food once the worm numbers build up.

2. I don’t have a garden.

Neither do I! The worm farm takes up only a very small amount of space, and it will take several months to fill up the worm farm with castings. You can use them with house plants or pot plants and even if you don’t garden, you are bound to know someone who does so just give them the box of castings once it is full.

3. I don’t have time.

Seriously, how much time do you think you need?! Once the worm farm is set up, all you do is empty your food scraps that you would have thrown in the bin into the worm farm. It helps to have the worm farm nearby – if it’s located at the bottom of the garden you are far less likely to make the trip.

Problem-Solving

This is by no means an exhaustive list, but hopefully covers some of the more common problems that you might encounter.

My worm farm smells

Likely cause: too much food

Solution: STOP ADDING FOOD! Give the worms a chance to eat what they already have. Anaerobic conditions (no oxygen) can also cause this so give the top layer a stir to aerate.

My worms are escaping

Likely cause: If it is only a couple of worms, there is probably not an issue. If there is a mass exodus, then there may be too much moisture or too much food.

Solution: Add newspaper to reduce the moisture levels, and stop feeding if there are large amounts of uneaten food.

I have other pesties in my worm farm

Likely cause: Not all insects in your worm farm are problems, and you should expect to find other creatures making their home here. But some pests indicate problems.

Solution: Burying food should keep unwanted pests at bay. Flies indicate there is too much food, so reduce the feeding. Ants indicate that the conditions are too dry, so add water.

Other Things to Know

  • You need to use composting worms for your worm farm – varieties such as red worms or tiger worms, as these are adapted to the conditions of a worm farm, whereas ordinary earthworms are not.
  • Worms prefer cooler conditions so on a very hot day, add an ice pack above the worm blanket to keep the inside of the worm farm cool. However, freezing will kill them! (This is not a problem we have here in Perth but may be an issue in cooler climates.) If you are expecting a frost, bring the worm farm indoors.
  • Worms do not have teeth, but suck in food. The smaller the food particles are, the more they can eat. Blending or chopping helps, but if you can’t be bothered, freezing the food then allowing to thaw will help break down the cell walls and make it easier for your worms. And if you can’t manage that, just try to bury your food so it doesn’t attract pests.
  • Worms don’t like acidic conditions and don’t like acidic food such an onions and citrus. Avoid giving these to your worms.

Worm Wee vs Worm Tea

You may come across references on the internet to both worm wee (leachate), and worm tea. The two names are often mistakenly used interchangeably, but they refer to different products. Leachate is what drains from the worm farm. Worm tea is a product made using castings, water and molasses, which are “brewed” for 24-48 hours. The main difference is that worm tea is aerobic, and so great for plants, whereas leachate can be anaerobic.

Leachate is fine to add to compost, but if your leachate is anaerobic it may harm your plants. I learnt this the hard way, diluting my leachate to a 1:10 ratio (1 part leachate for 10 parts water) and pouring on my seedlings, which caused them all to go yellow and die.

The way my worm farm is designed, my leachate does not have much contact with air and so will always be anaerobic. If your leachate drains freely into an open container it will probably be aerobic. You can try to aerate your leachate by diluting and exposing to air for a couple of days before using. However, always exercise caution when using on plants. Make sure you dilute 1:10 with water, and avoid using on seedlings, house plants or other temperamental plants.

[leadpages_leadbox leadbox_id=1429a0746639c5] [/leadpages_leadbox]

How to Build a DIY Worm Farm

One of the first things I noticed once I stopped buying plastic packaging was that my rubbish bin was now filled almost exclusively with organic waste – vegetable peelings, fruit skins and cores, leaves and the like. In the UK my local council had provided a brown bin for organic waste, which was industrially composted, but here in Perth Australia it was heading straight to landfill.

This meant someone was driving a truck to my flat, picking up my organic waste, driving it to a landfill site, dumping it into a hole in the ground and covering it with rocks. With fuel and machinery costs, wages, increased pollution from vehicle emissions, and the resulting contaminated land, it seemed like a lot of energy (and effort) was being wasted dealing with something I could potentially deal with at home.

And so I built a worm farm! I use the term ‘built’ loosely, as there was no actual building involved. In fact, it is dead simple. Additionally, I spent ZERO! Nothing! Zilch!

How to Build a Worm Farm

What you will need: two polystyrene boxes, a skewer, scissors, junk mail or shredded paper, some worms, an old towel

I salvaged two polystyrene boxes with lids from my local supermarket. (I just went to the Fruit & Veg section and asked a member of staff.) In Australia, vegetables such as broccoli and Brussels sprouts are delivered in these, and once emptied of stock, they are simply thrown away.

The boxes need to be the same width and length, but the same depth is not necessary.

Image

Two insulated boxes, courtesy of the supermarket. The bottom box doesn’t need a lid as the other box sits directly on top.

The boxes will be stacked on top of one another, so if they are different depths, choose the shallowest to sit on the bottom.

The top box is for the worms, and so needs drainage holes. The bottom box will be used to collect liquid that drains from the other box, so no holes in this one! To pierce holes in the bottom of the box simply use a skewer, making the holes approximately an inch apart.

Image

Drainage holes allow liquid to drain away, and stop your worms from drowning. The liquid collects in the bottom box.

Place a layer of cardboard at the base of the top box so that the worms do not fall through the holes. Next, add some shredded paper to make bedding for the worms. This is a great way to get rid of those annoying supplements and catalogues that come in the newspapers, or in the mail.

Image

If you don’t have a shredder (I don’t) then you can make strips of paper for bedding by cutting slits in a newspaper at 1cm intervals along the spine, and then tearing.

Using a litre of water (ideally rain water of filtered water, if you have) pour carefully over the bedding to ensure it is wet. Any excess water will drain through to the bottom box.

And then…worms! I got mine from a friend but many community gardens offer them either free or for a small fee. You can also find them on gumtree or freecycle. If all else fails they can be purchased at the big DIY stores but be aware that these will have potentially been sitting on the shelf for a long period of time and may not be in very good health, so will take longer to get going.

Image

The worms in their new home : ) One fistful of worms needs one fistful of food per week. It’s important not to overfeed them as this means a stinky worm farm and can also attract other unwanted pesties who want in on the action.

Finally, cover the worms with an old towel, sack or carpet, or if you don’t have these to hand then use cardboard. This cover keeps the worms dark and damp, and keeps flies out. If you’ve used cardboard or something biodegradable you will eventually have to replace this as it will disintegrate over time.

Image

An old flour sack acting as a worm blanket, as I don’t have any old towels.

Lastly, replace the polystyrene box lid, after piercing a couple of holes for air, and place in a shaded spot. My worm farm lives on my balcony but it would be fine to keep indoors in a laundry or kitchen…if you wanted to!

Do not feed the worms for a few days to give them a chance to settle into their new home.

And there you have it – a DIY worm farm that didn’t cost you a penny!

[leadpages_leadbox leadbox_id=1429a0746639c5] [/leadpages_leadbox]