Tag Archive for: vegetable garden

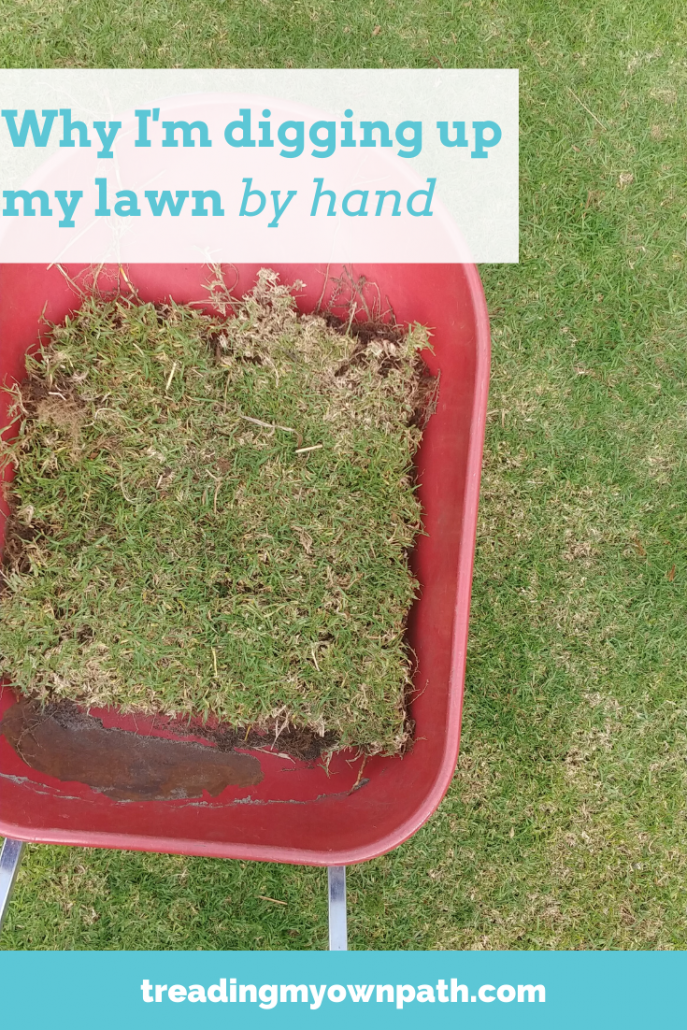
My garden transformation project: why I’m digging out my lawn by hand

When it comes to transforming my garden into an edible and productive food space, there’s one task that’s taking up most of my time currently: digging out the lawn. And if there’s one question I’m answering most often from the garden updates I post it is this: why are you digging out your lawn?

Which actually has two meanings: why aren’t you keeping the lawn? and why have you chosen digging out the lawn as your method of removal?

It’s not a short answer, so I thought I’d explain it here.

Why I’m digging out my lawn (why I’m not keeping the lawn)

I would like to grow edible food in my garden. I would like fruit trees and vegetables. I’d like native plants too. To grow these, I need to remove the lawn.

Lawn in Western Australia is not like lawn in Europe. If I leave it, it won’t grow into a beautiful field of wildflowers. In summer it will be dead without a lot of inputs. What does grow will be non-native grass species and weeds like castor oil (which is toxic to dogs – it’s the source of ricin).

My climate doesn’t naturally support meadows.

Growing lawn in Perth is hard work and takes a surprising amount of resources. It needs a lot of water to keep it green. I have a bore (which is a pump that draws water from the ground, as opposed to using drinking water from the tap) but even so, our groundwater levels are dropping and in my opinion, it is a waste of water to keep so much grass alive.

Anyways, I’m only allowed to use my bore reticulation three times a week. Any other watering needs to be drinking water.

The reticulation that’s in place to keep the lawn green is plastic and the parts break all the time. It breaks, and the trickle is replaced with a jet stream that gushes gallons of water down the road at the front (or floods the garden at the back). After replacing a few broken bits (luckily with second-hand freebies I was given, not new plastic) only to end up with more broken bits, I decided to just switch it off.

Then, it needs fertilising to keep it green. Lawn fertilisers cause a lot of problems in our rivers, because they are soluble fertilisers than run-off into the water and contribute to algal blooms (which kill the fish).

My non-fertilised lawn is yellow and patchy. Which is fine, because I’m digging it out.

Yes, lawn feels nice underneath the feet (well, when it’s not dead). Although our Australian grasses are not as soft as the European grasses, so it isn’t quite the same. But there are parks close by with lots of grass that are properly maintained and accessible to lots of people.

I know that a lot of non-Western Australians will look at a garden full of coarse wood chip mulch and think it looks ugly and weird. It took me a bit of getting used to when I first saw it, too. But if meadows are what happens to grasses in Europe, this layer of dead tree matter is what nature does in our natural bush areas.

It acts to protect the soil from the harsh sun, retains moisture underneath – and eventually breaks down to add carbon to the soil.

Although it looks extreme now, eventually I’ll cover most of my mulch with plants so it won’t be so obvious.

Why I’ve chosen digging out the lawn as my method of removal

There are lots of ways that people choose to get rid of their lawn. Digging mine out by hand (well, I did contemplate a turf cutter, but I’ve stuck with the spade) was the only option I really considered. I know there are plenty of ways, but I have my reasons for choosing this. Let me explain them.

Perth grass is TOUGH.

Even though I told you grass dies here in summer, it doesn’t actually die. Every autumn when the rain returns the dead patch of yellow grass resurrects itself. It dies, and yet it is almost impossible to truly kill.

There are a few species of grass used for lawns in Perth, and I have a few, definitely included these two.

Kikuyu grass: a tropical grass speces Pennisetum clandestinum, native to the highland regions of East Africa. Grows rapidly and aggressively. Categorized as a noxious weed in some regions. Has underground runners and its root system can grow to 3 metres deep.

Couch grass: a drought-tolerant grass described as ‘high maintenance and invasive’. It has an extensive root system with fine roots that is difficult to remove. Can grow through concrete. Also called Wintergreen couch – I wonder if this is because it dies back in summer and returns with vengeance in winter?

I don’t want to use chemicals (which is often recommended)

Because our grasses are so hard to kill, many gardeners and organizations recommend using glyphosate (you might know it as Roundup) to kill lawn. It’s a controversial chemical that’s been banned in many European countries due to safety concerns.

Whilst verge gardens tend to be non-edibles (well, for humans only) I’m not interested in using chemicals to kill any of my lawn that will remain in the soil and enter the food chain.

Smothering/solarising doesn’t work well in Perth

Lots of readers have suggested I just cover the grass with cardboard and mulch, or use black plastic to solarise the grass and kill it. I know that these methods work well in other places with other types of grasses, but they aren’t great in Perth.

If it has worked for you, brilliant (and I’m sure it can be done). But when it doesn’t work, all that happens is you create a cosy, warm, wet environment for the grass which means it expands its root networks, and eventually busts through the mulch/plastic.

An earlier guide to verge gardens by the Water Corporation specifically advised against these methods, recognising that they rarely work.

I’ve seen many, many examples of mulching/solarising grass failing in Perth, and I can’t say I’ve ever seen an example of it working successfully on the types of grass that I have.

Putting the work in up-front

Even if I thought that mulching/solarising was a great idea, and wanted to give it a go, I’d need to wait several months for the grass to die before I could plant anything in the ground. And I don’t want to wait.

The sooner I can plant trees the better, and the sooner I can plant vegetables the better.

Also, I think putting in the work up-front means not playing catch-up later. I don’t want to spend the next six months digging out regrowing grass – especially not grass that has grown through raised garden beds and now has 1+ metre deep roots.

I expect there will still be some regrowth, but it should be a lot less than if I’d just tried to plant on top.

The level of the land

One other reason why sheet mulching with cardboard and then heaping on the mulch wouldn’t work for me – at the front at least – is that the ground level is already a little high. It’s higher than the driveway, which means when it rains all the water (and mulch) will run off onto the concrete and down the drain.

In a place that’s short of water, this is a huge waste. I need to ensure any water that falls stays in my soil.

Adding an extra 10-15 cm of mulch on top would create a mini mountain, and just exacerbate the problem.

By removing the lawn I’m reducing the height of the land slightly, so the new surface is flush with the kerb/driveway.

Knowing my land

I did contemplate getting a turf cutter, and a few friends suggested just getting a bobcat in to blitz it in a couple of hours. But I decided to do it by hand.

Out the back, I don’t need it all done at once, so I’m chipping away as I’m ready to plant trees or put in beds.

At the front I am removing the whole lot, but I’ve found the by-hand approach useful.

There is a huge tree on my verge, and I don’t want to trash all of its roots with heavy machinery.

There are gas pipes, water pipes (and PVC reticulation pipes!) under the lawn, and I don’t want to damage anything.

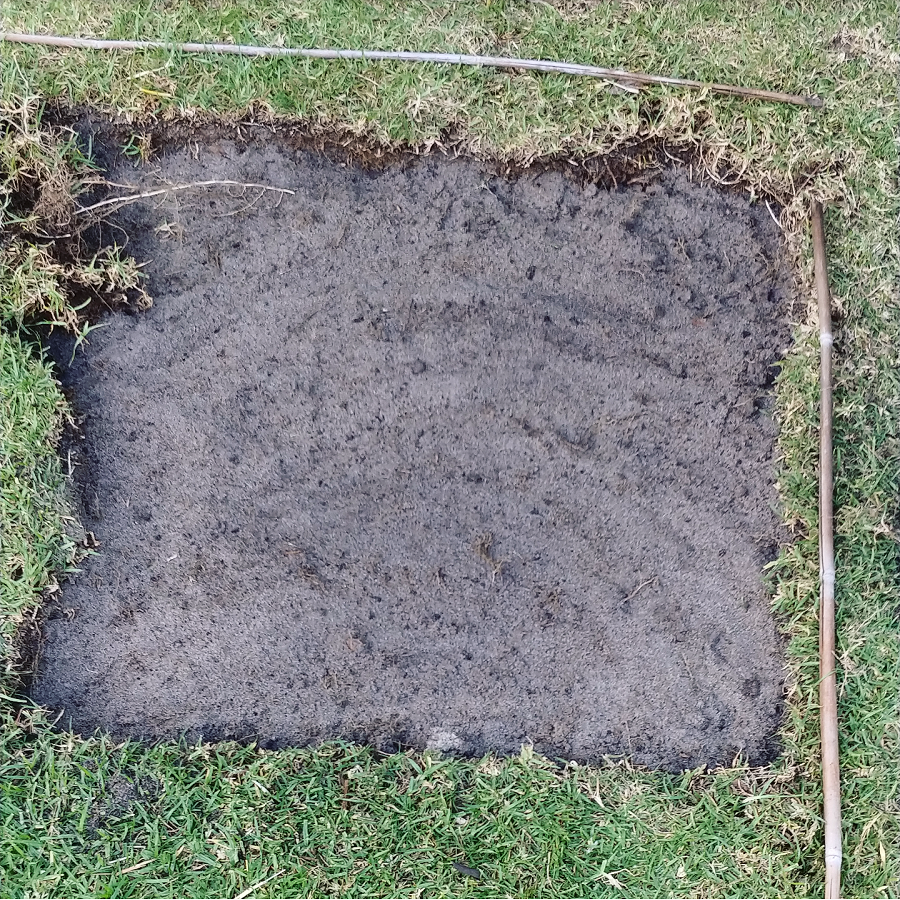
It’s been useful to go slowly and see exactly where the roots from the big tree, my neighbours’ trees and my hedge extend, remove random bricks I find, and also see the condition of the soil (which varies from extremely bad to pretty bad. But I did find a worm. Just the one. Yeah, Perth soil is really not great).

Because I want to put in-ground beds at the front, its useful to know if there are networks of roots or blocks of concrete under the soil before I plant anything out.

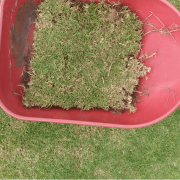
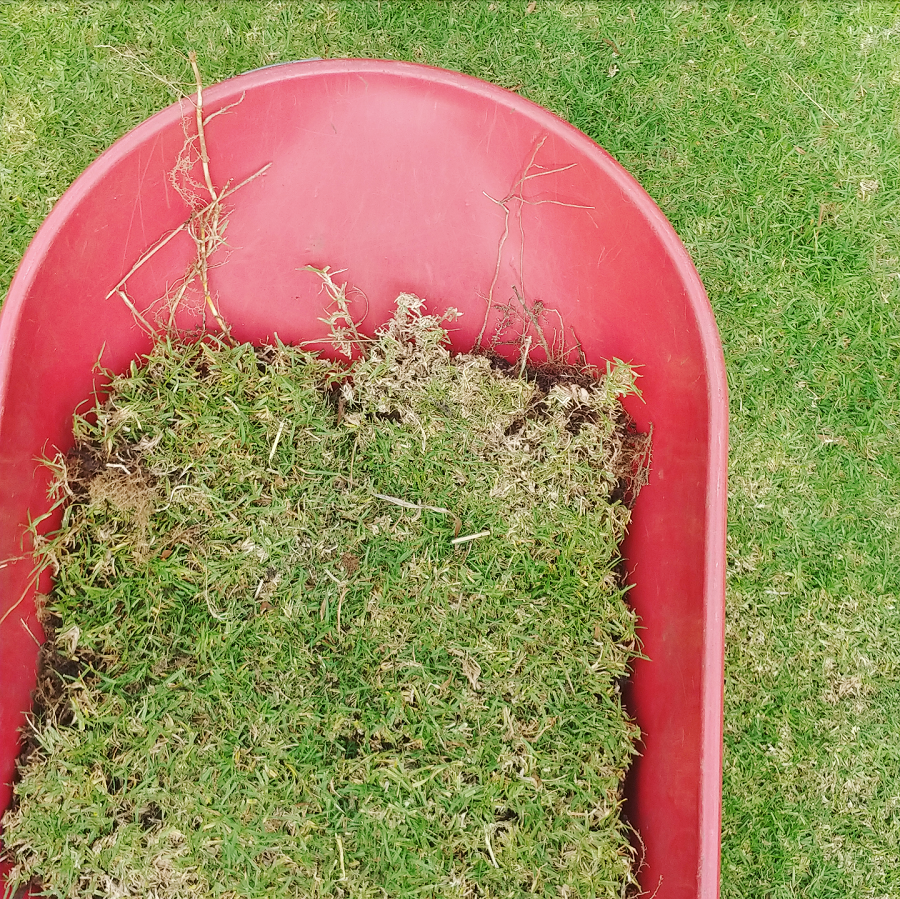
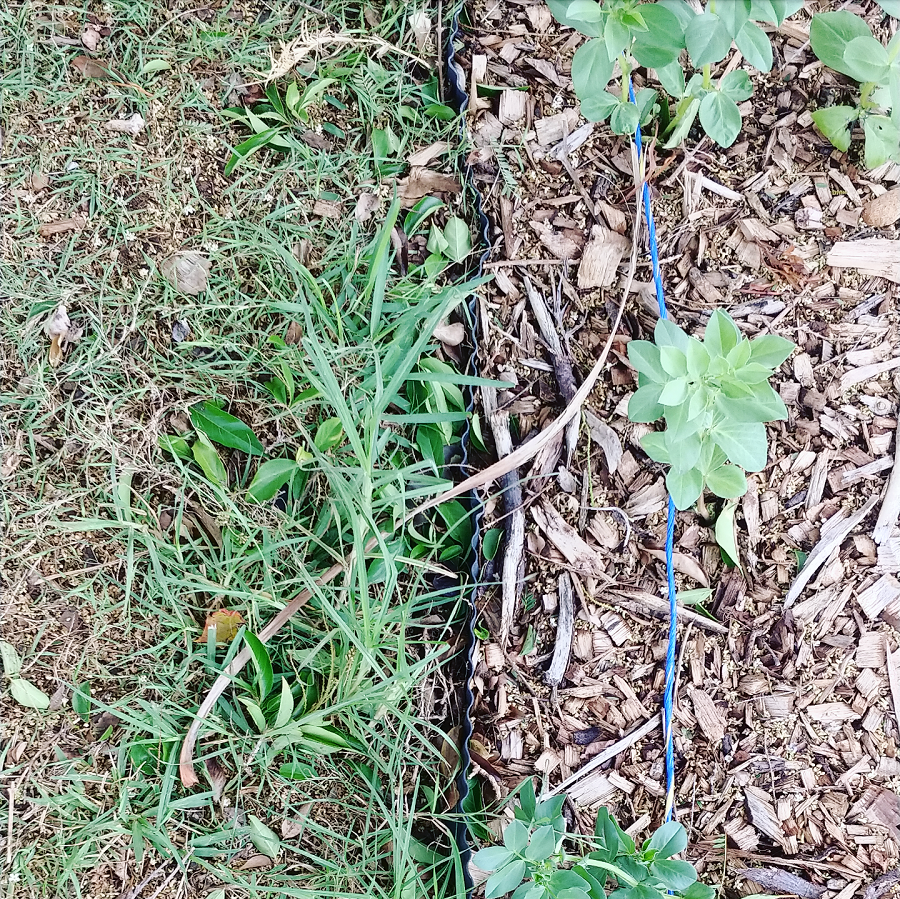
Removing the lawn – progress to date

The one advantage of living on a sandpit rather than heavy clay soils is that it is fairly easy to dig out grass. It isn’t back-breaking work… but there is a lot of it.

My superstar neighbour has given me a hand out the front (I think she is impatient for it to look good!) and it is quite amazing how much can be removed in a day.

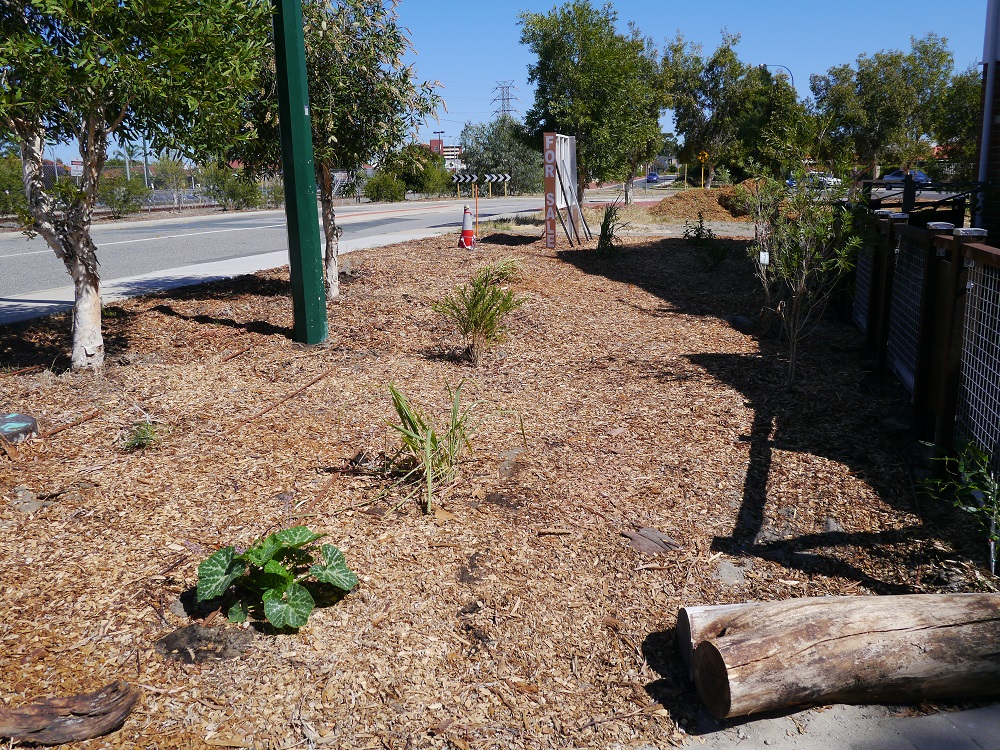
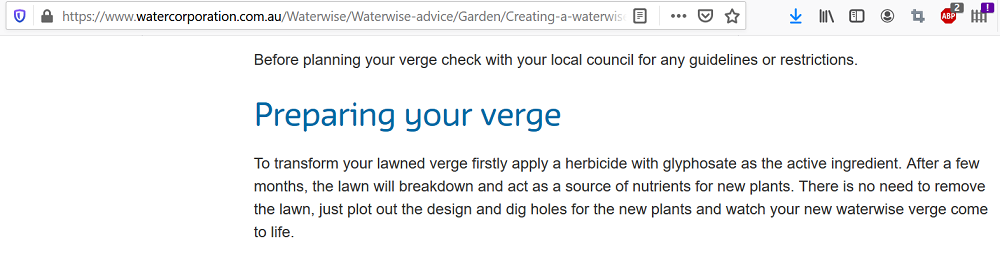
Currently, the front looks like this:

(The plants are a native Geraldton wax I transplanted from the back garden, a lemongrass bush and the beginnings of my broad bean patch).

I’m going to have another blitz at the weekend, and I’m hoping it will almost all be gone when I’m done.

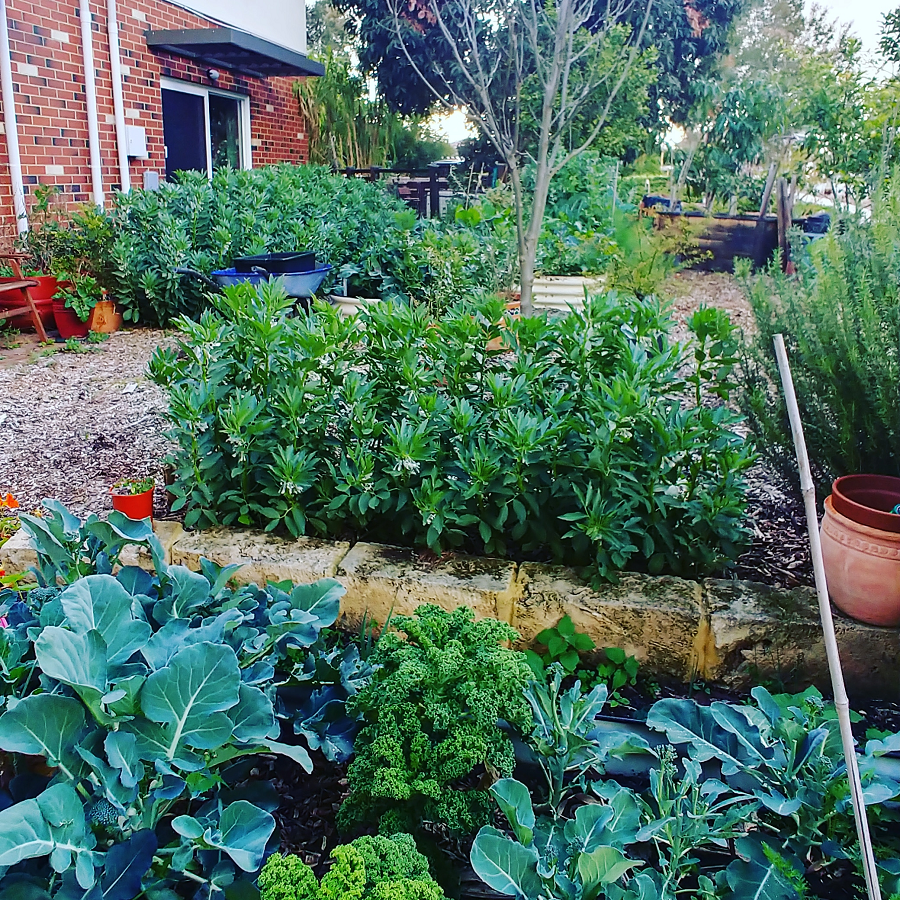
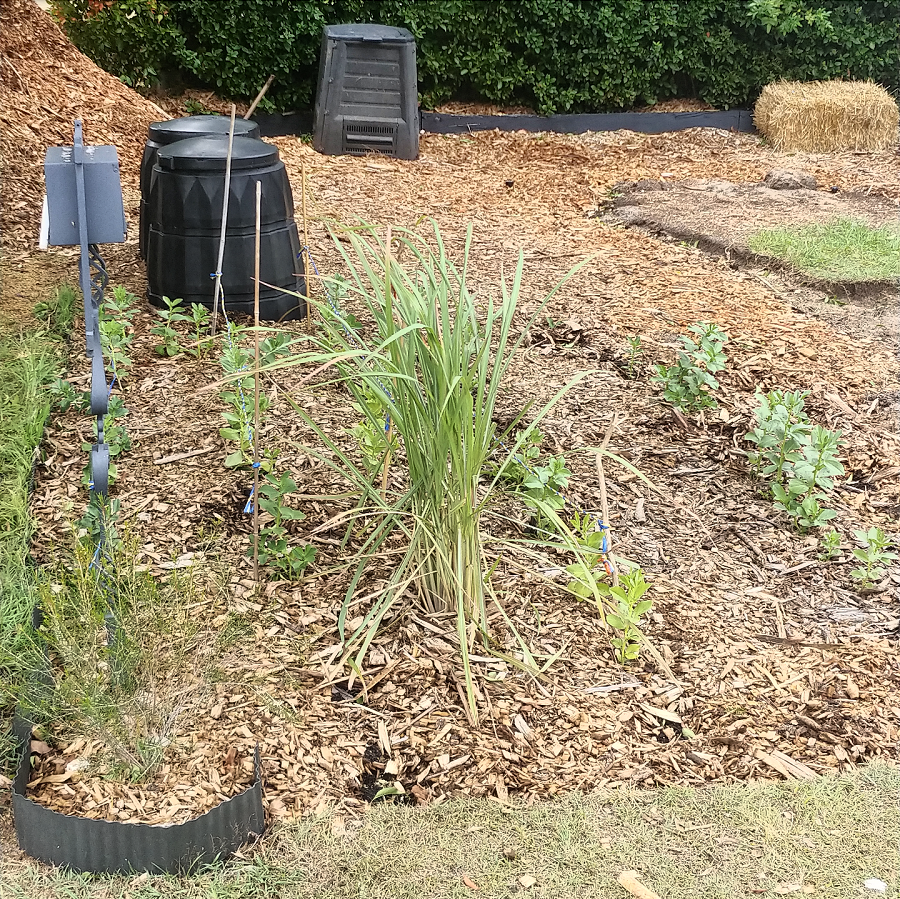
Here’s the back, with the new beginnings of my citrus ‘grove’ and my raised garden beds beginning to fill up:

So that, my friends, is the extremely long answer to the question: why am I digging out my lawn. It’s fairly boring work up front, but the long-term rewards will be worth it.

Now I’d love to hear from you! Any more questions about lawn or lawn removal? Any experiences of removing lawn yourself – both successful and unsuccessful? Any other thoughts at all? Please share in the comments below!

[leadpages_leadbox leadbox_id=123a865e9839c5] [/leadpages_leadbox]

How to get started growing vegetables…fast

At the start of the year, I started a project to transform my front-and-back lawn into a productive food garden. I got the compost cranking early on, and four chicken ladies moved in to help with pest control, weed suppression and providing manure (oh, and eggs). I’ve been slowly working on a garden plan, and my next steps were sorting out reticulation (to water the garden) and planting trees.

However, then life as we know it turned upside down, and priorities shifted.

In light of the continuing food shortages in the stores and impending isolation, not to mention that a lot of food sold here on the west coast is reliant on trucks arriving from the east coast (which feels fragile with all this uncertainty), I decided that growing vegetables was my new priority.

It seems that growing vegetables is everybody’s new priority, as veggie seedlings and packets of seeds have become the new toilet roll – selling out everywhere.

If you’ve decided you want to start growing food – whether you’re not sure where (or how) to start, or you just panic bought a heaps of seeds or seedlings and you’re not quite sure what to do with them, I thought I’d talk you through the process.

How to set up a vegetable garden…fast

One thing I want to be clear about is setting up a vegetable garden fast is not the cheapest way to do it. Fast will cost you more. As just one example, seedlings cost more than packets of seeds, and packets of seeds from a store cost more than swapping saved seeds with a neighbour.

As another example, making compost is cheaper than buying a bag from the store…. but if you don’t have a compost bin set up, you’re looking for at least 8 weeks before it’s ready. And that’s assuming you have enough stuff to fill it straightaway.

We are in unusual times, and what we might do in “normal” circumstances isn’t necessarily what we are doing now.

Fast costs more. But if your priority is securing a food supply for you, your family and your neighbours, or avoiding the stores as much as possible, the cost might be worth it.

Planting your veggie garden – containers or in-ground?

There are pros and cons to every option, and some plants will do better in one or the other.

In-ground beds

This is the cheapest option by far, and in-ground beds are less likely to dry out or become waterlogged than containers. Plus, worms and other good guys are free to come and go. In a hot, dry climate like Perth, these work well because they lose less water than growing plants in containers.

On the downside, they aren’t great if you have mobility issues, and your dog, other pets or young children may not understand the difference between lawn and vegetable beds.

With in-ground beds, you do need to know how good your soil is. When I lived in the UK and had an allotment, I could put anything into the ground, add nothing to the soil, and get a great crop. If I plant out seeds or seedlings straight into the ground in Perth, they’d shrivel and die (or at least, not get very big). There are various amendments I’d need to add to my beds – compost, clay (I live on a sandpit), rock minerals, and potentially other things too.

If you’re not sure what I’m talking about, and you’re keen to get your veggie garden started fast, I’d suggest going with containers or raised beds and buying soil. If you have a little more time, I’d suggest finding some local gardeners to chat to (either garden groups on Facebook, or even the staff at the local garden centre) about what they’d recommend for where you live.

Raised garden beds

The cost of these can vary substantially. Brand new beds made from colourbond steel or wood, or made by a tradesperson are at the top end; second-hand beds can be sourced for less (they are usually easy to track down on online classified sites like Gumtree), and at the bottom end, people make their own with salvaged materials and offcuts.

One advantage of the metal ones is they are lightweight and easy to move – so if you find you’ve put them in the wrong spot, or decide down the track you no longer need them and want to sell them, this is fairly straightforward. Wooden beds are more difficult to move once in place, as are brick/slab beds.

In colder climates, raised garden beds can work well for crops that like warm summers (aubergines, tomatoes, peppers etc). In hot climates like Perth, they tend to dry out, particularly metal ones, that get hot (we’d be better with sunken beds, really) and aren’t ideal for the climate. They might be a good option if you struggle with bending and kneeling, or you suspect in-ground beds will be trampled by dogs and children.

Raised garden beds also need to be filled with soil: the bigger the bed, the more soil, which is another expense. There are ways to save on the cost of soil, if you go down this route:

  • Rather than buying bags of soil, find a local soil yard where you can buy bulk soil. you may be able to bring a trailer and load up, or you may be able to order a soil delivery. It is much more cost-effective than buying bags (plus, no waste).
  • Buy soil suitable for growing vegetables, and buy the best quality you can afford. When it comes to soil, you get what you pay for.
  • Vegetables only have roots that are 25-30cm deep, so only buy good soil that will fill your beds 25-30cm deep. If you have deeper beds, fill the base with something else. I’ve seen people use empty milk bottles (because they have square sides they work pretty well), or you could fill with street tree mulch. If you have to buy soil, buy the cheapest soil for the bottom, and put the good stuff on the last 20-30cm only.
  • If you live in Perth, you can find bulk soil at Green Life Soil Co or Carlisle soil yard. Search for ‘landscaping supplies’ or ‘soil yard’ to find options near you. You can order street tree mulch Australia-wide from mulchnet.com.

Containers

If you’re short on space or have a tight budget, containers are a good option. They can be anything from purpose-made plant pots to old wine barrels, to repurposed olive oil drums or plastic tubs. They need less soil than a garden bed.

However, some plants are challenging to grow in containers, and whatever you do plant will need more looking after – watering more often and feeding the soil.

If you’re planning to grow in containers, check how big the plants will get and ensure you’ve chosen a big enough container – or you won’t get a crop. Lettuce, radish and spring onions won’t take up much space; cauliflower, broccoli and courgette/zucchini get huge, and you’ll need a big pot for just one plant.

Grow food in the right location

Vegetables need a certain number of hours of sunlight to grow. Summer vegetables like tomatoes, capsicums, squash, courgettes and cucumbers need full sun and lots of it. Kale, lettuce and spinach will still grow well with less sun.

When planning on where to put your containers or beds, you need to choose a spot that’s best for them rather than best for you. Full sun is ideal in winter (when daylight hours are less), afternoon shade is good in summer. The sun is also a lot lower in the sky in winter, meaning shadows from buildings and trees are cast a lot lower.

In an ideal world, planning a garden, you’d map out the sun patterns for spring, summer, autumn and winter (so 4 times a year) in morning, lunchtime and mid-afternoon. It’s easy to figure out where the sun is tracking in the sky, but how far the fence shadow or the neighbour’s tree reaches on the shortest day is harder to figure out. There are suntracking apps, but I prefer the slow approach. Usually.

Examples of shadow differences at the same time of day, three months apart (summer and autumn):

If you head outside today, in March, and make a note of where the shadows are, that’s a helpful start. Shadows will get shorter in summer and longer in winter. If you’re heading into winter and notice the shadows are already covering the site where you want to plant, it might not be ideal. If you’re heading into summer, there will be less shadow as the sun gets higher.

It’s an important consideration with in-ground beds, but matters less with containers, as you can move them. If you have the option, orient garden beds directly north (in the southern hemisphere) or directly south (in the northern hemisphere).

Choosing plants (seeds versus seedlings)

If you’re wanting to start a veggie garden quickly, you’ll want to choose plants that grow quickly and can be eaten quickly.

Vegetables that grow quickly and can be planted now (in spring in the northern hemisphere and autumn in the southern hemisphere) include:

  • Carrots
  • Salad leaves – so many different varieties to choose from
  • Greens – kale, Swiss chard, spinach
  • Lettuce (which are really salad leaves left to grow into full-size lettuce)
  • Beans (bush or dwarf beans grow faster than other types)
  • Spring onions
  • Beetroot
  • Radishes (one of the fastest growing vegetables)

Generally speaking, the fast-growing varieties I’ve mentioned above are easy to grow from seed, and much more affordable this way. It’s better to avoid root vegetables as seedlings as transplanting can damage the roots. Plus, one root vegetable seedling will give you one root vegetable (so one carrot seedling will give you one carrot, compared to something like a bean plant, where one plant will give many pods).

Seedlings are more established plants, so you’ve got a headstart on the growing process. You might like to buy lettuce or spring onion seedlings, or slower growing vegetables (pepper/capsicum seedlings will save you a few weeks of growing time). If there are multiple plants in each cell, you’ll need to thin them out or they will suffocate one another and not grow well.

If you can’t get seeds or seedlings at the garden centre, online gardening groups are a great place to swap seeds. Even if you can’t go out, members will often post seeds to you if you cover the postage (I’ve done this in the past).

You can even plant seeds you find in your pantry – such as coriander, mustard, amaranth or parsley seeds.

Whatever you choose, ensure you plant according to the instructions (and if there are no instructions on the packet, check online). Some plants – like broccoli or cauliflower – need a large space to grow, even though the seeds are tiny.

Start small, and learn as you go

You’ll learn much faster once you’ve started, so don’t try to read everything beforehand. Start, but start small.

The way I learned to garden was sticking some seeds and plants in my allotment, and seeing what happened. Then, as I noticed issues (seeds not germinating, or yellow leaves, or plants being munched by birds) I’d look up solutions. Some seeds can take weeks to germinate (others are fast, so you may have a dodgy packet of seeds), yellow leaves can indicate a nutrient is missing from the soil, or perhaps there is too much watering, and netting or cut up plastic bottles can protect seeds from birds (in the UK, birds would always eat my beans – but here in Perth the birds aren’t interested).

If you really don’t know what you’re doing, don’t do too much too soon. Plant a few things one week, and a few things the next, and so on. Better this than spending a fortune buying a raised garden bed and planting hundreds of dollars worth of plants, only to realise down the track you put the bed in completely the wrong spot, and discover all the plants you chose are frost-sensitive after they are wiped out overnight.

There is so much information out there. Books, YouTube videos, blog posts, social media pages and groups. Where possible, try to find information that’s local to where you live. The people growing food where you live will know what pests are common, which varieties grow best, the weather patterns, what to plant right now, what you might need to add to the soil… and where to find what you need.

Growing food is fun, a useful skill to have, and infinitely rewarding. It’s easy to forget the problems of the day when you’ve got your hands deep in soil. And there is nothing (nothing!) that tastes better than a homegrown carrot. Not even chocolate. Promise.

Now I’d love to hear from you! Are you starting to try growing food for the first time? Are you stuck or have any questions? Have you been growing food for a while and have any tips for newbie growers? Anything else to add? Please share your thoughts in the comments below!