Tag Archive for: simple living

Baking Sourdough Bread.

I love real food, and I especially love fresh real bread. Not the ‘bake-from-frozen’ or ‘filled with additives’ bread that the supermarkets sell as fresh bread, but proper, slow-risin’, crusty, still-warm-from-the-oven bread that is sold in bakeries where the bakers have been up since 4am. The kind of bread with just four basic ingredients: flour, water, salt and yeast.

I particularly love sourdough bread. Sourdough is slightly different to other bread because it requires a sourdough starter which, in addition to yeast, contains lactobacilli bacteria. These ferment the dough giving a distinctive and slightly sour taste. Compared to bread made with commercial yeast only, sourdough is easier to digest because fermentation helps break down gluten, and has a lower glycemic index (GI). Additionally, because sourdough is acidic it discourages mould from growing, and so the sourdough will keep for much longer.

The downside is that buying this kind of bread isn’t cheap. We used to spend over $11 a week buying two loaves from the bakery at the weekend markets. We also had to make sure we made time every weekend to go to the market in order to buy the bread, which was annoying if we wanted to make other plans. The dilemma: have fun…or have bread? Tricky.

So these factors (cost and freedom), combined with the appeal of learning a new skill, led me to decide I was going to teach myself how to make my own bread. That was six months ago, and we haven’t been back to the bread shop since.

There is a shedload of information about sourdough on the internet, and it can get a little overwhelming. I don’t claim to be an expert, but the sourdough I make consistently works, tastes amazing and keeps extremely well. If you think that bread from the shops that is still warm is delicious, wait until you make your own and eat it straight out of the oven!

How to bake a Sourdough loaf

Making sourdough can be thought of in four stages: looking after the starter culture, making the sponge (fermentation), making/proving the dough, and baking the loaf. The whole process takes about 36 hours from start to finish, although the physical time actually doing anything is far less. However it’s quite difficult to pause the stages because you’ve suddenly found something better to do, so it takes a bit of forward planning. That said, the fridge is your friend, and can give you a bit of extra time if something unexpected comes up.

The quantities described below are for making one large and small loaf. If you want to make one medium loaf, simply halve everything.

Total ingredients required: 175-200g sourdough starter culture, 1.010kg bread flour, 600ml water, 22g salt.

Sourdough Starter

To make sourdough you will need a starter culture, which contains yeast and lactobacilli bacteria. I got mine from a friend but if you don’t know anyone who makes their own bread, you could try eBay, Gumtree or Freecycle, or a local bakery.

This culture needs feeding and watering to keep it alive. I keep my culture in the fridge in a glass jar and feed it every time I make bread, which is usually every 10 days or so. It will keep fine in the fridge in-between bakes.

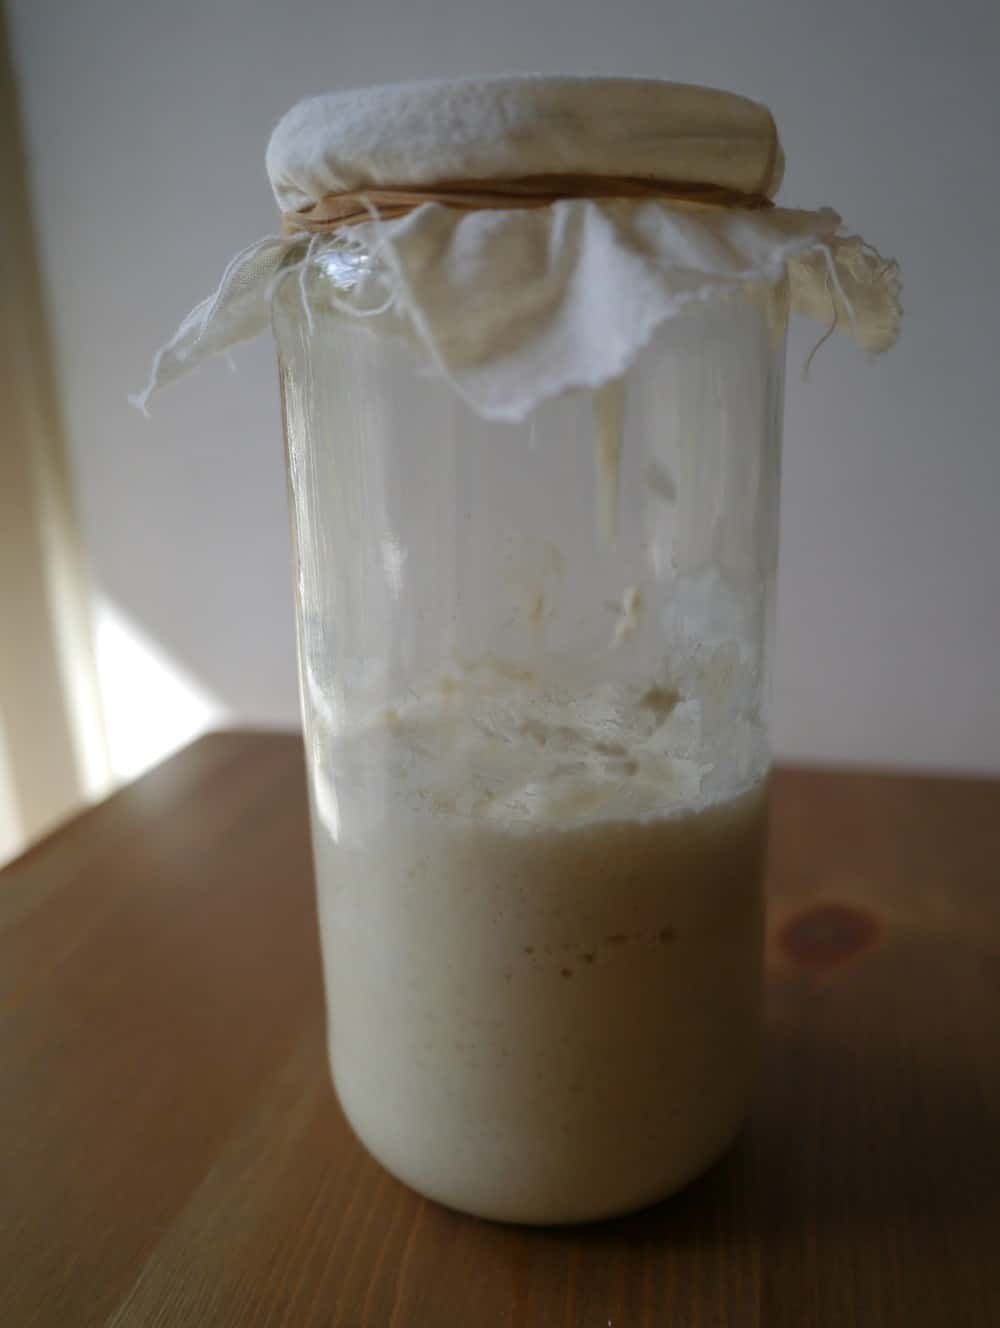
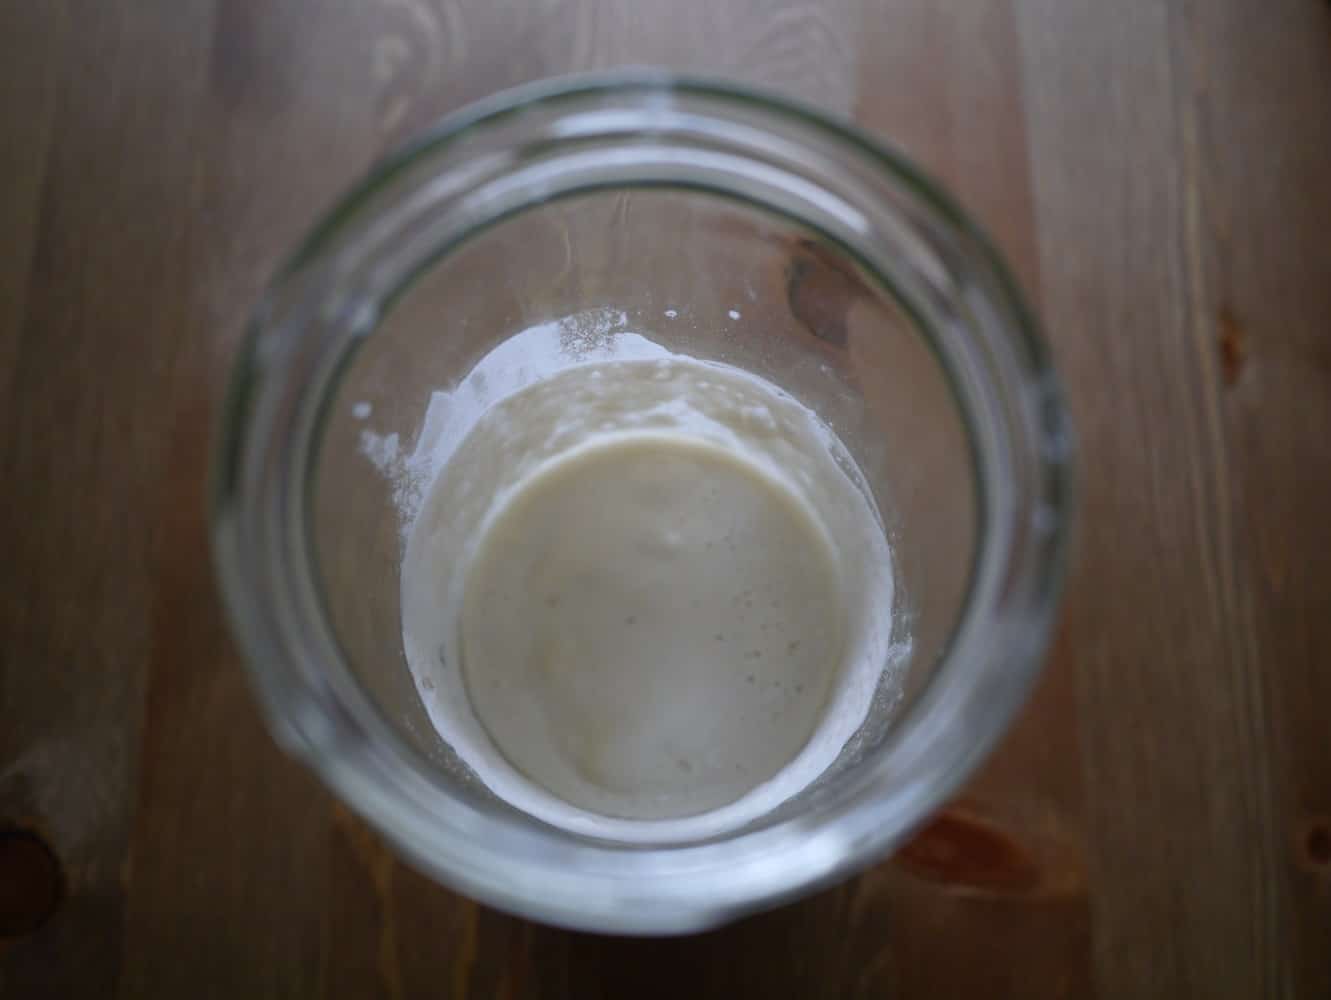
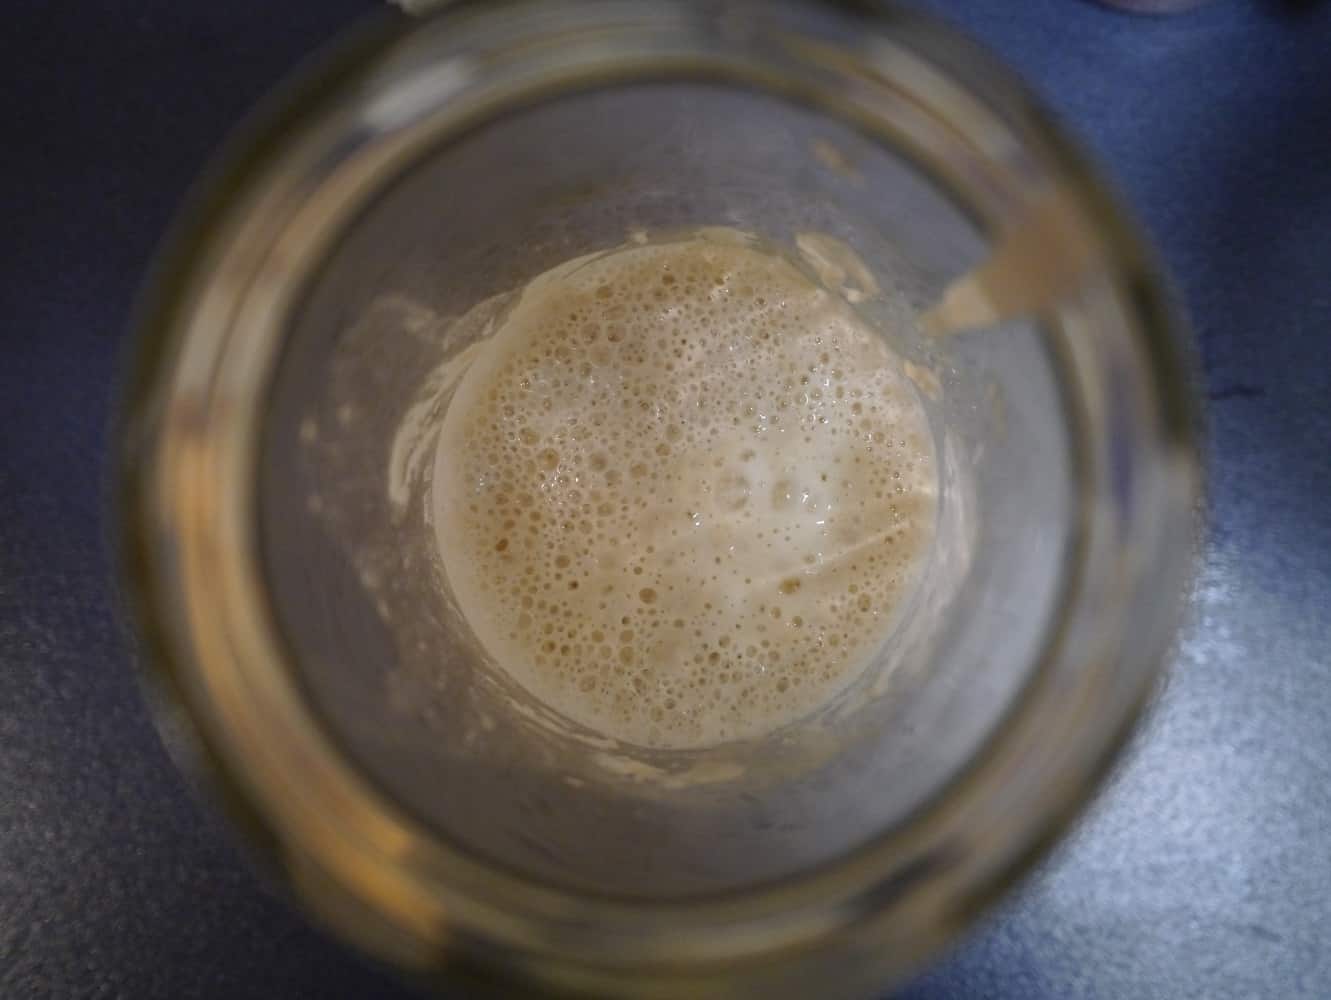
When you’re ready to bake, take the starter culture out of the fridge. It may have gone hard on top and not look very pleasant. Don’t worry! Stir in any lumps and they will be broken down. Leave the culture at room temperature for several hours to allow it to become active and ferment (or ripen). Leaving overnight is fine. What should happen is the culture should bubble and become frothy, and appear to double in size, before deflating back to its original size. This is when it’s ripe and ready to use. If you’re not sure whether it’s risen and deflated (if you left it overnight for example) look at the sides of the jar; if it has risen it will probably have left a residue.
oldstarter2jpg

Starter taken from the fridge. It will have started to ferment in the fridge but will not be fully developed.
oldstarter1jpg

The starter after a couple of hours. The bubbles show that fermentation is taking place.

oldstarter3jpg

Fermentation in full swing. The starter will appear to have doubled in volume.

oldripestarterjpg

Fermentation is complete and the starter is ready to use. You can see on the sides of the jar where the culture rose and then sank. Looking for this helps know when your starter is ready.

Before using the starter in your loaf you will need to retain some for the next time you bake. You will need to feed this with flour and water; the ratio starter:flour:water needs to be 1:5:5. So, for 20g of starter you need to add 100g flour and 100g water. This is called a ‘100% hydration starter’. Mix together in a bowl, pour into a clean glass jar, cover with a piece of cloth or a loosened jar lid and return to the fridge.

Making a Sourdough ‘Sponge’

Now you’ve fed your starter you’re ready to start making the loaf. The first part is making what is called the ‘sponge’. The sponge is made of flour, water and starter culture which is allowed to ferment for several hours.

Ingredients:
160-175g starter culture (remember to save 20g for the new starter culture)
460g strong white unbleached bread flour
580-600g filtered water

Method:

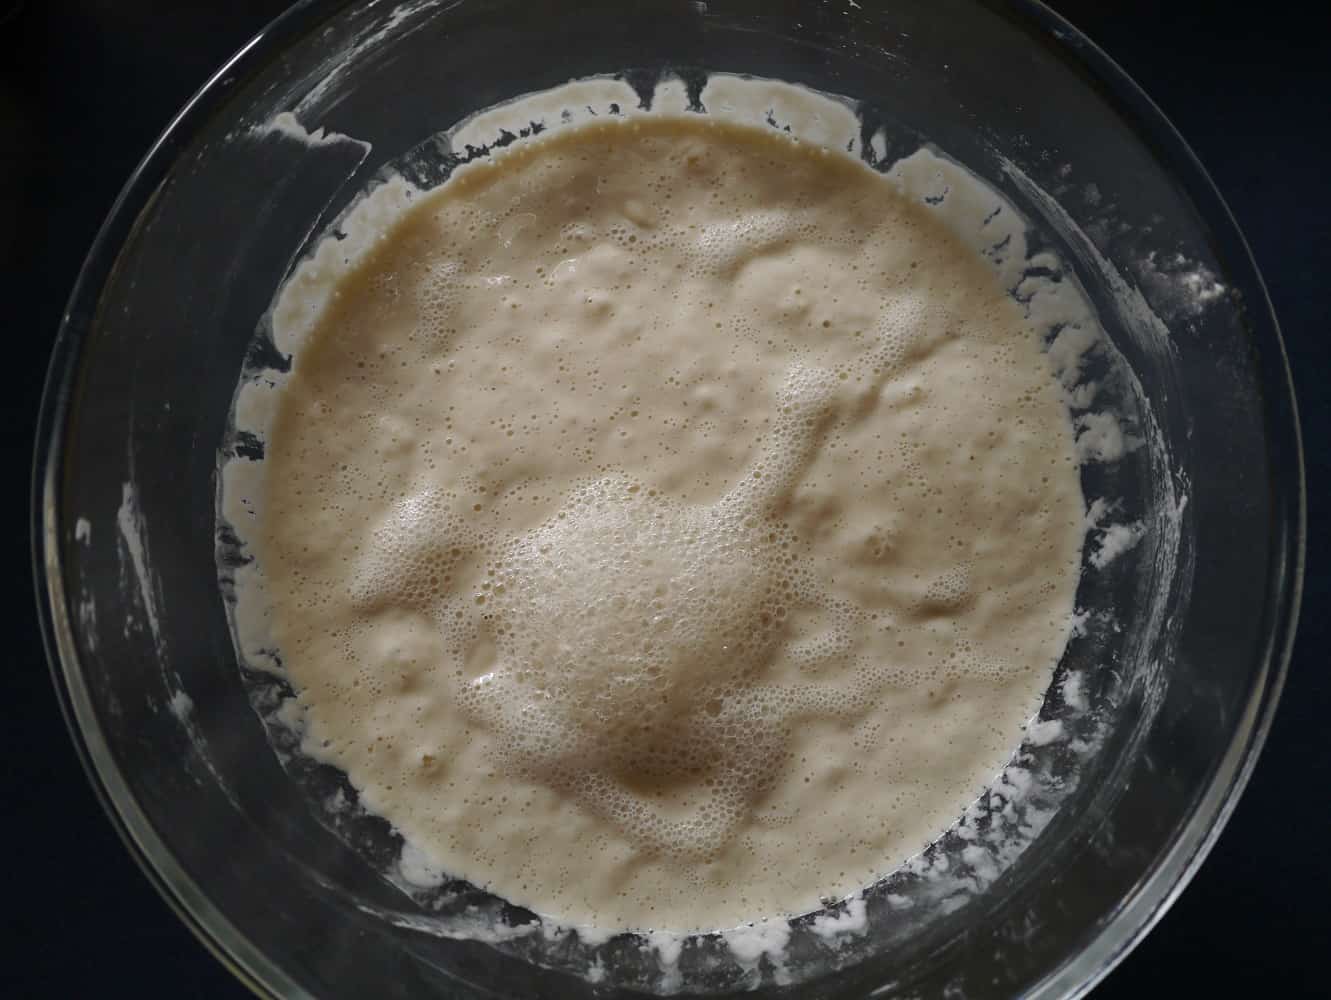
Weigh the ingredients into a large bowl (remember that whilst fermenting the mixture will rise). Cover with a tea towel and leave at room temperature for at least 8 hours (or overnight) until the mixture has risen and then deflated.
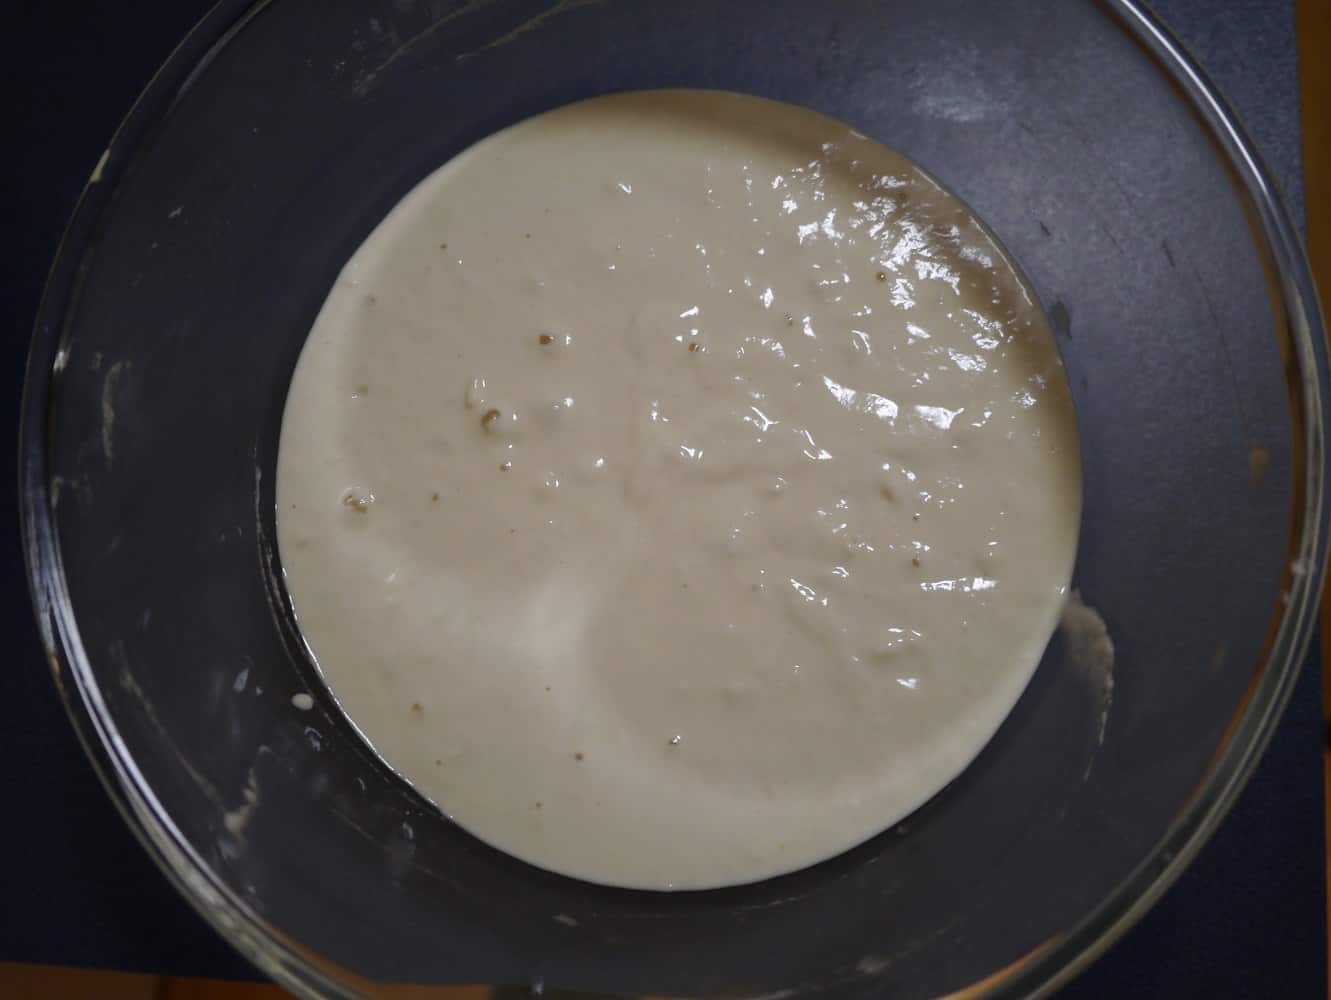
sponge1jpg

The sponge mixture starts with a glossy appearance.

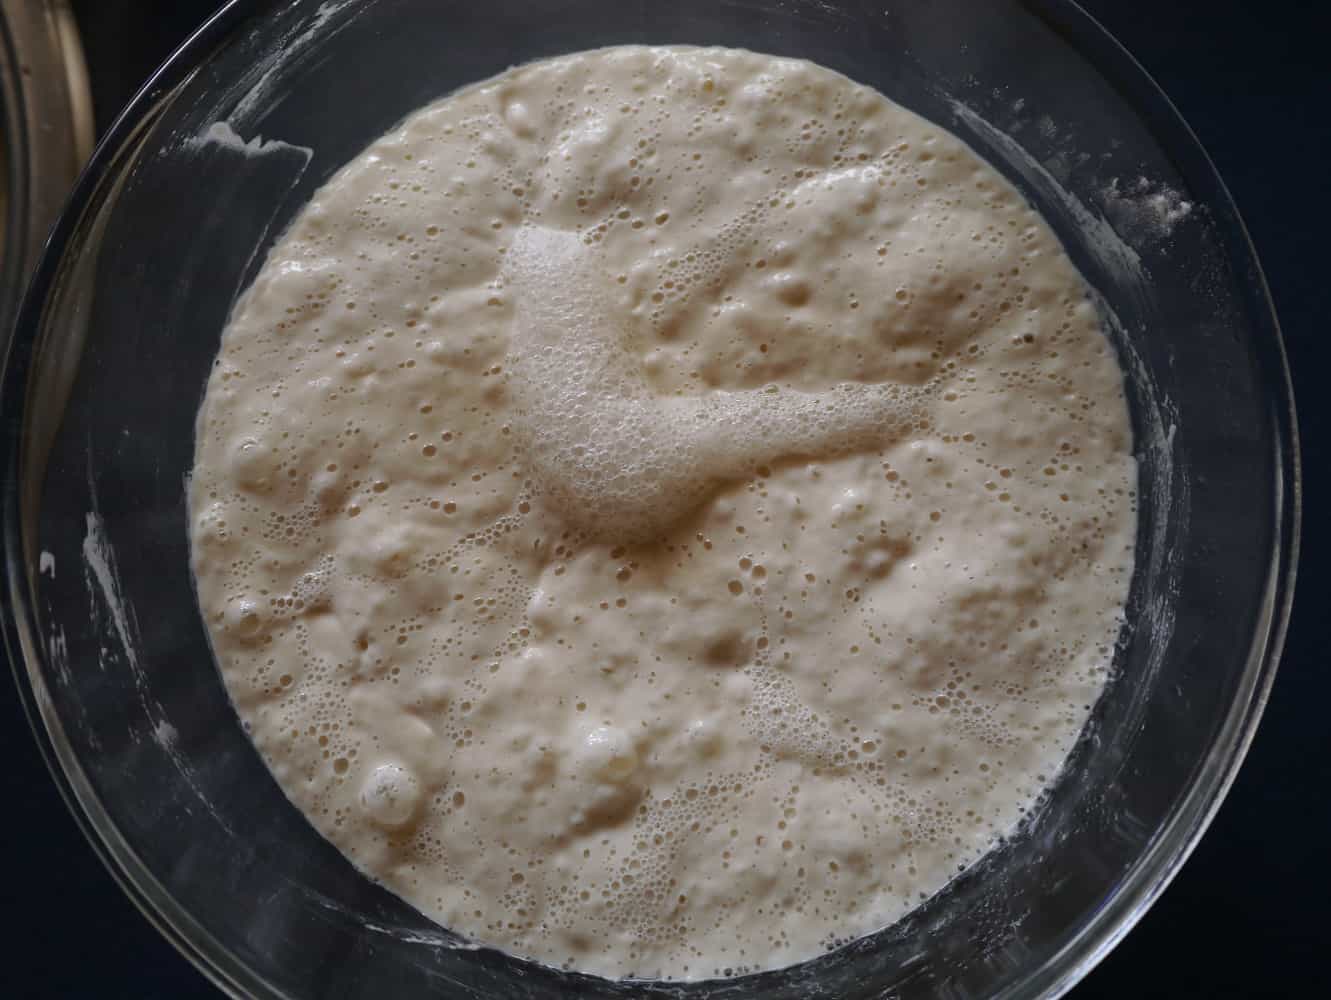
sponge2jpg

As it ferments bubbles appear on the surface and the sponge rises.

sponge3jpg

When the sponge is ready (ripe) there will be bubbles on the surface but it will have reduced in volume. You can see marks on the side of the bowl where the sponge rose and then sank. Look for this to know when your sponge is ready to use.

Preparing the Sourdough ‘Dough’

This is the stage where timing is more critical. If you don’t have enough time to make the dough, leave it to rise and then bake into bread, the sponge can be left longer until you are ready. I have left the sponge for a day in the fridge when something unexpected came up – just remember to bring it back to room temperature before using to make the dough.

Ingredients:
Fermented sponge (see previous step)
550g strong white unbleached bread flour
22g salt

(Don’t be tempted to leave the salt out. In addition to adding flavour it slows the fermentation rate of yeast, and also strengthens the gluten, which is what allows the dough to rise.)

Method:

Grease a loaf tin (or two) with butter or oil. Add the flour and salt to the bowl containing the fermented sponge mixture. Mix together with a wooden spoon until the mixture becomes stiff.

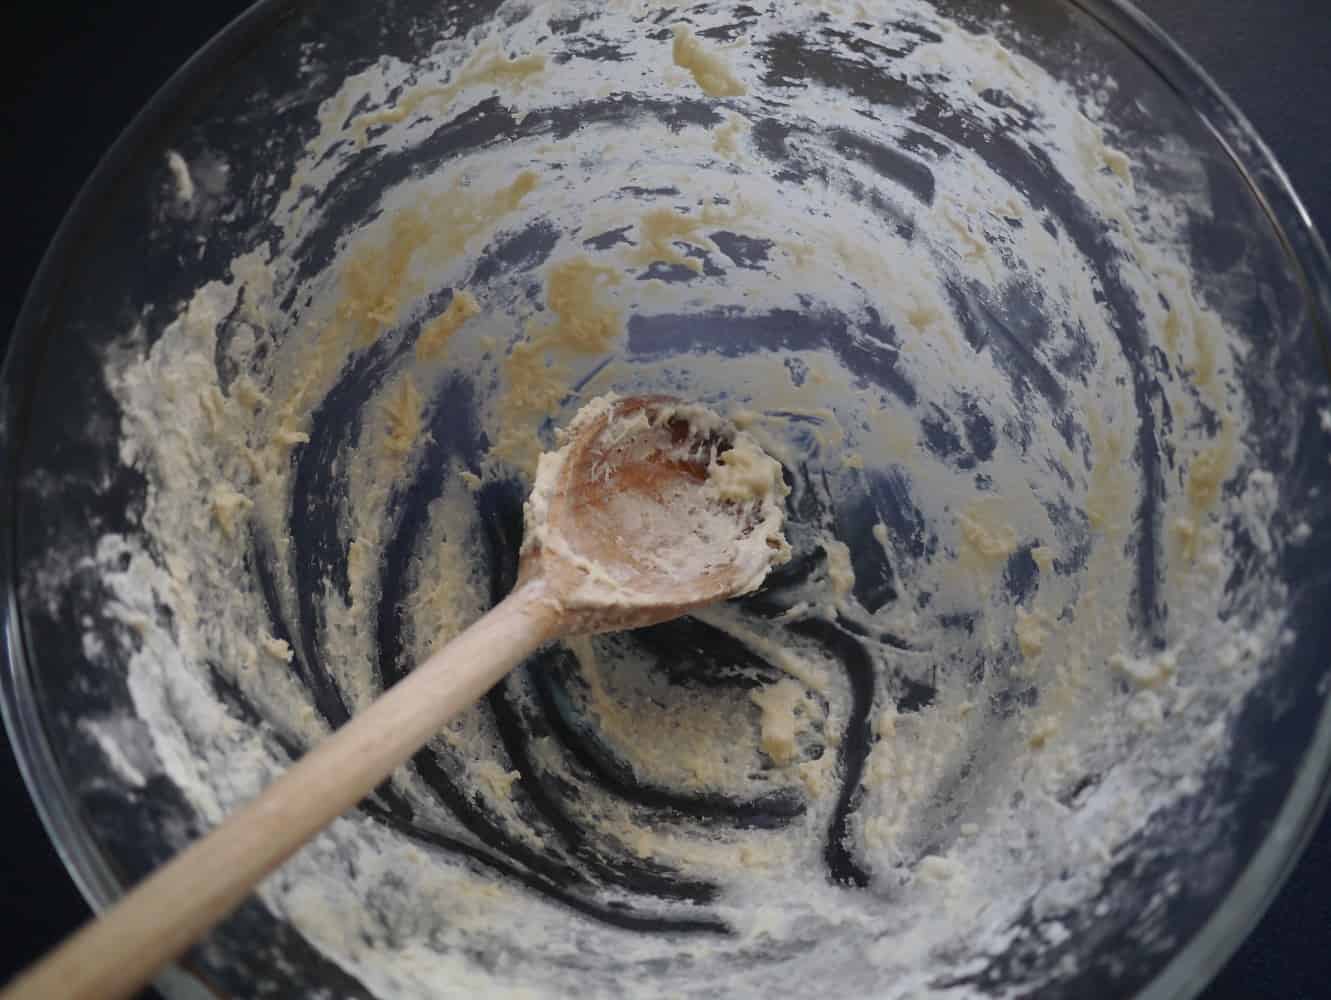
Turn the mixture out onto an un-floured surface. It will look impossibly sticky and nothing like bread dough, but don’t be disheartened. Once you start working it, it will start to look like dough very quickly.
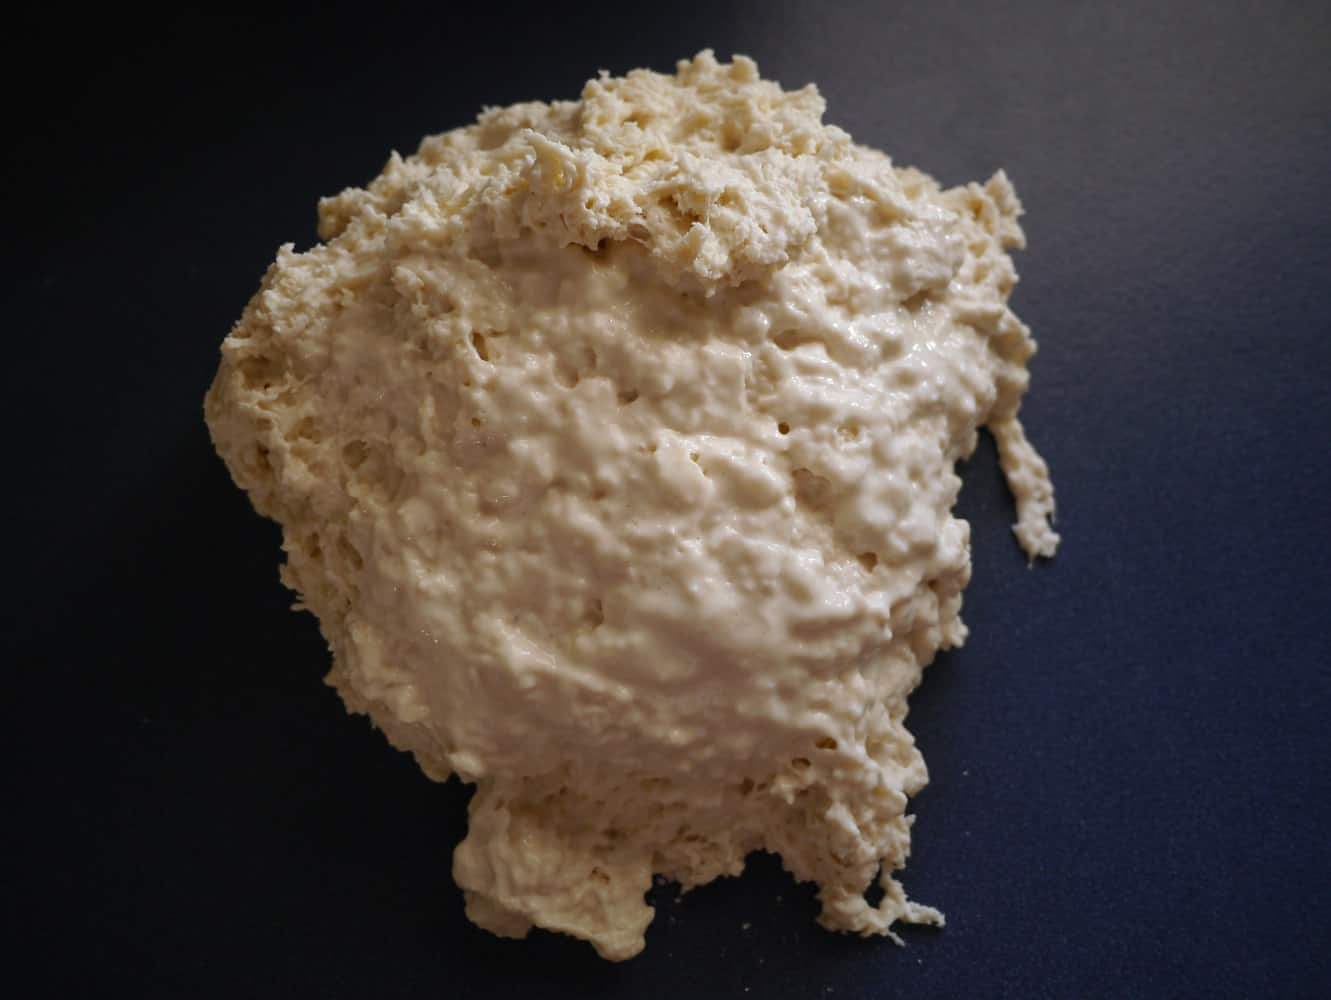
Don't panic if your mix looks like this! With ten minutes kneading, it will look like a proper ball of dough.

Don’t panic if your mix looks like this! With ten minutes kneading, it will look like a proper ball of dough.

Stretch and fold the dough for at least 10 minutes using your hands. (If it is really sticky a large silicon spatula is helpful to begin with.) Working it like this allows the gluten to develop which is needed for the bread to rise.

After 10 minutes the dough should be smooth and elastic (if it isn’t, keep on working it and you’ll get there). Shape into an oblong that will fit into the loaf tin. Cover with a tea towel and leave in a warm place until doubled in size. The time this takes will vary according to the temperature of your kitchen – in Australia I find that in summer it takes around 4 hours, and in winter nearer 6 hours.

You will know your loaf is ready when it has doubled in size. If you leave it too long it will start to sink.

Baking the Sourdough Loaf

Total time required: 30 minutes

Preheat your oven to 250°C.

Pour an inch of water into a roasting tin and place in the oven once it reaches the correct temperature. Once the water in the tray is bubbling, the oven is ready for your loaf. (You can speed this up by using boiling water to pour into the roasting tin.) The steam created will give your loaf a better crust.

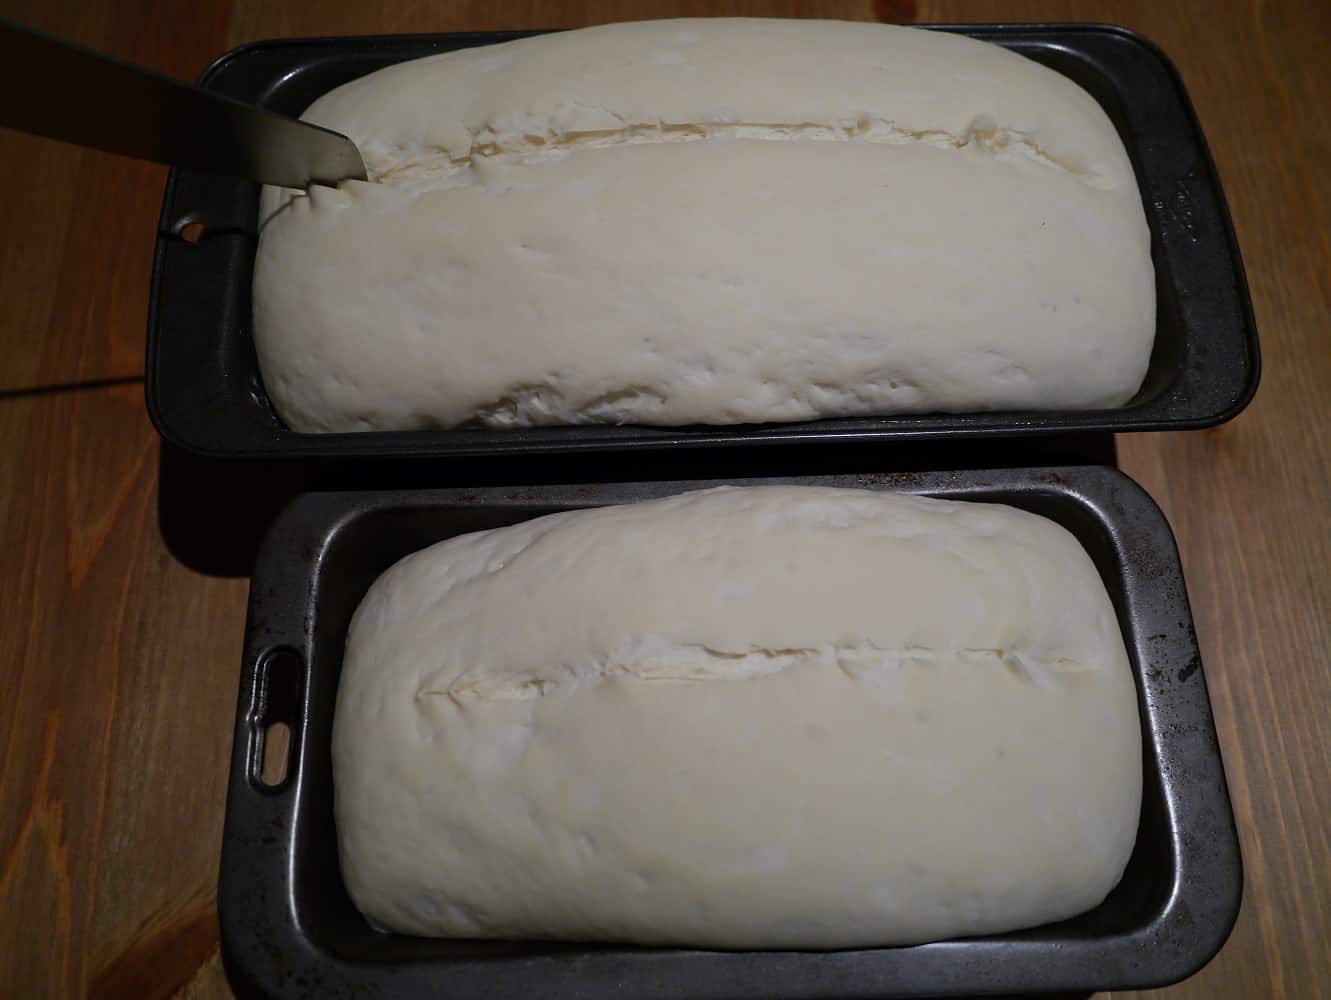
Using a sharp knife, score the top of the loaf just before you put into the oven. This will stop the loaf bursting open as it cooks.

bread1jpg

Use the sharpest knife you have and try to cut the bread quickly to avoid dragging the skin.

Place the loaf in the oven. After 10 minutes reduce the heat to 200°C, and bake for another 5 minutes. If one end appears to have cooked more than the other, it is fine to turn the loaf around at this point.

Now turn the oven off and leave for 5 minutes, then open the oven door slightly and leave for another 10 minutes.

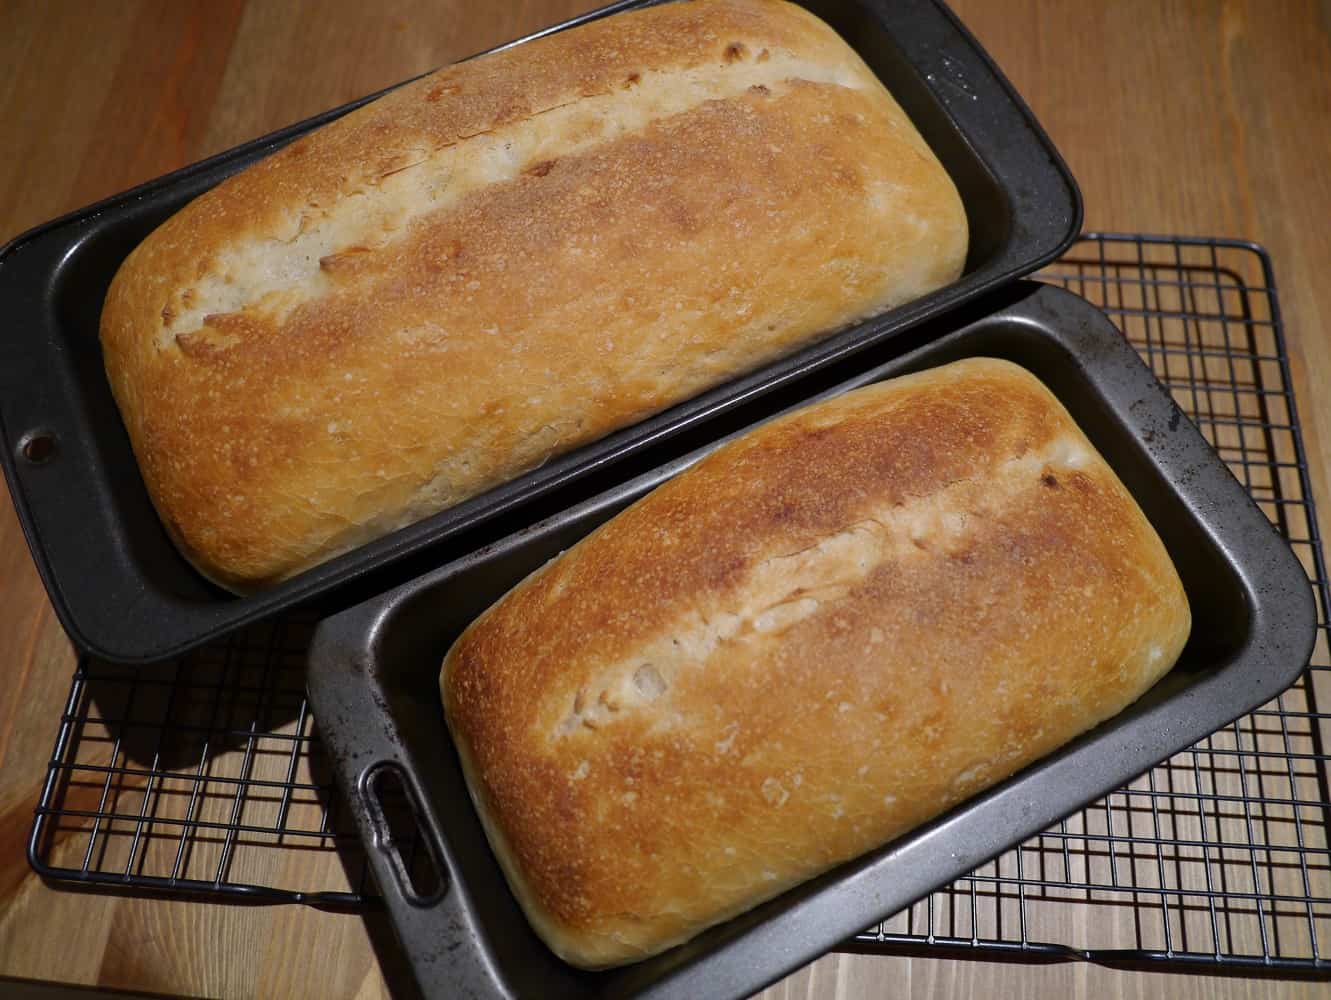
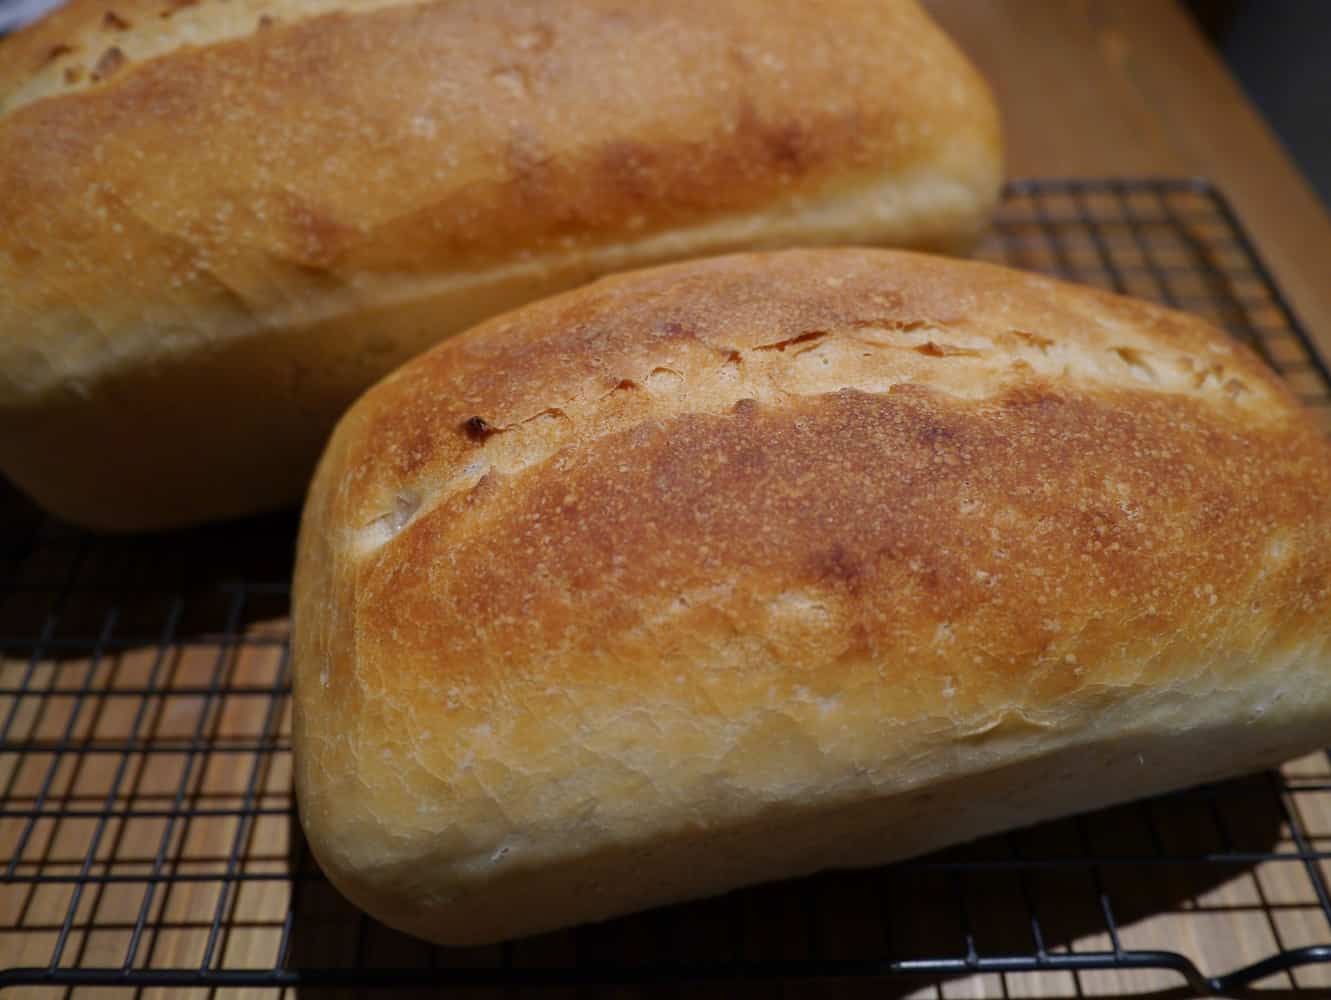
Take out of the oven and remove the loaf from the tin and onto a cooling rack as soon as possible – use a clean tea-towel to handle the loaf if it is too hot. If you leave the loaf in the tin the steam will make the crust soggy.

loaf1jpg

loaf3jpg

cutbread4jpg

Your loaf should keep for several days (and up to two weeks), and the flavours will continue to develop.

Baking Sourdough: Timings

It’s worth giving a bit of thought to when it will be convenient for you to actually put the loaf in the oven, and work back from that so that all the other steps happen at the right time. I have misjudged how long the loaf would take to rise and had to stay up past midnight in order to actually bake it so it wasn’t flat by morning!

This is what generally works for me:
Day 1: 6pm Remove starter culture from fridge and (leave at room temperature for 12 hours)
Day 2: 6pm Make new starter culture (10 minutes)
Day 2: 6.10pm Make sourdough sponge (leave at room temperature for 12-18 hours)
Day 3: 8am Make dough (10 mins)
Day 3: 8.10am Work dough (10-15 mins)
Day 3: 8.25am Grease loaf tin and put loaf into tin (leave at room temperature for 4-8 hours)
Day 3: 2pm Bake loaf (30 mins)

If you want to bake bread on a Saturday it’s quite easy to do the other stages on Thursday and Friday evening, and once the bread is rising in the tin you can leave it for several hours. I find it all starts to go wrong when I try to make the sponge and the dough on the same day, because the fermenting of the sponge can’t be rushed or speeded up, and it means I am still baking bread after midnight. If you start out with good intentions but come Saturday morning you can’t face getting up, let alone baking, the sponge can be left on the side for a few hours or put in the fridge for 24 hours without any adverse effects, and you can make the dough and bake the loaf the following day.

endofsourdoughblogjpg

[leadpages_leadbox leadbox_id=1429a0746639c5] [/leadpages_leadbox]

How to… Make Your Own Natural Yoghurt

This is a recipe for dairy yoghurt. You’ll find my recipe for dairy-free coconut yoghurt here.

Ever since I went to a workshop, I have been meaning to make my own yoghurt. The workshop was in February. We’re creeping towards May. I needed to stop thinking about it and talking about it, and actually do it!

The delay was predominantly the result of my not having the right equipment, namely a thermos flask and a thermometer. Strictly speaking you don’t need either of these things, but it makes it easier. Plus they are both useful tools to have in the kitchen anyway, and I know I will use them.

After scouring Gumtree and eBay for two months I decided to bite the bullet and buy a new flask. A wide-neck one is more practical and there didn’t seem to be any available second-hand. I also bought a new thermometer. Both came with a few pieces of unnecessary plastic packaging (do I really need a carry strap for the flask, and even so, does the carry strap really need to be ‘protected’ by a plastic bag?!).

I don’t buy brand new things very often (see why here) but sometimes I have to admit defeat. At least now I can get on with my yoghurt-making!

(I have to confess I was slightly nervous about the end result of my first batch. I remember at school in biology class having to do an experiment where we filled test tubes with milk and a dollop of yoghurt and then incubated them at different temperatures for a few days. After waiting the few days, we ended up with…test tubes of milk and a dollop of yoghurt. Even the teacher was confused. But I needn’t have worried…)

Making yoghurt is simple. You will need: fresh whole fat milk and live yoghurt (it will say ‘live’, ‘probiotic’ or ‘cultures’ on the label). 1 litre of milk requires 1 tablespoon of yoghurt, and should make 700ml yoghurt. As well as a flask and a thermometer, you will require a saucepan and a wooden spoon.

Pour the milk into a saucepan. Warm over a low heat, stirring occasionally, until the thermometer reaches 82oC. This heat treatment kills any bacteria that may be present in the milk. Turn off the heat and allow the milk temperate to drop to 45oC.

The milk needs to drop to 45oC so that when the yoghurt cultures are added they are not killed by the high temperature. Once the milk has cooled enough spoon the yoghurt culture into the flask (make sure the flask has been thoroughly cleaned with hot water beforehand) and add a small amount of the milk from the saucepan. Stir thoroughly before adding the rest of the milk into the flask.

Screw on the flask lid. Now you need to leave the flask for 8 hours to allow the yoghurt culture to do it’s thing – namely converting lactose (the natural sugar in milk) into lactic acid, which then causes the milk proteins to coagulate, which results in the thicker, creamier texture of yoghurt.

finalyoghurtjpg

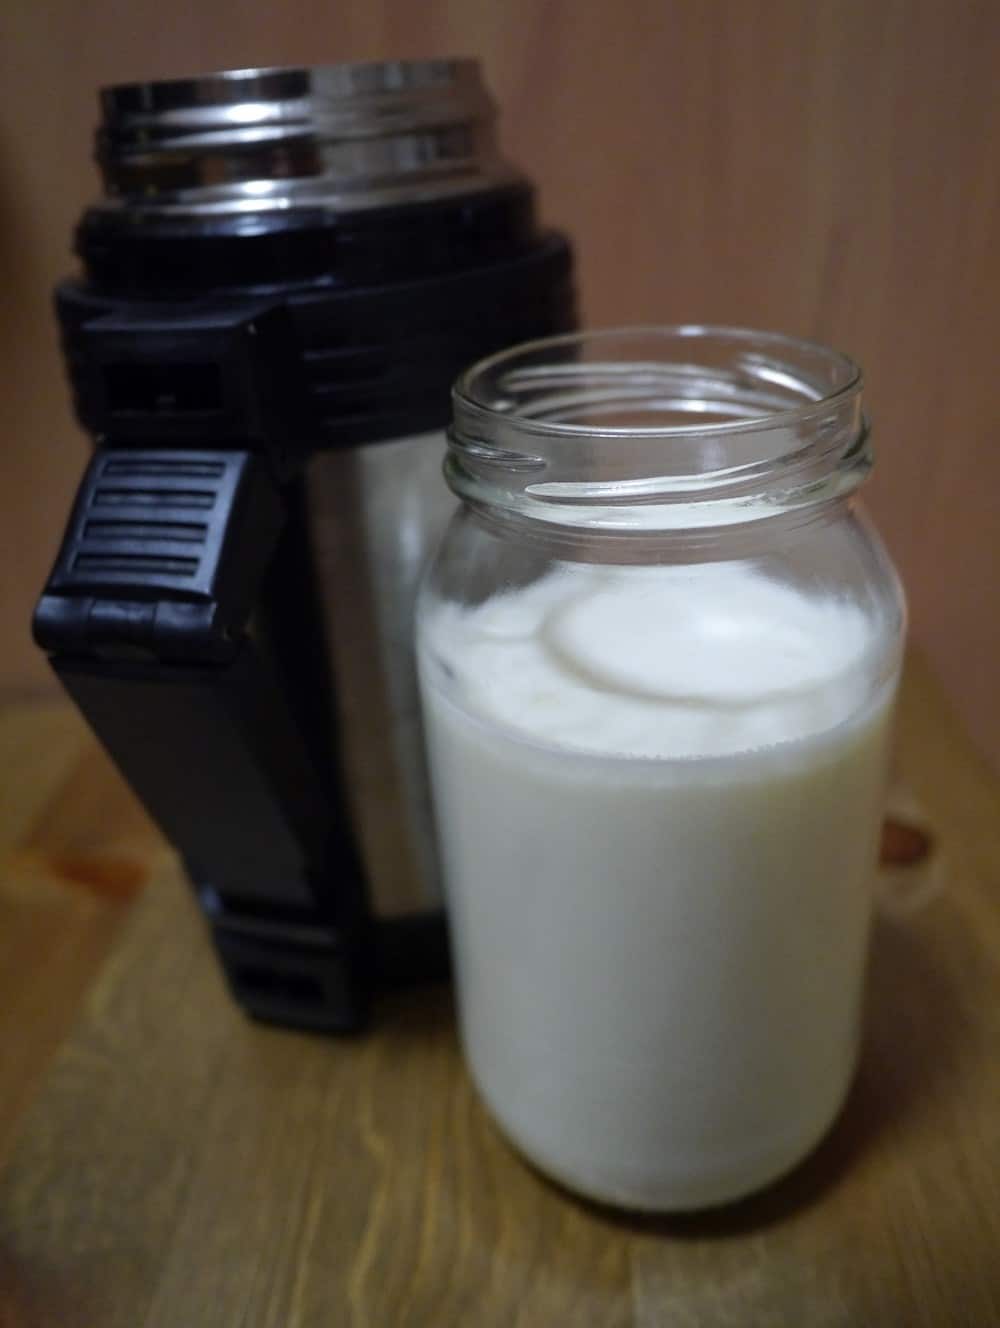
Ta-da! Fresh homemade probiotic natural yoghurt.

On opening up the flask, you should be looking at a container full of delicious probiotic yoghurt! It will need stirring to make sure there’s no lumps. (This is why a wide-necked flask is useful.) The yoghurt can then be poured into a glass jar and stored in the fridge. It should last several days.

[leadpages_leadbox leadbox_id=123a865e9839c5] [/leadpages_leadbox]

Fruit and vegetable shopping…the sustainable way

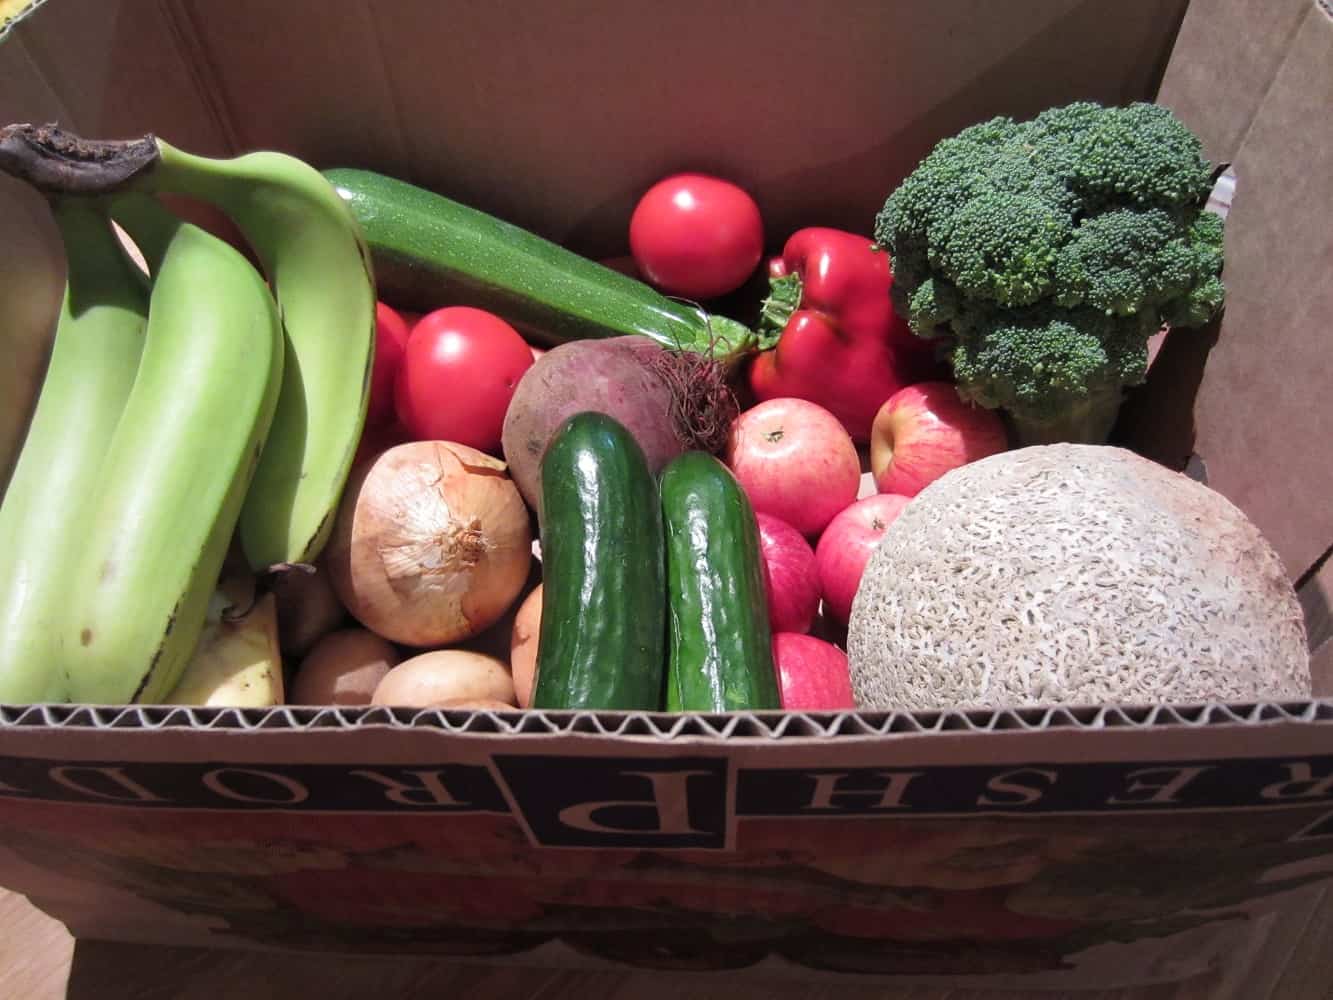
Wednesday night is vegetable box delivery night. This is a fairly new thing for us in Australia, although we had used vegetable box delivery schemes in the UK. Last night was our third delivery, and we’ve decided to make it a regular weekly thing.

vegbox1final

Our first veg box delivery. Completely plastic- and actually all unnecessary packaging- free!

Read more

Plastic Free July 2013 Breakfast Launch

This morning I was invited to the breakfast launch for the Plastic Free July 2013 campaign. Not only that, but I was asked to share my story about my Plastic Free July to the group, as a participant from last year’s challenge.

Plastic Free July is an initiative of the Western Metropolitan Regional Council in Perth, WA, developed by the Western Earth Carers, and this year will be its third year. The challenge went from just 40 local participants in the first year to a few hundred last year, mainly due to the hugely successful Plastic Free July facebook page and other social media.

This year, we’re hoping it’s going to attract thousands of participants, and there’s been considerable interest from people in the States and Canada as well as across Australia. The challenge is simple: go without single use plastic for the month of July.

I’ve talked before on the blog about how the movie Bag It and the Plastic Free July Challenge were big motivators for me to make some changes to the way I live, and what really started me on the sustainability journey I’m currently treading. So to be able to talk about my Plastic Free July journey to a packed audience, and hopefully inspire some others to take up the challenge this year, was pretty exciting!

It was really well received, which was fantastic, and I also had the opportunity afterwards to be interviewed by RTR FM for a radio programme that will be airing in June, although I don’t know the day or time yet. I’ll make sure I find out though; I’ve never been on the radio before! I thought it would be great to share what I talked about here on the blog too.

Before Plastic Free July

Looking back, my awareness of my plastic consumption was pretty low. I would take my own shopping bags to shops and generally refuse bags at the checkout, only taking a plastic bag if I needed to line my rubbish bin at home. I also used to buy fresh produce loose, rather than in bags, but everything else came in packaging.

My plastic-free consumption today

I would say that today I am pretty much plastic-free! I don’t buy food products in plastic packaging; I don’t buy cleaning products, cosmetics or toiletries in plastic packaging. Pretty much, if it comes in plastic, I don’t buy it. The main things I have issues with are plastic lids that come on glass bottles, which I cannot always avoid. Medicine comes in plastic, but I avoid anything excessive like boxes wrapped in cellophane.

What I did during Plastic Free July

The big message from Plastic Free July is that the challenge isn’t about going without, it’s about finding alternatives. One simple alternative to using a plastic bag to line your rubbish bin is to use old newspapers. I found a local dairy that sells milk and yoghurt in glass bottles and jars that can also be returned to the dairy for re-use. I started taking my own re-usable fabric produce bags and containers when I went shopping, and I started shopping more at markets and bulk food stores.

I also changed some of my habits. I now take my own reusable takeaway coffee cup when I want to grab a takeaway coffee, and if I’ve forgotten it, I’ll dine in (provided they use proper cups of course!). I also opt to eat in more than takeaway now to avoid all the unnecessary packaging. If I’m buying an ice-cream, I’ll always chose a cone rather than a tub, and avoid the little plastic spoon.

What I found difficult

The hardest thing at the start of the challenge was knowing where to find these plastic-free “alternatives”. But as more people took up the challenge it became a lot easier. The Plastic Free July facebook page was a great resource for seeking knowledge and support, and a useful tool to share great finds. At the Plastic Free July 2013 launch today, WMRC announced their new website www.plasticfreejuly.org, which is full of useful information.

What I learned

The biggest thing I learned was how much plastic exists in our lives. It’s quite scary when you think that every single piece of plastic that has been created since plastic was invented still exists in the world today. This stuff takes hundreds of years to break down.

The second biggest thing I learned was how, with a little bit of effort, you can eliminate a lot of it from your daily life…because it’s unnecessary. So much of the stuff we buy is completely over-packaged. As I mentioned before, going plastic-free isn’t about going without, it’s about finding alternatives. And I learned that there is a plastic-free alternative to almost everything.

Some people who talked about going plastic free told me that there is nothing that you can buy from your local supermarket. But that’s not true. Alternatives come in glass jars, bottles, tins. In my local supermarket I can buy pasta in cardboard boxes, cordial and fruit juice in glass, toilet roll wrapped in paper. The one thing that you can’t buy plastic-free is junk food. If it’s filled with synthetic ingredients, preservatives and high-fructose corn syrup, it’ll come in plastic packaging. So if you stop buying plastic, your diet improves straightaway.

I also learned that most people react positively. At the deli counters, even the supermarket ones, the staff are more than happy to use my containers rather than their plastic bags. I just have to remind some of them to weigh the container before filling it so I’m not charged for the weight of the container too! People are interested in why you don’t use plastic, and most people think it’s a great thing to be doing.

The other thing I learned since going plastic-free is that I spend less on food. Some things do cost more. The milk and yoghurt I buy in glass bottles is more expensive than milk in the supermarket, and cheese from the deli counter will cost more than the mass-produced cheese that’s vacuum-packed. The quality, however, is infinitely better. And these expensive items are offset by shopping more in markets and bulk food stores which are cheaper than the supermarkets. But the biggest saving comes from not buying junk.

Why I’d recommend Plastic Free July

There are so many reasons why Plastic Free July is an amazing experience, but I’ve kept it to just a few.

  1. It’s a real eye-opener in terms of the amount of plastic in our lives, especially UNNECESSARY plastic.

  2. It’s a great way to create awareness of the issues surrounding plastic, simply by doing your shopping.

  3. It’s fun! It’s a great way to try new things and change old habits.

  4. You’ll eat much more healthily.

  5. You’ll probably save money.

  6. You’ll be supporting local businesses and local producers rather than buying mass-produced rubbish and lining the pockets of the big multi-national companies.

If you’re interested in signing up to Plastic Free July, or even just finding out a bit more information, check out the new WMRC website at www.plasticfreejuly.org.

“Think about it. Why would you make something that you’re going to use for a few minutes out of a material that’s basically going to last forever, and you’re just going to throw it away? What’s up with that?”

-Jeb Berrier, Bag It Movie

[leadpages_leadbox leadbox_id=1429a0746639c5] [/leadpages_leadbox]
The Joy of Second-Hand

This weekend we were able to borrow a car for a couple of hours, and took the opportunity to go furniture shopping. I wanted a desk to be able to work from and as we recently sold our sofa to free up some space in the tiny flat, we now actually had room for one.

When we moved into our (unfurnished) flat 15 months ago, we decided that all the furniture we purchased would be second-hand. There were a number of reasons for this. The environmental factor was a big one, of course. Why buy something brand new when we could buy something old and give it another lease of life? New items are also always ridiculously overpackaged. Having just come from the UK, we had recently experienced selling a number of (once-new) items for significantly less than they had cost to buy. Not only did we realise the depreciation of new and shiny bits and pieces, but having seen the smiles of the people who were walking away with our stuff bought at cheap-as-chips prices, we realised that second hand furniture didn’t have to be rubbish and there were bargains to be had.

Our first purchases were a washing machine (I researched the top water efficient models currently on the market, and then looked for a second hand one) and two old but clean and surprisingly comfortable green armchairs which cost just $10. We have since added a bed, mattress and two bedside tables, a dining table and four chairs, the sofa (which we have just re-sold) and now the desk. I have also bought a couple of second-hand kitchen appliances. We’ve saved a few trees (and a lot of plastic packaging!) as well as a few dollars, and we’ve had only good experiences with everything we’ve bought.

Now I can’t imagine buying brand new furniture. That’s not to say I never will, but whilst there’s so much great pre-loved furniture out there just waiting for a new home, there just doesn’t seem to be any reason why I would.

Nine reasons why second hand furniture shopping is great:

1. Sustainability

In a world of finite resources, why waste what we have making new things when there are old things that can do the job perfectly well?

2. Plastic free

Second hand furniture never comes cling-wrapped or bubble-wrapped, there’s no individually wrapped drawer knobs and door knobs and screws, and there’s no plastic wallet for the ‘instruction manual’. In fact, there’s no instruction manual as it’s already been put together. Hurrah!

3. Individuality

Second hand furniture is a chance to find exactly what you want – quirky, functional, antique, ethnic, bohemian, sensible – in the colour, material and size that you’re looking for. Rather than in the shops, where what you can buy is dictated by what the powers-that-be have decided is fashionable this year.

4. Better quality

Things that are made to last – guess what? – last. Things that are made to be cheap usually don’t. For the same price as you’d pay in the cheap mass-produced furniture warehouses you can buy solid items that will last much longer. And, as an added bonus, you don’t have to traipse around a mass-produced furniture warehouse clutching a colander and some wooden coat hangers that you’re sure will come in useful.

5. VOCs

You how those new items you buy smell so…new? Well, that would be the volatile organic compounds, and you’re breathing them in. These are chemicals found in paints and coatings with low boiling points, which evaporate into the air. Because second-hand furniture is older, they will have less VOCs.

6. Money

Second hand furniture is invariably going to be cheaper than its brand new equivalent, and rare antiques aside, most furniture will depreciate. Scuffs, knocks and scratches are bound to happen in time, so why pay a premium for scratch-free? People sometimes need to sell stuff in a hurry, and it’s possible to find real bargains. In fact, people give away items that they no longer need if they are going to a good home.

7. Glimpses into the lives of others

It’s not often that you are welcomed into a complete stranger’s house. I love getting to see new neighborhoods and briefly glimpsing the lives of people whose paths would probably never cross with mine, were it not for this brief transaction. Whilst that may sound a little odd (!), it’s really surprising how often people ask about your plans, or share their own history, and you make a connection.  After all, you’re taking a tiny piece of their life, and placing it in your own. That’s how I feel, but maybe that’s just me!

8. Convenience

No traipsing round the shops with half the local population at the weekend. Instead, browsing online from the comfort of my own home at a time that suite me and making a quick phone call or two.

9. Freedom

There’s a quote from the movie Fight Club that goes “the things you own end up owning you”. I love the way that second-hand items feel transient… they might be mine now but they belonged to someone else before me and they’ll probably belong to someone else after me.

[leadpages_leadbox leadbox_id=1429a0746639c5] [/leadpages_leadbox]
Worm Farms…Tips and Tricks

After writing my post yesterday on how to build a DIY worm farm, I thought it might be useful to write another post explaining how to look after your worms, and also provide some reasons why you might consider worm farming in the first place.

In their National Waste Policy fact sheet, the Australian Government estimate that two-thirds of waste sent to landfill is organic. If you’re not sure what I mean by organic, it’s the waste that originally came from plants and animals which can be broken down. As well as the obvious grass clippings, food scraps and bones, this includes cardboard, paper and wood. In 2006-2007, Australians landfilled almost 14 million TONNES of organic waste. A full garbage truck holds 10 tonnes. Sending all that organic waste to landfill meant an extra 1.4 million garbage trucks on our roads. Even if you think Australia’s got the space, that’s a lot of unnecessary heavy road traffic, not to mention fossil fuel burning and airborne pollutants via vehicle emissions.

Next up, soil quality. Australia has some of the oldest land masses on Earth, and consequently they are nutrient-poor and with little organic matter. Perth has some of the worst agricultural soils in the world. (Someone once told me that it was officially the poorest soil in the world, but I can’t find anything that confirms it. However, ask anyone who ever tried to grow anything in the soil in Perth, and they’ll confirm it for you!) The sandy soil repels water and also nutrients. If you want to grow plants in Australia, you need to improve your soil by adding organic matter. And this is where the worms come in!

Image

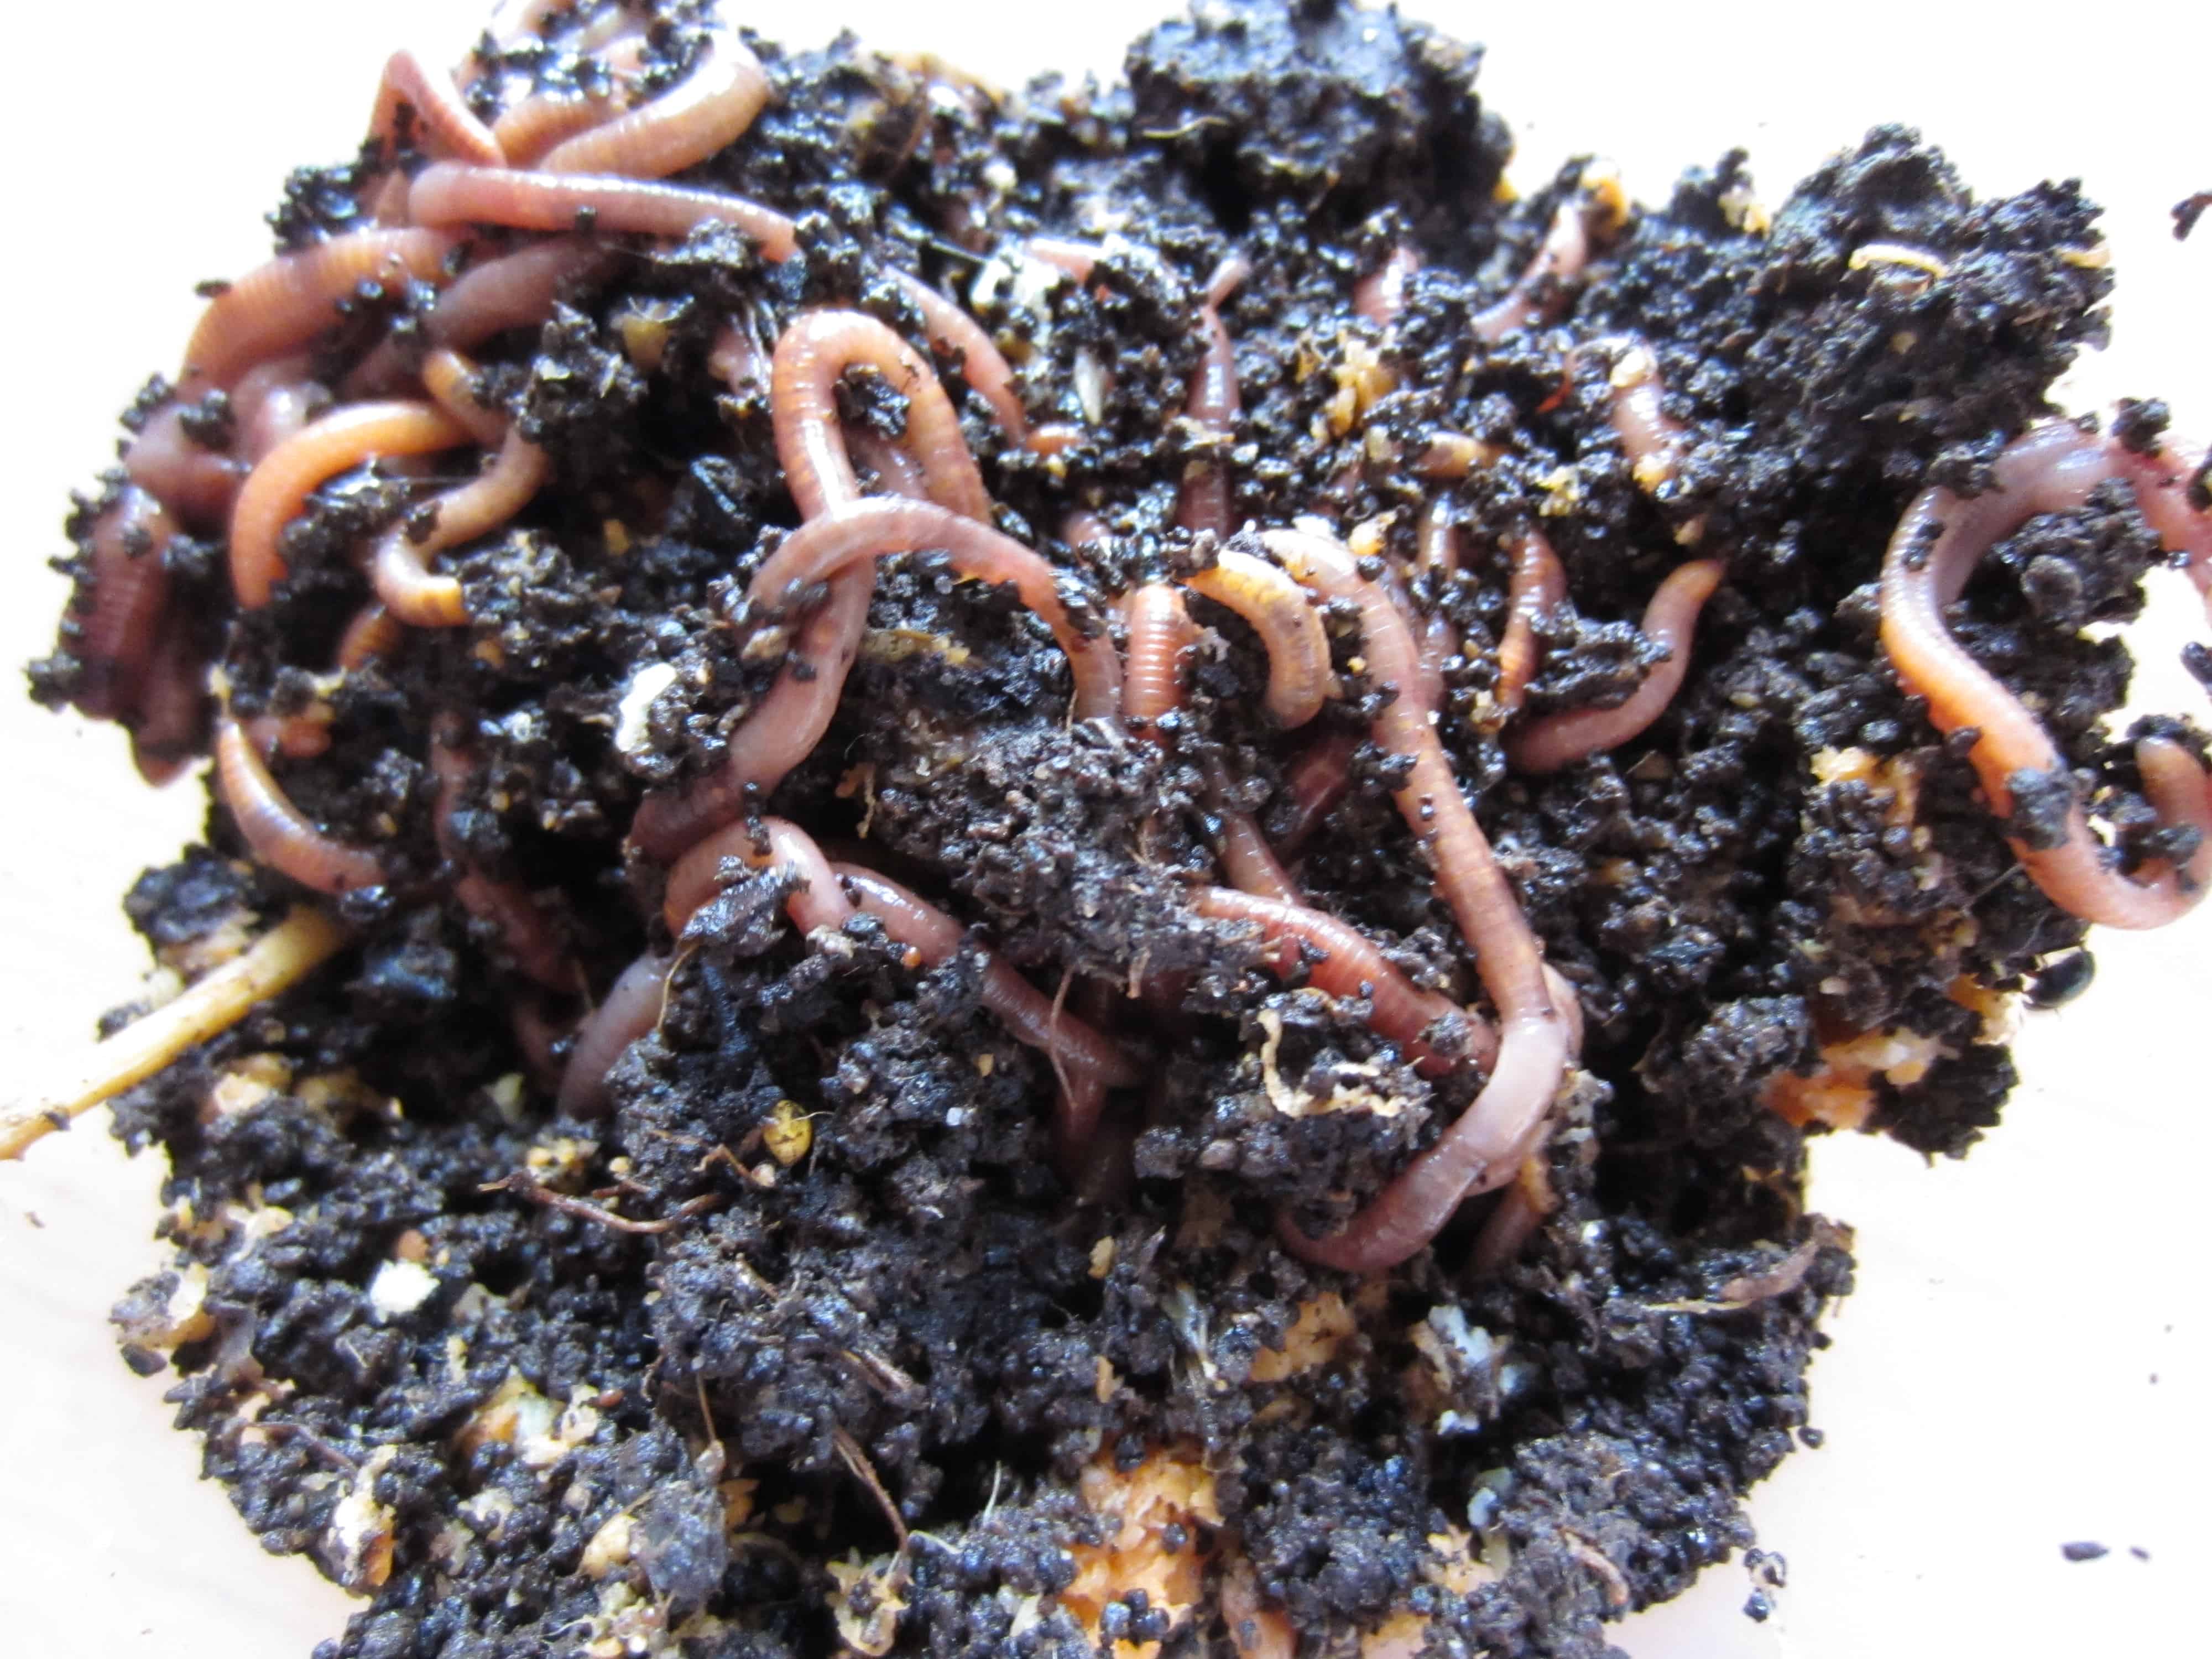
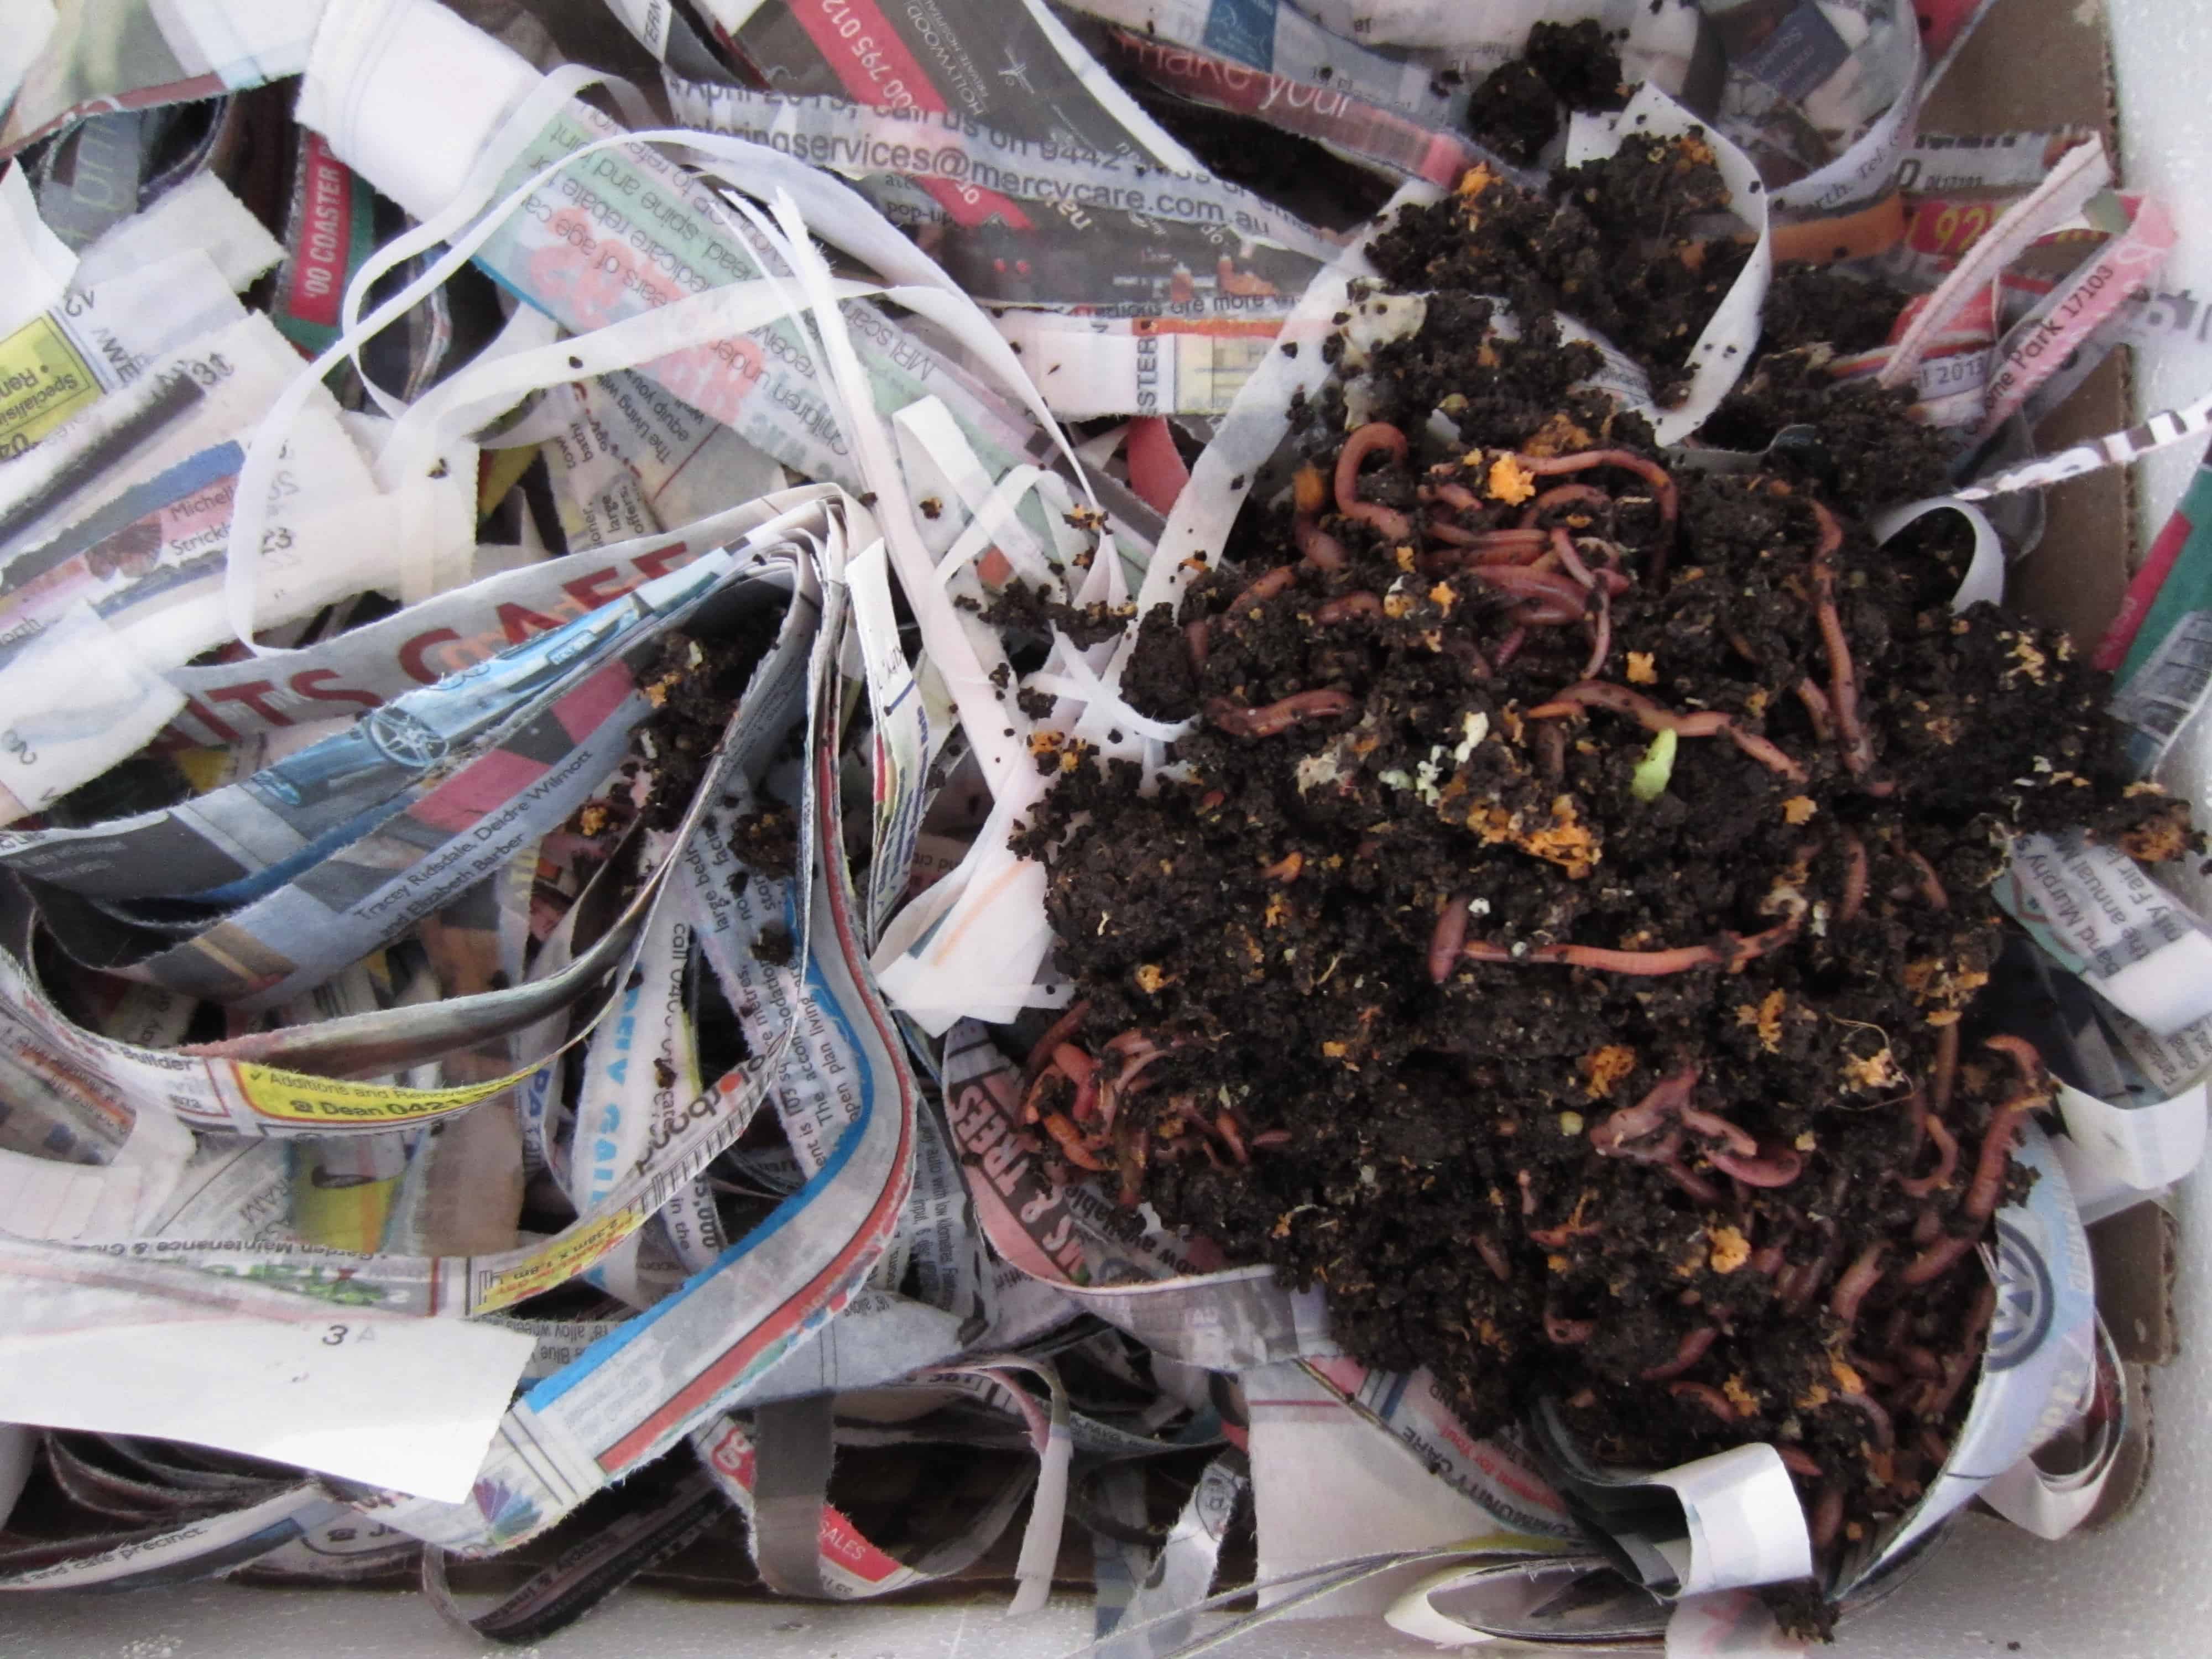
Worms and their castings. Castings are the product created when worms break down organic matter, and contain nutrients that plants can uptake easily.

Worms eat organic waste and break into down into a product called castings. These castings contain beneficial nutrients that can easily be absorbed by plants. Their texture also enables them to retain water and so they are great for improving soil structure. And they won’t burn plants, as some chemical fertilizers do. Castings are also suitable for seedlings. Worms also produce a liquid that needs to be drained – worm wee! (Or more technically, leachate.) Some tips on using worm wee are provided below.

And keeping worms is fun! It’s free, they require very little maintenance, meaning you can go on holiday for weeks and they will still be alive on your return – how many pets can you say that about?

Tips & Tricks

So I’ve made the case for reducing fossil fuels, reducing landfill, improving your garden and having fun…so what’s keeping you from getting your own worm farm? Is it any of these?

1. Worm Farms smell.

Actually, they don’t smell if you look after them properly. Castings have an organic smell similar to the earthly smell of soil. The main cause of smelliness is too much food. It can be tempting once you set up your worm farm to add every single scrap of food to it immediately, but worms only eat their body weight in food every day, so you need to start small and increase the food once the worm numbers build up.

2. I don’t have a garden.

Neither do I! The worm farm takes up only a very small amount of space, and it will take several months to fill up the worm farm with castings. You can use them with house plants or pot plants and even if you don’t garden, you are bound to know someone who does so just give them the box of castings once it is full.

3. I don’t have time.

Seriously, how much time do you think you need?! Once the worm farm is set up, all you do is empty your food scraps that you would have thrown in the bin into the worm farm. It helps to have the worm farm nearby – if it’s located at the bottom of the garden you are far less likely to make the trip.

Problem-Solving

This is by no means an exhaustive list, but hopefully covers some of the more common problems that you might encounter.

My worm farm smells

Likely cause: too much food

Solution: STOP ADDING FOOD! Give the worms a chance to eat what they already have. Anaerobic conditions (no oxygen) can also cause this so give the top layer a stir to aerate.

My worms are escaping

Likely cause: If it is only a couple of worms, there is probably not an issue. If there is a mass exodus, then there may be too much moisture or too much food.

Solution: Add newspaper to reduce the moisture levels, and stop feeding if there are large amounts of uneaten food.

I have other pesties in my worm farm

Likely cause: Not all insects in your worm farm are problems, and you should expect to find other creatures making their home here. But some pests indicate problems.

Solution: Burying food should keep unwanted pests at bay. Flies indicate there is too much food, so reduce the feeding. Ants indicate that the conditions are too dry, so add water.

Other Things to Know

  • You need to use composting worms for your worm farm – varieties such as red worms or tiger worms, as these are adapted to the conditions of a worm farm, whereas ordinary earthworms are not.
  • Worms prefer cooler conditions so on a very hot day, add an ice pack above the worm blanket to keep the inside of the worm farm cool. However, freezing will kill them! (This is not a problem we have here in Perth but may be an issue in cooler climates.) If you are expecting a frost, bring the worm farm indoors.
  • Worms do not have teeth, but suck in food. The smaller the food particles are, the more they can eat. Blending or chopping helps, but if you can’t be bothered, freezing the food then allowing to thaw will help break down the cell walls and make it easier for your worms. And if you can’t manage that, just try to bury your food so it doesn’t attract pests.
  • Worms don’t like acidic conditions and don’t like acidic food such an onions and citrus. Avoid giving these to your worms.

Worm Wee vs Worm Tea

You may come across references on the internet to both worm wee (leachate), and worm tea. The two names are often mistakenly used interchangeably, but they refer to different products. Leachate is what drains from the worm farm. Worm tea is a product made using castings, water and molasses, which are “brewed” for 24-48 hours. The main difference is that worm tea is aerobic, and so great for plants, whereas leachate can be anaerobic.

Leachate is fine to add to compost, but if your leachate is anaerobic it may harm your plants. I learnt this the hard way, diluting my leachate to a 1:10 ratio (1 part leachate for 10 parts water) and pouring on my seedlings, which caused them all to go yellow and die.

The way my worm farm is designed, my leachate does not have much contact with air and so will always be anaerobic. If your leachate drains freely into an open container it will probably be aerobic. You can try to aerate your leachate by diluting and exposing to air for a couple of days before using. However, always exercise caution when using on plants. Make sure you dilute 1:10 with water, and avoid using on seedlings, house plants or other temperamental plants.

[leadpages_leadbox leadbox_id=1429a0746639c5] [/leadpages_leadbox]
How to Build a DIY Worm Farm

One of the first things I noticed once I stopped buying plastic packaging was that my rubbish bin was now filled almost exclusively with organic waste – vegetable peelings, fruit skins and cores, leaves and the like. In the UK my local council had provided a brown bin for organic waste, which was industrially composted, but here in Perth Australia it was heading straight to landfill.

This meant someone was driving a truck to my flat, picking up my organic waste, driving it to a landfill site, dumping it into a hole in the ground and covering it with rocks. With fuel and machinery costs, wages, increased pollution from vehicle emissions, and the resulting contaminated land, it seemed like a lot of energy (and effort) was being wasted dealing with something I could potentially deal with at home.

And so I built a worm farm! I use the term ‘built’ loosely, as there was no actual building involved. In fact, it is dead simple. Additionally, I spent ZERO! Nothing! Zilch!

How to Build a Worm Farm

What you will need: two polystyrene boxes, a skewer, scissors, junk mail or shredded paper, some worms, an old towel

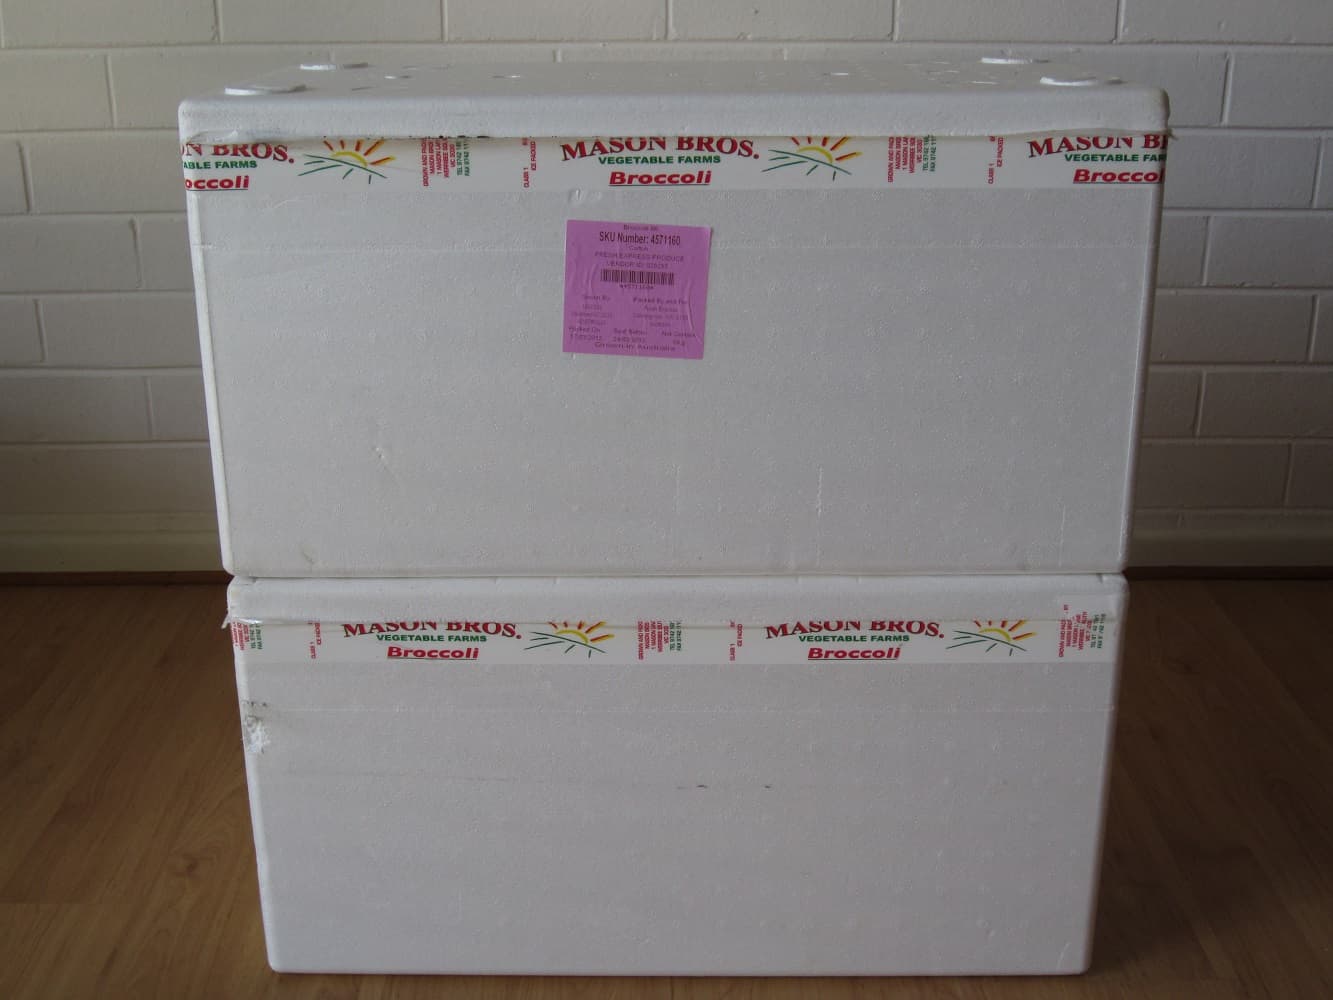
I salvaged two polystyrene boxes with lids from my local supermarket. (I just went to the Fruit & Veg section and asked a member of staff.) In Australia, vegetables such as broccoli and Brussels sprouts are delivered in these, and once emptied of stock, they are simply thrown away.

The boxes need to be the same width and length, but the same depth is not necessary.

Image

Two insulated boxes, courtesy of the supermarket. The bottom box doesn’t need a lid as the other box sits directly on top.

The boxes will be stacked on top of one another, so if they are different depths, choose the shallowest to sit on the bottom.

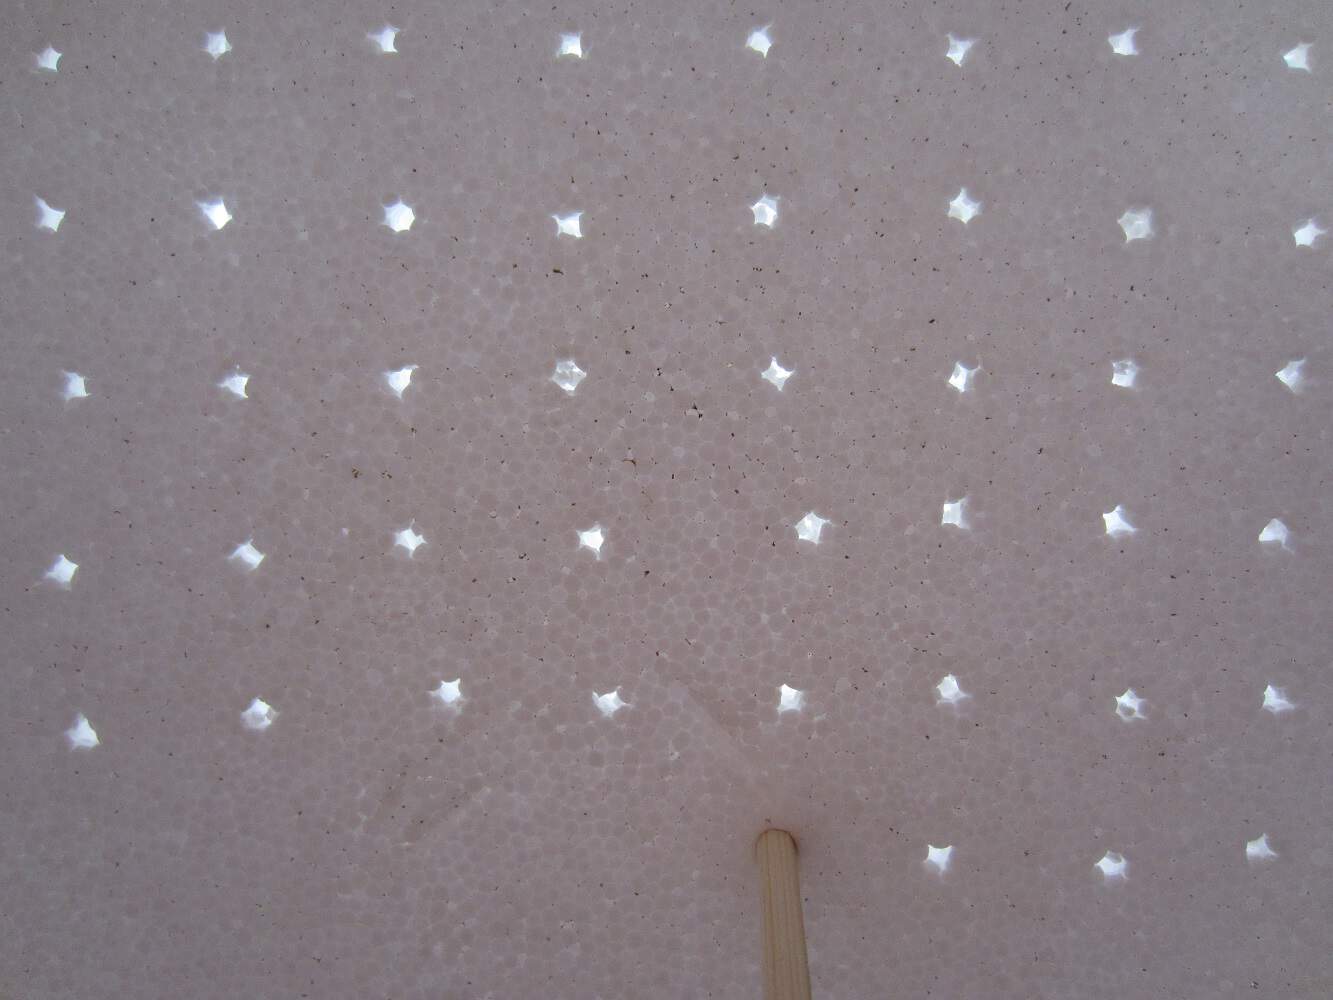
The top box is for the worms, and so needs drainage holes. The bottom box will be used to collect liquid that drains from the other box, so no holes in this one! To pierce holes in the bottom of the box simply use a skewer, making the holes approximately an inch apart.

Image

Drainage holes allow liquid to drain away, and stop your worms from drowning. The liquid collects in the bottom box.

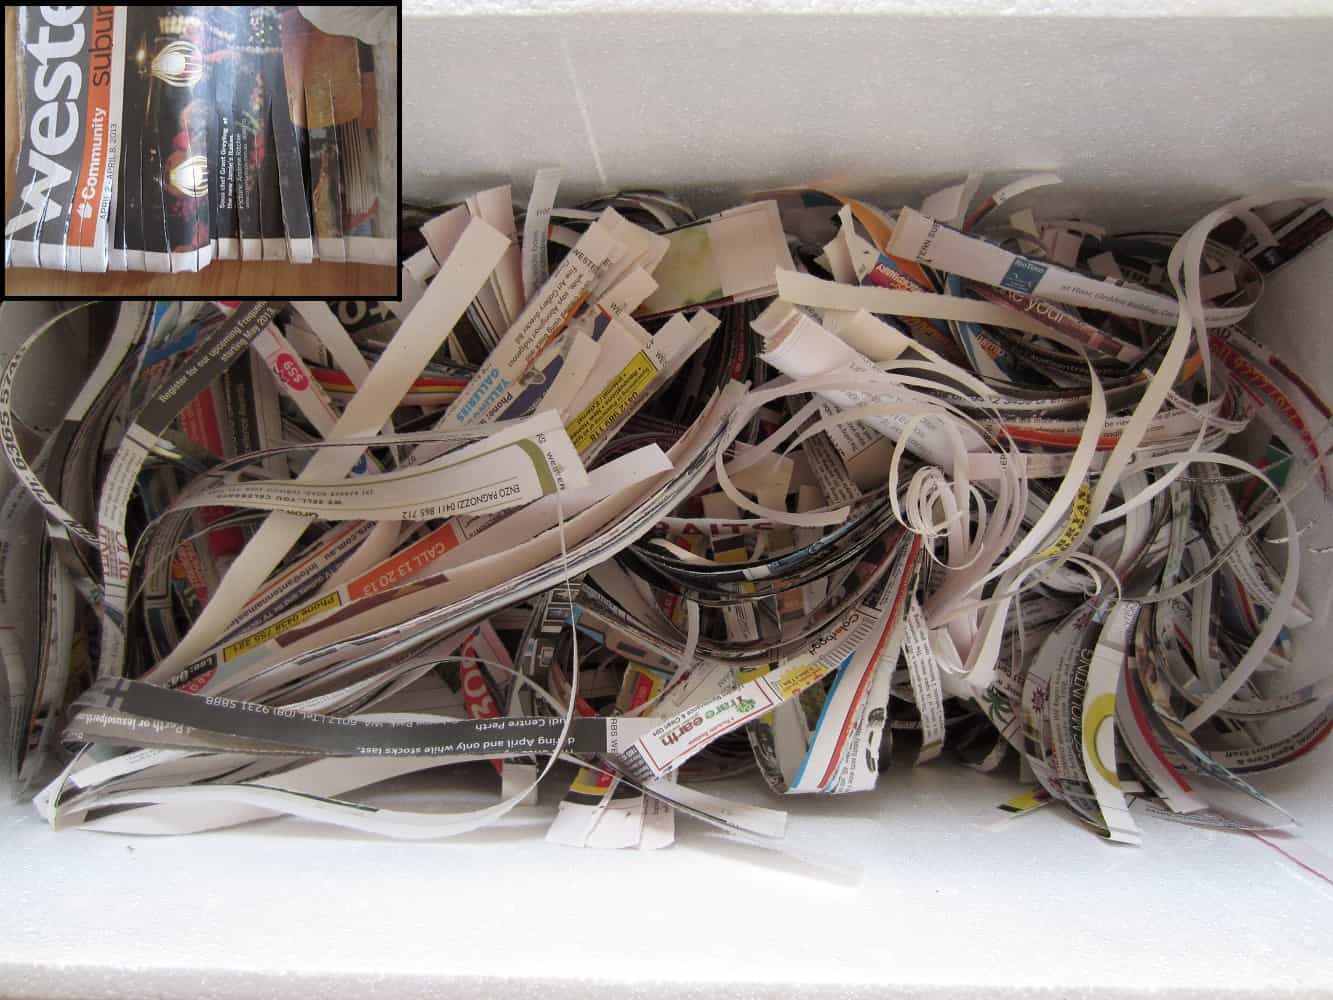
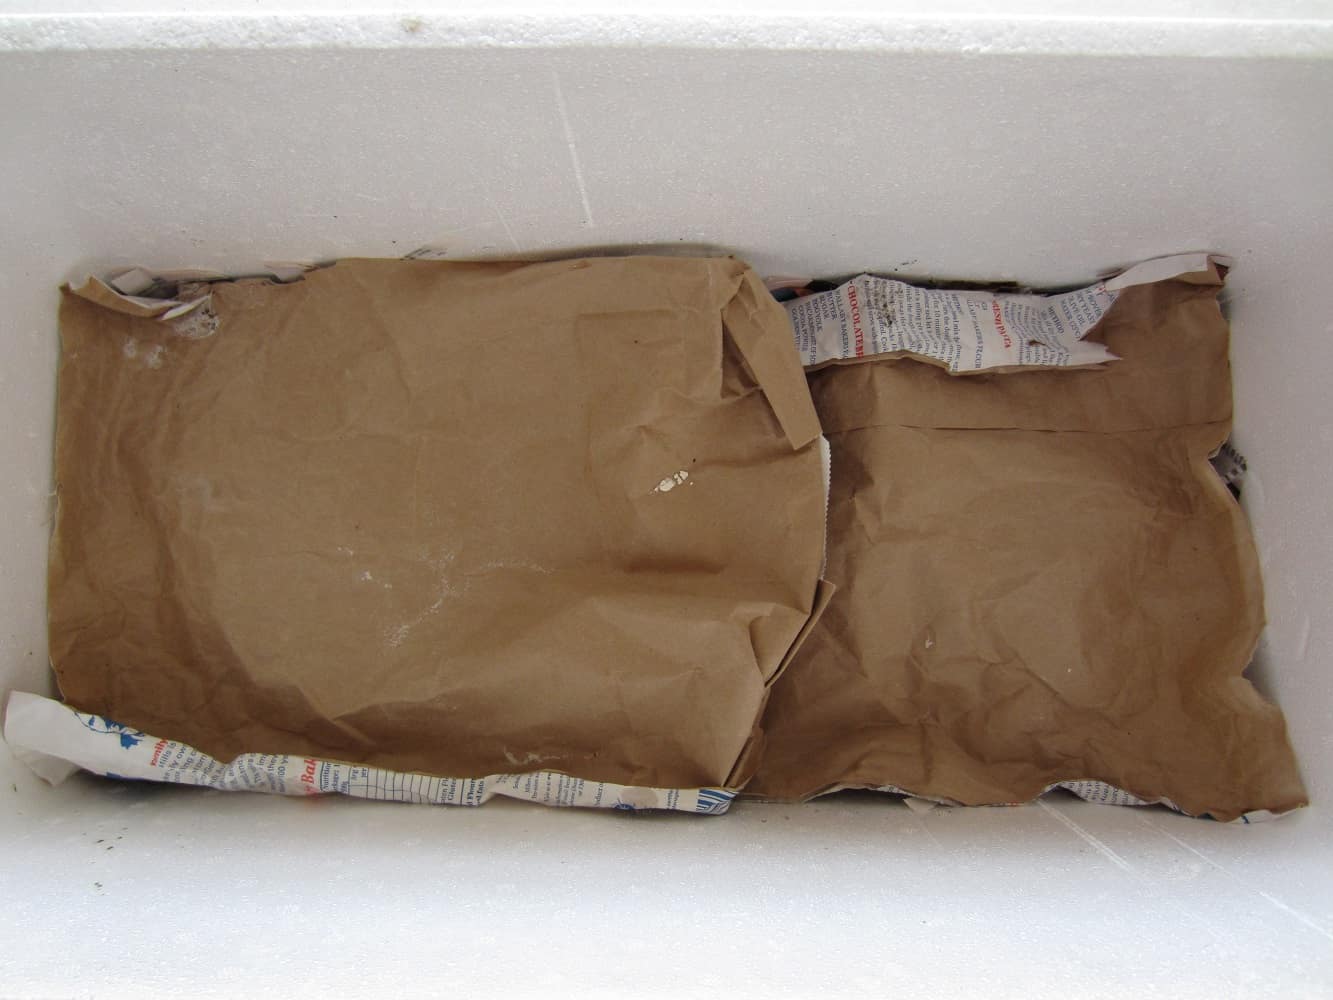
Place a layer of cardboard at the base of the top box so that the worms do not fall through the holes. Next, add some shredded paper to make bedding for the worms. This is a great way to get rid of those annoying supplements and catalogues that come in the newspapers, or in the mail.

Image

If you don’t have a shredder (I don’t) then you can make strips of paper for bedding by cutting slits in a newspaper at 1cm intervals along the spine, and then tearing.

Using a litre of water (ideally rain water of filtered water, if you have) pour carefully over the bedding to ensure it is wet. Any excess water will drain through to the bottom box.

And then…worms! I got mine from a friend but many community gardens offer them either free or for a small fee. You can also find them on gumtree or freecycle. If all else fails they can be purchased at the big DIY stores but be aware that these will have potentially been sitting on the shelf for a long period of time and may not be in very good health, so will take longer to get going.

Image

The worms in their new home : ) One fistful of worms needs one fistful of food per week. It’s important not to overfeed them as this means a stinky worm farm and can also attract other unwanted pesties who want in on the action.

Finally, cover the worms with an old towel, sack or carpet, or if you don’t have these to hand then use cardboard. This cover keeps the worms dark and damp, and keeps flies out. If you’ve used cardboard or something biodegradable you will eventually have to replace this as it will disintegrate over time.

Image

An old flour sack acting as a worm blanket, as I don’t have any old towels.

Lastly, replace the polystyrene box lid, after piercing a couple of holes for air, and place in a shaded spot. My worm farm lives on my balcony but it would be fine to keep indoors in a laundry or kitchen…if you wanted to!

Do not feed the worms for a few days to give them a chance to settle into their new home.

And there you have it – a DIY worm farm that didn’t cost you a penny!

[leadpages_leadbox leadbox_id=1429a0746639c5] [/leadpages_leadbox]