Tag Archive for: simple living

Plastic-Free Sweetcorn (How To Remove The Kernels + Freeze)

Some things seem so glaringly obvious with the benefit of hindsight. I would never have thought of processing my own sweetcorn cobs if it hadn’t been for giving up plastic last year. Until then, I had always purchased bags of sweetcorn from the freezer aisle in the supermarket. I didn’t use it often, but it was one of those staples I liked to have on hand, for when my fridge was empty and the shops were shut.

The freezer equivalent of the tins of tomatoes that I liked to have on hand in the pantry.

So Plastic Free July came along last year, and out went plastic food packaging, and so did frozen sweetcorn. I wasn’t about to buy the tinned stuff, because it’s filled with added sugar and salt, and the tins are lined with BPA plastic. Plus I always think it has a grey tinge that fresh and frozen corn just doesn’t have, which rather puts me off.

I resigned myself to only eating sweetcorn for the month of the year when it comes into season and I could buy fresh corn cobs. Along came the season, and with it more corn than I knew what to do with. And it occurred to me that I could process my own cobs and freeze the sweetcorn, plastic free! Why this epiphany took so long to come to me I have no idea. But at least it did, as I now have a supply of frozen sweetcorn in my freezer that should last me until next season.

It still makes me smile when I think about how obvious it was.

So if you’re like I was, and have no idea how to process corn, read on. If you were on that page years ago, I hope you feel a sense of satisfaction that I have finally caught up!

How to Freeze Sweetcorn

An average cob makes approximately 150g frozen sweetcorn.

corn1jpg
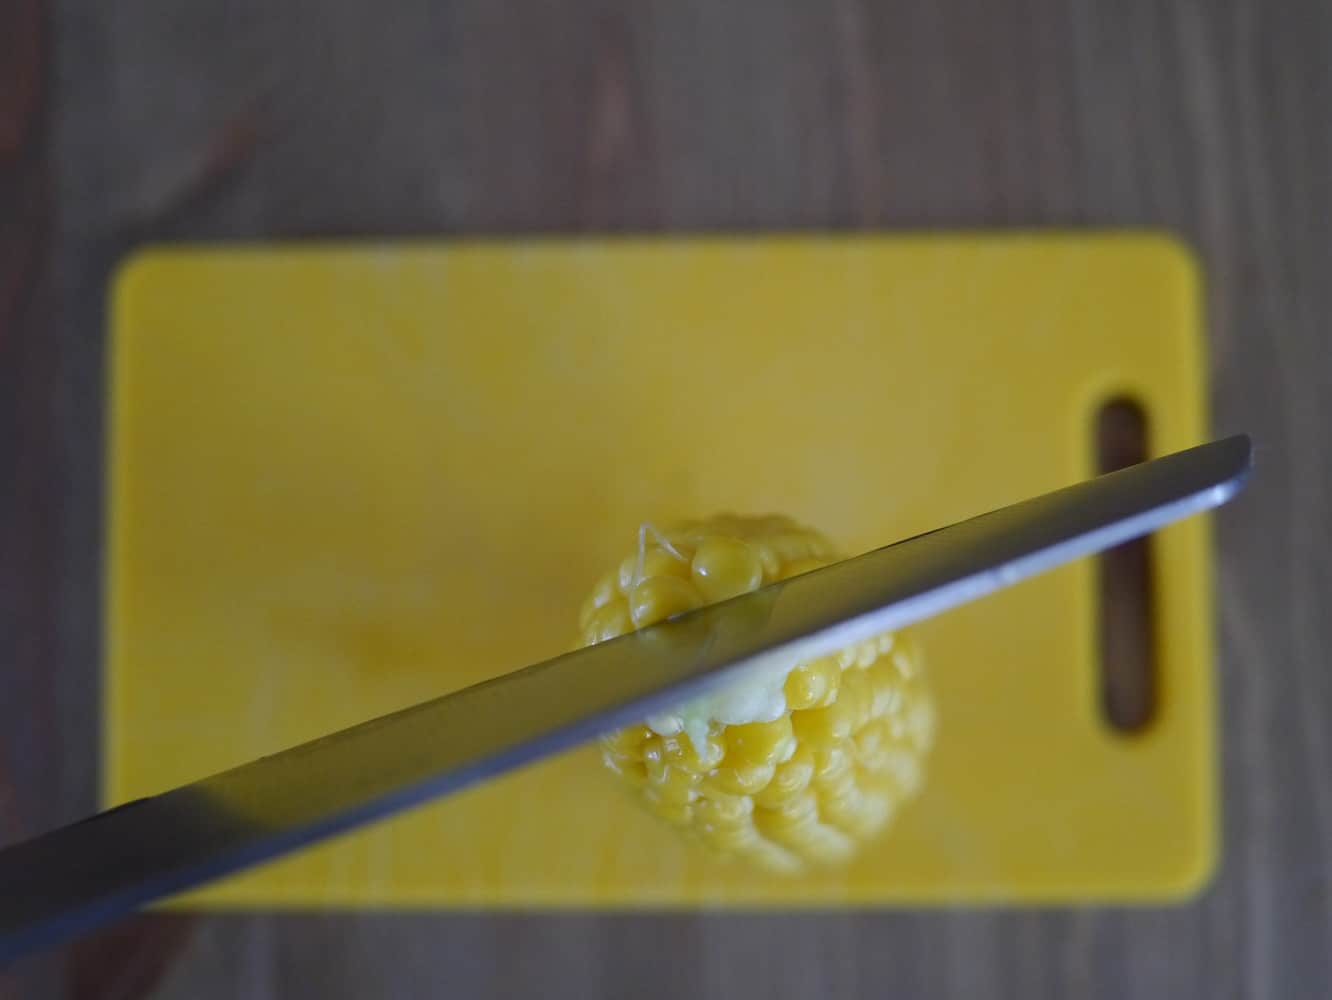
Remove the green husks and as much of the silky stuff as you can.

Place the corn in a pan of unsalted boiling water (wait until it is boiling before adding the corn) and allow to boil for 5 minutes. This is called blanching.

Remove the corn with tongs and place immediately into a bowl of icy water. This will stop them from cooking. Let them sit for at least 5 minutes, until cool to touch.

To cut the kernels off, hold the cob upright and using a sharp knife, cut downwards in strips. The corn will fall off in chunks but is easily broken up with your fingers.

corn5jpg

corn10jpgcorn9jpg Break up any clumps with your fingers. Place in a suitable container. Try to pack the containers as tightly as possible to minimise freezer burn.

corn12jpgFreeze until you want to eat!

[leadpages_leadbox leadbox_id=1429a0746639c5] [/leadpages_leadbox]

Making Almond Nut Butter (A Recipe)

Almond butter is essentially the same thing as peanut butter (except a lot of peanut butters have extra salt, sugar, oil and goodness-knows-what-else mixed in too), but made from almonds. I love peanut butter, but I prefer almonds to peanuts, and almond butter is definitely more delicious!

However, if you want to buy it from the shops it’s quite a bit more expensive than peanut butter. I guess that’s what comes from not adding all that other rubbish in.

You can buy almond butter from health food shops and actually our local supermarkets stock it too, except the brand they stock has a plastic wrapper over the lid – and I don’t buy plastic. I did find a plastic free version, but it wasn’t great – too many lumps, oily and ridiculously stiff.

So I decided to have a go at making it in my food processor. And…it was a total success! So I won’t be buying it any more, I’ll be making my own. And I might experiment with some other nuts. I think hazelnut butter would be amazing too, and I haven’t seen that in the shops at all.

Recipe: How to Make Almond Butter

I choose to make roasted almond butter, because roasting brings out the flavour.

This recipe makes approx. 1 cup almond butter.

Ingredients:

2 cups raw almonds

Method:

First roast the almonds. Preheat the oven to 150°C. Spread the almonds on a baking tray so they’re not on top of one another and cook for 20-30 minutes. (I cooked mine for 30 minutes and they were very well roasted – possibly a bit too much!)

almond1jpgLeave to cool completely. They will continue to make popping noises even once they feel cool to touch, so wait for this to stop.

Once the almonds are cold, place in the food processor or high powered blender, and turn on.

After a minute, the almonds will have turned into crumbs.

Keep blending, and the crumbs will form a dough.

Continue to blend, and the dough will form a smooth glossy paste, which is almond butter.

Scrape into a jar – I store mine in the cupboard, and a jar lasts 2-3 months. It will keep longer if stored in the fridge.

[leadpages_leadbox leadbox_id=1429a0746639c5] [/leadpages_leadbox]

My latest shower accessory

Last week my boyfriend and I went to a Water Smart workshop, which was about both the issues Perth is facing with water demand and supply, and how to use water sustainably. On the way home, my boyfriend commented that he wasn’t really motivated to make any changes to our lives, because water didn’t seem as important as other things, like power or transport. I was inclined to agree. I think greywater systems and rainwater tanks are fantastic, but we don’t own our own house, so this is something for the future. It is something I’d definitely do in the future, but it’s probably a long way off, and not relevant to us now. Read more

My new minimalist living space (the confessions of a hoarder)

I decided to take a week off from writing the blog in order to clear some space in my life (both the tiny flat that I live in, and also my schedule) and create some order. Now I would like to return triumphantly with reports of dazzling success, a new minimalist living space and feelings of serenity and calm.

Alas, that isn’t exactly what happened.

Last week I set myself the challenge of ridding myself of 100 things I no longer wanted/needed/used by the end of the month. I was committed. I was willing. I hadn’t decided what 100 things, but that was just a minor detail. To make it even easier, the weekend was a long weekend with a public holiday, so an extra day for sorting.

But despite my best efforts to sit on the sofa whilst willing the decluttering to miraculously begin, berating the general lack of action, and chastising my boyfriend every time he settled down to read a book/magazine for not helping, we didn’t manage to clear out anywhere near as much as I’d hoped.

We managed to fill a box with stuff to take to the charity shop. We also managed to get rid of two wastepaper baskets of recycling. I wish I could say it was a commendable effort, and a good first attempt, but in three days, I think I should have managed a bit more. I think I should have managed a LOT more. I like the idea of the stuff being gone, but actually doing the tasks that make it happen is another thing altogether.

100thingsjpg

This one box was the result of three days of sorting. I think it demonstrates quite well how most of the ‘sorting’ actually consisted of (me) moaning about the sorting, and (me) talking about how great it would be once the sorting was actually done, rather than actual genuine sorting. We (actually, no, my boyfriend did that) did put an additional couple of things on eBay and Gumtree, but actually, they’d fit inside this box too, so no extra points for those.

And that’s the thing. It’s me that’s stopping the process. I just can’t get rid of anything! Every time my boyfriend threw something in the bin I scurried over and fished it back out. He tested a drawer full of pens and threw the ones in the bin that didn’t work, but even then I was tempted to get them back out and test them myself just in case one of them could be saved. Why?! We have a million other biros that work and we don’t need those either.

And then on Monday evening when we went to bed, I said that I wished we’d got it all finished, and he looked at me in amazement, and said “but it’s not a job that’ll be finished and then you’re done. It’s a job that you’ll always need to keep coming back to.”

What?!?!?!? How can that be true?! Surely I can spend three days sorting out my things and then I will rejoice in my clutter-free space and will never need to declutter again? What if I declare never to buy or acquire anything ever again? What does he mean, I’m going to have to go through this all over again in a few months time?!

Of course, he’s right. Maybe some people could do it, but I am never going to be a true minimalist. I’m probably never going to be close! I hate waste too much. I have three pairs of shoes in my closet that I haven’t worn for over a year – in fact two of them I haven’t worn in two or three years. But I can’t bring myself to get rid of them.

I think when people accumulate stuff, and the stuff starts to get in the way of their lives, they have two choices. They either get a bigger house, or more storage, in order to assimilate their possessions and not have to really think about them. Or they decide to have a clear-out, in which case they have to face up to the money they’ve wasted, the dreams that never quite came true (even though you bought the book on paper maché crafts or the home candle-making kit or whatever new hobby, you just never quite got round to it), and the emotions which come with that (be it guilt, anger, resentment, or simply frustration at having too much stuff). Maybe some people really don’t care, they happily just chuck it all in the bin and head back to the shops to get a load more shiny new stuff, but for me, I find this second option really confronting.

What it means, though, is that on the public holiday weekend, whilst friends of mine are spending a few days relaxing in the beautiful Margaret River region down south and having a glorious time, I am at home fishing things out of the dustbin. That is the consequence of my having too much stuff. And it’s rubbish – literally.

So I’ve decided I need to rethink my challenge in order to actually make some progress. I think it’s going to be easier for me if I break my goal of 100 things down into bite-size chunks. I’m going to commit to getting rid of 5 things every day for the next 20 days. That will take me to the 24th June. Hopefully if I’m on a bit of a roll, I’ll be able to keep going until the end of the month.

I think spending a few minutes every day is a much better option than dedicating three days to achieving greatness, and then feeling miserable about my lack of achievement. And as that didn’t work anyway, I’m not going to spend another weekend floundering.

So, small steps. I’m off to find my five things to get rid of today. Wish me luck!

[leadpages_leadbox leadbox_id=1429a0746639c5] [/leadpages_leadbox]

My 100 Things Challenge

I’ve been feeling a little overwhelmed this week. It started with the washing. But it’s been a busy week too. I’ve had meetings, I’m currently participating in a course, I’m working with a couple of organisations on two different projects, I’m presenting next week on sustainable transport, all on top of all the regular stuff I need to do and all the things I want to do. I like to fill my time, get involved and keep busy, but then sometimes I stop and look at everything I’m planning to do, and I get that ‘whoah!‘ feeling where I don’t even know where to start.

And if my schedule is feeling cluttered, so is the physical place of my life, my tiny flat. I think, maybe, that when one aspect of your life is busy or cluttered you look for solace in the other parts. Well there’s no solace in the tiny flat! I talked a bit on Monday about how slowly I’ve been accumulating clothes, but it’s not just clothes. Yesterday we picked up our new sofa. It’s not actually new, but a bargain find from the Salvation Army charity shop, and we’d needed a new sofa since we sold the old one. (The old one had to go as it took up half the flat, literally, which I hadn’t realised when I bid on it on eBay because I didn’t actually bother to check the dimensions.) The new sofa allows us to seat people whilst leaving enough space in the tiny flat to fit in some storage so we no longer need to keep piles of things on the floor. Since losing the old sofa we got also got a set of drawers to put all the stuff in. Which is great…

Except the piles of stuff are still sitting around the place, or shoved in the drawers. They’ve not been sorted. I have that uneasy feeling that comes with not being entirely sure where any of your stuff is.

And the other thing that makes me uneasy, is this word ‘need’. We ‘needed’ the sofa. We ‘needed’ the drawers. We ‘needed’ the glass pyrex storage containers that I bought last week because we don’t have enough food storage. I feel like I’ve been spending like crazy and accumulating stuff, and when I look around the flat and in the cupboards I see too much stuff. It’s so easy to justify everything, to think it will make your life better, or easier. But all that stuff needs sorting, and tidying, and cleaning, and finding again when I’ve tidied it away and don’t remember where away actually is. And for all the new stuff that I ‘need’, there’s plenty of stuff that is no longer useful.

I love the idea of simplicity, but I am a natural hoarder. It’s a constant battle. I want to believe that those things will become useful again. Something has to tip me over the edge and push me into action. Well this week, that has happened. So whilst I’m still in the moment I’ve made a pledge. I’m going to get rid of 100 things.

I have no idea which 100 things. I have no idea if that’s a lot, or once I get started I’ll be able to get rid of 300 things. (Wouldn’t that be nice?!) All that stuff in the kitchen cupboards that I haven’t used since we moved in? That’s going. The clothes I haven’t worn since arriving in Australia? Out. The stuff in the bottom of the boxes that never got entirely emptied when we moved in? It’s not staying.

I’m going to give myself a month. And I’m putting it out here in a public forum because it should motivate me to actually go through with it! I’m hopeful that less clutter will mean a more positive environment, less stress, fewer chores (more time!) and more freedom.

Remember the film Fight Club? My friend and I were obsessed with it in school, particularly because of all the great quotes (there are many). Even now, I can remember many of them. I wanted to finish with one because I think it’s so true. It’s another reason to de-clutter your life.

“The things you own end up owning you.”

[leadpages_leadbox leadbox_id=1429a0746639c5] [/leadpages_leadbox]

The weekend and the washing

laundryjpgI had a really great weekend. Friday night sushi and a rare trip to the theatre with my boyfriend (Death of a Salesman by the Black Swan State Theatre Company), a Saturday afternoon afternoon trip to Fremantle then dinner with friends on Saturday night, and lunch with family on Sunday afternoon. Busy, fantastic company, amazing food, loads of fun. Read more

The power of nanna-technology

You’ve probably heard of nanotechnology. Well this post has absolutely nothing to do with that. I’m talking about nanna-technology.

Our tiny flat is leaky. In winter it leaks warmth. Australian houses just aren’t built to stay warm in the cold months, they leak warmth, letting the heat out (but letting it all in during the summer, when everyone is trying to keep cool). In our tiny flat, there are gaps between the door frame and the wall where you can see straight through to the outside. I’m not talking about the gap between the door and the door frame, although of course there’s a gap there too, but a gap between the actual door frame and the wall. Crazy. There’s also a space of about an inch under the front door, and another at the balcony door. The windows are single glazed. Even when they’re closed I can feel the cold air breezing in. And the window in the bathroom actually has a three-inch gap where there is no glass at all.

gapsinwalljpg

I’m not joking either! The gap at the bottom of the door is big enough for me to put my whole hand underneath, right up to my knuckles! And these gaps mean cold air coming in.

All this means that in winter inside the flat it can get quite cold. You may think of Australia as sunny and warm (I thought that before I came here), but in Perth in winter 2012 the minimum temperature averaged 6.7°C at night, and some temperatures were below zero (statistics here).

We rent our flat. We can’t just replace the door frame, install double-glazing or add roof insulation to make the place warmer. Even if we didn’t rent, these things can be expensive to install. But if we don’t do something, we’re going to spend a fortune trying to heat the place, and the heat is just going to escape outside through all the gaps.

So this brings me back to nanna-technology. If you’re suffering from the same problem as me, don’t just admit defeat and crank up the heating. Ask yourself, what would Nanna do?

You don’t always need to spend money to find solutions. Don’t let expensive solutions that you can’t afford be a reason not to do anything. Just try to find solutions with what you have. After all, if your house is drafty you’ll spend a fortune in electricity or gas trying to heat the place up by burning fossil fuels.

To help plug the gaps under the doors, I’ve made two draft excluders using some spare towels and a few elastic bands. They may not look catalogue-perfect, but as long as they’re doing their job and I’m not cold, I don’t care!

towel2jpg

towel1jpg

Just looking at these guys makes me feel warmer!

Last winter was my first winter in Perth, and I wasn’t prepared for the cold or the drafty-ness.  This year, I say bring it on.

[leadpages_leadbox leadbox_id=1429a0746639c5] [/leadpages_leadbox]

How to Make Labne (Cheese) and Greek-style Yoghurt

I recently started making my own yoghurt (you can read about it in this post). The next part of my yoghurt adventure is making Greek-style yoghurt and labne. The great news is that making it requires no additional ingredients and no cooking either!

In case you’ve never heard of it before, labne (also spelled labneh or lebni) is a simple fresh-tasting cheese made from yoghurt that originates from the Middle-East. It is made by straining the yoghurt to drain off the liquid (whey) and leave the solids (curds). The longer that yoghurt is strained, the firmer the consistency. Labne can be made after 4-6 hours and up to 3 days; thickened Greek-style yoghurt is the intermediate product formed after straining for 2-3 hours.

How is this different to shop-bought Greek-style yoghurt?

There’s no additives! Real natural yoghurt is fairly thin and runny. Draining the liquid off is the natural way to make the yoghurt thicker, but the final volume is much smaller. 1 litre of milk will make 700ml yoghurt, which if strained for several hours will result in around 350ml Greek yoghurt. To save money, instead of straining yoghurt, manufacturers may leave the whey and use additives to bulk and thicken the yoghurt artificially, including gums, gelatine, starch and milk powder. In Australian supermarkets it is almost impossible to find any yoghurt for sale without one or more of these additives. In the UK the market is much better and natural Greek-style yoghurt is more readily available.


Let’s get making!

You will need: 1 litre yoghurt, muslin (cheesecloth), a bowl and a sieve or colander. If you don’t have any muslin, you could improvise with other (very clean) material such as an old sheet or tea towel.

How to make thick Greek-style yoghurt

Fold the muslin so it is 4 layers thick and place in the colander. Place the colander over a bowl.

labne1jpg

Pour the yoghurt onto the muslin. The whey will begin dripping into the bowl below straight away.

labne2jpg

labne3jpg

Leave for 2-3 hours until thickened.

labne4jpg

Place in a glass jar and store in the fridge. The yoghurt will last for several days.

Note: if your room is not too warm it is fine to leave out on the side whilst the whey drips out. If it is a particularly hot day or you would prefer, place the bowl in the fridge instead of leaving at room temperature.

How to make labne

This is a lengthier version of the previous recipe, and it starts in an identical manner. By leaving the yoghurt for longer you will make labne instead of Greek-style yoghurt.

Fold the muslin so it is 4 layers thick and place in the colander. Place the colander over a bowl.

Pour the yoghurt onto the muslin. The whey will begin dripping into the bowl below straight away.

After 2-3 hours, take the four corners of the muslin to make a parcel, and hang over the colander to aid dripping. I used a clothes peg.

labne8jpg

labne6jpg

After 6 hours, the yoghurt will have thickened enough to make a soft cheese. You can leave this longer if you want the cheese firmer – leave for up to 2 days in the fridge to make a really firm labne.

labnes1jpg

This is how my yoghurt looked after straining for 6 hours.

When you are happy with the consistency, remove the curd ball from the muslin. You can eat it straightaway or store covered in olive oil in a jar in the fridge – it will keep for up to a week.

Storing your labne with herbs and olive oil:

You will need a clean glass jar, olive oil and some fresh herbs.

labnes2jpg

Cut the curd into pieces and shape into walnut-sized balls with your hands.

labnes3jpg

labnes4jpg

Add the balls to a clean jar along with some herbs, and cover with olive oil.

labnes5jpg

labnes6jpg

labnes7jpg

This will keep in the fridge for up to a week.

Using what’s left – the whey

I used 700ml yoghurt to make my labne, which made enough cheese to fill one small jar, and I was left with 350ml of whey.

wheyjpg

This cloudy yellow watery liquid (which has a similar taste to yoghurt) contains proteins, minerals such as calcium, potassium and B2 as well as friendly lactobacteria, making it a great probiotic. Don’t throw it away!

So…what should you do with it then? Well. It can be drunk as a probiotic drink. It can be used to replace the water when making bread products, or to replace the buttermilk in other recipes. You can use it to soak lentils and grains. Apparently. I wouldn’t like to recommend any of these things without trying them out myself first though, so expect a follow-up blog post in the coming weeks with some helpful tips with what to do with all the leftovers! In the meantime, you can leave it in the fridge in a sealed glass jar for several weeks.

[leadpages_leadbox leadbox_id=1429a0746639c5] [/leadpages_leadbox]

Two simple recipes for do-it-yourself toothpaste

This weekend we finally finished off the toothpaste we have been using since last year, purchased before our plastic-free adventure began. We had a bit of a stockpile of the old stuff to use up, but now the last little bit is gone, and from now on I’m gonna make my own.

I’ve been suspicious of conventional toothpastes for a while and stopped buying them 18 months ago. Conventional toothpastes are full of cleaning agents, detergents, preservatives, anti-microbial agents, and thickeners, and many of these ingredients are questionable in terms of their effects on the body.

Three Nasties in Conventional Toothpaste

Sodium lauryl sulphate
This is added as a foaming agent and detergent. It is a known irritant.

Sodium fluoride
This is added to toothpaste to help prevent cavities. However it is toxic by ingestion and can be fatal. It can affect the heart and circulatory system. In younger children too much fluoride can cause fluorosis, which is when the enamel of the teeth is discoloured and the teeth have brown markings.

Triclosan
This an anti-microbial and anti-bacterial agent used in toothpaste to help prevent gum disease. However, it has a number of other impacts on humans and the environment. For example, triclosan is fairly stable and fat soluble, meaning it can accumulate in the body. It has been found in blood, urine and breast milk. It is a demonstrated endocrine disruptor and has potential links to breast cancer.

Despite its stability, it can react with chlorine in tap water and sunlight to form toxic intermediate and breakdown products such as dioxins, which are highly toxic, and chloroform, which is a carcinogen. Triclosan is also toxic to aquatic bacteria, phytoplankton, algae and fish. (This fully referenced fact sheet is great if you want more information.)

There are also concerns that its widespread use may cause resistance in bacteria similar to the way antibiotic-resistant bacteria developed.

So what are the alternatives?

You can buy natural toothpastes but they are expensive (and some still contain questionable ingredients), and they almost all come in plastic packaging. Making your own safe, inexpensive, packaging-free toothpaste seems to be the best solution.

How to Make your Own Toothpaste

You can make your own toothpaste simply in just a couple of minutes using only a handful of ingredients.

Bicarb soda – is an abrasive agent that removes dental plaque and food from teeth. It also neutralises stains and odours.

Sodium chloride (salt) – is a mild abrasive and also has anti-bacterial properties.

Glycerine/glycerol – is a sweet-tasting colourless odourless liquid that makes the paste smooth, provides lubrication and acts as a humectant, helping the toothpaste retain water. You can buy glycerine at a pharmacy.

Peppermint oil – this gives the toothpaste its minty taste. You can also use other essential oils but ensure they are food grade.

toothpaste2jpg

Ingredients:

4 tsp bicarb soda
1 tsp sodium chloride (salt)
3 tsp glycerine
8 – 10 drops peppermint oil

Method:

Measure dry ingredients into a bowl. Add glycerine and stir to form a paste. Add essential oil.

bicarbandsaltjpg glycerin2jpg

Alternative Recipe – Glycerine-Free Toothpaste

There is a lot of information on the internet regarding  glycerine in toothpaste. It all seems to come from one source, Dr Gerard F. Judd, who wrote a book called ‘Good Teeth, Birth to Death‘ published in 1996 in which he claimed glycerine coats the teeth and prevents remineralisation. I have not read the book but if using glycerine in toothpaste is something that concerns you, you can replace the glycerine with coconut oil.

Coconut oil has anti-microbial properties and because it is solid below 25ºC it works well as a glycerine substitute.

To make this version use the recipe above but substitute 3 tsp glycerine for 2 tsp coconut oil.

toothpaste1jpg bicarbandsaltjpg coconutoiljpg

The Taste Test

Neither toothpaste willtaste like conventional toothpaste, so don’t be surprised! Bicarb soda and the salt make the taste very salty. The glycerine version is slightly sweeter and has more of the texture of conventional toothpaste. It has a higher melting point, whereas the coconut oil will melt in your mouth – literally – and has a mild coconut taste and the texture of oil. If you’re not worried about glycerine (and if you’ve been using conventional toothpaste you’ve probably been using glycerine in that) I would recommend starting with that, and once you get used to the taste you could consider making the switch to coconut oil.

[leadpages_leadbox leadbox_id=1429a0746639c5] [/leadpages_leadbox]

Deodorant: why natural is better and how to make your own!

Before you roll your nose up at the idea of making your own deodorant, let me tell you that is exactly how I was about a year ago. So what changed? Why would I want to make my own deodorant anyway?

Well… the first thing was that I became increasingly interested in what ingredients go into beauty products. I learned that some of the ingredients used in regular products are not good. And when I say ‘not good’, we’re talking carcinogens, neurotoxins, irritants, even pesticides.

Conventional anti-perspirant deodorants (the kind you buy in chemists, supermarkets and beauty stores) contain, among other things, aluminium salts. These have been linked to breast cancer. There is a LOT of info about this on the web; studies have been carried out that ‘prove’ they do with just as many that ‘prove’ they don’t. Whilst the verdict is still out, why take the risk?

The second thing that made me want to stop using conventional deodorant was learning about the way aluminium salts work. Aluminium salts are what makes a deodorant ‘anti-perspirant’, and they work by blocking the pores, or more specifically the sweat ducts. Sweat is still produced by the sweat ducts, but it cannot escape. Sweating is a natural process that has two useful functions – it regulates our body temperature by cooling us down, and also allows us to excrete toxins. (The skin is an excretory organ.) If we’re blocking our sweat ducts, then the toxins cannot be released, so where are they going? My view is, that if the body was designed to allow us to sweat, it’s probably best to let it do it’s thing.

These two reasons were enough to convince me to stop using conventional deodorant. However, I had mixed results with store-bought natural deodorants. They are often expensive, almost always come in plastic packaging, and I would say half of the ones I’ve tried don’t actually work. Let’s face it, the reason we use deodorant is to prevent ourselves from smelling bad. I’m willing to give up aluminium salts, but only if I’m exchanging it with something that will actually work. Natural and useless has no appeal.

So not being completely satisfied with the natural products on the market, I contemplated the concept of making my own. But what actually convinced me to make my own deodorant was meeting other people who made their own deodorant…and didn’t smell! For me that was the final reassurance I needed to jump in and give it a go…

Super Simple DIY Deodorant

This is a really simple recipe that only requires 3 ingredients and will take you about 5 minutes. What’s even better is that the ingredients are cheap, being things that you’d find in your grocery cupboard and are all safe enough to eat!

Makes enough to fill a small jar. Effective enough to last all day without reapplying!

Ingredients:

1 tbsp bicarb soda
4 tbsp cornflour / arrowroot powder (sometimes called tapioca flour)
2-3 tbsp coconut oil
optional: essential oils (therapeutic or food grade)

Mix bicarb soda and cornflour together in a bowl.

deo2jpg

Add 2-3 tbsp coconut oil. (Coconut oil has a melting point of around 25°C, so it will depend on the temperature of your kitchen whether it is solid or liquid. If it is solid, immerse the jar in a bowl of warm water for a few minutes and the oil will melt.)

Stir to form a paste.

deo6jpg

This looks runny because I had to warm my coconut oil slightly to melt it. As it cools it will stiffen to form a paste.

Add a few drops of essential oil if using (if not the deodorant will have a mild and pleasant coconut smell.)

Pour into a clean jar.

deo9jpg

How to Apply

Apply a small amount with fingertips  to underarms and rub in well.

How to store

I keep mine in the bathroom, where usually it maintains a good consistency. If the day is particularly hot and the deodorant completely liquifies, stir with a clean teaspoon and put in the fridge to harden. If it is too stiff, put the container in a bowl of warm water to soften.

Tips

  • Some people are sensitive to bicarb soda. My boyfriend has particularly sensitive skin and so I use the ratio 1:6 bicarb to cornflour. I tried the ratio 1:8 but found it was only effective for 6 or so hours after applying. I have also made it for myself using 1:4 with no problems, and I know people who use 1:1.
  • Everyone is different, so if you find my recipe doesn’t work for you, try tweaking it by adding more bicarb.
  • The amount of coconut oil you need will depend on the temperature of your house. I use less in summer and more in winter because our bathroom temperature fluctuates to maintain the same consistency.

[leadpages_leadbox leadbox_id=1429a0746639c5] [/leadpages_leadbox]