Tag Archive for: reduce food waste

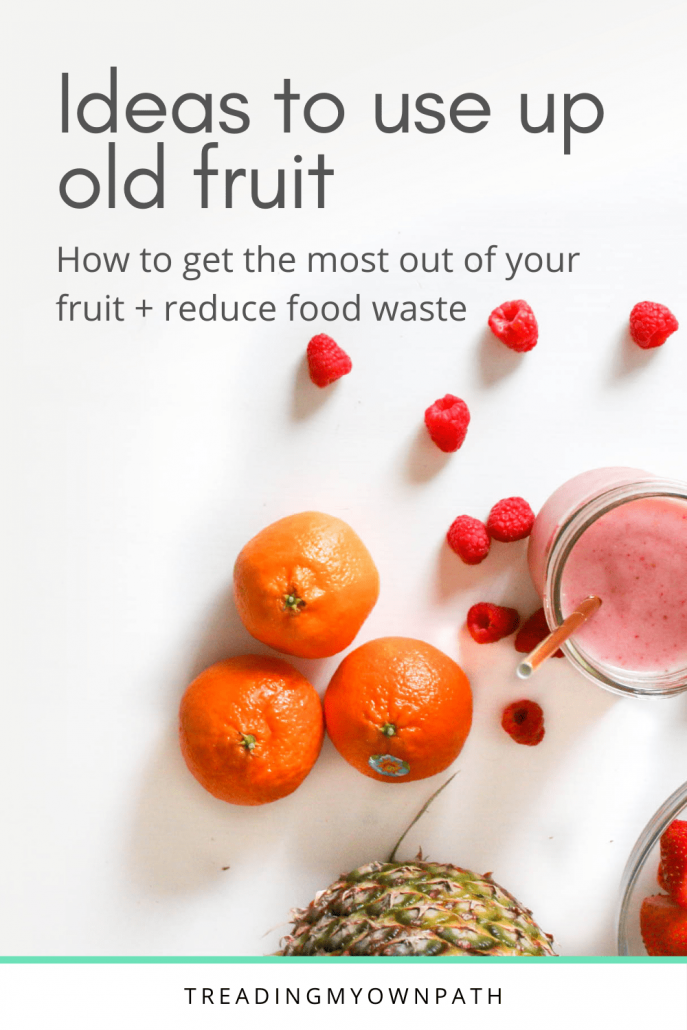
How to start a Grow Free Cart (+ share surplus produce with your community)

A Grow Free cart is simply a cart (or a stand, or a table – any surface really) where home-grown produce, preserves, seeds and seedlings are placed and made available to anyone in the community. It’s the ultimate answer to “how can I share my surplus with my neighbours”, or on a more basics level, “what do I do with my courgette/zucchini glut?”

It’s one of a number of awesome neighbourhood community initiatives popping up all over the world. You’ve probably heard of the Little Free Library movement , which is the world’s largest book sharing movement. Books are placed in little free libraries all across the globe, and people are free to take them, and/or add new books.

The Grow Free movement is the fresh-fruit-and-vegetables version of the Little Free Library.

There’s also Little Free Pantries, which are the dry goods/long-life groceries version, and Community Fridges – sometimes called Solidarity Fridges or Freedges depending on where you are in the world.

All three movements help reduce food waste through sharing, and make good food more accessible to those who need it.

Being a vegetable grower, a Grow Free cart seemed like the best fit for me, with a suitable space on my front verge. A fridge requires power, which wouldn’t be easy for me to set up on the verge. There’s already a Community Pantry two streets away from me, so no need for another so close – plus a local church two streets away in the other direction runs a food bank that I make regular donations to (one of my 2021 resolutions).

You don’t have to be a vegetable grower to start one, of course, but it helps knowing that every week I will have things to put on the cart.

I’ll talk you through the steps to get started. If you’re interested in starting a pantry or fridge instead there will be some differences to your setup, but the process will be pretty similar.

How to establish a successful Grow Free cart, in steps

Setting up a Grow Free Cart: what you need

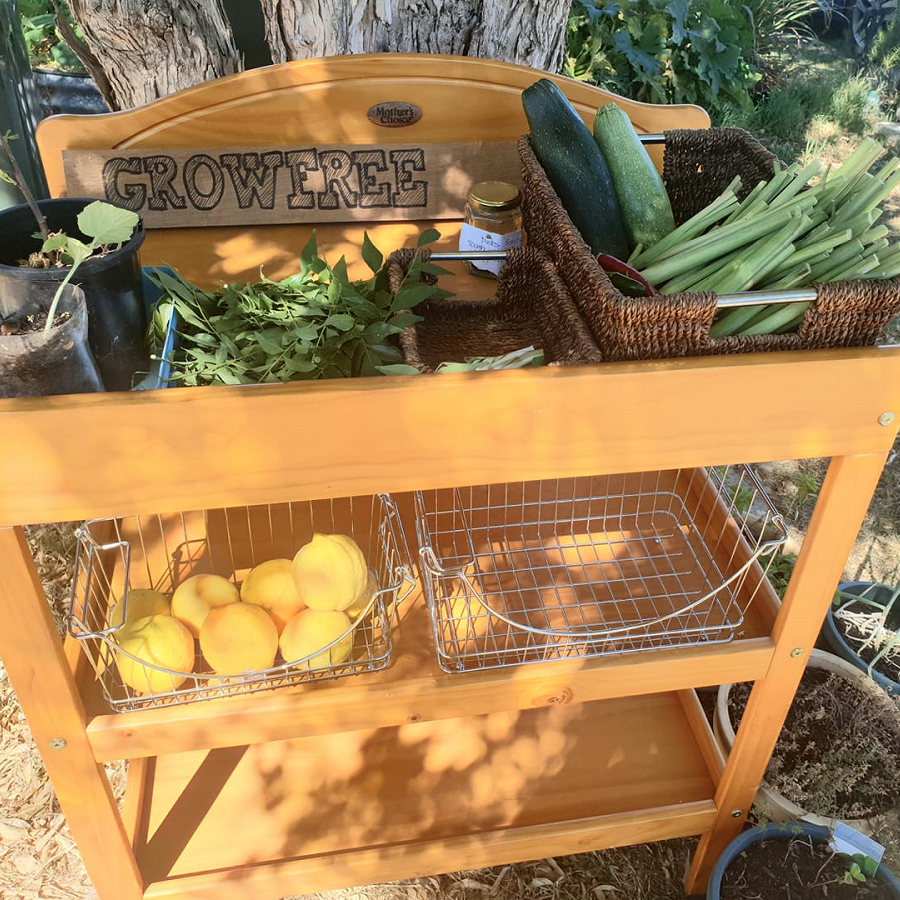
The only thing you really need is a surface on which to place things, so any table or shelving will do. A lot of cart stewards (as people who have carts are called) use baby change tables, because they are a great size, have multiple shelves, tend to be on wheels for easy moving, and have sides to stop babies (and lemons!) rolling off the edge.

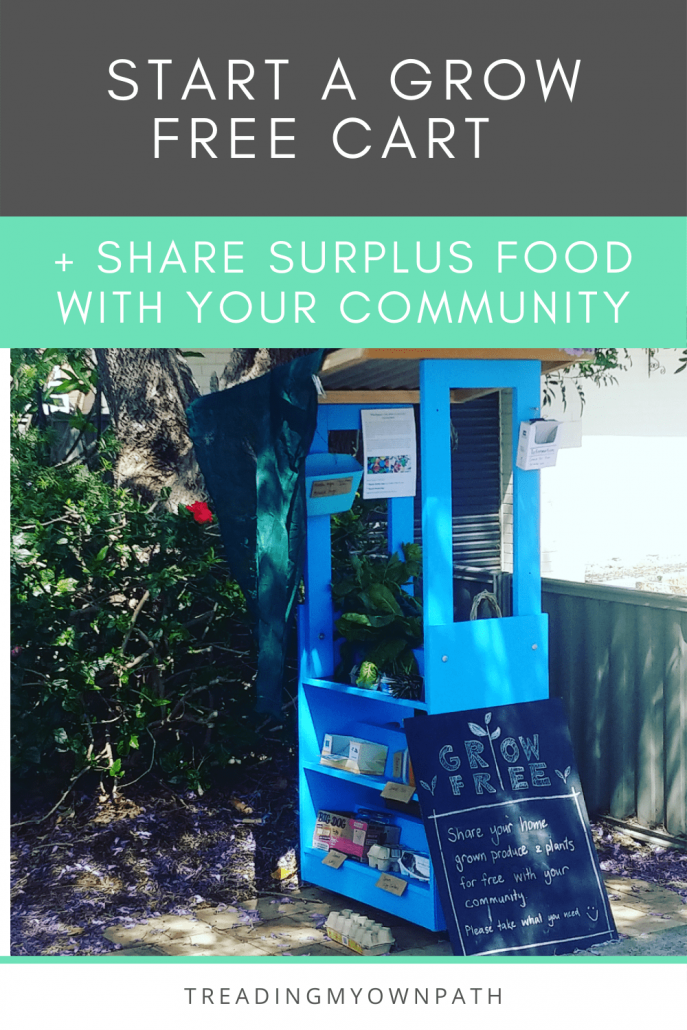
Some people go further and rig up a roof for their cart, to protect from the sun and rain, and even paint their carts in bright fun colours. This is the best one I’ve ever seen (in a neighbouring suburb, and how I first heard about Grow Free)…

I’m positioning my cart under a tree, where it has shade, and the one weekend there was a downpour I relocated to underneath my garage door where it was protected from the rain.

I purchased a wooden baby change table second-hand for $15. I spent a long time trying to find a free one, but in the end I decided to pay for one that was exactly what I wanted. Two shelves as well as the top, and unpainted wood, on wheels.

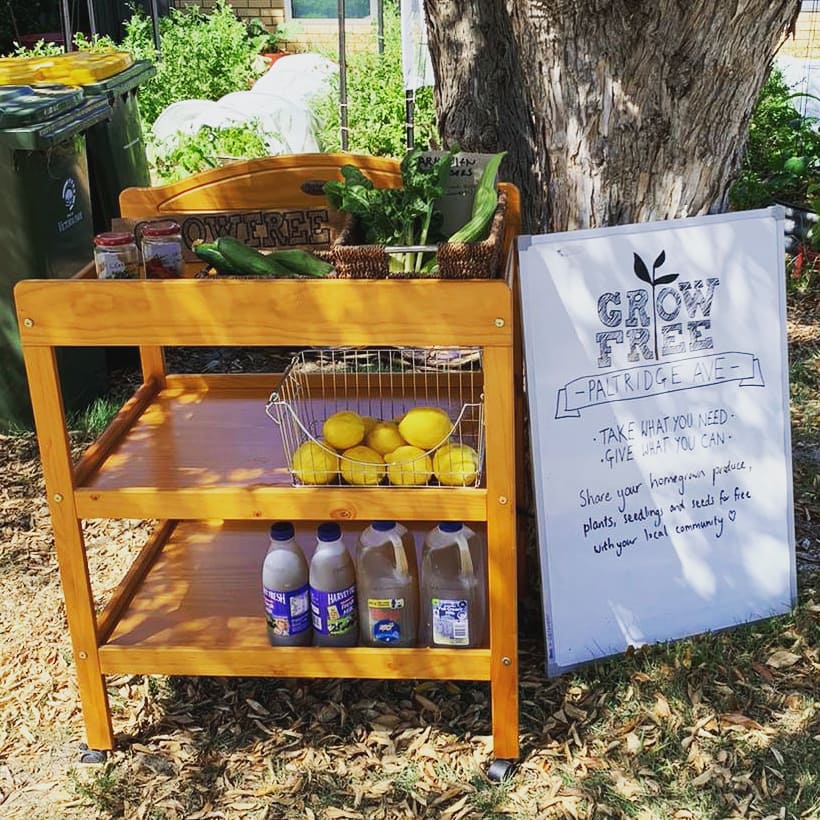
I’ve got a few different baskets that I picked up on the Buy Nothing website. I could use cardboard boxes, but I tend not to have them lying around.

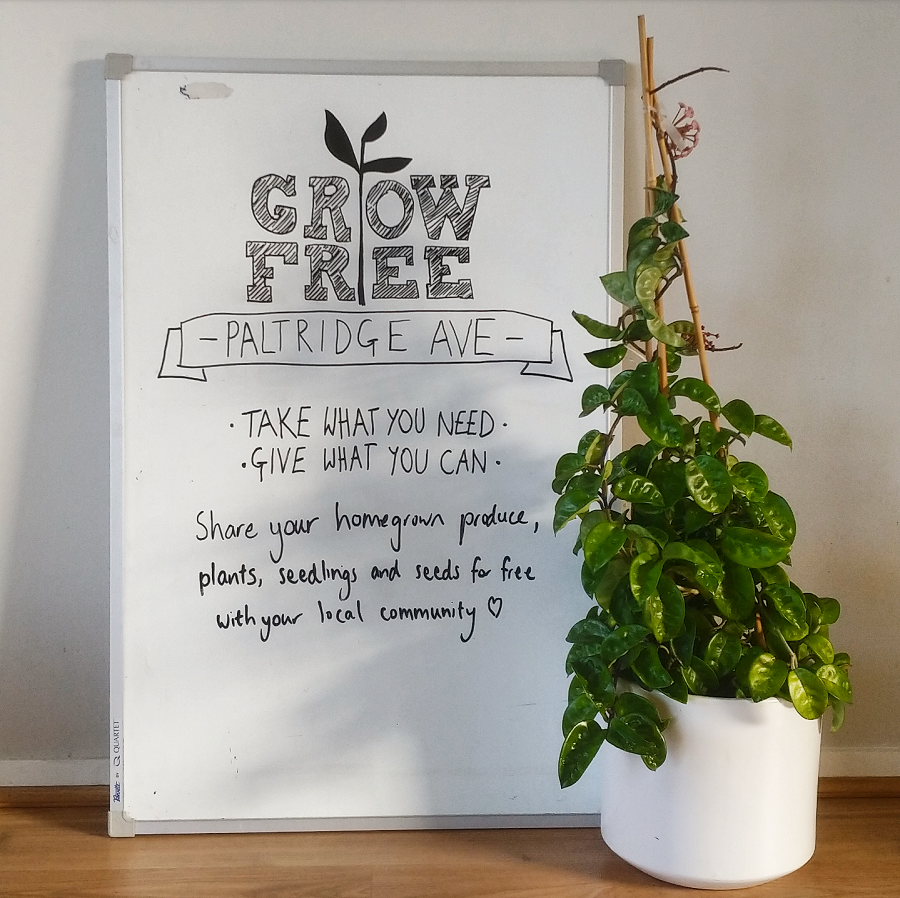
I also got a whiteboard from Buy Nothing that I’ve use to make a sign, and I wrote on a piece of scrap wood for a second sign.

Other people use Eskies/cooler boxes to store more heat sensitive items. I don’t, but I would use a repurposed polystyrene box that chilled products often get delivered in, or track down an unwanted cooler box on Buy Nothing.

My total cost: $15.

Choose your opening hours.

Unlike little free pantries and community fridges, most carts have opening hours. This is because the produce is out in the open, exposed to the elements, and often quick-to-perish. Some are run by community centres, and so open Monday-Friday 9am – 5pm. Others (like mine) are run by people outside their homes. I decided to open my cart at weekends, for now.

It goes out on Saturday morning, and stays out until Sunday evening. Then it’s wheeled back inside until the following weekend.

Finding produce for the cart and people to share with.

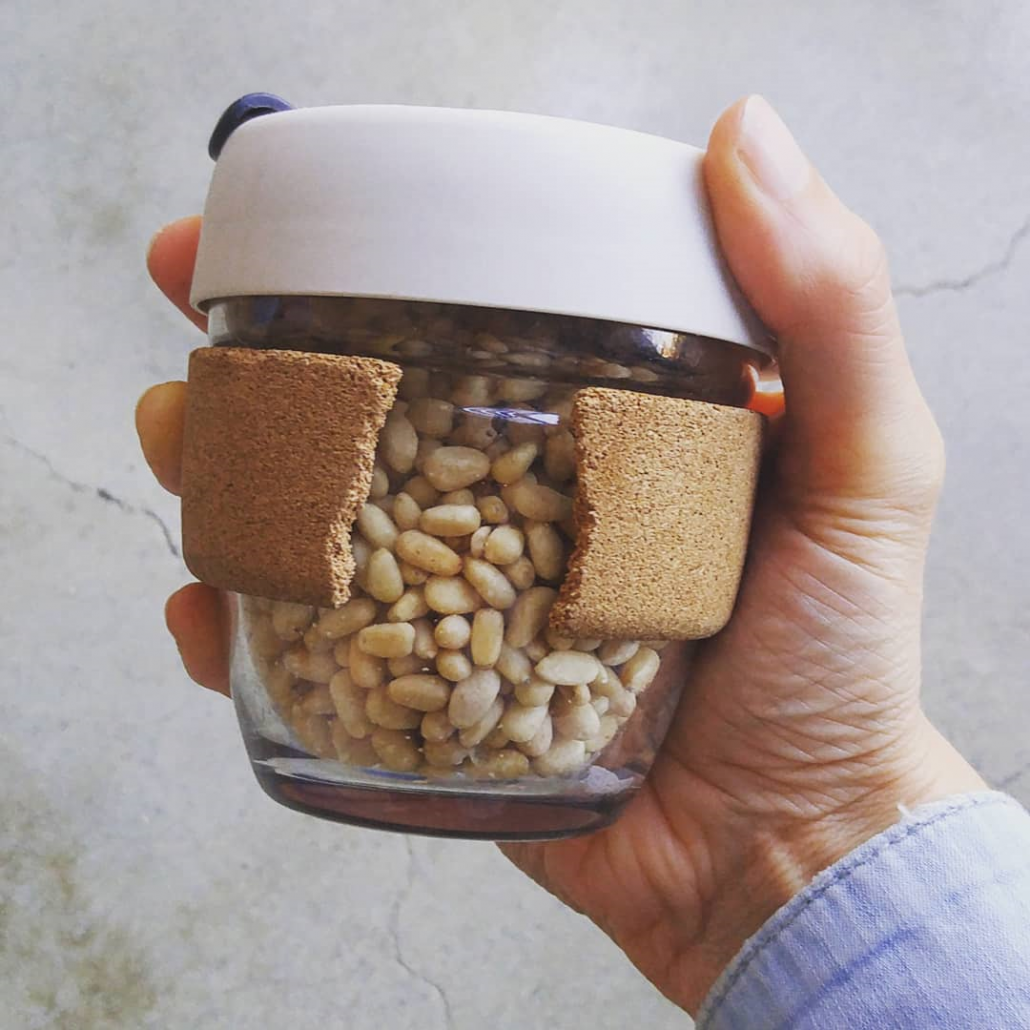
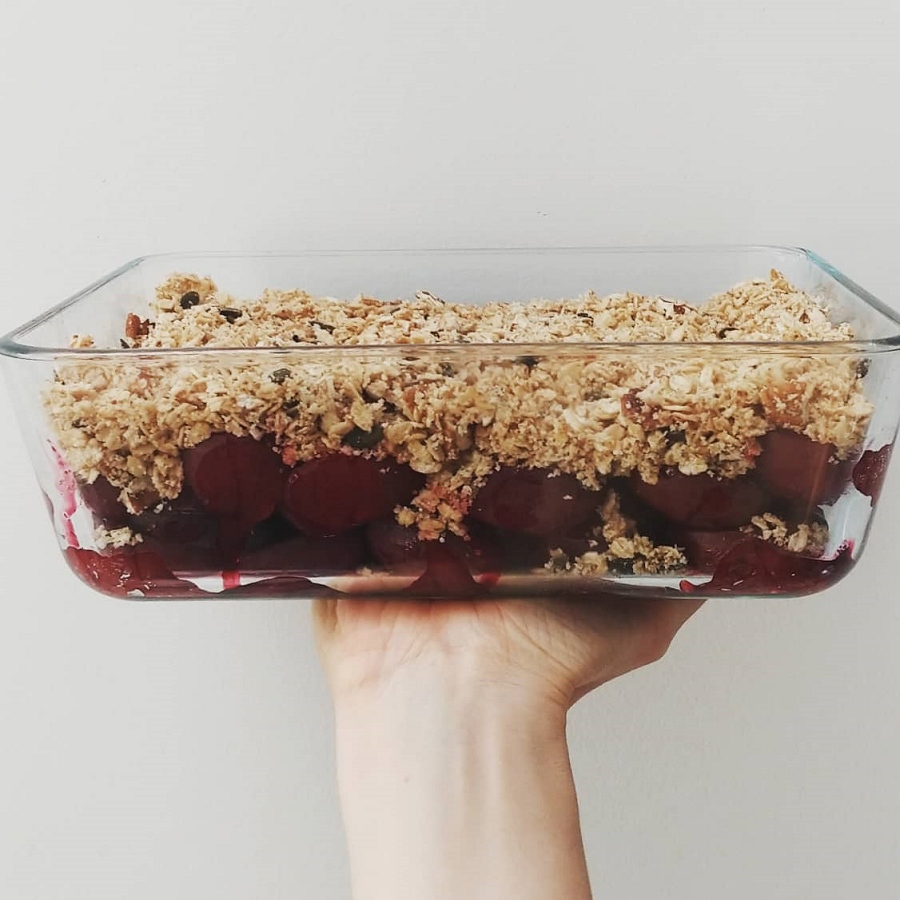
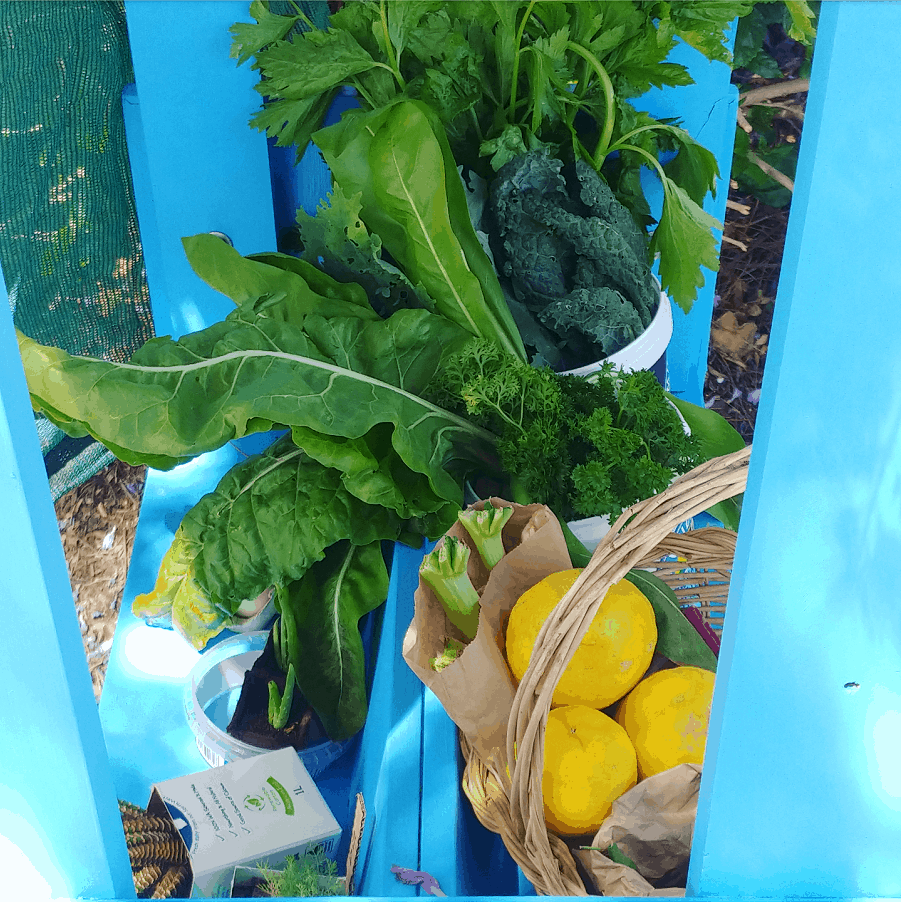
Of course, for a successful cart you need fruits and vegetables! Seedlings, seeds and homemade produce are also permitted. My garden has a few things growing, and I chatted to my neighbour with a lemon tree beforehand to get some lemons.

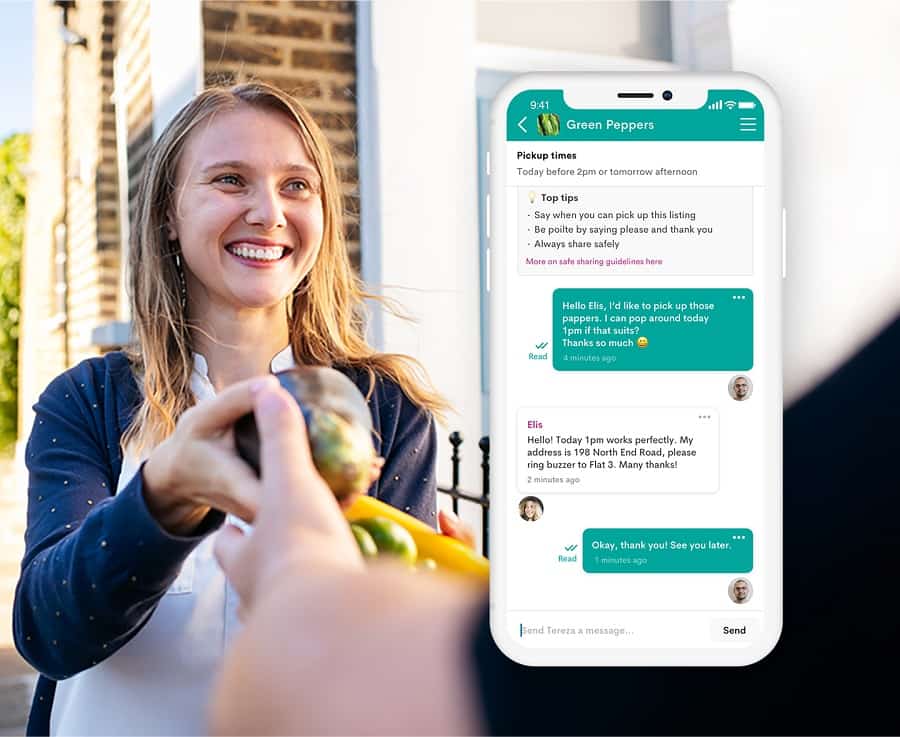
But the best way to find surplus fruits and vegetables is to tell others what you’re doing! I posted to the Buy Nothing group and a local Grow Swap Share group (both on Facebook) in advance of the first outing to let people know what I was doing.

There’s also a directory on the Grow Free website which lists all the carts across the world. I emailed them as soon as I was ready, and added my cart. There’s a local Grow Free Western Australia facebook group too, which I use, but without a doubt my other community pages draw the most people.

(I chose to register my cart with Grow Free because I love the movement and what it stands for. Obviously I can give away vegetables to my neighbours with or without official permission of Grow Free, so there is no requirement to ‘join’, but there’s value in being part of a collection of like-minded people like this and helping spread the word. On their website, Grow Free have some great resources, downloadable flyers, a logo etc and it’s helpful to be able to refer new visitors interested in learning more here.)

Start before it’s perfect.

I took way too long to start my cart once I decided this I what I wanted to do. (Like, twelve months too long.) I was worried about finding the right cart. About whether I’d have enough stuff. That I’d end up with too much stuff and create food waste when I was trying to reduce it. That no-one would come. That everyone would come! That it wouldn’t look inviting.

In the end, I just decided that I had to start. Best decision I made. Sure my cart isn’t beautiful or overflowing, but it’s growing each week and in time it will get to a place where I’m happy with it.

Promote, promote, promote.

For a long time before I started my own cart, I followed along on the Grow Free Western Australia Facebook page. And I noticed that the best carts were the ones that posted each week, saying they were open and sharing their offerings. And so I’ve done the same, and it’s been the best thing for getting people to the cart.

Even though it’s officially on the list as ‘open’ at the weekend, people need reminding. And mentioning what is on the cart also helps with visitors. (Tell people there are passionfruit, lemons and fresh figs and they are there!)

So every Saturday morning, once it’s out, I take a picture of the cart and post to the Buy Nothing group, Grow Free Western Australia group and sometimes the Grow Swap Share group, reminding people that the cart is ready for business and telling them what’s available.

Then on Sunday, I edit the post with an update as usually there’s a heap of different things by then. And people can message to check if stuff is still available before they swing by.

Posting every weekend is a bit tedious and part of me can’t be bothered, but I know it’s the single thing that gets people coming, so I grit my teeth and do it.

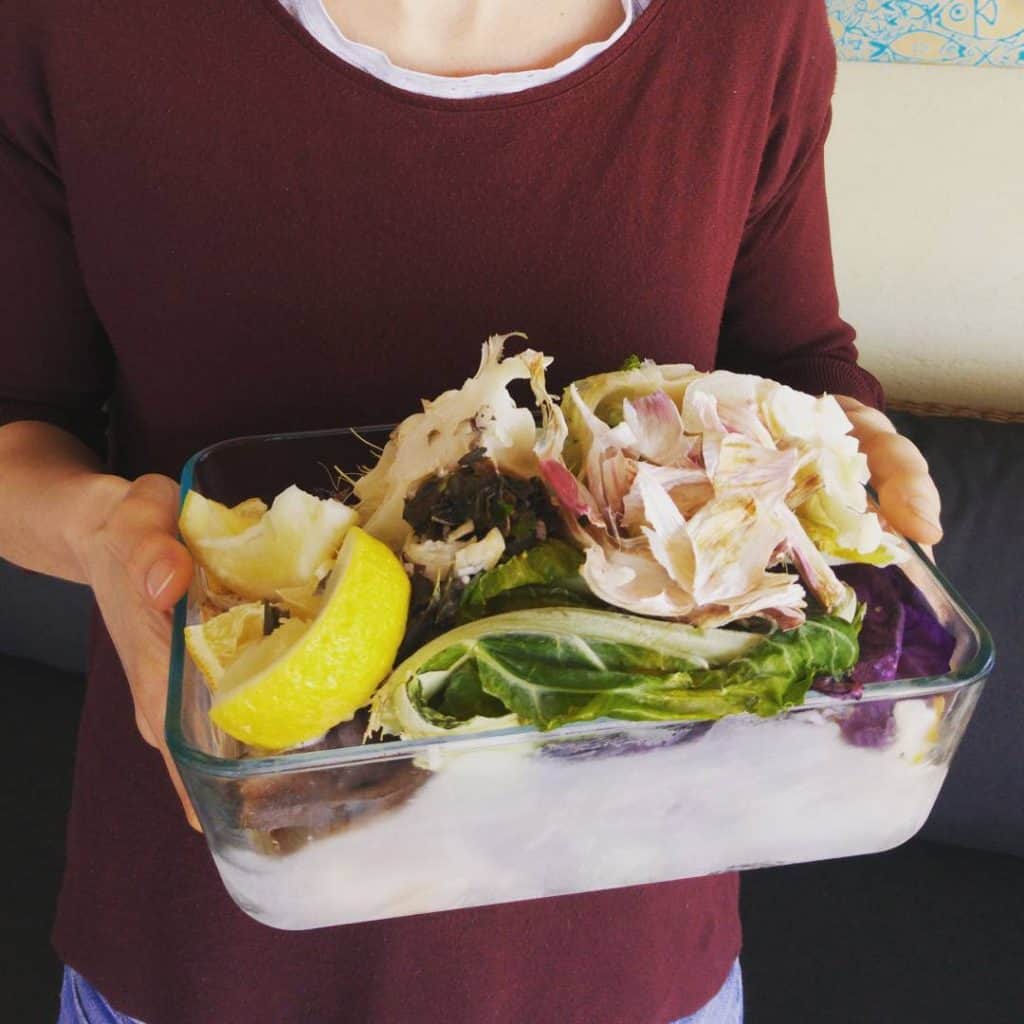
Dealing with surplus stuff.

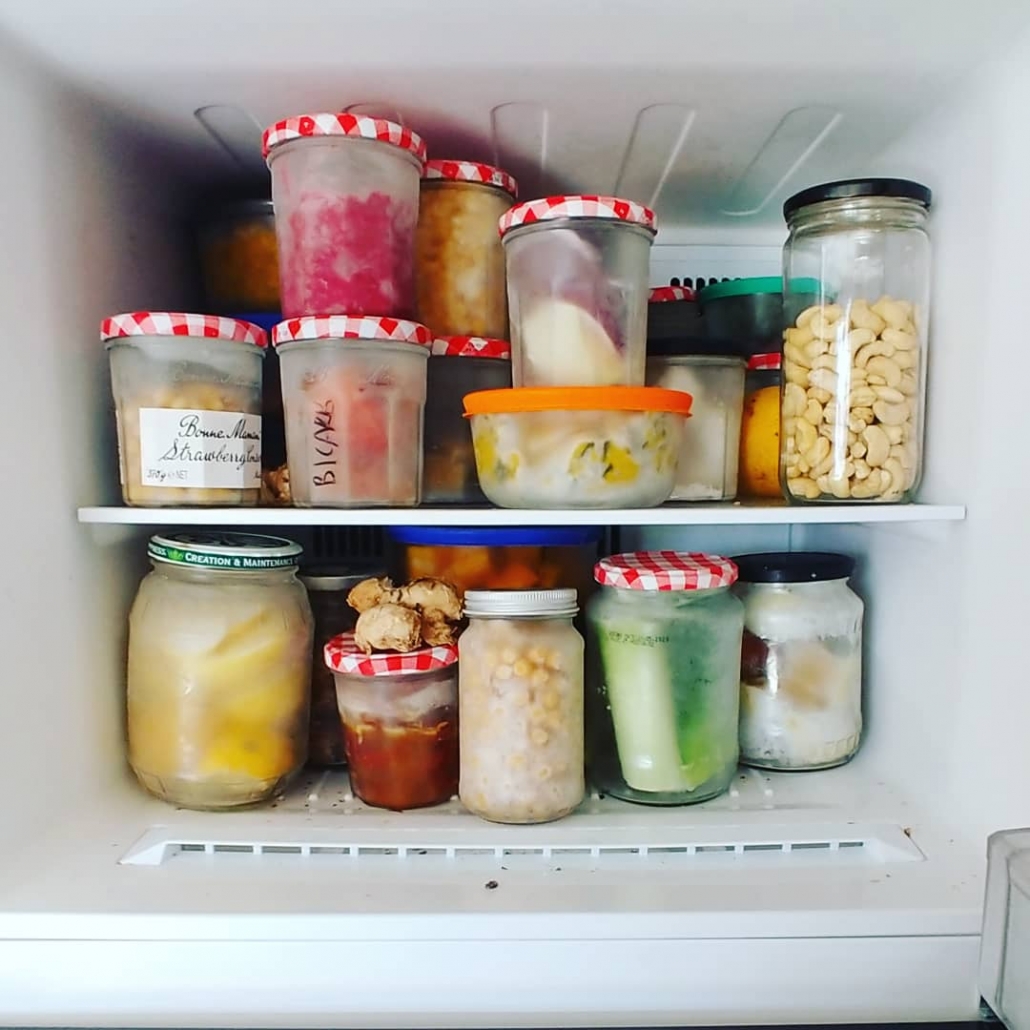
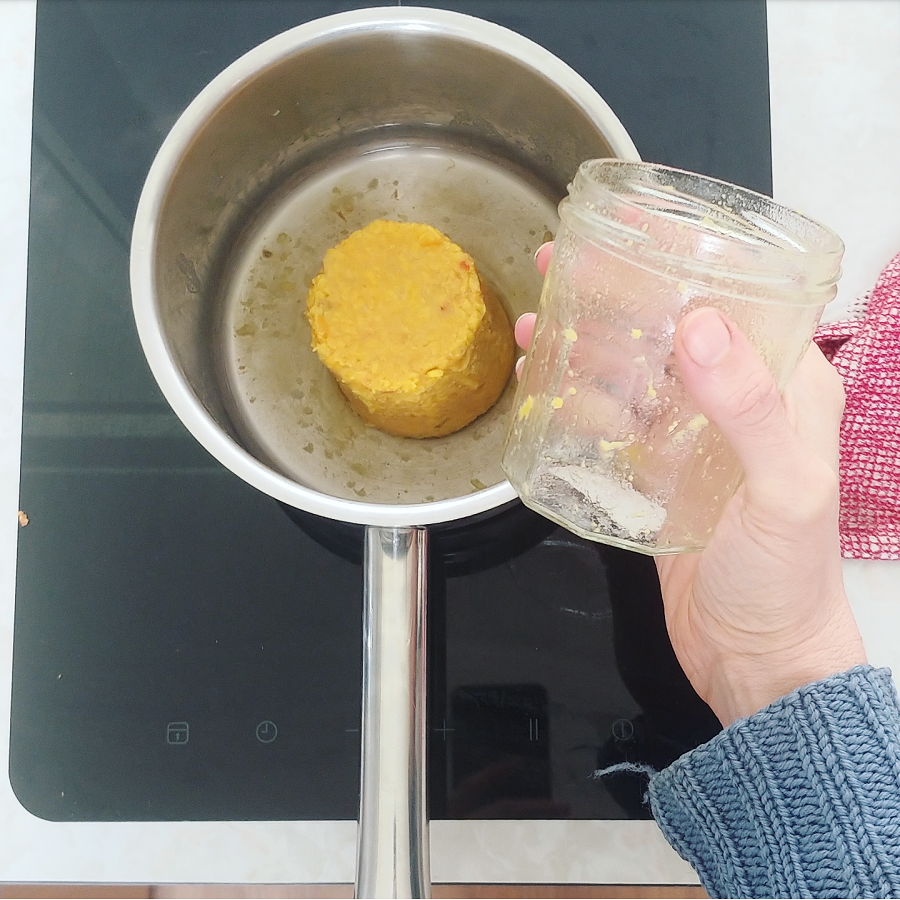
At the end of the weekend, there’s usually a few bits and pieces left. Some things can be popped in my fridge until next week (fresh chillies and lemons will last a week). I usually let my immediate neighbours know if there’s anything left so they can come and take it. I haven’t needed to yet, but I can always post to Buy Nothing if there’s too much for me to use.

Setting yourself (as well as your cart) up for success.

Stewarding a cart isn’t a lot of work, but it isn’t no work, either. I have to put it out each weekend, set it up (which means raiding the garden beforehand for things to share), post about it, and then pack it all away at the end of the day – and then repeat the next day.

I started mine in the hottest month of the year, which meant I had to check back often to top things up (rather than just putting out everything at the start of the day and being done with it).

If this sounds like too much work for you, a Little Free Pantry might be a better often, as they are much more ‘set and forget’.

If you decide to set up a cart, consistency is important for success. I’ve committed to weekends, and so I’m making sure that the cart goes out and that I post about it, every weekend. That way people know to drop things off, they know to come and take what they need. And I can decide if it’s too much work, or if I’d like to do more.

There’s no reason why a cart couldn’t be seasonal (from May – September only, for example) or even just once a month.

(Originally I’d thought about doing a midweek day too, but having been going for about 6 weeks now, I’ve found the weekend is more than enough for me.)

I don’t specifically commit to a time, so I don’t have to drag myself out of bed in order to meet a deadline – I just post when it’s ready. That works better for me.

Why set up a Grow Free cart in your neighbourhood?

Really, the answer is, why not?

It’s a great way to share excess produce with neighbours, meet new people, connect with our local community, reduce food waste, and feel good about taking some kind of positive action in a stressful world.

Now I’d love to hear from you! Have you heard of Little Free Pantries, Grow Free carts or Solidarity fridges before? Is there one in your area? Have you set one up, or are you thinking of doing so? Any questions about getting started? Anything else to add? Please share your thought in the comments below!

5 simple (and free) things you can do to have a more sustainable 2021

2020, I think we can all agree, has been a year unlike no other. The best-laid plans (no… wait… all the plans) went out of the window, and for many of us it was tumultuous and unsettling and a bit (or a lot) of a struggle. But if you’re reading this, you survived the year that was (hurrah!), and maybe – just maybe – you’re starting to think about the new year ahead, and making plans.

I think the New Year is always a great time for a reset, even if most of us are not making big, bold plans for next year. (If you are, go you! But I’m sitting the big bold plans out for next year. I’m tiptoeing into the new year, in fact.)

Anyways, I think a lot of sustainable habits went out of the window along with those plans in 2020, and I think a lot of us want to at least try to pick a few of them back up again. Honestly, there are probably a million and one great habits that we could adopt for 2021.

But to list a million and one great ideas would be completely overwhelming.

Instead, I spent some time thinking about which habits I’ve adopted over the past few years that have had a big impact in reducing my waste and living more sustainably, have been relatively easy to start and continue to do, and have been free.

If we are going to ease into the new year gently, we don’t need an overwhelming to-do list. We just need a few simple, easy and effective ideas to get started. Here are 5 of my favourite simple (and free) things that you can do, starting today, to have a more sustainable 2021.

Carry a KeepCup with you.

A KeepCup (but you can choose another branded or non-branded reusable travel cup, or even a sturdy jam jar with a silicone band or a few elastic bands around it), is something I recommend to carry in your bag, bike rack or glove box. It is probably the most useful thing in mine.

And I rarely get a takeaway coffee.

Obviously they are great for takeaway coffee (or tea, or other hot drinks). They can be used to dine-in if the place you’re drinking at only has disposables. They also work as a water glass, and to hold food scraps such as apple cores or banana peels that you want to take home and compost. They can be used as a container when bringing a snack from home, or buying small bakery items, or ice-cream, or when you didn’t bring enough BYO containers to the bulk store. And, you can pack a surprising amount of leftovers in them if you eat out and over-order.

In short, they are practical and useful – and easy enough to carry around.

And I think that carrying around reusables (and using them, obviously) is important for shifting the way that society sees disposables. We need to normalise reducing waste if we want more people to do the same.

If we can change the culture, then we are on the way to shifting policy.

These days, there are so many reusable cups about, you probably don’t need to buy one. (Reusables are almost the new disposables, it seems…) Ask friends and family if they have spares, look on giveaway sites, see if there are any abandoned ones at work.

Or you can buy one, if you really want to. But you don’t have to.

(You’ll often find them in second-hand and charity shops, too.)

Whether you rescue or buy, it can be helpful to think about what would be the most useful for you, as there are plenty of different options. And the best reusable is the one you actually use, so choose one that meets your needs.

Glass is more breakable than plastic or stainless steel, but easy to clean and doesn’t absorb flavours.

Some cups are fully leakproof, others leak-resistant, and others not leakproof at all.

You can choose a tall cup, a small cup, a collapsible cup that fits in your pocket, a cup that fits in the drink holder in your car or on your bicycle. Or a jam jar. Whatever it is that will be most practical for you.

The first ‘swap’ I made when I went plastic-free back in 2012 was getting a (plastic) KeepCup. I switched to a glass one when they were launched in 2014, and I still have that same one now. Whilst there are plenty of reusables you can carry around with you (cutlery, a napkin, reusable shopping and produce bags, a water bottle), the KeepCup remains one of my favourite zero waste swaps, ever.

If you switch to one reusable, start here.

Stop throwing away food scraps.

Food waste makes up 40 per cent of the average household bin in the UK, USA and Australia. Stop throwing away food scraps and you’ll reduce your waste by almost half, and you’ll be able to turn those scraps, which are actually nutrients, into compost, to go back into the soil.

And you’ll reduce your carbon emissions, because food waste in landfill creates methane – a more potent greenhouse gas than carbon dioxide.

Plus, you’ll no longer have a stinky kitchen bin. Wins all round!

Finding alternatives for your food scraps is not as hard as you think. There are plenty of options.

You might be lucky enough to have a council food scraps collection service (it’s sometimes called FO or FOGO – FO means food organics and GO means garden organics). If you have this option, make sure you’re using it to its full potential. Check what’s accepted and make sure everything that can go in this bin is going in this bin.

If you don’t have this service, there are a few ways you can process your food scraps at home.

You can set up a compost bin. There are two main options – the Dalek-style in-ground bins, that have an open base that you dig into the ground; or the rotary bins that sit on a frame and are great for patios. Sizes vary so you can pick one for a small space or a large family.

Composting is easy and low fuss – if you’re new to composting, this composting guide has more details on how to get started.

You could establish a worm farm. Worm farms can be kept indoors or outdoors: an indoor one is great if you live in a cold climate, as worms will die if they freeze. They are also excellent for apartments. The worms eat your food scraps and make an amazing nutrient rich product called ‘worm castings’ that is fantastic for gardens.

They take a little (but not much) more effort than a compost bin to maintain – mainly because you have to keep the worms alive. Which means feeding occasionally, and keeping them out of extreme temperatures.

Worm farms come in a variety of shapes and sizes: from plastic ‘worm cafes’ to the large capacity bin-shaped ‘Hungry Bin’ to ceramic and wooden designs (I’ve only seen these available in Europe). And there are in-ground versions too, where a tube drilled with holes is dug directly into the ground or a garden bed.

And there’s the option to DIY – in ground worm farms can be made out of old PVC tube, and worm farm ‘cafes’ can be made using two old polystyrene boxes.

You could set up a bokashi system. These are slightly different from composting and worm farming in that they ferment the food scraps rather than breaking them down. The scraps are placed in a sealed bucket with a tap, and a bokashi bran inoculated with microbes is sprinkled on top.

Fill, sprinkle, fill, sprinkle, until the bucket is full.

Eventually the bokashi waste will need to be buried or composted. Some people add to a compost bin, others add to a pot, top with soil and plant it out.

Bokashi systems are popular with apartment dwellers. They don’t smell, and once full the buckets can be stored for months until a place for burying is found. Plus they are a great way to process meat and fish scraps, cooked food and other items not recommended for compost bins.

If you’d like to know more about bokashi systems, this post explains the ‘what’, the ‘why’ and the ‘how’.

And finally, if you really like the idea of not throwing away your food scraps, but you’re not in a place to start composting or setting up a worm farm just yet, you can piggyback off of other people’s food waste systems. For free.

Simply find someone or somewhere convenient to you (maybe a school, or a community garden, or a cafe, or a neighbour), and drop your food scraps to them. Finding them isn’t that hard, either – check out the resources sharewaste.com or makesoil.org.

Download (and start using) the OLIO app

Still on the subject of food waste, but now we are not talking food scraps, we are talking edible food – food that isn’t wanted. Food we bought and didn’t like the taste of, food we bought and then plans changed, food that stores or cafes produced and couldn’t sell, that sort of thing. Well, OLIO is the app that allows people (and businesses) to connect food that isn’t wanted with people that want it. For free.

The OLIO app is free, the food is free. There is no catch, just food to be shared and people who want to help. OLIO has been around in the UK since 2015, and now has over 2 million users in more than 46 countries. Best of all, the app has helped save almost 10 million portions of food since it started.

In fact, because it has been so successful, OLIO has recently expanded into non-food items too.

You can read more about OLIO via their website www.olioex.com, and the app is available on Apple and Android.

Buy less stuff from billionaires (and their companies)

Billionaires really don’t need any more money, and they definitely don’t need their coffers lined further by us. I don’t believe anyone becomes a billionaire ethically and sustainably – but even if you did, hoarding all of that wealth is unethical.

(If you have $999 million dollars, then you are not a billionaire. So we are talking about people who have upwards of this.)

I can’t imagine what you can possibly need all that money for. The biggest houses, private jets, buying up entire islands – surely that’s small change when you’re a billionaire?

Oh, and for context: if you worked every single day, making $5,000 a day, from the year 1500 until the year 2020, you would still not be a billionaire. You’d have to work for 548 years, not spending a penny of what you earned, and earning $5000 a day, every day, to be a billionaire.

And yet billionaires own companies like Amazon and H & M, companies which became notorious during Covid-19 for not protecting their workers (who mostly earn minimum wage – or less), trying to avoid paying suppliers and rent, all in order to maximise profits for themselves and shareholders.

This type of business (and wealth hoarding) only benefits the few.

It’s often argued that poor people and those on tight budgets need to shop at these types of stores, where prices are low, in order to survive. But let’s be totally clear – people on tight budgets shopping for essentials do not create multi-million dollar businesses and billionaires. That comes from the middle and upper classes, and people buying more than they need.

Boycotting billionaire-owned businesses might not be an option for you, and that’s okay. But wherever possible, try to shop at these businesses less. Perhaps by choosing to buy nothing, make do, fix what you have, repurpose something else, borrow something rather than buy it, or shopping second-hand.

Or perhaps by choosing to support a small business or independent retailer instead.

When things are cheap, often the true costs are externalised. We (and definitely not the company) don’t pay for them. Perhaps the resources were taken from land that is being degraded or exploited for profit, perhaps the person who made the item didn’t get paid a fair wage, perhaps the employee who sold or packed the item doesn’t have fair employment conditions or access to healthcare.

We often hear the phrase “when we spend money, we vote with our dollars about the kind of world we want to live in”.

Do we really want to live in a world where a few billionaires hoard wealth at the expense of millions of others?

Join your local Buy Nothing group

Whether you’d like to buy less from billionaires, buy less generally or simply help keep resources in use for longer (and therefore reduce waste), the Buy Nothing project is going to help you – in more ways than you can imagine. It’s a network of hyper-local communities engaging in the true gift economy: giving, sharing, borrowing, lending and placing unwanted and unused items back in circulation for use by others.

The groups operate on Facebook. You can only join one group – the one where you live – and what this means is everyone is close by, so it’s easy to collect an old unwanted table, request a cup of sugar, or ask to borrow some glasses for a party, or a lawnmower, or whatever you need to use (but don’t really need to buy).

The great thing about the group is that generosity breeds generosity. People love to give, people love to receive useful things, and everyone loves to save stuff from landfill.

It also means you get to know your neighbours, and build connections.

My Buy Nothing group is the first place I go if I need something that is the kind of thing someone else might have lying around. It’s the first place I go if I’m wanting to pass on something I no longer need. It makes you realise just how much stuff is already in the world, and how willing others are to share it.

It’s hard to articulate just how great the Buy Nothing project is. If you use Facebook, I’d recommend joining your local Buy Nothing group. And if there is no local Buy Nothing group near you, you can start your own.

The year that has gone has definitely made some sustainable habits harder to keep up with, whether it’s because laws have been changed and legislation brought in, businesses have shifted policy, or life just became too hectic and some things just needed to be dropped.

Whilst we can’t just forget about 2020, and a new year doesn’t magic away all the chaos, there is the chance to reset, even just a little. Hopefully these ideas make your 2021 not only a little more sustainable, but easier and more enjoyable for you too.

Now I’d love to hear from you! Are you feeling ready to start getting back on track in 2021? Or are you sitting things out a little longer? Are you going big, or keeping things small? What’s the first thing you want to tackle? Any other thoughts? Please share your ideas in the comments below!

Everything you need to know to get started with home composting

Composting can seem a little overwhelming. There seem to be so many things to worry about; things that might go wrong. It can seem a bit technical and science-y. But actually, the basics are quite simple, and it is easier to get a compost bin cranking than you think.

If you’re composting at home, especially if you’re a beginner, you don’t really need to get bogged down in the details. Understand the principles, and you’re on your way.

If you love the idea of composting, but simply don’t have the option to compost at home (or where you live), this post on composting without a compost bin might be useful.

If you’re keen to get you own compost system set up at home, read on.

Choosing your composting system

There are a few different composting systems (and I’m only talking about composting today – not other methods like worm farming/vermicomposting or bokashi systems).

For the beginner, there are two great home composting systems: the regular compost bins we are most used to seeing (I call them in-ground compost bins), that sit on the ground or are slightly dug in, and rotary compost bins, which are an enclosed system mounted on a frame.

Compost heaps or compost bays aren’t great for beginners as they are more difficult to manage. Digging food scraps into the ground or in trenches (if you have space for that!) works too, but it’s not really a ‘system’.

In-ground compost bins

These are easy to set up and low maintenance, and usually cost less than the rotary versions. There are a lot of second-hand compost bins available, so it’s probably not necessary to buy a new one. It’s also possible to make them by upcycling plastic barrels, old bins or other old containers.

You’ll find different styles of bin, some with doors at the bottom and heaps of ventilation holes, others that clip together and some with no bells and whistles at all.

I’m a fan of the no bells and whistles type, pictured below (I call them Dalek bins). These work best for the climate I live in. These types of bin don’t have a base, and I dig into the soil (about 10cm deep).

In my hot climate, any ventilation holes are just gaps for moisture to escape and pests to get in. Plus they provide points of weakness (because we all know plastic breaks down when exposed to sunlight).

Doors at the bottom might look cute, but the reality is it is easier to wait for the entire contents to become compost and dig the whole thing out at once.

That said, it’s possible to make most compost bins work. My neighbour was recently clearing out her shed, and offered me this for free. My plan is to dig it into the ground so that the vents at the bottom are covered, and only use it for garden waste (no food waste) to deter any pests that might want to crawl in the sides.

Because of the gaps along the sides, it will probably need a bit more water added than the other type.

Rotary composters

These tend to be more expensive than the in-ground versions, but they are perfect for patios and balconies and spaces where it isn’t possible to dig one into the ground. I’ve seen DIY versions but you’re going to need to be a bit handy to make one, as the cylinder has to be able to rotate on a frame.

There are lots of different styles and sizes, too. Some are long and thin, others are short and squat – and the way they are mounted on the frame (and therefore how they turn) varies too.

When choosing which one is right for you, it’s best to think not only about your space but also your physical capabilities. A huge bin might seem like a great idea, but if you can’t turn it because it’s too heavy, that isn’t going to work.

Another great advantage of these bins is they are less likely to attract pests and are pretty much rodent-proof.

Where to position your compost bin

You’ll often see it written that a compost bin should be placed in sunny spot, but that depends on where you live. If you live in a hot climate, placing a bin in full sun means it dries out. (Compost bins need moisture to work.)

I think it’s more important to think about a spot where you’ll actually use it. At the end of the garden behind the shed might seem like a great idea… until you need to put your scraps in it when it’s dark and raining.

A well managed compost bin shouldn’t smell, so being near a kitchen window shouldn’t matter, but if you don’t trust your skills (yet) perhaps make sure it’s not too near any doors or windows.

If you do have a garden, under a fruit tree is great, as the tree roots will benefit from the compost at the bottom of the bin.

I’d say, choose a warm and accessible spot (in a hot climate, dappled shade / afternoon shade is helpful if possible). Don’t forget, you can always move it later if your first spot doesn’t work out.

Setting up your compost bin

Once you’ve chosen a site for your compost bin (and dug it into the ground a little if it’s an in-ground compost bin – 10cm is ideal), you need to get it set up and ready to accept food scraps.

Compost bins need air (oxygen) to work properly, so when you’re setting up a new bin, it’s good to start with something chunky as the base, that allows air flow. Twigs and sticks and egg cartons are great.

The biggest mistake I see (and yep, this was also me when I started) is to add ALL the food scraps, nothing else, and watch in horror as your compost bin becomes a stinky, fly-infested mass of yuck.

Compost bins need balance. In particular, they need a balance of fresh stuff (called ‘greens’) and dead stuff (called ‘browns’). On a more technical level, we are talking about nitrogen and carbon.

Too much nitrogen (fresh stuff) will make for a stinky compost bin as it will break down too fast, using up the oxygen. Too much carbon (dead stuff) and your compost will take forever to break down.

For a beginner, a good rule of thumb is one handful of green stuff, and two handfuls of brown stuff. Or even three handfuls of brown stuff.

Placing a tub of shredded paper, old cardboard toilet tubes, egg cartons, dried leaves, wood chips, sawdust or straw (all carbon rich) next to your compost bin, so that every time you add some food scraps, you can add some carbon easily, works well.

As you add things to your bin, the stuff at the bottom will get compressed, and eventually run out of oxygen. This will make for stinky compost. Turn your compost with a pitchfork or turning fork (like a giant corkscrew) – or by rotation if that’s the type you have – to keep the air circulating. Turning once a week or once a fortnight is fine, or more often if you start to notice any bad smells.

What can and can’t go in my compost bin?

Anything that was once alive will eventually break down to become compost. There are a lot of myths circulating that you can’t compost things like onions or citrus – of course you can! When it comes to plant-based food scraps, everything goes.

As for other food scraps, it’s not that they can’t be composted, but they are more likely to attract vermin, other pests (like flies and maggots) or harbour dangerous bacteria.

As a beginner composter, avoid putting meat, fish, dairy products, bread and large amounts of cooked food in your compost bin if possible.

Thinking about garden scraps, the only things I don’t put in my compost bin are persistent or nasty weeds – things like couch or Kikuyu grass roots, or those weeds that have the spiky seeds that stab you if you stand on them barefoot.

Although home compost systems tend not to get hot enough to kill seeds, most seeds aren’t really a problem. It can be fun to get surprise tomatoes or pumpkin plants germinating from compost. Common weed seeds like dandelions still go in – even if I didn’t put them in my compost bin, the seeds are going to blow in from elsewhere, and they are easy enough to weed out again if they do appear.

Common composting problems

A good compost bin needs variety, oxygen (air), moisture and microbes/insects to keep it working. When one of these things is missing, you get problems or it slows right down.

Stinky compost bin? Add more carbon rich material, and turn your compost to increase air flow. Make sure food scraps are buried. A well managed compost bin doesn’t smell (or smells earthy, like soil).

Dry compost? Add water.

Soggy compost? If you can squeeze water out of your compost with your hands, it is too wet. Add dry material – shredded paper, sawdust, dry leaves.

Insects? Most insects are fine, so don’t panic. Lots of one type might indicate an issue. Ants usually mean it is too dry, so add water. If flies or maggots are a problem, cover the top with mulch or soil, and make sure food scraps are buried rather than sitting on top. The odd cockroach might make you wince but it isn’t going to harm you or your compost. An infestation probably means you haven’t turned your compost for a while. Mix it up, and keep turning it and they’ll find somewhere else to live. Insects have short lives, and will be gone soon enough.

Not doing anything? Adding a handful of compost or manure will add some microbes to your compost to give it a boost. Turning it will also (literally) help stir things up.

Can I set and forget?

If you want ready-to-go compost in 2 – 3 months (in a warm climate), you need to balance your greens and browns, and turn frequently. But if you just chuck it all in and forget about it, it will break down eventually. Much more slowly, but it will happen. Winter (and colder weather) also slows things down.

If you do want to use your compost bin in the garden, two (or more!) bins can be helpful. If you’re constantly adding fresh food scraps to your compost bin, you are always going to have non-composted bits in your compost. Ideally, you’ll fill one bin to the top, and then continue to turn it whilst starting to fill a second one. That way, you’ll have fresh compost ready to go by the time the second one is full.

Once emptied, you can start refilling again and leave the other one to work its magic.

If you want to start composting at home, the best thing to do is to just start. Then, as issues pop up or you have questions, you can troubleshoot one by one. Most problems are easily fixed. Get a compost bin set up, and you’ll learn as you go.

Now I’d love to hear from you! Do you have any questions about composting? Any issues I didn’t cover? Any beginner tips you think others need to know? Any other thoughts at all? Please share in the comments below!

9 ways to get the most out of your freezer (+ reduce food waste)

My freezer has saved many a food item going into my compost bin. Overripe bananas, leftovers I’ve eaten for five days straight and really can’t bear to make it six, onion peels that I’ll use to make stock – the freezer is great for both reducing food waste, and treating future us to a ready-made meal in the form of something we prepared earlier.

Many of us are doing bigger and less frequent grocery shops than we might normally do, and cooking more than we might normally do – and this is putting extra pressure on the freezer.

Which let’s face it, for many of us is also a bit of a stick-it-in-there-and-forget-about-it zone.

My freezer is fairly small, which means that there’s always less room in there than I’d like. But it also means that I’ve got good at keeping my freezer organised, and making the most of the both space and the utility.

If you’d like to use your freezer more efficiently, here are my tips.

1. Ensure your freezer is a frost-free zone

If your freezer resembles a small iceberg, it’s not running as efficiently as it could be – and that ice is taking up valuable leftovers space. If this is the case, you need to defrost your freezer.

Defrosting it will melt the ice – then you just need to ensure the melted water is removed and it’s wiped dry, and turn it back on.

Whenever I defrost my freezer, I put my freezer contents in a neighbour’s freezer temporarily. You can also put frozen food in the fridge or use an esky/cool box to slow down defrosting. Any meat, fish or dairy products are better not refrozen, but vegetarian leftovers will probably be fine to go back in the freezer.

Make sure your freezer is set to (and running at) -18° C (0° F) before you fill it back up.

2. Audit your freezer

It’s really useful to go through your freezer every few months and see exactly what is in there – because there will be something you had forgotten about. Hopefully something tasty!

(With me, its usually extra jars of onion scraps for stock making. Sigh.)

It’s best if you can pull everything out and have a good look. That way you won’t miss anything, and you’ll spot half-empty containers and other things you might have missed.

Once you know what’s in the freezer, here’s some ideas to organise it better:

  • Make a plan to use anything old, or anything you have lots of, in the coming weeks;
  • Ensure anything you have lots of isn’t on your shopping list;
  • Put the oldest stuff at the front so you are more likely to notice (and therefore use) it;
  • Make sure everything is labelled (or at least the suspiciously ambiguous stuff);
  • Pop a reminder in the calendar for 3-6 months time, so you remember to do it again.

(I label my jars with a wax pencil – it’s easy to rub off. You can by them from art supply stores. You could also use a marker pen, or stick labels on.)

3. Prioritise what you keep in the freezer

If you’re like me, with a small freezer, you’re probably constantly juggling things to make space. When I need to make space for something else, there are a few things I think about.

What’s most valuable to be in my freezer?

Without a doubt, the most useful thing for me in my freezer is ready-cooked meals, ideally in 1-person or 2-person portions.

Generally speaking, the more prepared something is, the better. So frozen banana cake, or a frozen smoothie, is better than a frozen banana. A jar of stock is more useful than a jar of onion peels.

These are all things that save me time in the future (convenience) – which is what I value.

Value is also related to the cost of the item (what it would cost to replace), and the space it takes up.

Remove non-essentials.

I don’t keep ice in my freezer all the time (no space!) so if I have an ice cube tray in there during a sort, this is the first thing to go.

I also tend to have a bunch of ‘saved’ items in the freezer. I often have a jar of lemon zest, and maybe orange and lime zest too. That’s three jars. if I’m having a cull, these will go.

I don’t zest every citrus fruit I ever eat, so I don’t feel too bad about putting these in the compost if I’m short of space for something else. (Plus, it’s easy to make more down the track.)

Try to keep the contents balanced.

The more you rotate the food in your freezer, using up things and replacing them with new (different) things, the more you’ll get out of your freezer – literally.

I like to have a few slices of bread, a few portions of leftovers, maybe a jar of stock and a couple of jars of sauce, some frozen bananas – and then some snack items like falafels, fritters or hummus.

Rather than long-term storage, I use my freezer as a way to extend the life of leftovers, and make my meals more interesting – especially when the fridge is running low.

Prioritising doesn’t have to mean throw away.

If you do have to remove some things from the freezer, you don’t have to throw them in the bin. You can pop in the fridge where they will last a few days (they will defrost pretty slowly in there).

If it’s something that you know you won’t eat, but someone else might, you could try listing on the olioex app (it’s a free food sharing app).

4. Learn what you can freeze

In short, you can freeze almost everything (one important exception is meat and fish that has previously been frozen, and then defrosted).

When food is frozen, the water expands, which can change the texture. You’ll notice this with raw fruit and vegetables, which go mushy once frozen because the frozen water breaks the cell walls.

But this isn’t a problem if you intend to cook with them (using berries in baking, or veggies in soup) because cooking also breaks the cell walls.

Vegetables often freeze better if blanched (heated briefly in boiling water, then submerged in ice) first. But it’s not the end of the world to just freeze raw.

I always freeze my onion peels, leek ends and other bits I’ll be using to make stock raw, because they will be boiled later, so texture doesn’t matter.

You won’t notice much change in texture if you freeze cooked food. I often roast vegetables, and then freeze them this way. It also means that when I defrost, they are cooked and ready to go.

Milk and yoghurt can be frozen but freezing can change the texture of these – particularly of non-homogenised full-fat milk, which can go lumpy. It’s still edible, but may be better used in cooking rather than in coffee or tea.

5. Choose suitable containers

I prefer to freeze in a mix of glass jars, and Pyrex containers. I’ll occasionally freeze something in a stainless steel lunchbox, but they are less useful as you can’t see what’s inside (and frozen metal hurts my fingers when prising the lid open).

(Yes, you can freeze in glass. Instructions here.)

Bigger glass containers are more efficient in terms of space, but you’ll need to defrost the whole thing at once. Which is fine for traybakes or leftovers you made specifically for freezing, but less good for item you’d like to separate, like chunks or frozen berries.

Tip: if you want to freeze berries, or anything cut into chunks, you can freeze on a tray, and once frozen, add to a big container. That way they don’t all stick together, and you can scoop out just what you need.

Smaller containers are great if you just want individual portions, but the containers take up more space, particularly solid ones like glass or thick plastic.

For small containers, I love Bonne Maman jam jars. They are readily available and free, and to be delight, I discovered that there is enough space in my freezer to stack them, which makes the most of the space.

The tapered sides means it is easy to freeze in them (they are unlikely to crack, unlike narrow jars) and it is easy to slide still-frozen leftovers out to reheat in a saucepan.

I’m sure you all know that I’m not a fan of single-use plastic. If you simply don’t have room for solid containers, you could consider investing in some reusable silicone storage bags. And I do mean invest, because they are not cheap – but look after them and they will last a lifetime. Buy the best you can afford – if you have the budget, I recommend the Stasher bags (expensive, but you do get what you pay for), and can guarantee that they do not leak.

If reusable storage bags are out of your budget, and you’d prefer to use single-use plastic ziplock bags or similar, remember that you don’t have to use them once only. Wash and reuse them as many times as you can.

For freezing bread, I used a reusable cloth bag for years. After a million recommendations from readers I now have an Onya bread bag, purpose-made for freezing bread.

It’s not a necessity, but it will help keep your bread fresher for longer in the freezer.

6. Reduce freezer burn

Freezer burn happens when the fan that moves air around the freezer sucks out the moisture from the food, leaving pockets of air that discolour the food, and taste weird. Food that has freezer burn isn’t unsafe but it isn’t tasty, either.

The longer something is in the freezer, the more likely it is to develop freezer burn.

The more you can exclude air (and air circulation) from your food, the slower this will happen. Keeping food in containers helps, and packing containers tightly.

For really sensitive (or expensive) items, wrap with paper within in the container, which can help reduce the exposed surface area.

Make sure you’re rotating your food, eating the oldest things first, and don’t leave anything in the freezer too long. Whilst a few months will probably be fine, ultimately time is not on your side!

7. Label what you freeze

I am very bad at this, but it really is a good habit to get into. You might remember what the item is when you freeze it, but that doesn’t mean you’ll remember in six months time.

One label is better than no labels (it’s a start)…

And as the weeks/month pass, you’re less likely to remember the date – or even the year – you froze something.

So get into the habit of labelling what an item is (if it’s not obvious) and when you froze it.

8. Keep your freezer running smoothly

If you’ve gone to the trouble of defrosting your freezer, you don’t want it icing up again any time soon. There are a few things that speed up ice creation in freezers, so here’s a list of do’s and don’ts.

  • Don’t put hot food (such as leftovers) in the freezer. Let the food cool down, and ideally chill it first;
  • If you’re putting frozen items from the store in the freezer, wipe off any condensation or water that may have formed on the packaging;
  • Try to minimise how long you leave the freezer door open;
  • Check the freezer door seal, and if it’s not sticking properly, invest in a new one (it will also save you paying more than you need on electricity);
  • Don’t stuff your freezer so full that air can’t circulate;
  • Don’t block any fans or vents that say ‘do not cover’ on them.

9. Love your freezer and it will love you back.

Freezers are a pretty epic modern invention. By freezing, we can extend the life of our food, provide future us with tasty snacks and pre-prepared meals, and bypass the problem of ‘there’s nothing in the fridge’.

Keep your freezer frost-free, (relatively) organised and filled with things you like to eat, and you’ll be rewarded time and time again.

Now I’d love to hear from you! Are you good at making the most of your freezer, or could your freezer do with a bit of love and attention? Any tips you’d like to share, or questions about freezing? Any successes or fails when it comes to freezing food? Any other thoughts? Please share in the comments below!

Reducing food waste: store cupboard crumble (+ ideas to use up old fruit)

With the current lockdowns and restrictions on movements, I’ve been rethinking how I use my (rather small) freezer. Now that I really need to optimise the space, I’m removing and using up some of the less useful items that take up space (a few random sticks of rhubarb, and a jar of stock) and filling it up with more useful items – ideally meals, or parts of meals.

One of the things I find really handy to keep in the freezer is crumble topping. Whenever I make crumble I always double the topping, and freeze half. (After all, making double – or triple – the quantity creates exactly the same amount of mess and washing up, but twice the food, and I’m all for that.)

It means down the track, when I discover some sad fruit in the fruit bowl, or a glut of something that I want to use up, I can grab the topping outta the freezer, and voila – almost instant crumble.

Growing up, the crumble I ate was made of refined white flour, refined white sugar, and butter. These days I prefer to make my crumble a little bit healthier.

And as long as you follow the rule of some sweetness, some crunch and some fat, it’s a pretty great idea for using up random ingredients from the pantry.

Making crumble topping

Ingredients:

  • 2 cups rolled oats
  • 1 cup ground almonds (you could replace this with plain flour – wouldn’t be as tasty but kinder on your wallet. Other options are oat flour, rice flour, buckwheat flour)
  • 1/3 cup solid sugar (I like rapadura sugar, but any white or brown sugar that you have is fine)
  • 1/4 cup melted coconut oil
  • 1 cup nuts/seeds (use what you have: chopped almonds, mixed nuts, hazelnuts or pecans, shredded coconut or coconut flakes, pumpkin or sunflower seeds, even buckwheat kernels will all work great)
  • Pinch of salt

(A note if you’d prefer to use butter instead of coconut oil: the traditional way of making crumble is using cubes of cold butter, and rubbing into the flour to make ‘crumbs’. But my guess is, if you’re using chunky ingredients like oats rather than just plain flour, you can just pour melted butter in – it’s the same consistency as melted coconut oil.)

Method:

Mix all the dry ingredients into a bowl, pour melted coconut oil on top, and mix well.

Whatever you’re not using straightaway, pop in a container (I use a glass jar) and store in the freezer. If you don’t have space the fridge is fine. I’d keep in the fridge for a month or two, and the freezer for three to six months.

Reducing food waste: using old fruit for crumble

Crumble is the perfect way to use up old fruit. Apples that have gone floury, pears that have started to go squishy, stone fruit that’s gone wrinkly, blackberries or mulberries that have been sitting in the freezer for months – they are all perfect for crumble.

If you don’t have enough fruit to make a crumble, you can simply chop and freeze what you have until you’ve got enough. Or, you could just make a one person version.

Tropical fruit like bananas and mango will work too. I’ve never seen a crumble for citrus, but I’d love to try 50/50 with orange and rhubarb, for sure.

It can be helpful to stew the fruit before you make crumble. You don’t have to, but it will ensure the fruit isn’t hard in the crumble, and also reduce the cooking time considerably. All ‘stewing’ means is roughly chopping the fruit and chucking in a saucepan with a small amount of water (or orange juice), and cooking for a few minutes until the fruit starts to break down.

I don’t add sugar, because I find the fruit sweet enough, and there is sugar already in the topping. I usually add a sprinkle of cinnamon – and sometimes ginger – to the stewed fruit. Zested orange would be great, too.

Another option is to roast the fruit. Stone fruit are great roasted. Slice, place on a tray, brush with a little oil, sprinkle with a little cinnamon and bake in a medium-hot oven for 15-20 minutes. Takes longer, but tasty.

I like my fruit still a bit chunky, but you can cook it until mushy if you prefer.

How to cook store cupboard crumble

I don’t tend to weigh out fruit, or even the crumble topping. I prefer to measure it visually. Spoon the fruit into an ovenproof dish (I use glass Pyrex) so that it’s a few centimetres (a couple of inches) deep. Then, sprinkle on the crumble topping until it’s the thickness you like. No need to press it down.

Any excess crumble topping can be placed in a glass jar or other container, and frozen until you want to make crumble next.

Bake in the oven on a medium heat (I’d go for 150 – 180°C / 300 – 360°F) for about 15 – 20 minutes. If you’ve stewed the fruit beforehand you don’t actually need to ‘cook’ the crumble so much as warm it through. If you’ve used pecan nuts, opt for the lower temperature as they are prone to burning at higher temperatures.

(Better to cook for slightly longer at a lower temperature than end up with a blackened top.)

It’s ready when the top is browned and the fruit is bubbling.

Although crumble is traditionally a dessert, I often make it for breakfast (cooking the night before and either eating cold, or warming through in the morning). It’s got less sugar in it than a lot of cereals. I think if it as inverted muesli with fruit at the bottom rather than on top.

To store, allow to cool and then refrigerate and then eat within a week, or freeze and use within 3 months.

Now I’d love to hear from you! What ingredients are sitting in your pantry right now, and how are you planning to use them up? Any pantry ingredients you’re wondering how to use right now? What staples are you keeping in your freezer? Any other thoughts? Please share in the comments below!

How to grow a pineapple from scratch (from a pineapple)

This year, I’m working hard to transform my little patch of lawn into a productive food forest – or the beginnings of one, anyways. (They say Rome wasn’t built in a day, and I’m pretty sure they say a forest doesn’t grow in a year – but the foundations can be laid, for sure!)

If I was to buy a heap of plants to fill the space, I’d be bankrupt pretty quickly. Where possible, I’m trying to fill the space with plants I’ve grown from nothing – or rather, from cuttings, seeds, roots and runners.

It’s not possible with every plant I’d like to have, but there are lots of options.

I love the idea of using ‘waste’ to create something new. And I love watching nature do its thing. One of my favourite things to grow right now is pineapples. They are magical.

I thought I’d talk you through the how.

Pineapples are a tropical plant, but they will grow successfully and fruit in Perth (where I live). They’re also quite a fun plant, so they look good regardless of whether they fruit or not – but having plants that could potentially also feed me in the future is a winner.

If you’re not in a Mediterranean or tropical climate, you can still grow pineapples, but they’ll need to be kept indoors during the cooler months. I’ve read that it’s possible to get them to fruit, but I imagine it’s a lot more work.

Nevertheless, they make a fun indoor plant if you’re in colder climes. A cool experiment. A good conversation starter. An excellent gift.

Here’s how you grow one.

Step-by-step guide to growing a pineapple

You’ll need a pineapple with its green spiky head attached. If you’re lucky, you’ll find a pineapple with a more than one head, or possibly a main head and side sprouts. For every head, you’ll be able to grow a plant, so the more the merrier.

This pineapple has a main head, and a little side shoot to the side. Two future pineapple plants for the price of one pineapple.

Next, chop off its head – or rather separate the fruity part from the green spiky part. You want to try and cut between the fleshy pineapple part and the head so that there is no fruit attached to the green head part. (The fruit will rot which won’t be good for the plant.)

Pull off some of the bottom outer leaves. You may see roots when you do this, or you may just see little stumps that will grow into roots. Pull off enough that there’s a small ‘stem’.

Sit the pineapple on top of a jar filled with water, ensuring the stumpy root part is submerged. The leaves can help prop the plant up on top of the jar.

Suspending the pineapple rather than sitting in a saucer ensures the roots have space to grow downwards.

Wait.

The pineapple may sprout roots straightaway, or nothing may happen for ages. (I’ve tried two varieties: one sprouts straightaway and the other takes forever.)

Ensure the water is topped up so the root part stays submerged. I haven’t found it necessary to change the water.

Eventually, roots appear.

I wait until the roots reach the bottom of the jar (we are talking a few weeks at least), and then I repot in some well draining soil. Eventually I plan to put mine in the ground, but they can be grown in containers.

You have a pineapple plant!

More things to know about growing pineapples

Pineapples do not grow or fruit quickly. Growing a pineapple this way will take 24 months to fruit, and another 6 months for the fruit to develop. Plus one plant grows one pineapple, so you won’t be inundated in pineapples.

Another thing to know about pineapples: they take most of their nutrients through their leaves, not the soil. Feeding with worm castings, soluble seaweed solution or another natural feed is better than synthetic fertilisers which may burn the leaves and damage the plant.

Finally, you might come across information that tells you that you don’t need to bother getting the pineapple head to root before planting, and you can simply stick the freshly cut head straight into a pot or in the ground. Personally, I love watching the magic of roots appearing right before my eyes.

That would be lost if I simply stuck the head in some soil, which is why I prefer this method.

Here’s the beginnings of my pineapple plantation (all grown from pineapple tops)…

Now, doesn’t that just make you want to head to the shops to buy a pineapple?!

Now I’d love to hear from you! Have you had any success growing plants from scraps? Have you had any fails? Anything on the to-do list for one day soon? Any questions about growing plants from scraps in general? Anything else you’d like to add? Let us know your thoughts in the comments!

5 Bad Habits I Shook by Going Zero Waste

Often when we talk about the changes we’ve made since deciding to refuse single-use plastic, reduce our waste and/or live more sustainably, we focus on the products we buy (or no longer buy). There are plenty of articles online about ‘zero waste swaps’ and indeed, I’ve written a few myself.

I thought it might be interesting to change the focus slightly, and rather than talk about products, talk about habits. Now I’ve still got plenty of bad habits to shake (going zero waste does not make you a perfect human, alas), but luckily for me, embracing low waste living has enabled me to shake a few.

Throwing my food scraps in the trash.

That bin went to landfill, and I just thought that the landfill was a great big compost pile. I found out later it is most definitely not. It’s an engineered (and expensive to construct) depression in the ground that entombs waste without air, and creates a lot of methane instead.

Then there’s the fact that food makes for a stinky bin and attracts flies (particularly in hot climates), and needs hauling to the kerb every few days. Did you know that between 20 – 40% of everything the average householder throws away is food scraps?

Not to mention, I was throwing away my food scraps, and then buying plastic-wrapped bags of compost at the garden centre for my plants!

Setting up a worm farm, and then a compost bin, reduced my rubbish bin to almost nothing, solved the ‘how do I line my bin without plastic?’ problem (if there’s nothing stinky and wet going in the bin, it doesn’t need a liner) and gave me free nutrients for the garden.

There are so many solutions to dealing with food scraps. There are options whether you’ve got a garden, a balcony, or no outside space at all. There are options even if you can’t be bothered setting up and managing a system yourself.

Find more info here: How to compost without a compost bin.

Being ‘in love’ with my recycling bin.

Yep, I used to think that recycling was the best thing ever. (And pretty much that I was the best thing ever for filling it to the brim!) I saw that chasing arrow recycling symbol as my ‘get-out-of-jail-free’ card for packaging. ‘Oh it’s okay. It’s recyclable!’

It simply never occurred to me that I could say no to unnecessary packaging, refuse the excess, reduce what I did use and even rethink some of my choices for less wasteful alternatives.

As I’ve said often, recycling is a great place to start. But when I realised it was not the place to stop, and there was so much more I could be doing, that was when I really began to reduce my waste and my footprint.

Recycling – and learning how to recycle properly rather than chucking everything in and hoping for the best – that’s the first step. But it’s better to have an empty landfill bin and an empty recycling bin than an empty landfill bin and a recycling bin that’s overflowing.

Accepting free samples of everything.

I loved anything that was ‘free’. In fact, if somewhere was offering freebies, I’d quite often take one and then circle back round to take a second one. Because, free!

Cringe.

Whether it was sachets of moisturiser with real gold flakes in them (yes this was a real sample I once accepted), scented foot odour reducing insoles (again, a real thing) or any ‘free’ miniature or travel-sized thing whatsoever from any hotel, I was snaffling these thing up.

The old me thought all this stuff was great. It was duly popped in the cupboard and forgotten about. Yes, most of these freebies I didn’t even use. The new me just shakes her head at the old me.

What about all the resources? The pointlessness? The waste? The perpetuation of the cycle of more samples and free stuff?

Let’s just say, I don’t do that any more. I actually get more satisfaction now from refusing stuff than I ever did from taking it. (The only freebies I get excited about these days are my friends’ excess garden produce and cuttings from their plants which I’d like to grow in my garden.)

Taking ‘eco-friendly’ labels at face value.

Even before I went plastic-free and low waste, I’d buy all of the eco-friendly products. It was pretty easy, because so many products are labelled ‘eco-friendly’!

(Or if not ‘eco-friendly’, the equally eco-friendly sounding ‘green’. Bonus points – in my mind – for having an image of a green leaf on the packaging.)

It was only after I began to reduce my waste that I began to question these labels, and stopped taking them at face value.

There are no independently verified certification scheme for labels like ‘eco-friendly’ or ‘green’. (Or ‘biodegradable’ for that matter, but I won’t go into that now. If you want to read more, you’ll find my post ‘is biodegradable plastic: is it really eco-friendly‘ a helpful read.)

Anyone can write labels like ‘eco-friendly’ and ‘green’ on their packaging. And they do!

Rather than let the person who designed the packaging tell me that a product is eco-friendly, I now prefer to do my own research. If a company is truly environmentally responsible, committed to sustainability and equitable in the way they do business, they will be able to back up their claims.

They will be transparent, happy to answer questions, eager to find out answers that they don’t already have, and keen to talk more!

If ever I write to a company claiming to be eco-friendly, and receive responses that are cagey, defensive or hostile, I choose not to support those companies.

That’s not to say I can always find all the answers. But I make an effort and try to be conscious in my choices.

Waiting for ‘somebody else to do something about that.’

Before I decided to reduce my single-use and other plastic, I was the person picking all the overpackaged things off the supermarket shelves and muttering how ridiculous it was, and how somebody should do something about that, whilst piling those same things into my trolley.

I thought it was up to the manufacturers to change their packaging. I thought it was up to the stores not to sell these items. It did not cross my mind that I also had a role to play in this, and a way to influence change – I could just not buy them.

I don’t think it is solely the responsibility of individuals to create change. But we buy things and support (or don’t support) brands and companies, and companies pay attention. We can apply pressure, start conversations, write letters, share the good and try to hold the bad to account.

I don’t have the empirical evidence, but I’m pretty sure that nobody ever successfully influenced change by muttering under their breath. Nor by doing the exact thing they were complaining about.

It feels so much better to be doing something, and trying, however small that ‘something’ might be.

Embracing a life with less waste might not have ironed out all my flaws, but it’s definitely helped me shake some bad habits along the way.

Now I’d love to hear from you! What bad habits (if any) have you kicked through reducing your rubbish and trying to live more sustainably? Any bad habits you’re trying to shake that are still a work-in-progress? Anything else you’d like to add? Please share your thoughts in the comments below!

How to Compost ‘On The Go’

Having a compost bin (or worm farm) at home is great, and I’d thoroughly recommend it as a place to put all your food scraps, peels, bad bits and other things you might like to compost rather than put in the general waste bin. But we tend to eat food when we’re out and about too, and we all go on day trips and holidays… so what do we do about food waste then?

Whilst it isn’t as easy as stepping outside the back door and opening up a compost bin, there are still things we can do to ensure we’re still composting whilst on the move.

How to Compost on Day Trips

I always carry my reusable coffee cup in my handbag: it is most used not for takeaway coffee but for food waste scraps. Apple cores, pips and peels, the occasional teabag, a dirty napkin or anything else I might be left with when out gets stashed in here until I get home.

I’d recommend a glass, ceramic or metal coffee cup (or other container) for this. Plastic tends to absorb the flavours of whatever it’s holding, and coffee that’s flavoured with yesterday’s banana peel isn’t great. If you do use plastic, wash throroughly and leave overnight filled with water and a spoonful of sodium bicarbonate to try to lift any stufbborn smells.

If I ever wrote a ‘ten things I use my KeepCup for’ post, carrying around bits of compost would be number 1 (leftovers would be number 2, and actually, takeaway coffee would probably be number 10).

If I take snacks from home, I’m always conscious of any ‘waste’ they might create. Take a banana, I’ll be left with the peel; take an apple and there will be a (smaller) core; take grapes and I’ll be left with a couple of pips. I think about where I’m going and if I want to be carrying around these things before choosing.

If I go on a picnic, It’s pretty easy because I take my food in reusable containers, so I can simply use my containers for scraps.

How to Compost on Longer Trips and Holidays

If I’m going somewhere far from home, the absolute first thing I do is check ShareWaste, the free compost networking service. It’s one of my favourite resources. I see if anyone has a compost bin in the areas I’m travelling to.

I’ll also do an online search for local community gardens, as these often have compost bins.

Sometimes it’s a yes, but often it’s a no. In which case, these are my options.

In an ideal world, I’ll take my food scraps home with me. If I’m away for several days they will start to get a bit stinky, so I either store in the freezer (if there is a freezer) or fridge, which helps slow down any decomposition.

Ideally I’d have a cool box (Esky) for the trip home. Failing that, any container that can seal tightly will work. You won’t want to be spending time in a car with decomposing food waste smells, promise.

If you don’t have the luxury of a car, you’re camping or for other reasons can’t refrigerate or transport food scraps home, your options are more limited.

Does the local council have a food scraps collection service?

Councils are increasingly offering doorstop food waste collection services, and compost those scraps. It’s worth checking if this service is offered where you’re staying.

Could you bury the food scraps?

Ideally, food scraps need to be buried 25cm (10 inches) deep and covered with soil to deter pests. Burying is more practical in the countryside or bush than in the city. If there are signs specifically telling you not to do it, then don’t do it.

What about local parks?

Parks are not there to accommodate our personal food waste, although burying a single apple core deep in a planter box is a little different to dumping a week’s worth of trash on the lawn in Central Park. It’s not ideal, and it’s not really recommended.

As tempting as it is to take food waste to public places, remember that if everyone did this, it would turn into a garbage heap pretty quickly. Food will attract wildlife, and even if you bury it, you might be inadvertently adding pests or invasive species to the area (those fruit pips might sprout trees that are not welcome).

When you’re out of options…

Try to reduce food waste wherever we can. I try to make choices to reduce food scraps. If I need to cook, I’ll often choose vegetables like broccoli and mushrooms, where the whole thing can be eaten, and be less likely to choose foods like mango and pineapple that have huge amounts of skin and or a big stone to deal with, just to keep my waste to a minimum.

I don’t want to put my food scraps in the general waste bin, but if I really don’t have any other options, that’s what I do. I remind myself that it’s not my fault: governments, councils and businesses need to recognise food scraps both for the resource they are (nutrients) and the burden they are if not composted properly (methane emissions).

They need to make it easier for people to do the right thing.

When I say easier, I’m not meaning that we should appease people’s ‘apparent laziness’. I mean this: when I visited Exmouth in 2017, some of my food scraps travelled 1,248km home with me because there was no composting anywhere on the route. Sharewaste now has a few additions on their map, and it’s currently a ‘mere’ 835km from Exmouth to the closest compost bin.

Most people aren’t going to do this.

So whilst I encourage you to set up a compost bin at home, try to plan ahead, bring a container, think about the waste you might create it and attempt to avoid it, and look for local services that might be able to help, I also want to remind you that sometimes, trying to do what’s right feels like (or is) an uphill battle.

It isn’t always accessible or practical. That’s not our fault. Do what you can, celebrate your successes, don’t feel bad if you can’t make it work, and resolve to keep on trying.

Now I’d love to hear from you! How do you reduce food waste? Any tips to add? Any situations you particularly struggle with? Any questions about composting? Please share your thoughts in the comments below!