Tag Archive for: plastic free

How To Begin a Zero Waste/Plastic Free Facebook Group

Back in April 2016, I set up a Perth Zero Waste + Plastic Free Facebook Group. I wanted to create a space where local people could get information, ask questions, receive feedback and “meet” other people in our area. My website focuses a lot on zero waste and plastic-free living: the what, the why, and to some extent, the how – but not the finer details.

I always felt that this was missing and needed talking about somewhere, but I didn’t know where, or how to manage it. This kind of information changes quickly, and it is a lot for one person to keep on top of.

Eventually it occurred to me that Facebook Groups could be the answer.

Last week, the Perth Zero Waste + Plastic Free group hit 5,000 members. 5000! I am so proud and humbled that our community has that many people who care about their waste, and that they have all been able to connect with one another thanks to this group. The ideas shared and friendships made has been so inspiring.

I’m a huge fan of connecting offline, and there’s nothing like attending a workshop or talk or group activity to really get into the spirit. But there’s definitely a space for online groups. We don’t all have the time or energy to get out into the community, and besides – if you just want to know where to buy plastic-free tofu, that isn’t really a workshop kind of question!

I think when they work together – people meeting online and then connecting offline – that’s magical.

Our group has been really successful, and has far exceeded my expectations – not jut in terms of numbers, but also the kinds of information available and also the types of people who have joined. It’s a really diverse group, too. I talked about zero waste privilege a few weeks ago, and this group definitely debunks the white, middle-class female myth about zero waste living.

I definitely think it’s the members who have made the community what it is. But I also think the success has been due to the vision and the planning, and the way it is administrated.

Love or hate Facebook, there’s a lot of people using it. More than one billion people, in fact. Whilst we can all lament the fake news, and the fact we spend far more time looking at cat videos than we ever intend to, Facebook is a useful tool. Facebook groups in particular, have been a great way to connect with like-minded people. (At the time of writing this, Facebook Groups are still free from ads – another reason I like them.)

I thought I’d put together a guide for how I set up and how I run our Facebook group, what’s worked well and what I’ve learned. Whether you’re thinking of setting up your own group, or have a group that you’d like to improve, hopefully you’ll be able to draw from my experiences.

Setting Up a Zero Waste Facebook Group – Before You Begin

Consider Who The Group Is For, and What You Want It To Achieve

Think about your audience, the types of people you’d like to attract as members, and the types of people you think that you can serve best. What is your area of expertise, and who will benefit from joining a group that covers this?

Think also about how many members would make a good group. More isn’t necessarily better. Do you want a smaller, more connected group who you can get to know and maybe transition to an offline group? Do you want to keep things very local (just to your suburb), or to your town, or region/county/state? Is it for certain language speakers? Do you want the broad depth of knowledge that comes from a worldwide group?

Is your group just for women, or men; young mums, retirees, or students; low income earners, the unemployed or professionals? Beginners or experts?

There’s no right or wrong answer, but it helps to think about this in advance. Things evolve over time, but if you have a clear idea who the group is for, it will keep the information offered specific and relevant.

Try to think deeper than just “everybody”! Whilst “everybody” sounds inclusive, the more general you are, the less helpful you will actually be to your members.

For my group, it was specifically people who live in Perth who wanted to learn more about reducing their waste. They can be experts or beginners, but the information shared in the group has to be relevant to living zero waste and plastic free in the Perth area.

Why? Because I felt that this information was in my head and needed to be shared, and my website wasn’t the place. I knew people in Perth would want to know the specifics that other blog readers would not.

I also remember when I first took part in Plastic Free July back in 2012, the Facebook page was very small. Because Plastic Free July began in Perth, it was easy to get local information there. Fast forward a few years and there are now 30,000 followers on the Plastic Free July page. There is no way you’d find out which local grocers sell milk in glass.

I felt people new to Plastic Free July were missing out on something useful that I had experienced.

Check The “Competition”

I don’t really believe in competition. When we’re all working towards a common cause, it isn’t a competition, is it? What I really mean is “duplication”. There is absolutely no point in exactly recreating something that already exists. See what exists, and ask yourself – how will your group be different?

This doesn’t mean that if someone is doing something similar, that there isn’t space for you. Competition can mean there is high demand! Think about how many cookbooks there are on Italian cookery, or even something as specific as pasta – heaps.

However, duplication is wasted energy. There will be a different take or a different spin that you can offer. Be clear what it is.

Consider Who Else Can Join When You Launch

Tempting as it can be to open up the group to everyone, if you’re clear about who your audience is and who you want to participate, be careful about letting others who do not fit those categories in. Whilst it could be fine, you might dilute the message and usefulness of the group for other members.

One thing that I should have done differently was be much stricter about who could join the Perth group. The group is for people in Perth to talk about Perth things, but when I launched the group, I opened it up to members worldwide. I think I worried about getting enough members to make the conversations interesting and provide value. Honestly, when I set it up, I hoped to reach about 500 members. The group hit 500 members and kept on growing, and I realised if I didn’t change who could join, we’d end up with a generic audience with less relevance.

Firstly I limited the audience to Australia, and then Western Australia. Now anyone wanting to join has to let us know where they live in Perth or WA to be considered as a member. There are still some inter-state and international members who joined before we changed the terms (we didn’t delete anyone!), but they know that the conversation is Perth-centric.

Prepare the “Rules”

I wrote a couple of documents outlining what the group is about, who can join and how we expect members to behave. Our group is friendly and supportive, it doesn’t matter where you are in the journey and no question is a stupid question.

When new members join, they are expected to read this post. Whilst not everyone does, it is helpful to refer back to when conversations stray from the topics. It’s also useful to assess if a post or member doesn’t meet the standards we expect, and needs removing.

Running A Zero Waste Facebook Group – The Early Days

Finding New Members

I started with the people I knew, people who were already Facebook friends. I’m lucky that I have a lot of friends passionate about this topic! I probably started the group with 80 or so personal friends.

When I give talks, I always mention the Facebook group at the end as a next step for people to join. (I actually mention this rather than my website.) After every talk I give, a new flush of members comes in. As the audience grows, friends of friends request to join, and so it has grown organically.

Finding Admins

Unless you’re on Facebook all the time, you’ll likely need admins to help you approve new members, answer questions and delete spam. I asked a good friend and my husband to help admin the group (my husband uses Facebook much more than I do).

At the start, I checked in every day, often twice a day (once in the morning and once in the evening). As the group has grown, I’ve found I need to do this less often as there are plenty of knowledgeable people in the group to answer questions and share expertise.

Running A Zero Waste Facebook Group – Maintenance

Moderating a Growing Audience

As the audience grows, so does the number of admins required. I didn’t react to this quickly enough at the start, and there were a couple of times when huge fights broke out and then blew up in between the times I checked. When someone called it out as the admins “allowing this to happen” I realised it was too big for me to manage.

Once a group has been running for a while, it’s easy to spot the people who post often, are helpful, polite, and have interesting insights. I asked a few of these people (I chose people I’d also met in real life, although this isn’t necessary) to join as moderators. I really wish I’d done this sooner – it was a huge weight off my shoulders and it stopped any crazy conversations getting out of hand.

Occasionally I post to remind people about the values of the group (being nice to beginners, answering the question asked rather than telling the asker what they are doing wrong, not posting blatant advertising or Amazon affiliate links) but it doesn’t happen that often. Other members who are not moderators know how the group works, and are quick to jump in and remind people if a conversation begins to go off track.

Moderating the Conversation

Not every single post is 100% useful or 100% relevant, but we try to delete as little as possible. By sticking to the guidelines (no salesy posts or affiliate links, relevant to Perth, and relevant to zero waste and plastic free living) it’s pretty easy to decide whether something should stay or go. Posts about tiny houses in Oregon or India banning styrofoam might be really interesting, but they don’t fit the description of what our group is about, and ultimately they detract from the message.

Now we have 5000 members, we have to keep things stricter. We have a lot of posts per day, and we don’t want members feeling like the feed has become a bunch of memes. Happily, I think it’s worked.

Overall, I love what our group has become. It feels like a positive, inspiring and motivating space to spend time. (That isn’t something I thought I’d say about social media.) That’s not to say it’s perfect, and there are occasional disagreements and fiery exchanges, but overall the support offered and received is wonderful. It’s one of the best things I ever did to support zero waste living in my community.

If you’ve been wondering how you can get the zero waste or plastic free message out into your community, maybe it’s something you can do too.

Now I’d love to hear from you! Do you use Facebook Groups for connecting to your community (doesn’t have to be zero waste related) and what benefits have you found? Have you had a good experience, or a bad experience? Had it been mixed? Any other thoughts about Facebook groups you’d like to add? Leave a comment below!

[leadpages_leadbox leadbox_id=1429a0746639c5] [/leadpages_leadbox]

7 Tips for Choosing Ethical Zero Waste Essentials

The zero waste and plastic-free movements have been steadily building momentum over the last few years, and along with that, so has the proliferation of associated “stuff”. When I started my plastic-free journey back in 2012, there were products to assist with zero waste living, but choice was limited. Now, it seems we are inundated with options, an there are more coming onto the marketplace every day.

That makes me a little nervous.

It makes me nervous because zero waste is about not creating waste; buying less stuff, and making do with what we have. It still means the occasional purchase, but usually “buy-once-and-will-last-forever” type products.

The more stuff on the market, the more we are tempted to buy, the more fashion and style comes into it and practicality and functionality seem less important.

When there’s so much choice, and there’s the temptation to buy more or try new things, these reusables can become “single use”. Reusables made of glass or stainless steel have a big production footprint. Great if we use them all the time, and of course they are made to last forever. But we have to use them often.

When we buy things and then don’t (or rarely) use them, they aren’t such better than single-use.

Finally, it makes me nervous because choice is paralyzing, and too much choice can lead to overwhelm and inaction. Changing habits is hard, and that is without having to exert energy deciding which products might be useful and appropriate, sifting through the greenwash and making good decisions.

Choice adds another layer of complexity.

I recognise that we often do need to buy stuff at the start of our plastic-free and zero waste journey. Not everything, but some things. Now there’s all this choice on the marketplace, I thought I’d put together an ethical zero waste purchasing guide to help navigate through some of the choices.

1. ‘Needs’ versus ‘wants’

There are many beautiful, ethically-produced things out there. Far more than we could ever need. The truth is, we can appreciate and admire the things we see without having to purchase them all. It can be tempting to buy something, thinking “I need this”! But really, is it a  need – or is it a want?

Can we make do without? Can we sit on the decision for a week, or a month, and decide whether we really need it?

The most zero waste option is always to make do with what you have, and buy nothing.

That’s not to say we should never purchase anything. Sometimes “wants” have a place. Sometimes we want to support a local ethical business because we believe in the work they do. Sometimes we know we don’t need something, but we really really want it, and we decide to buy it. No-one is perfect, and we all have desires, standards of living we want to maintain… and moments of weakness!

It’s a balance.

Let’s not kid ourselves that buying things makes us more zero waste. It might help our journey, it might support others in theirs, but is buying something the absolutely most zero waste thing to do? No. So let’s make the things that we do buy the absolute best ethical choices that we can.

2. Before you go shopping…

Think about what you need. Think about the properties what you need has to have. Think about how you’ll use it. Decide what you need, and then go looking for it. Going to a shop for “inspiration” likely ends up in you buying things you don’t actually need.

Do your research. Look online, and search for options. If you find a product you like the look of, go to the manufacturer’s website and read more. Read their mission statement and ethical credentials. Read customer reviews.

If you find the choice overwhelming, ask others on social media what they recommend to narrow your choices down.

3. Read the labels. And I mean *really* read the labels.

Just because someone has shared a photo of a product on social media and stated it is compostable/ethical/zero waste/better, don’t just take their word for it. Go to the product’s website and look. What is the packaging made of? Where is it produced? What is the company’s reason for being? Ethical companies will be clear about their commitment to sustainability.

Does it claim to be biodegradable or compostable, and if so, is it certified? (Biodegradable can include toxic residue, and doesn’t mean that it will break down in home or even commercial composting facilities. There’s no regulations on using this term, and lots of products make the claim without providing evidence. If a product isn’t certified biodegradable or better still, compostable, I would avoid it.)

What does “better” mean? There’s a product on the market called “Boxed Water is Better”. Better how? Their containers are made of paperboard, a plastic-lined card that isn’t easily recycled in Australia. Why is it “better”? It’s because water packaged in paperboard uses less carbon emissions to transport than bottled water packaged in glass. Better in that scenario, yes, but why are they shipping water around the globe anyway? Transporting water to countries that already have drinkable water coming out of the tap doesn’t strike me as environmentally sound.

Ask questions. Dig deeper. Suspect everything ;)

If you ask questions, and can’t find the answers, stay away. Better to support those companies that are transparent and honest.

4. A gap in the market or a slice of the pie?

There are companies that have been working on the plastic-free / zero waste message for years. Stores like Biome opened in 2003, Life Without Plastic opened in 2006; brands like Klean Kanteen formed in 2002. They’ve been trailblazers in getting the zero waste message out there.

Then there are new companies and brands, popping up year after year, increasing the reach, making zero waste more accessible, and offering new products and ways of doing things.

I’m all for choice, and I love new companies that offer innovative products, improve and build on existing designs, or increase accessibility by opening in new markets.

What I don’t love is companies who see that there is money to be made, and rip off another company’s product with their own label, or maybe make a cheaper version (easy to do when someone has done the design work for you and proven the business model).

If the only differentiating feature of a zero waste product is that it’s cheaper than an identical product available on the market, that’s not a great reason to buy.

Where products are similar, I prefer to support the original. They were the ones that took the risk and put their product out there.

Where there’s multiple options, I look for other criteria: who owns the business and how it is run, what organisations and non-profits they support, how they manage their supply chains, where production and offices are based, how they support their customers.

5. Be wary of Kickstarter (and other crowdfunding campaigns)

Crowdfunding campaigns ask the general public to support them in raising funds to begin a business venture, often in exchange for a discounted product. Don’t get me wrong – there are heaps of great projects worth supporting.

But there are many more that are not.

What makes a good project? In my mind, it is something that does not exist already; a product that there is clear demand for, and there seems to be a viable business model behind it all.

Projects I prefer not to support: anything that seems like more unnecessary “stuff”, anything made of plastic (we have enough plastic stuff in the world already!), another version of a product that already has a saturated market. (Do we really need another reusable coffee cup design, or reusable water bottle? Maybe…but probably not.)

Crowdfunding campaigns offering discounted versions of reusables which imitate products already on the market can be tempting. We all know reusables can be expensive. But these campaigns put pressure on existing businesses. Once the discounted phase is over, are the new companies likely to stay in business? Or are simply they fracturing the market?

6. Choose your stores wisely

I think it is so, so important to support local, ethical businesses when making purchases. Ethical products purchased from a Big Box store in order to save a few dollars is missing a huge opportunity to support a small, independent, ethical business. The way I see it, these purchases are an investment, which will last years, and a few extra dollars upfront is worth it.

Yes, no-one wants to be ripped off, and we all have budgets we need to stick to. But that doesn’t necessarily mean choosing the absolute lowest price.

Ask yourself honestly, can you afford to spend just a little bit more? Those few extra dollars probably aren’t that much to you, but your support will mean a lot to a small business.

My first recommendation, before we even start to think about hitting the shops, is to try to find what you need second-hand. Try Gumtree, eBay, Buy Nothing groups, or charity shops.

Next, I always recommend local brick-and-mortar stores (or market stalls) in your local area. No shipping costs (both financial and emissions/carbon footprint), no unnecessary packaging, and you get to connect with a real person.

If that isn’t an option for you, then consider independent ethical online businesses. I’ve put together a worldwide list of online independent zero waste stores here.

(You’ll never ever find me linking to Amazon. The owner is worth US$81.6 billion: many would argue he made his fortunes by destroying competition and the high street, avoiding paying taxes, and other dubious practices. Maybe you’d argue that it’s fair – business is business. Personally, I don’t see why one man can possibly need all that money. I value choice, and I’d rather see thousands of small businesses owners earning enough money to send their children to college and affording holidays and buying good food than one man reap all the wealth.)

7. It’s not about perfection…

Ethical purchases are a minefield, and there’s rarely a perfect solution. There’s always compromise or trade-offs somewhere. The most important thing is making conscious choices. Knowing why you made the choice you did, and putting thought into the decision.

Think about what’s important to you – the carbon footprint, the production conditions, the company’s wider ethical footprint, transport miles, supporting the local economy, supporting Fair Trade, whether it’s made to last forever, whether it’s recyclable, whether it’s compostable. Chances are you won’t be able to tick all the boxes.

Ticking some is better than none.

Don’t be afraid to take action or make choices that aren’t perfect. Better to do something than do nothing. Worst case, you realise down the track that you could have chosen better. That’s a learning experience. We’ve all made mistakes, opted for choices we wouldn’t take again.

Let’s aim for progress, not perfection.

Now I’d love to hear from you! What are your biggest ethical struggles when it comes to making purchases? Do you have any non-negotiable criteria? How has your view on ethical purchasing changed over time? What tips do you have to add? Anything else you’d like to share? Please leave a comment below!

[leadpages_leadbox leadbox_id=1429a0746639c5] [/leadpages_leadbox]

Disclaimer: This post contains some affiliate links which means if you click a link and choose to purchase a product, I may be compensated a small amount at no extra cost to you. This in no way affects my recommendations as my priority is always you, my readers. I only recommend brands I love, and that I think you will love too.

6+ Zero Waste Plastic-Free Snack Ideas

This week, I’m talking snacks. Specifically, zero waste snacks that you can make at home. If you have access to a bulk store, then you’ll have access to heaps of delicious plastic- and packaging-free snacks. For example, we can buy vegetable crisps, flavoured nuts, rice crackers, protein balls, and chocolate-coated everything (not to mention chocolate itself).

If you don’t have access to a bulk store, then this is not the least bit helpful. I realise that!

Rather than bore you all (or make you jealous) by telling you how wonderful bulk stores are, I’m going to focus on things that you can do and snacks that you can make without access to a bulk store. Level playing fields for all!

Zero Waste Snacks: Fresh Fruit

I know, I know. Boring! But also very good for you. Extremely easy to find without packaging.

Zero Waste Snacks: Fruit with Extras

I get it. You don’t want fruit. You want chocolate. You want something satisfying. I hear you.

But fruit is very versatile, and can easily be jazzed up. One of my favourite things to make fruit a little more filling (and tasty) is to slather it with nut butter. Apple slices spread with almond butter is the best. (If you’re allergic to nuts, or want a cheaper option, consider seed butters.)

Literally, nut and seed butters are just blended nuts or seeds. The natural oils are released with the friction, so there’s no need to add anything else. Generally toasted (and cooled) nuts will blend better than raw ones, so unless you have a super fancy blender, stick to toasted.

Another favourite is chopping bananas into rounds, and filling two rounds with peanut butter to make a sandwich.

Talking of bananas, I’ve also seen them peeled, dipped into chocolate (maybe half the length) and then nuts, seeds, coconut or other sprinkles used as a topping.

Orange segments, strawberries and raspberries can also be dipped in chocolate (assuming you can find berries packaging-free).

Zero Waste Snacks: Nice Cream

“Nice cream” is often used to describe vegan ice cream, but actually it’s not really ice cream – nothing so complicated. It’s actually just blended frozen fruit, which makes a soft-serve sorbet / ice cream that is eaten straightaway..

This one is mango and banana. A spoonful of nut butter or coconut butter adds a bit of creaminess. Literally take frozen fruit out of the freezer, and blend. Then, eat. So refreshing on a hot day!

Another favourite “nice cream” combo of mine is chocolate banana peanut butter : literally 2 frozen bananas, 1/3 cup cocoa powder and 2 tbsp peanut butter, blended. Yum.

Zero Waste Snacks: Vegetables

Yes, vegetables can be a snack. Carrots, capsicum, cucumber, radish, celery can all be chopped into crudites – although I tend to just chomp on carrots as they are. If you’ve got a dip (such as hummus – see my recipe here) all the better, but they can be good on their own. Pesto and even peanut butter (yes, carrots and peanut butter are a “thing”) also make good dips.

Broccoli has to be my favourite vegetable ever. I could eat bowlfuls of it… and I do. I like to fry it on a high heat so it chars a little, then add a big squeeze of lemon juice and a couple of tablespoons of tahini and mix together. Yum.

If you’ve never made kale chips, you are missing a trick. Yes, they look green and a little too healthy, but actually they are oily and salty and very tasty. I add to a roasting pan, drizzle with olive oil, sprinkle a little salt and pepper and bake in the oven on a low temperature (100ºC) for about 30 minutes.

(The low temp dries them out whilst keeping them green. If the oven is too high they will dry out and be ready quicker, but they will also be brown – not nearly so attractive.)

We don’t buy potato chips as they don’t come without packaging. Sometimes as a treat we’ll make a bowl of roast potatoes (chopped into small cubes and roasted to increase the crispy surface area) and snack on them. Probably not the healthiest option, but potato chips aren’t exactly either!

Vegetable peels also make great potato chips / crisps. I don’t tend to peel my veggies often (who can be bothered?!) But sometimes a recipe calls for peeling. If that’s the case I give the veggies a good scrub, peel and then put the veggies in a bowl with a small amount of olive oil. Mix, lay out of a baking sheet and bake in the oven for 10 mins or so, turning half way through.

This works for most veggie peels: potato, carrot and parsnip are my favourite (and the tastiest), but beetroot peels and sweet potato peels also work.

Zero Waste Snacks: Other Crunchy, Salty Things

When I crave snacks, it’s not necessarily that I’m hungry. (Usually I’m procrastinating!) Often I just want something crunchy and salty. For me, my go-to option is popcorn.

Even if you can’t buy popcorn from a bulk store and without packaging, a 500g bag of popping corn will make a LOT of popcorn. If you were to buy that many packets of pre-popped popcorn or even potato chips, the waste would be enormous. Even if it comes in plastic, popcorn is a very low-waste snack.

I always make mine in a saucepan. Heat enough oil in the bottom of the pan to coat the kernels (but not so much it covers them) and heat until the kernels begin to pop. Rather than use a saucepan lid, I use a tea towel to stop the popcorn pinging out of the pan. Whilst popcorn is doing its thing, it releases a lot of steam. I find with a saucepan lid the moisture condenses and drips back onto the popcorn – cue soggy popcorn. The tea towel allows the steam to escape and gives you crispy popcorn. Hurrah!

(As soon as the popping slows down, take the pan off the heat, otherwise the popcorn will burn. You can always save unpopped kernels for next time.)

Roasted chickpeas are another snack I make. I tend to buy chickpeas in bulk and cook them up a couple of kilos at a time, so I’ll often make a batch of these. If you have access to dried chickpeas, either in bulk or in large bags, this is a great option. If you can only buy the tins, I probably wouldn’t bother (you’ll end up with way more packaging than snack). You can find my roasted chickpea recipe here.

Zero Waste Snacks: Really Simple Making & Baking

When I think of snacks, I think of something quick and easy. Baking is great, and I love it, but it often requires a little time. However, there are a few things that you can pull together and bake very quickly, so I’ve included a couple of ideas.

Bliss balls are the first option. All you need is a blender or food processor. They are typically made from nuts and dates blended together and rolled into balls. The less ingredients the better, in my view.

These are macadamias, shredded coconut, rice malt syrup and the juice and rind of a couple of lemons. Macadamias, dates and fresh ginger are also a great combo. And anything chocolate-flavoured, of course. Simply google “bliss balls” and you will find millions of options.

Cookies are another simple, low fuss baking solution, and 84th & 3rd’s 3 ingredient emergency cookies are a great zero waste option, requiring oats (these can be bought in cardboard only if not in bulk), pears and chocolate. You can substitute the pear for banana, switch the chocolate for nuts, add a couple of spoonfuls of nut butter to increase the flavour.

I’m not going to delve into full-on baking in this post, but of course, your imagination is your only limitation. Don’t be afraid to google recipes, or even inspiration for single ingredients and see what the internet has to offer. Or even better, experiment!

Now I’d love to hear from you! What are your favourite zero waste and plastic-free snacks? Any recipes that you’d recommend? Any tips and tricks to share? Any particular struggles that you have? I’d love to know more so please share your thoughts in the comments below!

[leadpages_leadbox leadbox_id=1429a0746639c5] [/leadpages_leadbox]

Is Zero Waste Only for the Privileged? (And Does It Matter?)

I’ve received a few emails recently asking whether I think zero waste is a lifestyle for the privileged. After all, it is predominantly represented in the media by white, seemingly middle-class females. Is zero waste really a lifestyle for everybody? Or just the more affluent few, or those with more time on their hands to spend traipsing to the various trendy organic stores and making DIY skincare products from scratch?

I wanted to explore this further by answering four questions: what is privilege; what is zero waste; is zero waste a lifestyle for the privileged; and ultimately, does it matter?

What is Privilege?

A good definition of privilege is this: “a special right, advantage, or immunity granted or available only to a particular person or group”. These “privileges” are often unearned, for example, being born into a particular country or family. Actually, privilege is a lot more complex than simply calling it an “advantage”. Often it’s multiple advantages, based on all kinds of factors.

This short video (less than 2 minutes) does a great job of explaining privilege, and this video below (which is 4 minutes) demonstrates how different people are affected by privilege in society.

In many ways, privilege is an advantage that manifests itself as choice. The more privilege, the more choice.

Having privilege doesn’t make anyone a bad person. It doesn’t mean not having to work hard, or struggle to achieve a goal. It just means having advantages that make these things easier than for someone else without that privilege.

What is Zero Waste?

I think it is important here to explain both “zero waste”, and also “zero waste as represented by the media”, because they are not the same.

“Zero waste” is about sending nothing to landfill, and recycling as little as possible. It’s about rethinking the way we do things: refusing what we don’t need, reducing what we use, reusing what we have, repairing what we can, and recycling as a last resort.

Zero waste is about consuming less, making conscious choices when we do need to make purchases, supporting companies who are trying to do the right thing and reducing our environmental impact. It’s about choosing second-hand, borrowing or making do, choosing things that will last and taking responsibility for our personal choices.

Of course, the media represent zero waste in a slightly different way. Zero waste in the media is the newsworthy bits, the glamorous bits, the bits that invite intrigue and discussion. The media love to talk about and show photographs of glass jars of annual trash, trendy bulk stores and Farmers Markets.

Some of the most popular zero wasters are glamorous Americans who are also extremely photogenic and live in beautiful houses and apartments, and their lifestyles lend themselves to media coverage.

But this is just a snapshot. Even glamorous zero wasters shop at second-hand stores, and compost their food scraps, yet this isn’t talked about nearly as much. Or they choose to buy nothing at all – but where is the photo opportunity there?

Is Zero Waste a Lifestyle for the Privileged?

I would say no. But also yes.

Whilst any “lifestyle” is a choice, and therefore infers some level of privilege, the zero waste lifestyle is the lifestyle of consuming less, of refusing the unnecessary. Of borrowing, and choosing second-hand. These choices are accessible to most.

So no, the zero waste lifestyle is not reserved only for the young, affluent, or those with plenty of time on their hands.

The media might represent the zero waste movement as white, female and middle-class, but scratch beneath this veneer and you will find that zero waste is embraced by men and women, young and old, from all of the continents.

The glass jar full of trash might be the emblem of the movement, but to me, the zero waste lifestyle is a philosophy and a set of principles rather than a destination.

Anyone can subscribe to the ideals.

How far and how quickly we can progress towards these ideals, in practical terms; I do think that is a matter of privilege.

Having a choice – about where we live, where we shop, what we buy and how we spend our money – that is a privilege.

I don’t have children. I don’t have elderly or sick relatives that I need to look after. I don’t have any disabilities, serious health complaints or allergies. I live in a city with plenty of options. I can do a big bulk grocery shop once a month because my budget allows me to, rather than having to go every week. Because the bulk store is very close to my house, I can also pop over there if I’ve forgotten a couple of things.

These factors make it easier for me to reduce my waste, and that is privilege.

Access to bulk stores and Farmers Markets, the choice of grocery store, being able to afford things like stainless steel lunchboxes or organic oats, these choices are not available to everyone.

For those of us who do have access to these things, we are privileged.

Of course, zero waste is not about stainless steel lunchboxes or organic oats. It’s about working towards reducing waste, consuming less and choosing better. Privilege makes it easier, for sure. The less privilege and the less choice, the harder we have to work for our desired results and vice versa.

Zero waste is no different from any other scenario.

Does it Matter?

I don’t want to talk about whether privilege matters. Rather, I’m interested in why, when it comes to living zero waste, privilege is talked about at all, and more so, why it is seen as a bad thing.

Privilege exists everywhere, that’s just a fact. Yes, privilege tends to mean more resources and more choice. Like many things, zero waste is easier for some than others.

But that shouldn’t stop us doing what we can. Every step is a step in the right direction, and small changes still add up to create a big impact.

Whenever I see negative press or comments about zero waste in the media, the discontent tends to be around privilege; perceived and actual. It is perceived that zero wasters are well off, and therefore the lifestyle is not attainable to most.

Firstly, I disagree that zero waste is only for the affluent. I disagree that we need expensive zero waste “trinkets” (like stainless steel lunchboxes or reusable coffee cups) to live zero waste. They are luxury items.

As someone who owns both a stainless steel lunchbox and a reusable coffee cup, I realise this. The most sustainable and zero waste choice would be for me to not drink coffee at all, and drink only water. But I enjoy an occasional coffee, and so I have a reusable coffee cup.

That doesn’t mean these things are necessities of the zero waste lifestyle.

The “stuff” gets talked about so much because it is a talking point! But talking about the “stuff” can detract from the real message.

 Zero waste is the lifestyle of refusing, rethinking, reducing, reusing and repairing. Of using what we have, and making do.

Buy nothing new and choose second-hand – that’s the zero waste lifestyle. Join the library – that’s the zero waste lifestyle. Ride a bike and get rid of the car – that’s the zero waste lifestyle. Refuse a plastic bag and a plastic drinking straw – that’s the zero waste lifestyle. Own less pairs of shoes, choose the best you can afford and wear them often – that’s the zero waste lifestyle.

Let’s not get distracted by the things that others buy. Zero waste is not about what we can afford to buy. It is about what we choose not to buy. Ultimately, zero waste is not a lifestyle of “buying” or “stuff”. The less we buy and the more we make do, the better job we do of living zero waste.

Secondly, I’m at a loss as to why anyone would think it is a bad thing that those with privilege are choosing to live zero waste, use less resources and tread more lightly on the planet. There are plenty of people with privilege exploiting the planet, using more than their fair share of resources, and encouraging consumption.

Why attack or dismiss those using their privilege trying to make the world a better place?

Anyone working towards reducing their impact and sharing what they’ve learned should be applauded, in my view.

I am very aware that I am white, female, middle-class, and living in Australia. The stories that I share are written from this perspective: my lived experience. Most zero waste advocates share their own experiences and lifestyle choices. It’s fact-sharing rather than prescribing a lifestyle for others. We do what we can, and we share what we know.

I do not think that people with privilege talking about and advocating for zero waste is a bad thing. However, if they are the only people talking about zero waste, then that is a bad thing.

I don’t think the issue is one of privilege. I think the real issue is one of representation. That is what matters.

Waste is something we all make decisions about, every single day. We all have the potential to create waste, and the opportunity to avoid it. Reducing waste is accessible to most.

But if zero waste is only talked about (or represented in the media) by one group of people, with one set of experiences, how can we expect everyone to embrace this way of living?

How can we expect those not in this group to relate, or to connect, or to feel inspired?

Whilst the zero waste movement is represented as white, female and middle-class, there will always be people who feel excluded.

I don’t have the answers, but I do know that if we want the zero waste movement to spread, we need to be supportive, inclusive, and encourage all voices, even those that are different to our own.

We need to recognize that people have different experiences and different journeys.

We need to recognize that we cannot and do not speak for everyone.

Where we have privilege, we need to be aware of it. Not deny that it exists, but recognise that it is there.

Privilege isn’t a bad thing in itself. It’s how we use it that counts.

[leadpages_leadbox leadbox_id=1429a0746639c5] [/leadpages_leadbox]

A Beginner’s Guide to Sauerkraut (+ Fermented Vegetables)

Today, I’m talking cabbage. (Stay with me…it gets better, I promise!) Now cabbage and I, we have a bit of a love-hate relationship. I like cabbage, but it arrives in the veg box every week, reminding me that there’s still last week’s cabbage in the fridge refusing to go bad.

(Of course, I can’t put a perfectly good cabbage in the compost. If it happened to accidentally go bad…well, maybe I could justify it, but cabbage is stubborn!)

In fact, cabbage simply refuses to go bad, which actually makes it a rather good zero waste vegetable. (It shrivels a little and the outer leaves go brown, but peel those leaves back and there’s still perfectly good cabbage underneath.) Plus it grows at a time of year when many other more delicious vegetables do not.

If you want to eat seasonal and you live anywhere except the tropics, cabbage is going to feature on your menu. But cabbage week in, week out; it can wear a bit thin.

That, my friends, is why we need to embrace sauerkraut.

Sauerkraut is fermented cabbage. That might not sound delicious, but it’s a tangy, crunchy, super healthy vegetable that’s tastier than the name suggests. Sauerkraut contains millions of good bacteria, so is like taking probiotics, but without the packaging. Sauerkraut also lasts for ages in the fridge.

I’ve kept sauerkraut in the fridge for a year. Fresh cabbage might seem to last forever, but it won’t last a year.

The good news is, whilst fermenting sounds hard, it is actually very easy. Plus you don’t actually need any specialised equipment. Sure, there’s all kinds of fancy gadgets out there, but you can get going with a glass jar and a tea towel. Oh, and some cabbage ;)

That said, you don’t actually have to make sauerkraut with only cabbage. You can mix cabbage with other vegetables like onion, carrot and beetroot.

But let’s not get distracted thinking about all the wonderful potential! Let’s start at the beginning.

Some Fermentation Basics

Fermentation is a process that uses good bacteria and yeast to transform a product. By fermenting, we crowd out the bad bacteria with good bacteria, which changes the flavour and texture, but also helps lengthen the shelf life of the product. For example, yoghurt is fermented milk: whereas fresh milk will last in the fridge for up to a week, yoghurt might last a month.

Fermenting is anaerobic, meaning without oxygen. (Although confusingly, some foods are actually fermented with oxygen, such as vinegar.) In my experience of making sauerkraut, this “without oxygen” rule doesn’t need to be absolute. By removing oxygen we create conditions for the good bacteria to multiply, and these prevent the bad bacteria getting a hold and spoiling the food.

Fermentation has been used for centuries as a way of preserving food, prior to refrigeration. People were fermenting long before air-lock attachments and special fermentation jars were invented. This specialist equipment can help, but isn’t necessary.

I make sauerkraut a few times a year, and I simply don’t see the need to buy specialised equipment when it works without.

Because we are dealing with bacteria, we need to be careful not to be too over-zealous with the cleaning. I’d avoid using an anti-bacterial hand wash or chopping boards, for example. Clean is good, sterile not so much.

How to Make Sauerkraut (No Fancy Equipment Required)

I’m a big believer that you don’t need fancy equipment. I don’t use any, and I’ve been making sauerkraut and other fermented vegetables for over 4 years. If you’re a professional, that’s different, and with certain ferments, it can be crucial. But for sauerkraut, I personally don’t believe that it is.

Ingredients:

Cabbage;
1/100th weight of cabbage in salt.

So if the cabbage weighs 1 kg, use 10g salt. Basically, divide the weight by 100. (It is possible to eyeball it, but when starting out it helps to measure.)

Equipment:

A large bowl;
A glass jar that you can fit your fist into (or if you have large hands or small jars, you’ll also need a wooden rolling pin);
A weight that fits inside the glass jar (I use a smaller glass jar filled with water);
A tea towel.

Method:

I’ve included a lot of photos before to give you a really clear idea of what each stage is meant to look like.

Remove the core of the cabbage (the stalky white bit), and chop the cabbage into strips. Weigh the cabbage, put into a large bowl and sprinkle the salt on top (the amount is calculated based on the weight of the cabbage – 1 kg cabbage equals 10g salt).

Massage the salt into the cabbage with your hands, and the salt will begin to draw the water out of the cabbage. This is what you want to happen. Massage for 10 – 15 minutes until the cabbage looks like it has shrunk.

At this stage I always add a tablespoon of cumin seeds. I love the flavour it gives. You can keep yours plain, add cumin or go crazy with the spices. At the beginning, I’d suggest keeping it plain until you learn what flavours you’re meant to be looking out for.

Notice how the cabbage appears to have shrunk. (If you taste it at this point, it will taste like salty cabbage, not sauerkraut.)

Next you need to start packing the cabbage into the jar. Choose a jar that’s going to have room for the juices to expand because they will. Ideally find one that you can fit your hands into, but if not, a rolling pin will work.

Put a few tablespoons of cabbage into the jar, and press down as hard as you can. You want to squeeze out any remaining liquid. Keep adding the cabbage and pressing, and you’ll start to see the liquid rising above the cabbage.

This is important as the liquid helps keep the oxygen away from the cabbage, and creates the right conditions for fermentation.

Once you’ve put all the cabbage in the jar, add any liquid remaining in the bowl into the jar. Do not add any other liquid.

The cabbage will probably sitting slightly under the water level. To compact it down and thereby raise the liquid level, use a weight. I use a smaller jar that fits inside my large jar, or a bottle (I fill it with water to make it heavier).

If there’s any floating or escaped bits of cabbage, poke them under the liquid. Next, I cover with a tea towel.

The bottle on top is pressing the cabbage below the water line and excluding oxygen, and the bottle restricts the amount of jar entering through the lid. For me, this is enough.

If you’d like to put a lid on the jar (and it fits), this will exclude oxygen better. However, it has its own drawbacks. In the fermentation process, carbon dioxide gas will be released. Unless you remember to open the lid at intervals to allow the gas to escape (called “burping” the jar), your jar could explode. Won’t happen with a tea towel!

(That’s why you can buy fermentation valves that allow carbon dioxide to escape without letting in oxygen. For some things, like cider making, it is very important. For sauerkraut and lactic acid fermentation, it is less critical.)

Every day, check your cabbage. You’ll start to notice bubbles forming. I tend to press the weight down to squeeze out the bubbles, and also check for any floating bits. If there’s cabbage floating on the surface, it is in contact with air (oxygen), so needs to be submerged or removed.

After 1 day (see the bubbles starting to form both on top, and within the cabbage layers):

And after 3 days:

How quickly and how much it bubbles will depend a lot on room temperature. If your jar is narrow or filled to the top it can be helpful to place in a bowl as it might bubble over!

This is a different batch, but shows how much it can bubble (and I’ve seen more than this!):

I tend to keep my sauerkraut on the kitchen counter, covered with a tea towel (to also exclude light) until the bubbling subsides, which takes 1 – 2 weeks.

Some people like to leave their sauerkraut on the counter for several weeks or even months to increase the good bacteria (it will also taste more sour). In my view, it doesn’t really matter, and once in the fridge fermentation won’t stop, it will just continue very very slowly.

When the bubbling subsides, the sauerkraut should be crunchy and taste sour (but delicious). You may see a white film, this is kahm yeast and is harmless. I’ve never had an issue with mold, but if you see anything multi-coloured or blue, that batch might be better in the compost.

When you’re ready to place in the fridge, you can remove the cabbage/sauerkraut from big jar and put into something more practical. The less surface area the better, so choose a smaller jar. At this stage it is fine to place a lid on the jar.

Other Fermentation Ideas

You can ferment most veggies and even fruits, but they have varying levels of difficulty. If you’re a beginner, stick to hard veggies like beetroot and carrot, or use softer vegetables like onion as part of the vegetable mix, but not all of it.

That said, I’ve had success fermenting chillies, and I’m sure capsicums would work well also.

My personal favourites are carrot, onion and white cabbage with cumin seeds – taken from a South American ferment called curtido.

I also like beetroot and purple cabbage together because the colour is fantastic.

I made an amazing turmeric ginger sauerkraut once that tasted like piccalilli, but I’ve never been able to recreate the flavour combination since.

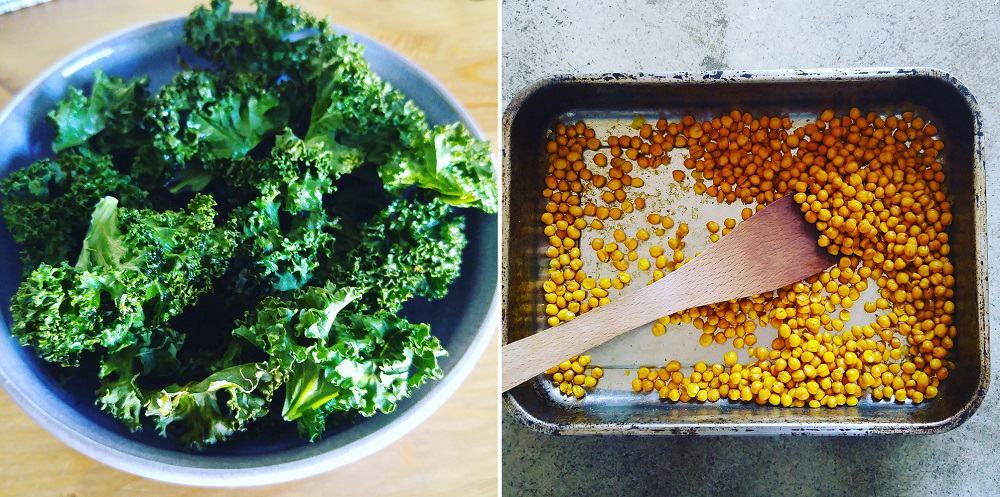
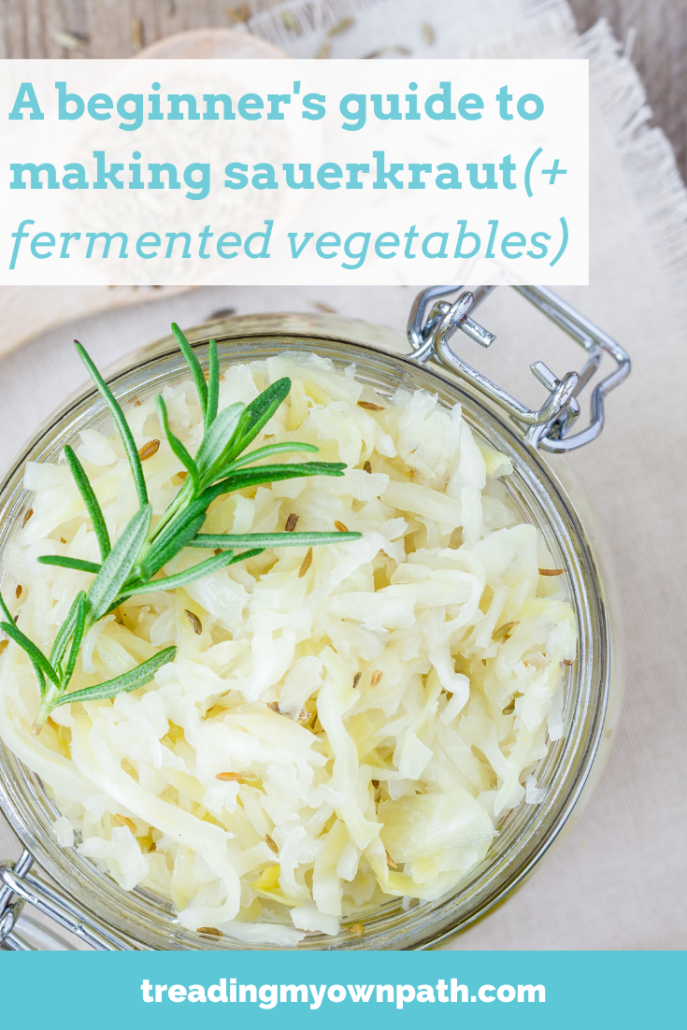
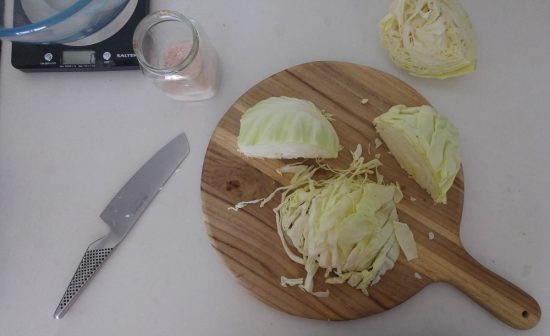
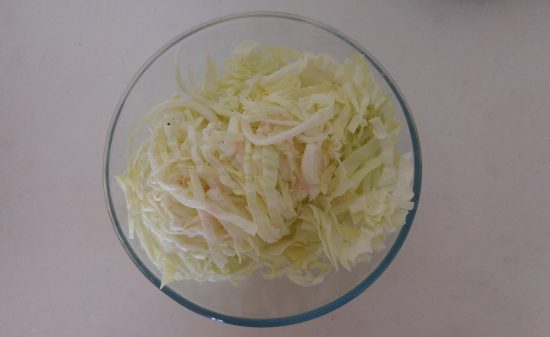
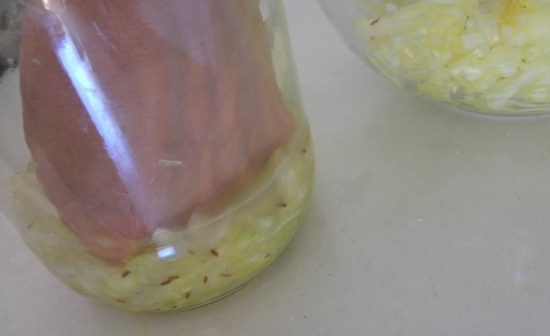
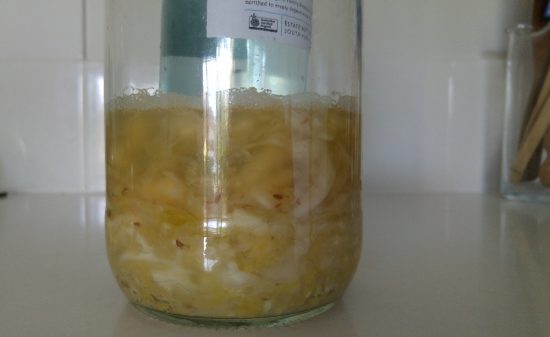
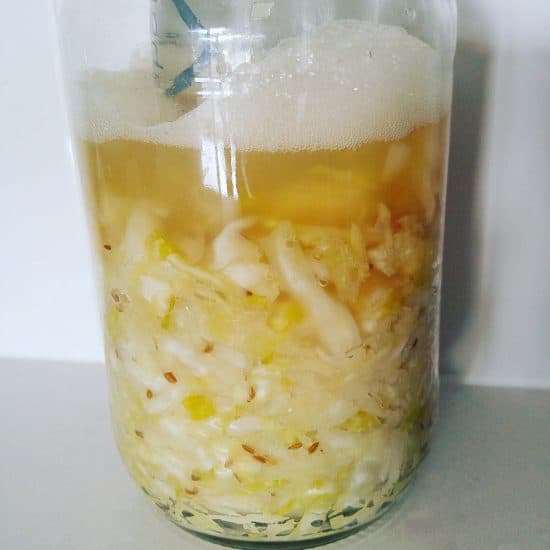
Fermentation is a great way to preserve vegetables, and it a healthier option than pickling: the food is literally “alive” with good bacteria (there’s not heat process to kill them) and there’s no added sugar.

Plus it means I get to keep my cabbage in the fridge for literally months, without feeling the slightest bit guilty about it!

Now I’d like to hear from you! Do you ferment vegetables? What are your favourite flavour combinations? Have you had any disasters? Are there any other tips you’d like to add? Are you tempted to give this a go, or does the idea still scare you a little? Please tell all in the comments below!

[leadpages_leadbox leadbox_id=123a865e9839c5] [/leadpages_leadbox]

10+ Practical Ideas for Eco-Friendly Plant Pots

I started my plastic-free life back in 2012 and my gardening life long before that. When it comes to plastic-free gardening, though, I’m still a relative newbie. I lived in an upstairs apartment for my first few zero waste years, so there was no garden to practice with.

I’ve been living in our new place, complete with garden, for over a year now, and there’s been plenty of opportunity to learn. I’ve come to realise that whilst plastic-free might be the goal, there is so much “waste” plastic that can be reused in the garden, that I’m more focused on zero waste (and reusing) than plastic-free.

I’d rather use what exists than purchase new “zero waste” items.

I thought I’d share some of my plastic-free and zero waste gardening tips, beginning with eco-friendly plant pots.

Choosing Eco-Friendly Plant Pots when Growing from Seed

The best way to avoid waste is to grow from seed. Saving your own seeds, and swapping seeds with others, is the best way to source seeds. However, it isn’t always practical. If you’re establishing a new garden, like I was, you’ll probably need to buy seeds.

However, before you go shopping, I’d recommend looking for local gardening groups and seed swaps, just in case. A few of our local libraries even offer seeds to “borrow” – the idea is that once you’ve planted them and have your own seeds, you return these to the library.

Some seeds can be sown directly in the ground, but most need planting into trays or pots before planting out.

Toilet rolls

Toilet rolls are the perfect size for seedlings, and you can fold one end over to make a base. However, if you have a productive garden, getting enough can be a challenge!

If you need more, Buy Nothing groups and Gumtree are a great way to find them. Similarly, if you don’t need your own, they are a great way to offload them to someone who does. Save them up until you have enough to entice someone to make the trip, and give them away.

It sounds bizarre, but if you look you’ll see that old toilet roll tube trading is a real thing! ;)

Newspaper Pots

My favourite way to make seedling pots is folding them, origami-style, using old newspaper (you can find DIY instructions for making seedling newspaper pots here). There’s no tape and no glue, no tools required and it takes less than a minute to make one.

I love these as, unlike toilet rolls, there’s no need to store them. Grab a couple of old newspapers and make everything you need in half an hour.

You can buy tools to make newspaper pots. They are usually made of wood, and to make the pot the newspaper is wrapped around a cylinder and pressing into an indented base (here’s an example of a wooden paper potter). Personally I think they are unnecessary, and as a minimalist I like to keep my tools to essentials only.

Wooden Seedling Flats

These are wooden boxes that are not compartmentalised, used for seed-raising. They are filled with soil and seeds sown, which can be transplanted once they’ve germinated.

Seedling flats can be made from softwood (like pine) or hardwood. If looked after properly and maintained, they can last several years. The most eco-friendly option are those made from reclaimed timber and offcuts.

Soil Blockers

Soil blockers are metal presses that allow you to press soil together to make cells to plant seeds without any other material. I first heard of soil blockers via Milkwood, and whilst I love the idea, I’m yet to give them a go. A friend has recently purchased one so I’m keen to test it out and will keep you posted.

Purpose-Bought Compostable Pots

It’s worth noting that ‘compostable’ is not the same as ‘biodegradable’. Compostable means it will break down in a compost bin or soil into humus (natural material) with no toxic residue. Biodegradable means it will be broken down by bacteria under certain conditions (often tested in a lab).

A ‘biodegradable’ label does not guarantee it will be broken down into constituent parts, only that it will break down small enough that it cannot be seen. It does not guarantee there will be no toxic residue.

There are a lot of pots that fall under the “compostable” category. The most eco-friendly ones are natural and made of waste materials like coconut coir or aged cow manure. Less environmentally sound ones are made with brand new wood fibre, and/or peat moss (removal of peat moss has been linked to global warming).

Whatever they are made from, they are designed to be single-use. They require energy to manufacture, package and transport. If we can use what we already have, that is a more eco-friendly option.

They are more durable than newspaper or toilet rolls, so are a good option for growing seedlings to sell or where they need to look more professional.

Purpose-bought Biodegradable Pots

Biodegradable (but not compostable) pots are often made with PLA plastic, also called corn starch or plant-based plastic. This is a polyester made from plant material rather than fossil fuels like traditional polyester.

Some PLA pots will state that they are compostable, but this will usually refer to composting under controlled conditions. They should state the test standard used and be “certified compostable.” Without the certification, the claim is meaningless.

These pots are a more eco-friendly alternative to traditional fossil-fuel based plastic pots. It should be possible to reuse them a few times before they begin to break down.

Personally, if a pot says biodegradable but does not say compostable, or is made of PLA plastic, I would avoid it unless absolutely necessary.

Things I don’t recommend:

Eggshells might look cute, but they are ridiculously impractical to fill. I found the same with egg boxes, and they are so absorbent they dry out the soil, but if you don’t live in a hot climate, they might work. On the downside, too cold and damp and they will encourage mold growth.

Terracotta pots aren’t great for seedlings as the roots can attach to the clay and get damaged in transplanting. Brand new compostable seedling punnets might sound green, but they seem a waste of resources when there are so many other options to use.

Transplanting Seedlings to Bigger Pots

Sometimes seedlings need to be transplanted into bigger pots before heading out to the veggie patch.

Reusing Seedling Trays/Plastic Pots

I’m a big fan of re-using what we have. We don’t use plastic at home, but I often find plastic plant pots thrown out on verge collection day, and I collect them to re-use. Plastic yoghurt pots, milk bottles and other plastic containers that can all be re-used to make plant pots.

Plastic that has been used with soil is difficult to clean and won’t be recycled. That’s fine if you intend to reuse the plastic as plant pots again and again. If there’s a choice, it is better to choose plastic that isn’t recyclable over plastic that is, and aim for as many re-uses as possible.

Plastic that is left in the sun will also begin to photo-degrade (break down into smaller pieces). They will last better in cooler, shadier conditions.

Potting On (Transferring Plants from Small Plant Pots to Bigger Plant Pots)

Seedlings eventually grow up, and either go into the garden or need bigger, more permanent homes. Whilst it’s easy to find small pots in various sizes, as the size goes up the opportunities become more limited. Here I’ve focussed on some of the biggest options, which are big enough to plant a small tree.

Terracotta Pots

I’ve found that terracotta pots aren’t great for small plants that I intend to repot as the roots get damaged, but they are a great plastic-free option for bigger plants, bulbs or annuals. We got these pots from the verge when our neighbours moved to Queensland.

One thing to note about terracotta – it is porous, which means in hot summers it can wick moisture out of the soil. One solution is to paint or glaze on the outside or the inside, to maintain the moisture of the soil, or choose pots that are already glazed.

Wine Barrels

I love wine barrels. They look beautiful and rustic, and are a waste product of the wine industry, but they are also very expensive to buy. These two wine barrels were purchased several years ago, but now they’d cost more than $100 each. Great for a feature, but not practical if you are on a budget or need more than one.

Wine barrels can be stained or varnished to help protect them from the weather, but ultimately the wood will break down. In Perth with its long dry summers, a wine barrel receiving haphazard (or no) care should last several years. In wetter climates I’d expect they’d need more management.

Olive Barrels

Olive barrels are big 190 litre food-grade plastic barrels that olives are imported in. They cannot be re-used by the import/export industry, so they are a waste product. Yes they are plastic, but they are second-hand. Much as I hate plastic, I love re-use,. Most terracotta pots for sale in WA are imported from Italy, whereas these barrels are already here. They are also extremely low cost – one barrel costs around $25 and can be cut in half to make two pots.

I would always choose the orange barrels, which are food grade. The blue ones are chemical barrels and most originally contained pesticides and fungicides, or other chemicals. They also tend to buckle in full sun, whereas the orange ones do not.

I’ve made all my olive barrels into wicking beds, meaning they have a hole at the side rather than the bottom, and a reservoir below the soil to hold water. This means the soil can wick water from the reservoir in summer, so the plants need less watering. Because a container needs to be fully waterproof to do this, it is difficult to do without plastic.

Upcycled Things

Honestly, it is only your imagination that will restrict you when it comes to finding eco-friendly plant pots. I’ve seen garden beds and plant pots made of old toilets, sinks, bathtubs, metal tins, plastic clam-shells and much more.

Just because it isn’t round and sold in a garden centre, it doesn’t mean that you can’t grow something in it!

Now I’d love to hear from you! Do you have any other suggestions to add to this list? Do you have any “not-to-do”s or things to avoid? What’s the craziest thing you’ve ever seen used as a plant pot? And more importantly – did it work or was it a fail?! Please share your thoughts in the comments below!

[leadpages_leadbox leadbox_id=1429a0746639c5] [/leadpages_leadbox]

How I Feed My Dog Without Plastic

You may remember that my Plastic Free July pledge this year was to stop buying dog food in plastic, and start making it myself. Aside from the plastic, I didn’t love that the brand that suited our greyhound best was imported from the USA, I didn’t love that it was supporting industrial agriculture, and I didn’t love that it was highly processed.

These are all things I try to avoid, and I was very conscious that buying this was against so many things I believe in.

Believe me, we tried other brands. We tried all of the Australian ones, and several other high quality ones. Whilst he ate them all with equal vigour (our boy loves his food), we noticed other effects: fat depositing around his neck, weight gain, loose stools, and one brand that led him to go to the bathroom four times every single day.

Not to mention, all the brands left his skin very itchy. Sometimes he would nibble at his legs so much his skin would bleed.

Enough is enough. I had to at least try homemade dog food.

Our greyhound Hans came to live with us a year ago. It was time to stop making excuses, and start knuckling down and getting the plastic-free dog food happening.

 Getting Started with DIY Dog Food

The internet can be an overwhelming place, and full of contradictory information as to what is best. My three main concerns were:

  • How would I know how much to feed him? (Wet food is very different to dry food.)
  • How would I ensure he was getting all the nutrients he needed?
  • How would I know that the food was safe?

Before I go any further, disclaimer. I am not a vet, nor am I an animal dietitian. This is not professional advice nor a recommendation. This is what I am exploring for our dog based on my own research and am sharing for information purposes only. Please do you own research or consult a professional.

How Much Do I Feed My Dog?

There are plenty of guidelines for feeding dogs wet or homemade food on the internet – and of course, they are all slightly different! I realised that if I underfed or overfed him, it would eventually become apparent with changes in his weight, energy levels and appearance.

Hans weighs 30kg, and he’s being fed 800g – 1kg of food per day.That seems to fit within most recommendations.

How Do I Ensure My Dog Gets All the Nutrients They Need?

I worried about this for a while, before realising that there are plenty of commercial pet foods that fall short here. Dog nutrition wasn’t even considered a few decades ago. Not forgetting, there are plenty of people who do not consume all the nutrients that they need.

In natural habitats, dogs are scavengers. They don’t get two meals a day fed to them out of a bowl. They might not get two meals a day.

That’s not to say I don’t want to do my best. But it gave me some perspective.

I looked into nutritional supplements to add to homemade dog food, but many of the recommended ones are not available in Australia.

I looked at the labels to discover the ingredients, did some research into the nutritional benefits, and opted to make my own.

How Do I Know My Homemade Dog Food Is Safe?

That was the easiest one to answer, because there is plenty of information on the internet regarding ingredients that are safe for dogs, and those that are not.

The second thing I found helpful was to look at the ingredient lists on the dog food I was buying, and try to mirror these ingredients in the dog food I was making.

Half the ingredients are things commonly available: carrots, sweet potato, rice. Other ingredients had unpronounceable names. For these, I asked the internet:

  • What is [insert name of unpronounceable ingredient]?
  • What foods contain [unpronounceable ingredient]?

Then, if I wasn’t sure, I’d ask: is [food containing unpronounceable ingredient] safe for dogs?

It turned out that these ingredients were either preservatives or a component/vitamin/mineral found in many natural foods.

In terms of toxicity, or malnutrition – these things become apparent over time. We are keeping a close eye on Hans and if we notice any change in his appearance or behaviour, we will consult a vet.

DIY Homemade Dog Food – Vegetable Component

Dogs need protein, fat, minerals and vitamins. Dogs don’t actually need carbohydrates at all. Carbohydrates like white rice and corn are  typically used in commercial dog foods as a filler, because they are cheap. But they offer little nutritional value.

For several months before I embraced the DIY dog food, I tested various ingredients on our greyhound. I’d add a small amount to his bowl along with his kibble. He gobbled everything up. And I mean everything.

I’ve heard that greyhounds can be fussy eaters. Not our boy!

The vegetable component has three parts, in equal proportions.

1. Protein component: 33%

Rather than use carbohydrates as a base, I use lentils. They are cheap but contain protein and vitamins. Typically I use red lentils as they are quick to cook. I soak for 30 mins, rinse thoroughly, and boil in a pan for 30 minutes. Once they have cooled I blend to a puree.

Red lentils are my preferred choice, but I have also used green/brown lentils, puy/French lentils, chickpeas and black beans. (Chickpeas and black beans require much longer soaking and cooking times.)

2. Sweet Potato or Pumpkin Cooked Vegetable Component: 33%

Sweet potato is a good vegetable to give dogs, because it contains beta-carotene, a pre-cursor to vitamin A. It also grows well in Western Australia and is available all year round.

Occasionally I use pumpkin (butternut squash or Japanese pumpkins) as an alternative.

I grate in my food processor, then steam for 12 minutes until cooked, and blend together with the lentils.

3. Raw Vegetable Component: 33%

This tends to be mix of whatever is in the fridge or the garden, but typically is 50% raw carrots and 50% of a mix of green leafy vegetables, beetroot, brassicas (broccoli, cauliflower), zucchini/courgette and cucumber.

These are blended together raw, and then mixed with the lentils and orange vegetable components.

DIY Dog Food – Vegetable Fats

I add a tablespoon of oil (olive oil or coconut oil) to every meal, and/or 1 tablespoon of ground flax seeds. Hans is also a huge fan of both peanut butter and tahini so I sometimes stir this through his food as a treat.

DIY Dog Food – Animal Products Component

Hans gets a fair amount of protein from the vegetable component of his diet, but we also add fish, eggs and other animal products.

Sardines: 4-5 per Week

Rather than feed Hans fish oil or supplements, it makes sense to me to feed him whole sardines. He eats whole sardines (head, guts and all) and he loves them.

Eggs: 2-3 per Week

Several of our friends have egg-laying chickens, so we source our eggs directly from them rather than buying commercially produced eggs. I also save the eggshells, wash, dry and grind them into a powder, and add a tablespoon along with a raw egg mixed in with his food.

Chicken Necks: 4 a Day

We’ve got a system with our butcher now where we drop off a big container, and when he gets chicken necks in, he fills up the container and gives us a call to collect. I was terrified of giving Hans chicken necks at first because I’d read that dogs can swallow them whole. Of course, the first time I gave him one, he swallowed it whole. And the second one. Naughty boy!

Now I have to hold them at either end and feed them by hand to ensure he bites in the middle and chews before swallowing.

Other Meat

I’m still finding my way with this one. I’m still exploring the various butchers and trying various options, and I don’t have an answer… yet. Hans is happy with whatever he gets, so it’s up to me to find a waste-free, sustainable and local option that I’m happy with.

DIY Dog Food – Nutritional Supplement

I make up a supplement to add to the dog food to give it an extra nutritional punch. I looked at a number of supplements (both available for purchase and DIY recipes), looked up the nutritional content of each ingredient, and made my own based on that, along with what ingredients I could find.

The ingredients I use: ground flax seeds, ground sesame seeds, chia seeds, barley grass powder, lecithin, turmeric, maca powder, and seaweed (either dulse flakes or wakame).

(I realise these ingredients might sound very foreign! I’ve been able to find most of them in bulk at The Source Bulk Foods, who have 35 stores across Australia. The only one they don’t stock is wakame. They also sell other things like brewer’s yeast and other green powders which can be used instead/as well as. Outside of Australia, I’d try a health food shop.)

I’m still playing around with quantities of each ingredient, and also how much to use.

DIY Dog Food – Progress so Far

So far, we have been DIYing it for about 7 weeks. As with all new habits, getting into a routine is the hardest part. We’ve also had to pretty much empty our freezer of our food to fit in Hans’ food!

I can’t report back regarding cost yet, as we are still finding our way. I hope to do an updated post in a few months with actual recipes and costs involved.

The Positives:

Hans loves his new food! He gets much more excited now we’re serving up fresh food than he did with kibble (although he still thought kibble was pretty darn fantastic.)

I feel better about what I’m feeding him. I just feel more comfortable knowing his food is natural and not made in a factory somewhere overseas.

His energy levels are unchanged.

His stools are much better! Which is very helpful when you’re trying to pick them up with newspaper and take home to compost ;)

He has completely stopped itching. Whatever it was that was irritating his skin in the kibble, it’s no more. Hurrah!

The Negatives:

Hans has lost a bit of weight. Actually, we think he might have been a little overweight before (something that is VERY hard to tell with a greyhound). Lots of people have commented on how good he looks and how good his coat looks. But we are keeping an eye on him to ensure he doesn’t get too skinny.

We now have a new friend (or should I say trip hazard) in the kitchen. Whereas he never showed much interest before, now he knows that his dinner comes from there, he is like a constant companion. And if you open the fridge door – there he is beside you!

Did I just hear the pantry door open?

Now I’d love to hear from you! This is all new to me, so I’d love to hear from your experiences. Do you make your own dog food, and if so, what ingredients do use use? What lessons have you learned? If you want to give it a go but are unsure where to start, what are you stuck on? Are you a vet and do you have any (off-the-record) advice? Anything else to add? Please leave a comment below!

[leadpages_leadbox leadbox_id=1429a0746639c5] [/leadpages_leadbox]

6 Plastic-Free Alternatives for Shampoo and Conditioner

Last week I wrote about hair washing with bicarb and vinegar, and I promised all the non-believers that I’d follow up with a post about other alternatives to plastic bottles of shampoo and conditioner.

Here it is: more ideas to wash your hair without plastic.

This post contains some affiliate links. You can read more at the end of the post.

1. Bicarb and vinegar.

I know this might be a bit of a bold one to start with, but I want to say that it’s worth considering! No, it doesn’t work on everybody’s hair, but it’s honestly worth a try. You won’t smell like fish and chips, promise.

I tend to use rye flour rather than bicarb because the pH is closer to the skin’s pH, and it makes my hair softer, but the principle is the same for both. Here’s the instructions.

Moving on…

2. Shampoo and conditioner from bulk stores.

Not all bulk stores have a non-food section, but many do. Bulk stores with a focus on waste reduction (such as my local store The Source Bulk Foods) usually stock these products, and you can buy bulk shampoo, conditioner and other products in your own containers.

Health stores often stock bulk personal care products too, so if you don’t have a bulk store locally, check out any health stores close by.

3. Bar shampoo and conditioner.

Many people who are trying to reduce their plastic use make the switch from liquid shampoo to solid shampoo because of the reduction in packaging. In recent years the number of options have exploded, which means you can find one that will suit your hair type and budget.

If you’re in Australia or New Zealand, Ethique products are definitely the most popular option with my readers. This New Zealand company packages everything plastic-free.

You can order direct from their website, but if you’re looking for deals or offers you’re better off trying Biome, Flora & Fauna or Nourished Life, who all stock a good range and often have deals.

If you’re in the UK, &Keep is a great online store with an excellent range of plastic-free products and they stock a really good selection of solid shampoo and conditioners.

Lush Cosmetics is another option if you prefer to shop on the high street, with stores across the world (including Australia, USA and UK).

There’s also heaps of micro businesses at local markets (I’ve seen several here in Perth) and online via Etsy. Whilst I can’t recommend anything in particular (I wash my hair with bicarb and vinegar, remember?!), I do love supporting local and independent businesses, and it’s great to find someone in your neighbourhood making products.

4. Shampoo and conditioner in refillable bottles.

I don’t recommend purchasing shampoo and conditioner in glass (or other non-plastic containers) as a zero waste option unless they are going to be refilled. Recycling is such an energy intensive process, and there are so many other alternatives, that I truly see it as a last resort.

Rather than recycling the bottles, some companies will allow you to return your bottles for cleaning and refilling. This means you buy a product from them, and can return your empty when purchasing a new one. You don’t actually refill the container yourself, the company takes it away, cleans it, and refills on the production line.

Whilst these companies are not easy to find, they do exist. Plaine Products in the US is an excellent example: they allow customers to return bottles for refill and reuse. I think this is something we will begin to will see more and more of.

(This isn’t to be confused with companies collecting containers back for recycling – such as Lush’s black pot recycling scheme. Recycling takes far more energy than simply washing and reusing.)

If you buy from someone who makes their own, ask if they can refill your containers. Before switching to bicarb and vinegar I purchased shampoo from a small business called Earth Products in refillable, returnable bottles that I provided. The owner didn’t sell refills as such, but was happy to refill my bottles when she made a new batch. I simply had to drop my bottles off in advance.

5. Soap Nuts

Soap nuts are often touted as a a laundry detergent alternative, but recently I met a lady on a course I was running who washed her hair with soap nuts. Soap nut shampoo? I was intrigued.

Soap nuts are dried brown wooden berries, slightly sticky, that have a saponin content. I’m always keen to try new things, so I gave them a go. I followed Monique’s instructions:

Place 9-10 soap nuts in a jug and pour over 500ml of boiling water. Allow to sit overnight. Remove the soapnuts from the liquid (they can be reused several times) and store the liquid in the fridge until ready to use.

I filled 1/4 measuring cup with the liquid and used in place of shampoo. It doesn’t foam like shampoo. I finished with vinegar rinse like usual. My hair felt soft and clean. I’m at day 3 now, and my hair could do with another wash, so it doesn’t last as long as bicarb vinegar, but definitely works better than plain water (for me).

6. Shampoo and conditioner in glass.

As I mentioned above, from a zero waste perspective I recommend the other alternatives over choosing glass unless it’s going to be refilled. Of all the options, it’s the more wasteful one. There’s a huge carbon footprint associated with transporting glass, not to mention that shampoo is 70-80% water. Then the glass has to be collected and recycled.

However, we’re not talking about zero waste, we are talking about plastic-free. I definitely purchased non-refillable products in glass at the beginning of my plastic-free journey, and sometimes these choices are important stepping stones to better ones down the track. If you’re not ready for bicarb or bar shampoo and don’t have access to bulk stores, this might be a good step.

If you do decide to look for products packaged in glass, try to find products made locally first. They will have a lower footprint. Try crafts markets and farmers markets, or investigate health stores to see if they stock locally made products.

Now I’d love to hear from you! Do you have an eco friendly solution for washing your hair? Any other method you’d recommend? Any experiences with any of these that you’d like to share? Please tell us your thoughts in the comments below.

[leadpages_leadbox leadbox_id=1429a0746639c5] [/leadpages_leadbox]

(Disclaimer – this post contains affiliate links, meaning if you click a link and choose to make a purchase, I may be compensated a small amount at no extra cost to you. I only recommend products and businesses whose commitment to creating zero waste and plastic-free solutions I believe in wholeheartedly.)

How I Wash My Hair with Bicarb and Vinegar

Most people are a more than a little intrigued when I tell them I wash my hair with bicarb and vinegar. (The ones that aren’t? They either say, me too. Or they raise their eyebrows in slight alarm!)

Then of course, everyone wants to know the specifics. How does it work? How is it applied? How often do I need to wash my hair? All great questions. If this has been puzzling you, today I’m going to share some answers.

If you’re really not up for trying it yourself, I’ve also shared a post on alternative plastic-free hair shampooing options. But before you head over there, why not read this anyway – you might be pleasantly surprised!

Washing My Hair With Bicarb and Vinegar

I’ve been washing my hair with bicarb (sodium bicarbonate, also called bicarbonate of soda or bicarb soda) and vinegar since 1st June 2014. I wrote a blog post about it at the time, along with my reasons why (aside from avoiding the plastic bottles). Three years later, I’m still using it, although I often use rye flour as an alternative to bicarb (I’ll talk about this later).

Here’s a picture from the first washes back in 2014…

…and here’s one from this week.

I’m definitely a convert.

So how does it work?

How much of each (bicarb and vinegar) do you use?

I have slightly-shorter-than-shoulder-length hair, and I use between a teaspoon and a dessert spoon of bicarb per wash. This is my shampoo replacement. I use 1/8th cup of white vinegar, diluted to a cup with warm water, as my conditioner replacement.

How do you apply bicarb and vinegar to your hair?

I mix the bicarb with a small amount of water to make a watery slurry (bicarb is water soluble). I apply to my hair, rub in (you wont be able to feel it like you can regular shampoo) and then rinse off with warm water.

I pour the vinegar/water mix over my head slowly, rub in, and then rinse off as I would regular conditioner.

I towel dry my hair as normal.

What containers do you use to store them?

I don’t keep them in the shower. I keep a jar of bicarb under the sink, and a bottle of white vinegar under the sink too. After trying various bowls and cups, I now use my stainless steel measuring cups in the shower. I was never particularly worried about breakages, but it could happen. I also find it easier to pour from the measuring cups than a regular cup or bowl.

A friend of mine tried bicarb and vinegar hair-washing, and kept the diluted vinegar ready in a bottle in the shower. I don’t do this because I learned the hard way that vinegar + hot water is a much more pleasant experience than vinegar + cold water. I would only do this if I lived somewhere so hot I wanted a cold shower.

Aren’t you meant to use apple cider vinegar?

I use regular white vinegar. I know that apple cider vinegar is commonly cited as the vinegar to use, and I’ve tried it, but I prefer white vinegar. I find apple cider vinegar leaves my hair duller. Apple cider vinegar is slightly less acidic than white vinegar, but I’m diluting 1:8 times with water, and rinsing off after a minute or less.

Don’t you smell of vinegar?

Actually, no. If you’re worried about smell, white vinegar dissipates almost instantly upon rinsing. Apple cider vinegar will take a little longer. The first time I ever tried this I was paranoid that I smelled like fish and chips, but I think it was just that my hair is much closer to my nose than anyone else’s.

If you’re really worried about smell, or miss the fragrance of traditional shampoo, you can add a 1-2 drops essential oil to the vinegar before applying.

How often do you wash your hair?

I wash my hair every 3-5 days. Not so much because my hair gets greasy, but because the curls start to look straggly. If it’s only been 3 days, I might omit the bicarb step and just do the vinegar rinse.

Will my hair fall out?

There was an article going around the internet, stating that using bicarb and vinegar to wash your hair will make it fall out. I’ve written my thoughts on that here. There’s no reason why using bicarb or vinegar to wash hair would cause hair loss.

After 3+ years, I still have a full head of hair.

You mentioned rye flour. How does that work?

Instead of using bicarb, I’ve also used rye flour to wash my hair. Bicarb is a salt, and is mined from the ground. Rye flour is ground from rye, a plant. Sustainable speaking, rye is probably the more eco-friendly option. It also leaves my hair much shinier than bicarb. Plus, as it’s not water soluble, it mixes with water to form a paste which is much easier to apply to your hair.

On the down side, if you aren’t careful you can end up with huge flakes of rye flour that look like brown dandruff. Believe me, discovering chunks of flour falling out of your hair as you ruffle it is quite alarming.

To reduce this, you can sieve the flour before you use it (a tea strainer will likely have the finest mesh). Also, post washing, be sure to towel dry your hair really well. And never ever apply to dry hair, or you will end up with a flour crust on your scalp!

Anything else?

If you’re switching from regular shampoo, your hair will take some time to adjust. Regular shampoo tends to strip oil from the scalp, so the skin compensates by making more oil. Some people find when they first use this that they have oily hair for a few days, or even a few weeks. Push through!

Ultimately though, this isn’t for everybody. It works particularly well on people with curly hair. If you’ve tried for a few months and you still don’t like it, maybe it’s not for you. Don’t worry, there are plenty of other options.

If you haven’t tried it, I definitely recommend you give it a go! There’s something very satisfying about personal care products that come from the pantry and with single ingredients.

Can I tempt you?!

Now I’d love to hear from you! Have you tried the bicarb and vinegar method? Do you love it? Did you hate it? Are you tempted to give it a go? Please share your thoughts in the comments below!

[leadpages_leadbox leadbox_id=1429a0746639c5] [/leadpages_leadbox]

How to Buy Milk, Yoghurt and Cheese without Plastic

When it comes to dietary staples, some things are very easy to find without plastic or single-use packaging, and others, not so much. Fresh fruit and vegetables? Easy. Fresh bread? Ditto. Milk, cheese and yoghurt? Not so much.

One of the most common questions I receive during Plastic Free July is “where do I find milk (or cheese, or yoghurt) without plastic?” I faced this struggle at the beginning of my own plastic-free journey back in 2012.

(Today I choose a plant-based diet, as do many zero wasters. That, however, is a conversation for another day. Not everybody is ready – or interested – to cut out dairy products from their diet, and I respect that. I have no interest in trying to persuade anyone otherwise. The question is – can these products be sourced without plastic? And the answer is yes.)

If you’re looking to find milk, cheese or yoghurt without plastic, here are my solutions.

Buying Milk Without Plastic

You’re unlikely to find milk in bulk or milk in glass at the supermarket. But that doesn’t mean that it isn’t available in your area.

The first places to look would be independent grocery stores, farm shops and health food shops. If you don’t see anything, ask the question – they may not stock any themselves but they may know where does stock it. Alternatively, they may know which brands are plastic-free – and if you know who makes it, it will be far easier to track it down.

In Perth, there are four different brands which sell milk in glass: Sunnydale, Grumpy Farmer, Over the Moon Organics and Bannister Downs. They can be found at IGA stores and independent grocers like the Boatshed and Farmer Jacks. No one store sells all four brands, so you have to do your homework and check out all the stores.

Secondly, try Farmers Markets and farm gates. Some farmers sell milk directly to customers and use a refill system, dispensing with single use bottles altogether. This is fairly common in New Zealand.

Thirdly, you could look for hobby farmers and people who keep their own milking animals. I live in a city, and I have friends (who live in the city also) who keep goats, and other friends who keep a milking cow. I know that might be a step too far for many, but if you really want a solution, don’t rule this option out. These things are more discoverable by word of mouth, but social media is a good place to start.

Something I did was supplement my dairy milk with nut milk. I realised that it was much easier to find cashews or almonds in bulk than it was to find dairy milk in glass, so I began to use nut milk with cereal and in baking. Making your own nut milk is really simple, and you can find instructions for making DIY cashew milk and almond milk here.

Buying Yoghurt without Plastic

If you can find milk in glass, there’s every chance that you will also be able to find yoghurt and cream in glass too. I have seen yoghurt for sale in glass and also in ceramic pots in supermarkets. However, I’d recommend looking in independent grocers, health food stores and farm shops for more options.

If you can’t find it, you might like to know that yoghurt is actually very easy to make yourself. All you need is milk and a yoghurt starter culture (which actually is just a tablespoon of live yoghurt). A thermometer is useful, but it’s possible to manage without. You definitely do NOT need any fancy gadgetry, such as a yoghurt maker. A glass jar wrapped in a tea towel will be fine. Here’s my DIY tutorial for how to make your own yoghurt. Homemade yoghurt will typically last 3-4 weeks in the fridge.

If you can’t find yoghurt in glass, consider buying the biggest tub rather than the individual pots and portioning it up yourself. That will create less waste overall. If you like flavoured yoghurt, you can make it yourself by blending a little sugar and fruit with plain yoghurt.

Buying Cheese without Plastic

Cheese is the easiest of the three dairy products to find without plastic. Most supermarkets will have a deli section, but if not, look for local independent stores, farmers markets, specialist cheese shops and other grocers.

Some  deli counters will have paper to wrap cheese, so you can ask for no plastic. Many will let you bring your own containers.

Some types of cheese are sold in brine (mozarella, feta) or by weight without packaging (ricotta, cream cheese). These are the easiest types of cheese to buy without packaging, simply by bringing your own containers. Smile, act confident and tell the person behind the counter than you’d like to use your own containers as you are avoiding single-use plastic.

Often, your success hinges on the way you do it. Acting like you do it all the time boosts the confidence of the person behind the counter to accept your request. Also, stating what you’d like to do rather than asking adds another degree of conviction. “I’d like to” is much more convincing than “is it okay to..?” If they say no, act surprised, but if they are truly insistent, don’t push. Almost everyone will say that’s fine.

It’s worth mentioning why (no single-use plastic) because staff won’t necessarily realise why, and will wrap your lovely container in gladwrap for “protection” – or pop it in a bag!

Many types of cheese are bought in large wheels or blocks, and will be pre-cut and wrapped by the store to save time. If you can only see pre-wrapped cheese behind the counter, ask whether you can have a piece cut fresh from the block, or whether you can leave your containers there for when the next batch is cut.

Some pre-packaged cheese can be found wrapped in wax rather than plastic. Most of these waxes are made from paraffin (which is sourced from petroleum). Studies have shown that paraffin wax can be broken down in the presence of Rhodococcus sp so if you do buy these cheeses, try composting the wax.

If you’re still having no luck, consider buying the biggest block of packaged cheese you can find (it will mean less packaging overall). Cheese freezes really well, so you can, freeze what you don’t need straightaway.

Bagged grated cheese is all packaging and very little product, so avoid these products and grate your own from the block when you get home. (A food processor with a grater attachment is very useful if you use a lot of cheese. If you’re less fussy, whizzing it through the food processor will also work.) The same is true for cheese slices – it will take less than 30 seconds to slice a block and save lots of packaging, as well as money.

Something else to consider is making your own. Ricotta, mozzarella and halloumi are all incredibly simple to make using milk, and your cheese will be ready in 1 – 3 hours. Labne, a soft cheese made from yoghurt, is also super easy to make. If you’re not confident to make your own, look into cheese workshops in your area.

Still Stuck?

If you feel like you’ve exhausted all these options and you still don’t have a solution, don’t stress. Look at choosing products with the least amount of packaging overall, and ensure that whatever packaging you do choose is recyclable in your local area.

Remember, there are so many ways to reduce our waste in all areas of our life. Milk, cheese and yoghurt are just three things that we consume. There are plenty of other things to work on!

Don’t let not finding these items without plastic be a reason to give up altogether. Much better to focus on the 97 other things that we can change than stress about the 3 that we can’t.

Now I’d love to hear from you! Is this something you struggle with, or not? What solutions have you found? Have you had a go at DIY and how have you found it? Do you have any DIY tips to share? Anything else to add? Tell all in the comments below!

[leadpages_leadbox leadbox_id=140b48fc6639c5] [/leadpages_leadbox]