Tag Archive for: organic gardener

Community Composting (+ Tips For Better Compost)

One of my favourite things about living with less waste is that there is never a single solution. There are always lots of solutions. Different options work better for different people and different situations, but there will always be a way.

In Australia, 40% of our landfill bins consist of food waste. Trimmed off bits, peels, skins, seeds, cores, outer leaves, shells, things we left in the fridge a little too long, bad bits, leftovers.

We toss this stuff in the general waste bin, and off it heads to landfill. Which, contrary to what many people believe, isn’t a giant compost heap. It’s a tomb of waste, sealed by layers of rocks (or sometimes layers of plastic) in between the layers of rubbish, and slowly releasing methane into the environment.

At the same time as we throw our food scraps in the bin, we head to the garden centre to buy plastic bags of compost to help our plants grow better.

We’ve got it all wrong!

So what can we do with our food scraps instead?

Before I moved to Australia, I lived in Bristol (in the UK), and I was fortunate enough to have my organic waste collected by the council every week and taken to an industrial composter. This isn’t an option where I live now (although some councils are currently trialing it).

Even if it was, I wouldn’t use that service now. I would rather keep my food waste (it is a valuable resource!) and turn it into something I can use – or donate it to someone else who can use it instead.

I’ve talked about some different ways of dealing with food waste before: DIY worm farms, done-for-you worm farms and bokashi bins. If you’re just starting out on the living-with-less-waste journey, setting up systems at home can take a bit of time.

As always, there’s a solution. Community composting!

For anyone wanting an easy beginner’s solution, or for anyone without the time or space to set up their own systems, community composting banks are perfect.
What Is A Community Composting Bank?

A community composting bank is simply a location where members of the community can go to deposit their food scraps.

(They are not necessarily called “banks”. I was thinking about this word, and whether it was better to use the word “hub”, “centre” or “facility”. A phrase popped into my head that I’ve heard many times before: “growing your own food is like printing your own money”. If compost is what helps us to grow food, then I think bank is the best word after all.)

The best composting banks are those with capacity to handle the scraps they receive; those with unrestricted access; and those that are managed/overseen by someone to check they are working properly, not contaminated or full of pests.

By “best”, I really mean “easiest to use”. That’s not to say others don’t work well too. Given the choice, I’d prefer to turn out to a facility that is open/accessible, has space to take my scraps, and isn’t infected with cockroaches.

I’d still come back if I turned up to find the place was locked, or the bins were full, but not everyone will. To reach the maximum number of people, things need to be as easy as possible.

The other important consideration is location. A 24 hour access composting hub on the other side of town is less practical than the restricted access compost bins just down the road.

As with most community initiatives, the more local, the more useful and likely to be used.

How We Set Up Our Community Composting Bank

I run a community composting hub together with my friend and neighbour. Originally, both of us listed our home compost bins on the awesome website sharewaste.com, a free-to-use service connecting people with food scraps with people with compost bins.

Around the same time, we started a Food Tree project on the land next to my house, planting 34 food trees for our community. We realised that these trees are going to need a fair bit of compost.

We had space for compost bins and we knew plenty of people in our community would be eager to donate their food scraps to our bins.

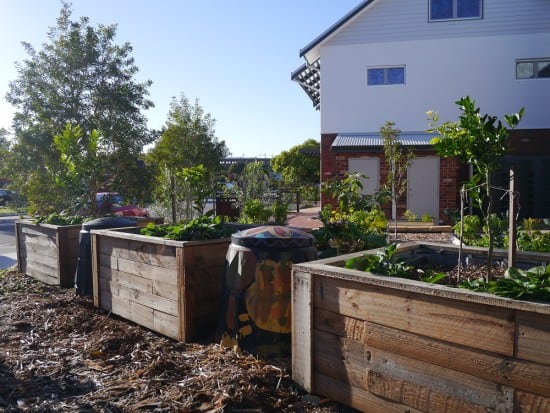
We started with two bins, and have now increased to five (all donated or sourced second-hand).
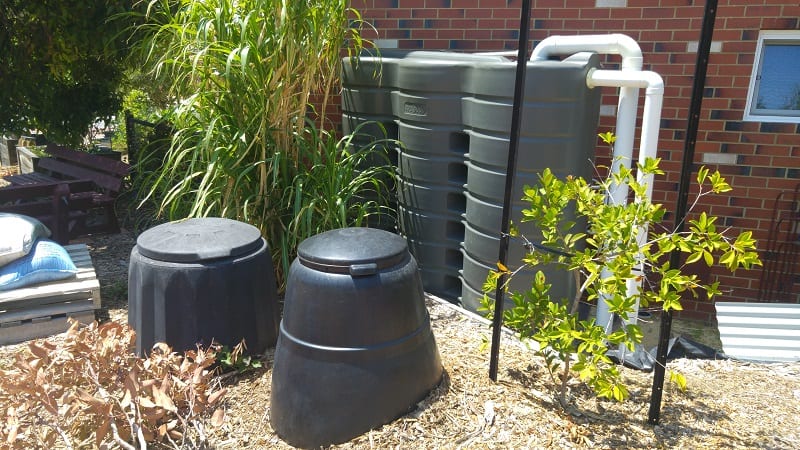
As people contact us via Sharewaste, we ask them to bring their food scraps here, and started making compost.

Managing A Community Composting Hub

As with everything, the more people who get involved with something, the more likely it is that things will go awry. With about 20 families currently emptying their food scraps into our bins, we started noticing more and more that things weren’t quite as they should be.

I should add that this is not the fault of the people donating their scraps. As the managers, it is our responsibility to make sure it is all working.

If people haven’t had compost bins before, there is no reason why they would know what is good and what is not.

There were a few problems that we had in particular.

Fresh food scraps going in whichever bin.

This meant all five bins would have fresh food scraps mixed into varying degrees of compost – frustrating when we wanted to dig out the ready compost and there’s a bunch of veggies in there too.

We realised that whilst it might be totally obvious to us which bin was the one for new food scraps, it certainly wasn’t clear to everyone!

Too many veggies scraps (too much nitrogen).

Compost bins need a balance of nitrogen and carbon. Nitrogen-rich scraps are anything green and fresh; carbon scraps are anything brown or dead. Veggie scraps are high in nitrogen. If the only thing being added is fresh green nitrogen-rich scraps, the bin will get stinky and attract flies and other pests pretty quickly.

For all of the green scraps added, some browns (carbon) need to be added too.

Food scraps not being mixed in.

A big mound of fresh veggies sitting on top of the compost pile will not break down nearly as well as those food scraps stirred in, because that is where the microbes are – inside, not on top! Not to mention that food on top will attract pests.

Too much carbon.

Less of an issue as most people are donating food scraps (nitrogen), but we did find one compost bin completely filled with shredded paper – and nothing else. Without anything else, that would have sat there probably for years, breaking down ever so slowly. In the same way as there can’t be too much green, there definitely can’t be too much brown.

Setting Up a Composting System That Works

My neighbour and I talked about all the issues, and how to reduce them in future. Community things need to be easy, and we felt a big list of rules would be overwhelming and put people off – which is the last thing we want!

We worked through the issues one by one, and have implemented a system.

Firstly, we decided that it was too difficult to expect people to figure out which bin was the one to add their scraps to simply by looking.

We decided instead to implement a linear system, where the scraps always go into one designated bin, and then we will move into other bins along the line manually.

(This means we can also check there’s nothing strange being added.)

We also decided that to make it easy for people to add carbon to their food scraps, we’d set up a bin solely with carbon so they could simply scoop some in afterwards.

Then, we added some signage and labels.

We wrote up the basics on a sign, weatherproofed it and secured it to a post.
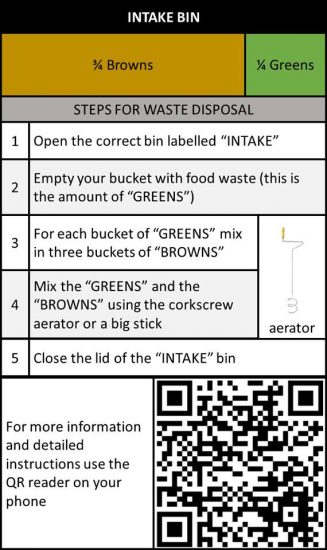
We wrote a document with more tips and tricks (the stuff that we’d like people to know) and added a QR code to the sign, so if they have a question, they can check.

We’ve also secured the aerator/composting fork to the signpost (and explained in the sign what it is for) so that it is easy for people to mix their food scraps into the existing compost.

We painted labels on the two bins that people need to use. When in doubt, always label.
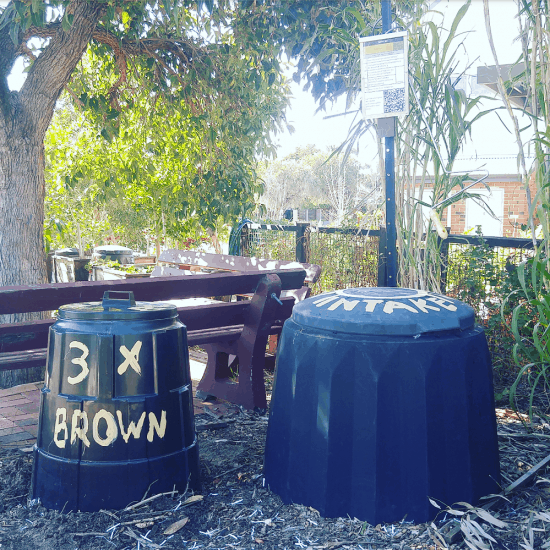
In short, we’ve tried to predict in advance what could go wrong, and then solve it before it happens. So far, it seems to be working well.

Looking for a Community Composting Hub?

If you’re feeling inspired to hook into an existing hub or maybe start your own, my first suggestion would be see who else is in your area via sharewaste.com. My second suggestion would be to contact your nearest community garden.

If both of these fail, consider whether you could set up a mini hub at your place. Even if you only have capacity to take a couple of household’s food scraps, it all helps!

Now I’d love to hear from you! How do you currently deal with your food scraps? Do you like your current system or would you prefer something different? Have you any experiences with community composting hubs – both good and not-so good? Anything other questions? Please share your thoughts in the comments below!

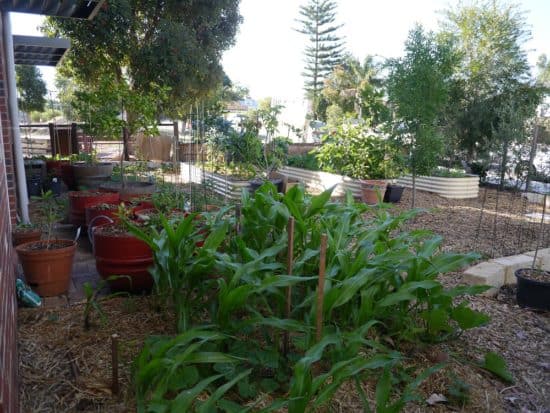
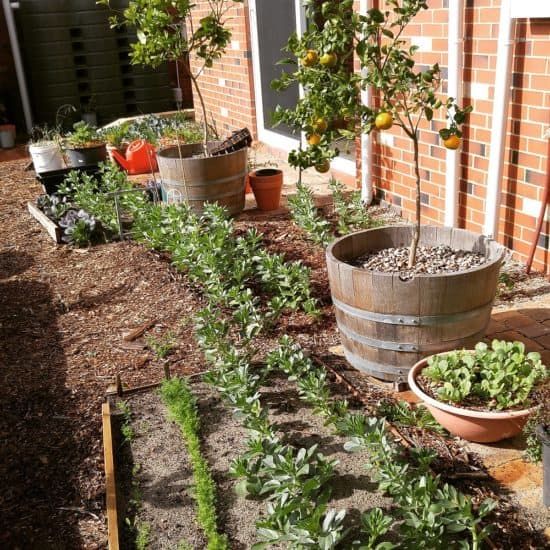
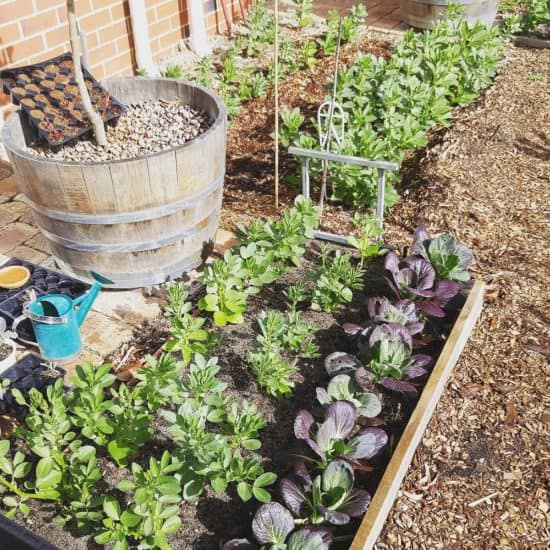
Establishing an Organic Vegetable Garden (Progress in Pictures)

It’s no secret that I love food, and I love growing my own food even more. There’s nothing more satisfying than eating something freshly picked; there’s no unnecessary single-use plastic packaging when we grow our own; and we can’t get more local than our own back yards.

Not everyone has a garden, true. When I moved to Perth from the UK, I swapped my beautiful and much-loved allotment for an upstairs apartment with a dark balcony. That didn’t stop me having a few pots outside the front door with herbs, though. Then we moved to another upstairs apartment with a bigger balcony, and I got a few more things growing.

Even the darkest, smallest balcony can grow microherbs!

Now I’ve moved to a development with 7 dwellings and a community garden, I finally have the space and the opportunity to plant more. And believe me, I’m making the most of it!

We’ve lived here for just over a year, and I thought I’d share how our garden has evolved over the time. Although there are 7 dwellings, some are still empty and others have been rented to tenants with no interest in gardening. To date, my husband and I have had the garden pretty much to ourselves. Two sets of neighbours have their own garden bed spaces, but other than that, we have free reign.

Honestly, we love having the space to ourselves, but we’re looking forward to more garden enthusiasts moving in. There’s so much wasted opportunity as we don’t have the time to turn over the beds as quickly as we should, or succession plant as regularly as we could. There are plenty of other tasks that get neglected, too.

Whilst the garden produces a lot of food, it could be so much more productive with just a little extra work.

Take the tour of my organic veggie patch (and permaculture garden in the making), Perth Australia

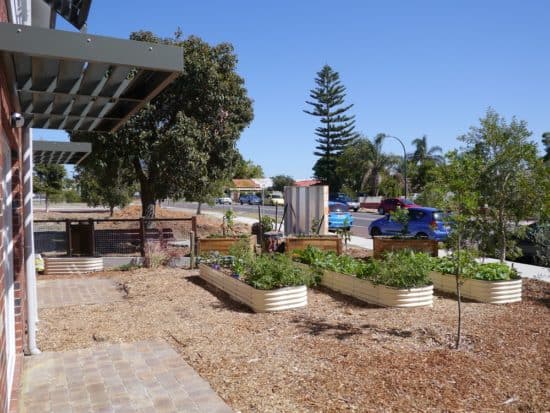
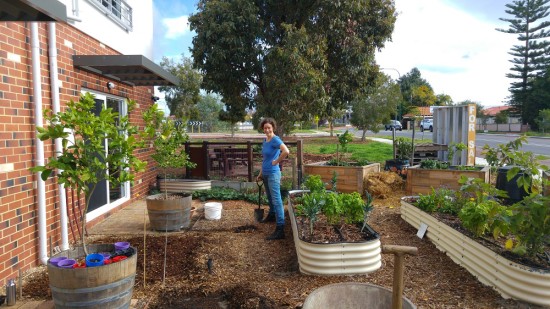
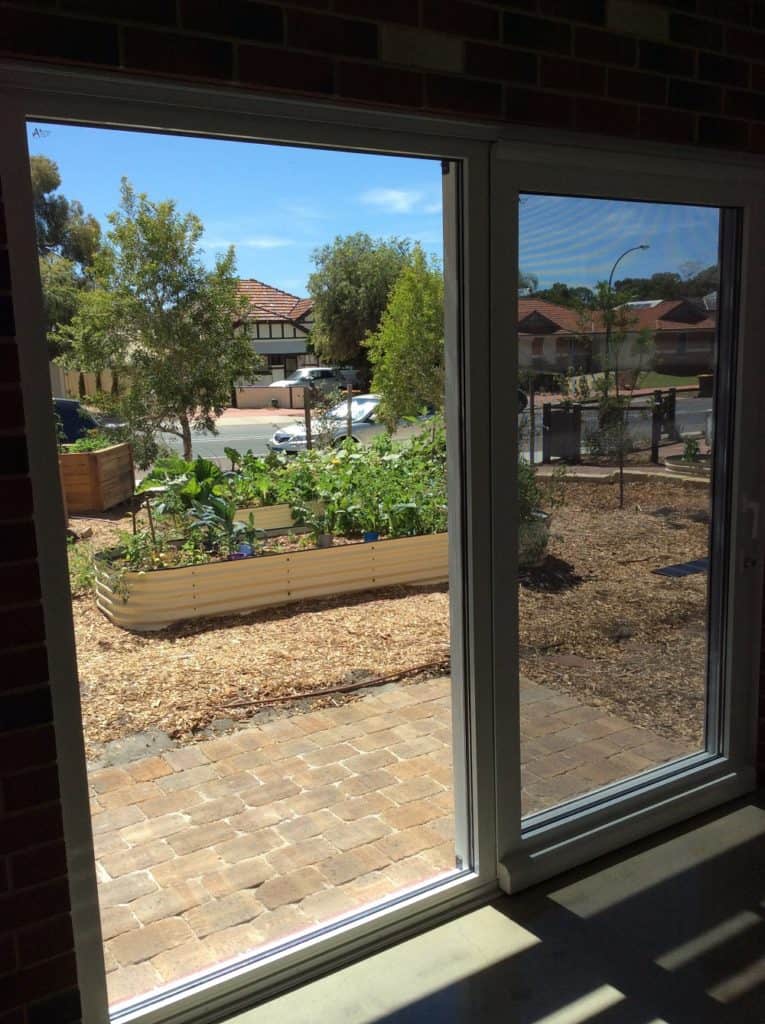
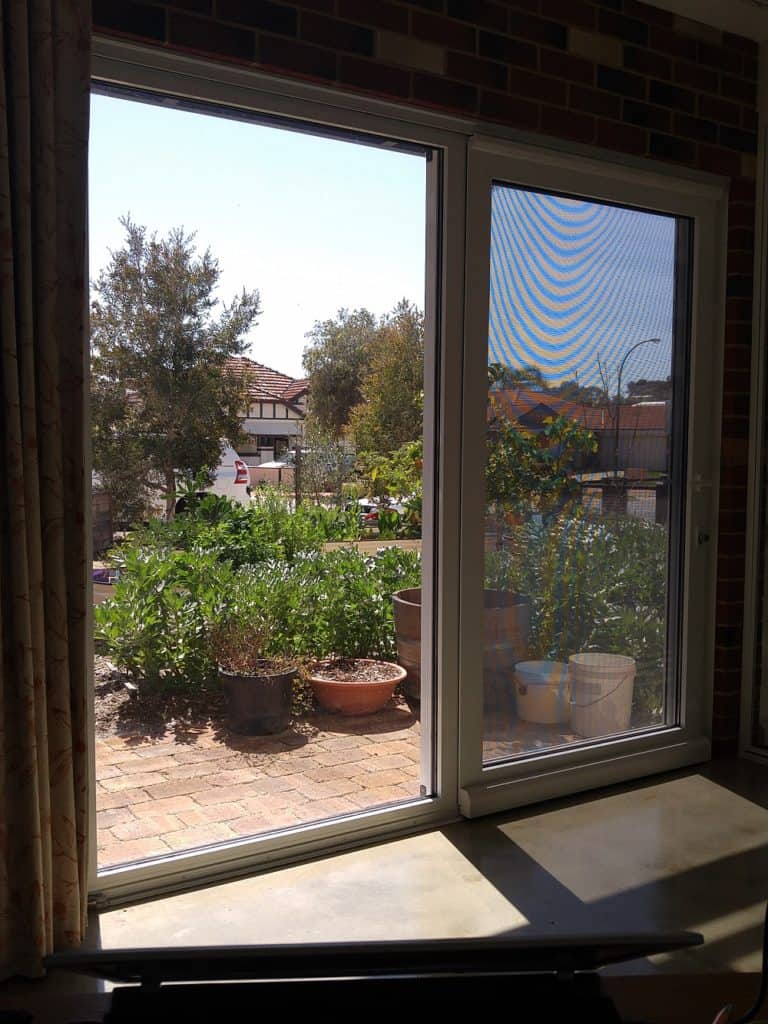
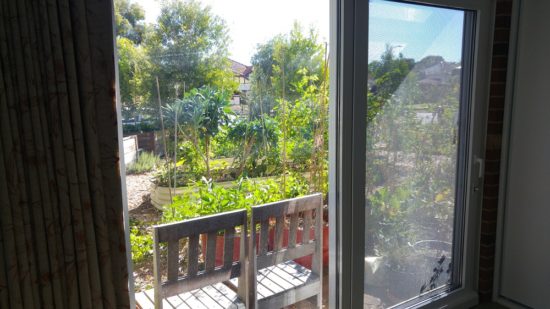
We own and occupy the ground floor flat, and the communal garden backs straight onto our home. We have two sets of big sliding doors, so the garden is an extension of our living space.

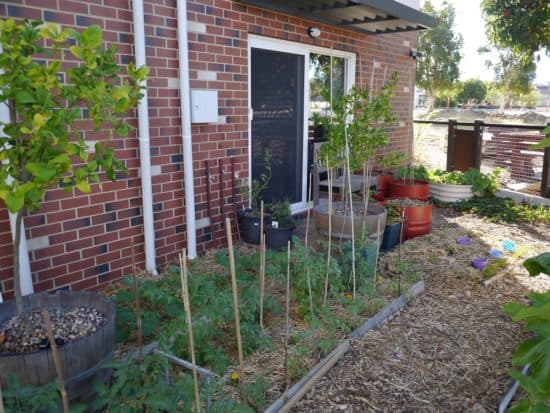
This is what it looked like when we moved in:

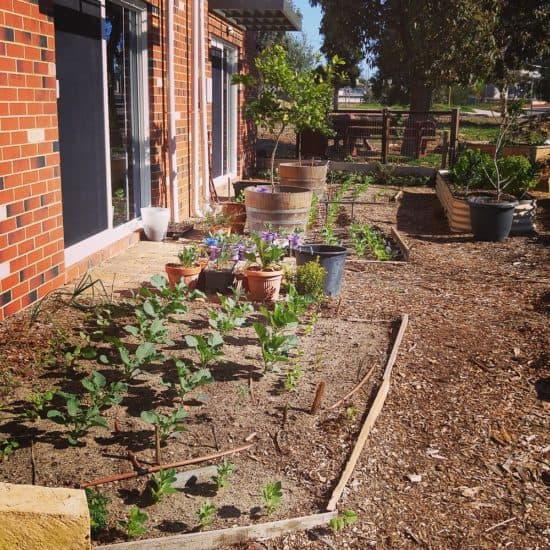
When we moved in the metal garden beds were in place, and reticulation had been installed, which definitively gave us a head start. ~April 2016

For 1 household, it’s a lot of space, but for 7 households it will be quite small. There’s also a huge amount of wasted space/growing potential, so we’ve been working hard to develop this and improve the soil and increase productivity.

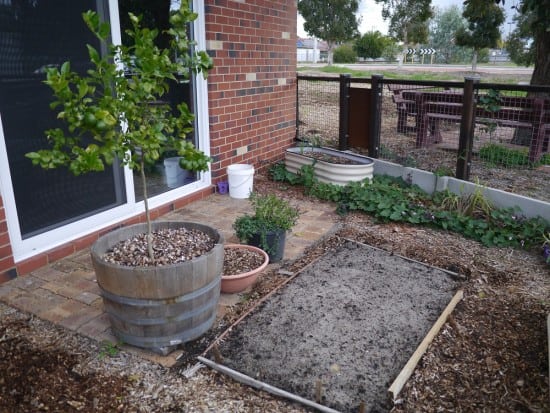
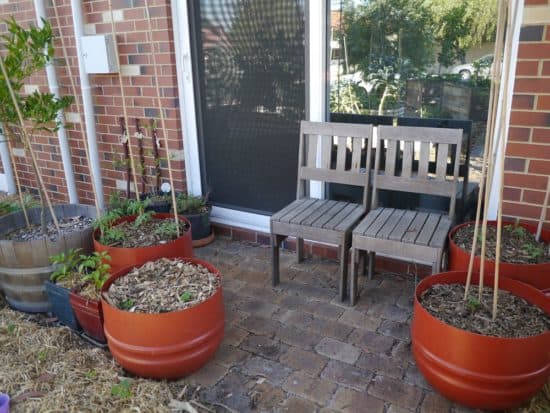
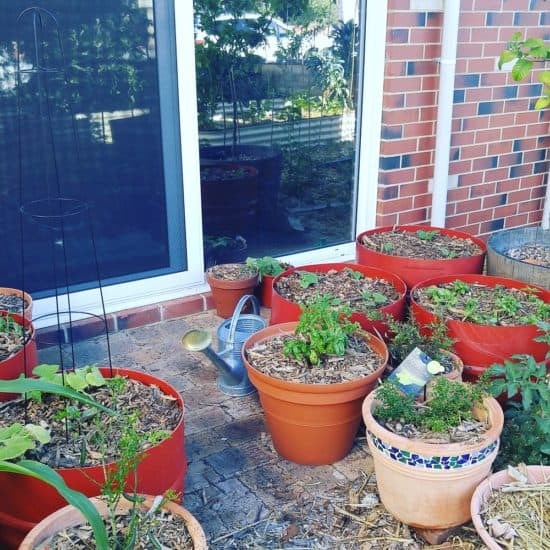
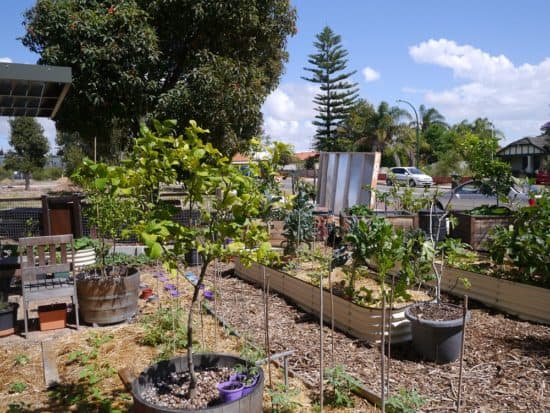
We’ve also added a lot of pots, which is a great way to decide which things work best where before digging them into the ground. The two wine barrels contain the citrus trees we had on our balcony in our previous place. All the other pots are new additions.

Creating New Veggie Beds

If you’re thinking that the soil looks really sandy, you’d be right. It is really sandy. The grey sands of the Perth Swan coastal plain (where I live) are considered to be the worst in the world. I don’t mean by disgruntled Perth gardeners, either. It’s a fact.

It means that we’ve dug in heaps of compost, veggie concentrate and clay into the sand to create soil. It might not look like it, but we have! The wood chip mulch breaks down over time to add carbon to the soil, too.

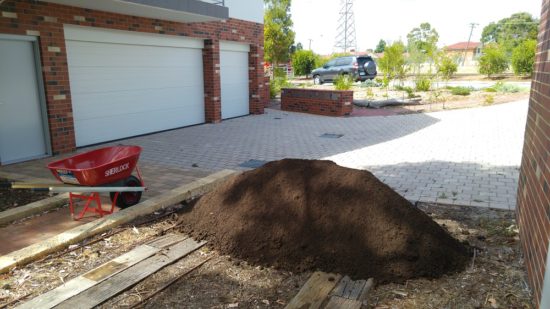
We bought a cubic metre of veggie concentrate from our soil yard and it was delivered via a tipping truck, so without packaging. It isn’t the cheapest option (we could have built up nitrogen using nitrogen-fixing plants or green manures, carbon using mulch and the soil web over time), but it meant we could plant veggies in the sand straightaway rather than waiting several months. It contains all the nutrients and minerals needed to grow veggies.

Creating Our Own Compost

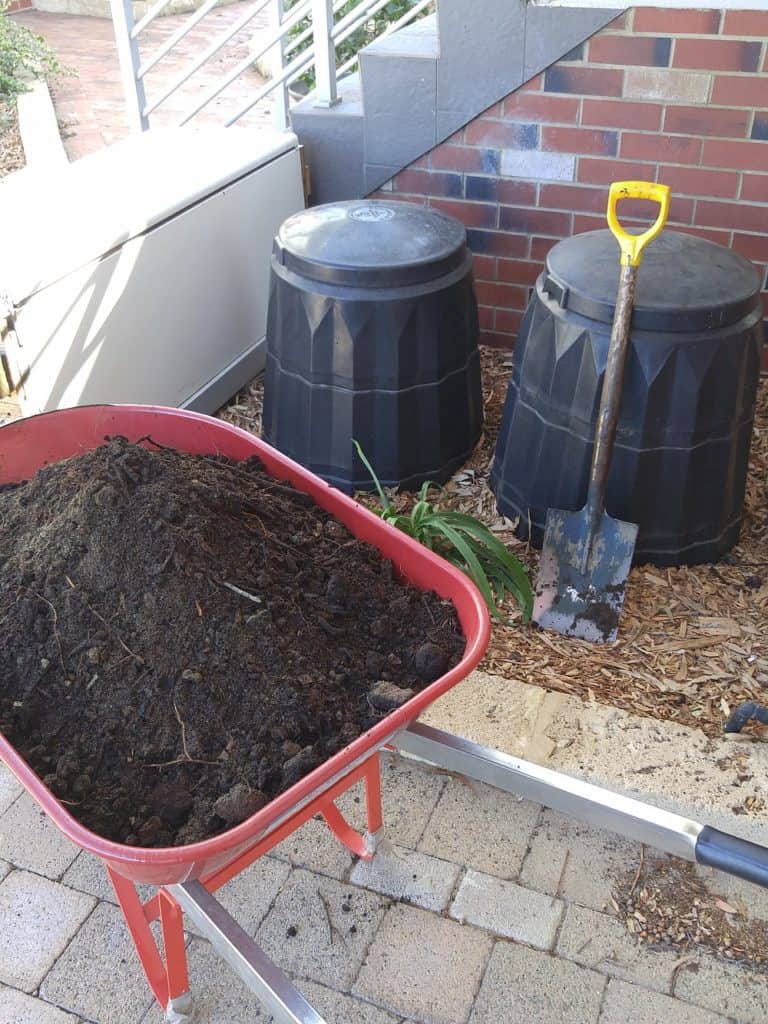
We have four compost bins and create as much of our own compost as we can. We don’t turn it as often as we should so it isn’t breaking down as quickly as it could be.

If the whole complex got involved we’d have compost coming out of our ears! The reality is, many of the tenants live on a diet of junk food (fried chicken and other fast food is delivered almost daily – I kid you not) and they don’t even compost the paper food packaging – it goes in the landfill bin. Sigh.

To top up our compost my husband brings food scraps home from his work every week (in a big 20 litre bucket), and we collect coffee grounds from a local cafe every month or so.

It’s pretty amazing that we can add stinky food scraps and a few handfuls of dried leaves to a compost bin and be rewarded with beautiful soil-like compost!

This is what your food scraps can be turned into. Beautiful compost!

Planting in Pots (and Wicking Pots)

To maximise the use of the patio area without ripping out the paving, we’ve planted a lot of things in pots. Our garden is north-facing, and the patio is one of the best spots to grow (we’re in the southern hemisphere – its the opposite for those in the north). The space is sheltered by the house by the hot summer afternoon sun, and gets full winter sun because the sun is lower in the sky.

To ignore this is a missed opportunity!

Wicking beds are self-watering pots. Not something I needed to worry about in the UK, but in Perth it is a different story. We’ve used old olive export barrels to make wicking beds – they have a hole at the side rather than at the bottom, so a reservoir can hold water for the plants.

Greening the Garden: Progress in the First Year

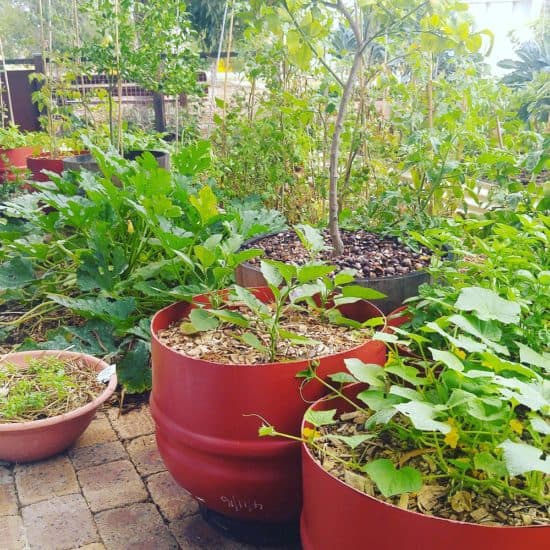
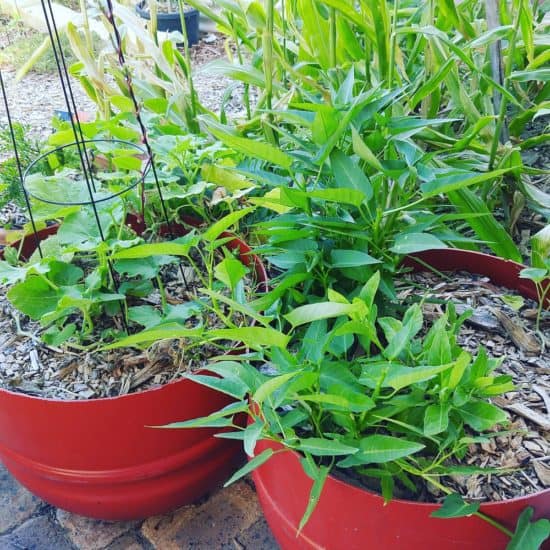
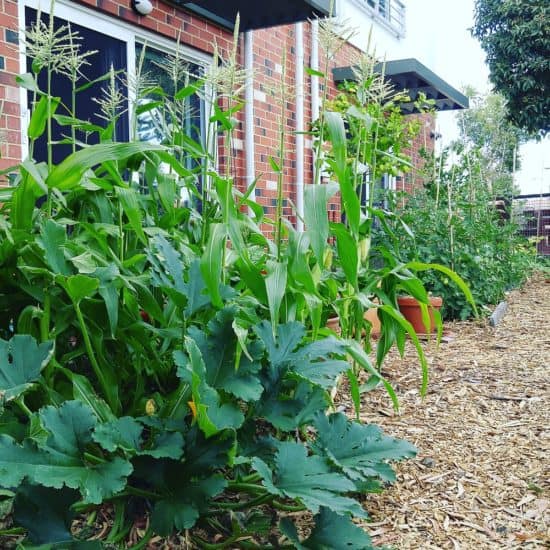
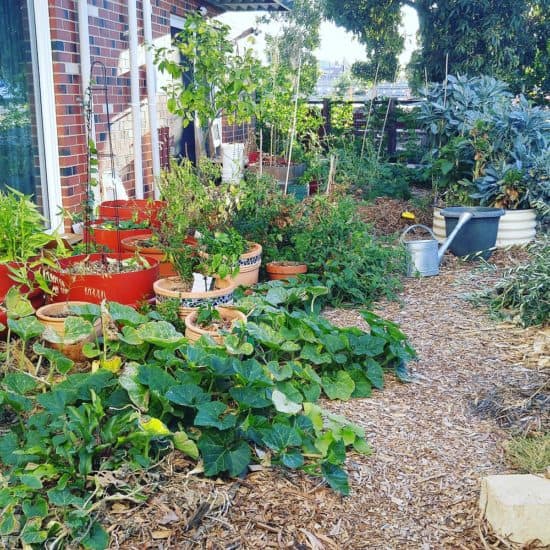
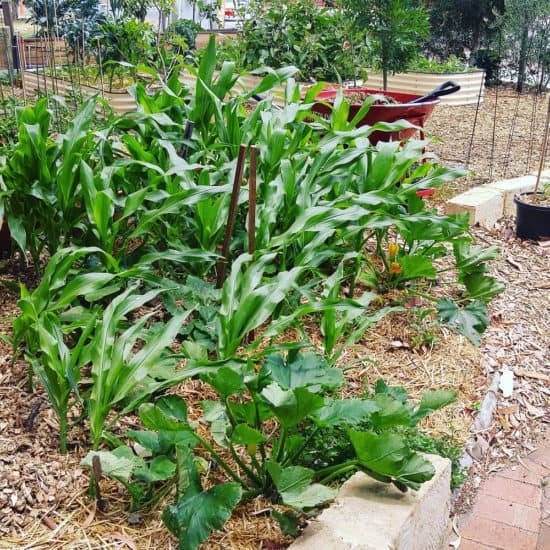
I’ve taken a few images from the same spots over time, and I’ve included a few below so you can see how things have changed in the first year.

The View from the Office Window:

April 2016

November 2016

February 2017

The Patio Space:

April 2016

November 2016

March 2017

The Ground Dug-In Beds:

July 2016

November 2016

The Veggie Beds:

July 2016

December 2016

February 2017

April 2017

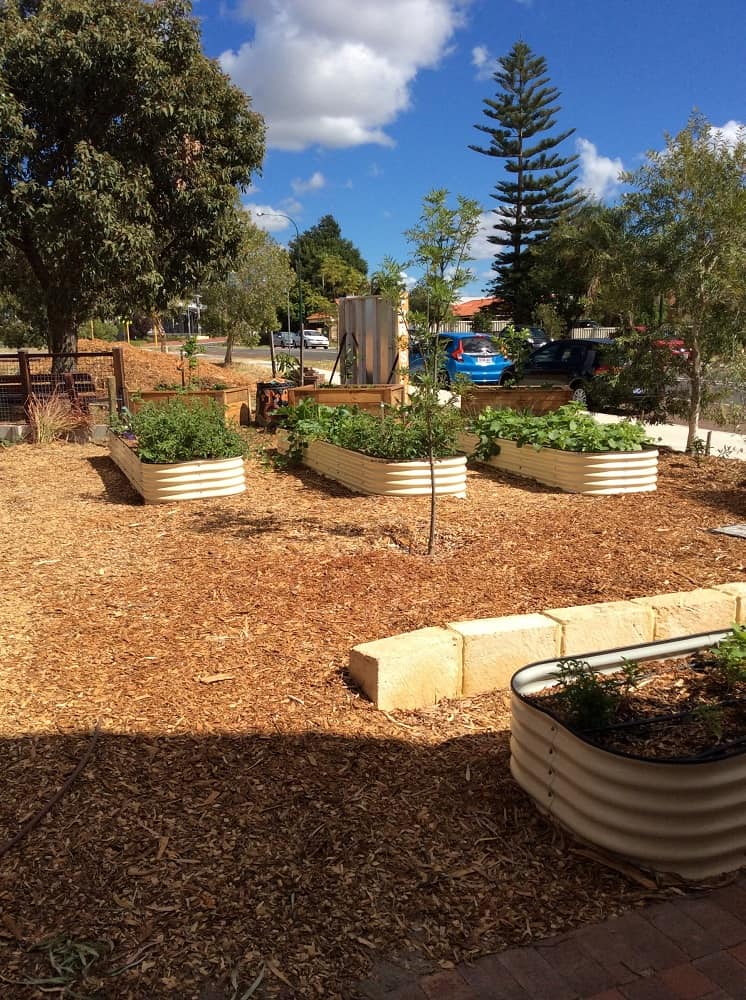
The Raised Garden Beds:

April 2016

Feb 2017

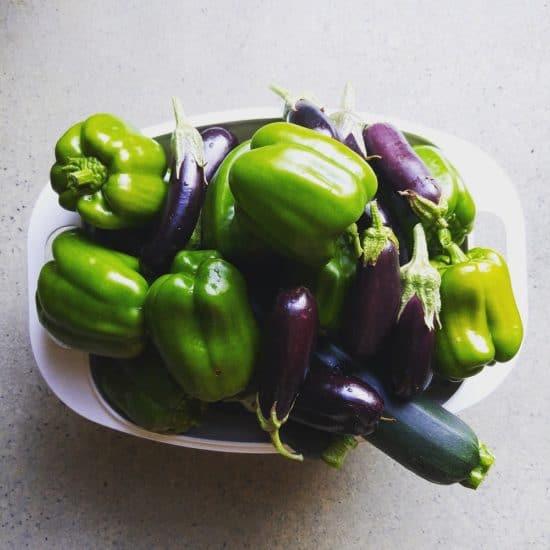
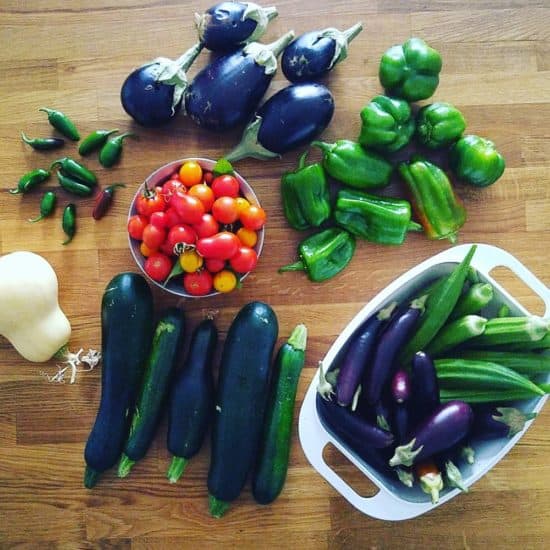
A Glimpse of the Harvest

We definitely aren’t growing all our own vegetables, but I do think we have the space. Unfortunately space isn’t the only constraint; the other is time! We did manage to produce a lot of our own vegetables over summer. Here’s a glimpse:

Perth has a warm enough climate to garden all year round, and in many ways summer presents more challenges than winter. We’re currently in the process of planting our winter veggies. By the start of next summer we’re expecting to have new neighbours, so it will be interesting to find out how the garden evolves. I’m looking forward to more hands!

Now I’d love to hear from you! Did you enjoy the garden tour? Did you have any questions? Is there anything you’d like me to write about in more detail? Do you have your own garden, and what tips do you have to share? Anything else you’d like to add? Please leave your thoughts in the comments below!

How to Make Zero Waste DIY Newspaper Pots

I’m all for small and low cost (or free!) solutions, particularly when they mean zero waste. We’re in the midst of sowing our autumn and winter seeds for our vegetable garden right now, which means we need lots of seedling pots. (Sowing seeds directly into the ground tends to mean the little seedlings get munched by pests before they have the chance to grow big.)

I don’t want to buy new. I’ve learned (the hard way) that reusing the tiny plastic cells from the garden centre (the ones they sell punnets of seedlings in) doesn’t work too well. They are too small and they dry out too fast. We don’t have enough of the bigger plastic pots to use those…plus they take up a lot more space.

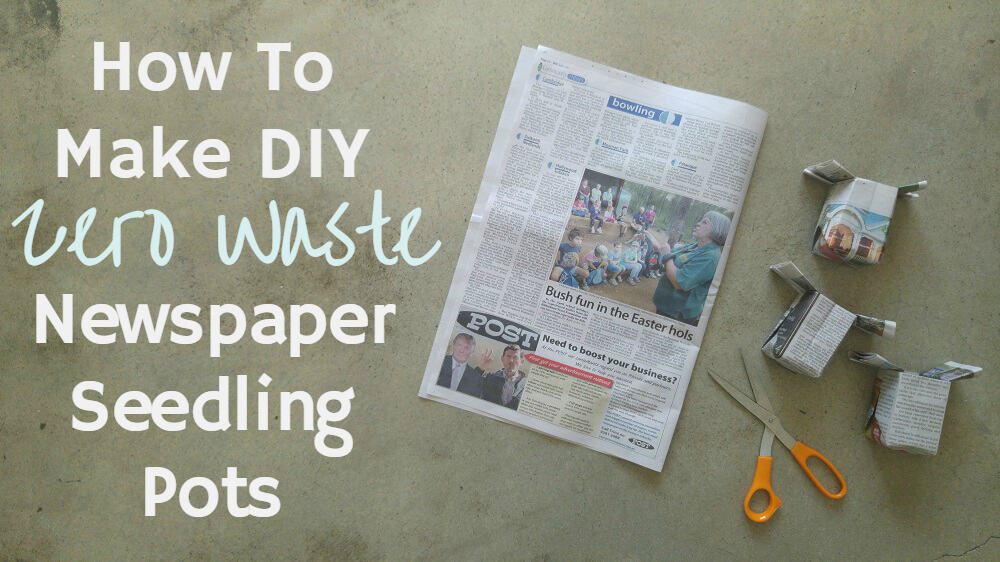
Instead, I’m making my own zero waste seedling pots out of newspaper.

You don’t need any fancy gadgets for this. Even the pair of scissors is optional. You just need two hands, and a bit of patience.

Even though I can make these without thinking now, I’ll admit that when my friend (who is a very good teacher) first showed me how to make these, I had a full-on tantrum! (How embarrassing.) If you get frustrated the first few times, just remember it’s only newspaper, and no-one has died. You’ll grasp it soon enough!

If you don’t read the newspaper, I guarantee that your neighbour does, or someone at work, or a family member. Maybe  a local cafe will have a mangled, well-read one.

The other great thing with these is that newspaper breaks down easily, so they can be planted directly into garden beds. No need to disturb the plant roots by removing from the paper. You can always tear the base before planting if you’re worried it will restrict growth.

How to Make DIY Zero Waste Seedling Pots (With Pictures)

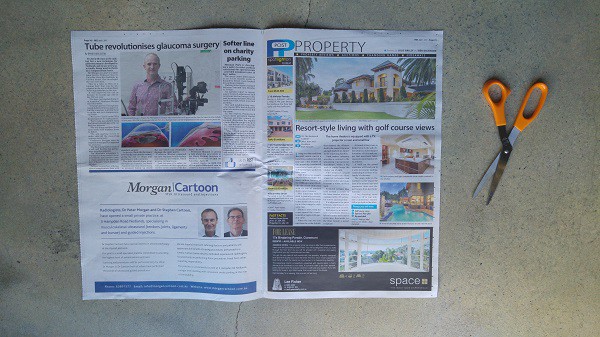
Start with a single sheet of newspaper. For seedling pots, I cut a double sheet like this in half.

All you need to start with: a sheet of newspaper, and some scissors. Although you could do without the scissors, if you can tear neatly ;)

Cut the newspaper sheet in half along the fold. Put the sheet to the left to one side. We will only be working with one sheet at a time.

Turn the sheet of paper so that the longest side is horizontal.

Fold the newspaper in half from left to right (the fold is on the left hand side).

Fold the sheet again from bottom to top (the new fold is on the bottom).

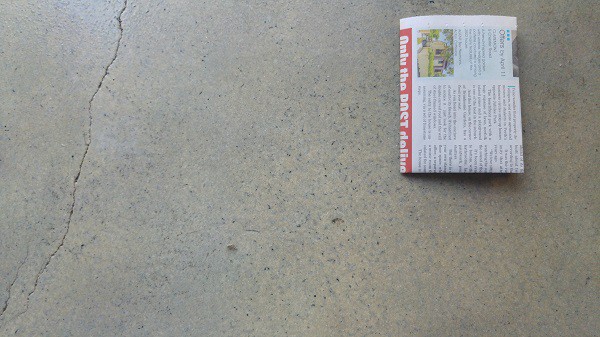
Fold the newspaper one more time from left to right.

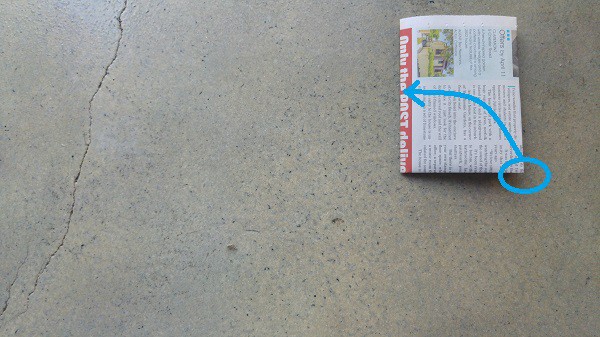
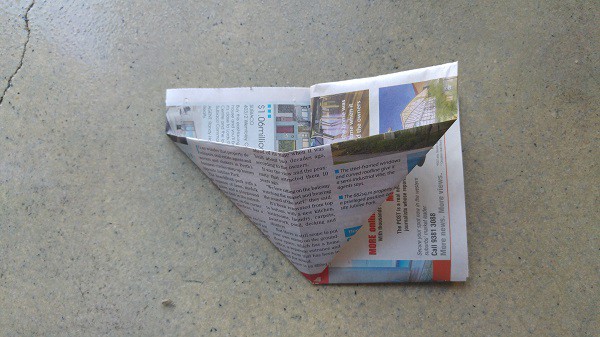
The paper in front of you will be folded a bit like a book, and each flap has a front and a back. You want to take the right-hand corner of the front flap, and fold it towards you, pulling it open as you do so to make a triangle shape along the “spine” of the “book”.

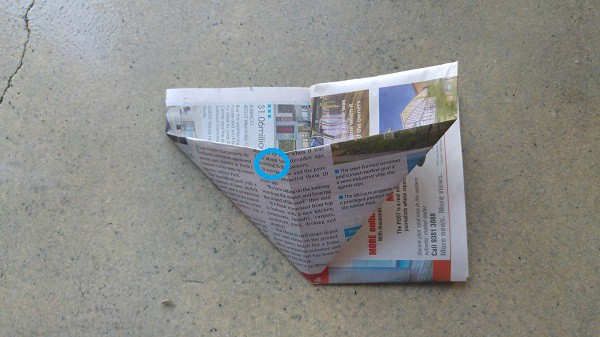
You can see (marked by the blue spot) that the bottom right hand corner has moved to where the spine was, and is opened to form a triangle.

Now that you’ve folded this side, turn the newspaper over (180°) and do the same on the other side. It will be mirrored, so the corner will be on the left hand side.

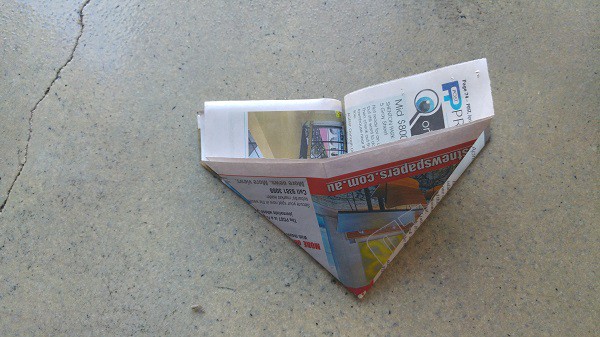
Once both sides have been folded, your newspaper will look like this. There will be a triangle-shaped pocket on the front and the back, and a gap in the centre seam above the two triangles.  Now turn the right hand side of the paper, like the page of a book, to the left (180°) so that you can see one continuous triangle.

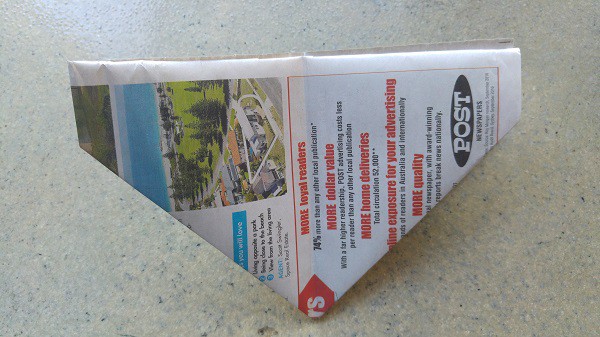
Flip the newspaper over and repeat with the other side so that both sides now look like this.

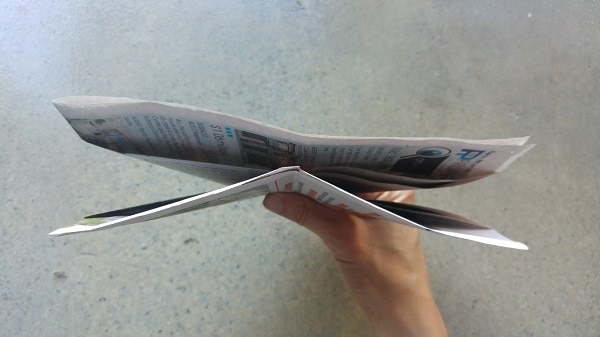
If it is correct, the paper will look like this from above.

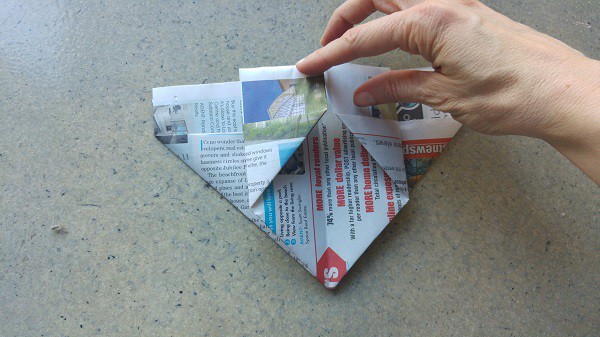
Lay the paper down flat, and fold each of the front flaps into the centre fold.

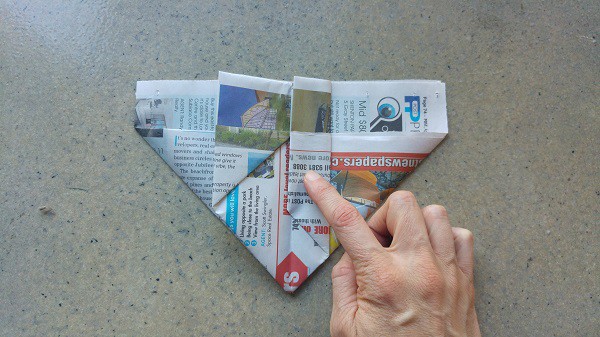
Fold these two flaps in half again, into the centre fold. (Don’t worry if it’s very flappy when you remove your fingers, that is absolutely fine.)

Now flip the newspaper over, and do repeat on the other side.

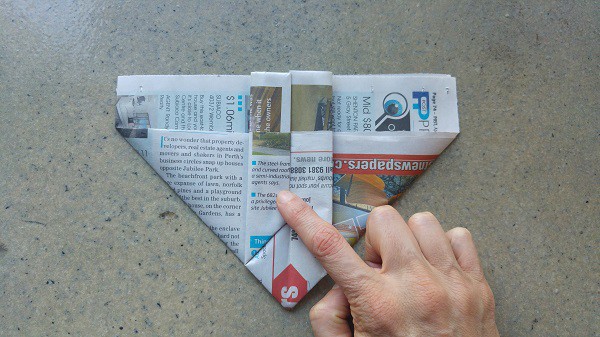
Fold the flaps into the centre…

And then fold these flaps inwards again…

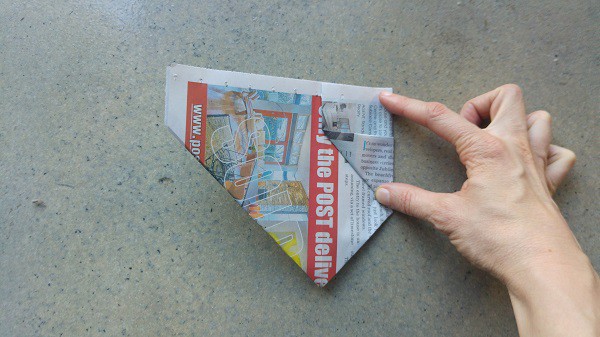
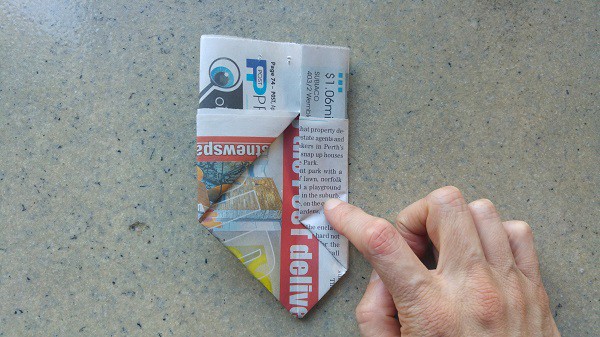
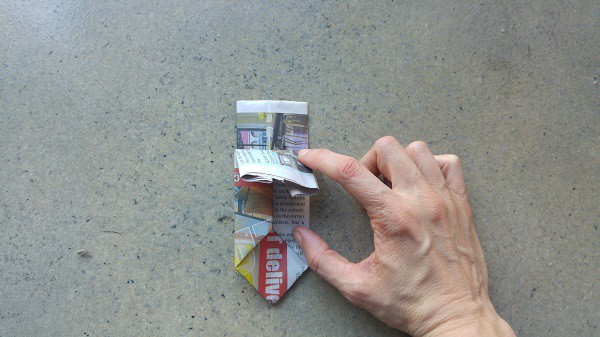
Your newspaper now looks like this. Fold the top flap down towards you along the newspaper line.

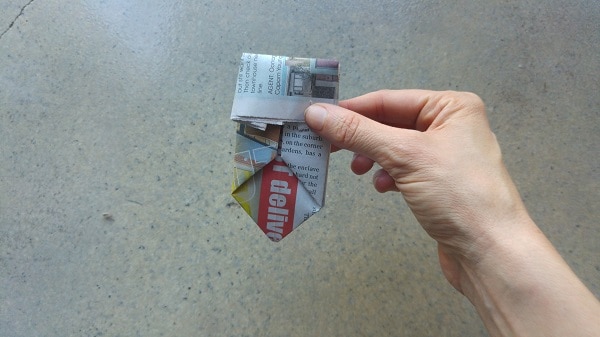
Repeat on the other side.

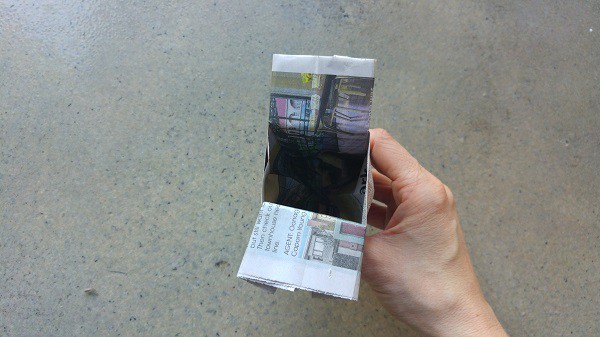
Now you can gently pull the two flaps outwards and open your pot!

Push your fingers inside to straighten out (and flatten out the bottom).

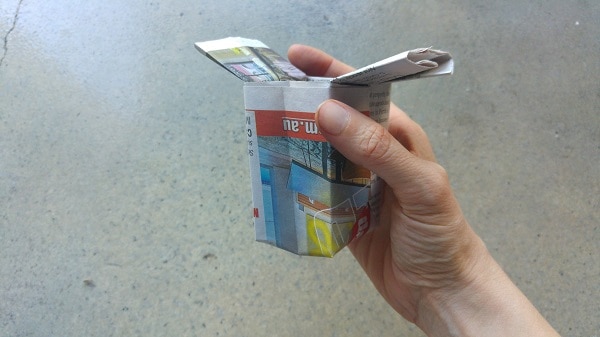
Ta-da! A zero waste newspaper seedling pot.

The flaps can be useful for lifting the pots, or labelling what you’ve planted inside the pot. If you don’t like them you can fold them inside. Once the pot of filled with soil they won’t flap about. I wouldn’t recommend cutting them off as the folding is what keeps it all in place.

Next step… to go forth and plant things!

Now I’ love to hear from you! Have you ever made these before? Do you have a different method? Are you feeling inspired to grow stuff? Do you want to make some and then share a photo with me so I can admire your handiwork? (Answer – yes you do!) Anything else you’d like to add? Please share your thoughts in the comments below!