Tag Archive for: low tox living

Using Oil as a Facial Moisturiser (+ A DIY Recipe for When Oil Alone is Not Enough)

I never thought I was a sucker for marketing. But when it came to beauty products, I used to spend a fortune buying products with names I didn’t understand (but sounded fancy) from department store beauty counters. You know those counters, the ones with the ladies wearing lab coats (oooh, how science-y!).

I thought those products were better for my skin. Plus they looked so luxurious, with all that (plasticky, single-use) packaging.

{Cringe.}

When I decided to go plastic-free, I realised that rather than trying to replace all of the products in my bathroom, it would be better for my sanity (and success rate) if I chose to simplify. Meaning, less products. I’ve talked about the switches I made and my natural skincare regime before, but today I wanted to focus on one aspect of that: moisturizer.

I used to buy an eye cream, a day cream, a night cream, and body lotion. Maybe after-sun in summer. It makes me laugh (or cry, perhaps) to tell you that, because I didn’t think I was a high-maintenance woman. Those marketing peeps got me good.

Rather than try to find 5 alternatives without packaging, I decided to go for one simple swap to replace all of them. Rather than using moisturiser, I switched to oil.

Using Oil as a Moisturiser

When I say I use oil as a moisturiser, I mean oil as a single ingredient. I do not mean oil-based products or oil blends that contain other chemicals.

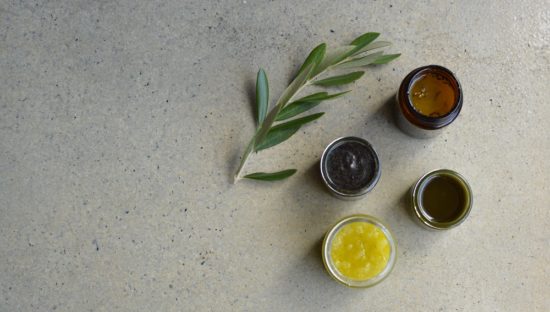
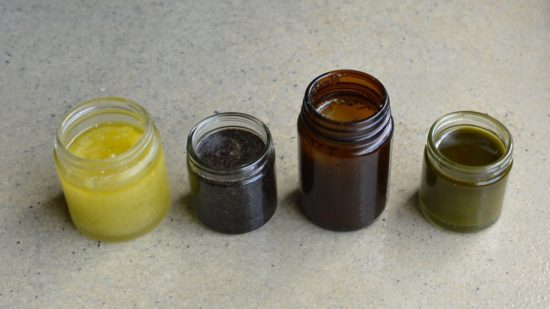
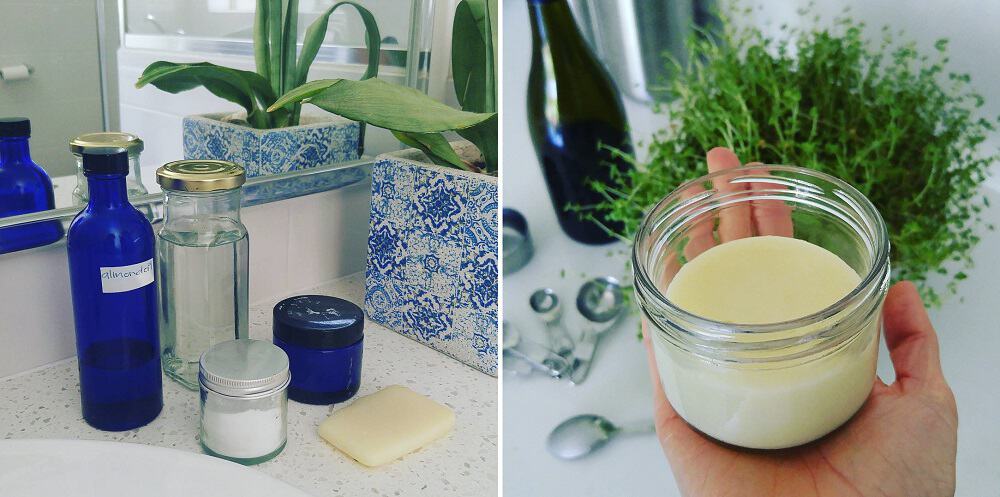
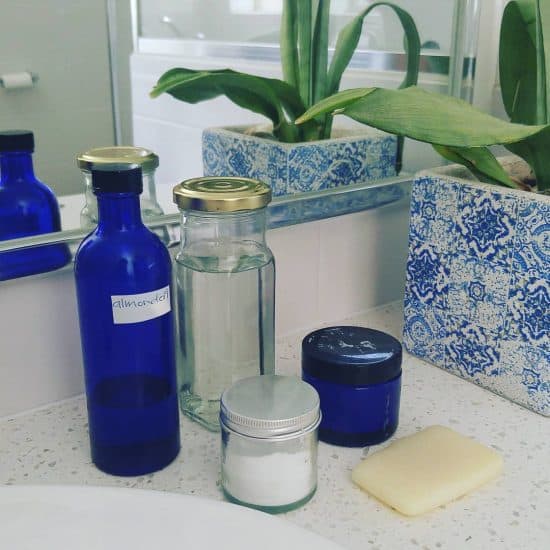
The staple oil I use as moisturiser is sweet almond oil. It is easy to find in bulk, absorbs well, is a neutral colour and has a very mild fragrance.

I have also used jojoba oil, rosehip oil, olive oil, hemp seed oil, coconut oil and shea butter. Jojoba oil is thought to most closely mimic the skin’s natural sebum. Rosehip oil is great, and apparently has anti-aging properties but is more expensive. Olive and hemp seed oil have a slightly green colour and need to be thoroughly rubbed in to avoid a green tinge. Coconut oil and shea butter are more effort to apply (both are solid at room temperature).

One of the other properties that differs between oils is their ability to block pores. Oils are graded on their ability to block pores, known as their comedogenic rating. (A comedone is a plug of dirt, bacteria and oil that blocks a pore and causes a spot: usually a blackhead but sometimes a whitehead).

Ratings vary from 0 (will not clog pores at all) through to 5 (likely to clog pores).

Almond oil, jojoba oil and olive oil are all graded 2, which means they have a moderately low chance of clogging pores. Rosehip oil is rated 1; hemp seed oil and shea butter are non-comedogenic with a score of 0. Coconut oil has a score of 4, and some people who use coconut oil find they do break out in spots.

People with dry skin tend to have smaller pores, and are more suited to oils with a lower comedogenic rating (2 or below). I have dry skin and almond oil works fine for me.

Does using oil make your skin oily? Actually, no.

I know that sounds counter-intuitive. But our skin produces its own natural oil, called sebum. It is produced to lubricate, waterproof and protect the skin. The absolute worst thing we can do is use cleansers and chemicals to try to strip this oil from our skin. That just makes our skin react, and produce more sebum.

Using oil doesn’t strip this sebum, and doesn’t stimulate the skin to produce more. Some people do produce more sebum than others, but that is due to more active sebaceous glands.

Using oil as moisturiser will not make your skin oily.

Oil can make the skin shiny, at least until the oil is absorbed. If shiny-ness is something you care about, a simple face powder will sort that out.

Rather than make the skin oily, using oil can make your skin dry out, particularly if you are prone to dry skin, as I am. I’ve talked about this below, and what to do if this happens.

Tips for Using Oil as Moisturiser More Effectively

Although I say I use oil as a moisturiser, oil does not actually contain moisture. It works as a barrier on the skin, preventing moisture loss. For most of the year this is fine, but in winter, when heating, extra hot showers and exposure to cold winds causes my skin to dry out, the oil cannot add moisture back in.

In contrast, most moisturisers are oil blended with water and stabilised with emulsifier. When they are applied they add moisture to the skin, and the oil acts as a barrier to keep it there.

When I start to notice dry patches on my skin, applying oil alone does not hydrate my skin. It appears to work temporarily, but the dry skin returns. There are some things that I do to help hydrate my skin.

Apply Oil Before Showering

In winter I always apply oil to my face before showering. This provides a barrier to stop the hot water and steam drying out my skin.

Avoid Soap or Soap-Based Cleansers

I use soap on my face very rarely in winter, and do not use it on my body every day. Instead, I use water and oil. Oil cleansing is an age-old method of cleansing, working on the premise that like dissolves in like. Grease and dirt on the skin are replaced with clean oil. It is as simple as putting a small amount of oil on the skin, and then wiping off with a flannel.

Apply Oil After Showering, But Before the Skin is Completely Dry

When I get out of the shower, I blot my skin dry with a towel but I always apply oil to my face before my skin is completely dry. If it has already dried, then I splash water on my face before applying oil. It is harder to rub in as the oil and water don’t like each other, but it leaves my skin much more moisturised.

Drink More Water

This is definitely a case of “do as I say, not as I do” because in my world, I’m constantly realising that it is 4pm and the only thing I have drunk all day is coffee. But I do know that drinking water is good for the skin, and I definitely notice the difference when I drink more water.

When Oil Really Isn’t Enough

Last winter was particularly cold, and my skin got very dry. I didn’t know back then that oil alone wasn’t going to hydrate my skin. I’d apply more and more oil, slathering it on thicker and thicker, and my skin just got drier and drier.

Eventually I realised I needed something with a little more oomph.

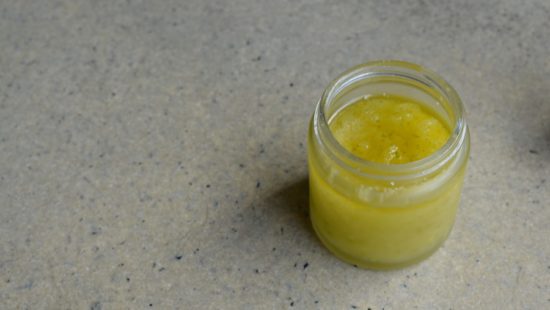
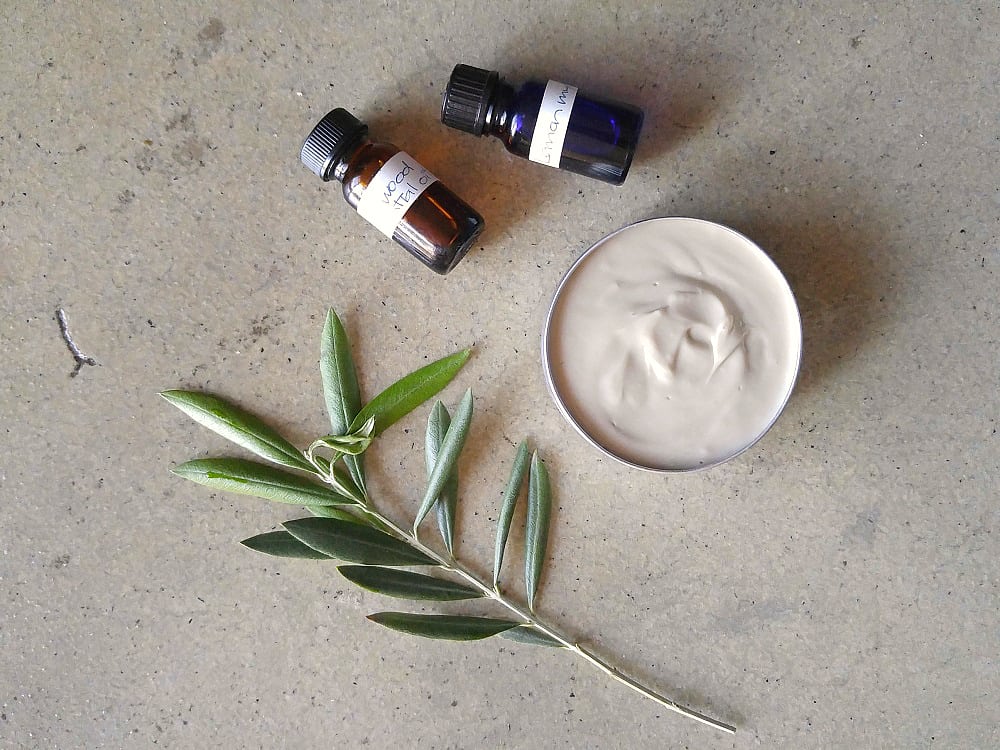
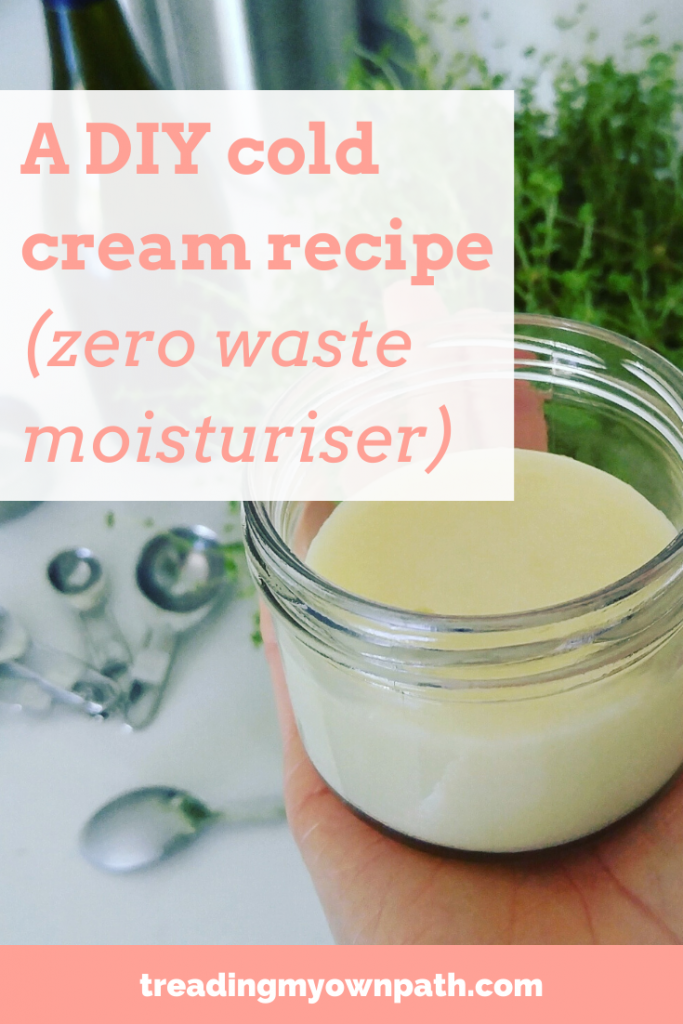
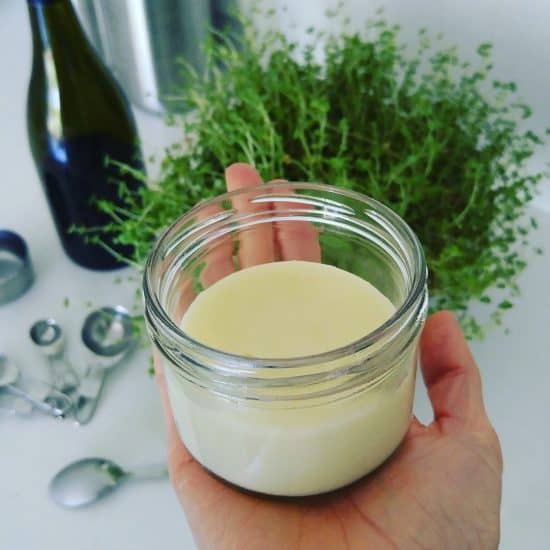
I’ve messed around with a few DIY moisturisers and balms, but the one I come back to often is cold cream. Cold cream is a water-in-oil type of emulsion (whereas most moisturisers are oil-in-water emulsions). Being oil in water, it is soothing and cooling on the skin.

Cold cream can be used as a cleanser, make-up remover, face mask or moisturiser. I’m a big fan of products with multiple uses.

The recipe I use is based on a recipe by Aelius Galenus, a Greek who was born in 129AD. Definitely a recipe that has been handed down through generations!

Galen’s Cold Cream Recipe

INGREDIENTS:
75 ml rose water / distilled water / rain water
15 g beeswax (2 tablespoons)
90 ml olive oil / almond oil
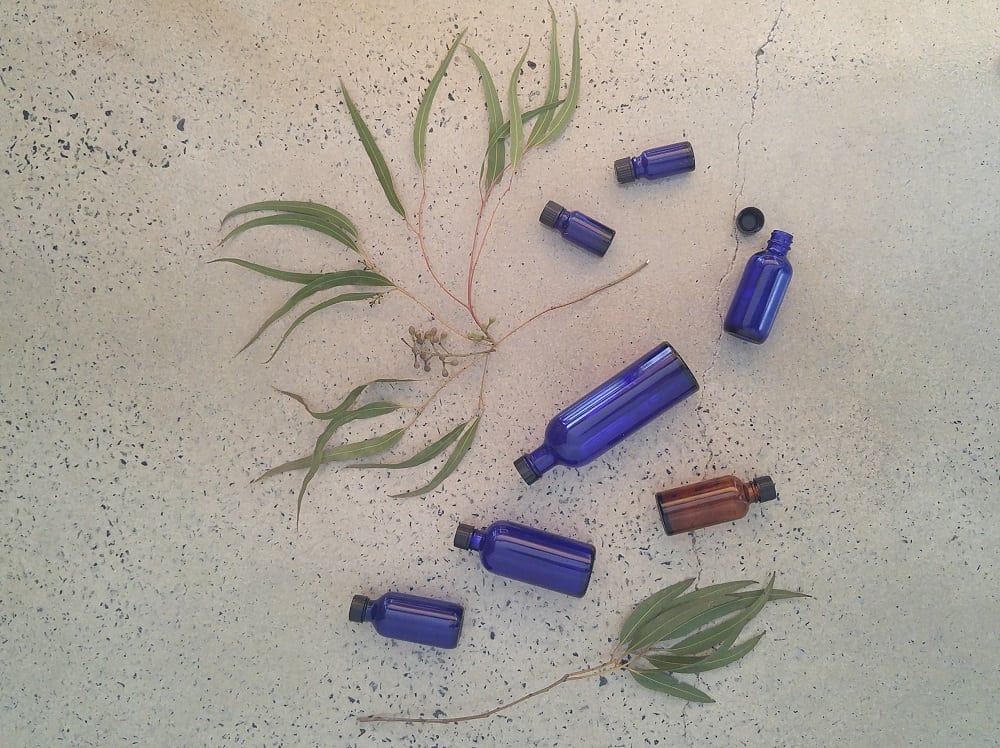
4 drops rose geranium essential oil
Optional: 2 drops vitamin E (vitamin E is a natural preservative)

METHOD:
Heat the rose water in a bowl over a pan of hot water.

Place beeswax and olive oil in a separate bowl over a pan of hot water, and melt. Remove from the heat and pour the rosewater into the melted oil, using a whisk to mix together. (Please be careful as melted oils become very hot and can cause burns.)

As the mixture begins to cool, it will turn opaque. Add the essential oil (and vitamin E, if using) and pour into a glass jar. Use within 6 months.

NOTES: Vitamin E is a preservative, so omitting this might shorten the shelf life of the product. If you are vegan, two alternatives to beeswax are candelilla wax and carnauba wax, which are both palm oil free. They are harder than beeswax so half the amount (1tbsp rather than 2tbsp) if using these waxes.

This cold cream cleared up my dry skin patches within days. Whilst I still use oil as my main moisturiser, I now use cold cream as an extra boost in the winter months, particularly if I am going to be outside.

Now I’d love to hear from you! What is your skincare routine? Do you use oil as a moisturizer? Which is your favourite? Do you make your own moisturiser? Is there a brand that you buy and love? Any other thoughts or questions? Join the conversation and leave a comment below!

DIY Body Scrubs (4 Recipes plus a Simple Formula to Invent Your Own)

Is that food on my face? Yes, it is! I take great satisfaction in making DIY skincare products out of regular ingredients that I have in the pantry. There are a few reasons:

  • If it’s safe enough to eat, then it’s safe enough to put on my skin. I don’t need to worry about reading labels, or trying to decipher chemical names, or battling through greenwash claims.
  • Food items are some of the easiest things to find plastic-free and generally packaging-free. Chemicals come in bottles. Coffee grounds, sugar, salt – all of these things can be picked up from bulk stores.
  • It keeps my home uncluttered. I like owning things that have multiple uses, and that goes for ingredients as much as for other stuff. One jar with multiple purposes. Plus, it’s kind of fun when you run out of something in the bathroom to just head over to the pantry, rather than traipsing all the way to the chemist.

That said, my bathroom routine is super simple (you can read about it here). Gone are the days when I thought I needed all of those products that the marketers tell us we need. I had the day cream, the night cream, the eye cream, the body lotion, the face scrub, the body scrub… I also had a cluttered bathroom and an empty wallet!

I’m also a big fan of making things that involve little effort. I like to make things from scratch, but I also like these things to take minutes to put together and to be fail-safe (I don’t want to stuff it up and have to throw anything away).

Mixing ingredients together in a jar, now that’s the kind of level of complexity I’m talking about.

DIY Skincare Scrubs from Scratch

Body scrubs exfoliate the skin and remove dead skin cells (there’s plenty of marketing mumbo-jumbo about glowing skin and improved lymphatic drainage and looking 20 years younger, but I’ll spare you any wild claims.) Some body scrubs also moisturise and these generally have an oil base alongside the exfoliating ingredient. I’m a big fan of products with multiple purposes, and I’m also lazy, so any product that can clean, exfoliate and moisturise all in one suits me perfectly!

A good body scrub has three main components: an exfoliator + a moisturiser + essence

By essence I mean more than the fragrance: I also mean the way it makes us feel. For example, lavender is known for its calming and sleep-inducing properties, citrus is energising and awakening, and chocolate feels decadent and indulging.

Good Natural Skin Exfoliators

Sugar, salt, dried coffee, used coffee grounds, ground oats, ground rice, bicarb of soda.

Different exfoliators have different properties. Sugar is considered more gentle on the skin than salt as the crystals are smaller and they dissolve more easily in water. Oats and ground rice are gentler on the skin and may be more suitable for face scrubs.

Good Natural Skin Moisturisers

Olive oil, almond oil, jojoba oil, grapeseed oil, sunflower oil, coconut oil.

Oils are not created equal. Some have far superior properties – and often far superior price tags to match. Olive oil is readily available and affordable so is a great optionto start with.  It does have a strong fragrance and a green tinge though, whereas almond oil is a more natural colour and without a strong fragrance.

Coconut oil is unusual in that it is solid below 25°C. If you live in a very cold climate you may have a hard time getting a scrub made with coconut oil out of the jar, but if you like the idea of having a more solid product to rub in it’s a good choice.

Ideas For Essences

Essences don’t need to be fancy. You can skip them entirely and leave the scrubs plain if you prefer, or just add a drop of essential oil for fragrance. Or you can go to town, combining essential oils and flower petals and all kinds of things. Up to you.

Stimulating essential oils: grapefruit, lemon, lemongrass, orange, peppermint, bergamont

Relaxing essential oils: lavender, rosemary, cinnamon, ylang ylang, rose, chamomile

Other ingredients to add: lemon, orange or lime zest; lemon, orange or lime juice; lavender flowers or rose petals; honey; thyme or rosemary; cocoa nibs; loose leaf tea (green tea, chamomile tea, peppermint tea).

DIY Body Scrub – a DIY Formula

A body scrub needs to be easy to remove from the jar, spread on your skin and rinse off.

Start with a tablespoon of your chosen oil, and a tablespoon of your chosen exfoliator, and combine. Add more of either to get your preferred consistency. Add your essences last.

If adding dried herbs, flowers or tea you may need a little more oil, as these will soak up the oil.

If adding lemon, lime or orange juice, you may prefer a little less oil as these will add more liquid to the pot.

Test it out! Always do a patch test first. Put a small amount on your skin in the crease of your elbow, and wait 24 hours to see if there is any adverse reaction. Use it in the shower, and see if you like the consistency. Make a note of any adjustments you might want to make. Test on your body before trying on your face as your facial skin is more fragile, and always avoid the eye area.

DIY Body Scrubs: 4 Recipes to Get You Started

From left to right: citrus olive oil scrub; coffee scrub; lavender sugar scrub; green tea and epsom salts scrub.

These are some ideas to get you started – feel free to play with the ingredients you have to hand and make your own combinations. All of these scrubs are fresh and do not contain preservatives, so are best stored in the fridge and/or used within a couple of weeks.

Citrus Olive Oil Scrub

Ingredients:

2 tbsp olive oil (30 ml)
1/2 cup sugar
2 tsp lime zest
juice of 1/4 lime
Optional: a drop of lemon, grapefruit or lime essential oil

Mix together the sugar and oil. Add the lime zest and lime juice, and essential oil if using. You can add extra sugar or oil to get your desired consistency. Spoon into a glass jar.

Allow the scrub to settle. A layer of olive oil on the top of the jar will help keep it from spoiling. Stir before use.

Coffee Scrub

Ingredients:

2 tbsp spent coffee grounds (ask a local cafe for their used grounds)
2 tbsp sugar
2 tbsp coconut oil
Optional: a drop of orange essential oil

Method: melt the coconut oil if solid, and mix the coffee, sugar and oil together. Add the essential oil last. Store in a glass jar in the fridge.

I love using coffee grounds as they are a waste product. You could use fresh coffee, but why wouldn’t you want to have a cup of coffee first?! If you use homemade coffee grounds, let them dry out as the extra moisture will mean it spoils more quickly. There’s no reason why you couldn’t use olive oil instead of coconut oil. I just like to experiment :)

Lavender Scrub

Ingredients:

3 tbsp almond oil
1/2 cup sugar
2 drops lavender essential oil
Optional: 2 tsp dried lavender flowers

Method: mix the oil and sugar together, then add the flowers and essential oil.

You could substitute the lavender flowers for chamomile flowers or rose petals, and lavender essential oil for chamomile or rose geranium. Almond oil works better than olive oil as the delicate floral flowers can be overpowered by the olive.

Green Tea Scrub

Ingredients:

3 tsp Epsom salts
3 tsp bicarb
1 tsp matcha powder
3 tbsp olive oil

Mix the dry ingredients together, then add the olive oil. Pour into a glass jar.

Epsom salts are not actually salt, but a mineral compound containing magnesium which is thought to be very good for the skin. If you can’t find Epsom salts, regular salt or sugar will be fine. If you don’t have matcha powder, you can use regular green tea.

Now I’d love to hear from you! Do you make your own skincare products? Do you want to, or is it something you can’t see yourself bothering with? Do you have your own favourite recipes or flavour/scent combinations? Are there any other products you make from scratch? Have you ever had any disasters, or things not going to plan? Any tips you’d like to add? I’d love to hear from you, so whether you’re a DIY skincare enthusiast or avoid it at all costs, please leave me a comment telling me your thoughts!

<

p style=”text-align: center;”>
Disclaimer: the information here is provided for information purposes only and does not constitute medical advice. It is a record of my own experiences. Always do your research before using ingredients on your skin, particularly when using essential oils.

The Definitive Guide to Storing Food without Plastic

Taking reusable bags to the store is a great way to reduce unnecessary plastic. Bringing reusable produce bags and selecting products without packaging is another way to reduce waste. Choosing to shop at bulk stores is a fantastic option, if we have the choice.

But what about when we get all of our food shopping home? What then? Is it possible to store food without plastic?

What about leftovers, and freezing food? How about packing lunches?

What are the plastic-free options?

Of course, plastic-free is possible. There are plenty of options to avoid using plastic containers, gladwrap/clingwrap and zip-lock bags. From choosing plastic-free containers to freezing in glass (yes, it’s possible), here’s the lowdown on how we avoid using plastic in our home when storing food.

Food Storage without Plastic – the Pantry

I buy all of our dry goods from bulk stores, and I store in the pantry in glass jars. Sometimes I take the jars to the bulk stores and weigh them before filling them, but more often I take reusable produce bags and decant when I get home.

Glass jars are heavy, and I find taking reusable produce bags is more practical for me.

Zero Waste Plastic Free Pantry

Whilst I love the idea of a pantry full of matching glass jars, the reality is, there are plenty of glass jars in the world begging to be re-used. It makes no sense to me to buy new when I can re-use. I’ve reused old jars that I own, and friends and family have given me their spares. I sourced some big glass jars from a local cafe.

I generally find that a good soak will get the old labels off. If they are particularly stubborn, I use eucalyptus oil and give them a scrub, and that usually works. Removing the label means I can see what’s inside, and there’s no confusion as to the contents.

Removing Jar Labels with Eucalyptus Oil Zero Waste

I have needed to buy a few new jar lids – kitchen shops sell these, or you can find them online.

It’s not always clear how long dry goods have been stored at the bulk shops, and the last thing we want is weevils or pantry moths, or other pests. If I think something has been at the store a while, or if it’s been in my own pantry a little longer than planned, I pop the jar into the freezer for 24 hours. This kills any eggs. After 24 hours I remove the jar from the freezer and place back in the pantry.

Freezing pulses and grains to prevent weevils

I have a terrible habit of not labeling my jars. I have a good memory and generally remember what I’ve bought, and if I forget I can usually figure it out by the smell. My husband has no idea what I’ve bought and has a terrible sense of smell, so whilst it might work for me, it doesn’t work for him! I’m planning to get a greaseproof pencil/chinograph so I can label the jars without needing to buy sticky labels or mark them permanently. If I was more crafty, I could paint blackboard paint on them, or even mark the lids.

Food storage without plastic – on the counter

I keep a fruit bowl on the counter which in addition to fruit, contains onions. I also keep fresh tomatoes here as I find they taste better than when stored in the fridge, and avocados whilst they ripen.

I often keep cut leaves such as beetroot leaves or silverbeet in glass jars on the counter rather than in the fridge as I find they keep better. Parsley and some other herbs also keep better this way. If the water is changed regularly, parsley will last on the counter for up to two weeks.

Beetroot Leaves in a Jam Jar

I store my bread in a cloth bag inside a wooden bread bin. The cloth bag helps absorb any moisture that might cause the bread to go moldy. Over time it begins to harden, and when I notice it’s becoming hard to cut I pre-cut the rest of the loaf. If there is more than I can eat in the next day or so, I pop it in the freezer.

For things like crackers, baked goods and other dry food, I use tins. I have some that I purchased in my pre- zero waste days, and some that I’ve been given (they often seem to appear around Christmas time as “presentation” boxes for biscuits and confectionery). I’ve been able to choose ones that are a good size for my needs, and that I can store easily.

Sourdough Zero Waste Crackers FINAL

Food storage without plastic – the fridge

I store most of my fruit and vegetable items in the crisper. Some veggies, such as carrots, courgettes and cucumbers have a tendency to go floppy, so I store these in a rectangular glass Pyrex container with a lid. I also find delicate fresh herbs like coriander and basil store better in a container with a lid, as do salad leaves.

Zero Waste Plastic Free Fridge

I’ve also tried storing them in glasses or bowls of water in the fridge and this works well, but I don’t own enough glassware for this to be practical.

Storing Veggies in Water in the Fridge

Another alternative to using glass containers is to use a damp tea towel to wrap your veggies. This works particularly well for larger items like bunches of celery or leafy greens that don’t fit in containers. Beeswax wraps are also useful if you’re not vegan – they are cloth squares that have beeswax melted onto them to create a waterproof wrap. They are very easy to make yourself (you can find a DIY beeswax wrap tutorial here) and making your own means you can choose sizes that work for your needs.

For storing leftovers, there are a number of solutions. Personally I was never a fan of gladwrap/clingfilm.  Some is ridiculously sticky and will stick to everything except the bowl in question (this type of clingwrap usually contains phthalates – not what we want to be wrapping food in). The phthalate-free type never seems to want to stick to anything at all. I find it far simpler simply to put a plate on top of the bowl in question.

I also have some silicone covers for bowls that were a gift that have been very useful. Beeswax wraps can be used for this, too. Glass jars are a great option for decanting small amounts of leftovers (and I have plenty of glass jars to hand), and Pyrex storage or stainless steel work if you want to decant into something bigger. Sometimes I even keep the food in the saucepan, pop the lid on and pop that in the fridge.

For some items, such as half a lemon or half an avocado, I find that placing it face down on a plate is enough. If I’ve roasted veggies or baked a sweet potato, I find it keeps well in the fridge uncovered for a few days. So long as it’s not got a strong smell, it works fine.

Food storage without plastic – the freezer (yes, you can freeze food in glass)

I store most of my food in the freezer in glass jars. I’ve been doing it for 10 years. Jars are a great size for one or two portions, and they fill the space well. I’ve only ever had one breakage. Freezing in glass is perfectly safe, but there are some rules to follow.

Freezing in Glass Jars in the Freezer

Firstly, choose good quality jars, with thick glass. Repurposed jars are fine. I tend to choose ones that have previously had jam or tomato sauce in them, as I know they will withstand changes in temperature. Buying poor quality jars from reject shops will likely lead to breakages.

Wider jars work better, and avoid any that taper inwards at the top (tapering outwards is fine). When filling, never fill all the way to the top – make sure the food is sitting at the widest point of the jar. Don’t screw the lid on until the contents have completely frozen. The food will expand when frozen – the higher the water content the more it will expand – so leave room for this to happen. Once it’s frozen you can screw on the lid.

Never put hot jars in the freezer, and try to chill them before you freeze them. This is important if what you’re freezing has a high water content, like stock. I find for foods like chickpeas, which don’t have a high water content, freezing from room temperature works fine.

If you’re worried about freezing in jars, you can also use freezer-safe Pyrex, or stainless steel containers, which won’t break.

Zero Waste Freezer Glass Jar Storage

I use an ice cube tray for freezing liquids and also fresh herbs. I find that the cubes make good portion sizes. I store the cubes in jars once they are frozen. To freeze herbs I add a little oil to the ice cube tray -they seem to freeze better. I have just upgraded to a stainless steel one, and you can also find aluminium ones second-hand if you’d like to avoid plastic.

Onyx Stainless Steel Ice Cube Tray

To avoid freezing a big mass of fruit, I lay out on on a tray (I line a baking tray with a tea towel) and pop in the freezer. Oonce frozen, I put in a container. This allows me to use a handful at a time, rather than needing to defrost the whole thing.

Preparing Strawberries for the Freezer

I don’t freeze everything in glass. I freeze bread wrapped in a cloth bag, and I leave bananas in their skins.

Food storage – out and about

Both my husband and I have stainless steel lunchboxes, which we use for food on the go. I always take my glass KeepCup with me as I find it great as an impromptu storage container. Being glass, it’s easy to clean. I have a set of reusable, washable wraps for sandwiches, baked goods and snacks which are handy as they fold up. If we’re taking food to friends’ houses, we either use tins or we have a stainless steel tiffin.

Zero Waste Lunchbox Stainless Steel Stainless Steel Tiffin and Lunchbox Zero Waste Plastic Free

Food storage – choosing containers

When I first started out with living plastic-free, I had a lot of plastic reusable containers. I didn’t want to waste them, so I continued to use them whilst I transitioned to other things. Because I was concerned with the health implications of using plastic for food storage, I used them only for dried food, before giving them away or using them for non-food items.

Zero Waste Week 2015 Reusable Containers

Whatever you decide to use, know that there’s no need to immediately rush out and buy new stuff. Glass jars are an obvious one to start with, and they are free. It’s possible to find good quality glass, tins and even Pyrex at the charity shops.

I chose to use Pyrex with the plastic lids, because I couldn’t find any without plastic, and they were affordable for me. Stainless steel containers come completely plastic-free, but they are an investment. They are expensive but should last forever, so it is important to know exactly what you want before you make the purchase. Slowly I’ve built up a small collection of stainless steel, and the pieces I have I use often and I love.

When choosing containers, think about how you’ll use them. If you’re looking for a lunchbox, think about the kinds of things you eat for lunch. What size and shape will be most useful? Planet Box make great compartmentalised lunch boxes for kids. Cloth wraps and reusable sandwich bags might be a better alternative. It’s possible to buy refillable food packs. Think about your needs and choose products that work for you.

It is possible to store food at home without using plastic, and you can make it as simple or as complicated (or as cheap or expensive) as you like. The most important thing is to make conscious choices. Look at your options, and decide what is practical and within your budget. There’s no need to buy new things straightaway. Take your time. Choose well.

Now I’d love to hear from you! Tell me, how do you store your food without using plastic? What are your favourite tips? Is there anything you tried that didn’t work? What purchases have you made that have been great investments? Any that turned out to be duds? Do you have any tips to add? Or any “not-to-do”s to share? Is there anything that you are still searching for a solution for? Any questions? Tell me your thoughts in the comments below!

Plastic Free {Bicarb Free} DIY Deodorant – for Sensitive Skin

I love my homemade deodorant. I first tried it back in 2012 when I was still a little skeptical about DIY concoctions (if I’m honest, I thought they were just for hippies). What made me convert?

The fact it actually worked.

That’s all we want from a deodorant, really. Sure, we don’t want chemicals and excess packaging – but it has to work, right?! There are plenty of natural deodorants on the market, but most are very expensive, don’t smell great and don’t actually work against body odour very effectively, either.

Plus very few have completely plastic-free packaging.

The deodorant I’ve been using since 2012 is a super simple recipe, and all the ingredients are edible (except the essential oil). There’s no heating or melting involved, just a little mixing, which suits my laziness when it comes to these things.

The ingredients are 1 tbsp bicarb, 4 tbsp cornflour (or arrowroot / tapioca flour) and 2-3 tbsp coconut oil. The coconut oil depends on the ambient temperature – you’ll need less in summer and more in winter. You want a paste. Mix in a jar and add a few drops of your favourite essential oil. To apply, get a small amount on your fingertips and rub in. (You can find the recipe here.)

This recipe has been serving me well for 4 years, but bicarb can be a skin irritant for some. It’s fine for me, but my husband reacts to it. I tried changing the ratio from 1:4 to 1:6 and even 1:8 bicarb:flour (note – the more you dilute it, the less effective it is) but the issue was the same. His skin became red, inflamed and sore and it took a few months for it to settle back down again.

Ever since then I’ve said I’ll experiment with a DIY non-bicarb deodorant. I don’t move very fast it seems!

But the good news is I have finally kept my word and made a bicarb free deodorant. Not only that, but I (and my husband) have tested it and can confirm that a) it works (hurrah!) and b) there have been no adverse skin reactions. Phew! I can also buy all the ingredients completely packaging-free.

For anyone else out there who struggles with super sensitive skin and cannot use bicarb deodorants, this recipe is for you. Give it a go.

It’s not quite as simple as just mixing some ingredients in a jar but it’s really not that much harder, promise. There’s some melting involved. Nothing complex – I like to keep things as simple as I can!

Final product: bicarb free DIY deodorant.

Bicarb free DIY deodorant.

TIP: I would also add: it’s not quite as effective as the bicarb version I use, and it works best applied to clean skin. Whilst the bicarb one can mask smells if reapplied, this one won’t!

Bicarb Free DIY Deodorant: Recipe

Ingredients:

1.5 tbsp grated beeswax
1 tbsp shea butter
4 tbsp coconut oil
4 tsp white kaolin clay
8 drops tea tree essential oil
8 drops cedarwood essential oil
10 drops lemon myrtle essential oil

A note about the ingredients:

Beeswax: beeswax is solid at room temperature (it melts at 62°C) so helps make the mix firmer. I used beeswax as it’s really local (my neighbour who lives 4 doors away produced this). The only other solid subsititue I can think of would be cacao butter so maybe next time I’ll give this a go as it would be a great alternative for vegans.

Shea butter: shea butter melts at 38°C so is more solid than coconut oil. It’s very moisturising and is thought be anti-inflammatory – which is good news for sensitive skin.

Coconut oil: this is a soft oil that melts at 25°C. It helps keep the deodorant soft so it can be rubbed into the skin. Coconut oil is also thought to have anti-bacterial properties.

Kaolin clay: kaolin clay is a white clay (bentonite clay has similar properties) that replaces bicarb and does a similar job. It absorbs liquid and neutralises bad smells. Clumping kitty litter is actually made of bentonite clay! There are other types of clay available but these are more expensive. I’ve heard that green clay is the most absorbant of them all so at some stage I’d like to try this… it’s in the queue ; )

Essential oils: I’m lucky enough to be able to buy refills (packaging free) so I have some flexibility with my choice. I chose tea tree oil as it is anti-bacterial and cedarwood as it is anti-inflammatory. Both also have strong smells and are often used in commercial natural deodorant recipes. I find both scents quite overpowering and not hugely pleasant so I used lemon myrtle (which I love!) to mask them. Lemon myrtle is an Australian bush scent with the most amazing smell! If you have limited choice, go for a single oil and choose one that you can use elsewhere. Tree tree oil is affordable, available in larger sizes (meaning less packaging overall) and great for cleaning too. (When choosing essential oils, it is important to read up on the properties, particularly if you are pregnant.)

Ingredients for making bicarb-free deodorant (for sensitive skin).

Ingredients for making bicarb-free deodorant (for sensitive skin).

Method:

Heat some water in a pan on the stove, and place a glass bowl over the pan. You don’t want to heat the oils directly as you’ll damage them. Add the beeswax to the bowl and stir until melted (I used a metal spoon as it’s easier to clean than wood).

Add the coconut oil and continue to melt, stirring occasionally. Once both are melted, add the shea butter and remove the bowl from the heat.

The shea butter should melt with the heat of the other two ingredients. You can place back on the heat if it needs some help but be careful of overheating shea butter as it can turn grainy. Stir to aid the melting process and to combine.

Add the clay 1 tsp at a time and whisk to incorporate. Once all 4 tsp have been added, leave to cool, whisking occasionally. It will begin to thicken after only a few minutes (less if your room is cold). Once you notice the thickening and there is no head radiating from the mix, add your essential oils to the mix and whisk in. If you add them when it’s still hot, you will lose all their beneficial properties!

Final product: bicarb free DIY deodorant.

Final product: bicarb free DIY deodorant.

Pour into a shallow jar with a wide neck or a tin, and leave to set. It will set into a paste that feels tacky and is easy to scoop with your fingers. (If you live in a very cold climate and find it too hard, you may like to add more coconut oil or less beeswax next time to get the right consistency, but it will soften with the warmth of your skin.)

Store with the lid on in a dark place. To apply, take a small amount with your fingertips and rub into your skin. will keep for ages.

Now tell me…are you going to make it?! If yes, I want to hear what you think! If not, why not? Have you ever tried making DIY deodorant before? What ingredients did you use and what success did you have (or not have)? What about other DIY skincare products – are you a fan or do you tend to put them in the “too-hard” basket? What are your simplest solutions to bathroom essentials? I love hearing your thoughts so please leave me a comment below!