Tag Archive for: less waste kitchen

Picking olives for oil – how to produce enough oil for a year when you don’t own any olive trees

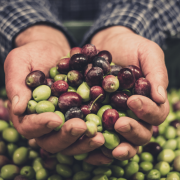
Ah, the annual olive oil harvest. For the last several years, I’ve dedicated a weekend to picking olives and sending them to an olive press to extract the oil. This gives me enough olive oil to last me for a year.

And I don’t own any olive tress.

Every year I’ll post about it on social media, and there are always lots of questions. Questions like:

Where do I find all the olives?

Are there particular types?

How much oil do you get from a kilo of olives?

Where is there an olive press?

And how do I join in?!

After all, there are abundant olive tress in the area where I live, most people use olive oil to some extent in cooking, and everybody likes the idea of getting fresh, local food for free.

(Except it’s not quite free, and I’ll come to that later.)

I just love the olive oil harvest – it ticks all my boxes. Reducing food waste and making use of a “waste” product, local produce with almost no food miles, community (I’ll come to that later too), and the fun and resourcefulness that comes from tracking down all the olives.

Here’s how I go about it.
Step 1: Find your people

Olive harvesting (for oil) is something that’s much better to do as a group or community activity than as an individual activity. There are many reasons (including, because doing things as a community is fun!) but the most expensive part is the pressing, and combining olives makes for cheaper olive oil.

The more olives you have, the cheaper it is to press them per kilo.

There might not be a minimum quantity to press your olives, but there will probably be a minimum charge.

At the Jumanga olive press (one of the local Perth presses I’ve used), the processing costs are $26 plus 0.58/kg for quantities up to 55kg and a fixed rate of $58 for 55kg – 100kg. There is a per kilo price above 100kg, their rate drops above 200kg, and drops again above 400kg.

At the York olive oil press (another press local to Perth that the community garden use) there is no minimum quantity of olives, but there is a minimum charge of $190. The York press is better for medium to large batches (their rates drop after 1 tonne, after 2 tonnes, and after 4 tonnes).

Bring anything under 350kg, and you’ll pay $190 (even if you just have 35kg).

And if you need to find 350kg or more of olives, you’ll probably need to find some friends.

Finding friends: there are two options here, either get together with some friends and do it yourself, or find an existing group to join.

I’ve done both, and there are pros and cons to each.

Doing it yourself with a group of friends is the cheapest option, and if you all go picking together can be super fun. But there will be a few logistics you’ll have to sort out.

You’ll need suitable containers to transport the olives, as well as actual transport (and 350kg isn’t light or a car boot job). Is there someone who can deliver the oil to the press on a weekday, and then drive back on another day to collect it? You’ll need a vessel for the pressed oil, and a way to share it with everyone.

Joining an existing group is the easier, but more expensive option. Often participation is limited to members, and so you’ll probably need to pay a membership fee to join. Some community groups will also take a portion of your oil to use for fundraising or other purposes.

So you’ll pay more and get less oil, although you’ll probably benefit from a lower press rate, and someone else will sort all the logistics and transport out for you.
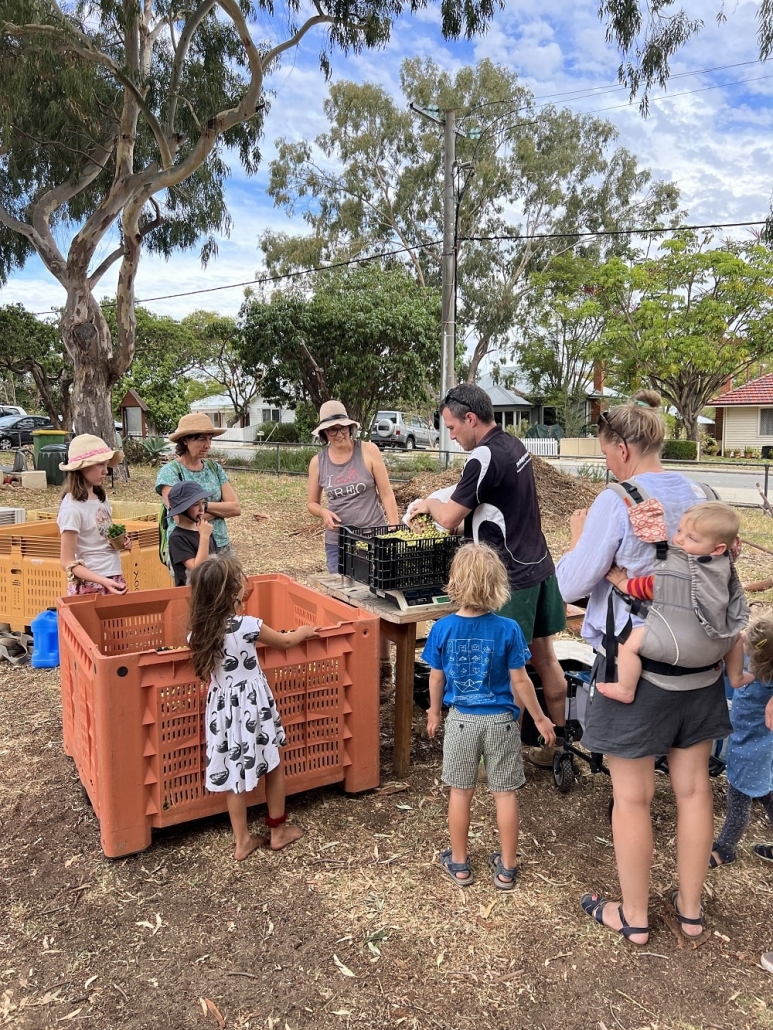
Olive oil harvest 2022 at Hilton Harvest Community Garden

Step 2: figure out how many olives you need

You need a lot of olives to make oil. Typically the yield of oil from olives is 9 – 15%. That means 10kg olives might give you one litre of oil.

There are lots of factors that determine yield. These include:

  • variety – there are 50 -100 types of olives in Australia alone (and several thousand worldwide), with some being better for oil and some being better for eating (these are called table olives);
  • Rainfall/water – large ‘swollen’ olives saturated with water don’t have more oil than small ones, and shrivelled olives might be better for oil;
  • Time of year, or how far into the season it is, which varies according to the weather each year (a late spring means a later harvest);
  • The press used – a commercial press will do a better job than trying to make olive oil at home with a blender.

So when you’re thinking about picking olives, ask yourself how much oil you’d like, and work backwards. 2 litres of oil is 20kg olives (roughly). If you want one litre a month for the year, that’s 12 litres, or 120kg of olives.

Step 3: Book the press

The thing you need last is the thing you need to do first. You can’t just rock up to an olive press with 350kg olives and hope they’ve got space for you! Picked raw olives don’t store for long. You need to know before you head to the press that your spot is booked.

And in olive season, everyone wants their olives pressed at the same time, so it’s busy. (In Perth that’s mid-March to early June.)

We’ve even booked a press a year in advance to guarantee a spot. I’d recommend booking as early as you can.

When you book, you’ll also have to commit to the amount. Whilst there’s a bit of flexibility there, it’s unhelpful for the press operators when people commit to 2 tonnes and then deliver 300kg. Some presses will charge you if you bring more than you pledge.

Once you know the date, you can start planning the harvest. In all the years I’ve been doing it, we’ve always booked the press on a Monday so that all the picking can happen at the weekend.

Step 4: find olives!

Prior to the picking weekend, it’s a good idea to suss out the options. This means finding olive trees on public land, or finding olive trees in people’s yards.

(I count verge trees as people’s yards, even though they are technically public land, as often the residents look after the trees with the intention of picking the olives. Always ask the resident before picking olives from the verge.)

Because olives are a lot of work to process, many people don’t have time to use them. Lots of people hate the mess and staining that black olives make, and you taking them away is also doing them a favour.

Finding olives could mean cycling or driving around the neighbourhood looking for laden olive trees, and then knocking on the door or posting a note in the letterbox.

Or it could mean asking on social media – on community pages, for example – whether anyone has an olives they won’t be using.

(This is what I do, although there’s a bit more risk here as one person’s “heaps” might only be a yoghurt tub full. Or there might be heaps… five metres up from the ground.)

Then again, you might get lucky and they’ll prune the tree for you!
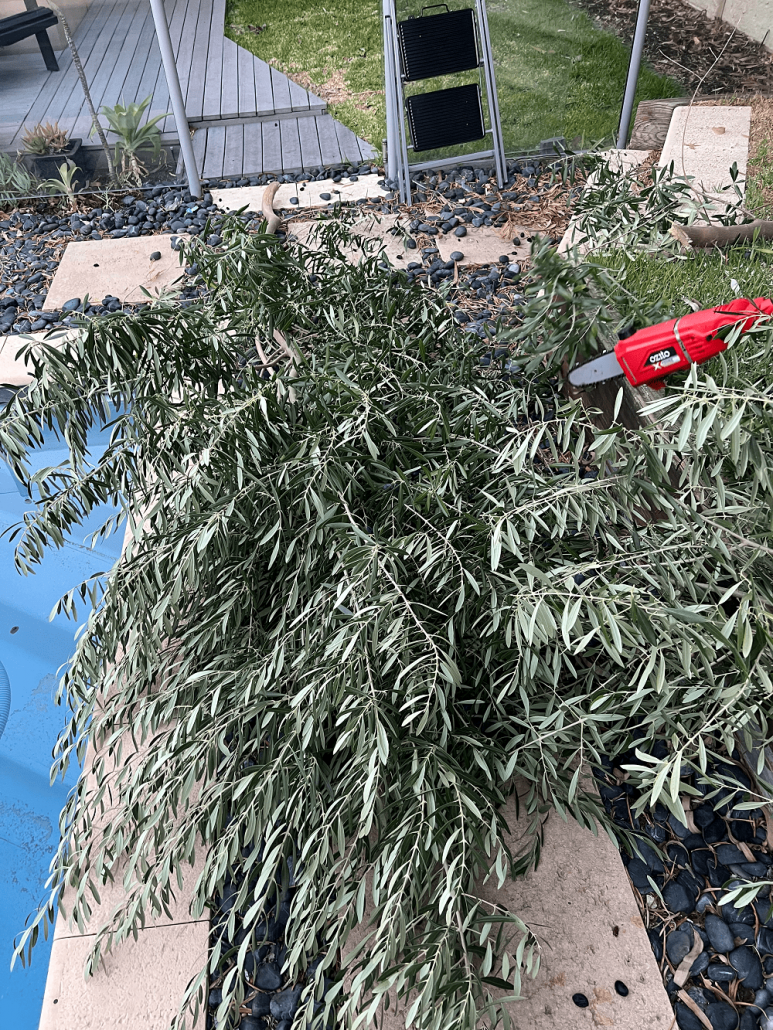
Try to avoid trees on busy roads as they will have bonus exhaust fumes included.

Olive trees tend to fruit well every two years, so one year’s bumper tree might be slim pickings the following year. Meaning, you can’t rely on last year’s winners.

Step 5: picking olives

Once picked, olives have a short shelf life (no more than three days). So the couple of days before the press is when ALL the picking needs to happen.

If you’ve committed to a reasonable amount of olives, it’s best to clear your calendar.

I usually commit to 84 – 96kg. The buckets I use hold roughly 12kg each, so I always commit to a multiple of 12 so I can think of it in buckets. 96kg, which is what I committed to this year = 8 buckets. Although the weight will vary slightly.

This year I’m picking with a community garden, and I need to give 15% of my olives to them as part of the agreement.

I ended up picking 107kg of olives, so 91kg will be pressed into olive oil for me. I should get 9 litres of oil to last for the year. From all of these olives:
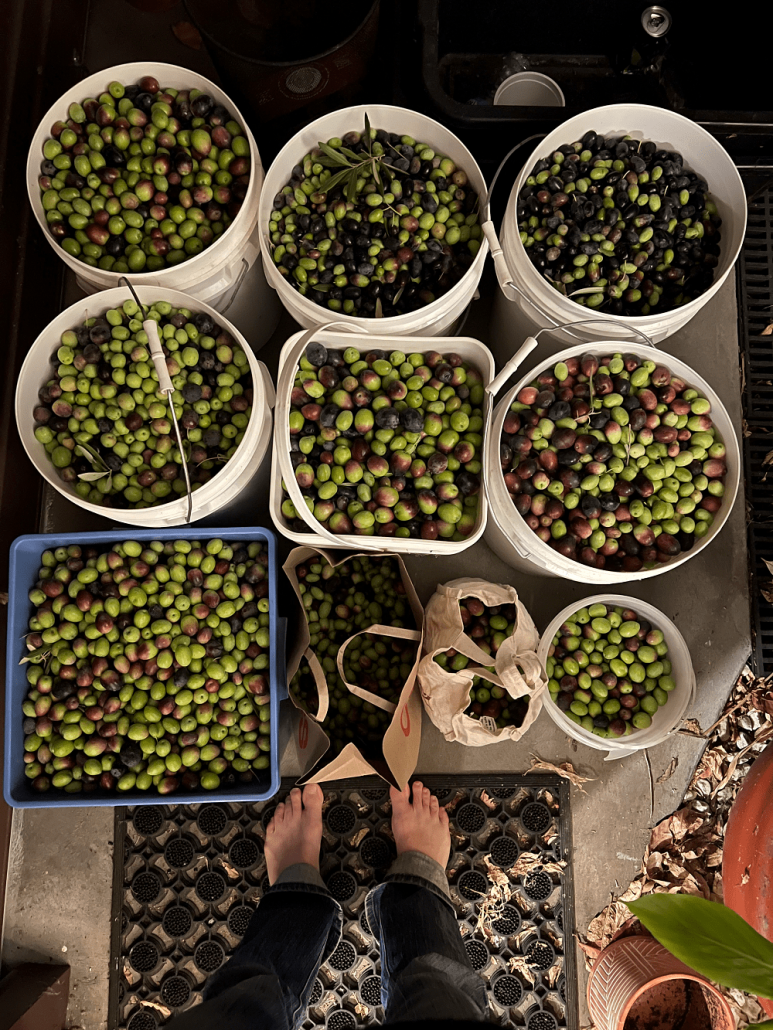
Olive oil harvest 2022

Which olives to pick:

Olives change from green to black as they ripen.

Ideally, you’d pick olives that are green and purple (either 50/50 or 33/66) as they taste best and have a better yield.

Fully green olives can still be picked. They are stronger flavoured and peppery, and have a lower yield. They are also the hardest to pick (they won’t dislodge by shaking the tree)/

Fully purple/black olives are very mild, but often lower in oil than the mixed colour olives. They are very easy to pick, and fine when mixed with green olives.

Wrinkly olives are also fine if the wrinkles are from lack of water and not from being overripe, and aren’t completely shrivelled.

When it comes to picking olives, especially in a community setting, quantity is EVERYTHING. Everyone picks everything they can get their hands on. Except bad, mushy, mouldy olives, of course.

(Commercial olive oil producers would be a lot more discerning.)

Picking everything results for a lower yield than if only oil olives were picked at the perfect time, but the oil tends to have a good flavour as the green, black and mixed colour olives, and all the different varieties, blend together to even one another out.

How to pick:

I’m not going to tell you how to pick as everybody has their system. My friend uses rakes and thinks it”s the only option, and wouldn’t do it any other way. (She picked 180kg this last harvest, so it’s clearly working for her.) You rake the oolives literally and they fall onto a tarp, and you gather them up.

I don’t like the rake option, and I’ve tried it more than once.

I attach a large yoghurt tub with a handle over my wrist, and strip the branches of olives with one hand so they fall into the tub on the other, then decant them into the big bucket. It works for me, and it’s faster than anything else I’ve tried.
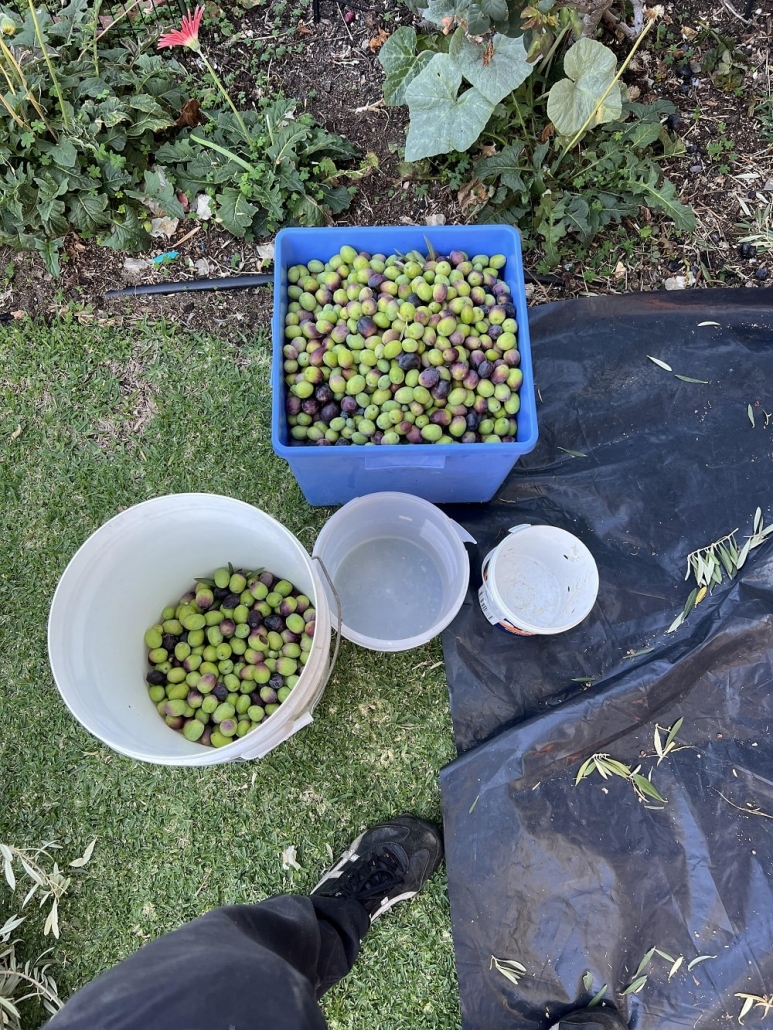
Olive oil harvest 2022

A tarp is useful to collect fallen olives.

A ladder tends to be helpful.

Step 6: take to press

I have to confess, in the 7+ years of doing this I’ve never actually been to the press myself. I do know that in some years the driver has been able to wait and then bring back the oil the same day, and in other years they’d have to return later in the week to collect. I think it just depends how busy they are.

You do need to provide large containers for the press to put the olive oil into.

Step 7: bottling

The oil from the press is unfiltered, which means it contains sediment – just natural fruit waxes and nothing unsafe. Ideally, let the oil sit for 4 – 6 weeks in a cool, dark place to settle before decanting.

Most people use wine bottles to store the olive oil. They are a good size, easy to come by and to clean, and a useful size to use in the kitchen. Dark glass is preferable to clear glass.

Other common questions

I’ve tried to answer some of the other questions I’m asked about olive picking and oil pressing below.

How much does it cost per litre?

The cost of the press is the biggest cost, but isn’t the only cost. There many be vehicle hire and fuel costs (both the presses I mentioned are quite far from the centre of Perth), and the cost of bottles or containers required by the press.

If you need to pay a membership fee to be able to participate, that’s a cost to factor.

The yield obviously makes a difference too – am 18% yield will mean more oil and a lower per litre cost than a 9% yield.

When I used to pick with friends, I’d pay $3.50 – $4 per litre.

Now I pick with a community garden I need to pay membership for, my costs are higher. Last year the cost of oil was $4.92 per litre, but combined with the membership fee worked out more like $7.26 per litre.

Do I give any oil to the people who gave their olives?

Generally, no, although if someone has a particularly fruitful tree, and helps me pick the olives, then I try to drop a small bottle of olive oil round to say thank you. But the whole process is a lot of work (and time), and then there’s a cost, and if I pick a bucket from a tree that only equals 500ml of oil, so there’s not really an excess.

I guess in that way olive oil is quite different to picking other fruits, where your yield is literally what you pick (minus some peels or core, perhaps).

How do I join in?

There are a few community groups in Perth that I know of that do an olive pick/press and are open to new members (if you know any others, please let me know and I’ll add them to the list).

Hilton Harvest Community Garden

North Fremantle Social Farm

Is it worth the effort?

It can be a little stressful when it gets to the weekend of picking and you realise you’re going to be way under your quota if you don’t find more trees, fast. Sometimes the weather can suck, but it’s not possible to postpone. By the end of the day, your whole body aches.
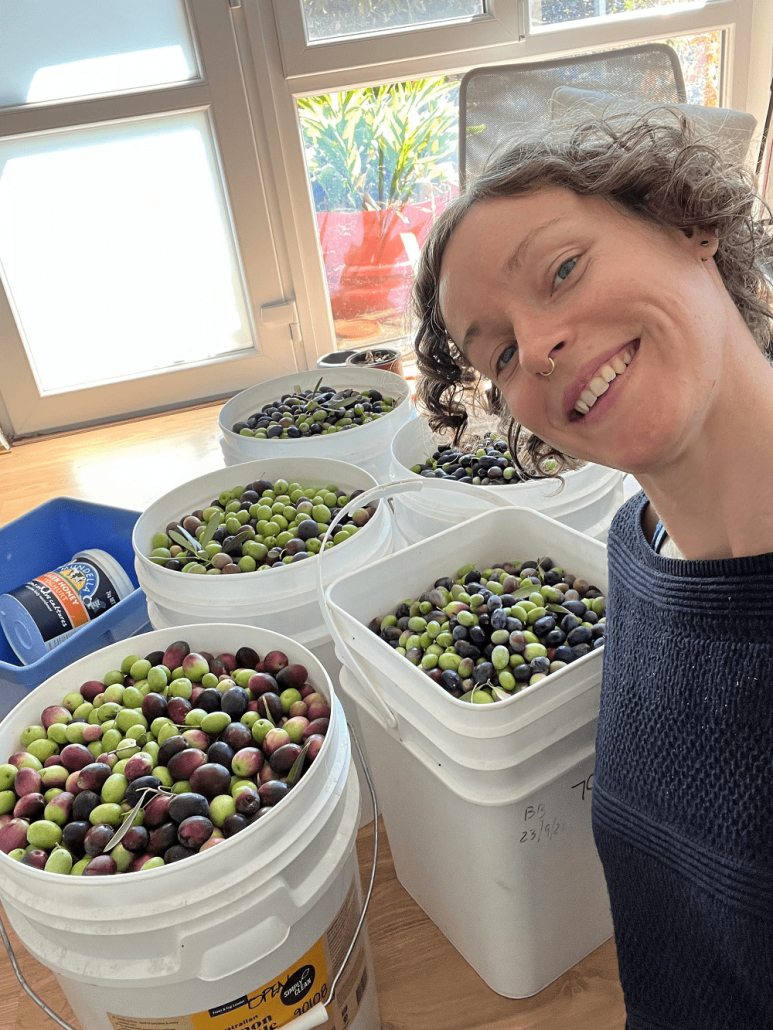
Olive oil harvest 2022

But the satisfaction, to me, of seeing all those buckets of olives that would probably have been wasted – it’s priceless. Most definitely worth it.

Maybe you’ll give it a go yourself next year?!

Now I’d love to hear from you! Any other questions I didn’t answer? Any tips for good public olive trees, or community picking groups to join? Any other presses you recommend (or not)? Anything else to add? Please leave your thoughts in the comments below!

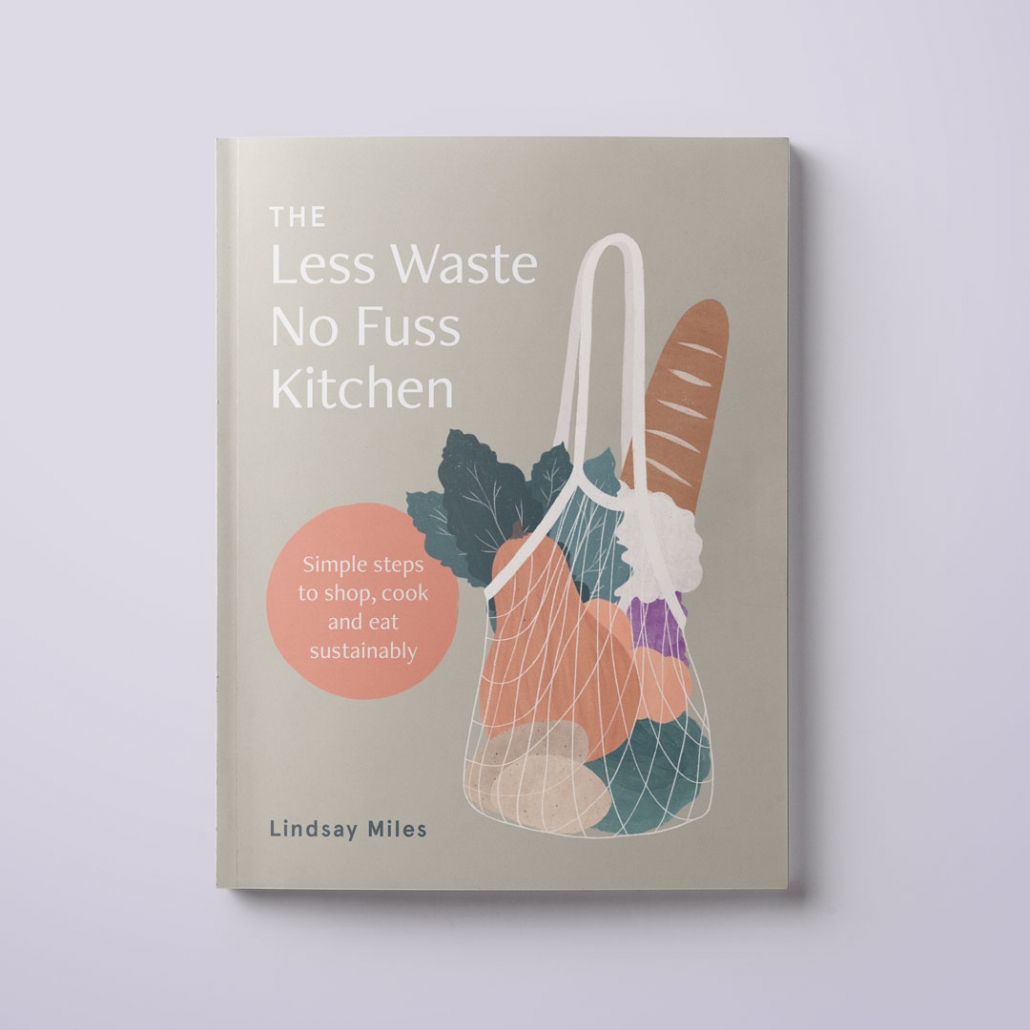
The Less Waste No Fuss Kitchen: simple steps to shop, cook and eat sustainably

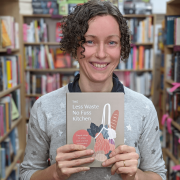
My new book ‘The Less Waste No Fuss Kitchen’ will be hitting the shelves in just a few days, and I’m excited to tell you all about it! Especially if you live somewhere where the bookstores are currently closed, so you can’t pop in for a good old snoop.

Never fear – I am bringing the snoop to you!

I’ve also included some answers to some of the questions I’ve been asked. I’ve had a few questions about the book, so just in case you’ve been wondering too, I thought I’d pop them all together for you.

A bit more about the book: introducing The Less Waste No Fuss Kitchen

The book covers three aspects of waste and sustainability: plastic and packaging, carbon footprints and food waste. I wanted to write something that talked about their interconnected nature. There has been lots written on each of the subjects but in isolation. But some of us who care about all of these issues – and we often don’t want to compromise anywhere.

And that makes making choices hard.

Is it better to buy plastic-free but air-freighted from overseas, or is it better to buy plastic-packaged but locally grown?

If groceries packaged in glass have a higher carbon footprint, is plastic packaging better if we want to keep our carbon footprint low?

Is it better to buy everything packaging free, but then increase my food waste as a result? Or choose the packaging to reduce my food waste?

And so it goes on.

What I realised as I was researching the book, is that there is never perfect answer. There are always exceptions to rules. ALWAYS.

Unless we’re going to grow every single thing we eat outside our back door, using rainwater we’ve harvested and seeds we’ve saved, and we’re recycling all our nutrients (I’m not just talking about composting food scraps…), then we are going to have some kind of impact.

Perfect isn’t possible, but better is. And that, my friends, is where this book is here to help. All the ways that it’s possible to take action, to do a little bit better than before. And how to figure out which actions will work (and be sustainable) for you.

Let’s take a look inside the book…

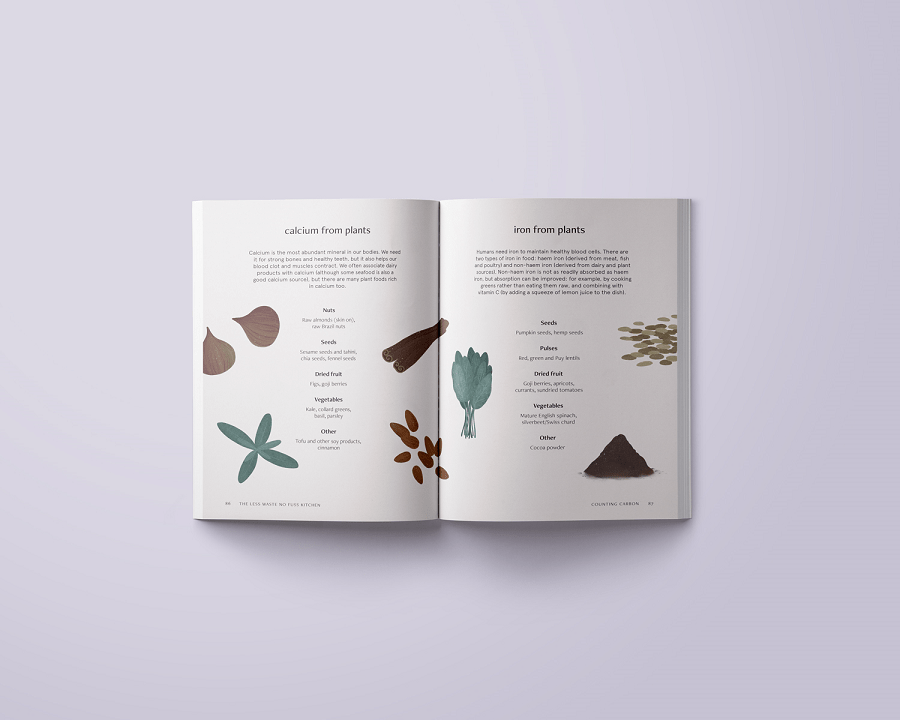
First, the technical stuff. The book is 224 pages, printed on FSC-certified sustainably sourced paper using vegetable inks. It’s full colour and there’s lots of beautiful illustrations throughout – and I even managed to get the illustrator to draw a compost bin, a bokashi bucket… and a mouldy strawberry!

These things are just as important as the pretty stuff, amirite?

A reader asked me if it was gloss paper – no, it most definitely is not! The cover is flexibound, which is half ways between a hardback and a paperback.

Now, the content!

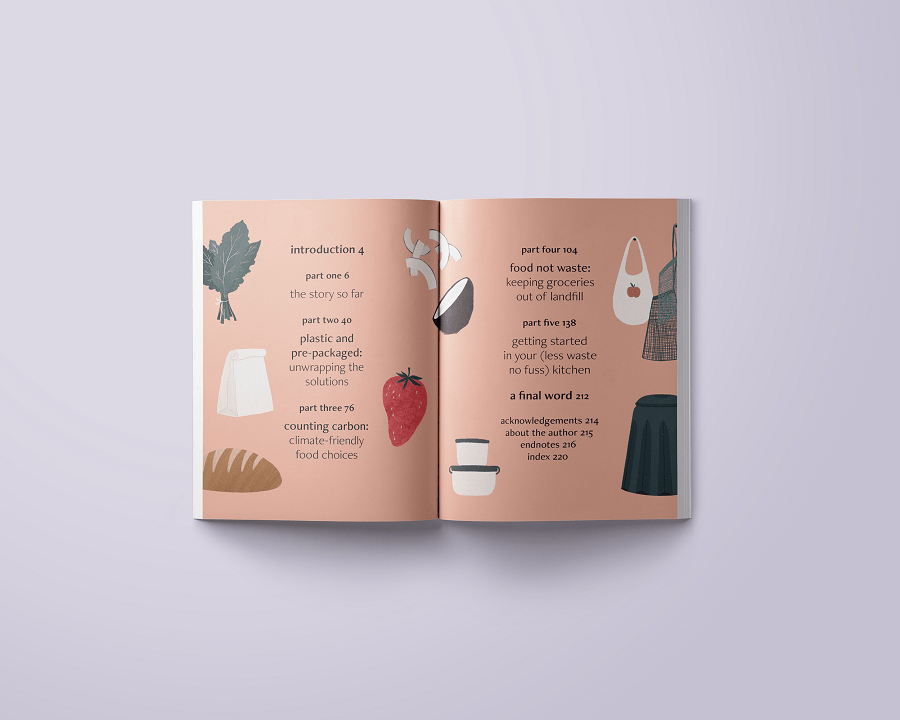
There are five sections:

Part one, the story so far – a look at our modern day food system, how it evolved to be the way it is and some of the problems it has created. I’m not one to dwell on problems, but it’s helpful to have a bit of an understanding of the issues we are trying to fix.

Then, we talk about habits, and making an action plan that’s sustainable for you, starting where you are.

Part two, plastic and pre-packaged: unwrapping the solutions – all about plastic and other types of single-use packaging, and how we can make better decisions around our choices and where possible, use less.

Part three, counting carbon: climate-friendly food choices – covering how our modern food system contributes to greenhouse gas production and all the ways we can lower our footprint, from the way we shop to the things we buy, and what we do with those things once we bring them home.

Part four, food not waste: keeping groceries out of landfill – a look at all the ways we can reduce what we throw away, from better storage to using things up to processing our food waste at home.

Part five, getting started in your (less waste no fuss) kitchen – practical ideas for reducing waste when in the kitchen. From setting up your kitchen to choosing substitute ingredients to use what you have, from tips for cooking food from scratch and simple recipes to get you started.

Here are a couple more sneak peeks of the pages…

Where you can buy The Less Waste No Fuss Kitchen

The best place to buy the book, if you can, is your local independent bookstore. If you can’t physically go into the shop to browse, you might be able to call and arrange collection, or they may deliver.

Alternatively, you might like to support MY favourite independent bookstore, Rabble Books & Games (Maylands, WA). They can post, if you’re not local. All books purchased from Rabble will be signed by me :)

Alternatively, here are some online stockists that are selling my book:

Australia / New Zealand stockists:

Angus & Robertson | Booktopia | Book Depository | Dymocks | Mighty Ape (AU) | Mighty Ape (NZ)

UK Stockists:

(Official publication date is 11 June 2020)

Blackwells | Book Depository | Foyles | Hive Books | Waterstones

US and Canada Stockists:

(Official publication date is 16 June 2020)

Amazon | Barnes & Noble | Books-A-Million | Indigo (Canada) | Indiebound

eBook:

(Release date 15 June 2020)

Apple Books (iTunes) | Kindle (UK) | Kindle (USA)

Don’t forget your library!

If you’re a book borrower and not a book buyer, please don’t forget to ask your library to stock the book. It’s hard right now with so many libraries currently closed, but if staff are still working behind the scenes they might be able to order it in ready for when they re-open the doors. It’s worth checking!

The Less Waste No Fuss Kitchen – your questions answered!

Is The Less Waste No Fuss Kitchen a recipe book?

It’s more of a handbook than a recipe book. There are some recipes in part five, but it’s a much more holistic look at the way we shop, cook and eat. From the places we shop at to the things we buy; from navigating confusing choices to making the most of what we have once we bring it home – the book explores the options and ideas to limit plastic and packaging, lower our carbon footprint, get more creative in the kitchen and reduce food waste – without overhauling our entire lives or chaining ourselves to the stove.

Less waste, no fuss.

Is this a book that vegans will get value from? / Is this a book that non-vegans will get value from?

Without wanting to say ‘it’s a book for everybody!’ (because when is that ever helpful?), if you’re a vegan or a non-vegan who gets value from reading my blog, then you will get value from reading my book. Remember, it’s not a cookbook (although the recipes that are included are plant-based/vegan friendly). There’s no beating anyone over the head with a baguette and telling them what they *should* be doing (or eating) – that’s just not my style.

My approach (here and in the book!) is to avoid being prescriptive, and anyways, I really don’t believe there is a single approach that works for everyone in all circumstances. The purpose of the book – as I see it – is to help you find which approaches will work for you (rather than tell you what I think you should do).

Can I get a signed copy?

Yes! If you order from my favourite local independent bookshop Rabble Books and Games (located in Maylands, Perth WA) you’ll be able to request a signed copy!

Pick-up is available in store, or they offer local delivery, or ship by Australia Post for orders further afield.

Are you doing any events or a launch for the book?

Sadly no, all the events that were planned have had to be cancelled due to Covid-19.

Why are there different covers of the book?

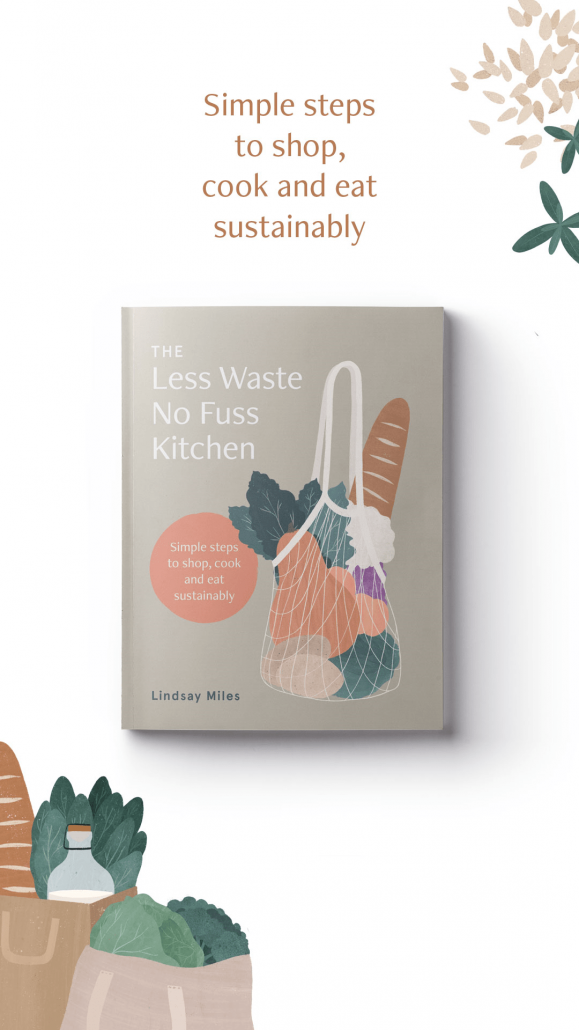
Actually, there aren’t. There is just one cover – this one.

However, the US office of my publisher released a super early concept version of the front cover several months ago (one that I’d never seen before it was plastered all over the internet!) and it’s been a long process trying to get all the stores to update the image. That cover never went to print, and you won’t actually receive a book with any cover other than the one above. Sorry for the confusion!

Is there an ebook or audiobook version?

The ebook is being published on 15 June 2020. There is no audiobook planned at this stage.

I hope that answers all your questions, and gives you a bit of insight into the book. If I missed anything, be sure to ask me.

I can’t wait for you to have a read, and I really hope you find it useful and actionable!

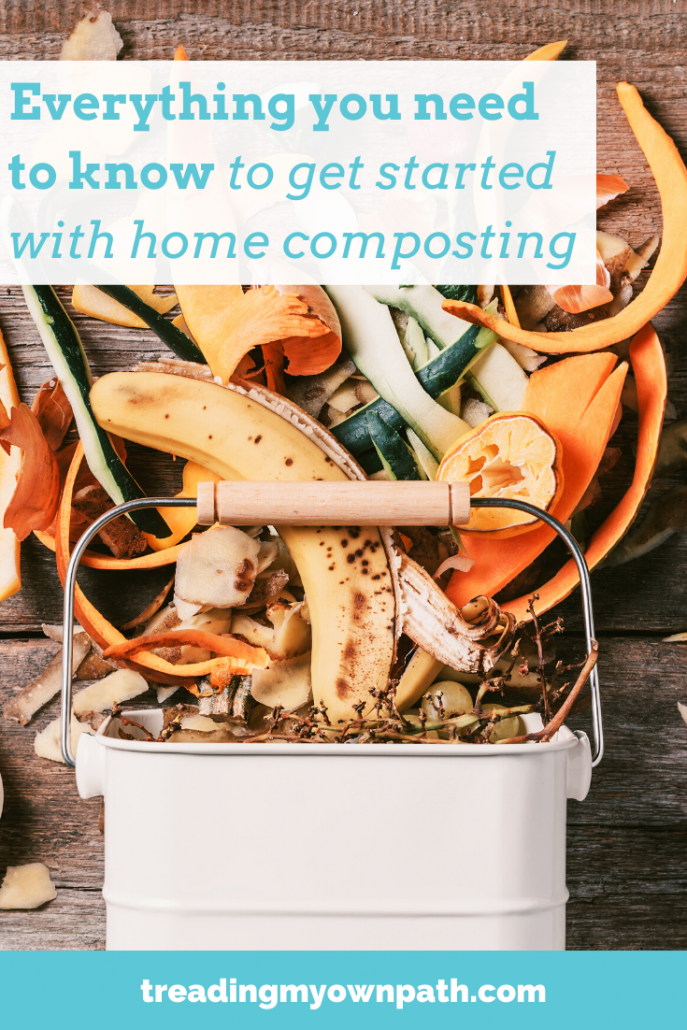
Everything you need to know to get started with home composting

Composting can seem a little overwhelming. There seem to be so many things to worry about; things that might go wrong. It can seem a bit technical and science-y. But actually, the basics are quite simple, and it is easier to get a compost bin cranking than you think.

If you’re composting at home, especially if you’re a beginner, you don’t really need to get bogged down in the details. Understand the principles, and you’re on your way.

If you love the idea of composting, but simply don’t have the option to compost at home (or where you live), this post on composting without a compost bin might be useful.

If you’re keen to get you own compost system set up at home, read on.

Choosing your composting system

There are a few different composting systems (and I’m only talking about composting today – not other methods like worm farming/vermicomposting or bokashi systems).

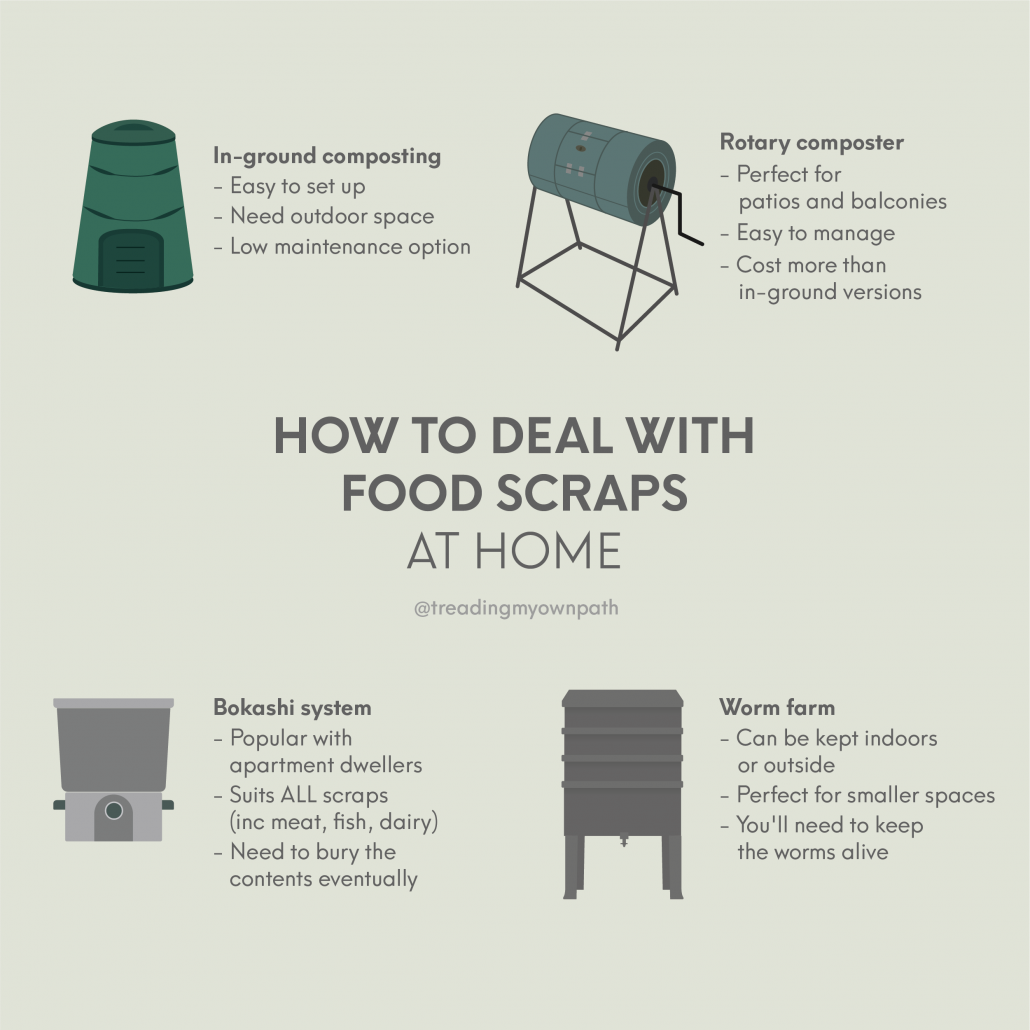
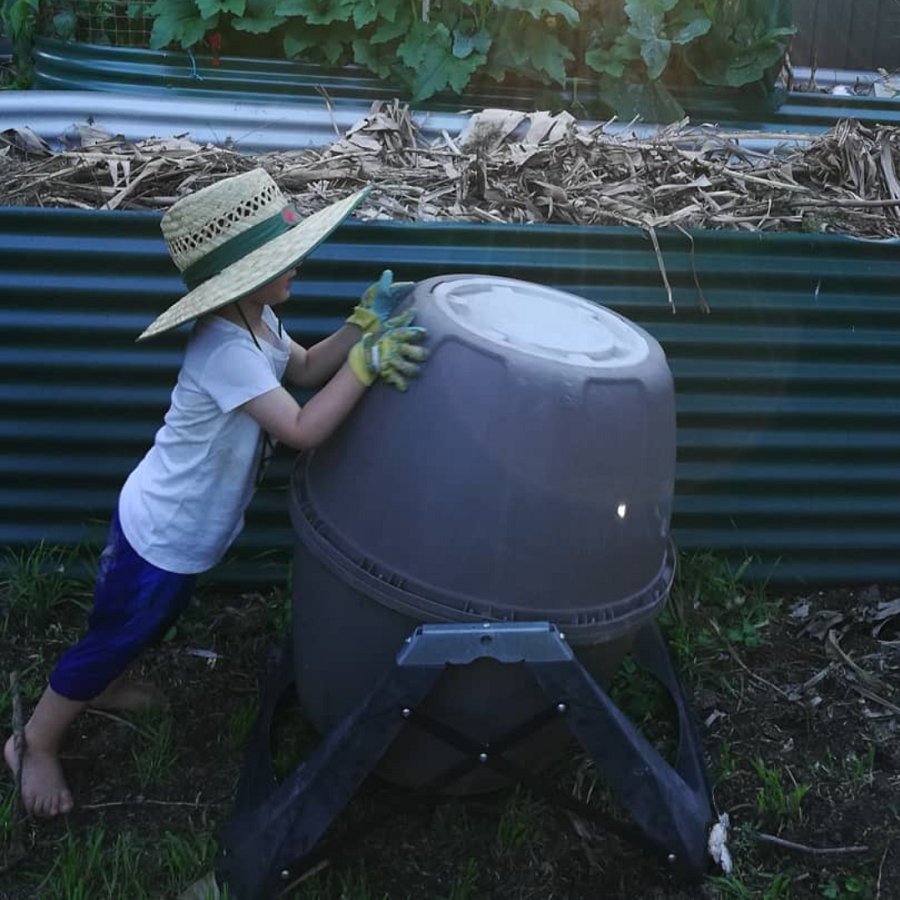
For the beginner, there are two great home composting systems: the regular compost bins we are most used to seeing (I call them in-ground compost bins), that sit on the ground or are slightly dug in, and rotary compost bins, which are an enclosed system mounted on a frame.

Compost heaps or compost bays aren’t great for beginners as they are more difficult to manage. Digging food scraps into the ground or in trenches (if you have space for that!) works too, but it’s not really a ‘system’.

In-ground compost bins

These are easy to set up and low maintenance, and usually cost less than the rotary versions. There are a lot of second-hand compost bins available, so it’s probably not necessary to buy a new one. It’s also possible to make them by upcycling plastic barrels, old bins or other old containers.

You’ll find different styles of bin, some with doors at the bottom and heaps of ventilation holes, others that clip together and some with no bells and whistles at all.

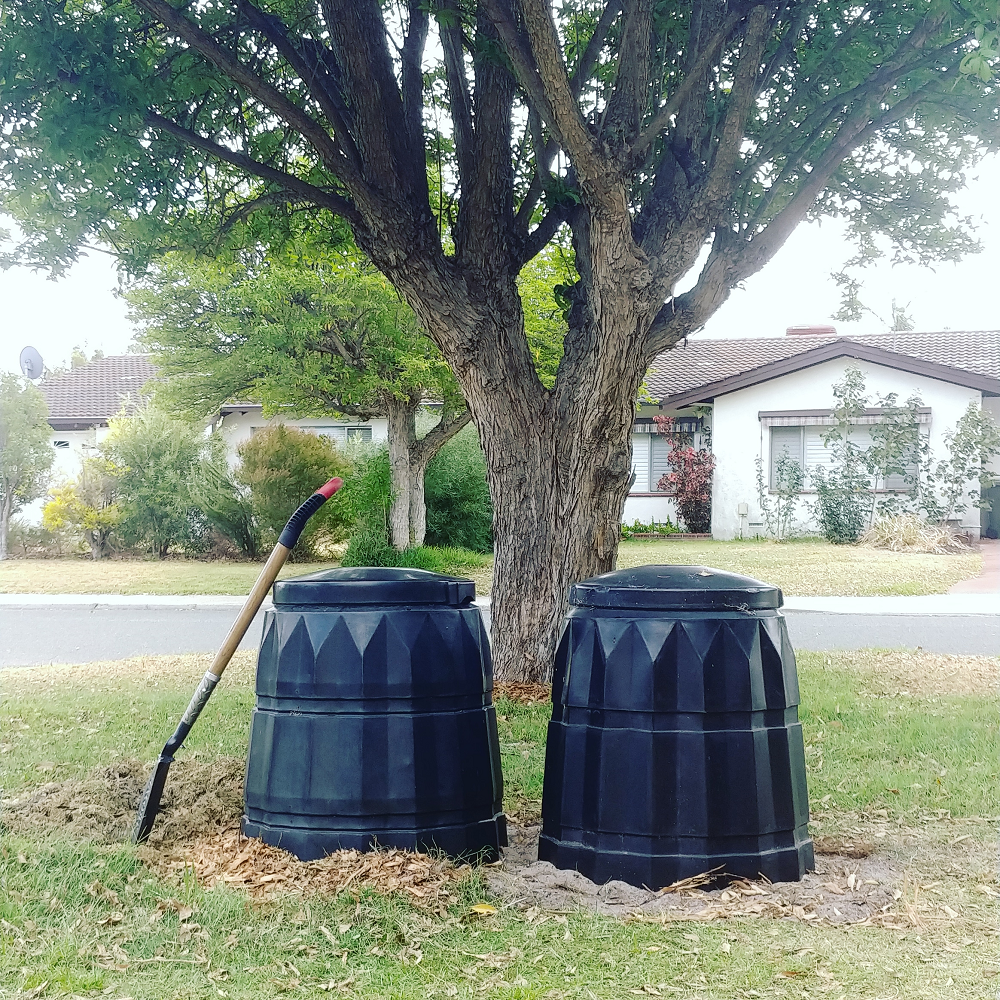
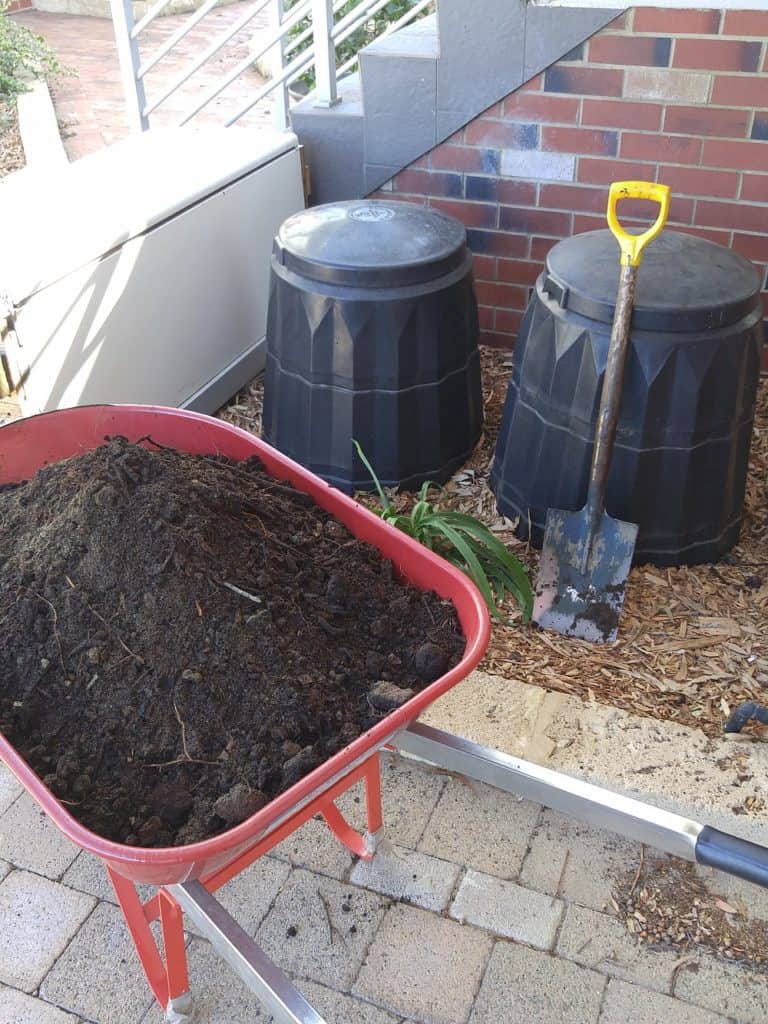
I’m a fan of the no bells and whistles type, pictured below (I call them Dalek bins). These work best for the climate I live in. These types of bin don’t have a base, and I dig into the soil (about 10cm deep).

In my hot climate, any ventilation holes are just gaps for moisture to escape and pests to get in. Plus they provide points of weakness (because we all know plastic breaks down when exposed to sunlight).

Doors at the bottom might look cute, but the reality is it is easier to wait for the entire contents to become compost and dig the whole thing out at once.

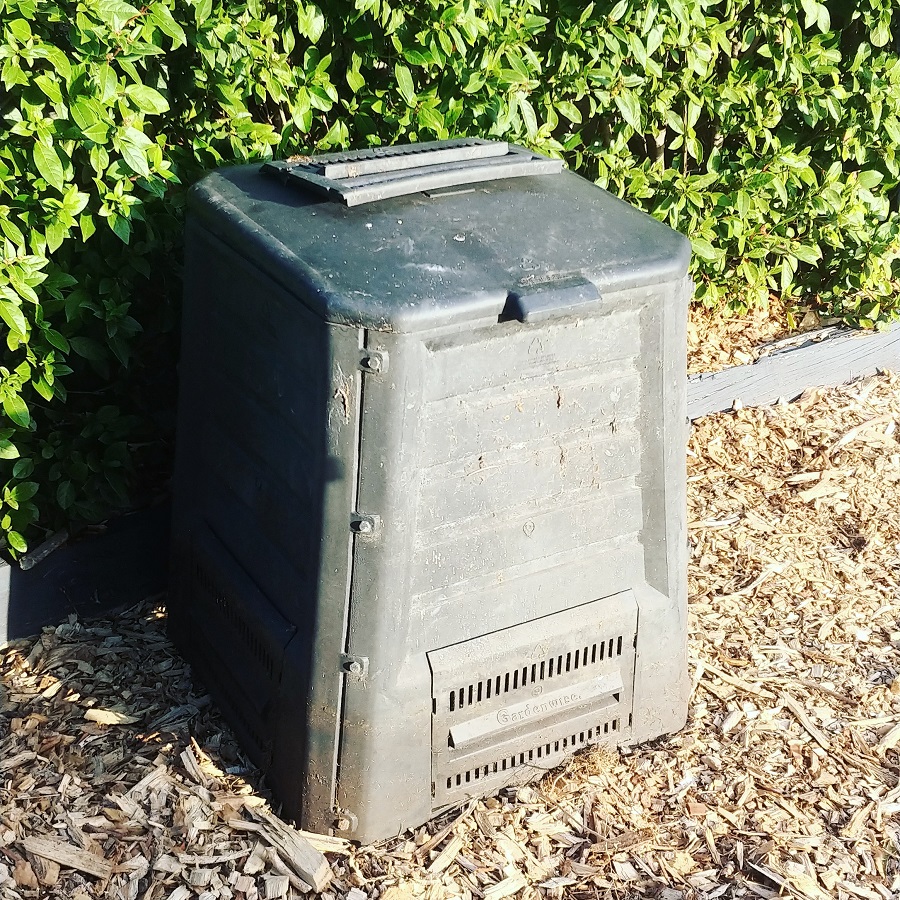
That said, it’s possible to make most compost bins work. My neighbour was recently clearing out her shed, and offered me this for free. My plan is to dig it into the ground so that the vents at the bottom are covered, and only use it for garden waste (no food waste) to deter any pests that might want to crawl in the sides.

Because of the gaps along the sides, it will probably need a bit more water added than the other type.

Rotary composters

These tend to be more expensive than the in-ground versions, but they are perfect for patios and balconies and spaces where it isn’t possible to dig one into the ground. I’ve seen DIY versions but you’re going to need to be a bit handy to make one, as the cylinder has to be able to rotate on a frame.

There are lots of different styles and sizes, too. Some are long and thin, others are short and squat – and the way they are mounted on the frame (and therefore how they turn) varies too.

When choosing which one is right for you, it’s best to think not only about your space but also your physical capabilities. A huge bin might seem like a great idea, but if you can’t turn it because it’s too heavy, that isn’t going to work.

Another great advantage of these bins is they are less likely to attract pests and are pretty much rodent-proof.

Where to position your compost bin

You’ll often see it written that a compost bin should be placed in sunny spot, but that depends on where you live. If you live in a hot climate, placing a bin in full sun means it dries out. (Compost bins need moisture to work.)

I think it’s more important to think about a spot where you’ll actually use it. At the end of the garden behind the shed might seem like a great idea… until you need to put your scraps in it when it’s dark and raining.

A well managed compost bin shouldn’t smell, so being near a kitchen window shouldn’t matter, but if you don’t trust your skills (yet) perhaps make sure it’s not too near any doors or windows.

If you do have a garden, under a fruit tree is great, as the tree roots will benefit from the compost at the bottom of the bin.

I’d say, choose a warm and accessible spot (in a hot climate, dappled shade / afternoon shade is helpful if possible). Don’t forget, you can always move it later if your first spot doesn’t work out.

Setting up your compost bin

Once you’ve chosen a site for your compost bin (and dug it into the ground a little if it’s an in-ground compost bin – 10cm is ideal), you need to get it set up and ready to accept food scraps.

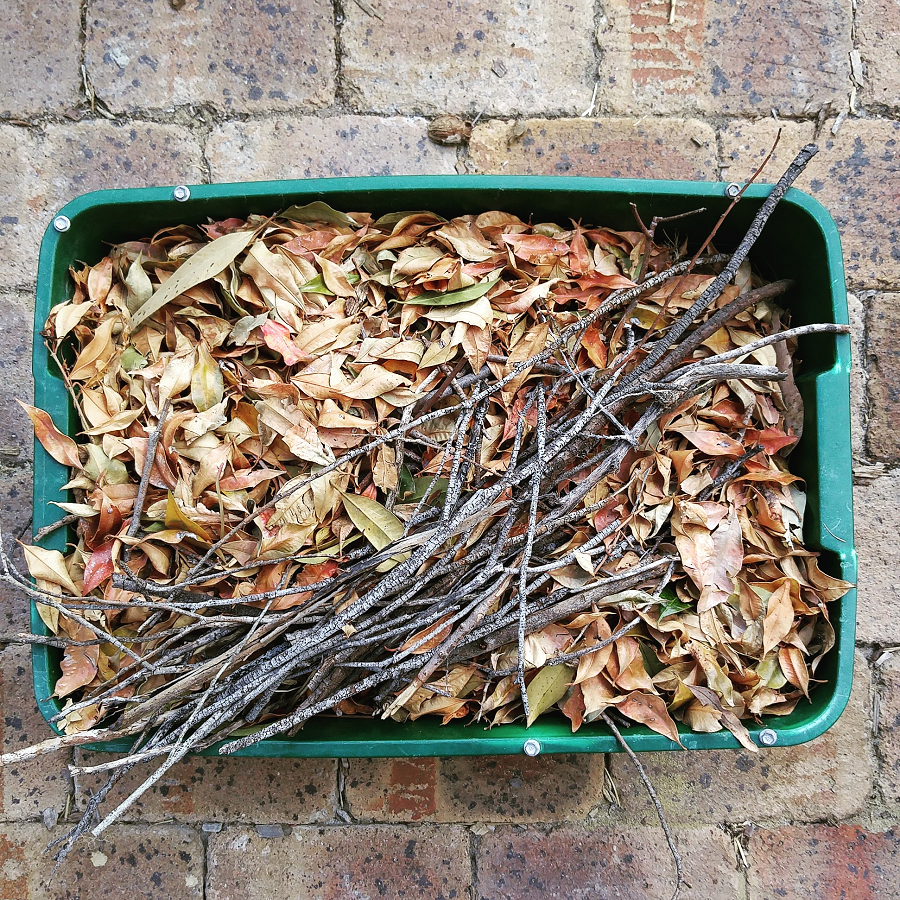
Compost bins need air (oxygen) to work properly, so when you’re setting up a new bin, it’s good to start with something chunky as the base, that allows air flow. Twigs and sticks and egg cartons are great.

The biggest mistake I see (and yep, this was also me when I started) is to add ALL the food scraps, nothing else, and watch in horror as your compost bin becomes a stinky, fly-infested mass of yuck.

Compost bins need balance. In particular, they need a balance of fresh stuff (called ‘greens’) and dead stuff (called ‘browns’). On a more technical level, we are talking about nitrogen and carbon.

Too much nitrogen (fresh stuff) will make for a stinky compost bin as it will break down too fast, using up the oxygen. Too much carbon (dead stuff) and your compost will take forever to break down.

For a beginner, a good rule of thumb is one handful of green stuff, and two handfuls of brown stuff. Or even three handfuls of brown stuff.

Placing a tub of shredded paper, old cardboard toilet tubes, egg cartons, dried leaves, wood chips, sawdust or straw (all carbon rich) next to your compost bin, so that every time you add some food scraps, you can add some carbon easily, works well.

As you add things to your bin, the stuff at the bottom will get compressed, and eventually run out of oxygen. This will make for stinky compost. Turn your compost with a pitchfork or turning fork (like a giant corkscrew) – or by rotation if that’s the type you have – to keep the air circulating. Turning once a week or once a fortnight is fine, or more often if you start to notice any bad smells.

What can and can’t go in my compost bin?

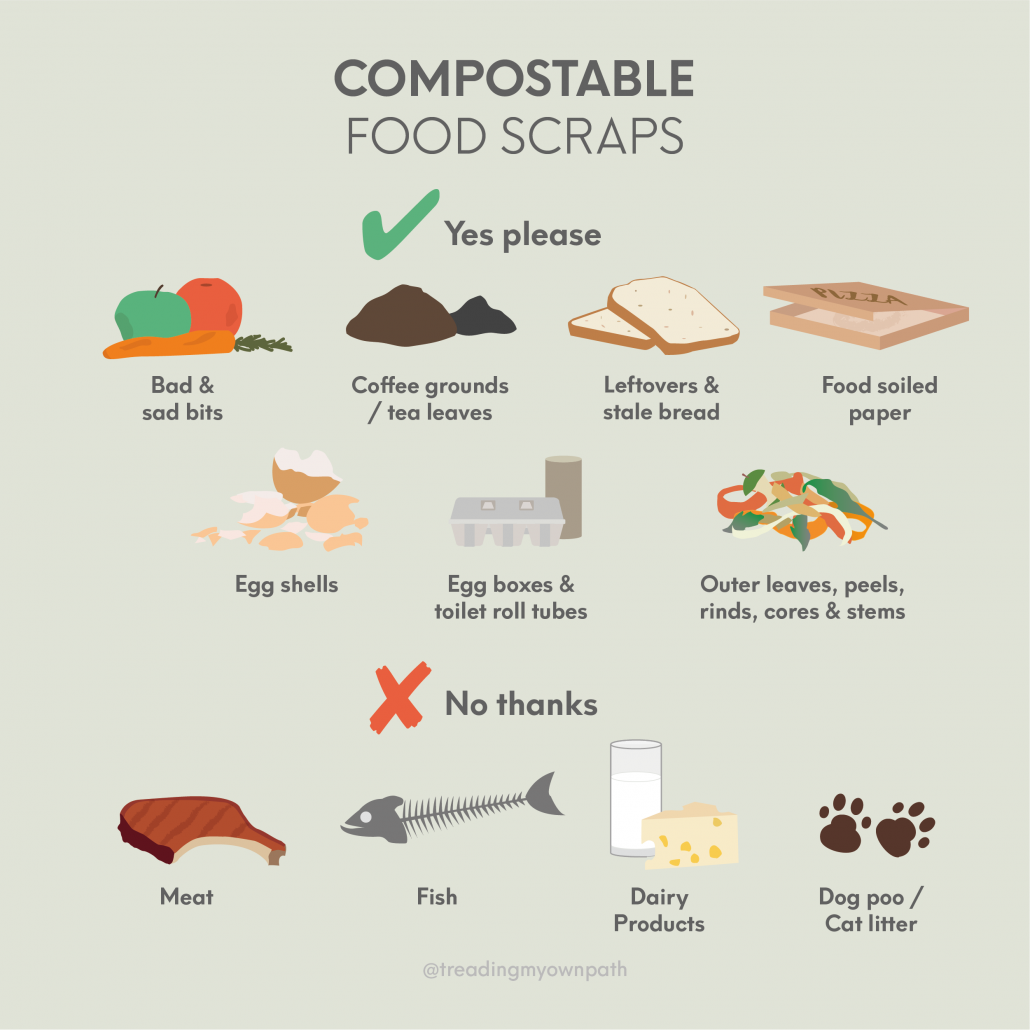
Anything that was once alive will eventually break down to become compost. There are a lot of myths circulating that you can’t compost things like onions or citrus – of course you can! When it comes to plant-based food scraps, everything goes.

As for other food scraps, it’s not that they can’t be composted, but they are more likely to attract vermin, other pests (like flies and maggots) or harbour dangerous bacteria.

As a beginner composter, avoid putting meat, fish, dairy products, bread and large amounts of cooked food in your compost bin if possible.

Thinking about garden scraps, the only things I don’t put in my compost bin are persistent or nasty weeds – things like couch or Kikuyu grass roots, or those weeds that have the spiky seeds that stab you if you stand on them barefoot.

Although home compost systems tend not to get hot enough to kill seeds, most seeds aren’t really a problem. It can be fun to get surprise tomatoes or pumpkin plants germinating from compost. Common weed seeds like dandelions still go in – even if I didn’t put them in my compost bin, the seeds are going to blow in from elsewhere, and they are easy enough to weed out again if they do appear.

Common composting problems

A good compost bin needs variety, oxygen (air), moisture and microbes/insects to keep it working. When one of these things is missing, you get problems or it slows right down.

Stinky compost bin? Add more carbon rich material, and turn your compost to increase air flow. Make sure food scraps are buried. A well managed compost bin doesn’t smell (or smells earthy, like soil).

Dry compost? Add water.

Soggy compost? If you can squeeze water out of your compost with your hands, it is too wet. Add dry material – shredded paper, sawdust, dry leaves.

Insects? Most insects are fine, so don’t panic. Lots of one type might indicate an issue. Ants usually mean it is too dry, so add water. If flies or maggots are a problem, cover the top with mulch or soil, and make sure food scraps are buried rather than sitting on top. The odd cockroach might make you wince but it isn’t going to harm you or your compost. An infestation probably means you haven’t turned your compost for a while. Mix it up, and keep turning it and they’ll find somewhere else to live. Insects have short lives, and will be gone soon enough.

Not doing anything? Adding a handful of compost or manure will add some microbes to your compost to give it a boost. Turning it will also (literally) help stir things up.

Can I set and forget?

If you want ready-to-go compost in 2 – 3 months (in a warm climate), you need to balance your greens and browns, and turn frequently. But if you just chuck it all in and forget about it, it will break down eventually. Much more slowly, but it will happen. Winter (and colder weather) also slows things down.

If you do want to use your compost bin in the garden, two (or more!) bins can be helpful. If you’re constantly adding fresh food scraps to your compost bin, you are always going to have non-composted bits in your compost. Ideally, you’ll fill one bin to the top, and then continue to turn it whilst starting to fill a second one. That way, you’ll have fresh compost ready to go by the time the second one is full.

Once emptied, you can start refilling again and leave the other one to work its magic.

If you want to start composting at home, the best thing to do is to just start. Then, as issues pop up or you have questions, you can troubleshoot one by one. Most problems are easily fixed. Get a compost bin set up, and you’ll learn as you go.

Now I’d love to hear from you! Do you have any questions about composting? Any issues I didn’t cover? Any beginner tips you think others need to know? Any other thoughts at all? Please share in the comments below!
[leadpages_leadbox leadbox_id=123a865e9839c5] [/leadpages_leadbox]

9 ways to get the most out of your freezer (+ reduce food waste)

My freezer has saved many a food item going into my compost bin. Overripe bananas, leftovers I’ve eaten for five days straight and really can’t bear to make it six, onion peels that I’ll use to make stock – the freezer is great for both reducing food waste, and treating future us to a ready-made meal in the form of something we prepared earlier.

Many of us are doing bigger and less frequent grocery shops than we might normally do, and cooking more than we might normally do – and this is putting extra pressure on the freezer.

Which let’s face it, for many of us is also a bit of a stick-it-in-there-and-forget-about-it zone.

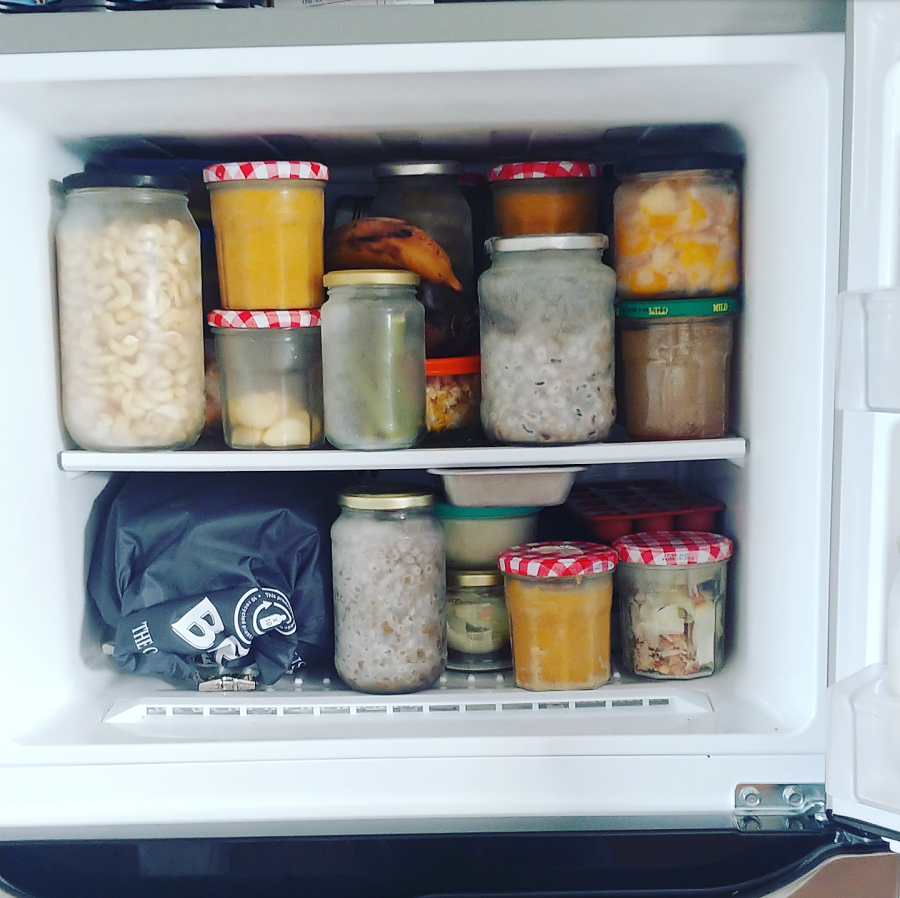
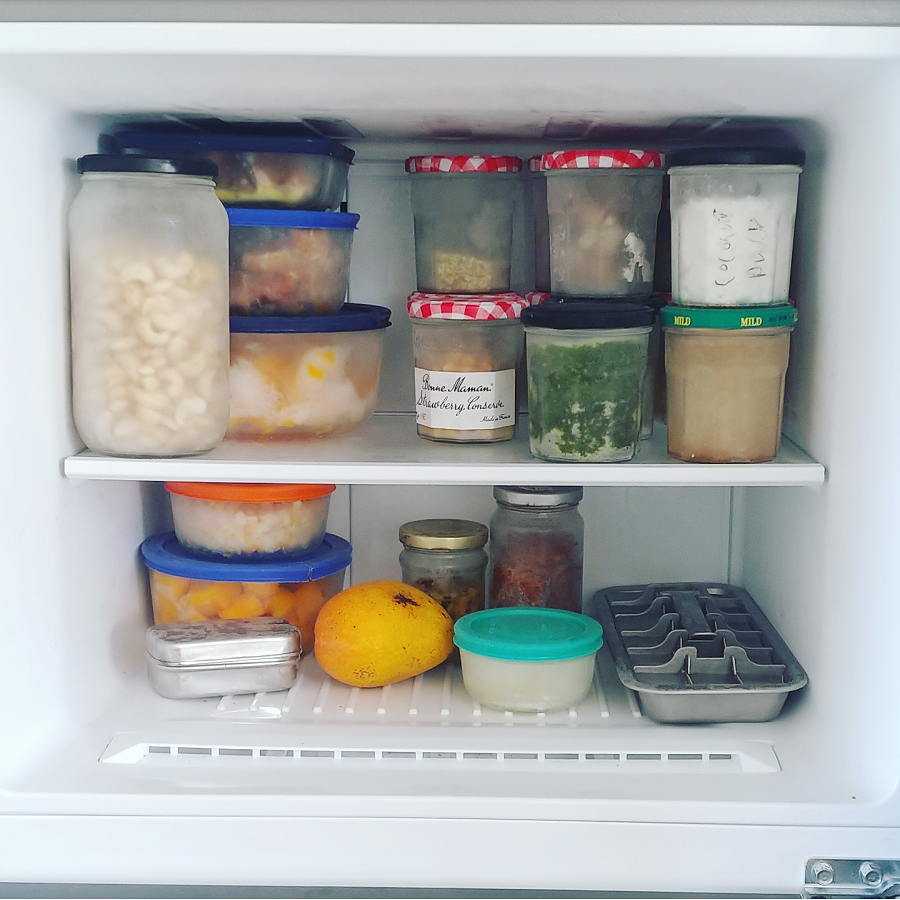
My freezer is fairly small, which means that there’s always less room in there than I’d like. But it also means that I’ve got good at keeping my freezer organised, and making the most of the both space and the utility.

If you’d like to use your freezer more efficiently, here are my tips.

1. Ensure your freezer is a frost-free zone

If your freezer resembles a small iceberg, it’s not running as efficiently as it could be – and that ice is taking up valuable leftovers space. If this is the case, you need to defrost your freezer.

Defrosting it will melt the ice – then you just need to ensure the melted water is removed and it’s wiped dry, and turn it back on.

Whenever I defrost my freezer, I put my freezer contents in a neighbour’s freezer temporarily. You can also put frozen food in the fridge or use an esky/cool box to slow down defrosting. Any meat, fish or dairy products are better not refrozen, but vegetarian leftovers will probably be fine to go back in the freezer.

Make sure your freezer is set to (and running at) -18° C (0° F) before you fill it back up.

2. Audit your freezer

It’s really useful to go through your freezer every few months and see exactly what is in there – because there will be something you had forgotten about. Hopefully something tasty!

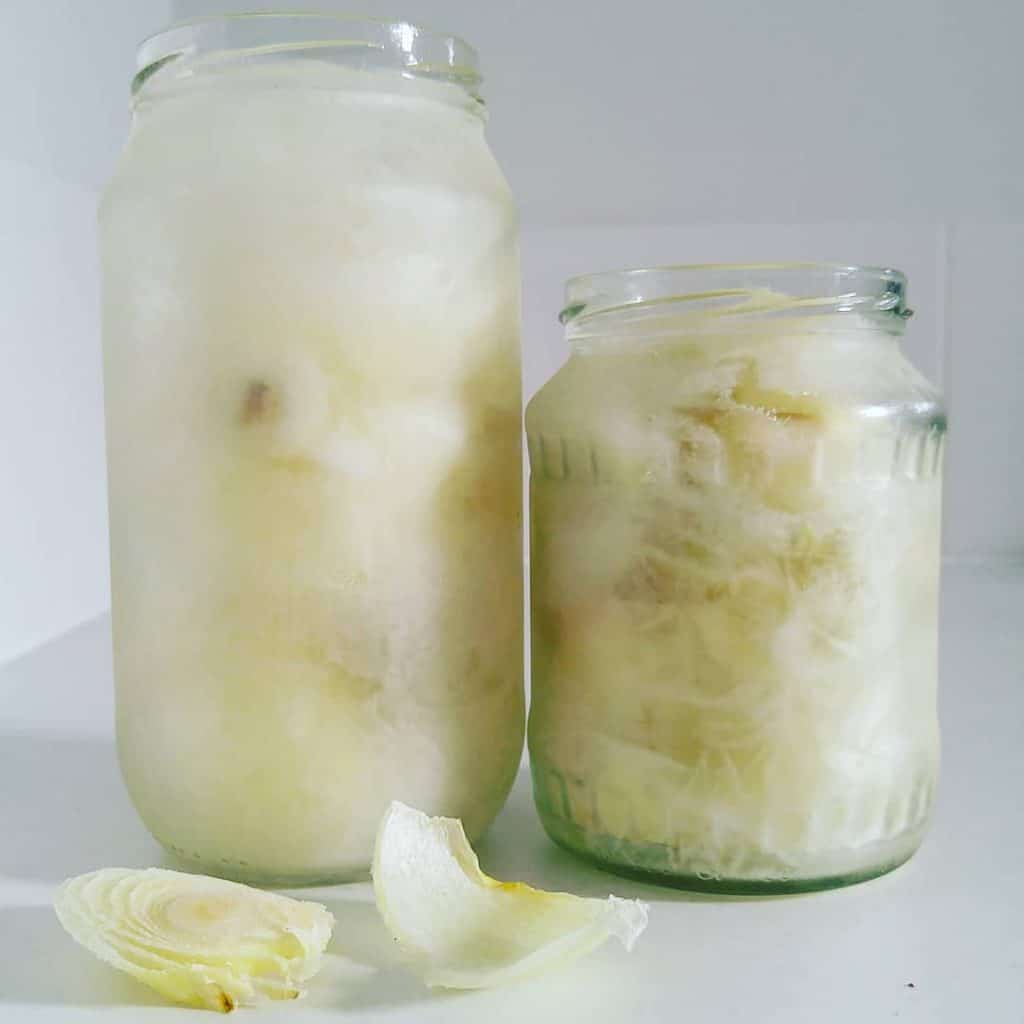
(With me, its usually extra jars of onion scraps for stock making. Sigh.)

It’s best if you can pull everything out and have a good look. That way you won’t miss anything, and you’ll spot half-empty containers and other things you might have missed.

Once you know what’s in the freezer, here’s some ideas to organise it better:

  • Make a plan to use anything old, or anything you have lots of, in the coming weeks;
  • Ensure anything you have lots of isn’t on your shopping list;
  • Put the oldest stuff at the front so you are more likely to notice (and therefore use) it;
  • Make sure everything is labelled (or at least the suspiciously ambiguous stuff);
  • Pop a reminder in the calendar for 3-6 months time, so you remember to do it again.

(I label my jars with a wax pencil – it’s easy to rub off. You can by them from art supply stores. You could also use a marker pen, or stick labels on.)

3. Prioritise what you keep in the freezer

If you’re like me, with a small freezer, you’re probably constantly juggling things to make space. When I need to make space for something else, there are a few things I think about.

What’s most valuable to be in my freezer?

Without a doubt, the most useful thing for me in my freezer is ready-cooked meals, ideally in 1-person or 2-person portions.

Generally speaking, the more prepared something is, the better. So frozen banana cake, or a frozen smoothie, is better than a frozen banana. A jar of stock is more useful than a jar of onion peels.

These are all things that save me time in the future (convenience) – which is what I value.

Value is also related to the cost of the item (what it would cost to replace), and the space it takes up.

Remove non-essentials.

I don’t keep ice in my freezer all the time (no space!) so if I have an ice cube tray in there during a sort, this is the first thing to go.

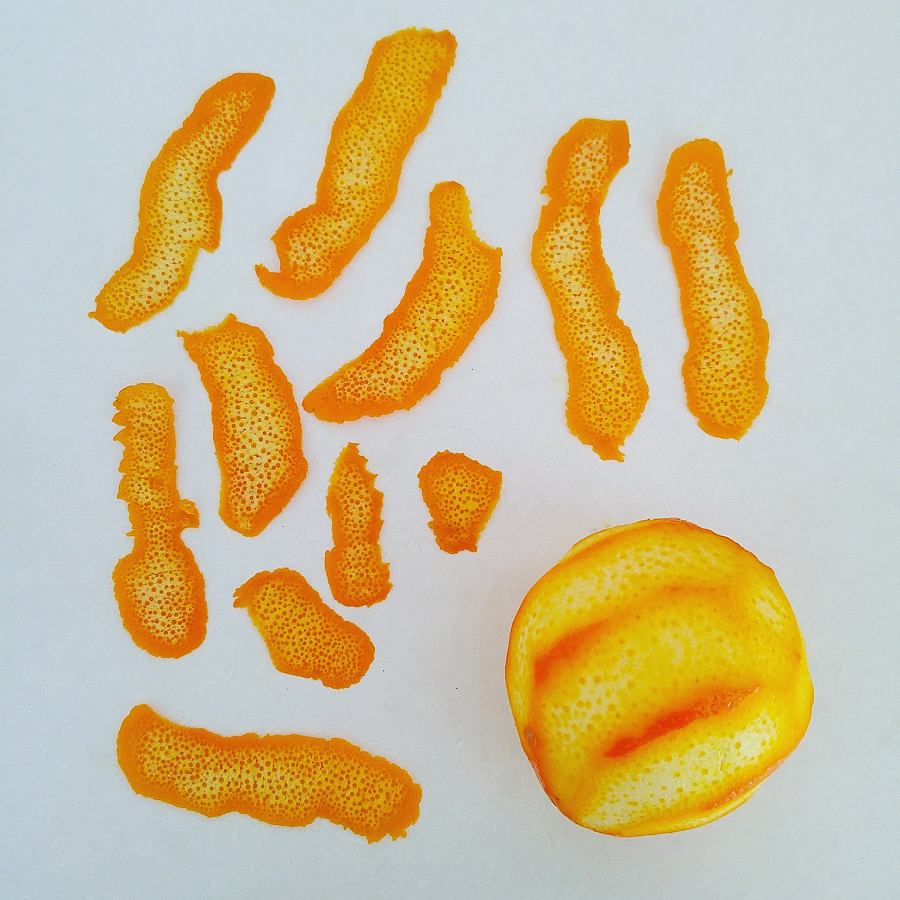
I also tend to have a bunch of ‘saved’ items in the freezer. I often have a jar of lemon zest, and maybe orange and lime zest too. That’s three jars. if I’m having a cull, these will go.

I don’t zest every citrus fruit I ever eat, so I don’t feel too bad about putting these in the compost if I’m short of space for something else. (Plus, it’s easy to make more down the track.)

Try to keep the contents balanced.

The more you rotate the food in your freezer, using up things and replacing them with new (different) things, the more you’ll get out of your freezer – literally.

I like to have a few slices of bread, a few portions of leftovers, maybe a jar of stock and a couple of jars of sauce, some frozen bananas – and then some snack items like falafels, fritters or hummus.

Rather than long-term storage, I use my freezer as a way to extend the life of leftovers, and make my meals more interesting – especially when the fridge is running low.

Prioritising doesn’t have to mean throw away.

If you do have to remove some things from the freezer, you don’t have to throw them in the bin. You can pop in the fridge where they will last a few days (they will defrost pretty slowly in there).

If it’s something that you know you won’t eat, but someone else might, you could try listing on the olioex app (it’s a free food sharing app).

4. Learn what you can freeze

In short, you can freeze almost everything (one important exception is meat and fish that has previously been frozen, and then defrosted).

When food is frozen, the water expands, which can change the texture. You’ll notice this with raw fruit and vegetables, which go mushy once frozen because the frozen water breaks the cell walls.

But this isn’t a problem if you intend to cook with them (using berries in baking, or veggies in soup) because cooking also breaks the cell walls.

Vegetables often freeze better if blanched (heated briefly in boiling water, then submerged in ice) first. But it’s not the end of the world to just freeze raw.

I always freeze my onion peels, leek ends and other bits I’ll be using to make stock raw, because they will be boiled later, so texture doesn’t matter.

You won’t notice much change in texture if you freeze cooked food. I often roast vegetables, and then freeze them this way. It also means that when I defrost, they are cooked and ready to go.

Milk and yoghurt can be frozen but freezing can change the texture of these – particularly of non-homogenised full-fat milk, which can go lumpy. It’s still edible, but may be better used in cooking rather than in coffee or tea.

5. Choose suitable containers

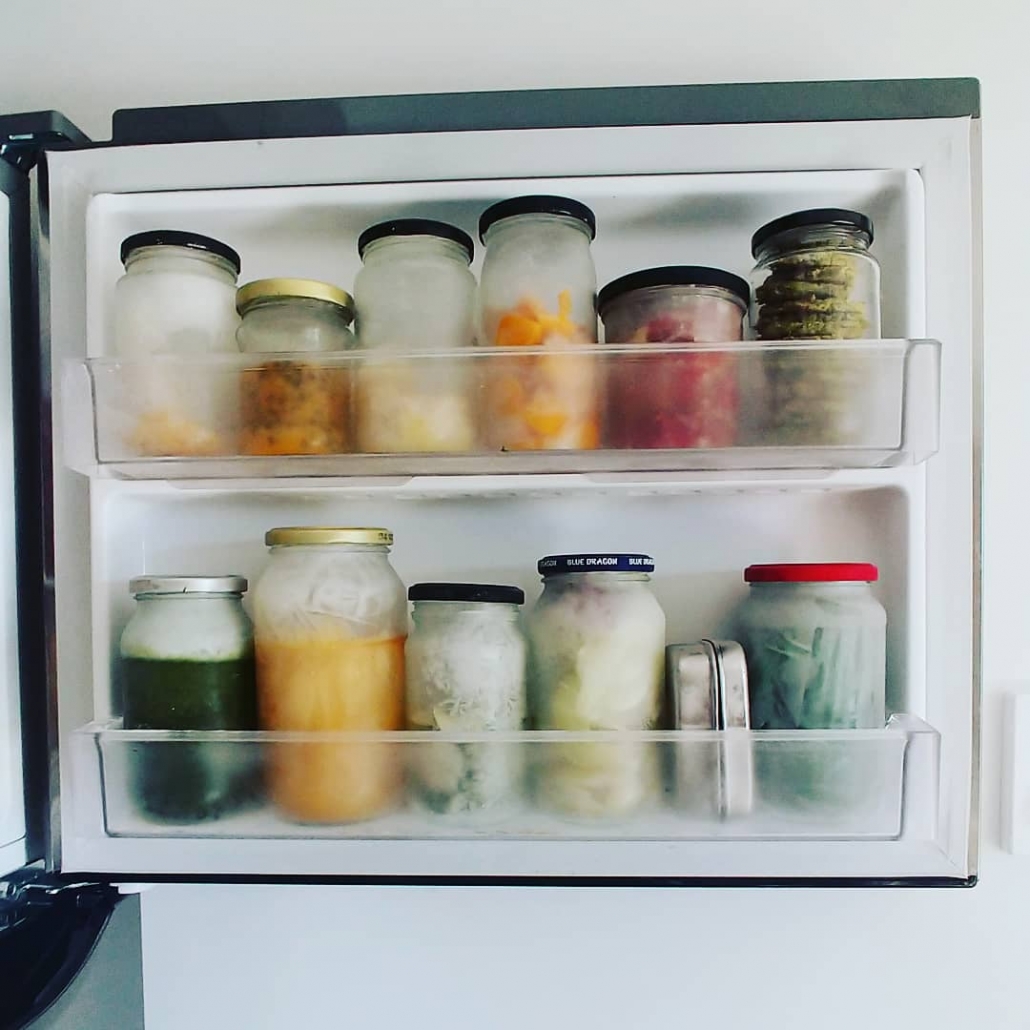
I prefer to freeze in a mix of glass jars, and Pyrex containers. I’ll occasionally freeze something in a stainless steel lunchbox, but they are less useful as you can’t see what’s inside (and frozen metal hurts my fingers when prising the lid open).

(Yes, you can freeze in glass. Instructions here.)

Bigger glass containers are more efficient in terms of space, but you’ll need to defrost the whole thing at once. Which is fine for traybakes or leftovers you made specifically for freezing, but less good for item you’d like to separate, like chunks or frozen berries.

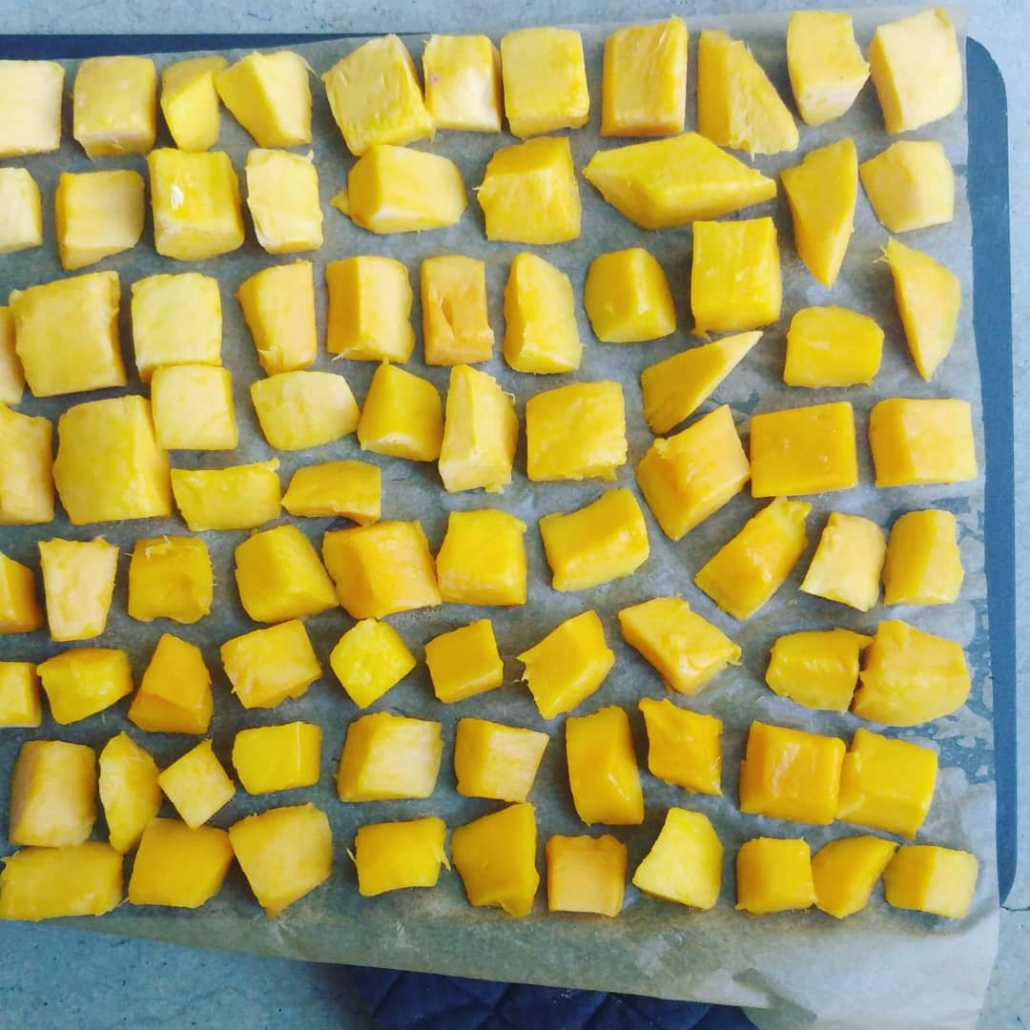
Tip: if you want to freeze berries, or anything cut into chunks, you can freeze on a tray, and once frozen, add to a big container. That way they don’t all stick together, and you can scoop out just what you need.

Smaller containers are great if you just want individual portions, but the containers take up more space, particularly solid ones like glass or thick plastic.

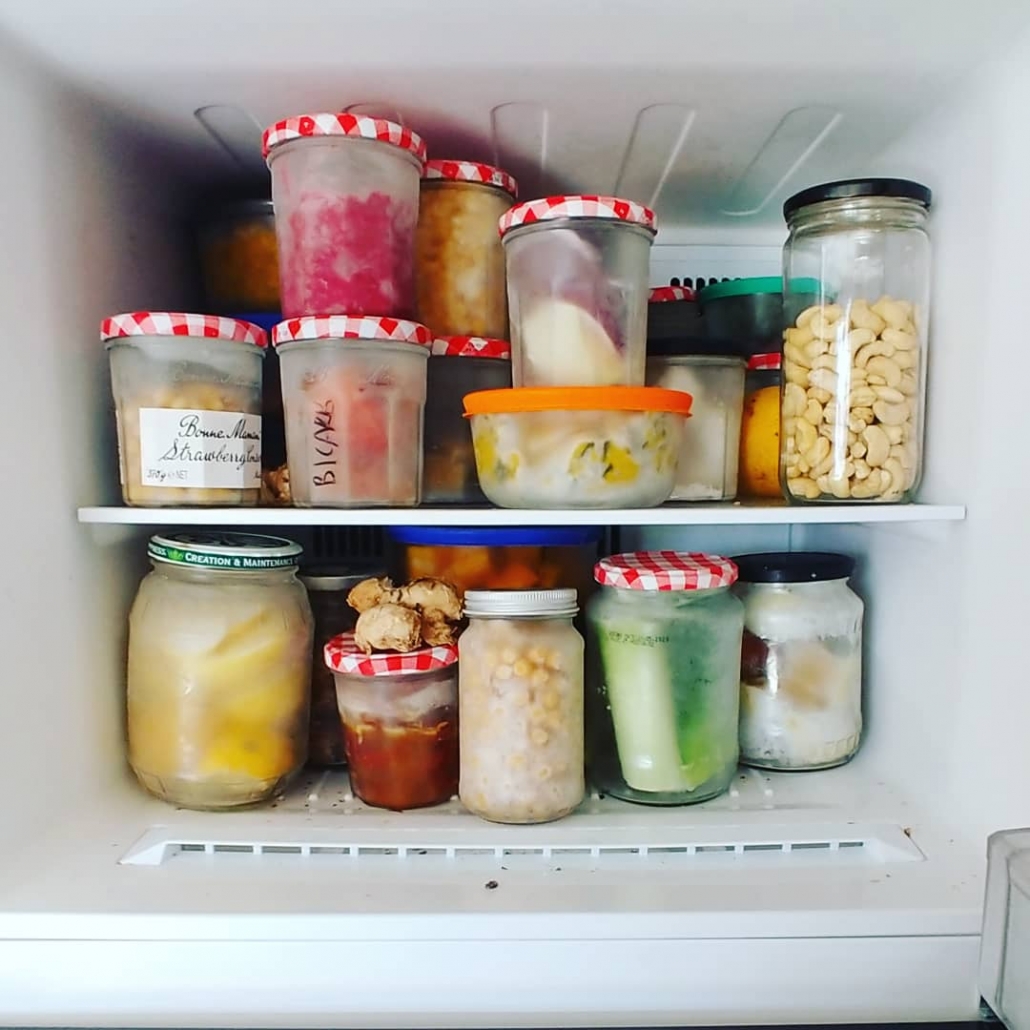
For small containers, I love Bonne Maman jam jars. They are readily available and free, and to be delight, I discovered that there is enough space in my freezer to stack them, which makes the most of the space.

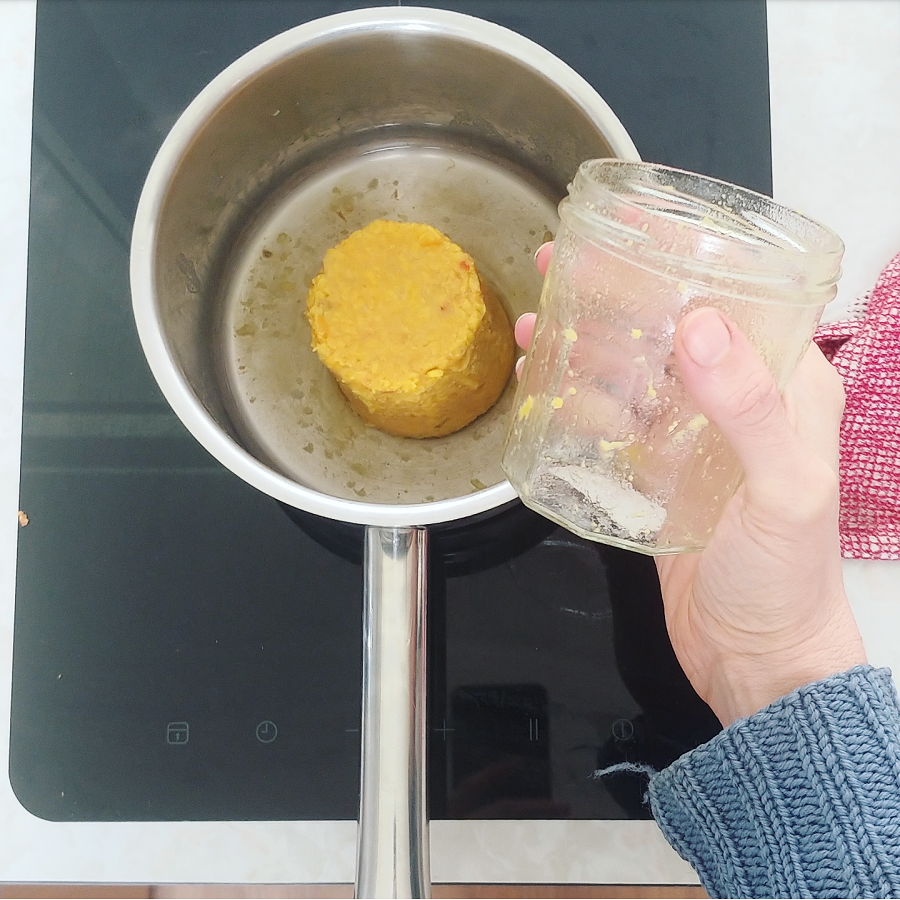
The tapered sides means it is easy to freeze in them (they are unlikely to crack, unlike narrow jars) and it is easy to slide still-frozen leftovers out to reheat in a saucepan.

I’m sure you all know that I’m not a fan of single-use plastic. If you simply don’t have room for solid containers, you could consider investing in some reusable silicone storage bags. And I do mean invest, because they are not cheap – but look after them and they will last a lifetime. Buy the best you can afford – if you have the budget, I recommend the Stasher bags (expensive, but you do get what you pay for), and can guarantee that they do not leak.

If reusable storage bags are out of your budget, and you’d prefer to use single-use plastic ziplock bags or similar, remember that you don’t have to use them once only. Wash and reuse them as many times as you can.

For freezing bread, I used a reusable cloth bag for years. After a million recommendations from readers I now have an Onya bread bag, purpose-made for freezing bread.

It’s not a necessity, but it will help keep your bread fresher for longer in the freezer.

6. Reduce freezer burn

Freezer burn happens when the fan that moves air around the freezer sucks out the moisture from the food, leaving pockets of air that discolour the food, and taste weird. Food that has freezer burn isn’t unsafe but it isn’t tasty, either.

The longer something is in the freezer, the more likely it is to develop freezer burn.

The more you can exclude air (and air circulation) from your food, the slower this will happen. Keeping food in containers helps, and packing containers tightly.

For really sensitive (or expensive) items, wrap with paper within in the container, which can help reduce the exposed surface area.

Make sure you’re rotating your food, eating the oldest things first, and don’t leave anything in the freezer too long. Whilst a few months will probably be fine, ultimately time is not on your side!

7. Label what you freeze

I am very bad at this, but it really is a good habit to get into. You might remember what the item is when you freeze it, but that doesn’t mean you’ll remember in six months time.

One label is better than no labels (it’s a start)…

And as the weeks/month pass, you’re less likely to remember the date – or even the year – you froze something.

So get into the habit of labelling what an item is (if it’s not obvious) and when you froze it.

8. Keep your freezer running smoothly

If you’ve gone to the trouble of defrosting your freezer, you don’t want it icing up again any time soon. There are a few things that speed up ice creation in freezers, so here’s a list of do’s and don’ts.

  • Don’t put hot food (such as leftovers) in the freezer. Let the food cool down, and ideally chill it first;
  • If you’re putting frozen items from the store in the freezer, wipe off any condensation or water that may have formed on the packaging;
  • Try to minimise how long you leave the freezer door open;
  • Check the freezer door seal, and if it’s not sticking properly, invest in a new one (it will also save you paying more than you need on electricity);
  • Don’t stuff your freezer so full that air can’t circulate;
  • Don’t block any fans or vents that say ‘do not cover’ on them.

9. Love your freezer and it will love you back.

Freezers are a pretty epic modern invention. By freezing, we can extend the life of our food, provide future us with tasty snacks and pre-prepared meals, and bypass the problem of ‘there’s nothing in the fridge’.

Keep your freezer frost-free, (relatively) organised and filled with things you like to eat, and you’ll be rewarded time and time again.

Now I’d love to hear from you! Are you good at making the most of your freezer, or could your freezer do with a bit of love and attention? Any tips you’d like to share, or questions about freezing? Any successes or fails when it comes to freezing food? Any other thoughts? Please share in the comments below!
Reducing food waste: store cupboard crumble (+ ideas to use up old fruit)

With the current lockdowns and restrictions on movements, I’ve been rethinking how I use my (rather small) freezer. Now that I really need to optimise the space, I’m removing and using up some of the less useful items that take up space (a few random sticks of rhubarb, and a jar of stock) and filling it up with more useful items – ideally meals, or parts of meals.

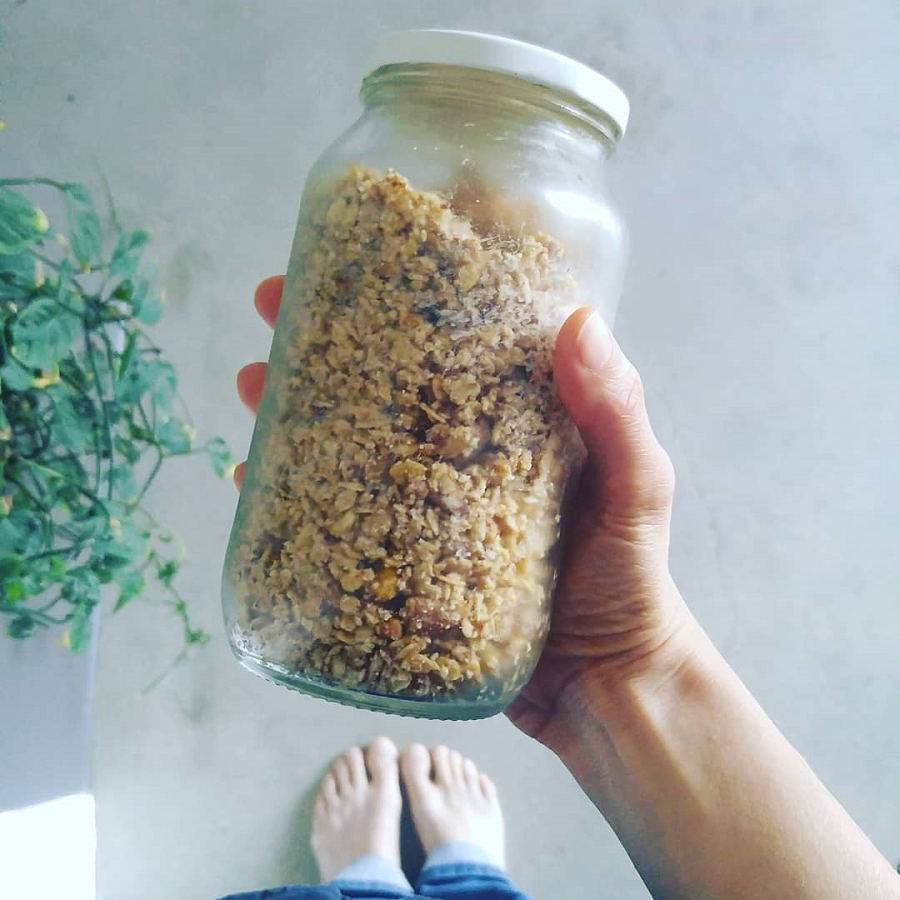
One of the things I find really handy to keep in the freezer is crumble topping. Whenever I make crumble I always double the topping, and freeze half. (After all, making double – or triple – the quantity creates exactly the same amount of mess and washing up, but twice the food, and I’m all for that.)

It means down the track, when I discover some sad fruit in the fruit bowl, or a glut of something that I want to use up, I can grab the topping outta the freezer, and voila – almost instant crumble.

Growing up, the crumble I ate was made of refined white flour, refined white sugar, and butter. These days I prefer to make my crumble a little bit healthier.

And as long as you follow the rule of some sweetness, some crunch and some fat, it’s a pretty great idea for using up random ingredients from the pantry.

Making crumble topping

Ingredients:

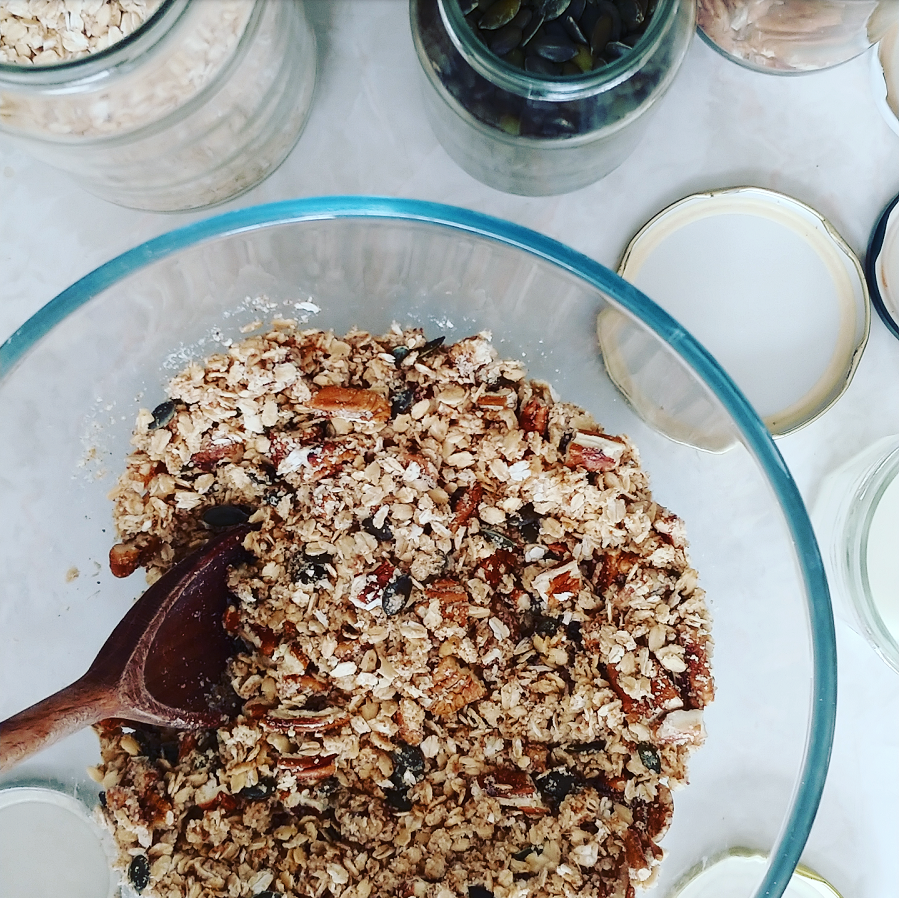
  • 2 cups rolled oats
  • 1 cup ground almonds (you could replace this with plain flour – wouldn’t be as tasty but kinder on your wallet. Other options are oat flour, rice flour, buckwheat flour)
  • 1/3 cup solid sugar (I like rapadura sugar, but any white or brown sugar that you have is fine)
  • 1/4 cup melted coconut oil
  • 1 cup nuts/seeds (use what you have: chopped almonds, mixed nuts, hazelnuts or pecans, shredded coconut or coconut flakes, pumpkin or sunflower seeds, even buckwheat kernels will all work great)
  • Pinch of salt

(A note if you’d prefer to use butter instead of coconut oil: the traditional way of making crumble is using cubes of cold butter, and rubbing into the flour to make ‘crumbs’. But my guess is, if you’re using chunky ingredients like oats rather than just plain flour, you can just pour melted butter in – it’s the same consistency as melted coconut oil.)

Method:

Mix all the dry ingredients into a bowl, pour melted coconut oil on top, and mix well.

Whatever you’re not using straightaway, pop in a container (I use a glass jar) and store in the freezer. If you don’t have space the fridge is fine. I’d keep in the fridge for a month or two, and the freezer for three to six months.

Reducing food waste: using old fruit for crumble

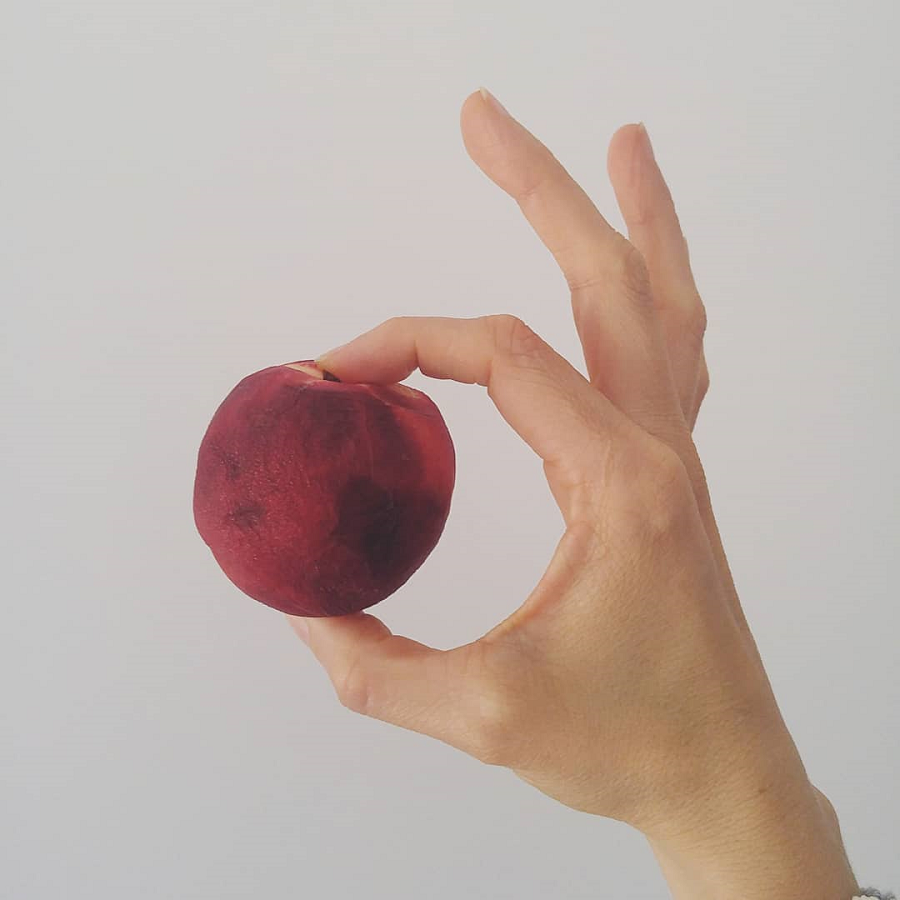
Crumble is the perfect way to use up old fruit. Apples that have gone floury, pears that have started to go squishy, stone fruit that’s gone wrinkly, blackberries or mulberries that have been sitting in the freezer for months – they are all perfect for crumble.

If you don’t have enough fruit to make a crumble, you can simply chop and freeze what you have until you’ve got enough. Or, you could just make a one person version.

Tropical fruit like bananas and mango will work too. I’ve never seen a crumble for citrus, but I’d love to try 50/50 with orange and rhubarb, for sure.

It can be helpful to stew the fruit before you make crumble. You don’t have to, but it will ensure the fruit isn’t hard in the crumble, and also reduce the cooking time considerably. All ‘stewing’ means is roughly chopping the fruit and chucking in a saucepan with a small amount of water (or orange juice), and cooking for a few minutes until the fruit starts to break down.

I don’t add sugar, because I find the fruit sweet enough, and there is sugar already in the topping. I usually add a sprinkle of cinnamon – and sometimes ginger – to the stewed fruit. Zested orange would be great, too.

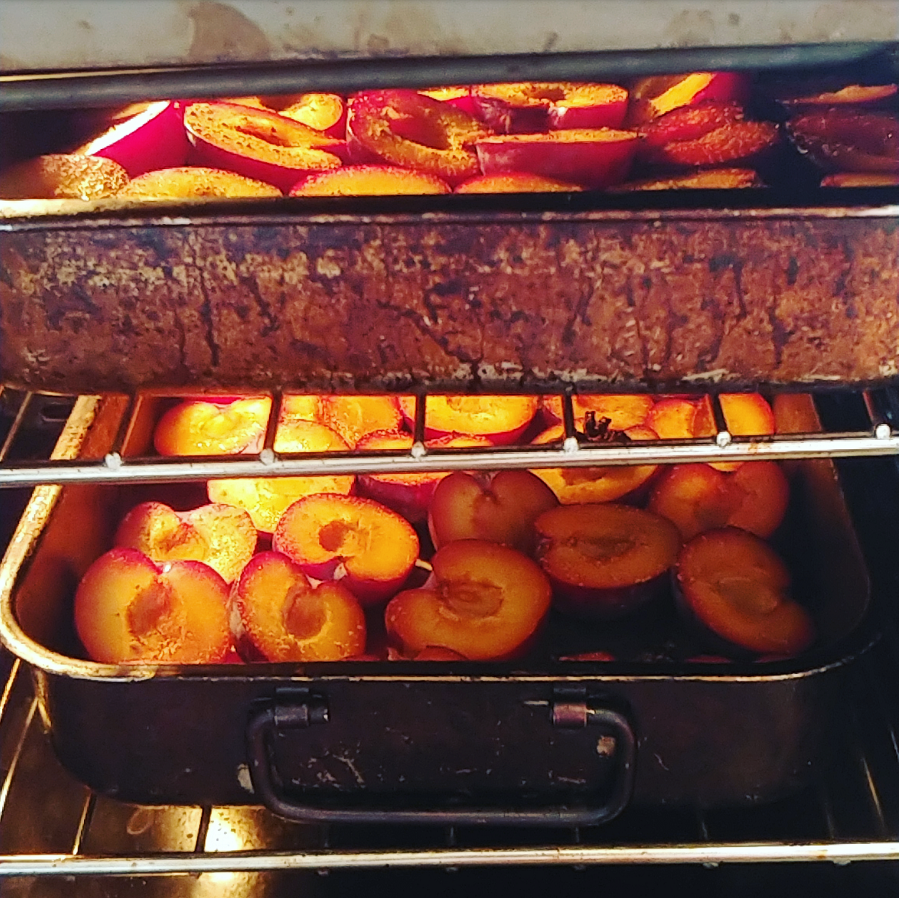
Another option is to roast the fruit. Stone fruit are great roasted. Slice, place on a tray, brush with a little oil, sprinkle with a little cinnamon and bake in a medium-hot oven for 15-20 minutes. Takes longer, but tasty.

I like my fruit still a bit chunky, but you can cook it until mushy if you prefer.

How to cook store cupboard crumble

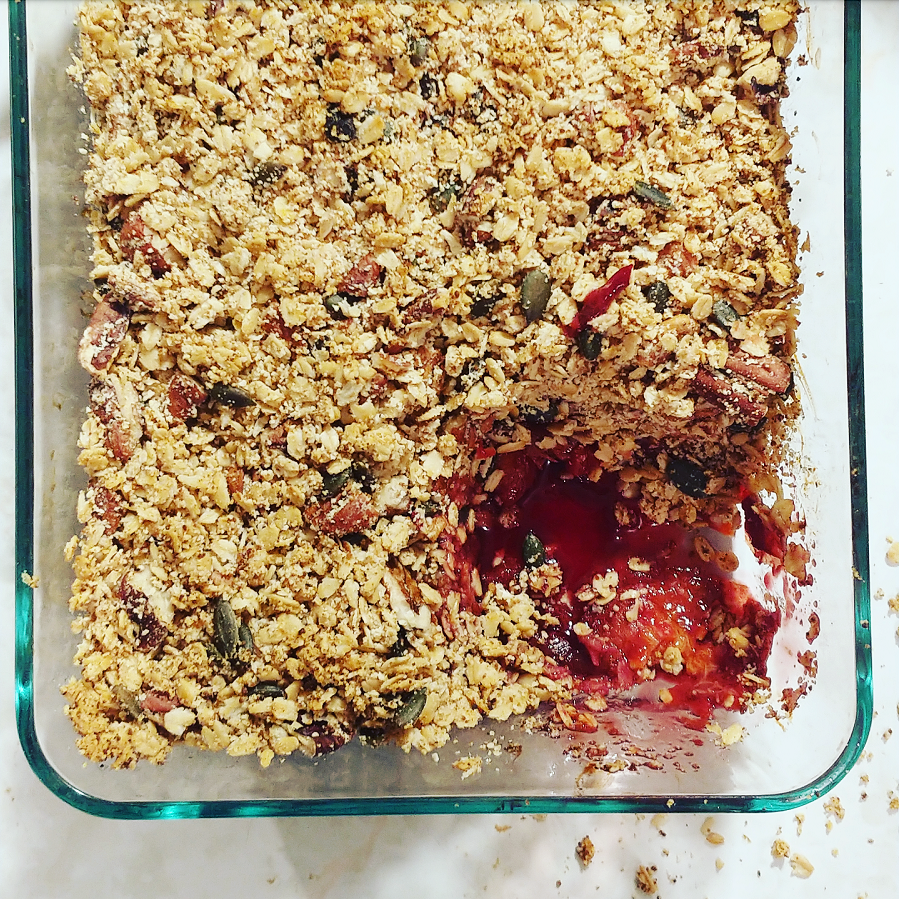
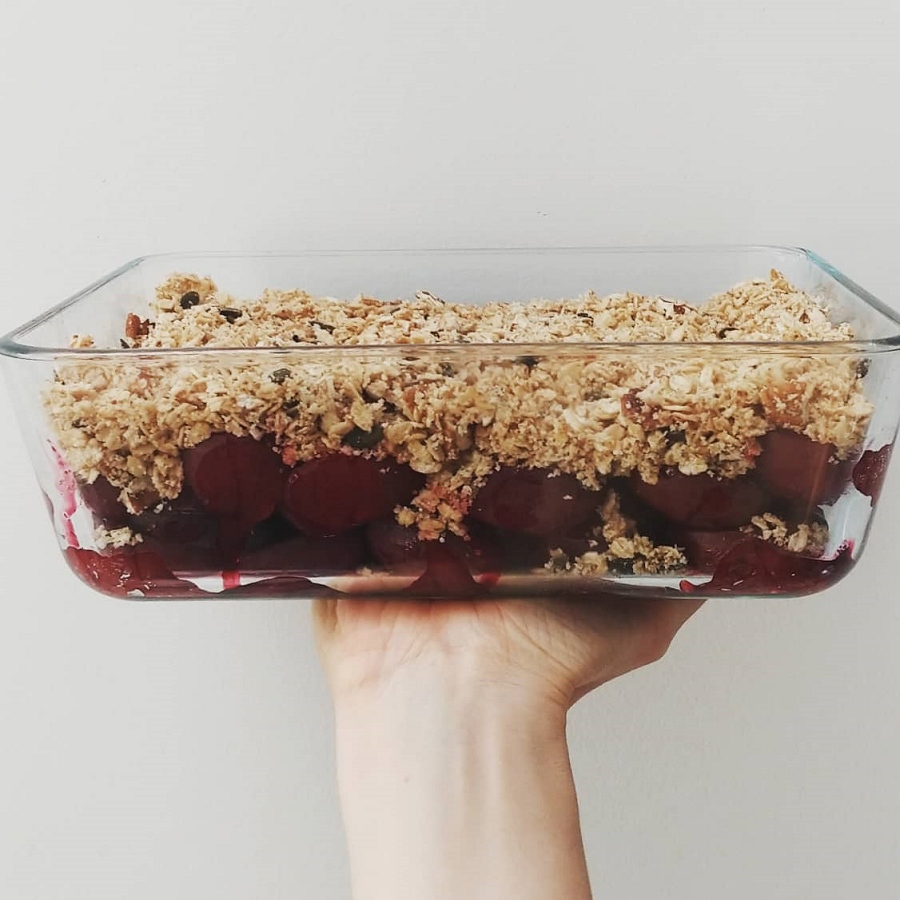
I don’t tend to weigh out fruit, or even the crumble topping. I prefer to measure it visually. Spoon the fruit into an ovenproof dish (I use glass Pyrex) so that it’s a few centimetres (a couple of inches) deep. Then, sprinkle on the crumble topping until it’s the thickness you like. No need to press it down.

Any excess crumble topping can be placed in a glass jar or other container, and frozen until you want to make crumble next.

Bake in the oven on a medium heat (I’d go for 150 – 180°C / 300 – 360°F) for about 15 – 20 minutes. If you’ve stewed the fruit beforehand you don’t actually need to ‘cook’ the crumble so much as warm it through. If you’ve used pecan nuts, opt for the lower temperature as they are prone to burning at higher temperatures.

(Better to cook for slightly longer at a lower temperature than end up with a blackened top.)

It’s ready when the top is browned and the fruit is bubbling.

Although crumble is traditionally a dessert, I often make it for breakfast (cooking the night before and either eating cold, or warming through in the morning). It’s got less sugar in it than a lot of cereals. I think if it as inverted muesli with fruit at the bottom rather than on top.

To store, allow to cool and then refrigerate and then eat within a week, or freeze and use within 3 months.

Now I’d love to hear from you! What ingredients are sitting in your pantry right now, and how are you planning to use them up? Any pantry ingredients you’re wondering how to use right now? What staples are you keeping in your freezer? Any other thoughts? Please share in the comments below!
How to Make DIY Coconut Milk from Scratch (A Recipe)

DIY coconut milk is one of the things I tried very early on in my plastic-free journey. I started making it in 2013, got tired of making it a few months after that and decided not to bother cooking coconut milk dishes.

Then my local bulk store started selling coconut milk powder, and that was my go-to.

Hence the recipe never made it onto my blog. But I decided I wanted to retry making coconut yoghurt (the recipe for coconut yoghurt did make it onto the blog, although it’s been tweaked since then) without using the tins. My zero waste journey has rather progressed since 2013, after all!

Plus whilst the coconut milk powder is pretty good, it’s not the same as coconut cream. And it is something we can DIY.

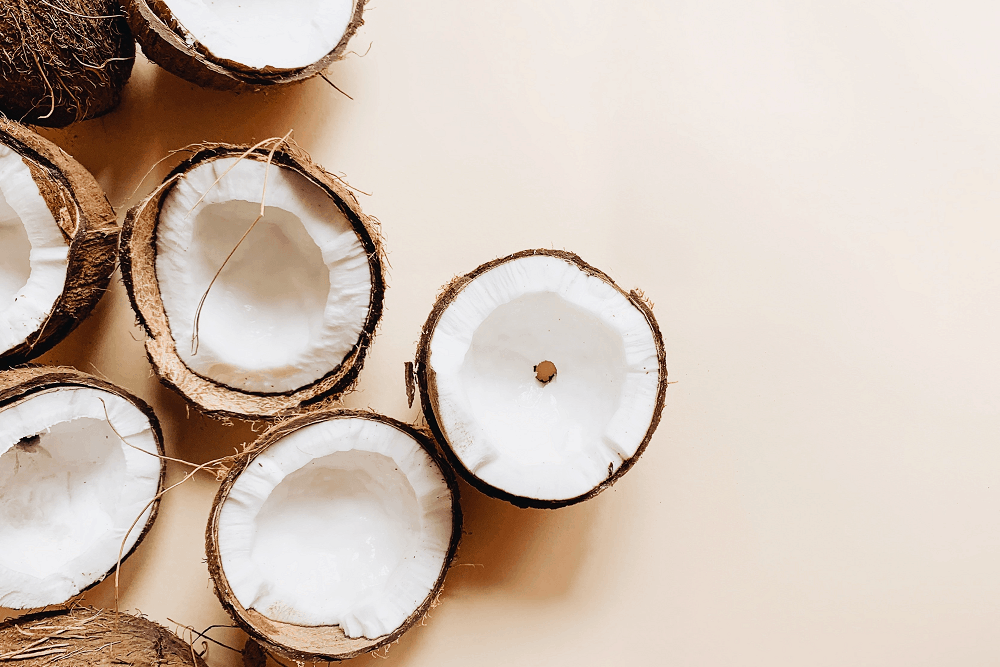
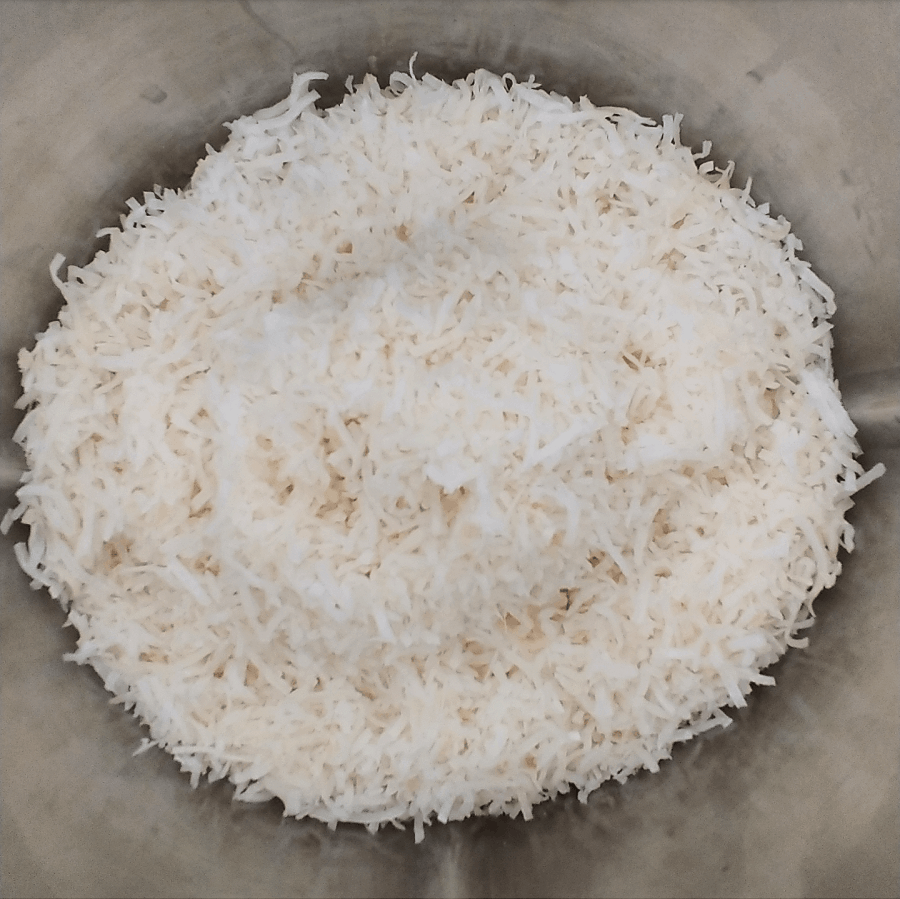
The coconut milk we buy in cans is made from the flesh and juice of young coconuts. Most of us don’t have access to young coconuts to make our own, but we can make something almost as good using dried (mature) coconut and water. I prefer to use shredded coconut (I look for the untoasted, unsweetened version). Desiccated coconut will work too.

You’ll need a blender. (Only attempt to use coconut flakes if you have a top-of-the-range blender.)

In Australia, canned coconut milk is coconut and water. Canned coconut cream is just coconut with less water. Literally. Check the back of the cans next time you’re in the store. Coconut cream is 80% coconut, 20% water; coconut milk is 60% coconut, 40% water. If you do buy cans, choose the coconut cream (it’s usually the same price) and add your own water from the tap. No need to import extra water from overseas.

In the UK, coconut milk is around 50% water. Coconut cream in the UK is often really thick – it’s not that high in coconut either (less than 70%), it’s just full of gums and stabilizers to thicken it.

Did I mention those cans are usually lined with plastic, too?

Get yourself some shredded or desiccated coconut, and try making your own.

Ingredients:

  • 300g shredded coconut
  • 1 litre boiling water (and then another litre)

The amounts don’t really matter, more coconut will give you more cream. If you don’t have access to a bulk store and the bagged coconut is 200g, use that – it will be fine.

First Press: Coconut Cream

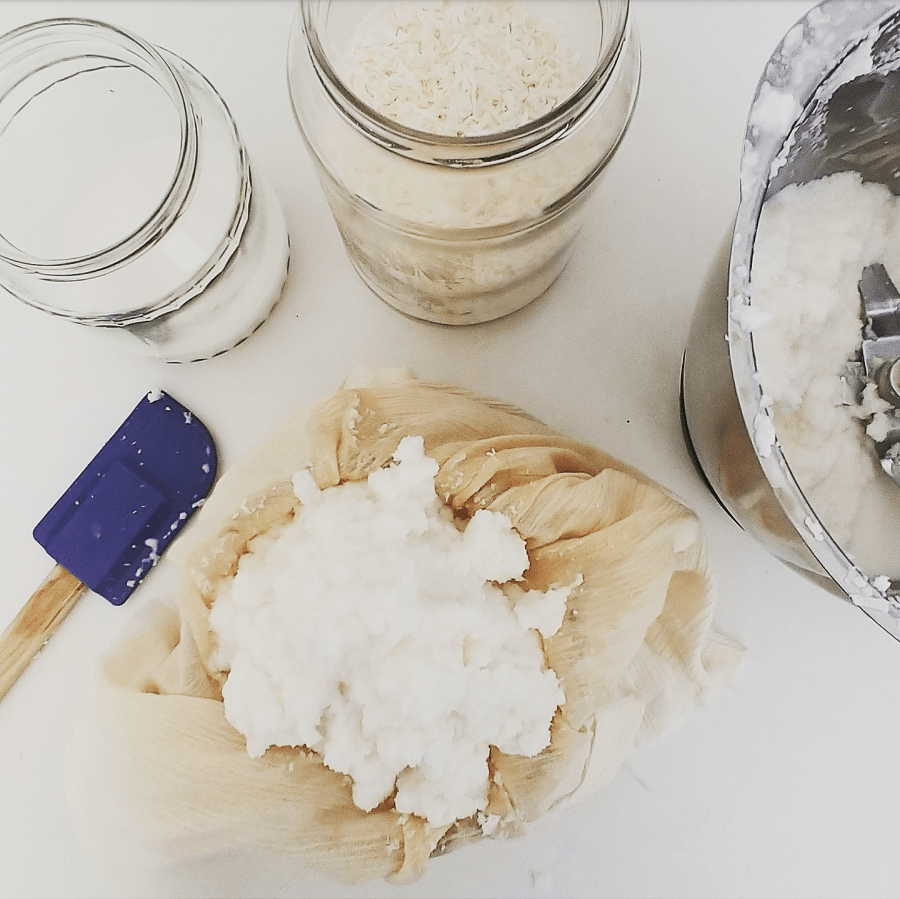
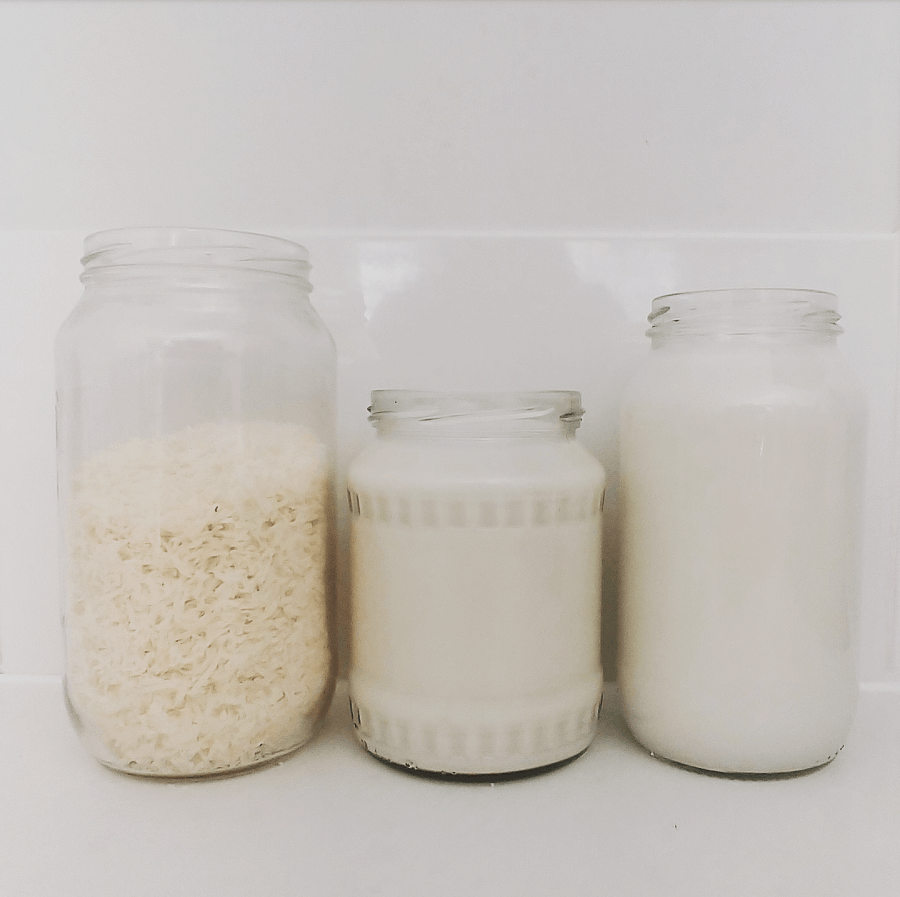
Boil the water in a kettle, pour over the coconut, and leave to stand for 30 minutes. (If your blender has a glass or metal jug, you can do this step in your blender; if not you may prefer to use a glass bowl or saucepan instead.)

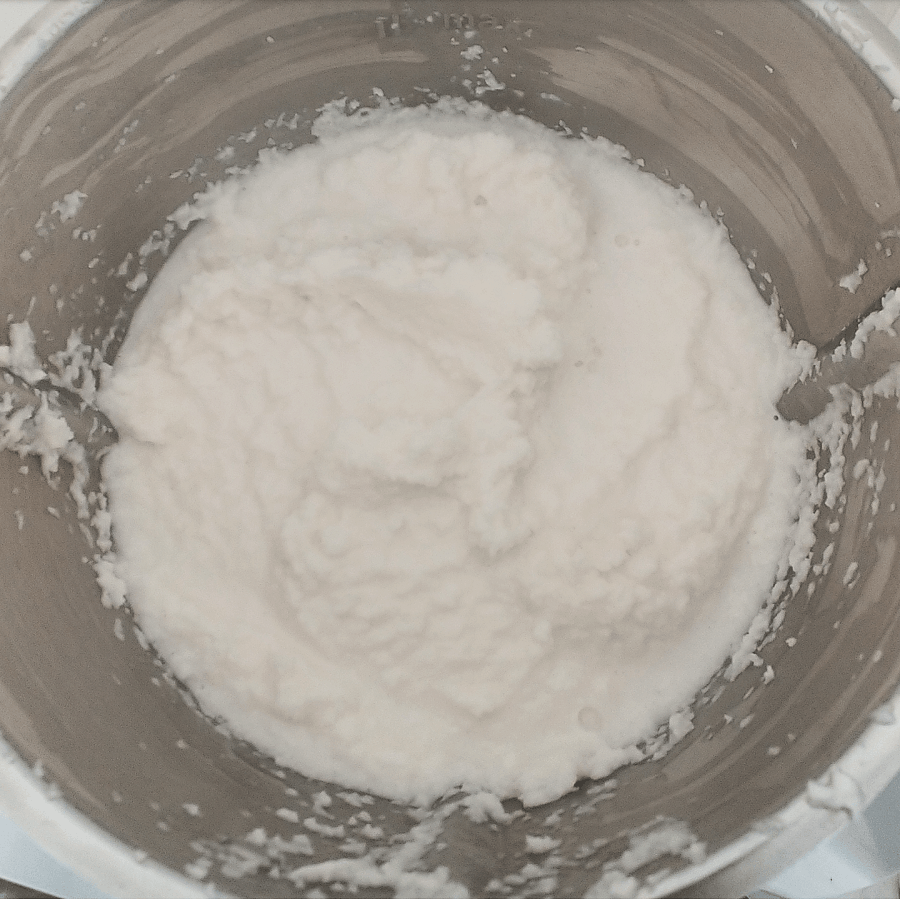
Blend the coconut and hot water until combined.

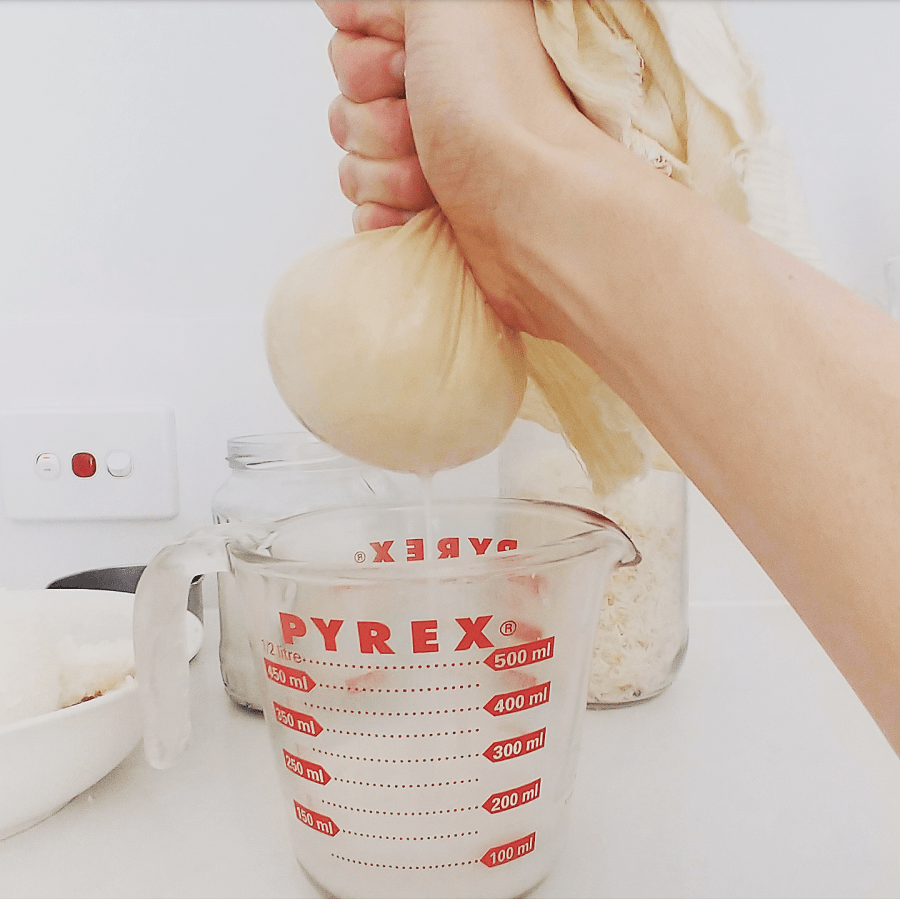
Strain the mix into a glass jug using cheesecloth or a clean tea towel to separate the pulp. Squeeze the cloth to ensure all the moisture is removed – you will want to allow the mix to cool slightly before you do this (or wear gloves!). Once you’ve strained every drop out of the pulp, pour the coconut milk into a glass jar, screw on the lid, and set aside.

Second Press: Coconut Milk

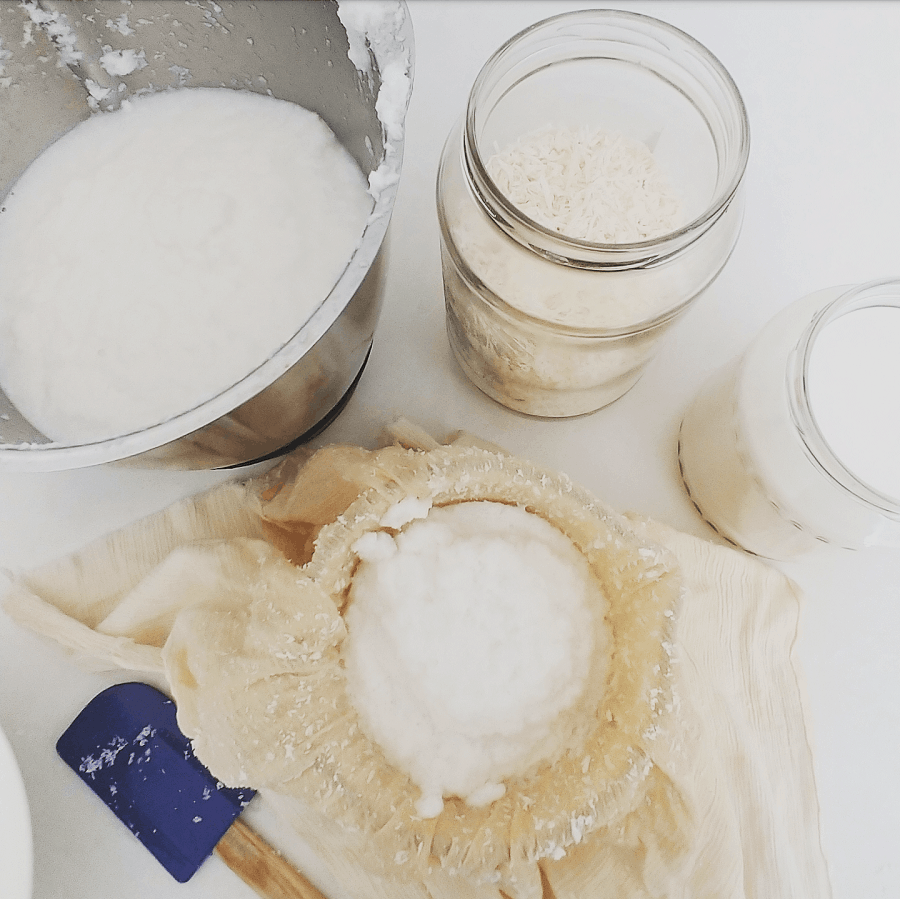
Now place the coconut pulp back into the blender, and add another litre of boiling water. Leave to sit for 5 minutes, and repeat the process. The second batch will be thinner.

(If you want to squeeze every drop of goodness out of your shredded or desiccated coconut, you can repeat with a third litre of water.)

Place the jars in the fridge.

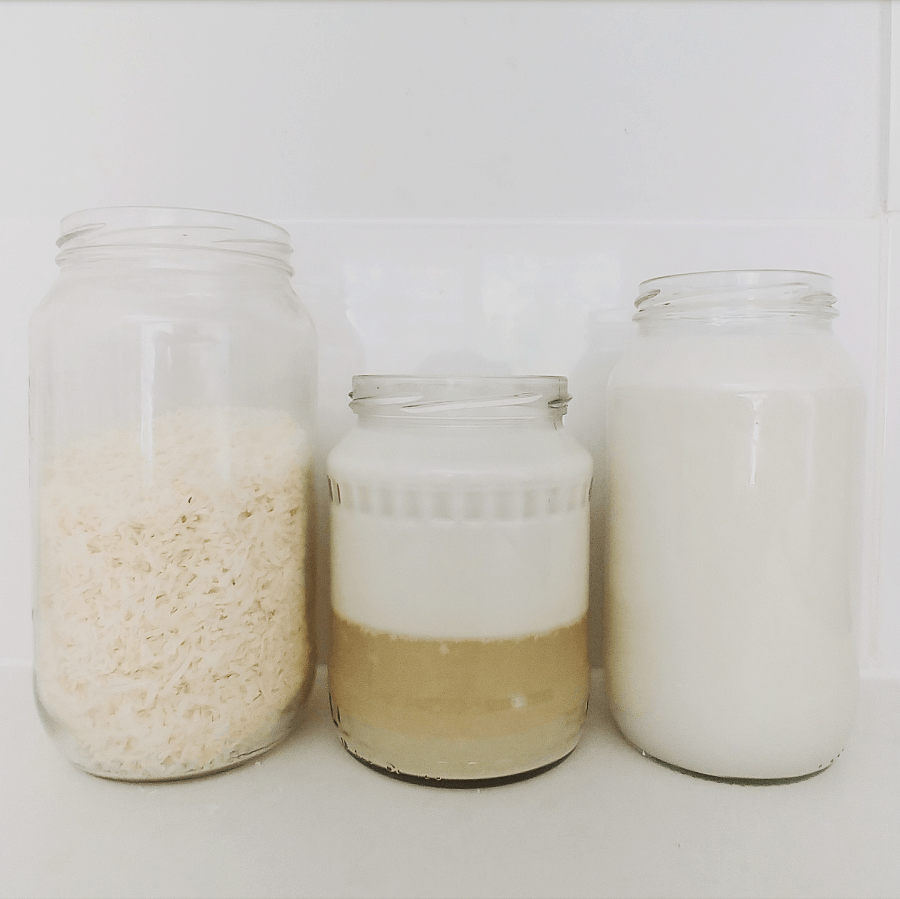
Once in the fridge, the solids will separate from the liquid. The first jar will have a thick, solid coconut cream layer. The second jar will have a much thinner coconut cream layer. (The third jar, if you did a third press, probably won’t have any coconut cream).

If you’d like to use the coconut cream, you can scoop off using a spoon. Alternatively, if you prefer coconut milk, you can warm the jar and shake to recombine, or empty the entire jar contents into a pan and gently warm the cream with the liquid to recombine when you’re ready to use.

The second batch is great for adding to smoothies instead of water, for cooking grains (quinoa, white rice or millet will absorb the coconut flavour), or adding to soups or dahl. It’s not as rich as coconut milk, but there is definitely some coconut flavour.

Coconut cream and coconut milk keep for up to a week in the fridge, an can be frozen.

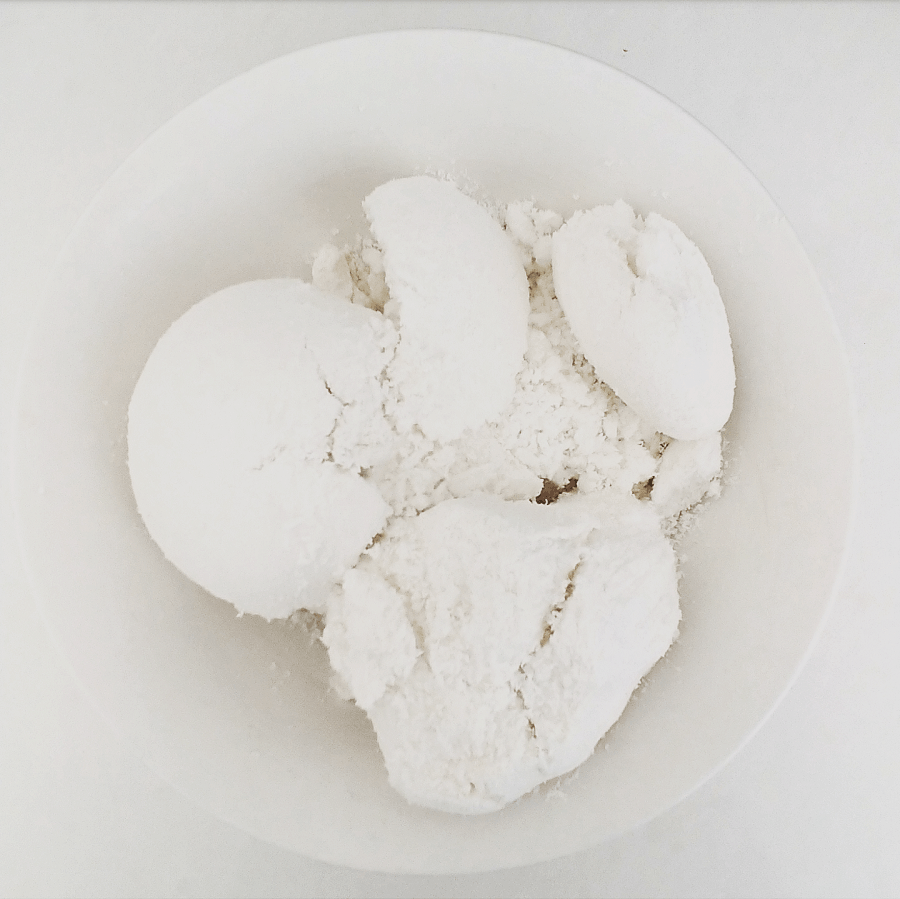
You’ll also be left with a bowlful of pulp. This tastes a little like desiccated coconut, but with less flavour (you squeezed that out)! You can freeze this, or dry it out in the oven on a low heat for an hour or so. (Don’t put it in the pantry as is, because it contains moisture and will go mouldy.) Alternatively it will keep in the fridge in a container for a few days.

Add the pulp to porridge, smoothies or even curries to add some flavour and fibre. You can also bake with it: you can sub a small amount of desiccated coconut (up to half) for leftover pulp in baking recipes, or use in veggie burgers/patties. There are plenty of options!

Now I’d love to hear from you! Do you DIY coconut milk? Do you DIY any other milk, and if so how do you like to use up the leftover pulp? I’ll share my leftover pulp recipes another day, but if you have any great ones you’d like to share, I’d love to hear in the comments! Anything else to add? Let me know in the space below!

A Beginner’s Guide to Sauerkraut (+ Fermented Vegetables)

Today, I’m talking cabbage. (Stay with me…it gets better, I promise!) Now cabbage and I, we have a bit of a love-hate relationship. I like cabbage, but it arrives in the veg box every week, reminding me that there’s still last week’s cabbage in the fridge refusing to go bad.

(Of course, I can’t put a perfectly good cabbage in the compost. If it happened to accidentally go bad…well, maybe I could justify it, but cabbage is stubborn!)

In fact, cabbage simply refuses to go bad, which actually makes it a rather good zero waste vegetable. (It shrivels a little and the outer leaves go brown, but peel those leaves back and there’s still perfectly good cabbage underneath.) Plus it grows at a time of year when many other more delicious vegetables do not.

If you want to eat seasonal and you live anywhere except the tropics, cabbage is going to feature on your menu. But cabbage week in, week out; it can wear a bit thin.

That, my friends, is why we need to embrace sauerkraut.

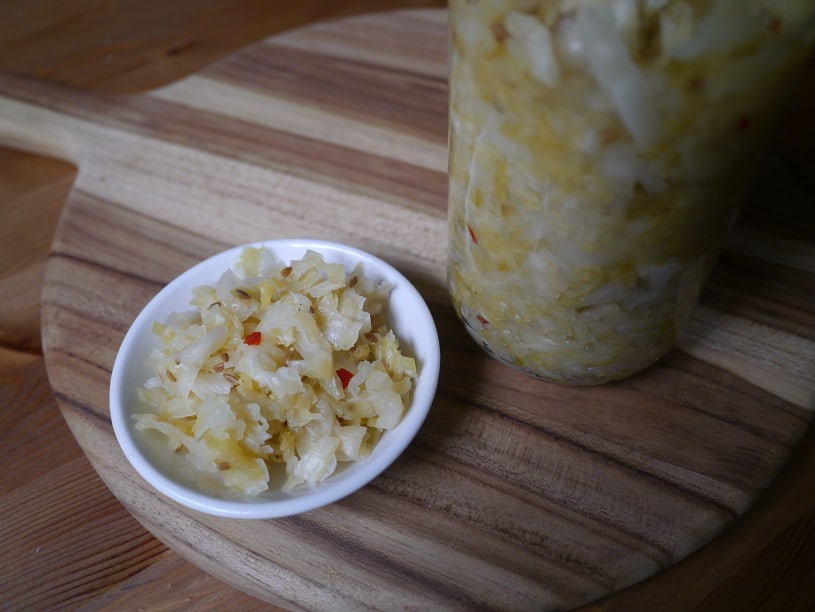
Sauerkraut is fermented cabbage. That might not sound delicious, but it’s a tangy, crunchy, super healthy vegetable that’s tastier than the name suggests. Sauerkraut contains millions of good bacteria, so is like taking probiotics, but without the packaging. Sauerkraut also lasts for ages in the fridge.

I’ve kept sauerkraut in the fridge for a year. Fresh cabbage might seem to last forever, but it won’t last a year.

The good news is, whilst fermenting sounds hard, it is actually very easy. Plus you don’t actually need any specialised equipment. Sure, there’s all kinds of fancy gadgets out there, but you can get going with a glass jar and a tea towel. Oh, and some cabbage ;)

That said, you don’t actually have to make sauerkraut with only cabbage. You can mix cabbage with other vegetables like onion, carrot and beetroot.

But let’s not get distracted thinking about all the wonderful potential! Let’s start at the beginning.

Some Fermentation Basics

Fermentation is a process that uses good bacteria and yeast to transform a product. By fermenting, we crowd out the bad bacteria with good bacteria, which changes the flavour and texture, but also helps lengthen the shelf life of the product. For example, yoghurt is fermented milk: whereas fresh milk will last in the fridge for up to a week, yoghurt might last a month.

Fermenting is anaerobic, meaning without oxygen. (Although confusingly, some foods are actually fermented with oxygen, such as vinegar.) In my experience of making sauerkraut, this “without oxygen” rule doesn’t need to be absolute. By removing oxygen we create conditions for the good bacteria to multiply, and these prevent the bad bacteria getting a hold and spoiling the food.

Fermentation has been used for centuries as a way of preserving food, prior to refrigeration. People were fermenting long before air-lock attachments and special fermentation jars were invented. This specialist equipment can help, but isn’t necessary.

I make sauerkraut a few times a year, and I simply don’t see the need to buy specialised equipment when it works without.

Because we are dealing with bacteria, we need to be careful not to be too over-zealous with the cleaning. I’d avoid using an anti-bacterial hand wash or chopping boards, for example. Clean is good, sterile not so much.

How to Make Sauerkraut (No Fancy Equipment Required)

I’m a big believer that you don’t need fancy equipment. I don’t use any, and I’ve been making sauerkraut and other fermented vegetables for over 4 years. If you’re a professional, that’s different, and with certain ferments, it can be crucial. But for sauerkraut, I personally don’t believe that it is.

Ingredients:

Cabbage;
1/100th weight of cabbage in salt.

So if the cabbage weighs 1 kg, use 10g salt. Basically, divide the weight by 100. (It is possible to eyeball it, but when starting out it helps to measure.)

Equipment:

A large bowl;
A glass jar that you can fit your fist into (or if you have large hands or small jars, you’ll also need a wooden rolling pin);
A weight that fits inside the glass jar (I use a smaller glass jar filled with water);
A tea towel.

Method:

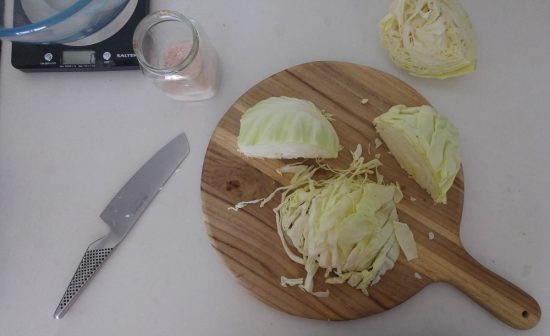
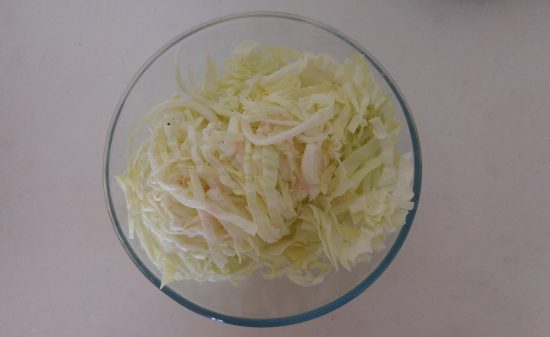
I’ve included a lot of photos before to give you a really clear idea of what each stage is meant to look like.

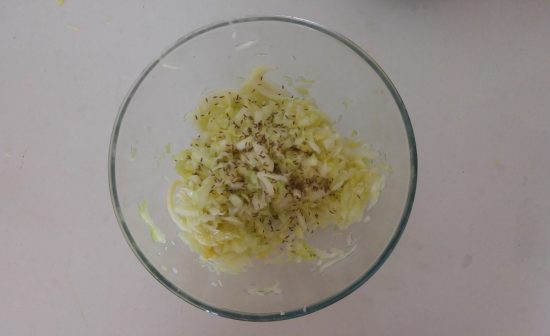
Remove the core of the cabbage (the stalky white bit), and chop the cabbage into strips. Weigh the cabbage, put into a large bowl and sprinkle the salt on top (the amount is calculated based on the weight of the cabbage – 1 kg cabbage equals 10g salt).

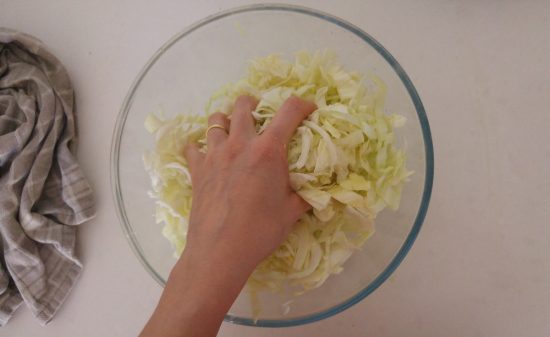
Massage the salt into the cabbage with your hands, and the salt will begin to draw the water out of the cabbage. This is what you want to happen. Massage for 10 – 15 minutes until the cabbage looks like it has shrunk.

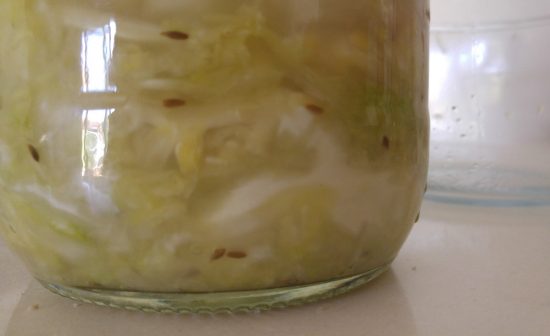
At this stage I always add a tablespoon of cumin seeds. I love the flavour it gives. You can keep yours plain, add cumin or go crazy with the spices. At the beginning, I’d suggest keeping it plain until you learn what flavours you’re meant to be looking out for.

Notice how the cabbage appears to have shrunk. (If you taste it at this point, it will taste like salty cabbage, not sauerkraut.)

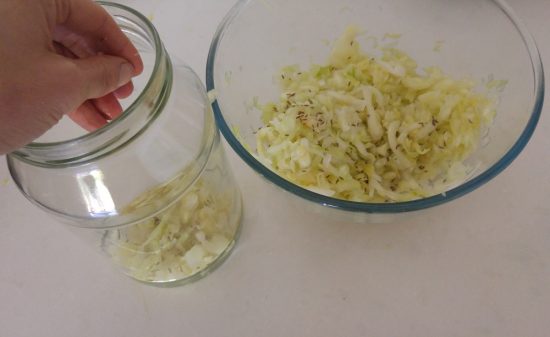
Next you need to start packing the cabbage into the jar. Choose a jar that’s going to have room for the juices to expand because they will. Ideally find one that you can fit your hands into, but if not, a rolling pin will work.

Put a few tablespoons of cabbage into the jar, and press down as hard as you can. You want to squeeze out any remaining liquid. Keep adding the cabbage and pressing, and you’ll start to see the liquid rising above the cabbage.

This is important as the liquid helps keep the oxygen away from the cabbage, and creates the right conditions for fermentation.

Once you’ve put all the cabbage in the jar, add any liquid remaining in the bowl into the jar. Do not add any other liquid.

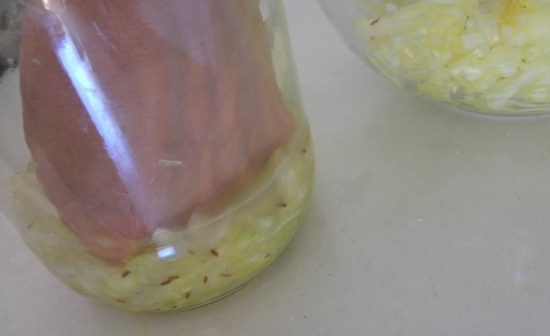
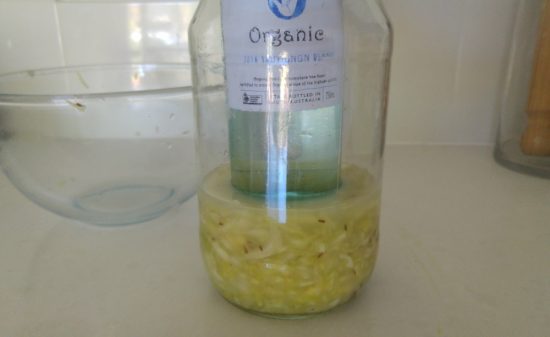
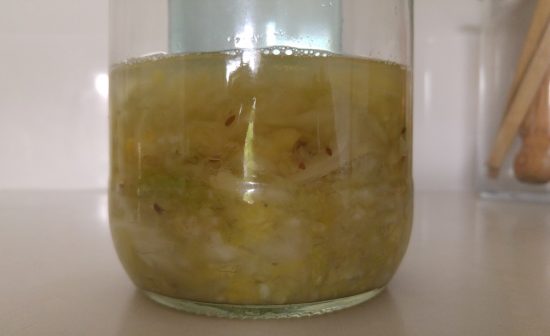
The cabbage will probably sitting slightly under the water level. To compact it down and thereby raise the liquid level, use a weight. I use a smaller jar that fits inside my large jar, or a bottle (I fill it with water to make it heavier).

If there’s any floating or escaped bits of cabbage, poke them under the liquid. Next, I cover with a tea towel.

The bottle on top is pressing the cabbage below the water line and excluding oxygen, and the bottle restricts the amount of jar entering through the lid. For me, this is enough.

If you’d like to put a lid on the jar (and it fits), this will exclude oxygen better. However, it has its own drawbacks. In the fermentation process, carbon dioxide gas will be released. Unless you remember to open the lid at intervals to allow the gas to escape (called “burping” the jar), your jar could explode. Won’t happen with a tea towel!

(That’s why you can buy fermentation valves that allow carbon dioxide to escape without letting in oxygen. For some things, like cider making, it is very important. For sauerkraut and lactic acid fermentation, it is less critical.)

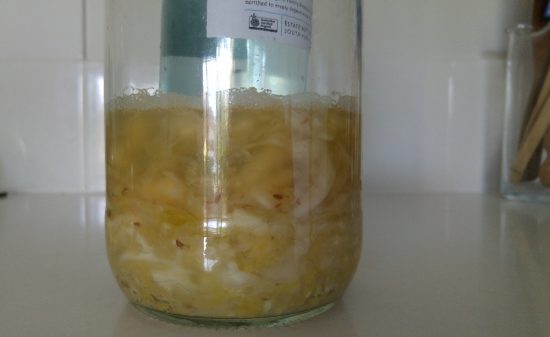
Every day, check your cabbage. You’ll start to notice bubbles forming. I tend to press the weight down to squeeze out the bubbles, and also check for any floating bits. If there’s cabbage floating on the surface, it is in contact with air (oxygen), so needs to be submerged or removed.

After 1 day (see the bubbles starting to form both on top, and within the cabbage layers):

And after 3 days:

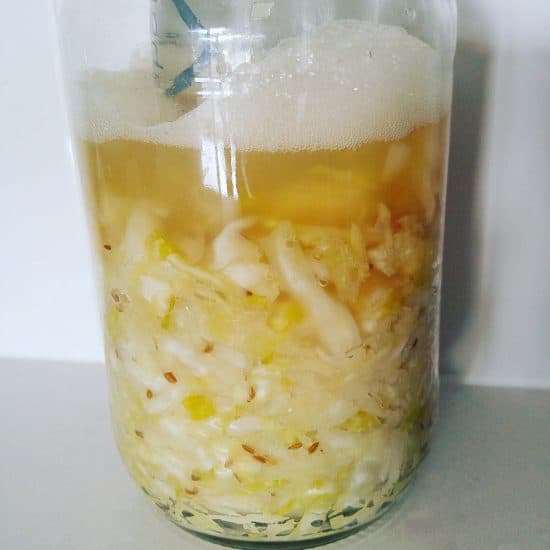
How quickly and how much it bubbles will depend a lot on room temperature. If your jar is narrow or filled to the top it can be helpful to place in a bowl as it might bubble over!

This is a different batch, but shows how much it can bubble (and I’ve seen more than this!):

I tend to keep my sauerkraut on the kitchen counter, covered with a tea towel (to also exclude light) until the bubbling subsides, which takes 1 – 2 weeks.

Some people like to leave their sauerkraut on the counter for several weeks or even months to increase the good bacteria (it will also taste more sour). In my view, it doesn’t really matter, and once in the fridge fermentation won’t stop, it will just continue very very slowly.

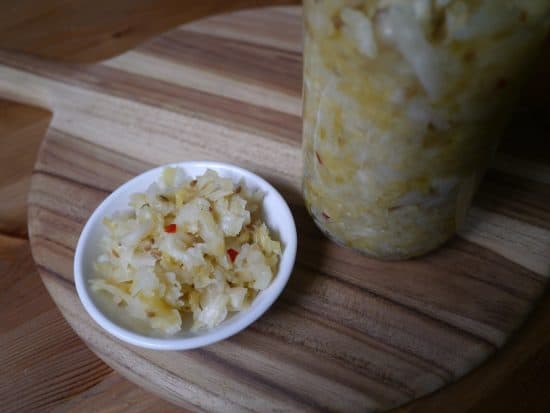
When the bubbling subsides, the sauerkraut should be crunchy and taste sour (but delicious). You may see a white film, this is kahm yeast and is harmless. I’ve never had an issue with mold, but if you see anything multi-coloured or blue, that batch might be better in the compost.

When you’re ready to place in the fridge, you can remove the cabbage/sauerkraut from big jar and put into something more practical. The less surface area the better, so choose a smaller jar. At this stage it is fine to place a lid on the jar.

Other Fermentation Ideas

You can ferment most veggies and even fruits, but they have varying levels of difficulty. If you’re a beginner, stick to hard veggies like beetroot and carrot, or use softer vegetables like onion as part of the vegetable mix, but not all of it.

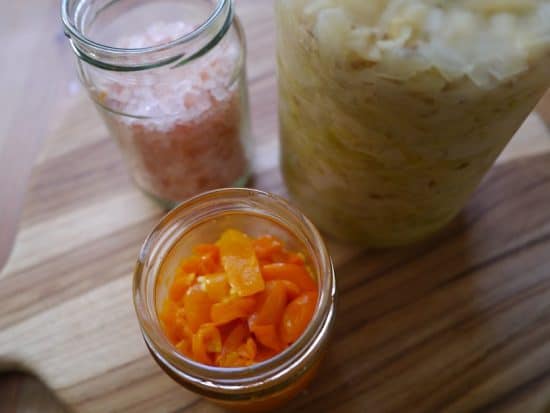
That said, I’ve had success fermenting chillies, and I’m sure capsicums would work well also.

My personal favourites are carrot, onion and white cabbage with cumin seeds – taken from a South American ferment called curtido.

I also like beetroot and purple cabbage together because the colour is fantastic.

I made an amazing turmeric ginger sauerkraut once that tasted like piccalilli, but I’ve never been able to recreate the flavour combination since.

Fermentation is a great way to preserve vegetables, and it a healthier option than pickling: the food is literally “alive” with good bacteria (there’s not heat process to kill them) and there’s no added sugar.

Plus it means I get to keep my cabbage in the fridge for literally months, without feeling the slightest bit guilty about it!

Now I’d like to hear from you! Do you ferment vegetables? What are your favourite flavour combinations? Have you had any disasters? Are there any other tips you’d like to add? Are you tempted to give this a go, or does the idea still scare you a little? Please tell all in the comments below!
[leadpages_leadbox leadbox_id=123a865e9839c5] [/leadpages_leadbox]

How to Make Your Own Beansprouts

Although they look a little different, these guys are similar to those long white beansprouts that you can buy from the supermarket to put in stir-fries. Although they are both sprouts, the homegrown versions are totally superior, being packed with way more flavour and a good deal more crunch than their insipid white cousins.

Making your own sprouts is super easy, and you can make them from most dried pulses, small bean or seeds.

The smaller the better as they will be the quickest to germinate.

It’s a great way to use up any lifeless dried old lentils that you’ve had sitting in the pantry for months (or years) whilst you wait for an appetising recipe to turn up. All you need is a glass jar, and some water!
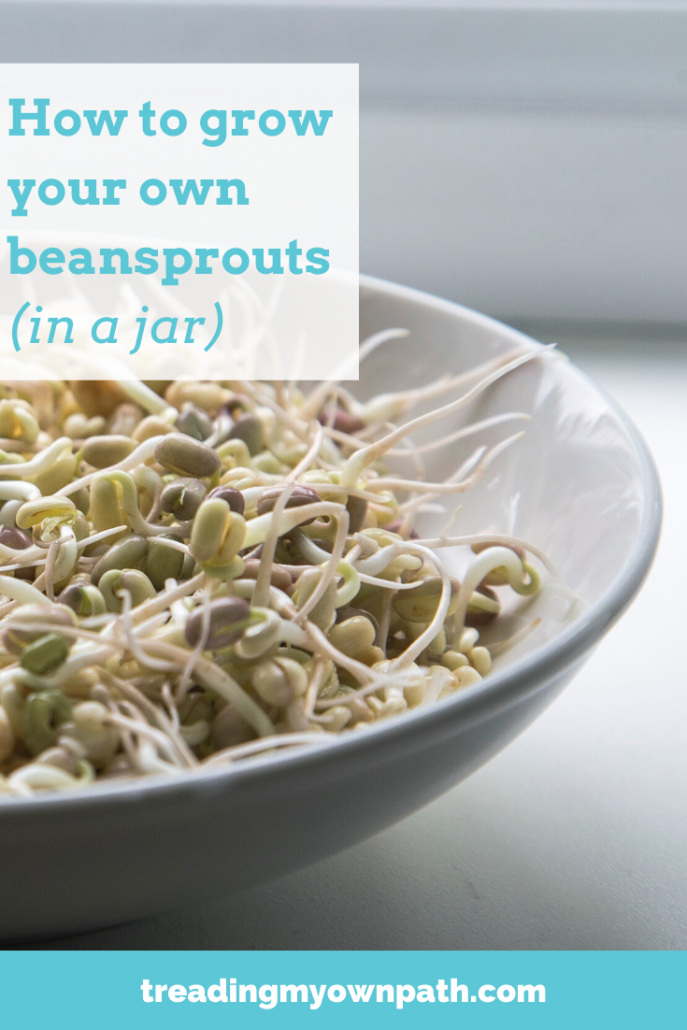
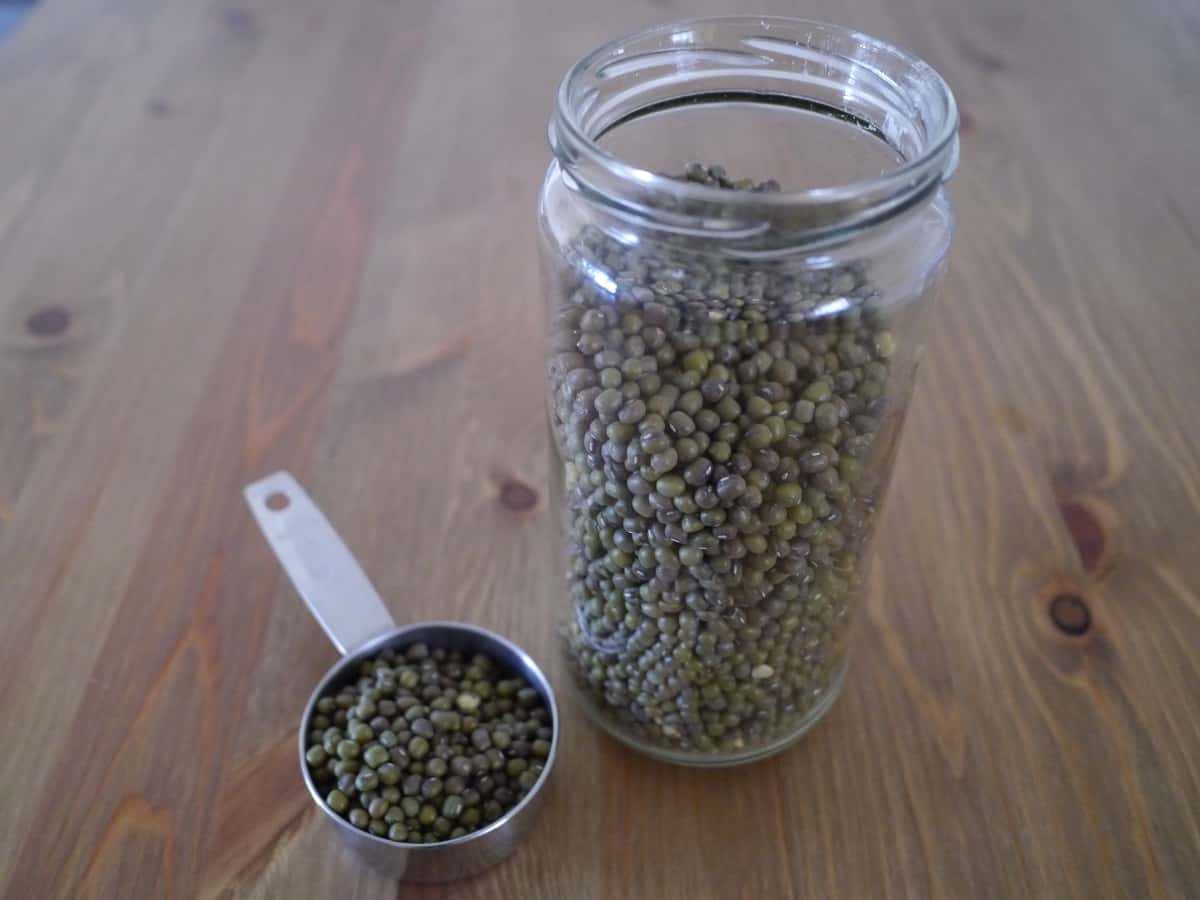
The sprouts I’ve been making recently have been using mung beans, as I had a packet in the cupboard (from before my plastic-free days!) that I had no idea what to do with. It’s hard to believe when you look at these hard, dry little balls that there’s any life in them at all!

sprouts1jpg

Yet with a little bit of watering they turn into something super fresh and tasty. They’re also nutritious, containing thiamin, niacin, Vitamin B6, pantothenic acid, iron, magnesium, phosphorus and potassium, and being a great source of dietary fibre, vitamin C, vitamin K, riboflavin, folate, copper and manganese (for nutritional information check here).

I’ve also made sprouts with various lentils, azuki beans, sunflower seeds and chickpeas, often as a mix.

All you need to do is put whichever dried pulses/beans/seeds you want to use in a jar, and cover with water, and leave for a few hours or overnight. They will swell considerably so be liberal with the water. (Don’t be afraid to add more if they appear to have absorbed it all.)

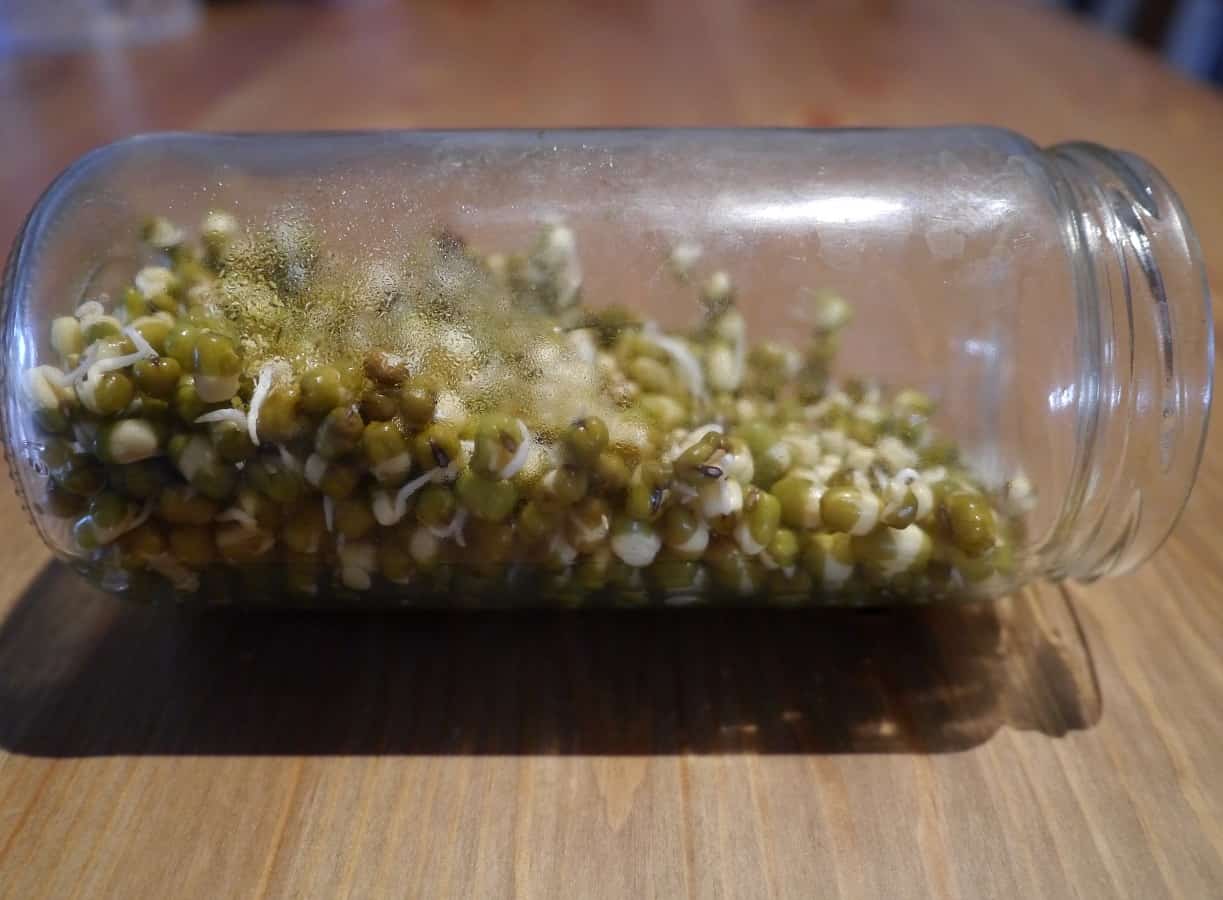
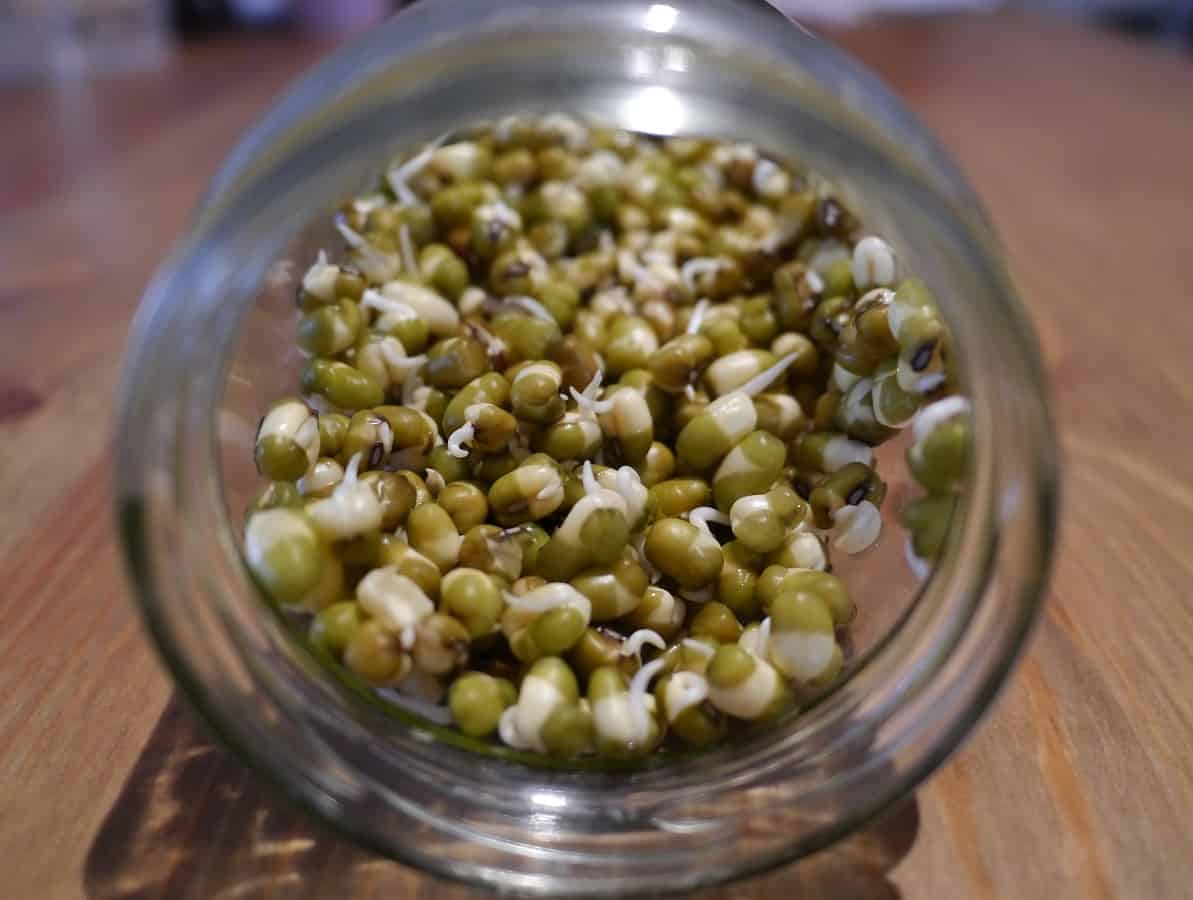
The next morning rinse and add fresh water. After the initial soaking add enough to keep them moist, but not too much so as to drown them! Aim to rinse and replace the water twice a day – more often if the weather is hot. Small sprouts like mung beans should be ready in 24 hours; seeds and larger pulses (like chickpeas) take a bit longer.

sprouts4jpg sprouts3jpgYou can eat them straight after the overnight soak, but I prefer to wait until I can see the little root poking out. Once they’ve sprouted I usually keep the jar on it’s side so the ones at the bottom don’t get so waterlogged.

They will keep in the fridge for a few days but as they are so quick to prepare I make small batches often so I can eat them as fresh as possible.

Stir them into quinoa, use in stir-fries, add to salad or just eat straight out of the jar!

[leadpages_leadbox leadbox_id=1429a0746639c5] [/leadpages_leadbox]