Tag Archive for: DIY

The power of nanna-technology

You’ve probably heard of nanotechnology. Well this post has absolutely nothing to do with that. I’m talking about nanna-technology.

Our tiny flat is leaky. In winter it leaks warmth. Australian houses just aren’t built to stay warm in the cold months, they leak warmth, letting the heat out (but letting it all in during the summer, when everyone is trying to keep cool). In our tiny flat, there are gaps between the door frame and the wall where you can see straight through to the outside. I’m not talking about the gap between the door and the door frame, although of course there’s a gap there too, but a gap between the actual door frame and the wall. Crazy. There’s also a space of about an inch under the front door, and another at the balcony door. The windows are single glazed. Even when they’re closed I can feel the cold air breezing in. And the window in the bathroom actually has a three-inch gap where there is no glass at all.

gapsinwalljpg

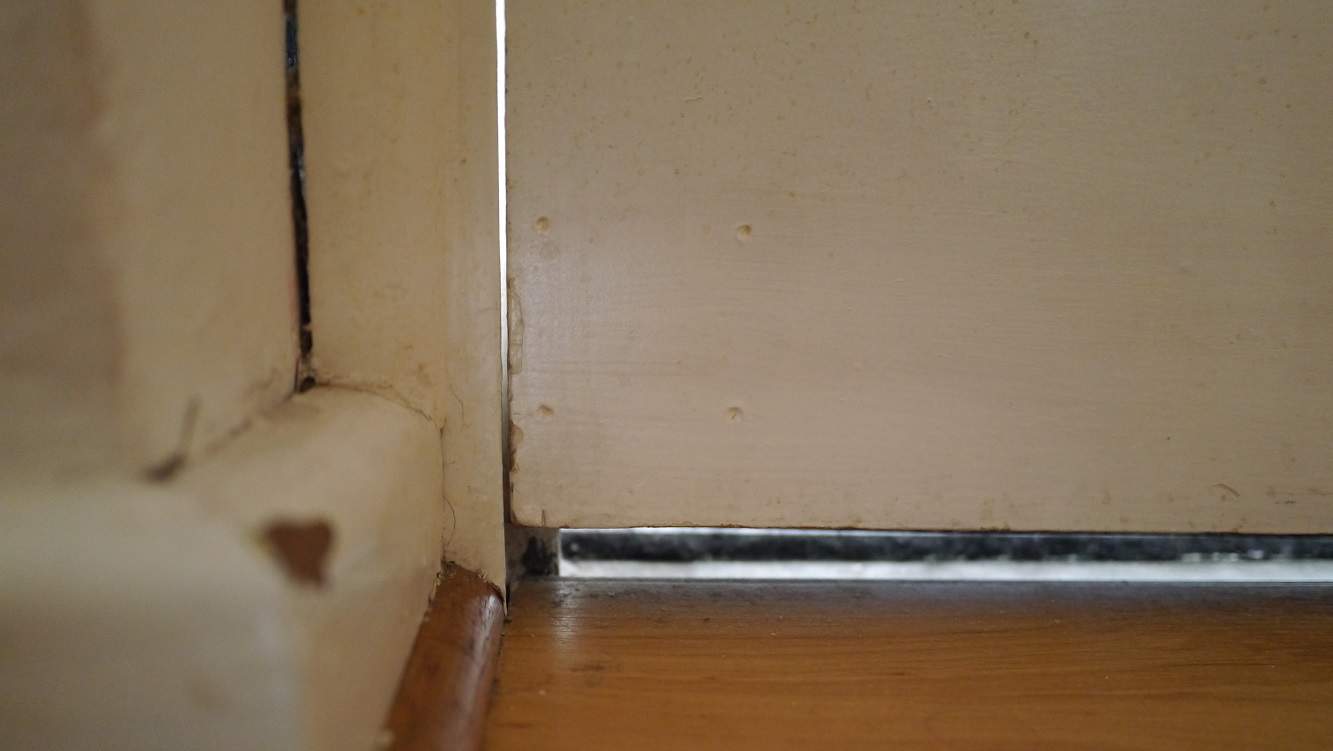
I’m not joking either! The gap at the bottom of the door is big enough for me to put my whole hand underneath, right up to my knuckles! And these gaps mean cold air coming in.

All this means that in winter inside the flat it can get quite cold. You may think of Australia as sunny and warm (I thought that before I came here), but in Perth in winter 2012 the minimum temperature averaged 6.7°C at night, and some temperatures were below zero (statistics here).

We rent our flat. We can’t just replace the door frame, install double-glazing or add roof insulation to make the place warmer. Even if we didn’t rent, these things can be expensive to install. But if we don’t do something, we’re going to spend a fortune trying to heat the place, and the heat is just going to escape outside through all the gaps.

So this brings me back to nanna-technology. If you’re suffering from the same problem as me, don’t just admit defeat and crank up the heating. Ask yourself, what would Nanna do?

You don’t always need to spend money to find solutions. Don’t let expensive solutions that you can’t afford be a reason not to do anything. Just try to find solutions with what you have. After all, if your house is drafty you’ll spend a fortune in electricity or gas trying to heat the place up by burning fossil fuels.

To help plug the gaps under the doors, I’ve made two draft excluders using some spare towels and a few elastic bands. They may not look catalogue-perfect, but as long as they’re doing their job and I’m not cold, I don’t care!

towel2jpg

towel1jpg

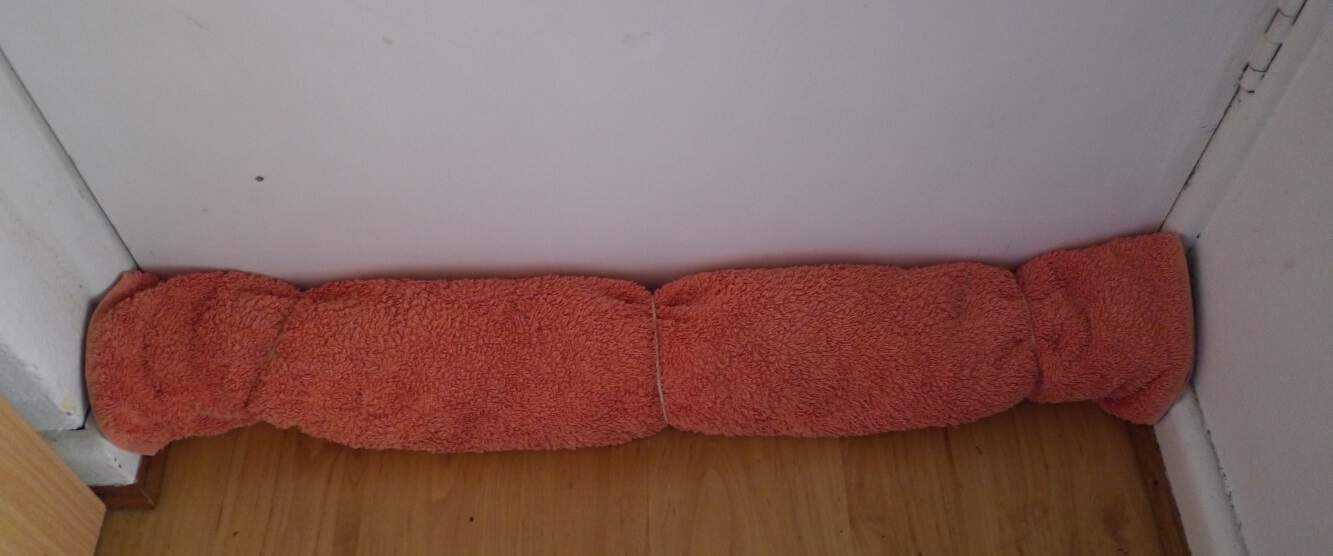
Just looking at these guys makes me feel warmer!

Last winter was my first winter in Perth, and I wasn’t prepared for the cold or the drafty-ness.  This year, I say bring it on.

[leadpages_leadbox leadbox_id=1429a0746639c5] [/leadpages_leadbox]

How to Build a DIY Worm Farm

One of the first things I noticed once I stopped buying plastic packaging was that my rubbish bin was now filled almost exclusively with organic waste – vegetable peelings, fruit skins and cores, leaves and the like. In the UK my local council had provided a brown bin for organic waste, which was industrially composted, but here in Perth Australia it was heading straight to landfill.

This meant someone was driving a truck to my flat, picking up my organic waste, driving it to a landfill site, dumping it into a hole in the ground and covering it with rocks. With fuel and machinery costs, wages, increased pollution from vehicle emissions, and the resulting contaminated land, it seemed like a lot of energy (and effort) was being wasted dealing with something I could potentially deal with at home.

And so I built a worm farm! I use the term ‘built’ loosely, as there was no actual building involved. In fact, it is dead simple. Additionally, I spent ZERO! Nothing! Zilch!

How to Build a Worm Farm

What you will need: two polystyrene boxes, a skewer, scissors, junk mail or shredded paper, some worms, an old towel

I salvaged two polystyrene boxes with lids from my local supermarket. (I just went to the Fruit & Veg section and asked a member of staff.) In Australia, vegetables such as broccoli and Brussels sprouts are delivered in these, and once emptied of stock, they are simply thrown away.

The boxes need to be the same width and length, but the same depth is not necessary.

Image

Two insulated boxes, courtesy of the supermarket. The bottom box doesn’t need a lid as the other box sits directly on top.

The boxes will be stacked on top of one another, so if they are different depths, choose the shallowest to sit on the bottom.

The top box is for the worms, and so needs drainage holes. The bottom box will be used to collect liquid that drains from the other box, so no holes in this one! To pierce holes in the bottom of the box simply use a skewer, making the holes approximately an inch apart.

Image

Drainage holes allow liquid to drain away, and stop your worms from drowning. The liquid collects in the bottom box.

Place a layer of cardboard at the base of the top box so that the worms do not fall through the holes. Next, add some shredded paper to make bedding for the worms. This is a great way to get rid of those annoying supplements and catalogues that come in the newspapers, or in the mail.

Image

If you don’t have a shredder (I don’t) then you can make strips of paper for bedding by cutting slits in a newspaper at 1cm intervals along the spine, and then tearing.

Using a litre of water (ideally rain water of filtered water, if you have) pour carefully over the bedding to ensure it is wet. Any excess water will drain through to the bottom box.

And then…worms! I got mine from a friend but many community gardens offer them either free or for a small fee. You can also find them on gumtree or freecycle. If all else fails they can be purchased at the big DIY stores but be aware that these will have potentially been sitting on the shelf for a long period of time and may not be in very good health, so will take longer to get going.

Image

The worms in their new home : ) One fistful of worms needs one fistful of food per week. It’s important not to overfeed them as this means a stinky worm farm and can also attract other unwanted pesties who want in on the action.

Finally, cover the worms with an old towel, sack or carpet, or if you don’t have these to hand then use cardboard. This cover keeps the worms dark and damp, and keeps flies out. If you’ve used cardboard or something biodegradable you will eventually have to replace this as it will disintegrate over time.

Image

An old flour sack acting as a worm blanket, as I don’t have any old towels.

Lastly, replace the polystyrene box lid, after piercing a couple of holes for air, and place in a shaded spot. My worm farm lives on my balcony but it would be fine to keep indoors in a laundry or kitchen…if you wanted to!

Do not feed the worms for a few days to give them a chance to settle into their new home.

And there you have it – a DIY worm farm that didn’t cost you a penny!

[leadpages_leadbox leadbox_id=1429a0746639c5] [/leadpages_leadbox]