Tag Archive for: dairy free

Zero Waste Kitchen: A Recipe for (Don’t Laugh) Mung Bean Bread

Have we got all of the sniggers out of the way? Great. Yes, mung bean bread sounds a little… well, silly. It was my sister who first raved about it to me, and what can I say? I laughed and dismissed it. Mung bean bread?

Then, several months later, as I was lamenting what to do with all the mung beans in the pantry, she said again – make mung bean bread.

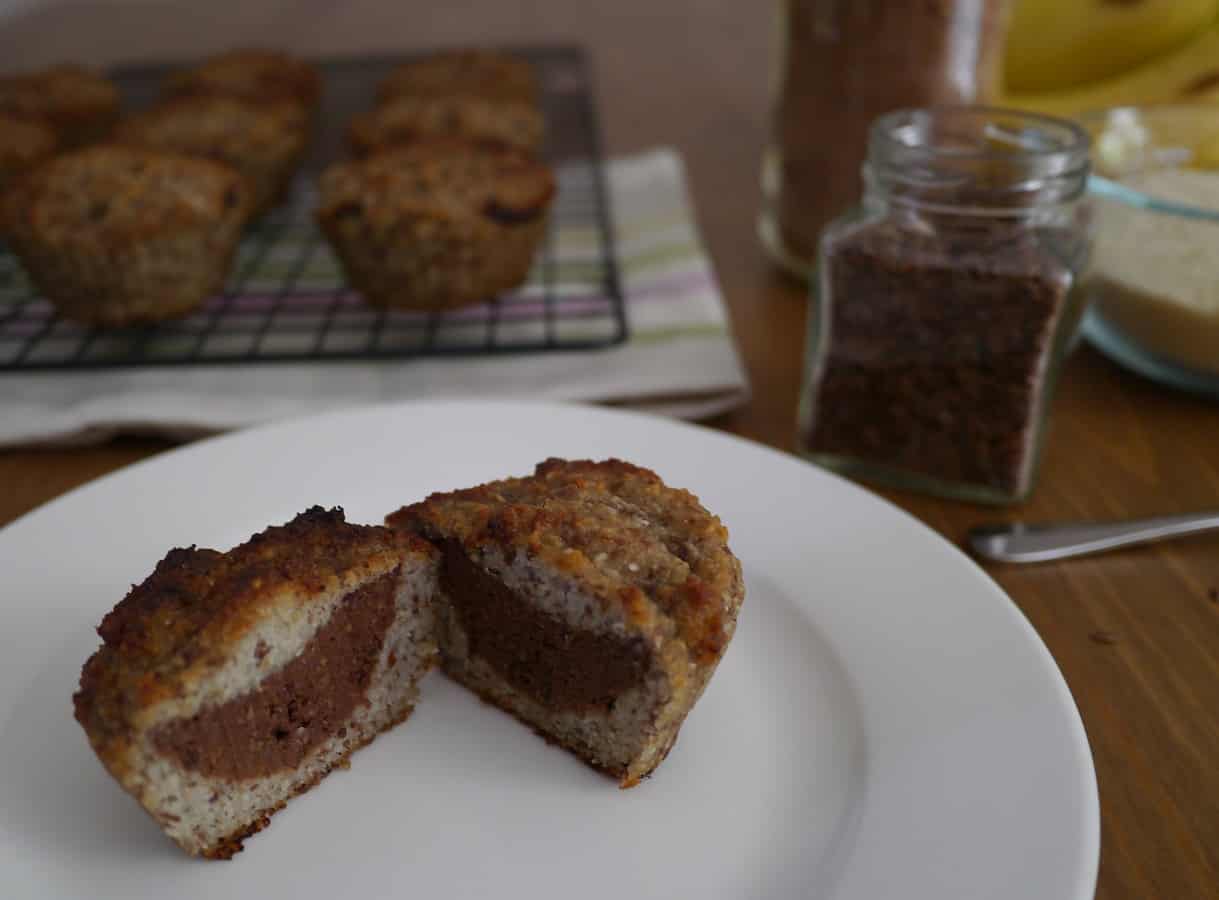
And I did, and it was delicious. So delicious that it has now become a staple, in fact.

I wanted to share the recipe with you because not only is it delicious (and good for you, and very affordable – mung beans are one of the cheapest legumes), but because it is always fun to do interesting things with regular ingredients.

Food is always an education. There’s always something new to learn. And when we learn, it is always fun to share.

The bulk stores are packed full of curious ingredients, which we often don’t buy because we have no idea how to cook them. Or we buy, and make the one recipe we know.

I’ve actually never cooked with mung beans before this. I sprout them, to make beansprouts. So making bread from mung beans was a revelation to me.

I think it serves as a great reminder to never judge food by its appearance (or a recipe by its name), and to always be willing to try new things.

And with that… mung bean bread!

Mung Bean Bread: A Recipe

This recipe is adapted from one by Jasmine Hemsley from her cookbook (which my sister owns and loves). I’ve chosen fresh ingredients over dried, missed out a few things with unpronounceable names – I decided if I didn’t know what they were, they weren’t worth including! – and tweaked how I prep it.

You’ll need to soak the mung beans for a good while before you make the bread (I’ll cover this in a sec), but once the soaking is done it’s pretty quick from there.
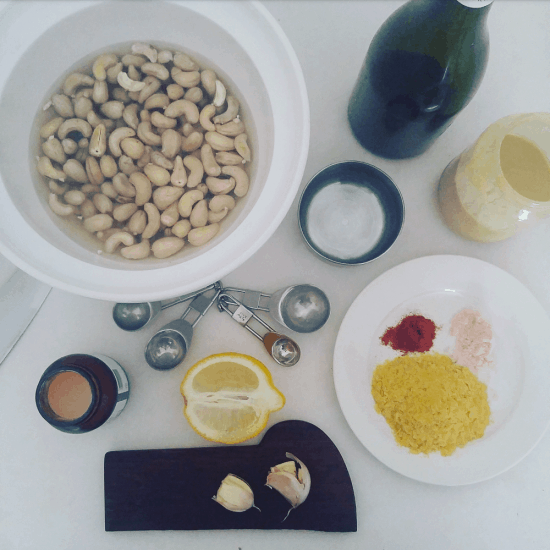
Ingredients:

  • 250g mung beans (sometimes called moong beans)
  • 1 small clove garlic, finely chopped
  • 1 tbsp chopped rosemary
  • 2 tbsp olive oil
  • 120ml warm water
  • 1/2 tsp bicarb/sodium bicarbonate/baking soda
  • 1/2 tsp salt
  • Juice of 1 lemon

Method:

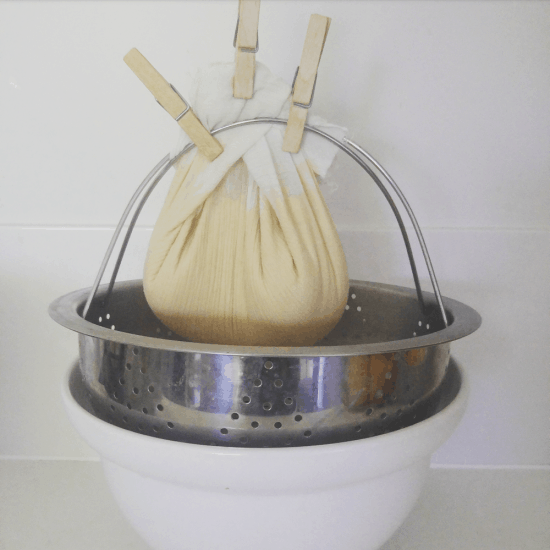
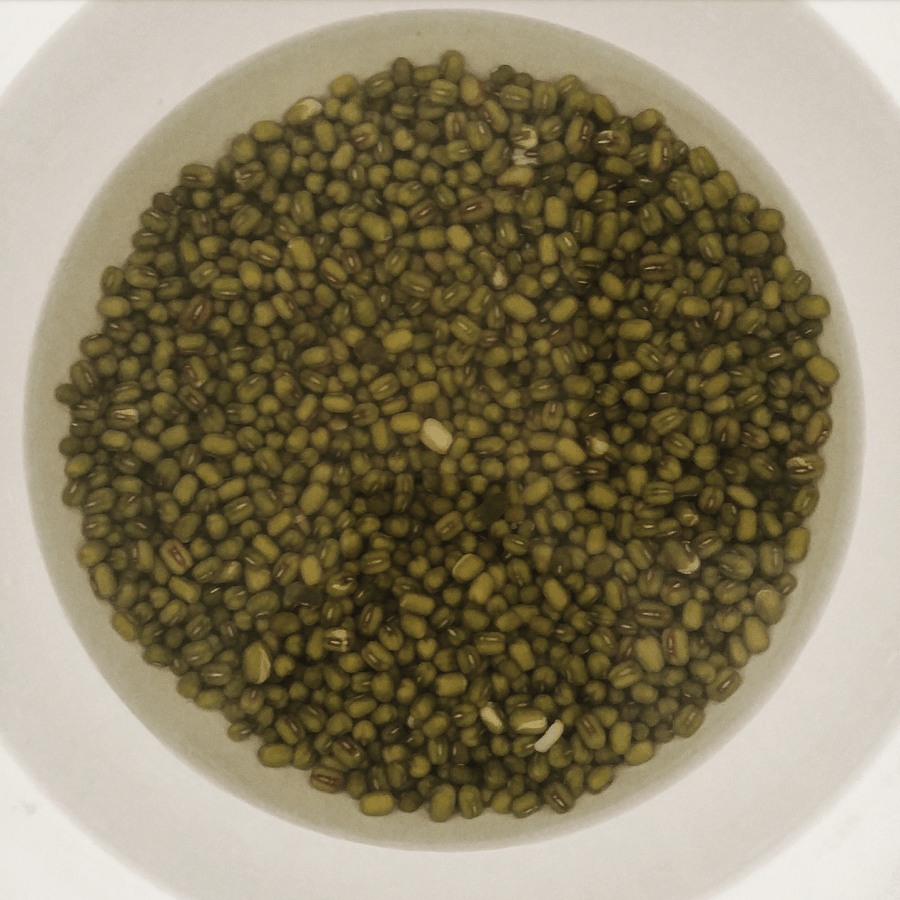
First, place the mung beans in a bowl and cover with plenty of water, and leave at room temperature. They will start to swell pretty quickly. Soak the mung beans like this for at least 24 hours – when you start to notice little bubbles of gas, change the water. I soak mine for closer to 48 hours.

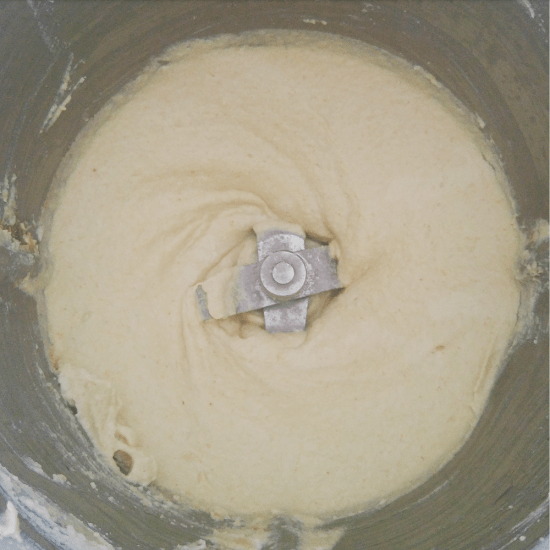
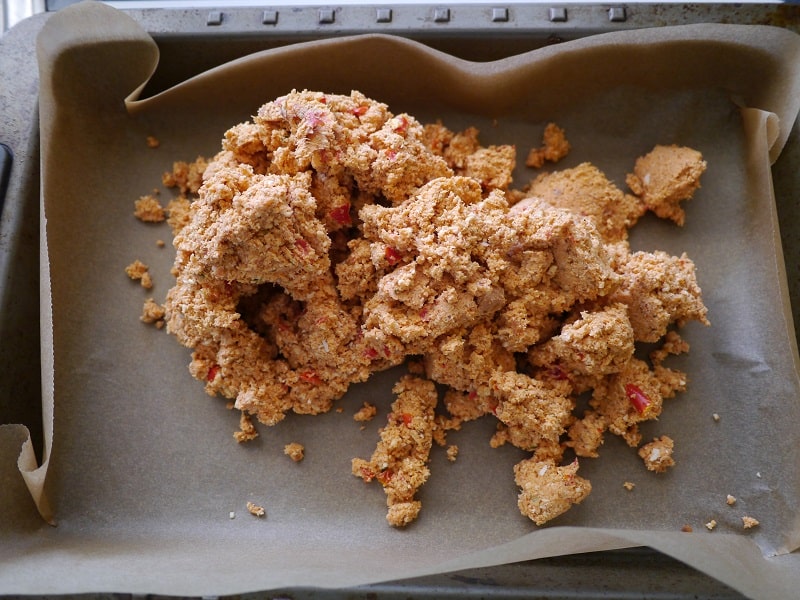
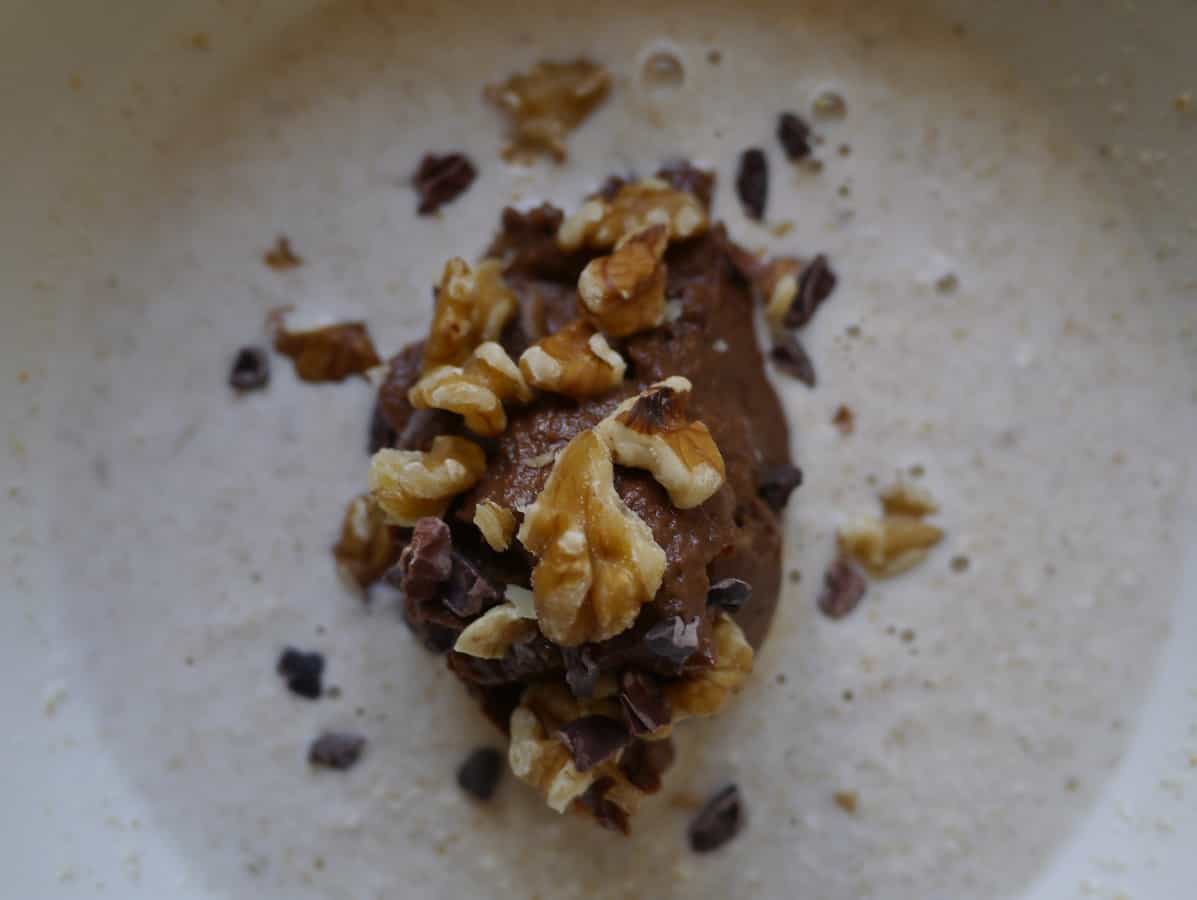
Next, drain and rinse and then place is a blender. Bonus points for picking out the unsprouted still-hard beans – there will be a few. Add finely chopped garlic and rosemary, and blend until a paste.

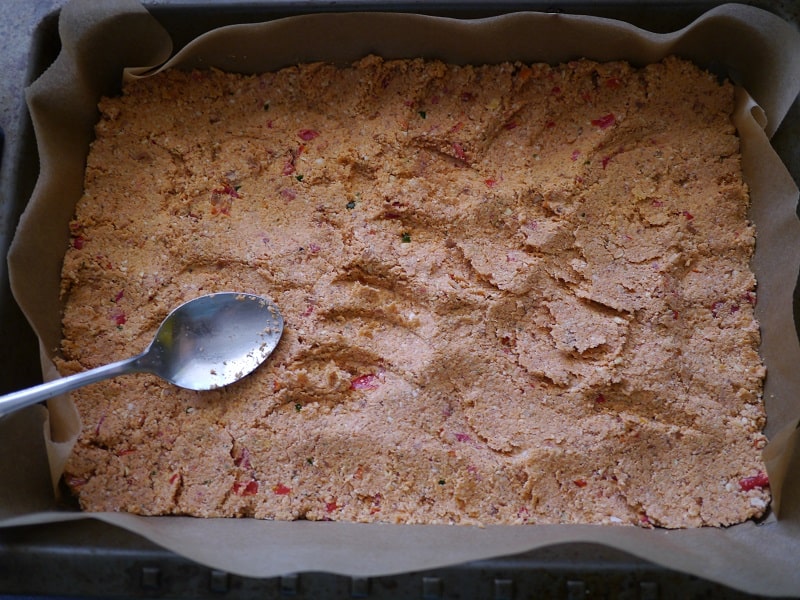
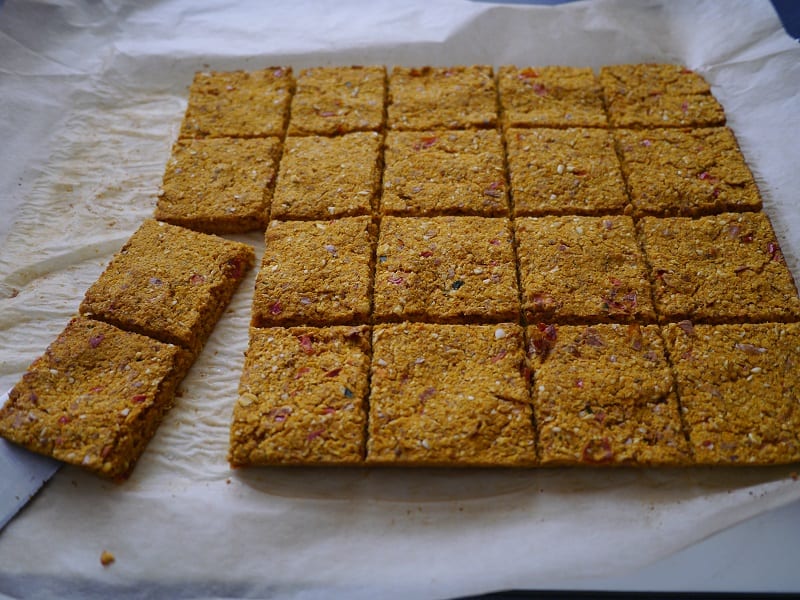
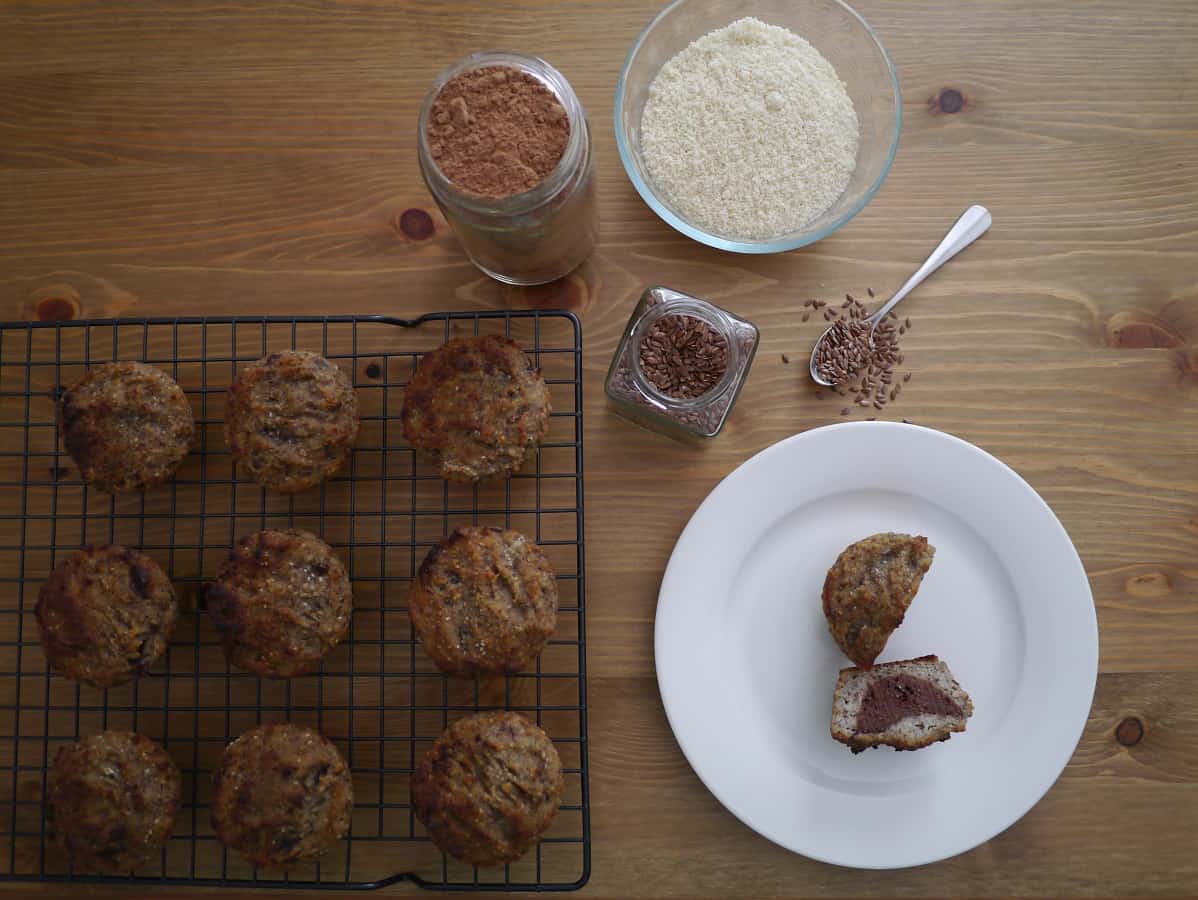
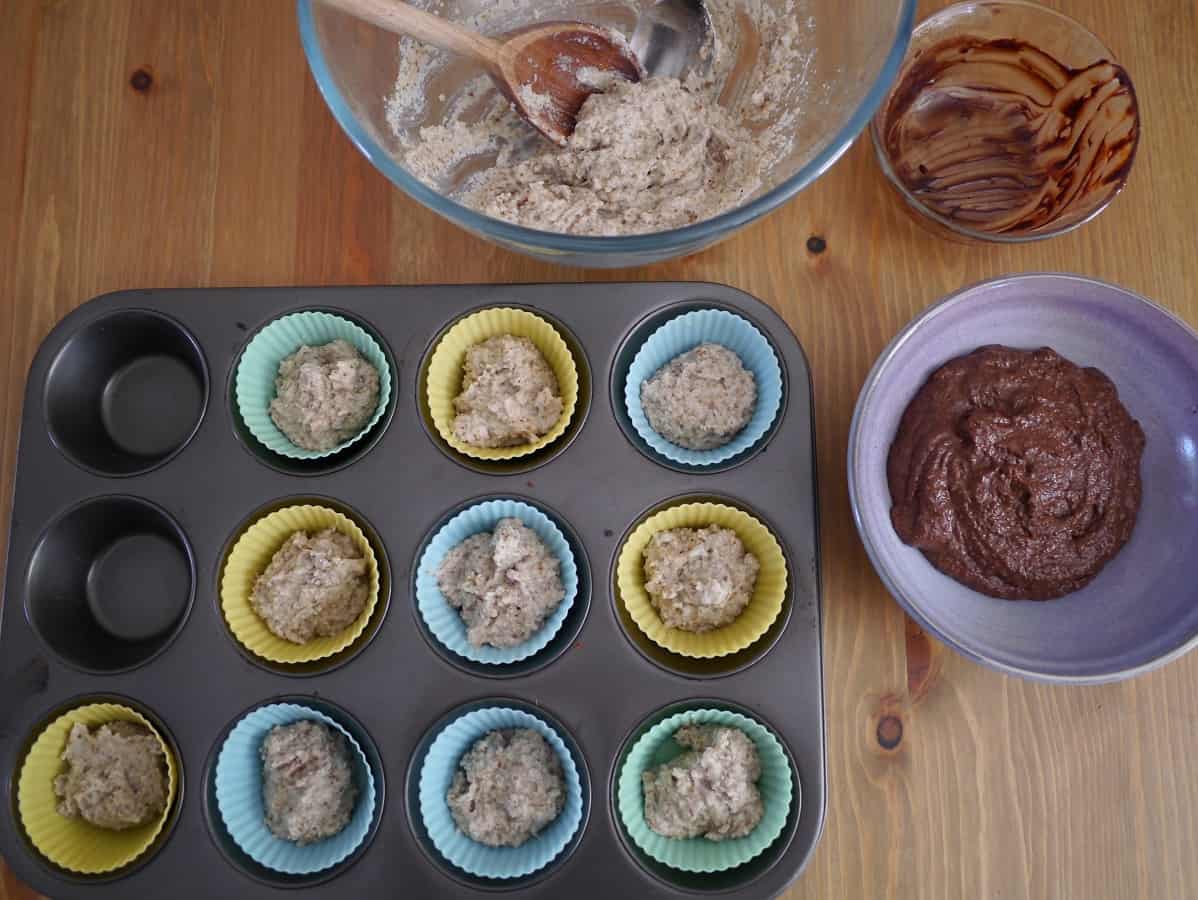
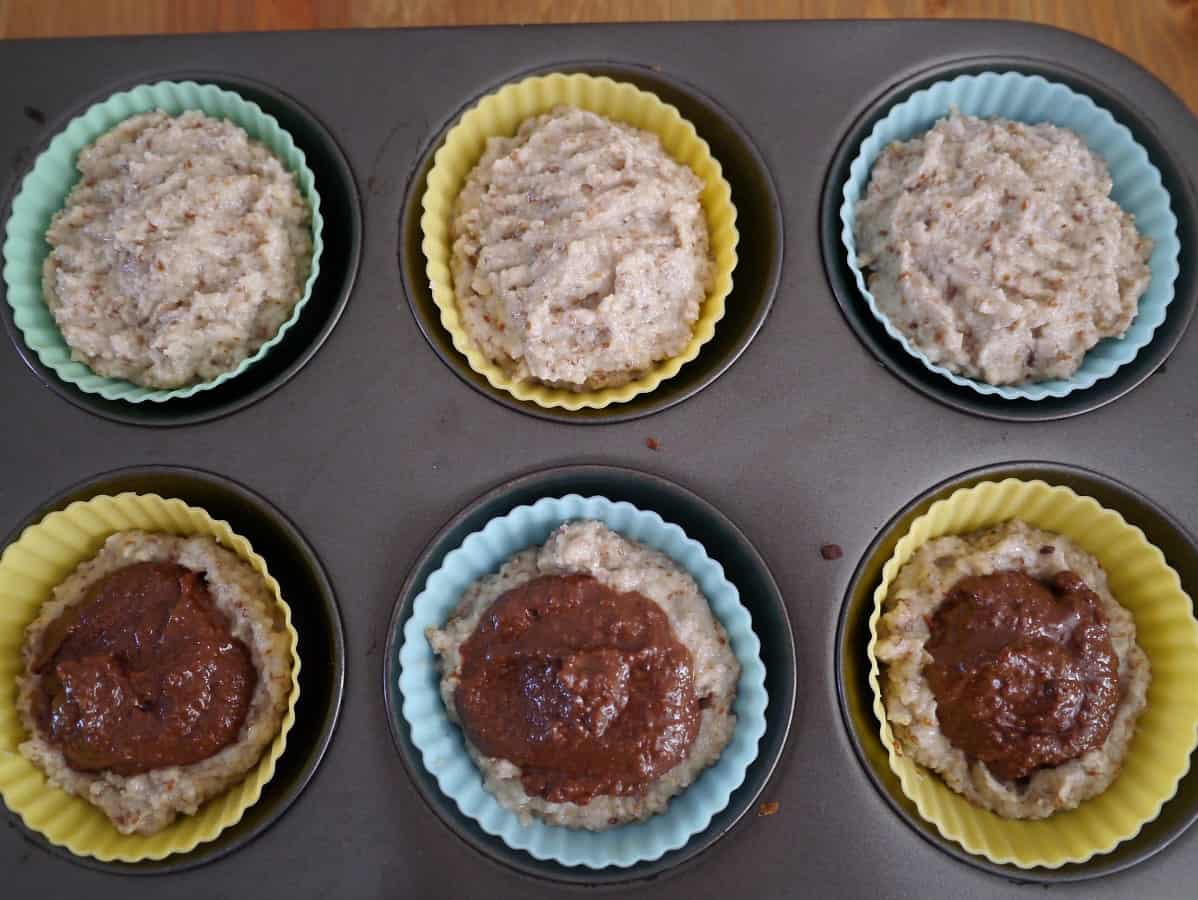
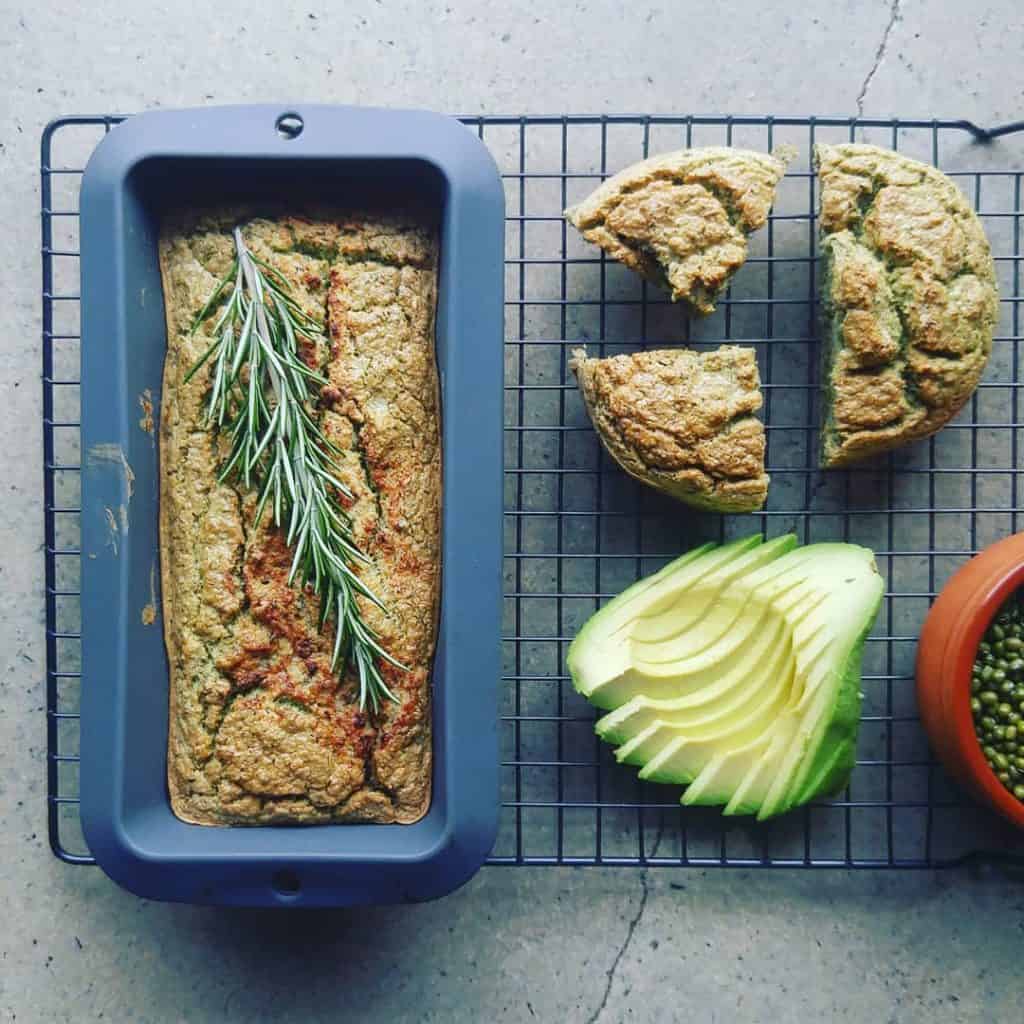
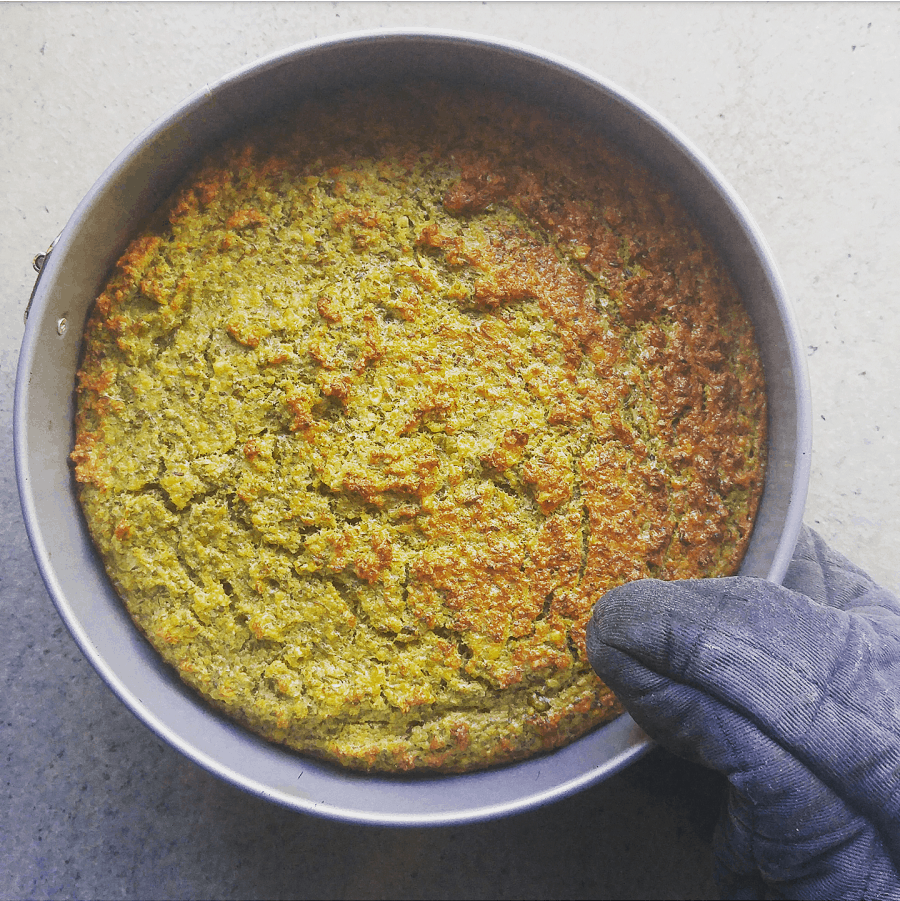
Now pre-heat the oven to 180°C. I use a silicone loaf tin and muffin cases which don’t need lining or greasing, but if you’re using regular bakeware (a round 20 cm tin or a loaf tin are ideal) line with paper or grease to the max.

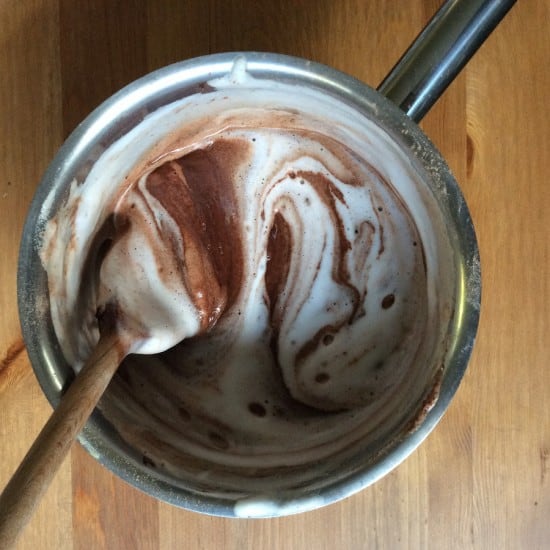
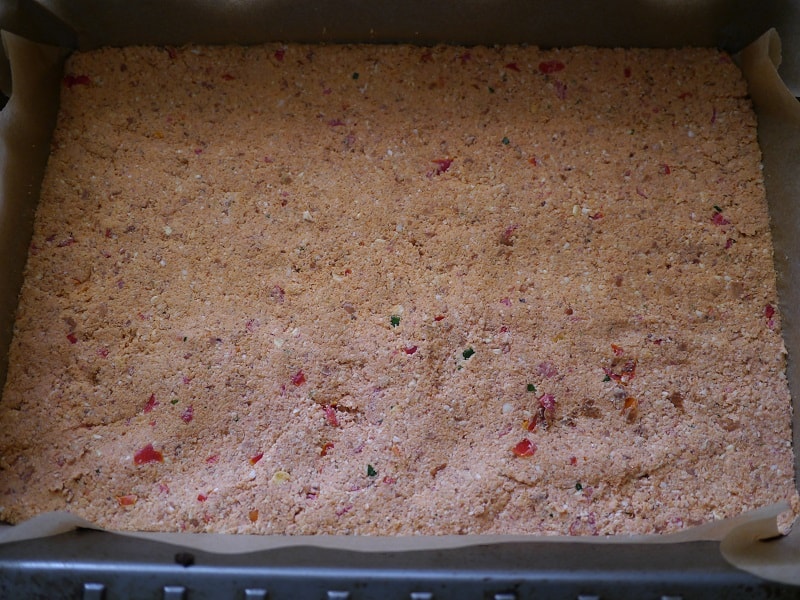
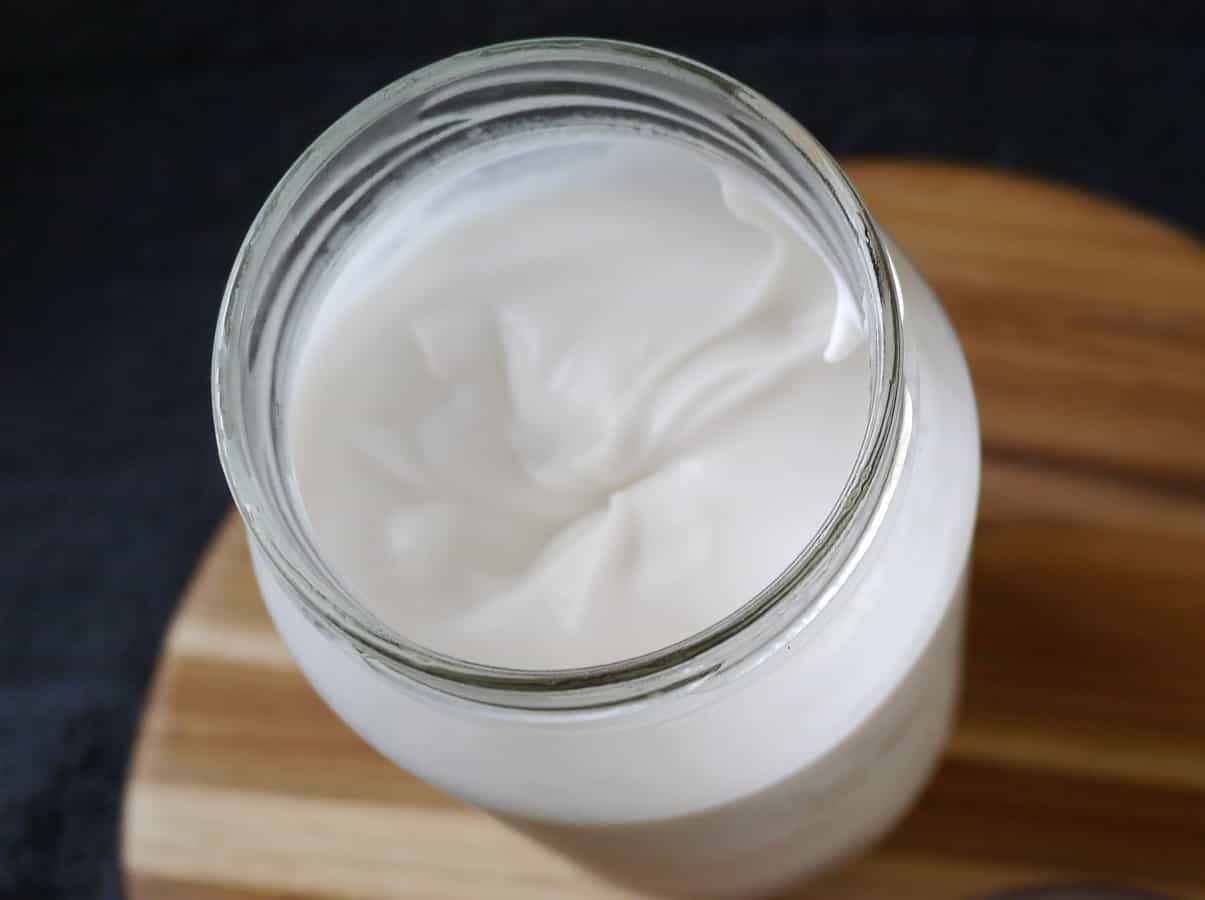
In a separate bowl, mix together the warm water, olive oil, salt and bicarb. Finally, add the lemon juice – it will fizz as soon as it is added. Stir quickly, pour into the blender and mix with the mung bean paste. Pour the mix into the prepared baking tins and pop in the oven.

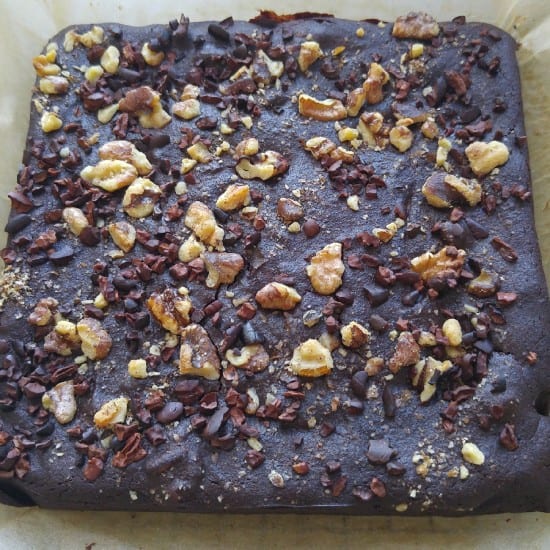
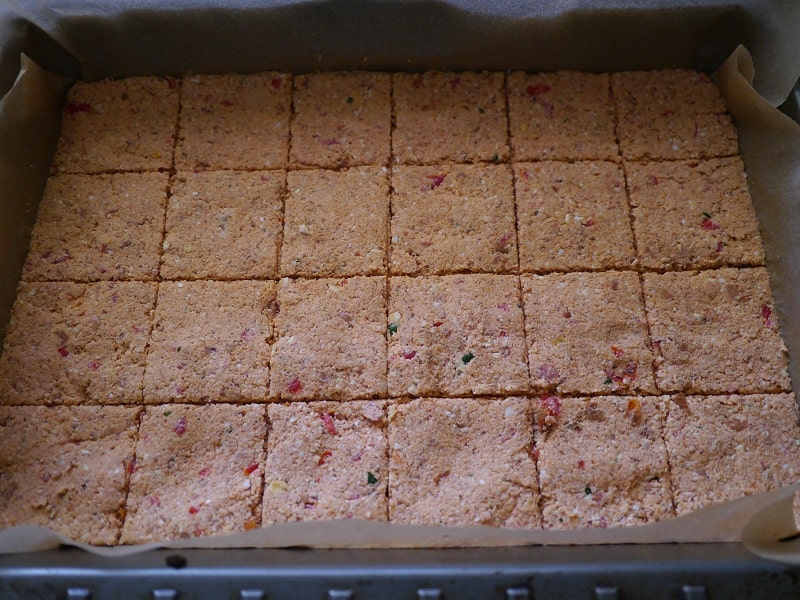
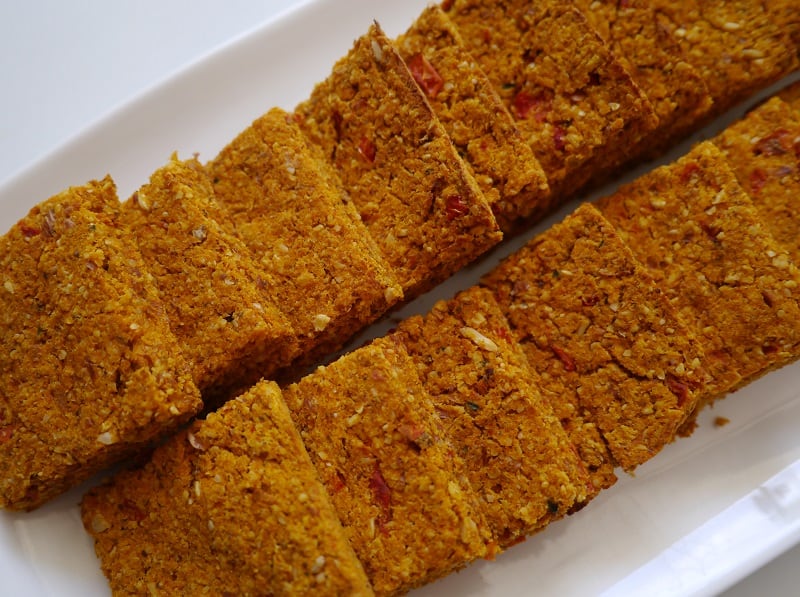
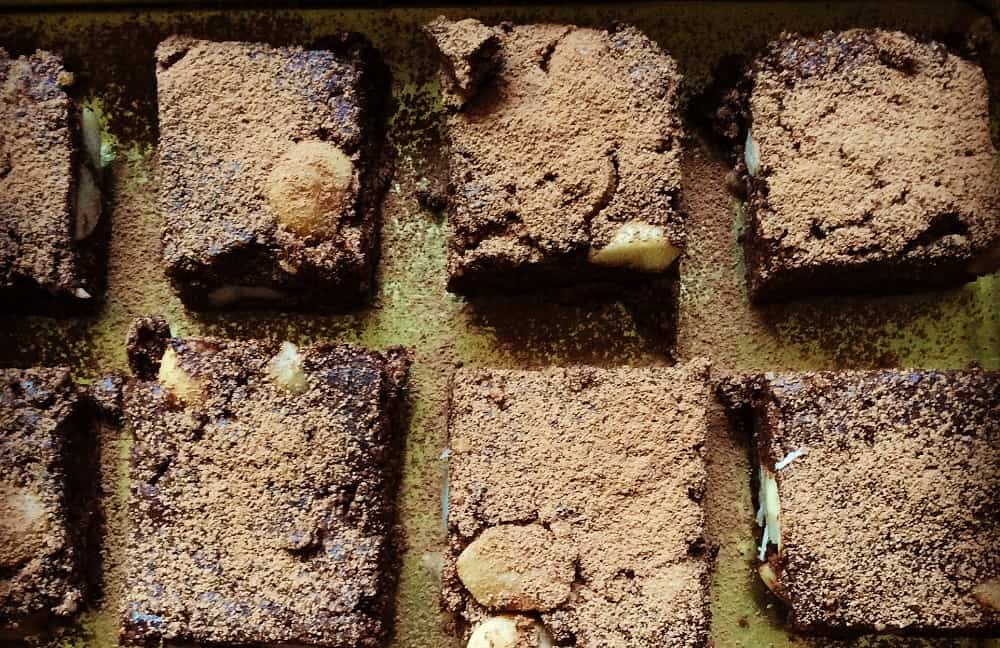
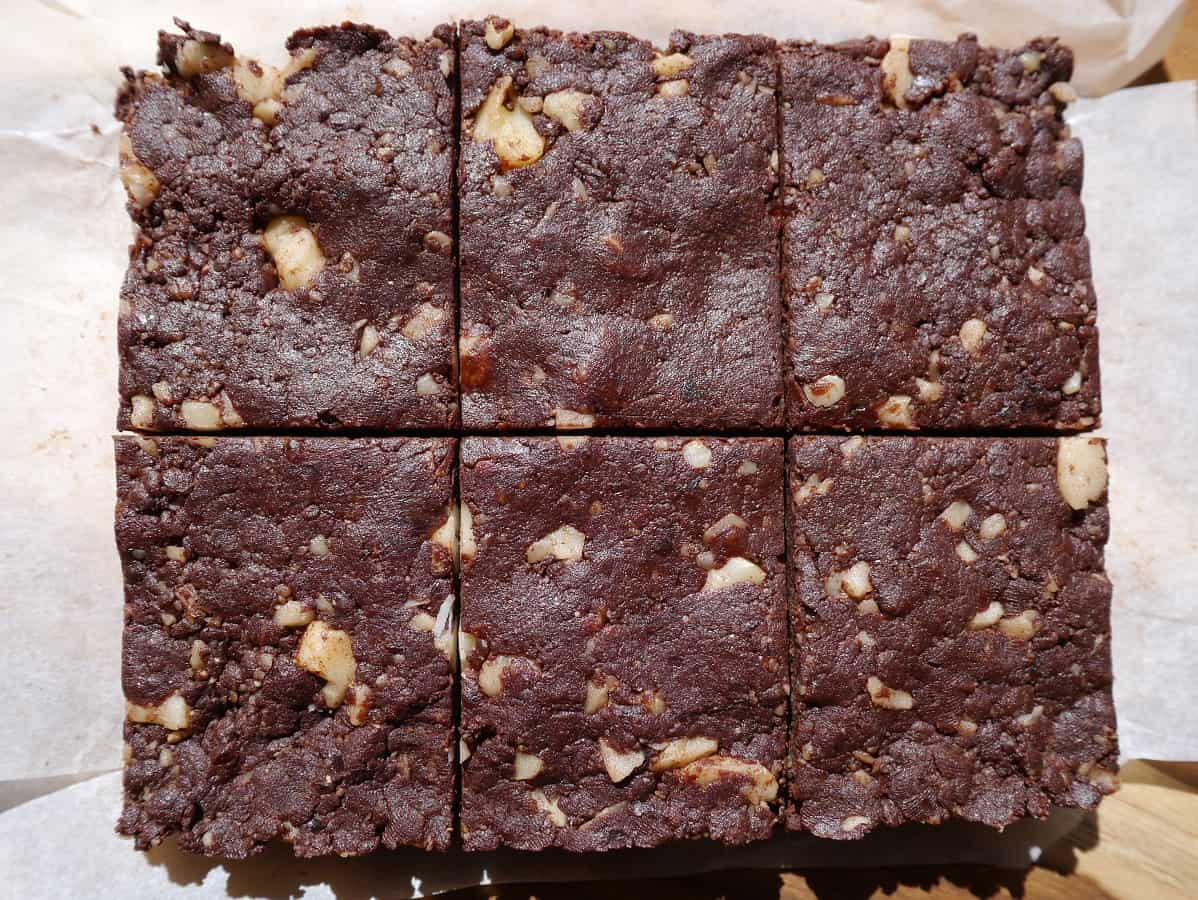
Bake for 30 minutes or until the top is golden.

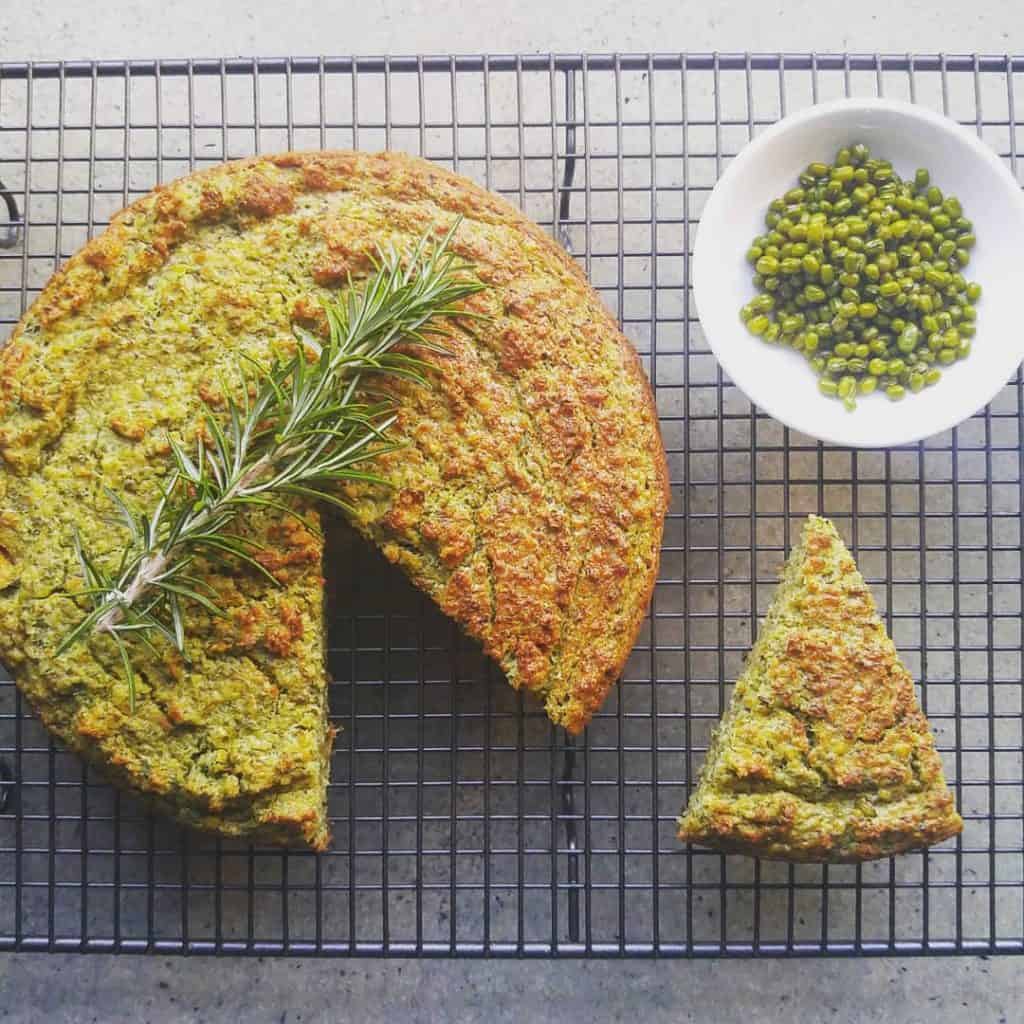
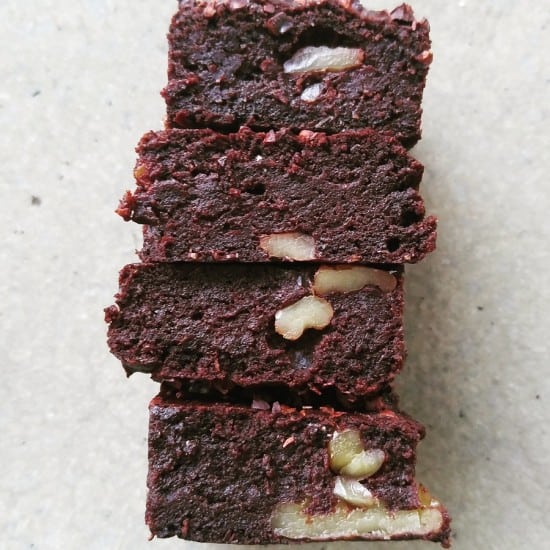
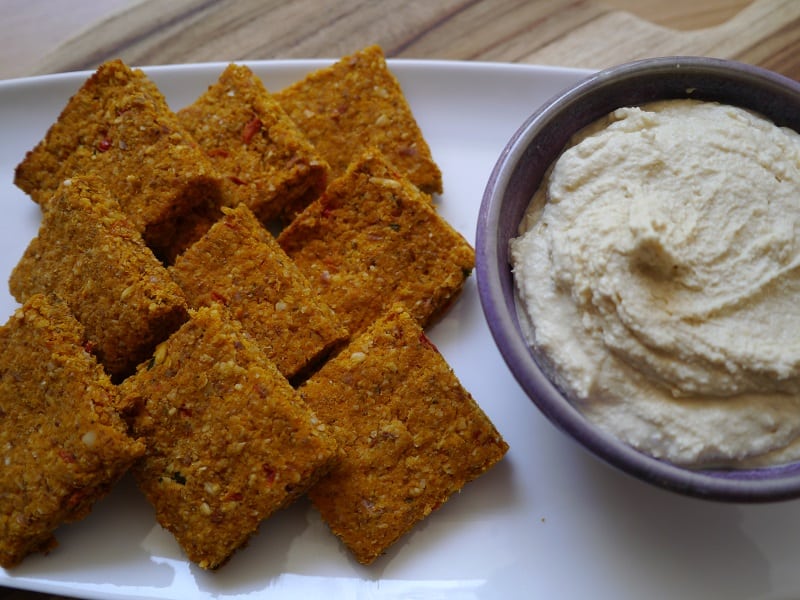
This bread tastes best straight from the oven and within the first 24 hours, but will keep for 3-4 days. Serve warm, but store in fridge after the first day.

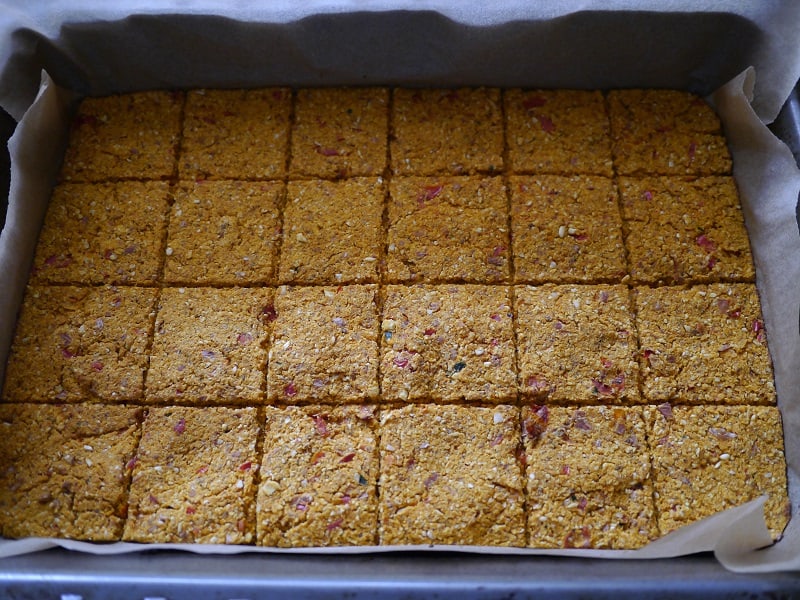
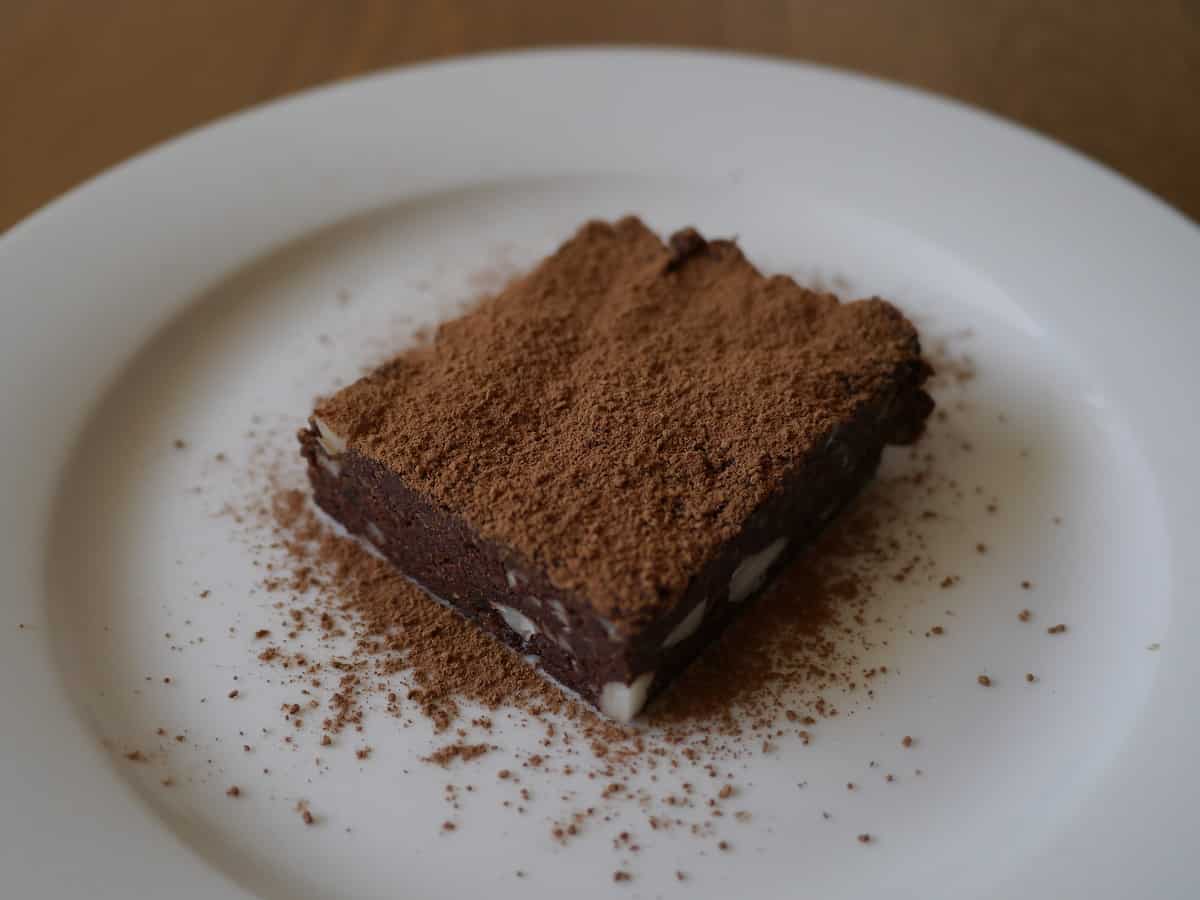
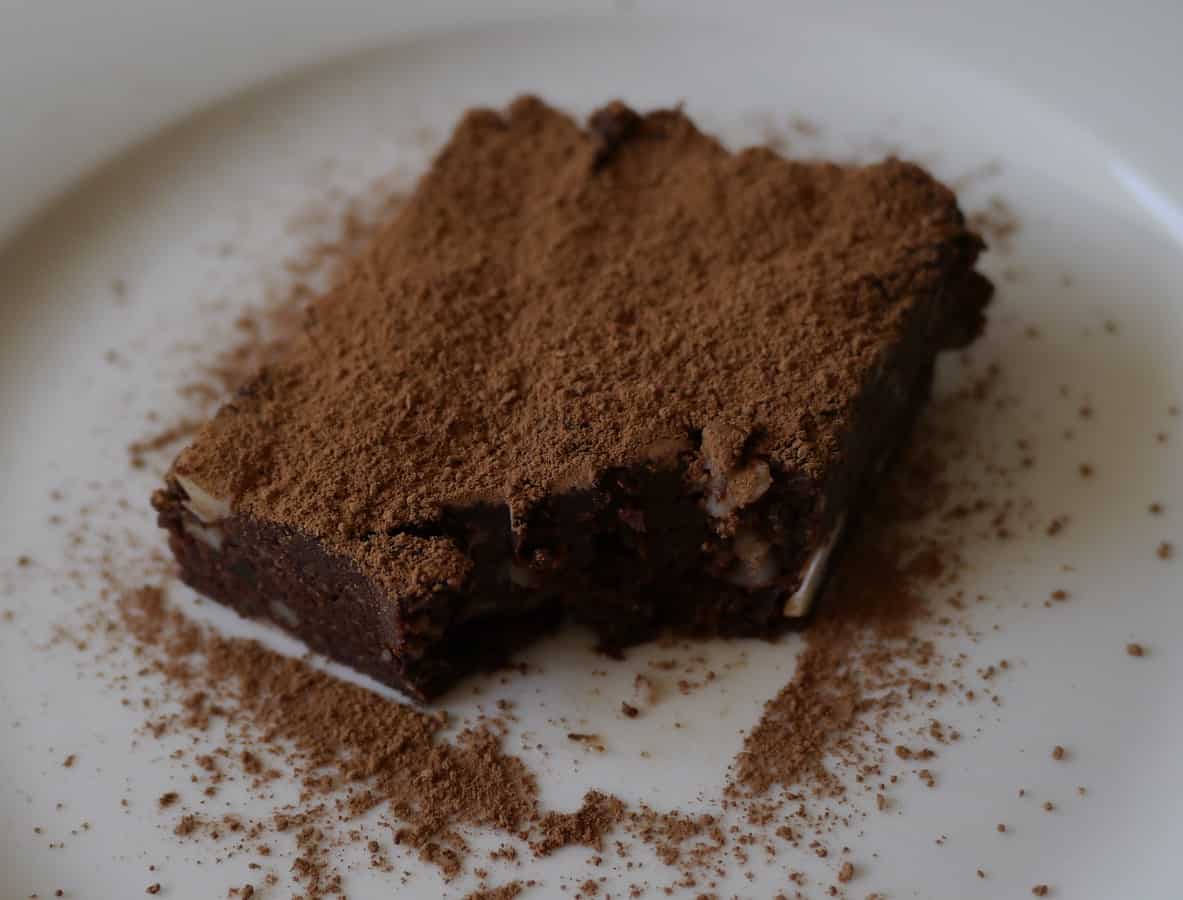
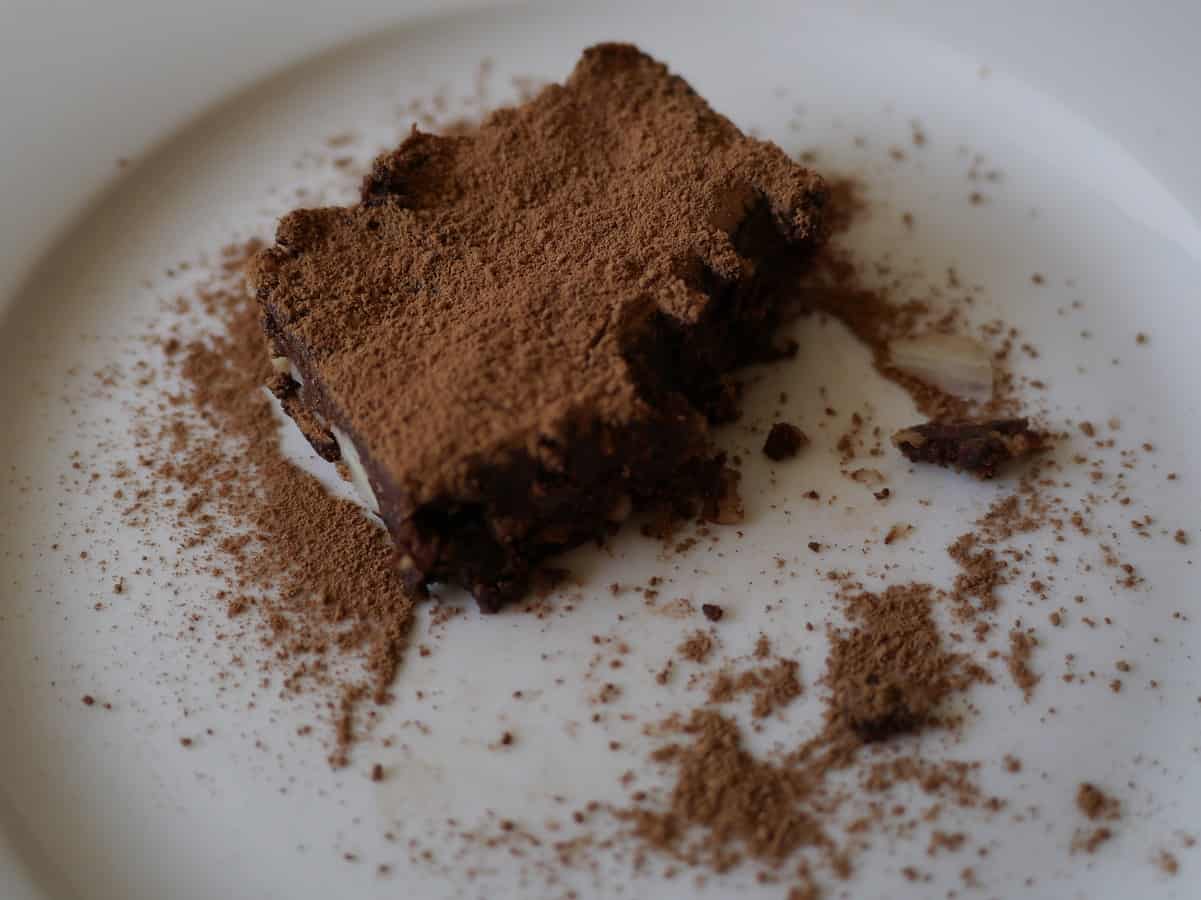
A Variation: Adzuki Bean Bread

I pretty much believe that recipes exist to be tweaked and experimented on. I was really keen to see if something similar to mung bean bread can be made with other types of beans.

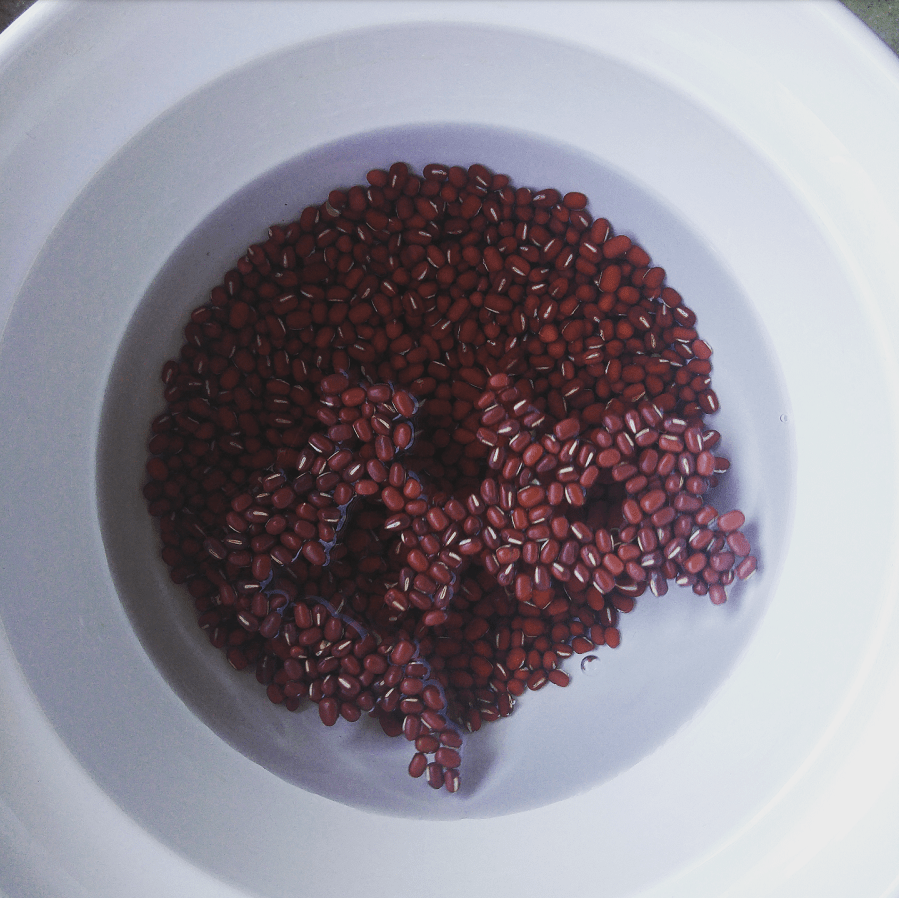
Adzuki beans are little red beans a bit larger than mung beans. It turns out, they take far, far longer to soak. Mine took 4 days to sprout. On the plus side, their sprout success rate is was 100%, so no picking the hard ones out.

Aside from increasing the soaking time, the other ingredients and timings were unchanged. The resulting bread had a glorious purple hue.

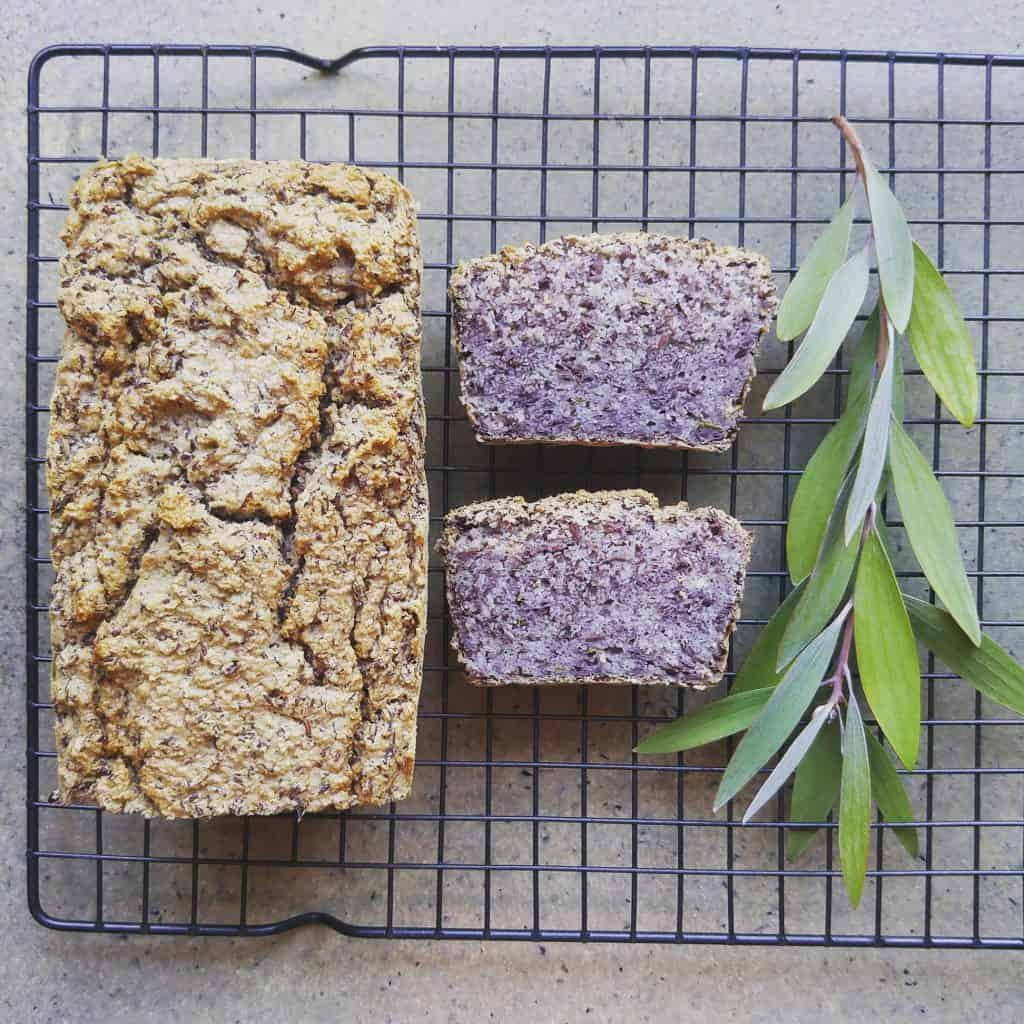
As with mung bean bread, tastes best on the first day, but will keep for up to four days.

Now I’d love to hear from you! Do you have any go-to mung bean recipes? If so, I’d love to hear them! What about any – it-doesn’t-sound-like-it-should-work-but-it-does recipes? Hit me with the weirdest (in a good way) things you’ve come across. Or, if your stuck with an ingredient, let’s see if we can come up with some ideas. Share your thoughts below!

DIY Recipe: Spreadable Soft Cashew Cheese

It is rare that I make something once and share it straight away, but I was so impressed by this recipe that I simply had to. Soft, spreadable and cheesy tasting, this simple blend of cashews and a few other things is a taste explosion, I promise.

If you’ve avoiding dairy, want to eat more plants or like trying new things in the kitchen, this is for you.

I’ve been wanting to experiment with making plant-based cheeses for a while, and I actually decided to go to a workshop to get started. (I went to one of the workshops at the Raw Kitchen in Freo.) Whilst I’m not afraid to experiment, plant-based cheese uses big quantities of nuts and I am afraid of buying ingredients and then throwing them in the compost.

The workshop allowed me to taste and smell and feel the texture of the different things we made – something I’d never glean from a recipe. Definitely worthwhile.

This cheese recipe is a slightly-tweaked-but-mostly-intact recipe from that workshop.

You’ll need to allow a couple of days from start to finish (but don’t panic, the actual making time is about 5 minutes. The rest is waiting around). You’ll also need a high powered blender or a food processor for best results, but it should still work without.

How to Make Cashew Cheese

Ingredients:

2 cups cashews, soaked overnight and then rinsed
2 cloves garlic, crushed
1/2 cup cold water
Juice of 1/2 lemon
2 tbsp olive oil
2 tbsp hulled tahini
4 tbsp nutritional yeast (nooch)
1/2 tsp smoked paprika
1 tsp salt
1 tsp probiotic powder (I used Inner Health Dairy Free Powder – I prefer powder to capsules as there is more ingredient for my money, and less waste/packaging)

A few notes on the ingredients:

Cashews are smooth, creamy and do not have a strong flavour or colour, making them ideal for plant-based cheese. Other nuts will also work but the result will be less smooth, more fibrous and they will have the flavour and colour of the nut used. They will still taste delicious though!

The nutritional yeast adds a cheesy flavour to the mix, and some yellow colour. It will definitely taste less cheesy without this, but a small amount of turmeric will add some of the yellow colour. 

Paprika adds some colour and also smokiness to the mix.

Probiotic powder is what ferments the cheese and gives it a unique tangy flavour, and probiotics are great for the gut. Honestly though, it is still super tasty without the probiotics, so if you don’t have, it is still worth making. You will be able to use straightaway as there is no need to wait for fermentation to occur.

Method:

Blend the soaked, rinsed cashews briefly until they resemble crumbs (this helps ensure it is smooth). Add everything except the probiotic powder, and blend until smooth. Try to avoid overheating the mixture – it is better to stop and allow to cool before blending again if it is taking a while to become smooth rather than running the blender continuously.

Add the probiotic powder and whizz briefly to combine.

Scrape the blender contents onto cheesecloth or into a nut milk bag, twist into a ball and suspend over a bowl to allow to drain. You could place in a sieve and suspend this over a bowl, or hang. Do not let the cheese ball sit in the draining liquid.

Leave at room temperature for 24+ hours to ferment. (My house is warm, and 24 hours works for me. If yours is colder, allow 48 – 72 hours.

Open the cheesecloth / nut milk bag and scrape the cheese into sealable containers (or a dish covered with wax wrap) and store in the fridge. The cheese will continue to ferment in the fridge, but much more slowly – you will notice the flavour getting more sour over time. Keeps for 5 – 7 days in the fridge.

Soft Cashew Cheese Recipe Suggestions

Spread on toast, use as a dip, or roll into balls or a log shape (roll in nuts, herbs, spices or dukkah for extra flavour) and serve on a cheeseboard. It also works really well stirred through pasta and – hurrah – it doesn’t separate. Cook the pasta and veggies first and stir the cheese through just before serving.

Now I’d love to hear from you! Have you experimented with making vegan plant-based cheese? Any recipes you’d recommend? Have you been able to find the ingredients in bulk? Any other thoughts? Please share in the comments below!

3 Zero Waste Recipes: DIY Cashew Milk, Homemade Almond Milk + Almond Pulp Brownies

Nut milk. The name sounds kind of ridiculous. But it looks like milk, has a similar shelf life, can be used in similar ways, and in many cases the nuts do actually have to be “milked”, so it’s easy to see why the name took hold!

milking-almonds-to-make-nut-milk-treading-my-own-path

When I started out on my plastic-free journey, I bought cow’s milk that came in returnable glass bottles. But it wasn’t stocked in many places, so finding it was hard – and a bit of effort. Gathering those glass bottles together to return them meant a heap of clutter and a journey across town with them all (there was no deposit return either, only goodwill). Plus what to do with all those lids?!

I began making nut milk alongside dairy milk, because it was a lot easier to find nuts in bulk, and they have a long shelf life (they will last for months in a jar in the pantry, or even better, the freezer). I found nut milk worked just as well in baking, in porridge and in coffee, and I began to use it more and more.

Eventually I thought more about the impact of the dairy industry on the planet. Cows need a lot of water and land to produce milk, they produce huge amounts of methane, cause soil erosion, and the product has to be transported fresh, meaning a higher carbon footprint. Nuts use less water, the trees are beneficial for the environment, and the products have a long shelf life.

Nut milk seemed like the greener option. I decided to stop buying dairy milk altogether (my husband stopped too, but later).

almond-milk-and-cashew-milk-treading-my-own-path

But of course, I don’t buy nut milk. Some commercial brands of nut milk are little more than bottled water! Alpro’s nut milk contains only 2% almonds, and the second biggest ingredient is sugar. Unnecessary packaging aside, shipping all that water across the globe seems like such a waste when we can ship dry nuts (or even better, use local ones) and make our own.

And I have to tell you, making your own is super easy. It requires no specialised equipment, and takes very little time. You’ll need a blender, but it doesn’t have to be a fancy one.

How To Make Cashew Milk

Cashew milk is my go-to milk because it’s the easiest. Cashews are already quite soft, so they do not need to be soaked for a long time. They also contain very little fibre, so there is no need to strain.

To make:

Soak 1 cup of raw cashews in water for a few hours or overnight. Rinse, and blend with 4 cups water. Done.

I tend to blend my cashews with 1 cup of water at a time, for 30 seconds, before adding the next cup of water. I find that there are less (no) lumps in it this way.

Makes 1.2 litres. Lasts 7 – 10 days in the fridge. It may get thicker over time, in which case add a little more water to it.

cashew-milk-and-cashews-treading-my-own-path

cashew-milk-makes-great-plant-based-coffee-treading-my-own-path

Cashew milk works absolutely amazingly in coffee, too :)

How to Make Almond Milk

Almond milk is the most common nut milk, but it isn’t the easiest or quickest to make. That doesn’t mean it’s hard, mind! It just needs soaking a little longer, and also straining.

To make:

Soak 1 cup of raw almonds in water for at least 12 hours, and even 24 hours (change the water every 8 hours or so). Rinse, and blend with 4 cups of water.Now you need to strain.

I strain my almond milk using cheesecloth as it has a fine weave and is 100% cotton. Spread the cheesecloth over a bowl or jug, pour the milk over and allow the almond milk to drip through. Squeeze to get any remaining drops out.

straining-almond-milk-treading-my-own-path milking-almonds-to-make-nut-milk-treading-my-own-path

I bought my cheesecloth off the roll at a fabric store – it is very inexpensive. (Cheesecloth is not the same thing as muslin. Muslin has a much looser weave and the fibre all gets stuck!)

Alternatively, you could use a clean tea towel or old pair of tights, or even a fine mesh sieve. Before I had the cheesecloth, I used one of my mesh produce bags. There is absolutely no need to buy an expensive plastic nut milk bag!

Makes about 800ml, and leaves a cup of almond pulp. Don’t throw the almond pulp away! It will last in the fridge for a week, or freeze it. And then make chocolate brownies : ) (Recipe below).

fresh-almond-pulp-and-almond-milk-treading-my-own-path

Fresh almond pulp (almond milk on the right). I use cheesecloth the strain, and scrape the excess pulp off with a knife.

How to Make Other Nut Milks

Other nut milks can be made in the same way, and most will require some kind of straining, although they won’t produce as much pulp as almond milk does. I’ve made macadamia milk (no need to strain), brazil nut milk and walnut milk.

Cheaper Nut Milk Alternatives

Nuts can be expensive. Increasing the ratio of nuts to water will make a more cost-effective milk, but will also dilute the milk. I tend to use the ratio 1:4 nuts:water but this could be increased to 1:5 or 1:6.

As well as nuts, you can also make plant-based milk with seeds, oats and peanuts (which are techincally a legume, not a nut).

Pumpkinseedmilk

Homemade pumpkin seed milk :)

These work out much cheaper than nut milks. I’ve tried making sesame seed milk (not recommended – it has a very strong flavour!), pumpkin seed milk (which is absolutely delicious) and sunflower seed milk. Flaxseed milk is also popular, although I’ve never tried this.

As above, the principle is the same. Soak, then blend 1 cup seeds with 4 cups water, and strain.

Now, let’s talk about what to do with the leftover pulp.

What to Do with the Leftover Pulp: Make Almond Pulp Brownies

This recipe has become my go-to almond pulp recipe. I’ve made savoury crackers, and macaroons too, but nothing beats chocolate-y goodness, so I always come back to this one.

vegan-almond-pulp-aquafaba-brownies-treading-my-own-path

Ingredients:

180g sugar (I use rapadura sugar)
1 cup almond pulp, approx (the pulp left over from using 1 cup of almonds to make almond milk)
80g cocoa powder (I’ve used both cocoa powder and raw cacao for this – I prefer cocoa powder but it doesn’t really matter. You might want to add a little more sugar if using cacao, though)
1/2 cup (110g) coconut oil (I use deodorised as I find the coconut oil flavour a little intense in desserts)
9 tbsp aquafaba (chickpea water – effectively a waste product being put to good use. Find out more here!)
1/2 cup (60g) spelt or other flour
1 tbsp vanilla essence
1/2 tsp salt
1 cup macadamias/walnuts/raspberries/chocolate chips/something else delicious
(or you could leave plain. But I consider all good brownies to need some kind of crunch)

Optional: a few tablespoons of cacao nibs and/or chopped nuts to top.

Method:

Line a square baking tin (if you use baking paper) and preheat the oven to 175°C.

Melt the coconut oil in a pan. Turn off the heat, add the almond pulp and stir to combine.

In a separate bowl, combine the sugar, cocoa powder and flour, and mix well. Add to the pan and stir in. It might seem really dry at first, but it will incorporate. Once combined, add the vanilla essence, salt and walnuts (or delicious thing of your choice).

In a tall cylinder, whisk the aquafaba to form stiff peaks. (This will take longer than you think.) I use a stick blender with a whisk attachment and it takes at least 5  minutes of  constant whisking. Add the aquafaba to the brownie mixture in the pan, slowly folding to incorporate with as little stirring as possible.

This yellow liquid is what you get when you cook chickpeas and strain (and keep) the water

aquafaba-and-chocolate-brownie-mix-treading-my-own-path

Once incorporated, pour into the baking tray. Sprinkle the toppings on (if using) and bake in the oven for 20 – 25 minutes until the top is dry.

chocolate-brownie-slab-treading-my-own-path vegan-almond-pulp-aquafaba-brownies-treading-my-own-path plant-based-aquafaba-brownies-treading-my-own-path

Best stored in the fridge if you don’t demolish the whole lot in one sitting.

Now I’d love to hear from you! Have you ever made nut milk (or seed, oat or rice milk)? Which is your favourite? Which is your least favourite? If you’ve never made it before, is there something putting you off? Do you have any other alternatives to suggest? What about aquafaba – have you ever experimented with that? Are you just a little bit tempted to make these chocolate brownies?! Anything else you’d like to add? Please tell me your thoughts and leave a comment below!

Recipe: Carrot Pulp Cracker Flatbreads

This super-simple recipe tackles two dilemmas I face when trying to live plastic-free and with zero waste – how to make your own plastic-free crackers, and what to do with leftover carrot pulp (from juicing carrots). I came up with this recipe after realising that if I wanted plastic-free snacks, I was going to have to make my own. I am yet to find crackers in plastic-free packaging.

I went through a phase of drinking carrot juice a couple of times a week, and decided to experiment with using the pulp to make my own crackers. After countless experiments, I am happy with this recipe, but I must point out that they are not crunchy. Making them crunchy just meant I had to drink a gallon of water every time I ate one, because they were so dry. This was my happy spot. They are still soft on the inside, which makes them more of a bread than a cracker – except they are nothing like bread either. I’ve called them cracker flatbreads because I have no idea what else to call them. Crackerbreads? Anyway, if you make them and think of a better name, please let me know!

If you don’t have carrot pulp, you can use grated carrot instead. The mixture will be a lot more watery, so will need longer to cook (still at the same temperatures), but will still work. You could try squeezing the juice out of the grated carrot, but then you’d be wasting delicious carrot juice!

Recipe: Carrot Pulp Cracker Flatbreads

This recipe is for a 33cm x 23cm tin.

Ingredients:

Approx 200g-250g carrot pulp
1/2 cup almonds, soaked overnight, rinsed and drained
1/2 cup oats (for gluten-free, use gluten-free oats; or replace with 1/2 cup almonds for completely grain-free)
2tbsp flaxseeds, ground
2 small tomatoes, chopped
1 tbsp olive oil
Salt and pepper
Optional: 1/2 tbsp fresh rosemary, finely chopped, or other herbs or spices depending on your taste

Method:

Preheat the oven to 170ºC.

Line a baking tin with greaseproof paper.

In a blender, grind the soaked and rinsed almonds until small pieces. Add the oats and grind to a coarse mixture. Add the carrot pulp and blitz to combine. Add the tomatoes, oil and flax seed and blend until combined. Add the salt, pepper and nay herbs or spices that you want to add and blitz again to ensure everything is mixed together.

Tip the mix into the lined baking tray. It will look sticky. Press into the tin with a spoon.

It may seem like there isn’t enough mixture for the tin, but you want a fairly thin layer. Push right up into the edges and corners, and press the edges down firmly. You can use your hand to firmly pack the mix into the tin once it’s all spread evenly.

Mark out the cracker shapes using a knife.

raw carrot pulp mix

Empty the carrot pulp cracker mix from the blender into a tin lined with baking parchment…

raw carrot pulp cracker mix with spoon

Use a spoon to press the raw carrot pulp cracker mix into the edges of the tin…

raw carrot pulp mix squished

Compact the carrot pulp cracker mix down using your hand, and use a spoon to make sure the edges are neat…

raw carrot pulp mix with squares cut

Use a knife to mark out the carrot pulp cracker squares before they go into the oven.

Place in the oven, and leave for 30 minutes.

After 30 minutes, see if you can lift the baking paper lining out of the tin without breaking the crackers. If they are still too soft, pop them back into the oven for another 5 minutes or so, and keep trying until they are firm enough to handle. Lift firmly and quickly.

Lower the oven to 100ºC and put the crackers (still on the baking paper) on a grill tray in for another 15 minutes (do not wait for the oven to drop to temperature; they will be fine).

Remove from the oven, and carefully separate the crackers. You may need to use a knife to cut them. Put each one upside down on a grill tray (to aid air circulation), and return to the oven for 15 minutes to cook the other side.

carrot pulp crackers in baking tin

Golden carrot pulp crackers out of the oven…

carrot pulp crackers baked once

The underside will still be moist, so separate the crackers carefully to avoid breaking them…

Carrot pulp crackers other batch

Pop back into the oven with the damp underside facing up. Use a grill pan or rack to enure the air can get between them and they don’t burn!

Once they are ready they will be a golden colour and be dry to touch.

Remove and enjoy!

carrot pulp crackers on a plate

Carrot pulp crackers and hummus

These carrot pulp cracker flatbreads are perfect with hummus!

Tips:

  • This recipe is extremely forgiving, so feel free to change quantities, cook for longer to make them crunchier or modify however you think best. Just let me know in the comments!
  • Feel free to miss out the middle step. Cook in the oven for 30+ minutes, then take out, separate straightaway and put back in the oven for the last 15 minutes. The crackers will be more moist and harder to separate, but if you’re patient enough it will work fine!
  • If you don’t want to make crackers immediately after juicing carrots, store the pulp in a sealed container in the fridge. It will last for a couple of days.
  • The tomatoes provide the moisture. If you don’t like tomatoes, you could swap with a small courgette.
  • Brazil nuts make a great alternative to almonds. They make a much crunchier cracker. Cashew nuts don’t work as well – the crackers tend to discolour and not look as appealing.

These crackers are delicious with hummus! Follow the link to find my super-simple plastic-free hummus recipe.

A Recipe: Plant-Based Banana Chocolate Muffins (Gluten-Free)

These muffins may look plain on the outside, but there’s a decadent rich chocolatey centre hiding inconspicuously inside each one. Because chocolate makes everything better, don’t you think?!

They’re great for people with allergies, being vegan and dairy-free, paleo-friendly and gluten-free. They are also full of nutritional goodness; rather than flour and dairy they’re packed with bananas, almonds and flax seeds. Bananas are packed with potassium, magnesium and manganese, and B vitamins including B6 and folate. Almonds are a great source of magnesium, calcium and zinc (as well as many other minerals) and are also high in vitamin E. Flax seeds are super high in omega-3s, B vitamins and minerals including magnesium and selenium.

Did I mention that they’re super tasty too?

pic4 pic9 pic8 pic7 pic11

Recipe: Chocolate Surprise Banana Muffins

Makes 10 muffins.

Ingredients

3 bananas (about 300g)
1/4 cup nut milk (I use cashew nut milk – you can make it yourself; it’s super simple)
2 tbsp maple syrup (or other liquid sweetener)
50g macadamia oil (or other high quality flavourless oil)
175g ground almonds
30g ground flax seeds
1.5 tsp baking powder
1 tbsp chia seeds

For the chocolate filling:
30g macadamia oil
20g cacao powder
20g maple syrup

What To Do

Preheat your oven to 170ºC.

Blend bananas, maple syrup, cashew nut milk and oil together until smooth. Add the ground almonds, ground flaxseeds and baking powder and mix well.

Put the 1 tbsp chia seeds in a bowl and add 3 tbsp water, stirring well. Leave for 10 minutes or so until the chia has formed a gel.

Separate 1/4 of the cake mixure and place in a separate bowl. If you want to be accurate, use scales. Otherwise guesswork is fine! Stir the chia gel into the larger cake mix portion.

To the 1/4 mixture in the separate bowl add 20g cacao powder, 20g maple syrup and 30g oil and stir until combined.

Put a heaped dessertspoon of cake mix into 10 muffin cases. You should be left with a small amount of cake mix. Using a teaspoon, make a well in the centre of each muffin.

Divide the chocolate mix between the 10 muffins, carefully filling the well in the centre using a teaspoon.

Top each muffin with a thin layer of the remaining cake mix, using a spoon to seal the gaps. You shouldn’t be able to see any of the chocolate mix.
pic12premuffin1 premuffin2 premuffin3 premuffin4 premuffin6Place in a pre-heated oven and bake for 25 minutes until golden.

Enjoy!

pic2

Tips:

  • I used chia seeds to help bind them together as these muffins don’t contain egg. Flax seeds and bananas are also great binders though, so if you can’t find chia seeds just leave this step out.
  • If you think the assembly sounds like too much hassle, don’t stress. Just fill the cake cases with half of the plain mix, add a spoonful of the chocolate one and then top with remaining plain mix. They might not look quite so neat but they’ll still taste amazing!

The Irony of the “Treat”

Why is it, that when we think of treats, we often think of the over-processed, over-packaged, sugary, additive-filled, preservative-pumped, nutritionally-devoid excuses for food that we can buy at the supermarkets? I used to think that way, and I’d head to the supermarket to pick up a sugar-laden, calorie-filled, preservative-packed “treat” whenever I felt like I deserved a reward, wanted to celebrate, or was feeling sorry for myself.

Thing is, after that initial euphoria that came with eating said “treat”, I’d end up feeling less than special. All that refined sugar and refined carbohydrates would make me feel tired and lethargic.

I’d often end up bloated and with stomach ache.

I’d feel guilty – for having filled my body with junk, for having wasted my money, for not having the willpower to eschew junk food altogether and treat myself to a relaxing bath instead. The kind of guilt that could possibly be placated by the soothing comfort of a chocolate bar – and so it would continue.

I used to think like that, but I’ve changed. I haven’t stopped enjoying treats though – I still love chocolate and cake and all of those things. What’s happened is I’ve discovered that it’s possible to enjoy treats that still taste amazing and are made ingredients that are actually good for us. More on that later.

profiteroles and ingredients

Custard-filled profiteroles. But seriously, have you seen the ingredients?! How is filling your body with rubbish like that any way to treat yourself?

This change wasn’t a quick process. A combination of a few things – increasing interest in my health, a desire to stop buying things in plastic packaging and a passion for sustainable food – led me down this path, but it took time to learn and adjust. Once I was on the path though, I knew there was no going back.

I can’t tell you how much better I feel. When I eat something packed with nutrients, there’s no way I feel guilty! Food made with real ingredients fills me up, tastes far better, and the flavours linger… which helps stop me eating 100 cookies all at once.

If I served you a banana, an avocado and some walnuts for breakfast you’d probably think that was pretty healthy. And possibly also a little boring. But chuck it in a blender and add some cacao powder and a few other bits and pieces and you have chocolate mousse. For breakfast. How awesome is that?!

chocmouseebreakfast

Yep, this was breakfast! Chocolate mousse topped with walnuts and cacao nibs, with oatbran and cashew nut milk. What a way to start the day!

The point of a treat is just that. It is a treat. A treat should be something that makes us feel good. But this feeling shouldn’t just come simply from the knowledge that we are indulging ourselves. It should also come from the fact that we are indulging in something that will nourish us, that will provide our bodies with what it needs to feel good, to repair itself, to restore us.

With food, this means something that will continue to benefit our bodies long after the taste has left our lips. What is the point in “treating ourselves” to something that tastes sugary and satisfying but as soon as it is gone we are plagued with regret, because we know it is actually bad for us – full of preservatives and fillers but devoid of any nutritional benefit?

In case you haven’t noticed, I’m super passionate about food! So this year, one major focus on the blog is going to be to try to inspire you in the ways of clean eating, by making and sharing simple recipes (with probably far too much focus on desserts and sweet treats!) that are packed with things that are good for us and make us feel great. You don’t need to be a great cook. For some of them you won’t even need an oven! Simplicity is best.

Here’s to a year of deliciousness : )

A Recipe for Coconut Milk Yoghurt (Dairy Free + Plant Based)

I did something this month that I haven’t done for over a year. I deliberately bought something in a plastic container.

Oh, the scandal!

The product in question is a dairy-free yoghurt alternative called CoYo, made from coconut milk and full of probiotic cultures. I’d seen the name pop up in various places and was intrigued. Since being advised to cut out dairy from my diet as much as possible, yoghurt is something I miss, and I particularly believe in the benefits of probiotic foods for maintaining a healthy gut. This product seems like a win-win… apart from the packaging. Of course, I questioned whether I would be able to make it at home. When I saw it in stock in my local health food shop, I was intrigued enough to buy it.

coyo

I have to say, CoYo tastes amazing. If I was to describe the flavour, I would say it has the yoghurty-ness of yoghurt, and the coconuty-ness of coconut milk. (Does that make it any clearer?!) I guess what that means is, it has the tangy, slightly acidic taste of yoghurt, but the creamy smooth richness of coconut milk, with that exotic coconut flavour. It is also super smooth and literally melts in my mouth. It is also a stunning bright white colour – like coconut.

It also has a pretty amazing price tag. One small 400g tub cost me over $13! Indeed, I have suffered for my sin.

For reasons of both price and plastic packaging, I can’t justify buying this again. However, now I know how good it is I can try to make my own (and I have a benchmark to measure against), and I can use the CoYo as my starter culture. Its deliciousness has only made my resolve to make my own stronger! I want this in my life!

After a couple of attempts at recreating it, I’m now pretty happy with the recipe I’ve come up with. This recipe makes 1 litre, and should keep in the fridge for 2-3 weeks.

How to Make Coconut Yoghurt

Ingredients:
2 x 400ml tins of organic coconut milk/cream
200ml water (to make up to 1 litre)
8 tbsp arrowroot powder (also called tapioca)
20 drops stevia
1 tbsp CoYo (or other starter culture)

Method:
Blend the arrowroot, coconut milk and water together briefly to remove any lumps.

Heat to above 80ºC for several minutes to allow the mixture to thicken, stirring with a spoon.

Cool to 45ºC.

Add stevia and stir.

Add a spoonful of Coyo to pre-warmed thermos flask. Add a cup of the coconut milk mix to the flask and stir well. Fill the flask halfway and stir again. Add the rest of the mix, stir a final time and seal the lid.

Leave for a minimum of 12 hours but preferably 24 hours.

Pour into a glass jar and store in the fridge.

coyo3 coyo2

Notes:

I use Woolworths (Australian) organic coconut cream which comes in a BPA-free tin. It’s one of the few items I still buy at the supermarket and it’s one of the better organic brands that I’ve tried… although I’d love to find a independent brand or make my own in the future.

I used arrowroot and stevia as these were what CoYo lists as its ingredients. It may be possible to use other thickeners. The stevia is to give the friendly bacteria a food source. Other sugars might work too, I just haven’t tried them yet.

I used CoYo as the starter culture as I already had it but if you’re not lactose-intolerant or vegan you could use ordinary live yoghurt. Another option is to use a vegan probiotic capsule.

Coconut yoghurt takes a lot longer to culture than cow’s milk yoghurt. I find that leaving it for 24 hours gets better results.

I have also found that the yoghurt thickens over time, something that doesn’t happen with dairy yoghurt. I don’t know why this happens, but if your yoghurt is a bit thin, you should find it thickens up after a few days.

Obviously, once you’ve made your first batch you can use this as a culture for future batches – no need to keep buying things in plastic containers!

5 Ingredient Chocolate Brownie Recipe (No Baking Required)

This is my new favourite thing to make. Aside from the fact that it tastes amazing, it is also super simple to assemble.

Now I love a cooked brownie, when the edges are crispy and the middle is molten, but there’s a bit of an art to it. Knowing your oven well and being super accurate with timings is the only way to catch the brownie in that tiny window between still-raw-and-gloopy-and-dissintegrates-upon-touch and overcooked-and-crunchy-and-dry-all-the-way-through. There’s also a lot more mess generated, and washing-up, with cooked brownies, and you need more time. Luckily, his cousin, the raw brownie, means none of this to worry about!

With this brownie, there’s no cooking. Hurrah! You can’t over- or under-cook it, and you don’t have to wait ages for it to be ready. Also, you only need 4 ingredients (plus salt). How awesome is that?! The other great thing is you can make this in small batches rather than having to make a tray full. If you’re greedy like me and can eat 24 brownies in 24 hours, this is a great way to exercise some restraint – just make less!

I also imagine that these would keep much longer than normal brownies which dry out over time, but I’ve not been able to resist eating them long enough to find out. They will definitely keep for a week in the fridge or freezer in an airtight container, and I can’t see any reason why they wouldn’t last longer if you have more willpower than me.

This recipe makes enough for 6 pieces. You will need a food processor or high powered blender.

Ingredients

100g walnuts (approx 1 cup)
60g macadamias (a very full half cup)
10 medjool dates, stones removed
1/2 cup cacao powder
1/4 teaspoon salt (recommended but optional)

Method

Grind the walnuts and salt into a flour. Add the cacao and mix well. Blend the dates in a few at a time until the mixture has formed small crumbs.

Roughly chop the macadamias by hand. Stir into the mix.

Line a container with baking paper. Tip the mix into the container and press down firmly. Place in the freezer before cutting into pieces (it will cut into pieces better if it is cold).

brown1

Store in the fridge or freezer.

You can eat straight from the freezer, or allow to warm to room temperature. I dust extra cacao powder on the top to serve but this is optional.

brown2 brown3 brown4 brown5

Yum!

Experimenting with Seed Milks

Seed milk. If the name ‘nut milk’ sounds bad, seed milk sounds far worse. But don’t let the feeble name put you off… they are surprisingly tasty!

Nut milks are a great substitute for cow’s milk in smoothies (and whatever else your heart desires), and I often make cashew nut milk as a base for my smoothies (see recipe here). But nuts can be expensive, and seeds are often cheaper. Plus pumpkin seeds and sunflower seeds are delicious, which got me thinking…

I decided to experiment with making some different seed milks. So far I’ve made sesame, pumpkin and sunflower seed milk.

Recipe: How to Make Seed Milks

To make these, the procedure is the same. Soak one cup of seeds in water for a few hours, or preferably overnight. Drain and put in a blender with 3 cups of chilled water. Blend until smooth.

Next you need to strain. I used one of my produce bags made with a fine netting type material. You could also use muslin, or improvise with some other material. A fine sieve should work. I’m sure old tights would work too – but do make sure they’re clean first!

Drain the liquid into a bowl. Once the pulp is dry (squeeze any excess moisture out) pour the liquid into a glass bottle or jar and store in the fridge. It will keep for up to 5 days.

Sesame Seed Milk

This milk has quite a distinctive and strong flavour. If you love tahini and sesame then you’ll love it; if not you may find it a bit strong. I used it to make my cacao banana smoothie and even with all the rich chocolatey-ness I could still slightly detect the sesame flavour.

I also tried this with (plunger) coffee and was really impressed with the result. It didn’t curdle (hurrah!) and I thought the flavours really complemented each other.

Pumpkin Seed Milk

I love pumpkin seeds and I loved this. The flavour is quite subtle and nutty. It has a slight green tinge, which amuses me slightly too.

PumpkinseedmilkSunflower Seed Milk

Sunflower seeds are the hands-down cheapest option I’ve tried so far. The milk tasted great, but had the unfortunate side-effect of separating into a milky layer at the bottom and a strange red liquid layer on top. It is easy to shake and mix the two layers together again, but none of the other seed or nut milks I’ve made have done this before.

I tried this in coffee and it worked really well too; it didn’t separate or do anything strange.

Other seed milks

I tried these three because that’s what I had in my cupboard. Also, they are all fairly cheap seeds. There’s plenty of others out there though. I want to make hemp and flax seed milk at some point too; both of these seeds are really good for you and have a great nutty taste that I think will work really well. Plus I love experimenting in the kitchen!

Recipe: Raw Chocolate Mousse (With a Secret Ingredient)

Chocolate mousse doesn’t have to be all about dairy products and refined sugar. You can actually make a much healthier alternative that tastes just as good – no, better! There’s a secret ingredient that gives it the creamy, smooth texture and is really good for you. Avocado!

I say secret, because it’s probably best that you don’t tell anyone eating it that you used avocado until afterwards, lest it put them off. People don’t always like to know that healthy green produce has sneaked into their dessert.

If you don’t like avocados, I promise you that you won’t even know it’s in there. The cacao completely masks the flavour, and by blending it the texture is altered too. (To my sister, who doesn’t like bananas or milk and whom I once many years ago persuaded to try a banana smoothie on the premise that it didn’t taste like bananas or milk…she was nearly sick…this time I ASSURE you that you’d never know.)

In fact, if you know someone who loves chocolate mousse but won’t eat avocados, don’t tell them what’s in it, make it for them and see if they notice. If they do, you’ll just have to eat it all yourself, which is hardly a hardship! (Obviously, if they’re allergic, it’s best you find another recipe!)

This is super simple to make, and tastes amazing. I made mine in my food processor but handheld blender should work, and if you’ve got the patience you could try mashing it all by hand with a fork, although I doubt it will be as smooth.

This makes enough for two people.

Avocado Chocolate Mousse

Ingredients:
1 large avocado
2 tbsp raw almond butter
1 tbsp maple syrup
2 tbsp raw cacao powder
2 tbsp melted coconut oil

Method:
Blend avocado, raw almond butter and maple syrup in a food processor until smooth. Add cacao powder and blend until incorporated. Add melted coconut oil and whizz briefly until combined.

Serve straightaway or store in a glass jar in the fridge for up to 3 days.

avochocmousse1jpg avochocmousse3jpg avochocmousse4jpg