How to Make DIY Coconut Milk from Scratch (A Recipe)

DIY coconut milk is one of the things I tried very early on in my plastic-free journey. I started making it in 2013, got tired of making it a few months after that and decided not to bother cooking coconut milk dishes.

Then my local bulk store started selling coconut milk powder, and that was my go-to.

Hence the recipe never made it onto my blog. But I decided I wanted to retry making coconut yoghurt (the recipe for coconut yoghurt did make it onto the blog, although it’s been tweaked since then) without using the tins. My zero waste journey has rather progressed since 2013, after all!

Plus whilst the coconut milk powder is pretty good, it’s not the same as coconut cream. And it is something we can DIY.

The coconut milk we buy in cans is made from the flesh and juice of young coconuts. Most of us don’t have access to young coconuts to make our own, but we can make something almost as good using dried (mature) coconut and water. I prefer to use shredded coconut (I look for the untoasted, unsweetened version). Desiccated coconut will work too.

You’ll need a blender. (Only attempt to use coconut flakes if you have a top-of-the-range blender.)

In Australia, canned coconut milk is coconut and water. Canned coconut cream is just coconut with less water. Literally. Check the back of the cans next time you’re in the store. Coconut cream is 80% coconut, 20% water; coconut milk is 60% coconut, 40% water. If you do buy cans, choose the coconut cream (it’s usually the same price) and add your own water from the tap. No need to import extra water from overseas.

In the UK, coconut milk is around 50% water. Coconut cream in the UK is often really thick – it’s not that high in coconut either (less than 70%), it’s just full of gums and stabilizers to thicken it.

Did I mention those cans are usually lined with plastic, too?

Get yourself some shredded or desiccated coconut, and try making your own.

Ingredients:

  • 300g shredded coconut
  • 1 litre boiling water (and then another litre)

The amounts don’t really matter, more coconut will give you more cream. If you don’t have access to a bulk store and the bagged coconut is 200g, use that – it will be fine.

First Press: Coconut Cream

Boil the water in a kettle, pour over the coconut, and leave to stand for 30 minutes. (If your blender has a glass or metal jug, you can do this step in your blender; if not you may prefer to use a glass bowl or saucepan instead.)

Blend the coconut and hot water until combined.

Strain the mix into a glass jug using cheesecloth or a clean tea towel to separate the pulp. Squeeze the cloth to ensure all the moisture is removed – you will want to allow the mix to cool slightly before you do this (or wear gloves!). Once you’ve strained every drop out of the pulp, pour the coconut milk into a glass jar, screw on the lid, and set aside.

Second Press: Coconut Milk

Now place the coconut pulp back into the blender, and add another litre of boiling water. Leave to sit for 5 minutes, and repeat the process. The second batch will be thinner.

(If you want to squeeze every drop of goodness out of your shredded or desiccated coconut, you can repeat with a third litre of water.)

Place the jars in the fridge.

Once in the fridge, the solids will separate from the liquid. The first jar will have a thick, solid coconut cream layer. The second jar will have a much thinner coconut cream layer. (The third jar, if you did a third press, probably won’t have any coconut cream).

If you’d like to use the coconut cream, you can scoop off using a spoon. Alternatively, if you prefer coconut milk, you can warm the jar and shake to recombine, or empty the entire jar contents into a pan and gently warm the cream with the liquid to recombine when you’re ready to use.

The second batch is great for adding to smoothies instead of water, for cooking grains (quinoa, white rice or millet will absorb the coconut flavour), or adding to soups or dahl. It’s not as rich as coconut milk, but there is definitely some coconut flavour.

Coconut cream and coconut milk keep for up to a week in the fridge, an can be frozen.

You’ll also be left with a bowlful of pulp. This tastes a little like desiccated coconut, but with less flavour (you squeezed that out)! You can freeze this, or dry it out in the oven on a low heat for an hour or so. (Don’t put it in the pantry as is, because it contains moisture and will go mouldy.) Alternatively it will keep in the fridge in a container for a few days.

Add the pulp to porridge, smoothies or even curries to add some flavour and fibre. You can also bake with it: you can sub a small amount of desiccated coconut (up to half) for leftover pulp in baking recipes, or use in veggie burgers/patties. There are plenty of options!

Now I’d love to hear from you! Do you DIY coconut milk? Do you DIY any other milk, and if so how do you like to use up the leftover pulp? I’ll share my leftover pulp recipes another day, but if you have any great ones you’d like to share, I’d love to hear in the comments! Anything else to add? Let me know in the space below!

Microbeads: Hidden Plastics in Cosmetics (+ What We Can Do About It)

I thought microbeads were old news. We discovered a few years ago that chemical companies were putting little plastic beads in our toiletries and cosmetics, we got mad about it, we signed petitions and applied pressure to our various governments and microbeads were banned. Job done, right?

Apparently not.

I’ve put together a guide to microbeads and the state of play in 2019, and what you can do to spot them and avoid them.

What are Microbeads?

Microbeads are tiny solid plastic particles, measuring 1mm in diameter or less. They are deliberately added to cleaning products, skincare products and cosmetics to give exfoliating properties, create ‘gloss’ and as fillers to bulk out products.

They are a type of microplastic, a more general term given to tiny plastic particles less than 5mm in diameter.

Many of these microbead-containing products are designed to be rinsed off, meaning this plastic is designed to go down the drain. However, the small size of the beads means they are mostly not captured by water treatment plants, and end up in rivers, seas and oceans.

Once in the water, microbeads pose a threat to wildlife, who ingest the plastic particles. This builds as bigger fish eat smaller fish and so accumulate more plastic. If the plastic alone wasn’t enough concern, plastic actually binds to chemicals in the ocean (including POPs – meaning Persistent Organic Pollutants, or chemicals resistant to environmental degradation). As the plastic accumulates in the food chain, so do these POPs.

Remember who is top of the food chain? Humans (well, the ones that eat fish).

Aren’t Microbeads Banned?

There are some bans on microbeads in place but the exact rules vary, along with what’s banned and what’s not. Most bans actually apply to ‘rinse-off cosmetics’ only (South Korea ban all microbeads in cosmetics, and Canada have banned all microbeads smaller than 5mm).

Source: beatthemicrobead.org

You’ll spot that Australia doesn’t have a ban on microbeads in place. Instead the government opted for a voluntary agreement from industry to phase out microbeads. Accord Australia have been coordinating the phase out with their initiative BeadRecede.

Research in 2018 that looked at 4,400 products across 148 stores found that 94% of products available in Australia were microbead-free. That means 6% were not.

No microbeads were found in shampoos, conditioners, body wash or hand cleaners. The products that still contained microbeads? The top 5 were:

  • Foundation/blush
  • Skin cream/moisturiser
  • Eye make-up
  • Lip make-up
  • Facial scrubs.

What’s interesting to me about this list is that 4 of these product groups are not rinse-off. Which makes me wonder even with countries that have a microbead ban in place, if these products are still making their way to store shelves, into our homes and flushing down the drain?

How can we find out if there are microbeads in the products we buy?

How to Identify Microbeads

What would you guess the number of ingredients that are classed as microplastics to be? 10? 50? 100? The number seems to be growing all the time: it was estimated at 325 when the Australian data mentioned above was collected in 2018, but current estimates are that there are more than 500 microplastic ingredients widely used in cosmetics and personal care products.

500 different ingredients!

If you’d like to know whether any product you’re using contain microbeads, and what ingredients actually count as microbeads, the absolute best resource I’ve found is beatthemicrobead.org.

If you’d like to know the names of all these ingredients to check the products you have at home, Beat The Microbead have put together a ‘red list’ of known microplastic ingredients. (There’s also an ‘orange list’ of suspected ingredients, where there is not yet enough information.)

Among the most common microplastics ingredients are:

  • Polyethylene (PE)
  • Polypropylene (PP)
  • Polymethyl methacrylate (PMMA)
  • Nylon (PA)
  • Polyurethane
  • Acrylates copolymer.

Alternatively, they also have a search function on their website where you can search products in their database. Not to mention, there’s an app available on both Apple and Android.

Switching to Microbead-Free Products

If we find out (or suspect) that there are microbeads in our products, here’s three things we can do.

Simplify

When I went plastic-free, faced with the prospect of finding a plastic-free alternative for the bazillion products in my bathroom, I asked myself whether I actually needed all of these products I was buying. It turned out that many of them weren’t really necessary, just things I purchased because I liked the packaging or had seen an advertisement (no doubt promising some miracle).

You might find the same thing. You might decide that you actually don’t need that product at all.

Find Microplastic Free Alternatives

Beat the Microbead has a list of companies guaranteed to not use microbeads on their website. These are mostly big brand who use plastic and other single-use packaging, but they are a start.

Also, look for small and local producers. There are plenty of excellent small businesses making safe products, and hopefully you can track down something in your area. If you’re looking for make-up (which can be a bit harder to find), two brands I recommend are Dirty Hippie Cosmetics (Australia) and CleanFaced Cosmetics (USA).

Make Your Own Beauty Products

If you really want to know what’s going into your products, the best way to know for sure is to make your own. Body scrubs (one of the products still found to contain microbeads in the research) are easy to make from scratch by mixing something abrasive (sugar, salt, coffee grounds, ground oats, ground rice) into some oil.

Find more DIY scrub recipe ideas here.

Remember, it doesn’t have to be ‘all or nothing’. Deciding to make one product rather than buying the pre-packaged microbead-containing alternative is a great first step.

Plastics in cosmetics is a design error that is slowly getting the attention it deserves. If you want to be sure you’re not unwittingly taking part in this hidden form of plastic pollution, audit your current bathroom, beauty and cleaning products. Check the ingredients, and if you find any products that contain suspicious ingredients, make it a priority to track down a suitable swap or solution.

For every irresponsible brand there is another doing good. Let’s give them our money where we can, rather than funding businesses that pollute. Our choice and actions matter.

Now I’d love to hear from you! Do you live in a country that’s banned microbeads? Do you know which products are banned and which are not? Have you ever done an audit of the things you buy to look for microbeads? Are you going to do it now? Any good microplastic-free brands you’d like to recommend? Any other thoughts? Please share in the comments below!

Plastic-Free Living: 10 Foods I Make From Scratch

Reducing plastic and living with less waste means ditching the plastic wrap and other single-use packaging, and some foods are hard to come by without packaging. Either that, or they are very expensive to buy plastic-free.

As I’ve gone down the path of waste-free living, I’ve tried making various things, mostly for these two reasons.

Some things, I have discovered, are well worth spending the extra money on to buy the package-free version and not have to make your own! Others turned out to be either so simple, so tasty, or so much less expensive to make from scratch that I really have no reason to ever go back to the pre-bought versions.

This isn’t about being a slave to your kitchen. I do enjoy making things, but I appreciate it isn’t everyone’s idea of fun, so I’ve focused on the quick, the easy and the satisfying. I’ve put together a list of foods I make that are less waste and low fuss. You’re welcome.

DIY Crackers

If there’s one thing that’s impossible to buy plastic-free or zero waste, it’s crackers! I tried making crudites (fancy word for vegetable sticks) and slicing fresh bread in place of crackers, but they lack that lovely crunch which makes crackers so desirable to eat.

I’ve tried a few different recipes. The ones that get made the most are the seed crackers. They are simple to make; all they require is soaking the seeds in water, then spreading out on a baking sheet and slowly drying in the oven. You can find the recipe here.

If already you’ve decided that this is a step too far, another super easy way to make crackers is to thinly slice a baguette, drizzle with oil and bake in the oven, turning once half way through.

These are so simple to make and require only 25 minutes in the oven, that they probably don’t even require a recipe, but here is the recipe if you’d like to see the steps.

DIY Pesto

I make pesto all the time, with whatever greens I have to hand. Basil pesto is a summer classic but in winter when the parsley, coriander and nasturtiums are growing, I use these instead.

The basic formula is garlic, two large handfuls of greens, 1/2 cup of nuts and some oil (avocado sometimes to add smoothness and thicken, and nutritional yeast for cheesy flavour if required). You can also sneak in wilted salad leaves to reduce waste.

A blender is ideal, a herb chopper will also work and so will a pestle and mortar. Most pesto will keep in the fridge for at least a week, and it freezes really well. Four zero waste pesto recipes here.

DIY Dips (Hummus, etc)

Have you ever noticed that the more natural ingredients (and therefore ‘fancy’) a store-bought dip is, the more packaging is included? There’s the tub, the foil lid, the plastic lid to go over the foil lid, the cardboard sleeve and then the tray it’s displayed on in store.

Rather than pay for all that packaging, I make my own. They taste much better anyway. I mostly use a food processor, but you can also use the herb chopper attachment with a stick blender, a stick blender itself if you’re making large quantities, a pestle and mortar if you don’t have gadgets, and even a fork if you like a more textured dip (I always use a fork when making guacamole).

My staple dip is hummus (you can find the recipe here). If I’m being fancy (well, if I need to use up old veg and want to disguise them in something tasty) I’ll add beetroot (raw or cooked) to the mix, or roasted sweet potato. When fresh broad beans are in season I use those in place of chickpeas, without the tahini and a lot more lemon juice.

DIY Legumes (beans, pulses, lentils)

I don’t buy chickpeas (garbanzo beans), lentils or any other legume in a tin, I make my own by cooking the dried beans.

Lentils are really easy because they just need a quick wash and then can be thrown into soups, stews, dahls as is, and will cook in the pan.

Beans and chickpeas need soaking first. They all vary slightly but the longer the better. If you change the water every 8 hours you can keep them soaking for days (they won’t go bad, but eventually they will sprout!) and you can pop the still-soaking beans in the fridge to bide some extra time before you’re ready to cook them.

I soak my chickpeas for a couple of days, then boil in water for about an hour, maybe an hour and a half. (If you have a pressure cooker you can reduce the cooking time to minutes).

They store really well, in the fridge for at least a week, or you can store in glass jars (just chickpeas, no liquid) in the freezer. They fit really well in my freezer door.

DIY Sprouts

I’m counting these as ‘making’ and not ‘growing’: soak most seeds and smaller lentils and beans (chickpeas also work) and they will sprout a root, making beansprouts.

They don’t look the same as the ones you buy in the store: they are not as elongated (expect a length 1-2 times the length of the original seed/lentil) but they are so much tastier.

You don’t need any equipment for this, just a glass jar (or a colander if you want to make heaps). Soak and drain the sprouts but keep moist, cover jar with cloth or colander with a plate, rinse and drain morning and evening. In 2-7 days you’ll have sprouts (depending on the lentil/seed type – mung beans are very quick, and you’ll need a week for chickpeas). Full instructions here.

DIY Apple Cider Vinegar

This is one of my favourite things to make because it ticks all the boxes: it is low effort and super simple and it can be made for (almost) free! Bought apple cider vinegar , on the other hand, is expensive.

All you need is some apple cores, stems and peels (you can use whole apples, but I prefer to eat the actual apple and just use the waste bits), some water and a spoonful of sugar, all mixed together in a glass jar. The natural yeast in the apple will ferment the sugar first to alcohol (you’ll smell cider) and then to vinegar (which is what happens when alcohol is exposed to air).

It takes about a week to finish fermenting, and only requires the occasional stir during this time. Stores for months. Recipe here.

DIY Nut Milk

Nut milks (and their cousins seed milks) are really easy to make from scratch. Soak 1 cup of nuts (or seeds) overnight, then rinse and blend with 4-5 cups water. If you have a cheap blender, add the water one up at a time rather than all at once for a smoother result.

With some nuts, like almonds, you might like to strain (I use cheesecloth) because there is a lot of pulp. Other nuts like cashews don’t need straining at all.

Cashew milk is one of my favourites as it also lasts well, around 7-10 days in the fridge. Homemade almond milk lasts 3-4 days. Recipes for cashew and almond milk here.

DIY Nut Butter

An easy thing to make and a great way to avoid palm oil, added sugar and salt and of course, packaging. Peanut butter is the one we always think of but you can make any type of nut butter. Cashew and macadamia butter are light and sweeter, and of course, hazelnut butter pairs best with chocolate.

You’ll need a food processor or a high power blender (most blenders are designed for liquids, not solids). Roasted nuts blend much more quickly and easily than raw ones (and taste better, generally). It will take about 5 minutes to make your own. Full nut butter instructions here.

DIY Stock

Rather than buying stock powder, I make my own using vegetable scraps. I save onion peels, leek tips, garlic skins and any other bits I don’t eat (except kale stalks, I did that once and never again), filling a jar in the freezer a I go until it’s full.

If I peeled carrots and potatoes I’d save these scraps too, but I prefer not to peel and eat the scraps as they come!

Then, I boil the scraps in a pan of water for an hour with some bay leaves, strain off the scraps, cool down and freeze in a wide-neck jar or ice cube molds, and use as I need.

DIY Frozen Sweetcorn

Before I went plastic-free, I’d buy bags of frozen sweetcorn. I’ve never liked the canned stuff, so I didn’t want to switch to that, but I like the ease of having it in the frezzer. So I make my own.

I buy fresh corn cobs, boil, drain and cut the kernels off. One cob has about 150g kernels. Then I pack tightly in a glass jar and freeze until I need. Step-by-step instructions here.

I don’t believe that the zero waste lifestyle or going plastic-free means making everything from scratch. There are a lot of things I don’t make from scratch, or only make sometimes. But when it’s quick, easy and low fuss, you save on all the single-use packaging and you get to eat the results of your creations, why wouldn’t you at least give things a try?

You may find it fun, you may wonder why you haven’t been doing this your whole life already, or you may decide it is an experience never to be repeated. But you’ll never know if you don’t try. Whatever happens, you’ll definitely have a new-found appreciation for the things you eat – whether it’s something homemade or something you’re extremely glad someone else is making so that you don’t have to.

Now I’d love to hear from you! Do you have any favourite from-scratch recipes? Are their any foods you can’t find in packaging that you’re yet to successfully DIY? How do you balance making your own with buying ready-made? Any other thoughts? Please share in the comments below!

15+ Swaps for a Plastic-Free Bathroom

The two areas of the home where we tend to use the most single-use plastic and other packaging are the kitchen, and the bathroom. The good news is, both have plenty of opportunity for doing things differently!

In many ways, the bathroom is easier to tackle. We don’t need to replace the items as often or as quickly (toothpaste doesn’t go bad like milk or cauliflower does), and there are less products to switch. (Surely no-one’s bathroom cupboard has more products than the pantry, fridge and freezer combined?)

Plus even if you’re not feeling drawn to DIY, guaranteed someone in your town does! There is so much opportunity to support local businesses when it comes to making bathroom swaps.

I thought I’d run through all of the swaps I’ve made to give you some ideas that might work for you. There are plenty of awesome brands making thoughtful products, and I can’t list them all (I don’t know about them all!).

So I’ve shared the ones that work for me – and part of that means being available in the physical zero waste stores in my neighbourhood. I prefer to buy local where I can, and support independent businesses trying to create positive change.

If that’s not possible, there are heaps of great online independent small businesses that you can support.

Plastic-Free / Zero Waste Swaps – Hair Care

Shampoo soap: I washed my hair with bicarb and vinegar for about 3 years, but a two month trial with just water left my hair really dry, and I decided to switch to a shampoo bar to fix it. I really like the Source Foods shampoo bar, which I buy from my local Source store in Victoria Park.

There are heaps of brands making solid shampoo soap and most people find it takes a while to find one that works with their hair. (I’ve only tried two, the Source one is great, the other was not great at all.) If you don’t love the first bar you try, keep going. Some companies also make samples so you can test without committing to a huge block you don’t end up using.

Conditioner (white vinegar rinse): I still use white vinegar to rinse my hair (instructions here). I don’t use any other styling products. In fact, I still cringe at how much I used to spend on conditioner and frizz-ease hair serums when actually, white vinegar does a much better job for a fraction of the cost and with no plastic waste.

White vinegar is pretty easy to find at most bulk stores (I refill an old wine bottle), or even at the grocery store in glass. You can use apple cider vinegar as an alternative.

Plastic-Free / Zero Waste Swaps – Dental Care

Toothbrush: you’ll probably notice that my toothbrush appears to be plastic. That’s because it is plastic. But it’s not single-use: it has a replaceable head. Back in 2012 when I went plastic-free, bamboo toothbrushes were far less common and I just couldn’t get on with the two brands that were available to me. So I switched in 2014, and for the last 5 years I’ve kept the handle and replaced the heads.

The brand I have is SilverCare: it’s made in Italy (I purchased from Manna Whole Foods in South Fremantle). There’s a small amount of plastic with the packaging. Annoyingly, Silvercare changed the shape of the head recently, meaning it is harder to find the heads that fit my brush.

I’ve since found another brand Lamazuna, made in France, that uses 70% bioplastic (plastic made from plants, not fossil fuels) in the handle, and also uses no plastic packaging. I’m wondering if the Lamazuna heads fit in the Silvercare brush handle.

The heads can be recycled via Terracycle.

Toothpaste: I make my own using equal (ish) parts glycerine and sodium bicarbonate (also called baking soda, bicarb or bicarb soda) mixed together to form a paste, and I add a couple of drops of peppermint oil. I look for plant-based glycerine, and food grade bicarb.

Dental Floss: I purchase a brand called Dental Lace, who make floss from mulberry silk that is coated in a plant-based Candelilla wax. The floss comes in a refillable glass container with a metal lid, along with refillable packets of floss in certified compostable packaging. I purchase it from Urban Revolution in Victoria Park.

Plastic-Free / Zero Waste Swaps – Skincare

Bar soap: Bar soap has replaced all of the liquid products I used to use: face wash, hand wash, shower gel and body wash. After being terrified of making soap for far too long, I finally gave it a crack at the end of last year and am pleased to say it is not as hard or dangerous as I thought. I made soap with coconut oil, olive oil and rice bran oil, and I’m still working through that first batch.

Should soap-making not be your thing (yet), look for a good quality soap made from vegetable oils.

Almond oil: I use almond oil as a light moisturiser in summer, applying straight after a shower whilst my skin is still damp to help keep my skin hydrated. A few bulk stores sell almond oil, otherwise olive oil is just as good and even more widely available.

Oil is also an excellent make-up remover, and doesn’t sting like chemical versions do.

Cold cream: I make a cold cream for winter, which I use as moisturizer but can also be used as a cleanser. It’s a blend of beeswax, oil (rosehip if I have it, almond if I don’t, or olive oil) and water. I use a version of Galen’s cold cream (you can find my cold cream recipe here).

Deodorant: I’ve made by own deodorant since 2012. It’s a 1 minute job, literally stirring tapioca flour, bicarb and coconut oil together in a jar. Best and most important thing: it actually works! If you’re sensitive to bicarb I also have a bicarb-free deodorant DIY recipe that uses clay instead – you can find both DIY deodorant recipes here.

Sunscreen: I make my own sunscreen too, using zinc oxide powder, which is a physical barrier against UVA and UVB rays. I tend to make one batch that lasts all summer. Here’s my DIY sunscreen recipe (and more information about these products).

Make-up: I wear very little make-up. The product I use most is blusher and it is simply pink clay. There are some great small businesses out there making plastic-free and zero waste make-up and I’ve tried and would recommend both Dirty Hippie Cosmetics (Australian-based) and Clean-Faced Cosmetics (US-based).

Plastic-Free / Zero Waste Swaps – Other Bits + Pieces

Toilet paper: I’ve used Who Gives a Crap toilet paper since it launched in 2013. The boxes are delivered plastic-free to my doorstep. I use the wrappers for various things including picking up dog poo and gift wrapping (different pieces for each activity, clearly).

There’s another brand I’ve also tried which I liked called Pure Planet, as an alternative option.

Make-Up Rounds: The reusable make-up rounds I use are made of organic cotton (I’ve seen others made of bamboo but I prefer 100% cotton), and the fabric is offcuts from other products. The ones I have were a gift from my friend Jeanne who owns a small ethical underwear business called Pygoscelis but there are plenty of other brands, or you could even sew your own.

Cotton buds: These may be single-use, but they are also non-negotiable for me. I simply cannot stand having water in my ears! (Yes, I also know that you are not meant to put them in your eyes. What can I say? I’m livin’ on the edge.) I use 100% biodegradable ones made by Go Bamboo with a bamboo stick and cotton tip that can be composted. These are another purchase from Urban Revolution in Victoria Park.

Soap Saver: I have a little bag made of flannel for putting in scraps of soap to use rather than them going down the drain. I love this and it’s saved me so much soap and so many blocked drains! I purchased this at a market, but they are easy enough to make or track down.

These swaps might work for you, you might find something different or better, or you may not see the need for some of the things I use. There’s never a perfect way to reduce your waste, only a ‘better’ version that works for you.

All you need to do is look at the products you’re currently buying and using, and ask yourself – could I switch this out for something better?

That’s how we reduce our plastic consumption and our waste: one simple swap at a time.

Now I’d love to hear from you! What low waste/plastic-free bathroom swaps have you made? What are you still struggling with? Any products you’d recommend – or recommend steering clear of? Anything else to add? Please share your thoughts in the comments below!

Join the ‘War on Plastic’ with Plastic Free July (+ 3 Ideas for Plastic Free Veterans)

Another year, another Plastic Free July – and the appetite for living with less plastic is stronger than ever! More and more of us are concerned about plastic pollution and more importantly, determined to do something about plastic use in our own lives.

Plastic Free July always swings around at exactly the right time of year. Never heard of it before? Plastic Free July is a free-to-join challenge that runs during the month of July. It encourages us to choose to refuse single-use plastic, and be part of a movement that is not only raising awareness but taking action and sharing solutions.

I first took part in my first Plastic Free July back in 2012, when I was one of about 400 participants. Since then the challenge has grown exponentially, and in 2019 it was estimated that 250 million people from 177 different countries took part.

If you’d like to be registered for this year’s challenge, you can do so via the official Plastic Free July website.

I’ve written about Plastic Free July every year since my first challenge, and this year is no different in that respect. But I always try to approach it from a different angle, and this year I wanted to reach out to the plastic-free veterans.

There are plenty of articles for plastic-free beginners; I’ve written a number of them over the years. Here is last year’s contribution: 5 Tips to Get Prepped For Plastic Free July (and Living with Less Plastic). (There are plenty more in the archive).

I also created this graphic and accompanying (free) eBook to give you more ideas to get started.

But for those coming back for a second, third, fourth or more year, getting those same beginner’s tips you received in year one can seem a little… well, repetitive.

So today’s post is for you.

3 Plastic Free July Ideas for Plastic-Free Veterans

Find Your ‘One More Thing’ Swap

You’re a pro at bringing your reusable bags to the store, you remember to refuse the plastic straw, you opt to dine-in rather than getting those takeaway containers and you’re a regular at the bulk store. Hurrah!

But that doesn’t mean there isn’t still something more to do or somewhere else to improve.

  • Take another look at the contents of your landfill bin and your recycling bin, and see if there’s anything in there that could be swapped out for something plastic-free;
  • Consider revisiting something that you tried in previous years and decided was too hard – maybe times have changed and this year is the year you succeed;
  • Try to make something new from scratch: maybe a food item, a cleaning recipe or a personal care product. That doesn’t mean committing to make it from scratch forevermore! It’s simply about experimenting with change;
  • Maybe there’s something that is too expensive, impractical or time-consuming to become a permanent change in your life, but you can commit to making this change for 31 days during July to show solidarity with the movement and do your bit.

Plastic Free July isn’t just about refusing plastic. It’s about learning new skills, examining our habits and challenging ourselves to do better.

Take the Challenge Beyond Your Own Habits

Those first years, Plastic Free July is all about changing habits, making swaps and settling into new routines. Trying to remember our reusables and investigate all the alternatives takes up a lot of energy, and time.

But new habits eventually become ingrained, and the time we once spent figuring out all of this stuff is freed up again. Plastic Free July is a great time to spread the refuse single-use plastic message to people who haven’t heard of it before.

Maybe that means pinning up some posters at work, or persuading your local cafe and shops to get on board with the challenge.

(You can find the whole range of official Plastic Free July posters – free to download – on the Plastic Free July website.)

Maybe it means giving a talk to your colleagues or your community, organizing a litter pick-up or hosting a movie screening.

Maybe it means writing to companies expressing your annoyance with their packaging and suggestive alternatives, or writing to companies to tell them you love their commitment to reducing waste.

Maybe it means writing to your local councillor or MP to ask them what they are doing about plastic pollution.

Use your voice to speak up for what matters, and share what you know.

Be The Kind of Person You’d Have Liked Supporting You in the Early Days

Chances are, if you’ve been living plastic-free for a while, you’ve ventured down the rabbit hole and discovered a whole heap of twists and turns along the journey.

There are probably plenty of choices you made and things you did back at the start that with the benefit of hindsight, you wouldn’t do again.

Try to remember this when you see others making similar choices. You have the benefit of hindsight, and they don’t. Yet.

How would you have felt if you’d triumphantly shared your first plastic-free chocolate bar purchase that took you three weeks to track down, only to be told that a) didn’t you know that particular Fair Trade organic bar is made by a multinational company b) it’s probably not vegan c) haven’t you heard of palm oil d) you didn’t buy it in the supermarket, surely e) did you even look at the carbon footprint?

It’s unlikely you’d feel inspired to continue, that’s for sure.

Part of the journey is trying new things and making mistakes. If you see someone sharing a choice they made that you wouldn’t make, before diving in to “help”, ask yourself: how helpful will it really be for you to share your opinion right now?

This is particularly true on the internet, with people you don’t know. No-one wants to be berated in public by someone they’ve never met and who has no idea about their individual circumstances.

That’s not to say that we can’t or shouldn’t share information. Just be sensitive about what you share, who you share it with and how you share it.

People need time to find their own way. That first Plastic Free July can be overwhelming. As someone who has gone ahead, we can try to remember that, be encouraging, inclusive, and celebrate the small wins of others.

If we want people to feel confident to take the next steps, we need to be supportive with the first steps.

Challenges such as Plastic Free July are not just for beginners, but we all start as beginners. If you are a beginner, I want to assure you that whilst change can be challenging, it is also fun… and very rewarding. Those ahead of you are here to help when you get stuck – we have all been stuck at some point! If you are a veteran, remember that part of our challenge is continuing to push ourselves, not get complacent and help keep the spark alight in those just starting out.

Happy Plastic Free July, everyone!

Now I’d love to hear from you! Are you a plastic-free newbie? A veteran with one year’s service? Two or three year’s service? Four or more years of service? If you’re a veteran, what do you remember most about starting out? Do you remember?! And what advice would you give to someone taking the challenge for the first time? Any other thoughts or ideas? Please share your comments below!

How to Go Zero Waste and Do Less Dishes

If I had to say there was a drawback to living plastic-free or zero waste, then I would say it is this: the dishes.

There’s not really any way round it. Choose reusables and you’ve got to wash them up. The more reusables, the more washing up.

Sigh.

It’s not that I hate washing up. I love washing up… well, once it’s done and put away. (I’m less of a fan of the dirty dishes.) It’s not that I mind the process itself either. It’s just that there are always dishes.

Always. Dishes.

Still, once we’ve accepted that there will be dishes, we can do things to ensure there are less dishes. The less the merrier, I think! (That’s not a saying, but it should be.) Because we’re not going back to single-use plastic and disposables, right?

So let’s do what we can to make less dishes.

To Dishwasher or Not to Dishwasher?

As soon as I mention dishes, someone brings up dishwashers. Yes, I’ve read the studies, and it is true that some dishwashers use less water than filling a sink and doing the dishes by hand.

A modern water-efficient dishwasher might use 15 litres per cycle. Depending on the size of your sink, how careful you are with water and how long it takes for the water to run hot, plus any rinsing, hand washing can use a fair bit more.

There are other factors. Dishwashers use electricity. They are also big chunks of metal and plastic (those resources had to be extracted from the ground), and take up a fair amount of space in a small kitchen.

I have solar hot water, meaning it comes from a tank heated by solar panels whereas a dishwasher would run from the mains. I have a fairly minimalist kitchen, and I’d run out of things before the dishwasher is even full. (This is by design – for creating less dishes. I’ll come back to this.)

Plus, I have unresolved childhood trauma around dishwashers. Don’t ask ;) All things considered, a dishwasher won’t work for me, and I’m happy with my sink.

If you have a big family, you already have a dishwasher or you know that a dishwasher will be the thing that makes less waste possible for you, go for it! Look after it, service it, get it fixed and make it last.

For those who have taken the path of more dishes and no dishwasher, here’s my tips for keeping them to a minimum.

Not Dirty? Don’t Wash It.

Now I’m not advocating for risking food poisoning here, but we can be sensible about these things. And if something isn’t dirty, we can get away with not washing it.

Level 1. The wipe.

Does it need to be washed, or could it just be wiped? Plates that have had toast or dry crackers tend to accumulate nothing more than a few breadcrumbs. These can be brushed off.

The same goes for lunchboxes that have had sandwiches in them, and bowls used to weigh out dry ingredients. Sometimes I’ll wipe out a jar from the pantry rather than wash it if I know it is something I use often (pasta, oats).

I find a wipe with a clean dishcloth or a dry tea towel is enough.

Level 2. The rinse.

Some things can pass with a quick rinse, particularly bowls, plates and cutlery (not forks) if rinsed straight after using. It depends what is was used for and by whom of course. I’d be happy to rinse a spoon that I’d used to measure out coffee, less so if someone had just eaten a dessert with it.

I’m also happy to quickly rinse out pans that have steamed vegetables or boiled pasta, too.

Oh, and I save the rinse water and add to the compost or worm farm.

Level 3. Wash it up.

Actual washing up is best for anything baked on and greasy, most cooking pans, dinner cutlery, day-old lunchboxes, pantry jars that have been stored to a while, anything sticky.

Coming back to food poisoning, the highest risk foods include ice-cream, rice and animal products (meat, fish, eggs, dairy). I’d recommend washing up anything that contained these foods.

Own Less Stuff

There are two reasons why owning less stuff helps with the dishes. The first is that with less stuff, you use up all the stuff more quickly and need to wash it before your kitchen gets swallowed by unwashed dishes.

This doesn’t create less washing up, but it does create less overwhelm, and keeps things more manageable.

The second is that when your stuff is all used and dirty and you need something but can’t be bothered to do the dishes, you’ll spot clean that one item – or just use it again as is – which means the number of dishes don’t get any bigger. And some things get used again before being washed up.

If I’m out of side plates for lunch I’ll figure out which one had toast for breakfast, dust the crumbs off and use that again. Same for mugs and making tea. No net gain in dishes.

Eat Like No-One is Watching

Well, when no-one is watching, does it matter if you use a proper plate? Or could you just eat out of the saucepan? Classy no, but if it saves on dishes then I am willing to make these sacrifices.

Quite often if I reheat my lunch I’ll eat it out of the pan, or if it was stored in a container I’ll then eat it in that rather than dirty a plate. If there’s the last of something coming out of the fridge I’ll eat that straight out of the container, too.

Me 1, dishes 0.

Make Your Dishes Multi-Purpose

If try to avoid washing something up after it has been used once. If I can get a few uses out of something before it heads to the dirty dishes pile, that’s a win. If I’ve used a bowl to weigh something out, I’ll try to use that same bowl for the meal. I might even store leftovers in it, in the fridge.

I’m a big fan of using the saucepan I used for cooking as the leftover container – meaning, I stick the saucepan straight in the fridge. Especially if the food can be reheated in the saucepan. Otherwise I’m washing the pan, putting the leftovers in a container, emptying the contents back into the pan the next day and washing it all again.

Saucepans are excellent stainless steel storage containers that we already own.

I do the same thing with glass jars. Just finished off the pasta? That jar is good for leftovers in the fridge.

Plan Your Meals with the Dishes in Mind

Just thinking about all the prep you need to do in advance can save on dishes, particularly with trickier-to-clean items like blenders. I like to time my prep to maximise the making of stuff and minimising the washing up.

For example, I might make nut butter, scrape that out of the blender and then make nut milk (usually with a different type of nut). Once emptied, I might make pesto, and then whizz up some tomatoes. Four things and one wash.

I don’t need to eat all these things that day, as they will keep in the fridge for a few days. Rinsing out a jar later is less onerous than cleaning the blender. Again.

Make Extra

I never make a one portion meal. Not only because of dishes but also because it is never twice as much work to make twice as much. I always make extra, and pop the leftovers in the fridge or freezer for later.

Reheating something uses far less dishes than having to chop, steam, boil or stir-fry a bunch of different things every single meal.

Plus, I am a messy cook. Stuff gets everywhere. I might as well trash the kitchen once, and then enjoy the relative tidyness for a few days.

Sometimes I’ll just double or quadruple the recipe. Other times I’ll just cook more of an ingredient. I always make a big pan of rice or quinoa, and keep the leftovers to make stir-fry or to go with something else the next day.

In an ideal world Sunday is my day to do this, when there is more time to make things and clean up. It feels good to start the week without an onerous pile of dishes every night. If that doesn’t work, it tends to be mid-week when I’m sick of the chaos!

Eat Leftovers Cold

I like leftovers cold. I don’t have a microwave, and to save on using a pan to heat things up I just started eating my leftovers cold. Pasta salad is a thing, rice salad is a thing, so it isn’t that strange not to heat things up.

It does depend on the weather – in the depths of winter I’m prepared to wash than pan for the heat it gives!

There’s no miraculous way to end the dishes, but there are little tweaks we can do to create less of them. On the plus side, there’s no hauling bags of trash to the kerb every week, and there’s no trashing of the planet, by contributing to the litter/landfill/plastic problem.

Plus there’s something quite satisfying about a gleaming stack of glass and stainless steel. And if the options are creating dishes or creating plastic pollution, I know where my choice lies.

Now I’d love to hear from you! If you have any tips for doing less dishes, we want to hear them! Do you have a dishwasher, or do you manage without? How do you keep the dishes under control? Please share your thoughts in the comments!

How to Make DIY Crackers, Zero Baking Skills Required

This recipe feels like such a non-recipe, I wondered about making it into a post at all. But then again, the reason it feels like a non-recipe is because it is so simple and easy – and who wouldn’t want to know about something simple and easy? I know I would.

Plus when I consider all of the crackers completely overpackaged in plastic being purchased every day, I think – we need to be talking about zero waste crackers every chance we get!

For the purists amongst us, these technically aren’t a cracker. The Italian name is crostino/crostini and in Australia we like to call them “crustini”. These names sound so much more exotic and exciting than calling them pieces-of-stale-bread-baked-in-the-oven, which is what, in fact, they are.

I told you they were simple.

Correct nomenclature considered, I still refer to them as a cracker. They pretty much serve the purpose of a cracker, whose entire function is to be able to carry as much topping from the dip bowl into the mouth without causing spillage.

If toppings can be piled on the vessel and the vessel can be eaten, it is a cracker.

To make these crostini/crustini/crackers, you will need a French stick/ baguette. Of course you can make your own from scratch, but that is a whole other post.

Often baguettes can be purchased plastic-free from bakeries (a pillow case makes an excellent bread bag because these guys are loooong). If your local bakery still packages them up in plastic, consider if making crackers this way will reduce the amount of plastic you use overall. Crackers use a lot of packaging.

How to Make Crackers from a Baguette/French Stick

What You’ll Need

  • A baguette, ideally 1-2 days old so that it is slightly dried out
  • Olive oil
  • Salt and pepper

Method:

Slice the bread into thins 1/2 cm thick using a bread knife. If the bread is fresh (you’ll know because it will squish easily as you cut it), it will benefit from being placed in the oven for a few minutes on a low temperature to help it dry out a little.

Lay the sliced thins out on a baking tray, drizzle with olive oil and grind a little salt and pepper over the top. The oil doesn’t need to be spread evenly, so don’t panic about being neat.

Bake in the oven at 160-180°C (350°F) for 15 minutes, then remove from the oven, flip over and bake on the other side for a further 10 minutes.

Cool on a cooling rack, then store in an airtight container (I use a tin).

They should last for a few weeks, but I’ve never been able to test this as they get eaten long before that.

30+ Ideas for a Low Waste Christmas

If you don’t want to cancel Christmas, but the thought of all the excess wrapping, plastic decorations, gifts that end up in the charity shop within weeks of Christmas day and fighting all the food waste fills you with dread, today’s post is for you. Because it is possible to have a low waste Christmas, I promise.

That said, I’m not the best person to talk about Christmas. Because I probably would just cancel it ;) So today’s post is a collaborative effort brought to you by the recent participants of my recent WASTEless course. Together we brainstormed ideas for how to have a low waste Christmas.

As the participant who suggested the Christmas topic said:

“I want to try to be as zero waste this year as possible, but it’s tricky with packaging/wrapping/decorations. But I also don’t want to be a Grinch, haha!”

Okay, so I will be the first to admit – I pretty much am the Christmas grinch. I don’t do decorations, I don’t do gifts, I don’t do Christmassy foods, and I’m happy with these choices. I like my so-low-key-you-wouldn’t-actually-know-it-was-Christmas approach.

But I realise that it’s not for everyone.

If Christmas is your thing, but not putting too much stuff in the bin is also your thing, there are plenty of solutions. Here’s the result of 20+ people putting their heads together to come up with ideas for a low waste Christmas.

Low Waste Christmas: Decorations

Reusable Decorations: avoid anything with this year stamped across it, because less than a week later we flip over to a new year, and those decorations are instantly worthless. Whilst most of us intend to use decorations again and again, that doesn’t always happen. If buying new, pay attention to what they are made of, and avoid anything that looks like it will break easily.

Think about how you’ll store them between Christmases, because 11 months haphazardly chucked into a box and shoved to the back of a cupboard might not do them any favours. Storing in lidded containers (old plastic containers, or storage tins) will keep dust out and help protect things.

If choosing fabric, consider if it is machine-washable. Fabric bunting or cotton hanging decorations can be cleaned easily, whereas felt and faux fur is harder to clean.

Christmas Cards: if you receive Christmas cards, hang them over string and use these as bunting-style decoration. After Christmas, cut out the images and use to make decorations of gift tags the following year. (Store them in a tin.)

Solar lights: if you want to light the place up, solar lights might be an option. Candles (beeswax or soy rather than paraffin) add a Christmassy glow to things and are a more natural alternative.

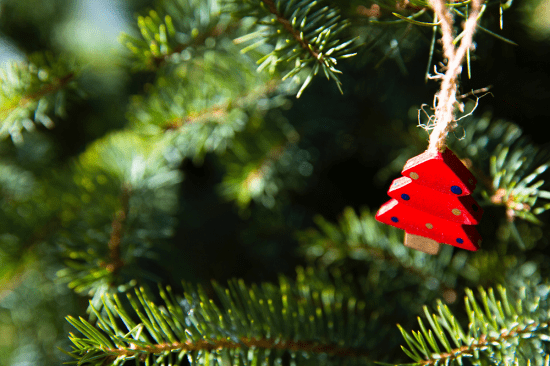
A Real Tree in a Pot: a real tree in a pot can (in theory) be used again and again each Christmas. For the most sustainable option, don’t restrict yourself to the “standard” pine Christmas tree, look at what is suitable for growing in pots, and what is suited to your local climate. Different pine trees will suit different conditions.

If pine trees don’t really grow where you are, consider a different type of plant altogether. You can hang baubles off of any tree with branches. Figs, yuccas, whatever you have and suits where you live.

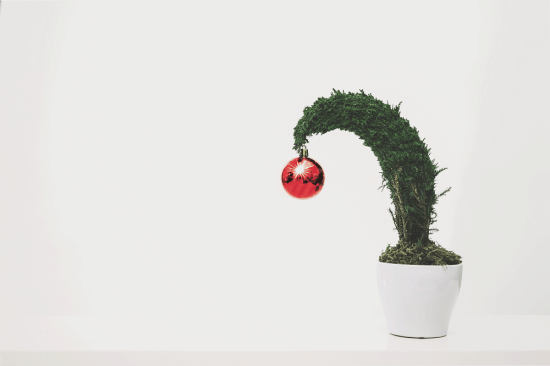
Driftwood / Pallet Tree: if you’re creative, you can make a tree out of driftwood or other materials. For a slightly less labour-intensive approach, paint a tree onto a surface (e.g. a wooden pallet). Pinterest has heaps of ideas.

Decorating the Furniture: instead of having a tree, use your furniture to make a shrine to Christmas, and decorate that instead.

Sticks, flowers, cones and leaves: natural decorations are plastic-free and biodegradable, and the more local the better. If you can forage your own, excellent; alternatively go to a florist and find out what is in season where you live.

Low Waste Christmas: Food

Just Enough: Probably the biggest challenge at Christmas, when we want to have extras and be prepared for unexpected visitors. Meal planning can help with this. Be realistic about how much people will eat.

Also, try to choose dishes that will keep well as leftovers if there ends up being too much. Leafy salads and BBQ prawns won’t keep past a day, however a dish of roasted veggies or a grain-based salad will last a few days. Pavlova won’t keep more than a couple of days, whereas Christmas cake will literally last for months. Mix up your dishes so you don’t have a race against time to consume it all in 48 hours.

Buy from Bulk Stores: if bulk stores are an option for you, embrace them! As well as general groceries, bulk stores sell plenty of snack foods that usually come overpackaged in plastic. Bring glass jars or old Tupperware, and fill up, packaging free.

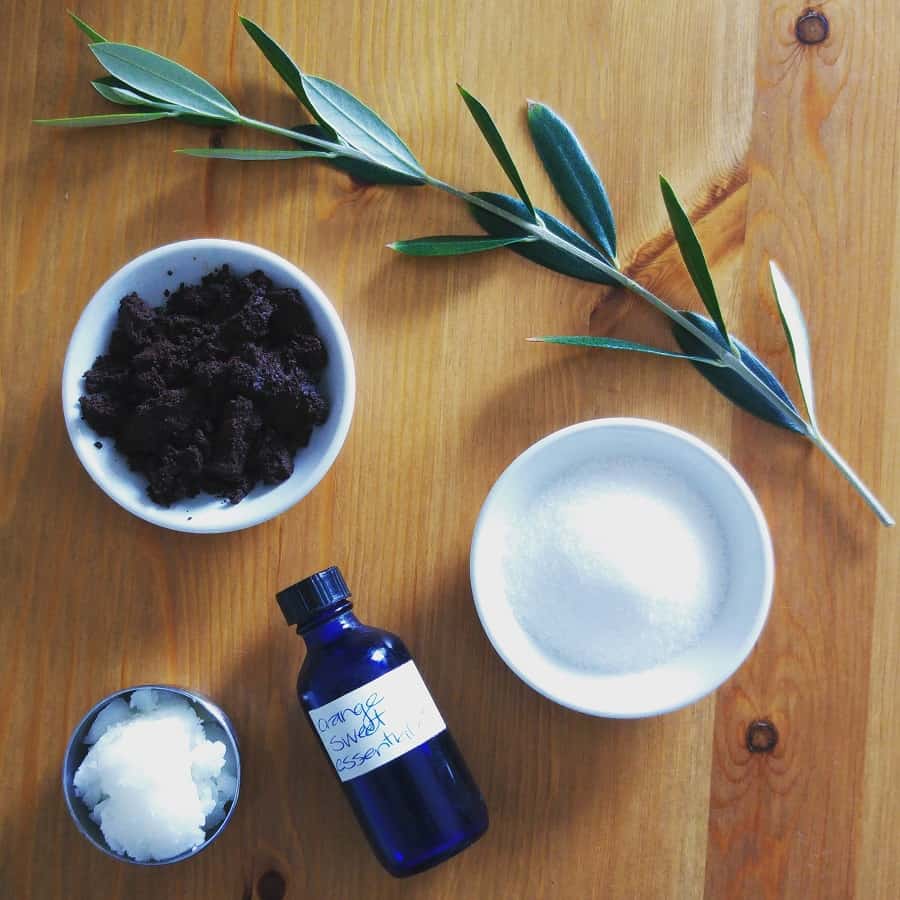
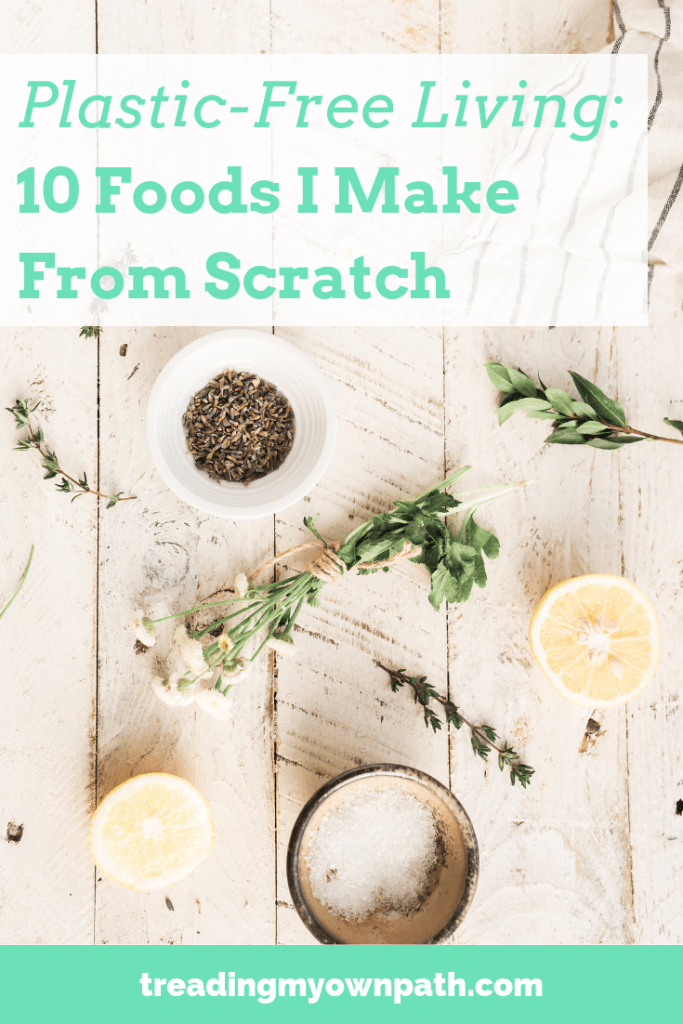
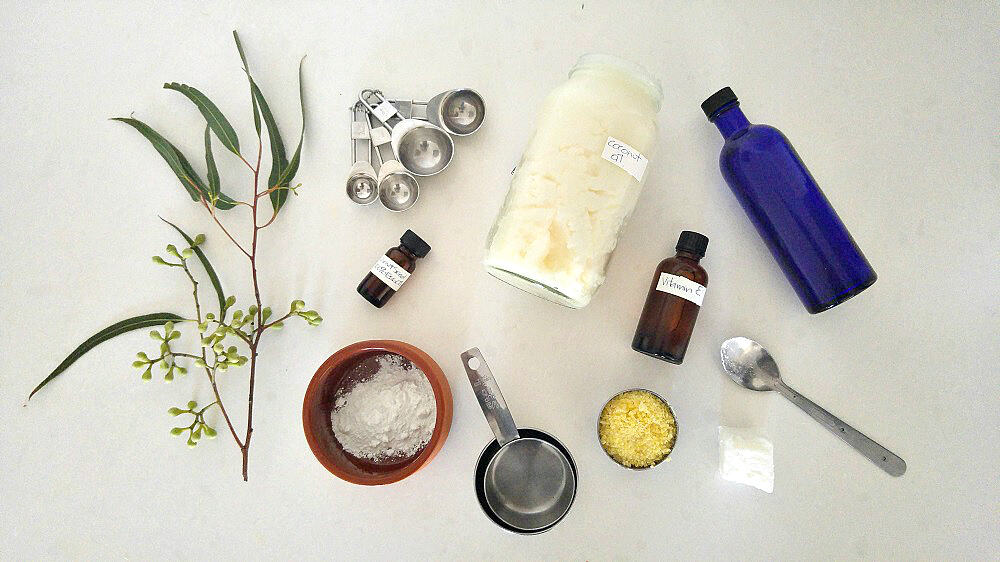
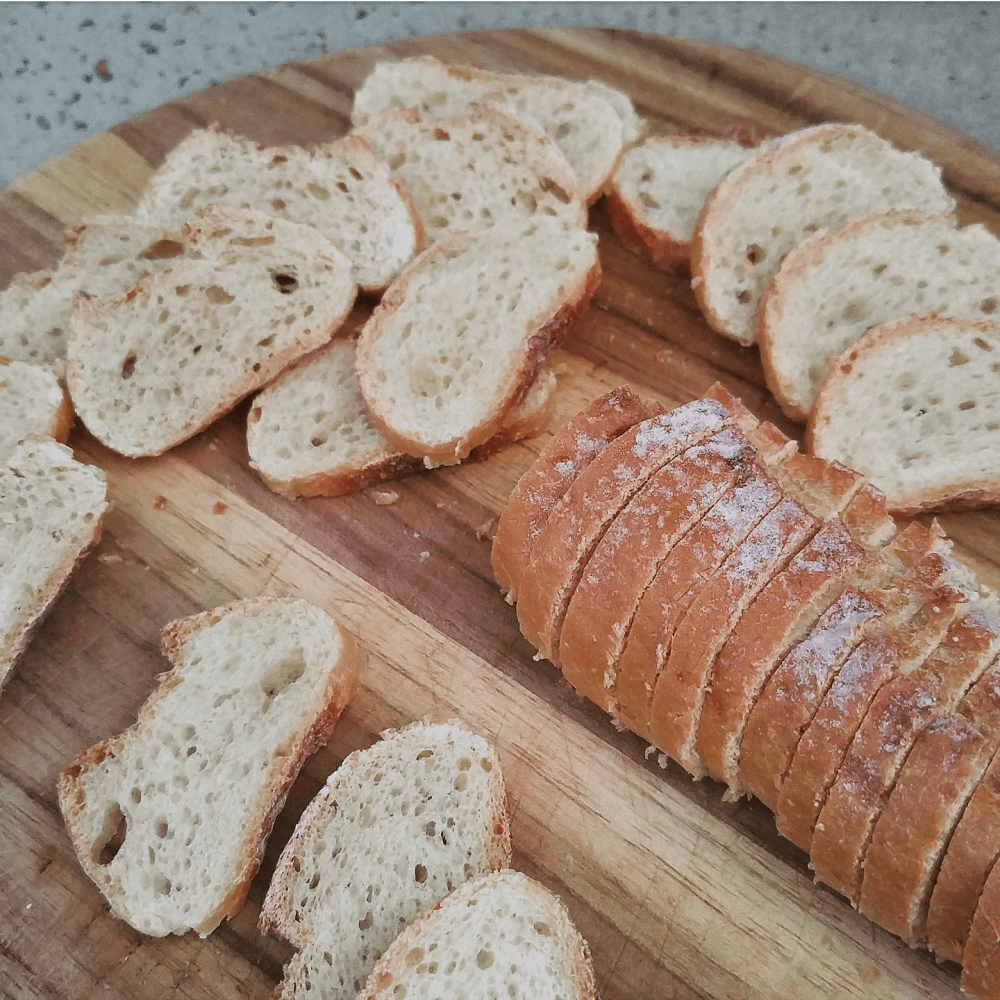
Make It Yourself: foods made from scratch don’t come in plastic. Plenty of food can be made in advance so there’s no need to end up overwhelmed and panicked with no food ready on Christmas eve. Christmas cakes and puddings can be made a good month in advance, and some foods (sausage rolls, pastries and even veg dishes like braised cabbage) can be made in advance and frozen. Decide what kinds of foods you’d like to have, then take some time to look up how easy they are to make, and decide what will work with your timeframe and energy levels.

Making one thing is better than making no things!

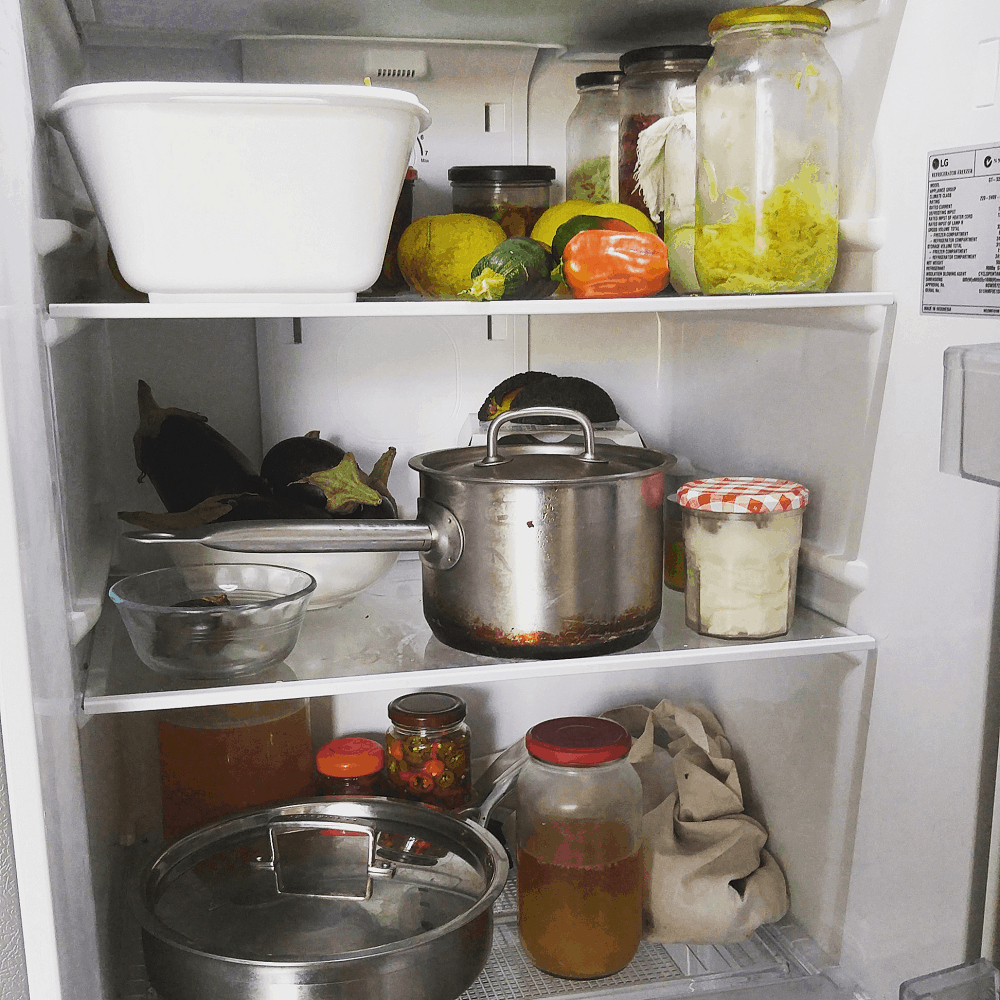
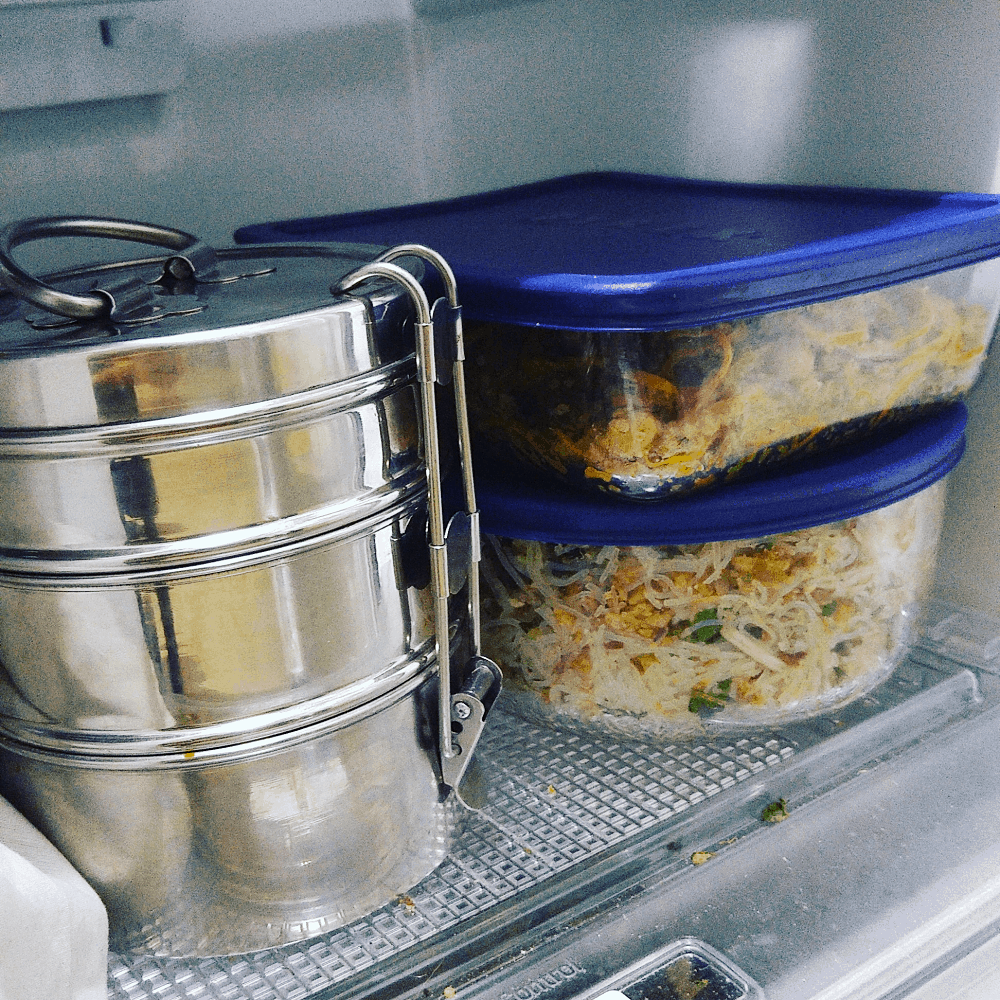
Reusable Containers: if you’re going to be cooking up a storm on Christmas day, or you like to pre-prepare lots of food so you can avoid cooking for the rest of the week, reusable containers are a must. Most things keep better (and last longer) in sealed containers. Make sure you’ve got plenty of glass jars, Pyrex, yoghurt pots, Tupperware, or whatever you storage vessel of choice is.

Use Leftovers: have a plan for your leftovers. Think of meals that could use up excess (e.g. risotto for meat, patties with leftover veg). Ensure you use up the stuff that will go off first, and then use up the things that will happily sit in the fridge for a few more days. Worst case, if making meal plans overwhelms you, commit to freezing your leftovers and make a plan once they are safely frozen.

Freeze leftovers: lots more things can be frozen than people realise. Cheese, dips such as hummus, roasted veggies, cooked meat, cake – all common Christmas leftovers – can all be frozen. Freeze what you can and eat up what cannot be frozen first. With frozen foods, it can help to label and date the items you freeze, and put a reminder in the calendar to check in and make a plan to use it up once the holiday period is over.

Avoid Individually Wrapped Foods: if you do decide to go down the packaged route, try to choose items with less packaging and avoid things that are individually wrapped or completely overpackaged. They will cost you more and fill your bin with waste!

Low Waste Christmas: Gift Wrapping

Last Year’s Gift Bags / Paper: if you had the foresight to save last year’s gift bags and paper, use these this year. It’s always worth pulling all the Christmas stuff out of the cupbaords and seeing exactly what is there before going to buy new. If you use a lot of wrapping consider trying to salvage the best of this year’s packaging for use next year (assuming you have somewhere practical to store it).

Tie with Ribbon / String (No Tape): if you want to avoid sticky tape, tie parcels with ribbon or string (both of which can be reused). Washi tape is a paper-based sticky tape alternative if tying is a bit too tricky to master.

Decorate with Nature: to jazz up brown paper or newspaper parcels, use nature. Holly or pine cones work if these are seasonal where you are, cinnamon sticks look Christmassy and are easy to find at bulk stores, and rosemary is an easy find that looks (and smells) good.

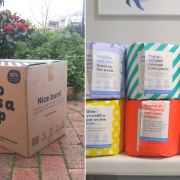
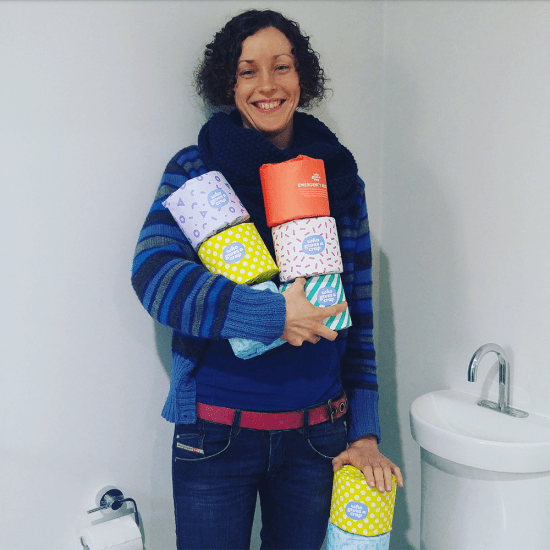
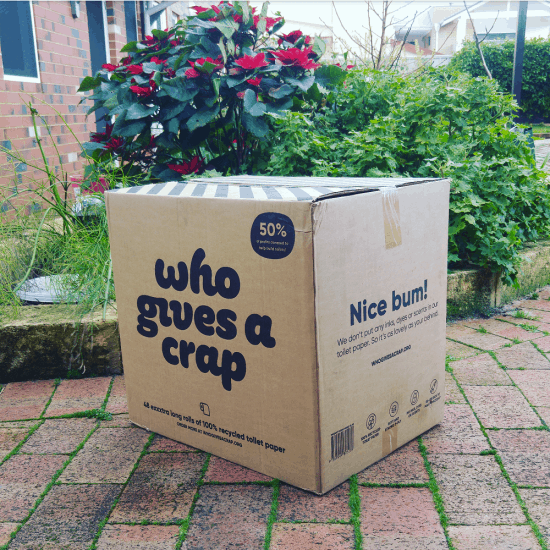
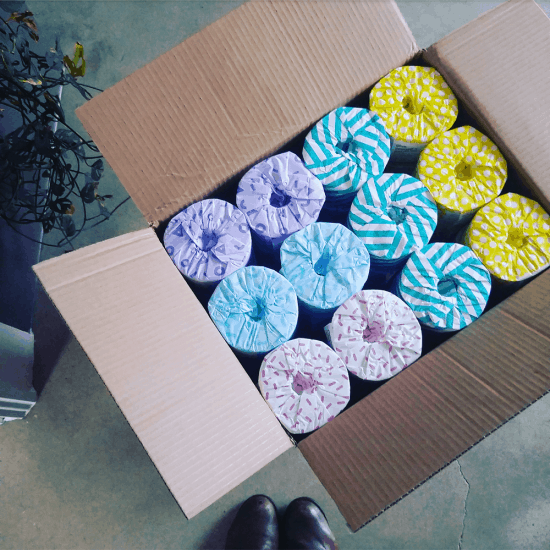
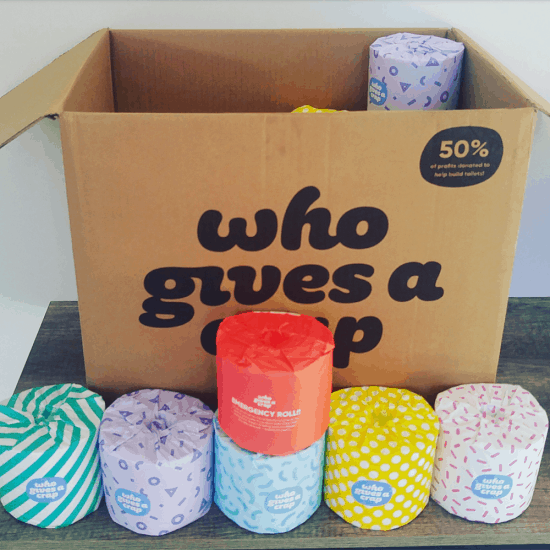
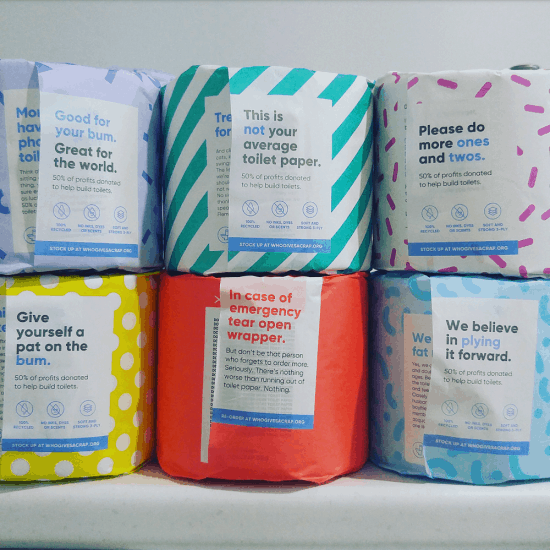
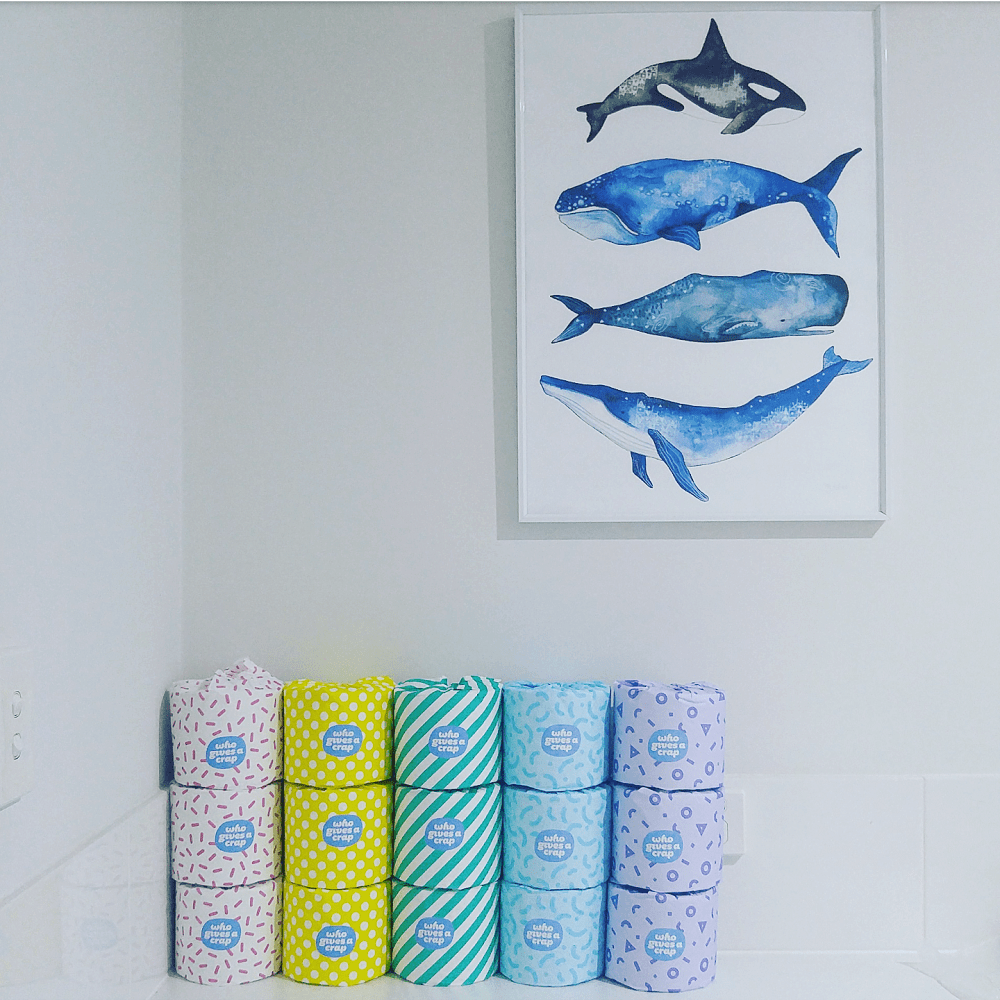
Newspaper: if you receive a newspaper at home or at work (or you know someone who does) then make use of this to wrap presents. Another alternative is Who Gives A Crap (or other brand) toilet paper wrappers.

Brown Craft Paper: brown craft paper is a glitter-free, embellishment-free wrapping option that is much easier to recycle than many types of Christmas paper, and it can also be reused if unstuck carefully.

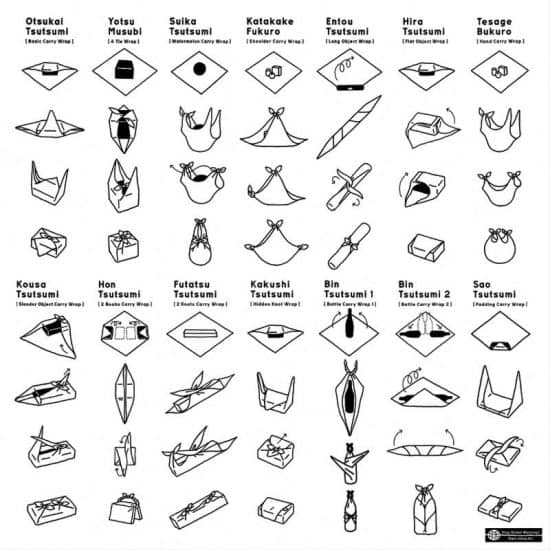
Furushiki: the Japanese art of wrapping items in cloth. The cloth can be scrap fabric, a scarf, a tea towel, or whatever it is you have. There are lots of great tutorials online.

Nothing: does the present need to be wrapped at all? That depends on what it is, how it is packaged already and who it is for. There might be no need for further packaging.

Low Waste Christmas: Gifts

Thoughtful Gifts: the best gift is the one that the recipient will actually use. Buying ethical reusables just because that is what we like might not be appreciated by friends and family;, and presents that end up in the bin or sitting unused are not eco-friendly. Put some thought into what the recipient will actually use, want and like.

Food Items (Purchased, Cooking or Baking): everyone eats, so food is a pretty safe bet for gifts. At its simplest, filling a jar of treats from the bulk store is a good gift. If cooking or baking is your thing, Christmas is a great time to get creative. Be mindful though of making items that need to be eaten immediately – Christmas is the time of year when everyone buys too much food, so adding extra food items with tiny shelf lives to another person’s pantry might not be the best idea.

Choose things that will keep for at least a week, or tell people that you’ll be making dessert as their Christmas present in advance so they can plan around it. Alternatively make a “voucher” and say what you’ll make and when (e.g. a chocolate cake in the first week of January).

Books: books are great Christmas gifts for people who love to read. It is often possible to find second-hand books in great condition.

Second-Hand: second-hand is a much more zero waste option than buying new, and second-hand doesn’t have to mean old, tired or worn out. Whether it’s antique furniture, vintage jewellery or accessories, preloved clothing, refurbished electronics or simply something great you found in the charity shop, gifts do not need to be straight off the production line.

Plants and Terrariums: plants are another great Christmas git idea, whether it is house plants, veggie seedlings, filled planter boxes or fruit trees. Terrariums (a sealed glass container with plants inside) are an easy DIY with a glass jar and some plants.

Experiences, Workshops and Memberships: I’m a big believer in experiences over stuff. Tickets to an event, a workshop, lesson or class, a show or performance all make great no-waste gifts. Membership to a theatre, zoo, fitness club or gallery, ditto. They don’t need to be formal either: something as simple as organising a picnic or dinner is fantastic way to spend more time with the people who are important to you.

Charity Gift Cards and Donating to Charity: Charity gift cards are gifts that go to people in less economically developed countires, via the person you “gift” them to. You buy a goat for someone in Africa, and your gift recipient receives a card telling them this is what you’ve done. One of my course participants, Karen, told us that every year she buys (literally) a pile of poo for all her family and friends. It’s one of the gift card options offered by Oxfam. If novelty gifts appeal to you but waste definitely does not, this pretty much nails it.

If you want to do away with the cards altogether, you can make a donation to charity in lieu of gifts, and tell everyone that is what you’ve done.

Secret Santa for Family Gifts: If the prospect of every family member getting a gift for every single other family member overwhelms you (and you can’t bear the thought of all the excess and waste), a Secret Santa can reduce the burden. Names are put into a hat, and each person gets one name – the person they buy the present for. Some people do this for adults only; other families with lots of nieces and nephews might choose to put families into the hat.

The upside of this (aside from the reduced financial strain) is that if there is only one present to buy, it is much easier to put thought into it, and find something that is suitable and appreciated. 

Regifting – January (White Elephant Parties): One person’s trash is another person’s treasure. We all end up with stuff we’d prefer not to have, and an entertaining way to swap gifts with friends is to host a gift reswapping party – also called a White Elephant party. In short, everyone brings one gift which are placed in the centre of the room. The first person takes a gift, then the second person can either “steal” that gift, or take their own. It continues until everyone has a gift.

I’ve never been to one, but friends have and it’s amazing how stuff gets swapped and exchanged with people who will actually use it. I think it is a much more effective idea than taking this stuff to the charity shop, which is what the other 7 billion people on the planet will be doing come Boxing Day – and no-one is buying novelty Christmas gift items in January.

Now I’d love to hear from you! What are you planning to do to keep Christmas low waste? Do you have tried-and-tested things that work, or are you embracing some new ideas this year? How has your Christmas evolved over the years for the better? Please share your thoughts in the comments below!

Recipe: how to make (plastic free + zero waste) seed crackers

If there’s one thing that is next to impossible to find without plastic, it’s crackers. Before I went plastic-free, I’d buy packet upon packet of crackers – usually with the plastic tray, then wrapped in plastic and with a final plastic or cardboard outer. Packaging overload!

These days I do things very differently. I either skip the crackers entirely, and make crudites (fancy term for vegetable sticks – carrot, cucumber and capsicum/pepper) or use bread; or I make my own crackers.

I’ve shared in the past how I make sourdough crackers and carrot pulp flatbreads, and today I’ve got another recipe for you: 4 seed crackers.

I actually found the recipe via my local Source Bulk Foods store, who sell the ingredients ready-weighed in a little pack. I bought all the ingredients separately in bulk as I wanted to avoid the packaging but if you were short on time or didn’t want random amounts of seeds left in the pantry, the pack would be a shortcut.

Being made almost entirely of seeds, these crackers and gluten-free, dairy free and vegan.

The magic ingredient binding the seeds together is psyllium husk: it’s the husk of a seed that’s high in soluble fibre, and binds with water to form a slippery gel. It’s often used in raw and vegan recipes for its binding properties.  It’s pretty readily available at bulk stores. If that’s not an option, chia seeds might be an alternative to experiment with but it’s not something I’ve yet tried.

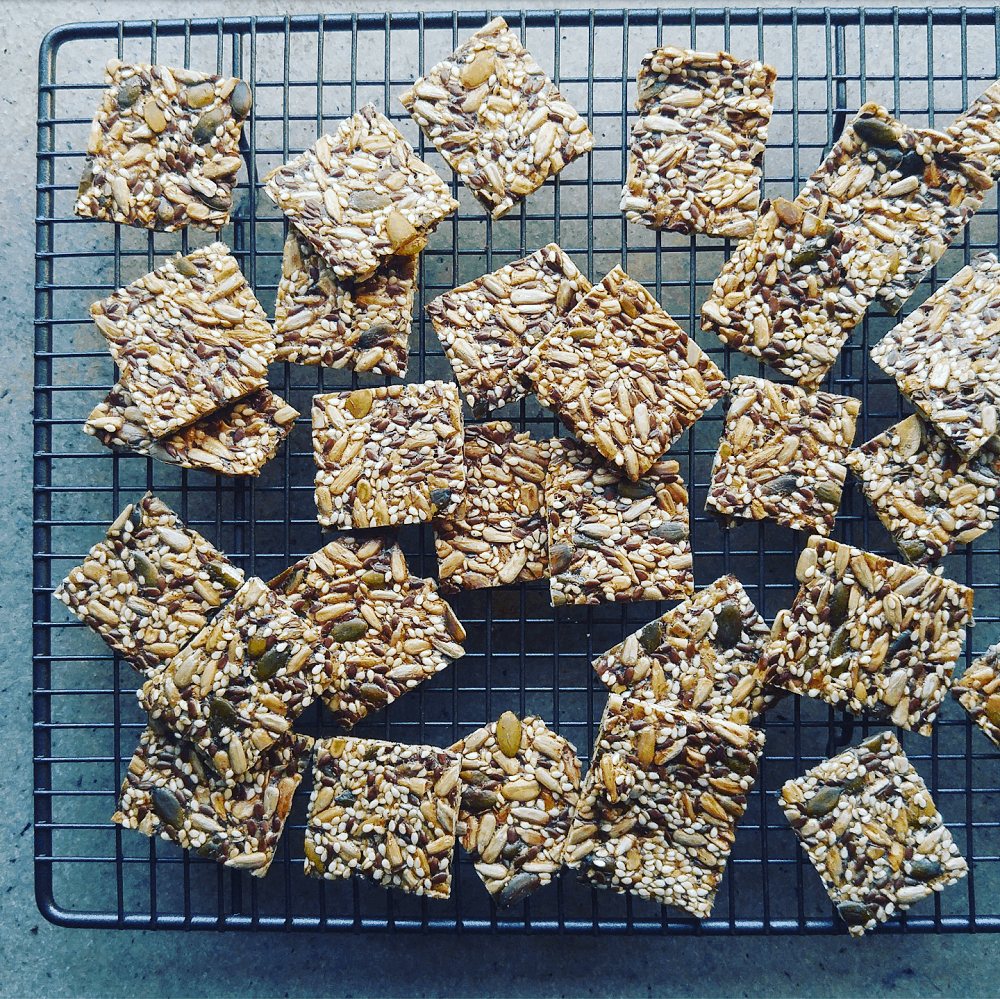
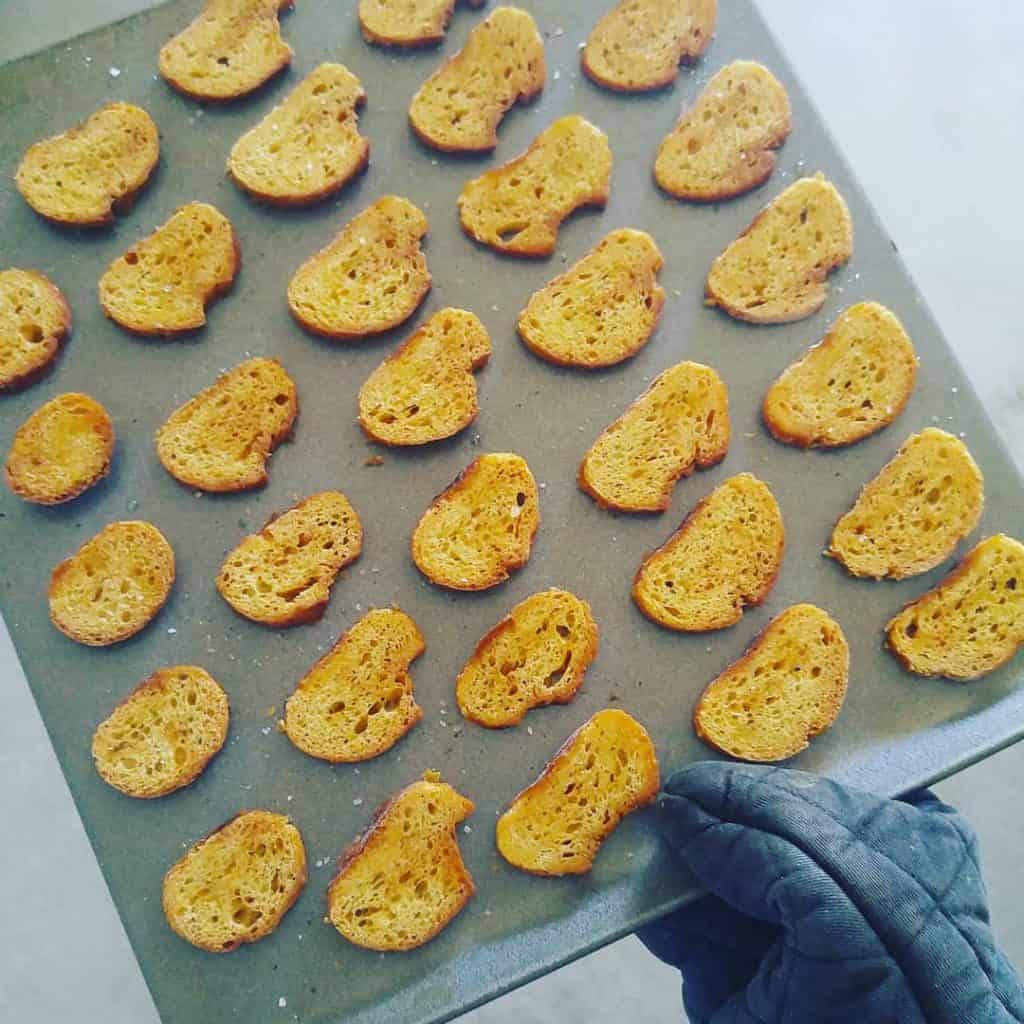
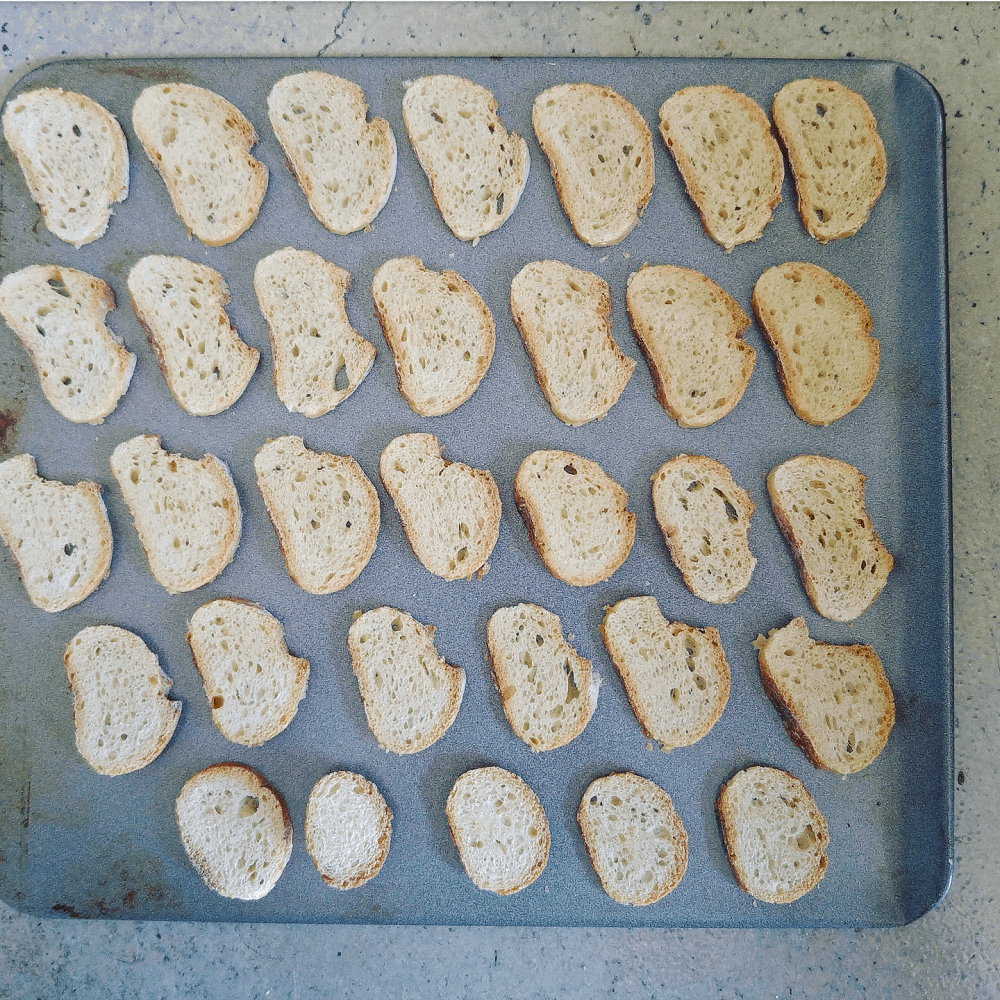
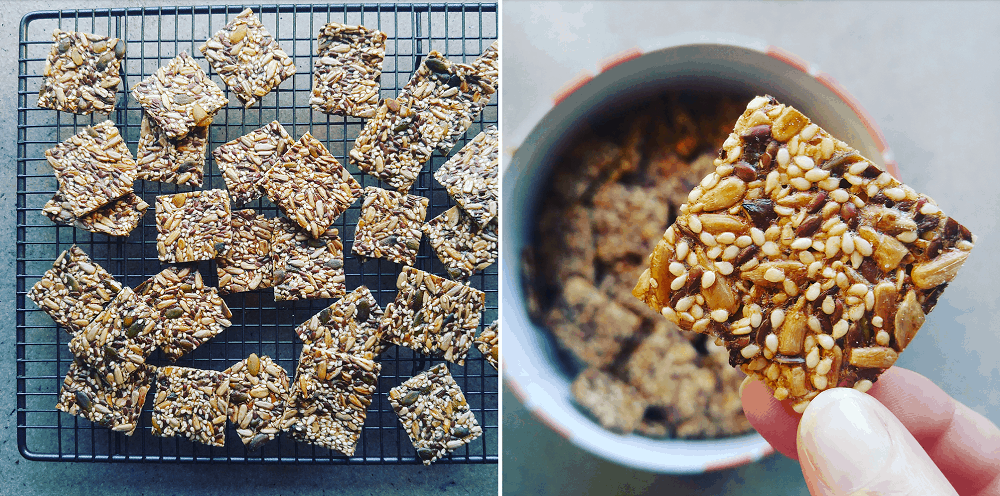
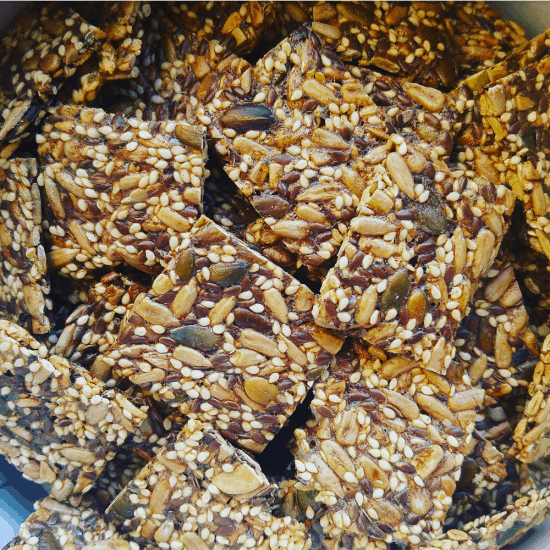
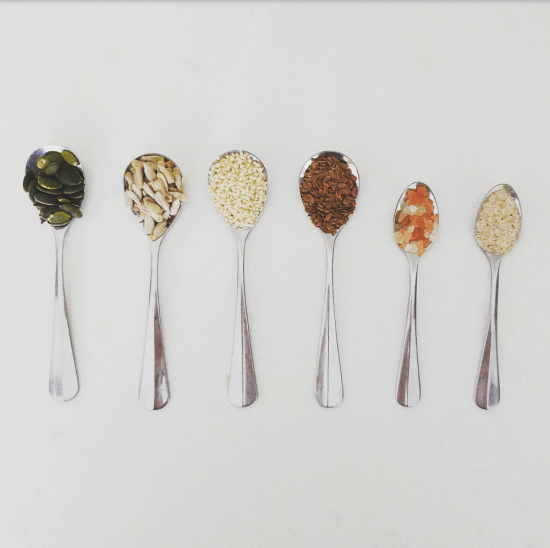
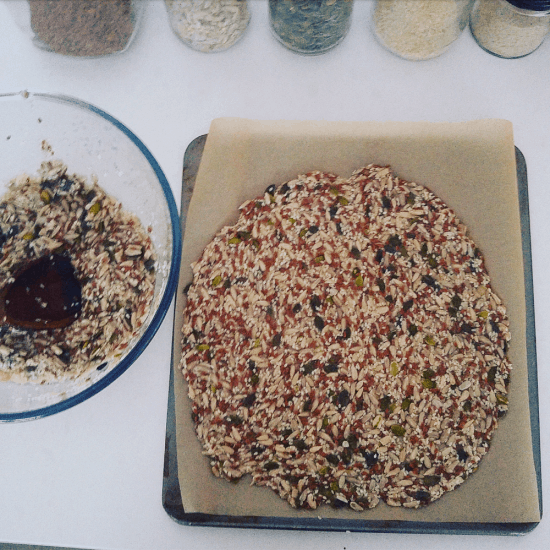
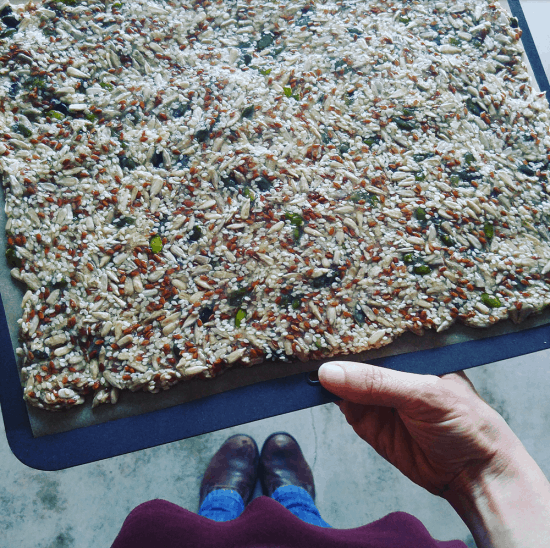
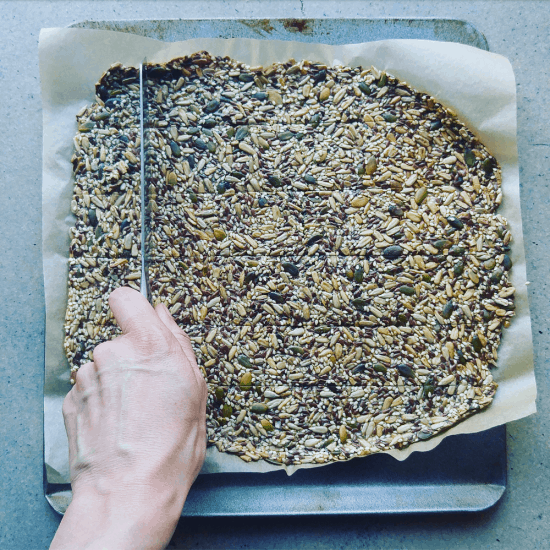
Recipe: Zero Waste 4 Seed Crackers

I chose raw seeds rather than roasted ones, as the crackers are baked in the oven. If raw seeds aren’t an option, try with roasted ones but bear in mind you might need to add a little more water to the mix.

Preheat the oven to 160°C, line three trays with baking paper or use silicone baking mats.

Ingredients:

490ml water
200g sunflower seeds
100g sesame seeds
60g pumpkin seeds (pepitas)
60g linseed (flax seed)
15g psyllium husk
5g salt

Method:

Mix all the seeds, husks and salt together in a bowl and pour in the water. Leave to stand for 30 minutes until the mixture has a gloopy consistency.

Empty a third of the mix on each baking tray and spread out thinly and evenly using the back of a spoon. Try to make the mixture as thin as possible. (but be careful of creating holes).

Bake in the oven for 1 hour, then remove from the oven and using a knife, score the cracker lines in the mix. Once they are fully baked they will not cut without shattering, so the lines need to be marked whilst the mixture is still soft.

Return to the oven for 30 minutes. Check the crackers and remove any that are cooked (the middle will take longer than the edges). If possible, separate the crackers and return to the baking tray to speed up final cooking.

Return any uncooked crackers to the oven. Cook for another 30 minutes or until the crackers are completely dry, crisp and crunchy. To dry out further, the crackers can be left in the warm oven once it is turned off. Remove from oven and cook completely on a rack.

Store in an airtight tin. They will keep for at least a week.

Possible Variations

There are plenty of other seeds to experiment with: hemp seeds, poppy seeds, chia seeds, or even chopped nuts. You could try adding cumin, nigella or fennel seeds; or herbs and spices such rosemary or thyme, paprika or ground coriander. Recipes are there to be played with!

Now I’d love to hear from you! Do make your own crackers? Has it been on the to-do list since forever but you’re yet to get round to it? Or is it something you’ve put in the too-hard basket for now? I’m always interested in hearing new cracker recipe ideas so if you have any favourites – or favourite flavour combinations – share below, along with anything else you’d like to add!

[leadpages_leadbox leadbox_id=123a865e9839c5] [/leadpages_leadbox]

Toilet Paper That Builds Toilets? Yes, that’s a Thing…

This post contains affiliate links.

If there’s one brand that’s consistently been with me since very early on in my plastic-free living and zero waste journey, it’s Who Gives A Crap toilet paper.

The thing about Who Gives A Crap toilet paper, is that it isn’t just about the toilet paper.

For me, it isn’t enough for a company to print a green leaf on their packaging and tell me it is eco-friendly. I want to know how; I want to know the details.

The more ethical, sustainable and environmental boxes that can be ticked, the better.

Who Gives A Crap tick a lot of these boxes for me.

I use their toilet paper every day, and I recommend it to everyone who uses toilet paper.


I thought I’d summarise what Who Gives A Crap do, and why they do it (as well as why I think they are pretty great) – it’s about more than just selling loo roll.

(I was wondering exactly how long ago it was that I first started using Who Gives A Crap. They only actually started selling toilet paper in March 2013. Turns out, I placed my first order back in January 2014.)

Firstly, Let’s Talk Eco Friendly Toilet Paper

I started buying Who Gives A Crap toilet paper because it was plastic-free. It’s also made of 100% recycled paper. There’s plenty of recycled toilet paper out there, but finding a plastic-free toilet paper is surprisingly challenging.

Not buying anything in single-use plastic is very important to me.

Who Gives A Crap is plastic-free and 100% recycled, and they do not put inks, dyes or scents in the paper. As natural as toilet paper can be.

I order online (I order the 48 double-length rolls, which is the most toilet paper for the least packaging), and it gets delivered in a big box. Cardboard and loo roll, nothing else. (Oh, except a bit of sticky tape to seal the box shut.)


Even now, I still appreciate the “nice bum” comment printed on the box. Thanks, guys!

Each roll is wrapped in colourful paper (Who Gives A Crap have updated their designs over the years, and each iteration gets a little bit more fun.)

As someone who doesn’t do presents, opening a box of brightly wrapped toilet roll is about as Christmassy as it gets for me! Yes, I get my present-opening fix with boxes of loo roll ;)

(A quick note on the packaging – according to the folks at Who Gives A Crap, individual wrappers might seem wasteful, but actually it’s only possible to wrap a maximum of 6 wrappers in paper. It also needs to be thicker. With the individual wrappers, the net use of paper is the same, but it avoids any plastic, still protects the rolls from moisture, and looks fun.

You can read more about the decision-making around the wrappers, if you’re interested.)

In every box, there are three “emergency” rolls, wrapped in red paper. This is possibly my favourite feature.

I can tell you, since switching to these rolls, I have never run out of toilet paper.

The trick is to pack the emergency rolls at the back of the cupboard though, so they are definitely the ones that are used last!

I can wedge most of my loo roll into my under-the-sink cupboard in the bathroom, but because it looks so good, I don’t mind having a few rolls stacked on the counter.

It brightens up the place!

I never put the wrappers straight in the recycling. Firstly, they are too pretty. Secondly, they are too useful!

I’ve used the wrappers to wrap gifts, but as someone who doesn’t do presents, this has limited demand. What I do with them instead, is use them to pick up dog poo. They are cut to the perfect size and strong enough for the task.

I actually tend to purchase this toilet roll 11 boxes at a time, by getting together with a group of friends and neighbours and splitting it up. Whilst there’s a bit of admin and organising involved, doing it this way means it’s much cheaper ($39 AUD a box rather than $48 AUD), and it also means there isn’t a truck driving round the suburb dropping off one box at a time to 11 different houses.

Even better, my neighbours then leave their finished wrappers in my letterbox, so I can use them to clean up after my greyhound too!

As for the toilet paper itself (it is easy to get distracted by the wrappers!), well, it does all the things that you’d expect toilet paper to do. It’s 3 ply, and as strong and absorbent as toilet paper should be.

Sometimes eco friendly paper can be so feeble that you end up needing to use twice as much, which rather defeats the point of choosing eco-friendly. Good news is, this is definitely not the case with Who Gives A Crap. A single square can meet all your needs ;)

Second, Let’s Talk Ethical Toilet Paper

Who Gives A Crap meet the eco-friendly toilet paper criteria for me by using 100% recycled paper (meaning not trees are harmed in the making of the loo roll); not using dyes, scents or inks on their paper; and not using any single-use plastic packaging.

However, their impact goes far beyond simply wrapping a few loo rolls in paper to skip the plastic.

Firstly, Who Gives A Crap donate 50% of their profits to their charity partners, to help build toilets and improve sanitation in less economically developed countries. The business was established to do something about the fact that 2.3 billion people do not have access to a toilet.

To date, Who Gives A Crap have donated over $1.2 million ($ AUD) to charities working in this field. As the company grows (and they now sell toilet paper in the USA and UK as well as Australia) this figure is only going to grow.

More toilet paper sales means more toilets built in places where people need them.

You can read more about how and why they donate to these organisations on their impact page.

(Alternatively, they do a pretty good job of explaining their mission and ethos on their toilet paper wrappers themselves.)

The other thing I love about Who Gives A Crap is that they are a certified B Corp. If you’ve not heard of B Corporations before, I like to explain it as similar to a Fair Trade certification scheme, except it is for businesses that manufacture goods rather than grow food, and use factories rather than farms.

B Corps explain it like this: Certified B Corporations are businesses that meet the highest standards of verified social and environmental performance, public transparency, and legal accountability to balance profit and purpose.

What this means is that not only do Who Gives A Crap claim they care about the environment, people and the planet – they have actually invested in being independently audited and verified, to prove it.

Who Gives A Crap have been a certified B Corp since February 2016.

This is important to me, because many companies make great claims about their mission, but few are able to demonstrate how.

Whilst some companies are simply too small to afford the auditing and certification process, those that can – and do – are demonstrating commitment to positive change, transparency, and integrity.

Whilst Who Gives A Crap is an Australian company, they manufacture their toilet paper in China. I’m a big believer in buying local, but I also recognize that China is the manufacturing hub of the world. For me, being a registered B Corp is proof that Who Gives A Crap are manufacturing responsibly. (You can read more about their decision to manufacture in China here, as well as how they audit their factories.)

Personally, I choose to purchase from Who Gives A Crap because they are an independent, Australian grown company with a transparent commitment to environmental responsibility and ethics, who donate profits to good causes.

No company is perfect, but those that recognise their imperfections, explain their choices and always strive to do a little better next time will always get my vote.

In short, I’m a long-time fan of Who Gives A Crap toilet paper, and I’d encourage anyone looking for a plastic-free, sustainably sourced and ethical brand to give them a go. Here are the links if you’d like to learn more:

Australian site: au.whogivesacrap.org

UK site: uk.whogivesacrap.org

USA site: us.whogivesacrap.org

This post contains affiliate links, meaning if you click a link and go on to make a purchase, I may receive a small commission at no expense to you. I chose to become an affiliate in 2022 after using these products for several years, because I think they offer a plastic-free and ethical solution to a need that almost all of us have. I only recommend products with my readers in mind.