
5 steps to a productive food garden (progress in pictures)
It’s been just over a year since I moved into my “new” (1970s) house, and just under a year since my garden transformation began. (The transformation from lawn to productive food garden, that is.) And this last month, things have really (finally) taken a big leap forward.
There is still so much to do, but a lot of things have come together, and it’s starting to resemble in real life what until now has only existed in my head.
The main change, which was holding everything else up, was installing reticulation. I already had a bore installed, which is a pump that pulls up groundwater (the groundwater level where I live is pretty close to the surface). Using groundwater means I don’t have to use mains drinking water for the garden.
Having reticulation means I don’t have to water everything by hand every day.
(The alternative to not watering at all would be living on a sandpit.)
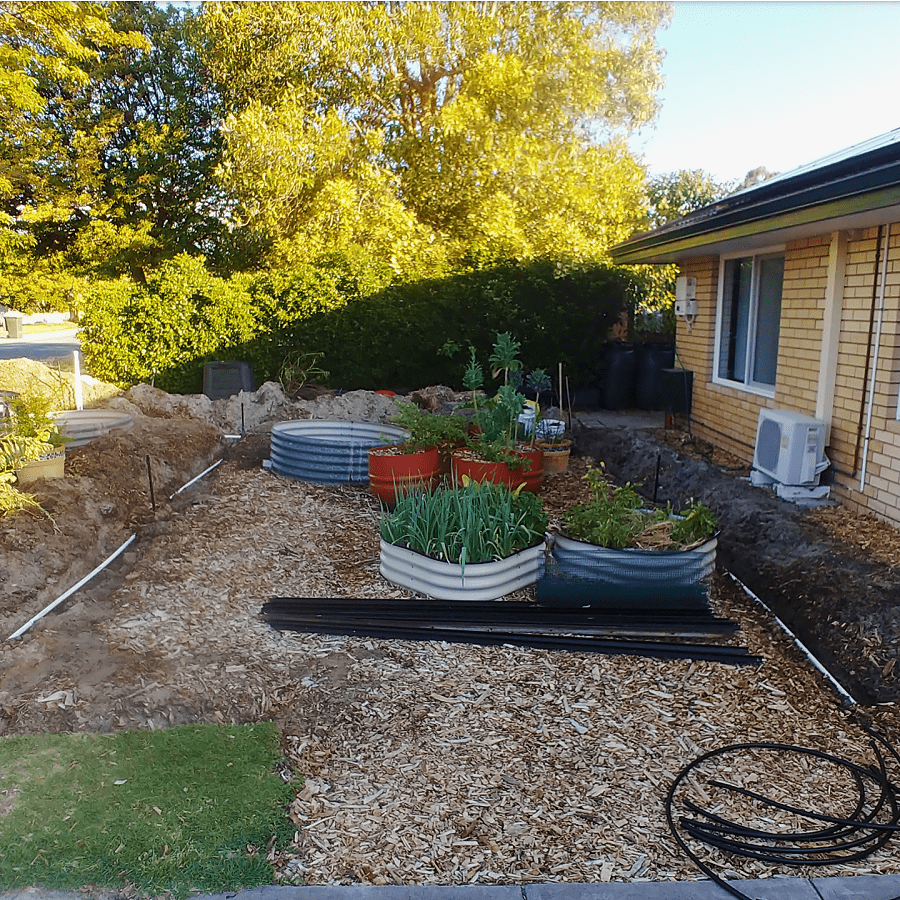
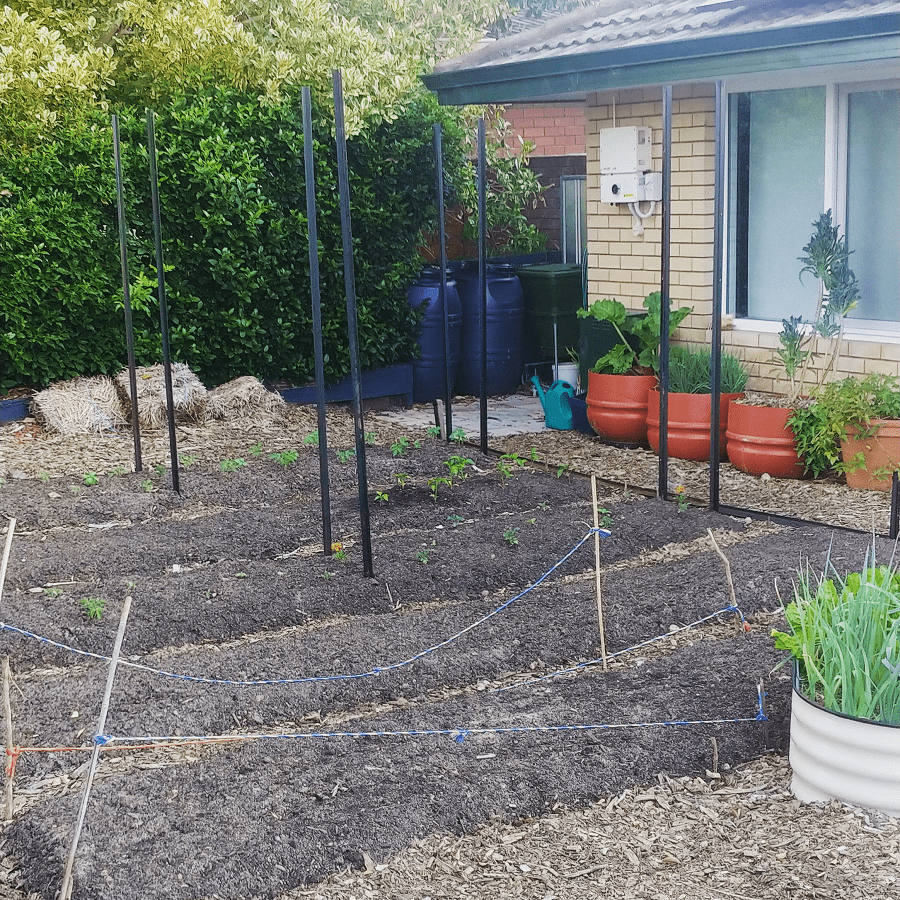
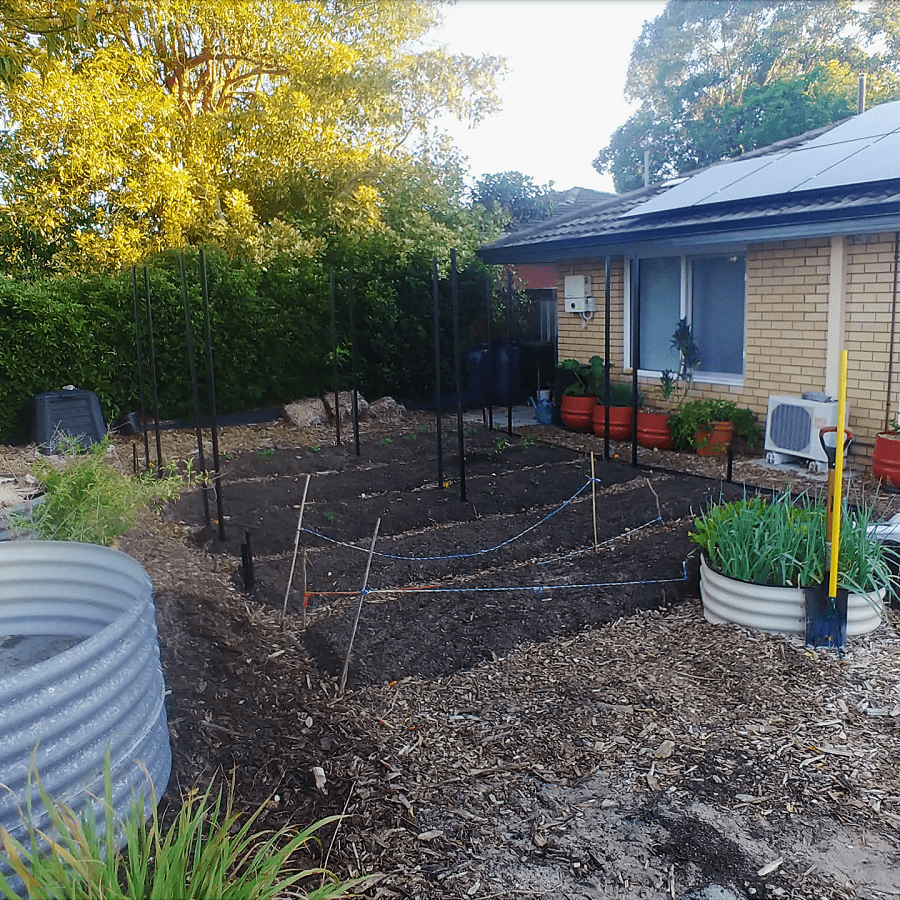
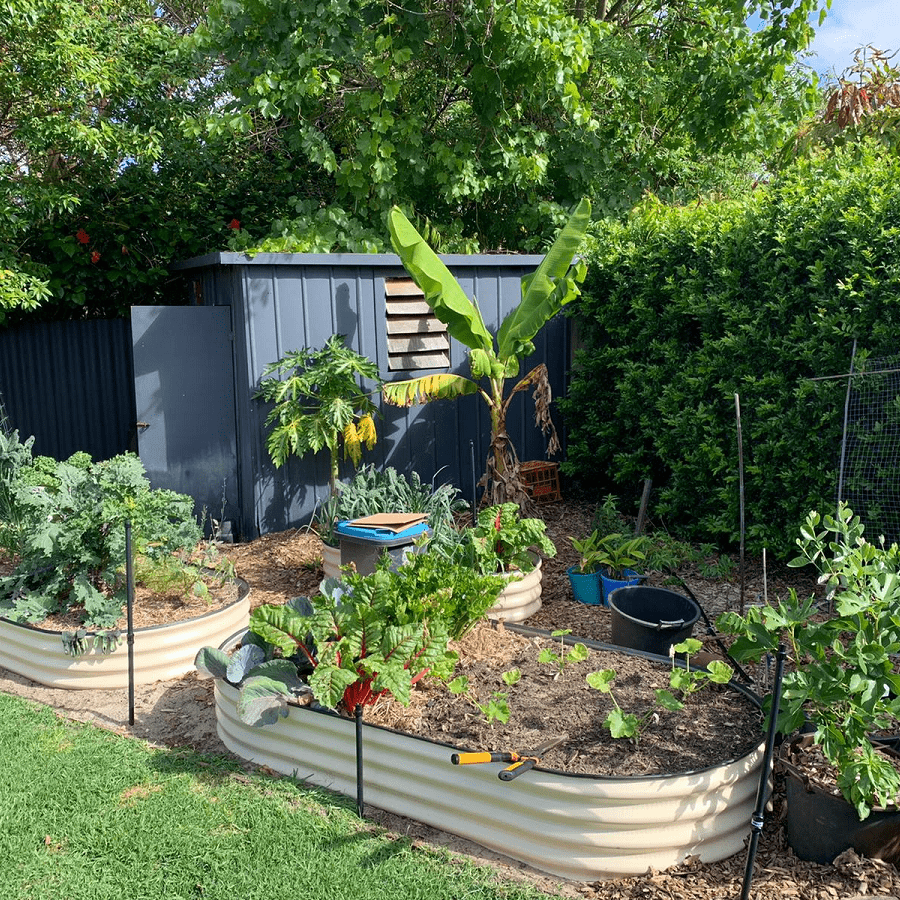
Having reticulation means I can now plant out my garden beds, and believe me, I wasted no time. The front garden is well on its way to becoming a productive food space.
If you’ve been following along since the project began, it is virtually unrecognizable these days.
I wanted to talk you through the five stages of getting this up and running. Depending on the scale you want to grow, stages might take less (or much more) time – but the principles are the same.
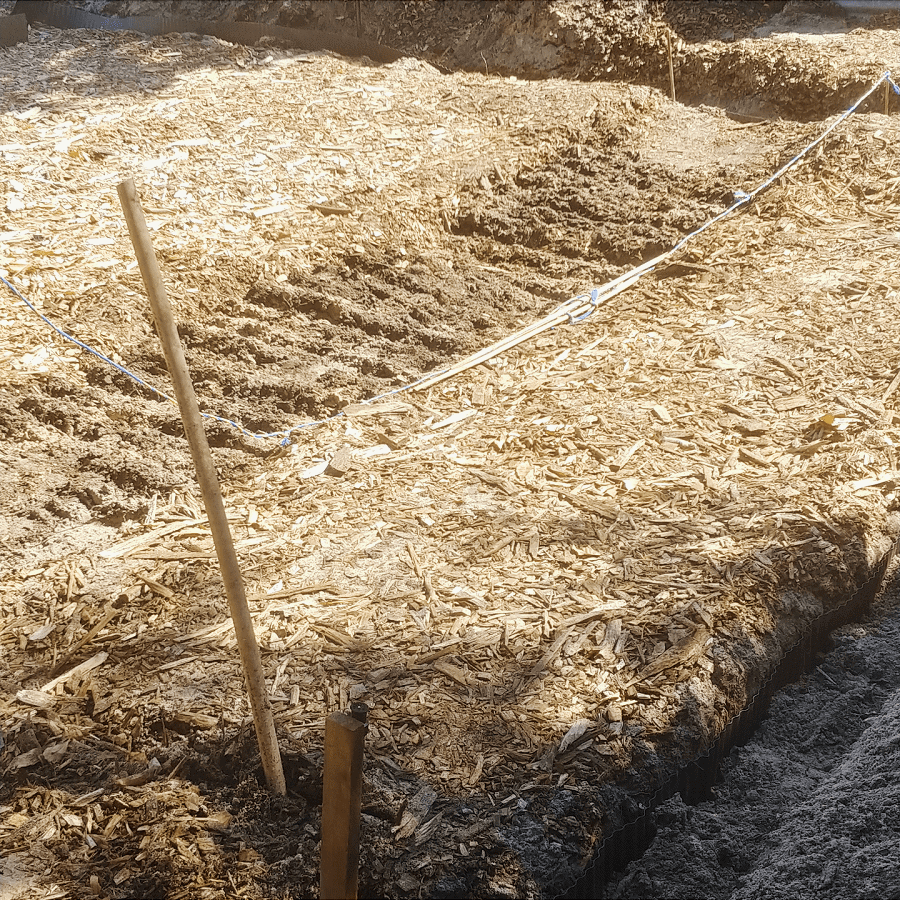
Step 1: Planning the growing space
Before I could install reticulation, I needed to figure out (more or less) what I was going to do with the space, as different plants have different water requirements. Some things have no water requirements. Also, different types of reticulation are more practical in certain spaces.
Not to mention, installing reticulation means digging trenches everywhere and laying PVC pipe, so I needed to know where the paths would be and the edges of zones. (This is why I haven’t planted out heaps of plants so far… I didn’t want to kill them all when all the roots are messed with.)
The previous reticulation was pop up sprayers everywhere, which meant my laundry got soaked as one fired directly onto the clothes line, my chickens got soaked as one fired directly onto them, Hans the greyhound got soaked as one fired directly onto his wallowing hole…
Plus delivery drivers parking on my verge (when there is a perfectly good driveway or road) had trashed the PVC pipe so when it was turned on, a man-made geyser channelled litres of water down the street.
Not every corner of the garden needs water (such as the places we sit). So thinking about where plants will grow and where they won’t is an important first step.
Figuring out what I will plant now and how the garden will evolve in future was pretty important so water goes to the right places. It’s not that I can’t change the reticulation later, but it is more expensive and very inefficient to do so! I can add on to what I have, of course.
Step 2: Deciding on plant zones
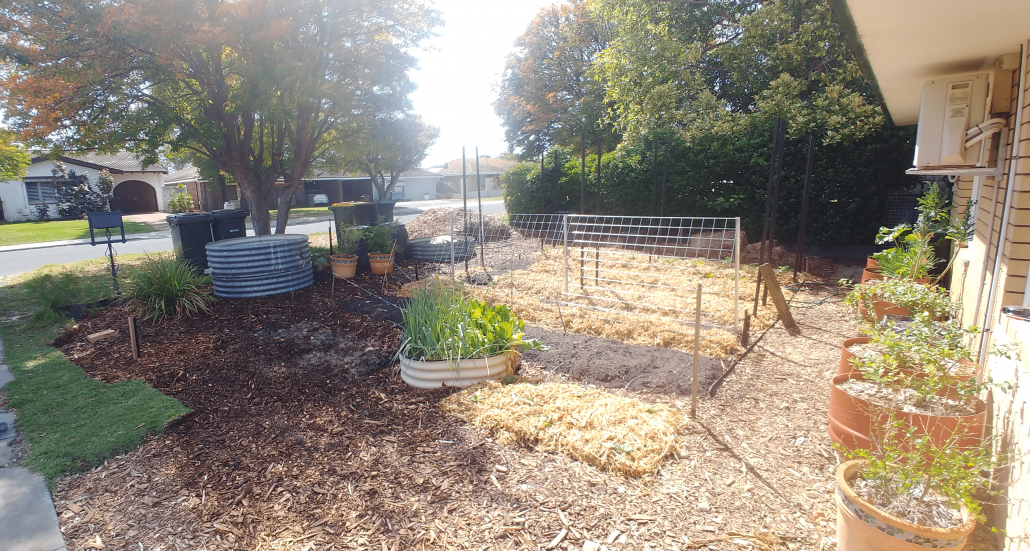
I have four main growing zones in the garden: vegetable beds, fruit trees, lawn and the verge. Each of these is now set up with its own watering schedule and different type of reticulation.
For the vegetable beds, I wanted overhead sprayers. They allow an even distribution of water across an area, and work for both raised beds and in-ground beds. They are the most flexible option: I can interchange the types of beds (installing raised beds, or removing them) without having to alter the reticulation, as well as switching things like orientation.
Drip lines (which I had at the old place) are fiddly with vegetables because different crops have different spacing requirements, so what works one season might not work the next. There is also heaps of pipe to move every time you want to add stuff to the soil. And because the drip lines sit on the soil, raised beds need raised pipe, and if you remove the beds you also need to lower the pipe.
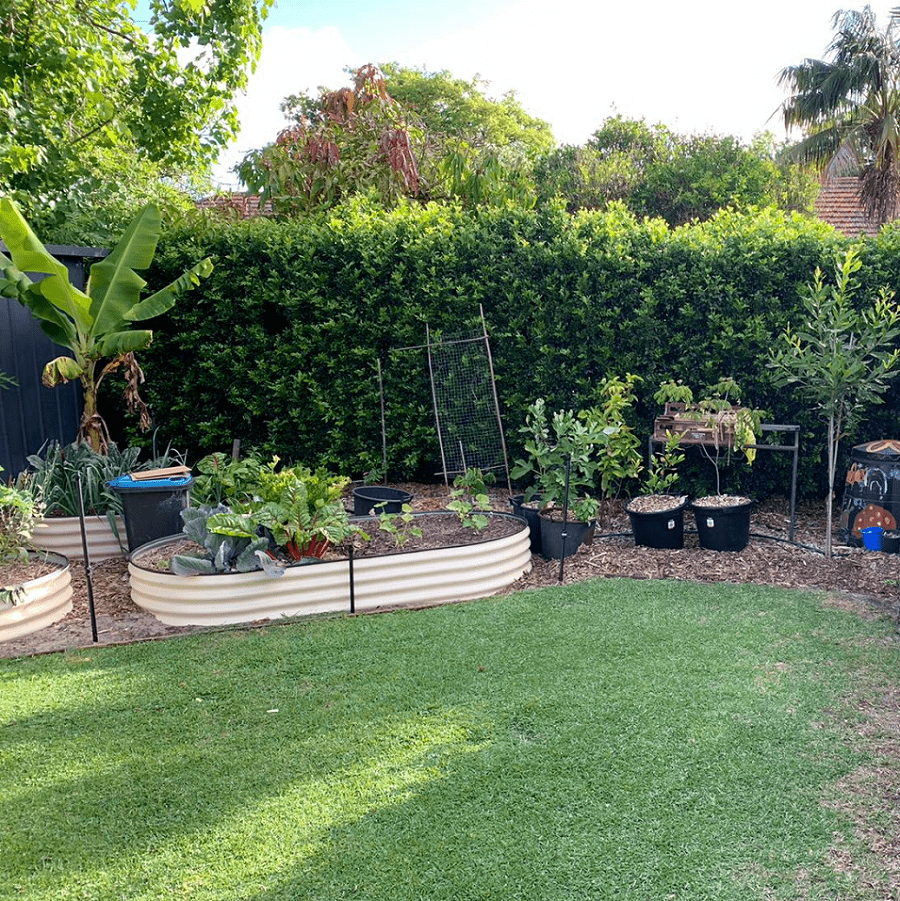
For the trees, I’ve used drip lines. The trees are round the edge of the property, next to the fence and down the side of the house, so sprayers wouldn’t work as well – plus they’d spray the chickens, the dog and my laundry. Plus trees tend to stay in the same place for a long time, so its unlikely I’ll need to change anything here.
For the lawn, I’ve used overhead sprayers. I find pop-ups really annoying – they break all the time, get stuck in the lawn and are generally frustrating. The overhead sprayers are located around the edge of the lawn – it is small enough not to need anything in the centre.
The verge will be drip lines (so delivery drivers have nothing to snap). But it’s currently still weedy lawn, so I’ve left that until autumn when I’m ready to plant out.
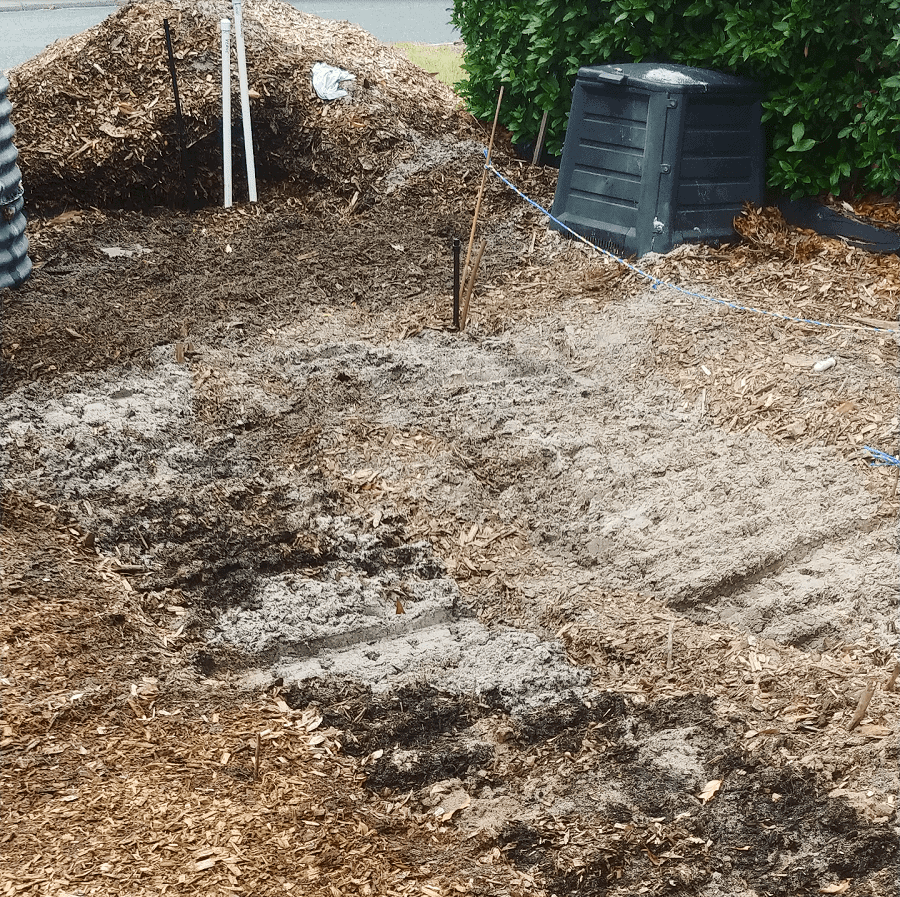
Step 3: Figuring out a watering schedule / installing the reticulation
If you live somewhere with plentiful rainfall, you can probably skip this step – or at least on this scale. For me, this was a big (and expensive) job… but it had to be done.
The bore pump and original control box were still usable (although the control box needed moving) but everything else needed updating. Trenches were dug everywhere (the whole place was chaos) and pipes laid, and then more pipes laid.
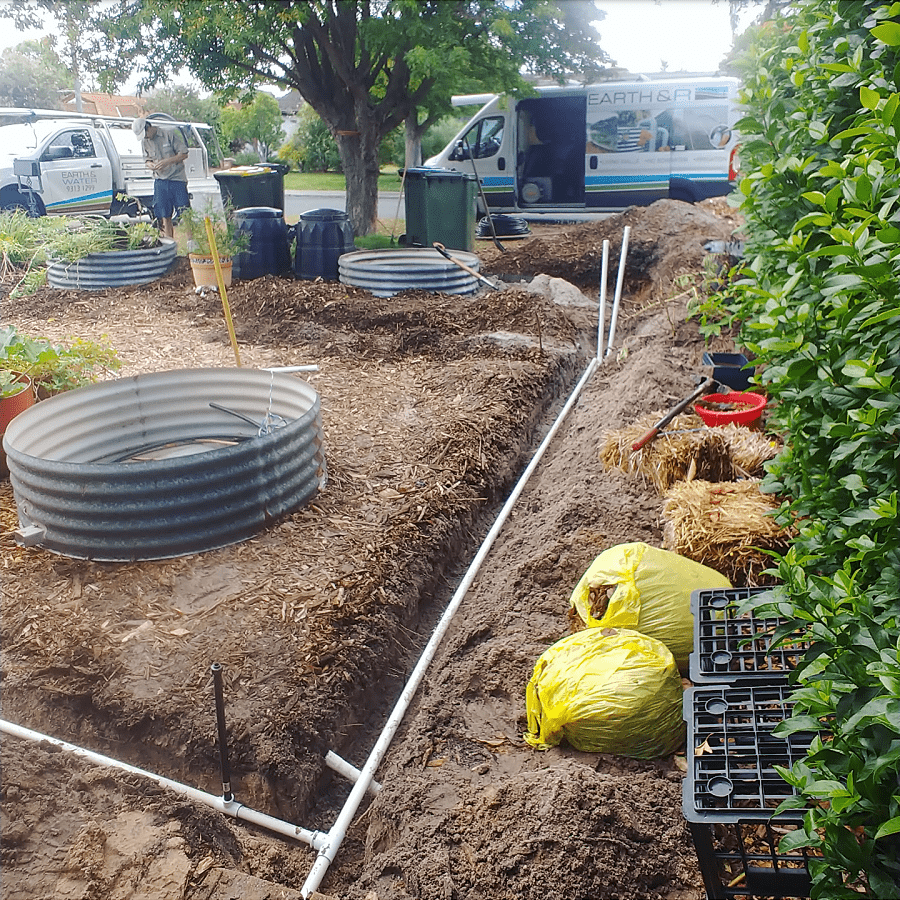

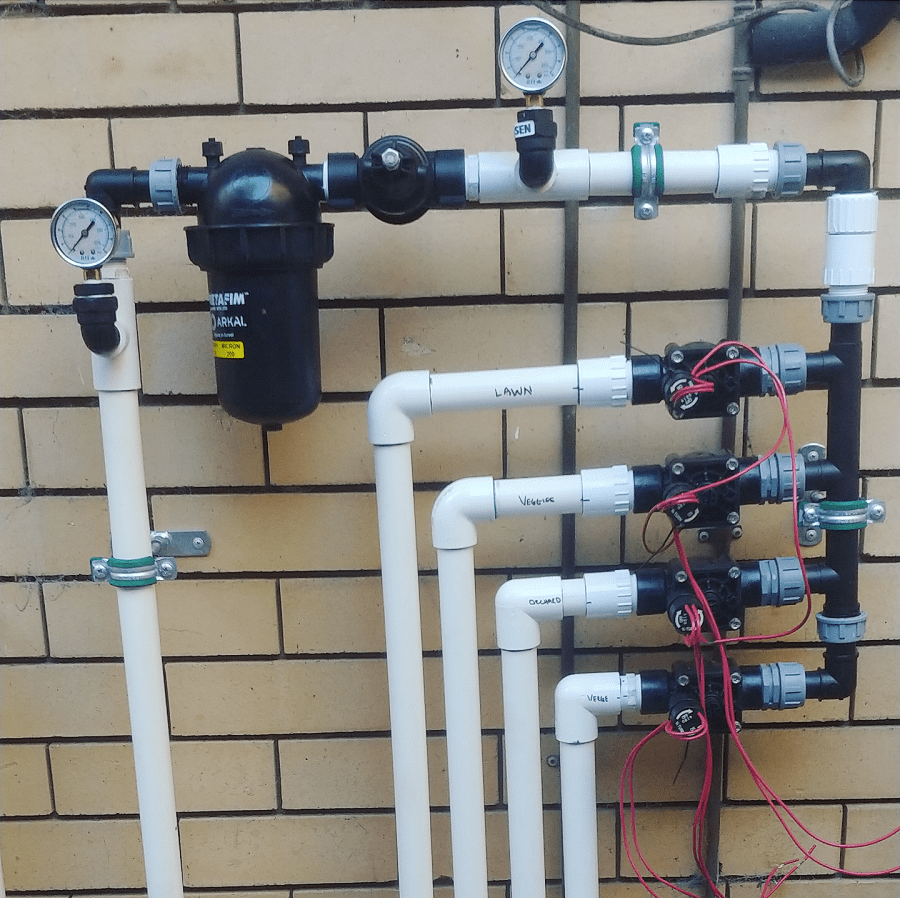
But when it was finally turned on, and there was water! – oh, it was worth it.
(The previous reticulation pipes are decades old, and the control box is something out of the 1980s, so it had a good innings. The new pipework should all last a (my) lifetime. Expensive upfront, but over 20 – 30 years, not so much.)
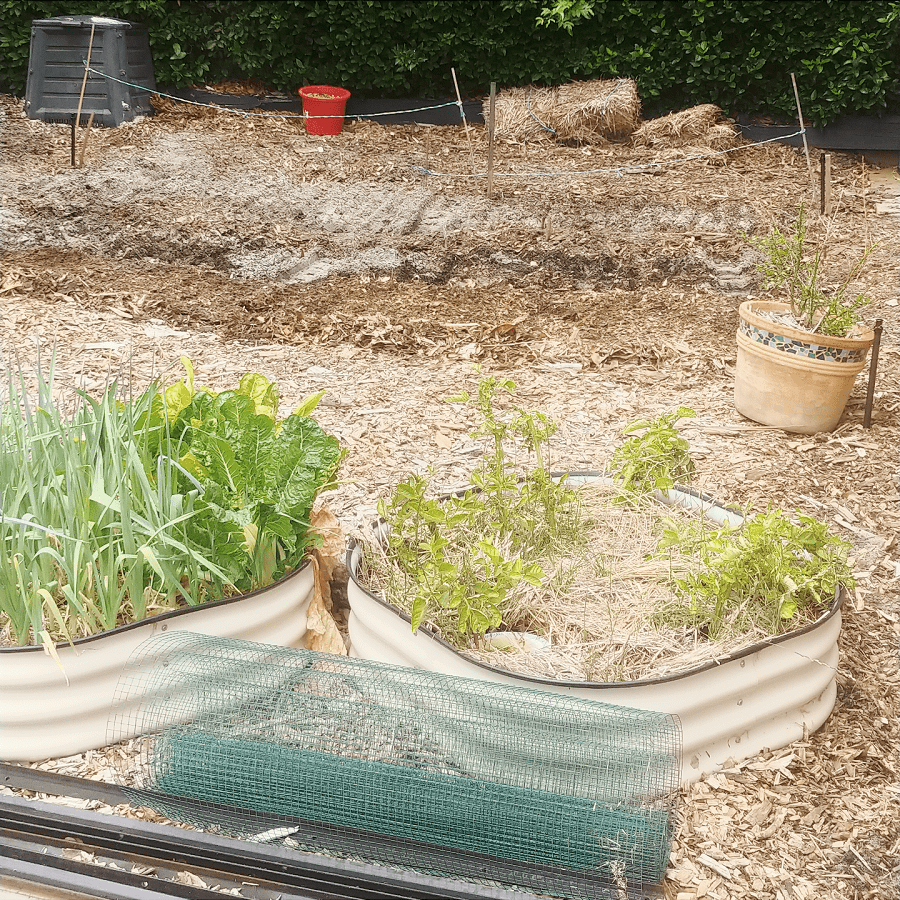
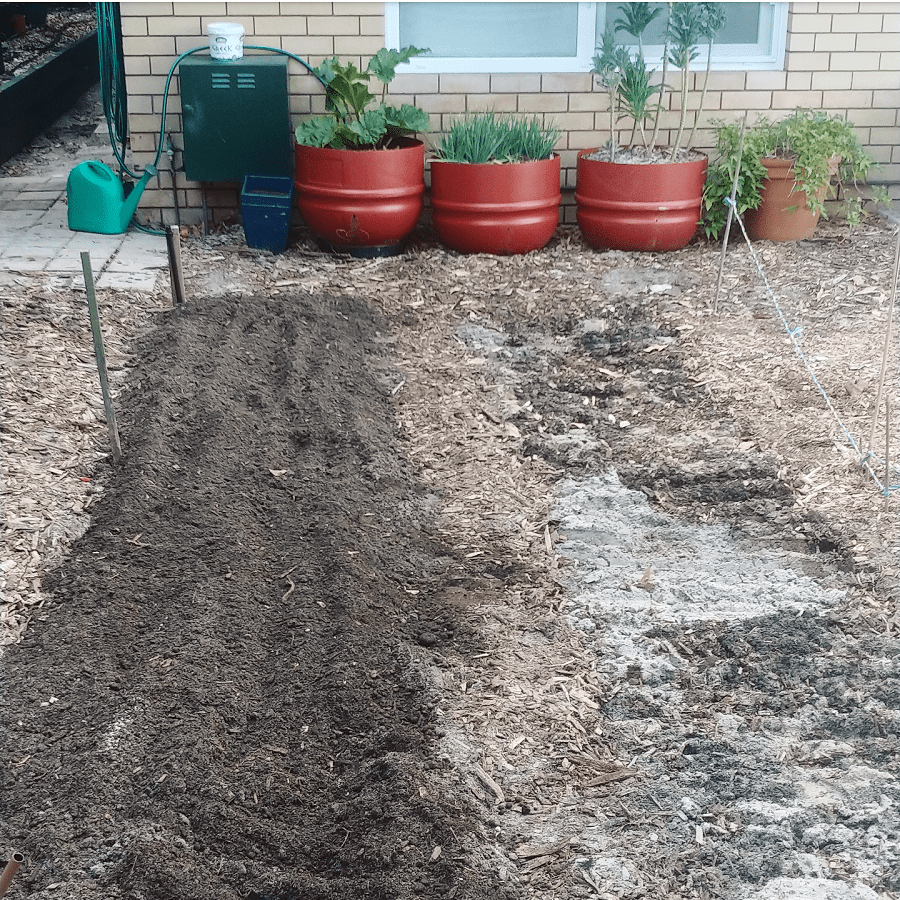
Step 4: Preparing the soil for the vegetable garden
My plan has always been to have in-ground beds at the front of the house, and as soon as the reticulation was installed, I got creating them. I wasn’t sure I’d have enough time to even get things growing this year – my rule is, if it isn’t in the ground before Christmas day, it doesn’t get planted until April. Perth summers are too hot to be trying to get seeds and young seedlings going in January/February.
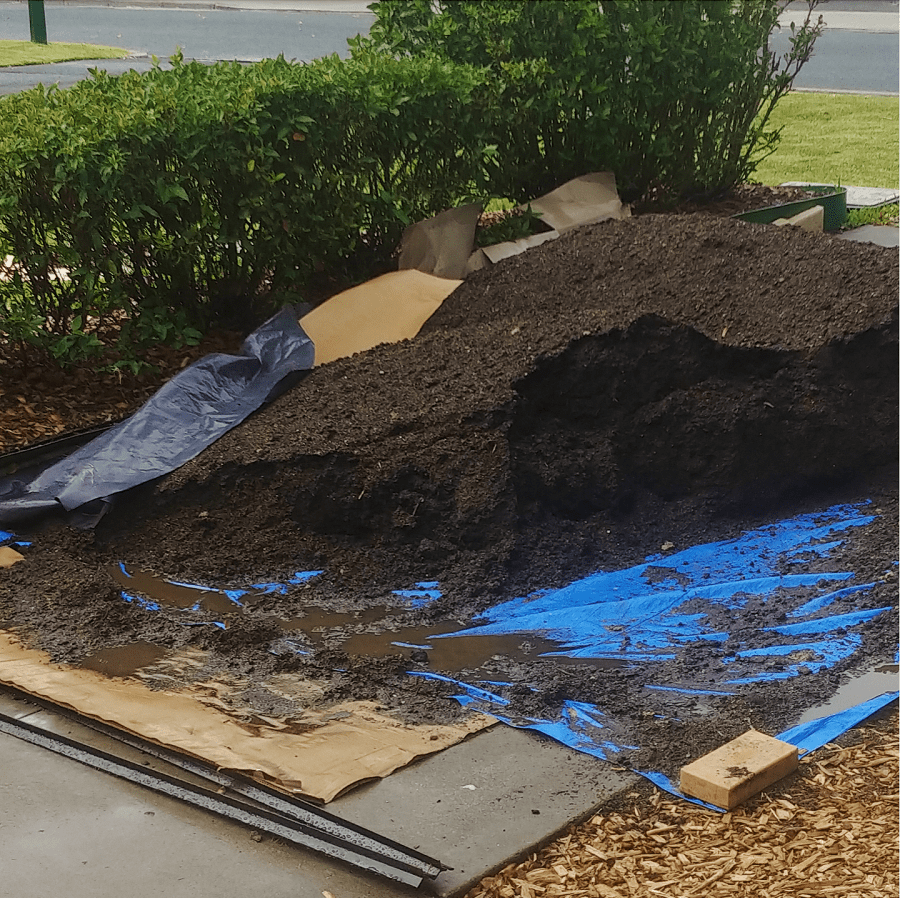
To get started quickly, I cheated – and ordered in a veggie concentrate mix. My soil, being basically hydrophobic sand, has nothing of worth for vegetable growing. To make the amount of compost I’d need for all these beds (prepping them all at once) would take years.
Not to mention all of the different soil amendments I’d need, too.
I ordered 2 cubic meters of veggie concentrate from the Green Life Soil Co for the beds. It’s a mix that can be mixed 50:50 with existing sandy soil to grow vegetables. It meant I could shovel, and plant the next day.
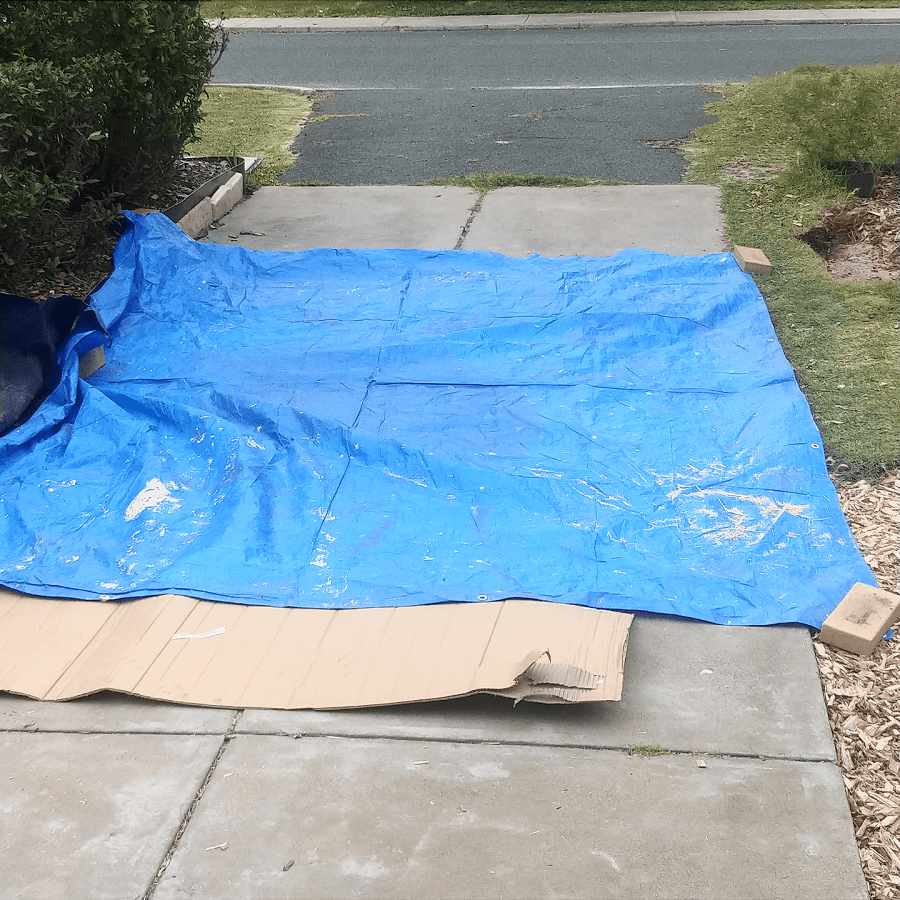
(As opposed to something like lasagne beds, which need a few weeks after creating before planting out – time that I don’t have, I need to use the cooler days whilst they still exist – and would also mean driving around getting all the components, and on a huge scale.)
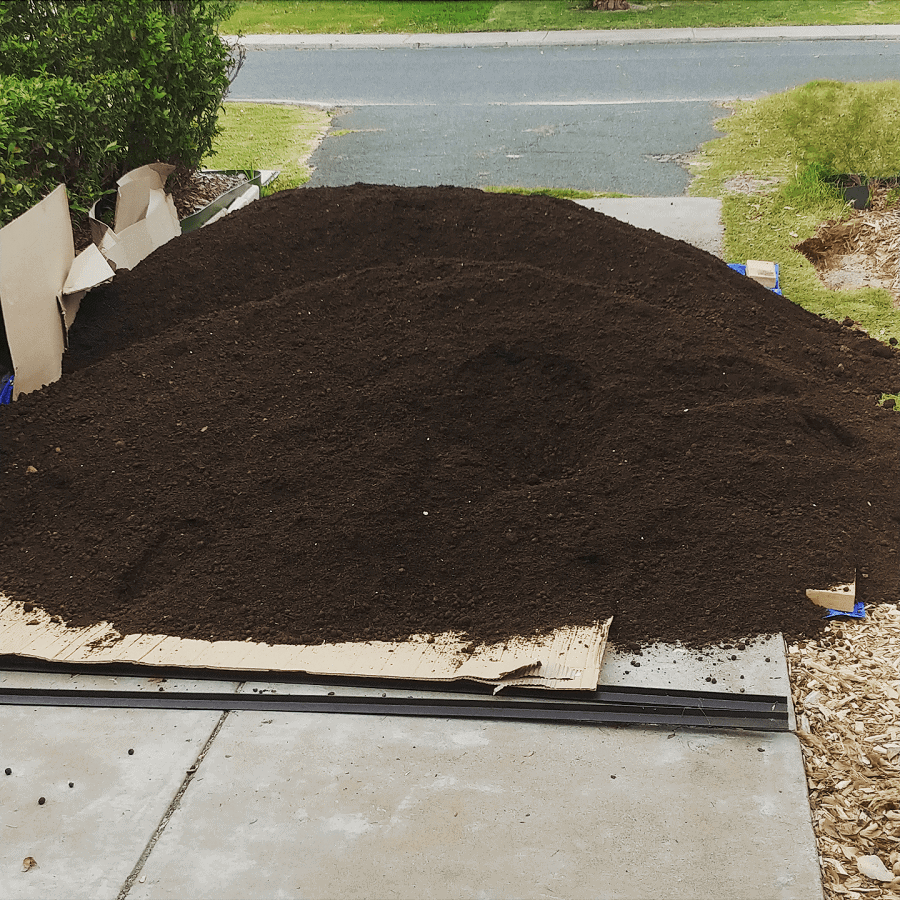
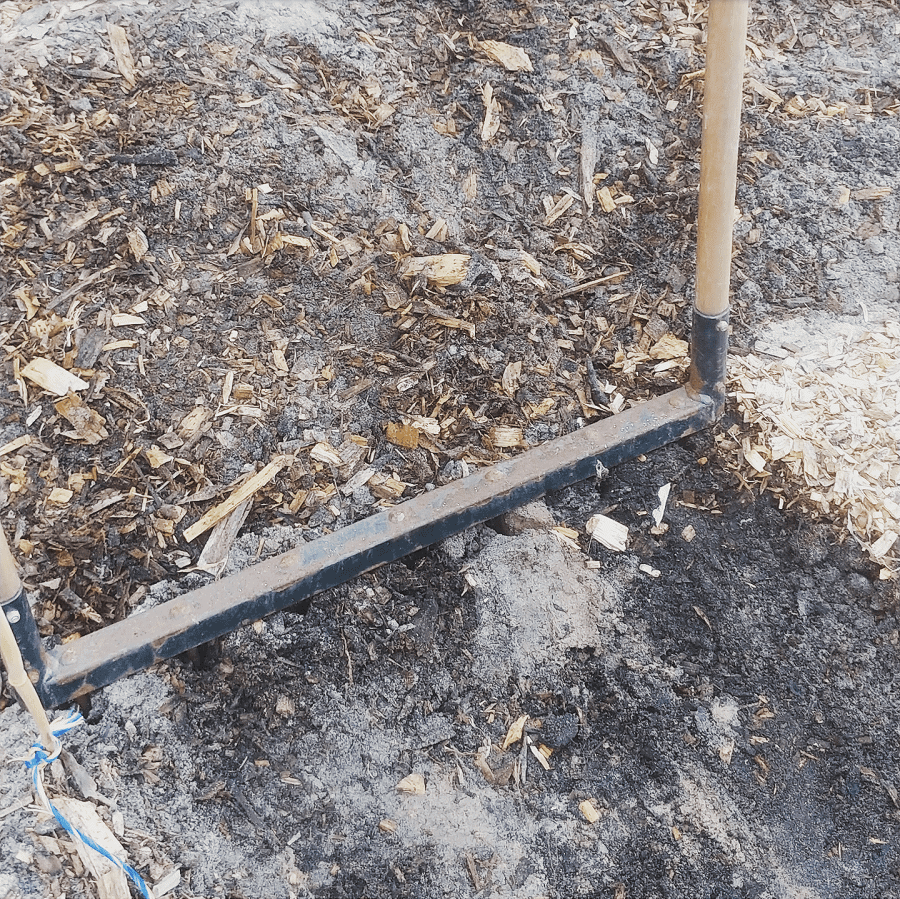
I prepped the soil using a broadfork to loosen the sandy soil, and then shoveled the concentrate on top, and raked and forked it in.
Once the beds are established I can add compost and other elements as I need them, but starting from scratch – and in summer – I wanted to give my plants the best chance of success.
I ordered enough soil mix for what should have been 4.5 – 5 beds, but I seem to have enough for 5.5, so I’m keeping going until it’s all dug in. I have space for 7 beds in total, all 4 m long. I’d like to tell you it is enough space (along with my two and a half raised beds at the back) but I really don’t think it is!
(I was going to order enough soil for 7 beds, but the guy at Green Life talked me out of it. I think he was worried I was biting off more than I could chew!)
Step 5: Planting out my vegetable garden
As I prepped the beds, I started planting. Not a moment to waste!
I’ve used a mix of seedlings grown from seed and bought seedlings (capsicums, marigolds for companion plating with the tomatoes, basil because my seeds were duds, and cherry tomatoes because I was struggling to even find seeds – I always said to myself I would never buy tomato seedlings as they are so easy to grow but I panicked! I’ve since found seeds.)
Because I wasn’t sure if the reticulation would be finished I didn’t plant seeds early, and I also have a lot of expired seeds, so I decided to have a clearout and see what germinated. It’s resulted in a bit of a motley crew but it means next year I will be much more organised.
{Coughs.
At the front I’ve planted:
Bed 1 – Roma tomatoes and basil.
Bed 2 – capsicums and eggplants/aubergine.
Bed 3 – cherry tomatoes and basil.
Bed 4 – cucumbers (Lebanese and Armenian) and I’ll be planting zucchini/squash.
Bed 5 – corn (Chinese mini corn, that’s started to germinate, and regular corn from an old seed pack, so we will see what happens there.) Once the corn is done, I’m going to plant climbing beans in between.
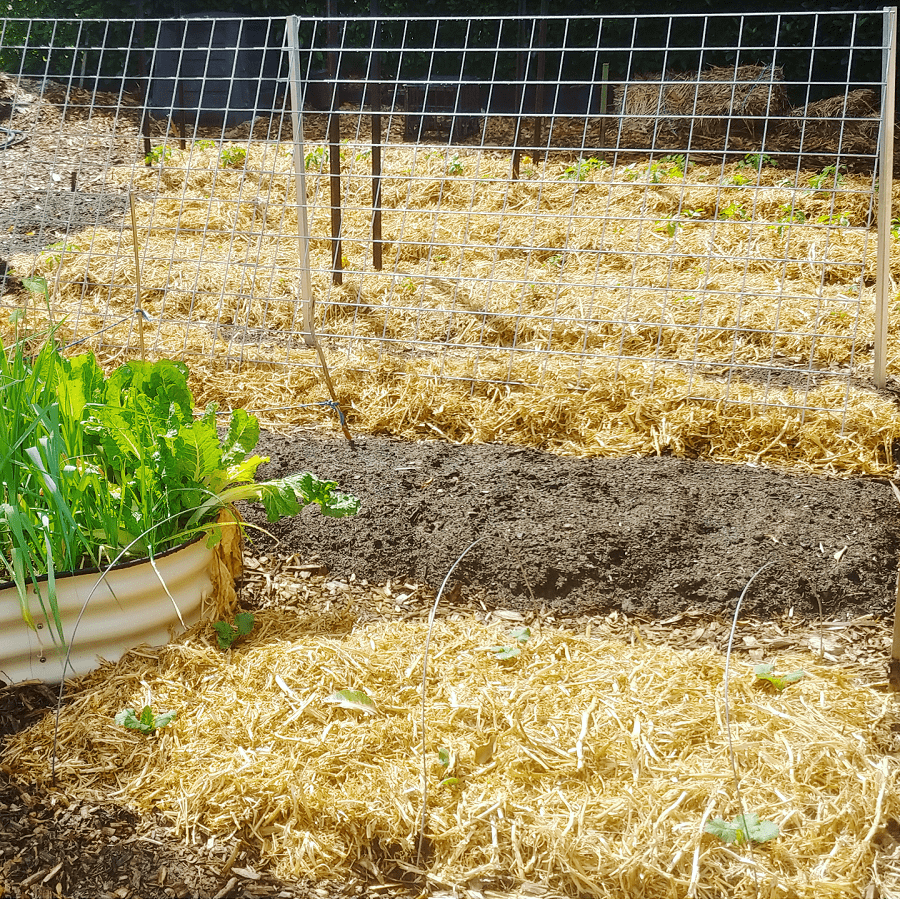
Bed 6 – this bed is currently sandwiching the raised bed I already had full of leeks, that I’m keeping for now. Until I can harvest the leeks, at least. I’ve planted pumpkins on one half, and I still need to add soil to the other part. I might plant spaghetti squash here.
Bed 7 – I don’t have soil for this yet, but I’m thinking about planting okra here. This bed is the most exposed, and okra can handle the heat pretty well.
I have excess tomato seedlings, and I also want to grow gherkins, so I’m planning on planting these in some of the empty wicking bed pots.
At the back I’ve planted:
Raised bed 1: blackjack zucchini and bush/dwarf beans (Cherokee yellow, and purple).
Raised bed 2: Virginia bunch peanuts (my kale in there is still looking good so it’s staying, and there are carrots still from winter).
Raised bed 3: the smaller bed is still filled with leeks, and ruby chard.
I also have some overwintered chillies – jalapenos, cayenne and birdseye – in large pots, so I’ve refreshed the soil and these will be good for another summer. I’ve already pickled my first jar of jalapenos.
Creating a productive food garden – what’s next?
At the front, the three raised beds made out of a chopped up rainwater tank need filling with soil and planting out. I’ve started a lasagne bed in one with things I had on hand (leaves, grass clippings, straw and compost) but I need to finish it off, fill the second one and put the third one into place (which involves relocating my two compost bins, one of which is still mid-brew).
The hedge area next the vegetable beds is going to be removed and planted with fruit trees – something else that probably won’t happen until winter.
And then there’s the digging out of the lawn on the verge.
At the back, I’m adding a second passion fruit near the first because the plan is to add an outdoor shower (why let the water go down the drain when you can add it directly to the soil?!) and the new passionfruit will screen one side.
(Haven’t figured out the screening of the other side, or the front yet!)
I was hoping to plant a couple more trees but all of the nurseries have sold out of what I want (a panache fig and a persimmon – they blame Covid). I’m also keen to get my fruit tree espalier area set up, but I might need to change the fencing (which is currently asbestos) so that might be a bigger, slower and more expensive job than I’d like.
So there is still a lot to do, but it is starting to come together. The more pressing challenge will be keeping all the plants I’ve planted alive (I’ve mulched with pea straw, and I’ll be setting up shadecloth), and then eating and preserving the harvest so it doesn’t go to waste. I’m not sure a gardener’s job is ever done.
Now Id love to hear from you! Are you growing food right now? What have you planted? Or if you’re in winter, what are you planning for Spring? Want to set up a new veggie patch and have questions for getting started? Anything else to add? Please share your thoughts in the space below!
[leadpages_leadbox leadbox_id=1429a0746639c5] [/leadpages_leadbox]


Love this post! I currently live in an apartment and have no space for a garden, but when I move next year I think I want to give gardening a try. I find so much joy from the plants around my house, so why not expand it to growing food? Thanks for these great tips! :)
Jenna ♥
Stay in touch? Life of an Earth Muffin
Thanks for this. Even though we live in totally different climates (I’m in Ontario, Canada) I really enjoy the story of your journey to growing your own food. We are doing something a bit smaller (less growing time). I decided to create a blog about it. It was my covid creative project to just share what we are doing – trying to live sustainably in the country. I like that you tell your story, bumps and all. We are certainly not experts. Just figuring out all this stuff as we go along.
Hi everyone! I live in Mexico, in Quintana Roo, I have a small vegetable garden with some great challenges because if the weather (some recent tropical storms and a hurricanes) but what has been the greatest struggle are the ants!! I swore not to use any pesticide but they eat everything and I would appreciate some advice…. I have been browsing and trying things without major results. Any advice? I have red ants and also big ones (Atta Cephalotes).
You can spray the pavements & directly onto the soil (not the plants) a mixture of vinegar (any), dishwashing soap and water. Continuous application makes them eventually disappear
Hello, I live in Spain and the best solution I’ve found for ants is orange peels. Ralla la piel de la naranja y espárcelo por donde estén las hormigas. Ya verás cómo desaparecen. ¡Y más ecológico no puede ser!
I commend you for making a vegie garden in Perth. I was always amazed that land that had been there for millions of years had no soil to speak of. So much sand! I only grew things in containers while there since we were renting. Your plants will appreciate the shade cloth.
Now I’m back in the US in the eastern mountains. New challenges. Seems the deer and woodchuck enjoy my plants and ate more than we did this year. We will have to find what they won’t eat. Who knew that tomatillos are a delicacy on the deer menu. Gardening is a never ending adventure.
Hi Lindsay,
I’ve been enjoying your posts about growing food, your garden is looking amazing. Your watering system is so well thought out.
I’m in Tasmania, moved here 3 years ago and have been on a similar journey to you – we have no lawn left in our front yard, it’s all vegie beds with mulch paths – and the back yard is a beginning food forest. Different challenges here (clay soil! temperate climate) but I still get ideas from your journey that apply to my context.
Looking forward to seeing your next steps!
I’ve just planted my first ever veg garden this year. It’s been a good experiment so far, I’m already learning so much!
Brilliant post and pictures. We have had a very successful garlic harvest here in the Western suburbs of Sydney. Only two cabbages survived to have hearts. Asparagus was okish, we have no idea why this year it was so stringy. Our winter bean crop of broad beans and an unidentified but tasty green bean was very productive. Husband wants to try tomatoes again but I think the fruit fly will win no matter what defences we use. We water via two 5,000 litre rain tanks and three olive barrels by hand. A watering system would be great but maybe too much work to install. I admire all your hard work and send lots of best wishes for wonderful produce.
that is looking amazing! you’ve done a tremendous amount of work, but what really stands out is the patience and planning that went into it as well. as my papa always says, “petit a petit, l’oiseaux fait on nid”—your nest should be very productive. :)
Thank you, Lindsay, for putting together everything in the raised garden bed for plants. I think you have covered all the major points in this article, I will share this with my network as well.
In some forest situations, tree seedlings readily spring up from seeds produced by nearby trees, reducing (or even eliminating) the need to plant trees.
I currently live in an apartment and have no space for a garden, but when I move next year I think I want to give gardening a try and i will buy bean bush and start with that. I find so much joy from the plants around my house, so why not expand it to growing food?