Tag Archive for: recipe

Zero Waste Kitchen: DIY Chickpea Falafels Recipe

I buy dry chickpeas in bulk, a couple of kilos at a time. I soak them, then cook them, and then proceed to make every chickpea recipe I can think of. (I do freeze the spare for later, so it’s not about needing to use them up. More a celebration of this delicious and super versatile legume.)

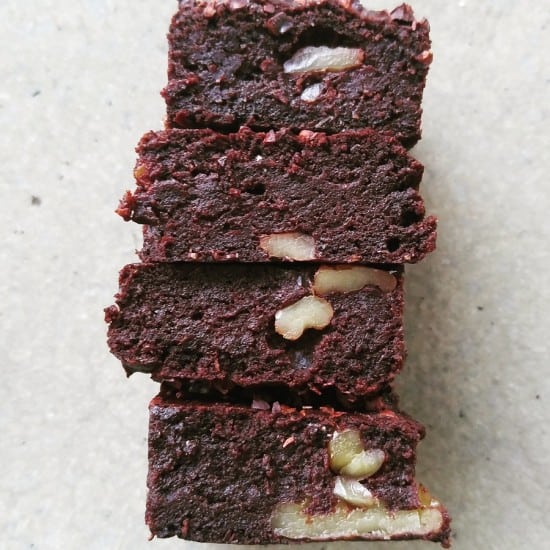
One of my staples is chickpea falafels.

Falafels are actually only a recent staple. Well, the DIY version are. Back in 2011, before I left the UK, I’d buy little plastic tubs of falafels all the time. Plastic tub with plastic lid, and cardboard packaging outer – with 8 falafels inside. I could polish those off in one sitting! Oh, the single-use packaging waste! {Cringe.}

Then I went plastic-free, and falafels were no more.

I’ve tried making falafels many times over the years, but every attempt was a dismal failure. Dismal and messy, I should add. (Which is why I purchased the little tubs.)

I figured they were just too hard, until I went to a party where we had to bring a dish, and my friend brought homemade falafels. And they were ah-mazing! I demanded the recipe, and vowed that I would make them too.

Confession: the first time I made them, they were a disaster. But I knew that my friend had mastered it, so I knew it was possible. I stole all her secrets (we spent rather too much time discussing the finer details of falafel making), I tweaked the recipe a billion times to adjust to my taste and what was in my pantry, and now I have a recipe that works every time. Hurrah!

So if you’ve tried to make falafels before, and you’ve found that they’ve been a disaster, I want to encourage you to try again. Not all recipes are equal, and a homemade falafel is worth striving for, in my view!

But first, let me quickly talk about chickpeas.

How to Cook Chickpeas from Scratch

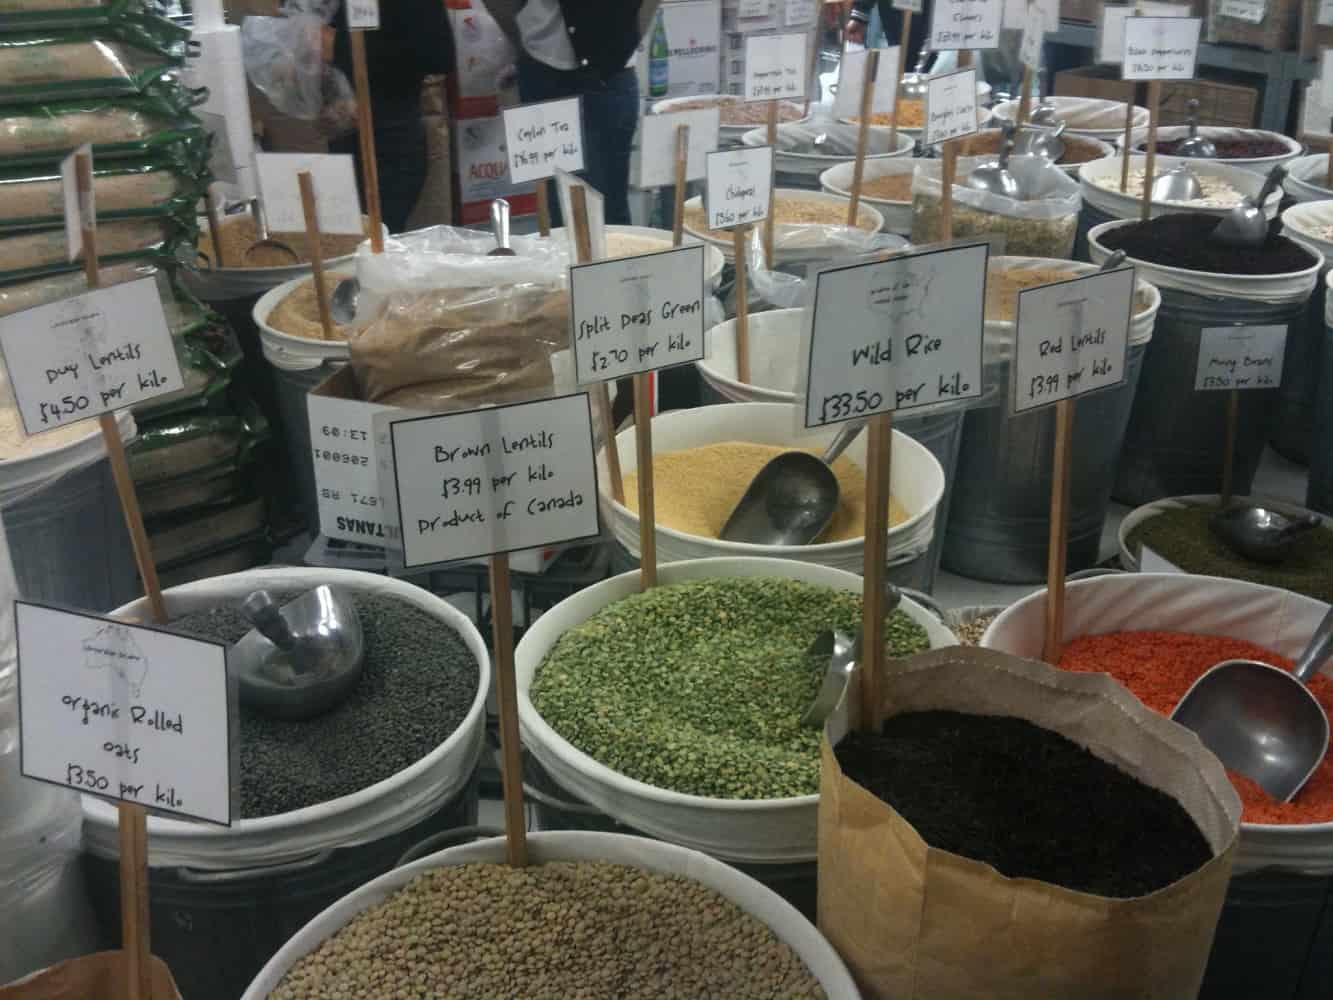
Tinned chickpeas tend to have added salt and sugar, not to mention come in a steel tin can that ends up in the recycling. Bulk dried chickpeas are a fraction of the price, and there’s no (or next-to-no) packaging or additives.

Plus fresh always tastes better.

I buy chickpeas a couple of kilos at a time, and cook a big batch. First, I soak.

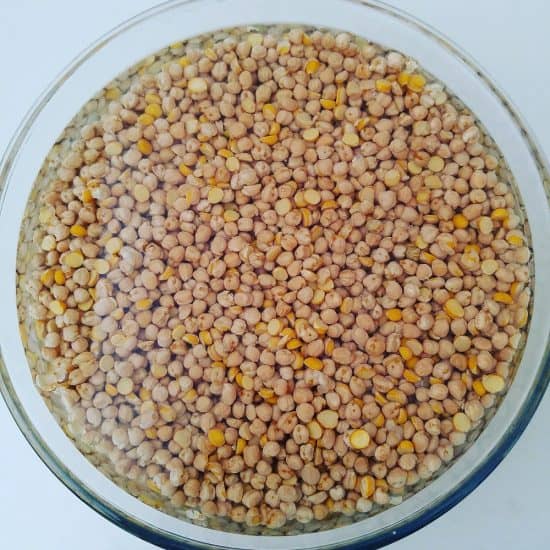
I take my soaking very seriously. Soaking makes chickpeas and other pulses more digestable because they release anti-nutrients. It’s not just about reducing the cooking time.

I soak my chickpeas for 2 – 3 days, changing the water every 8 – 12 hours.

After the first couple of days, bubbles start to appear. Then I know that biology is happening and they are becoming more digestible. (They are actually gearing themselves up to sprout, which is what will happen if they get soaked for about 5 days.)

I usually change the water a couple of times after the bubbles start appearing, over the space of a day or so.

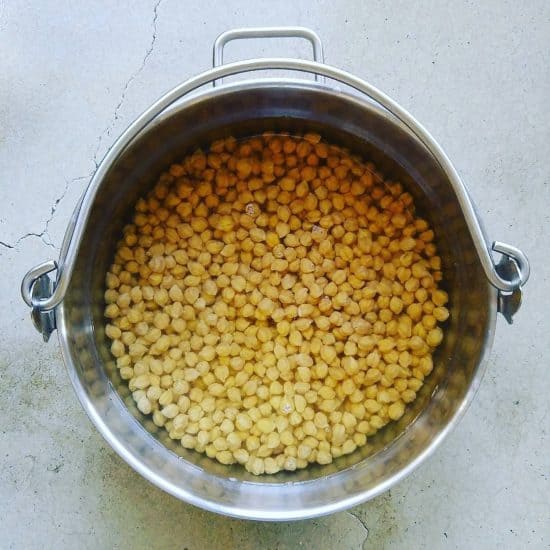
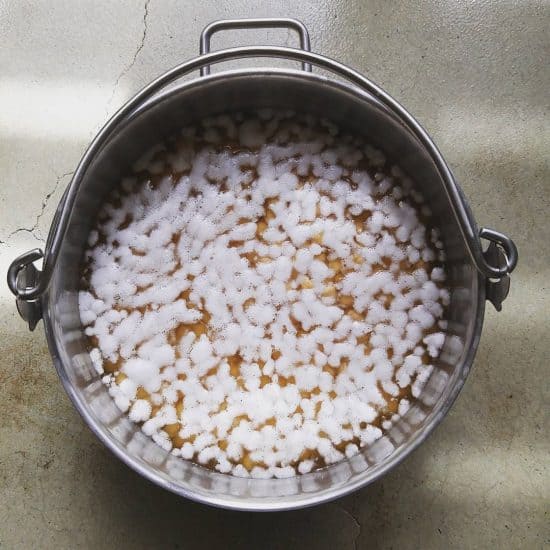
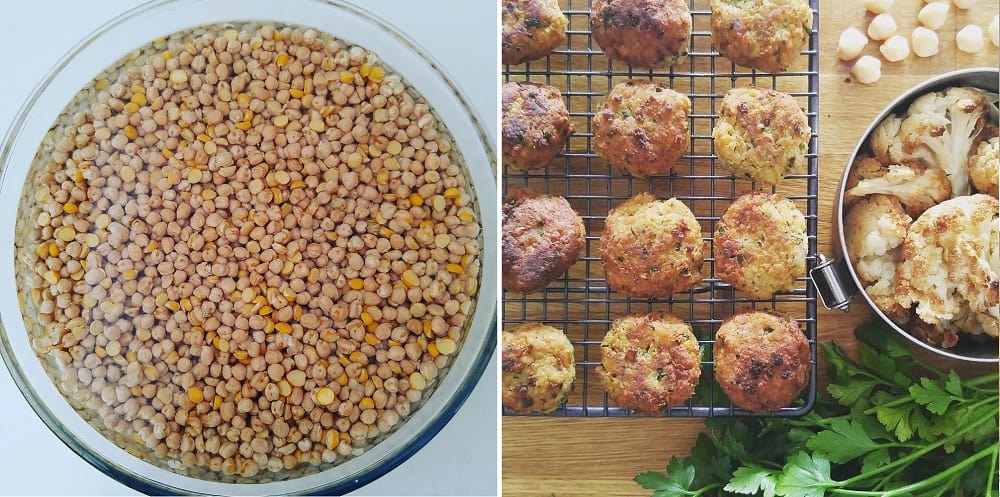
After the final rinse/water change, I cook on the stove for 1.5 hours.

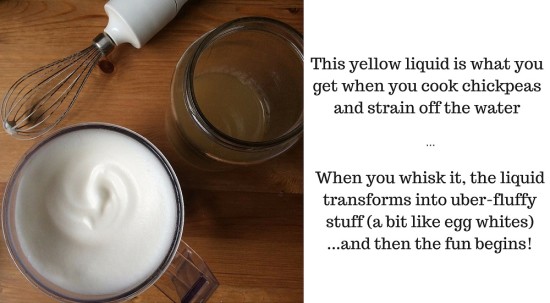
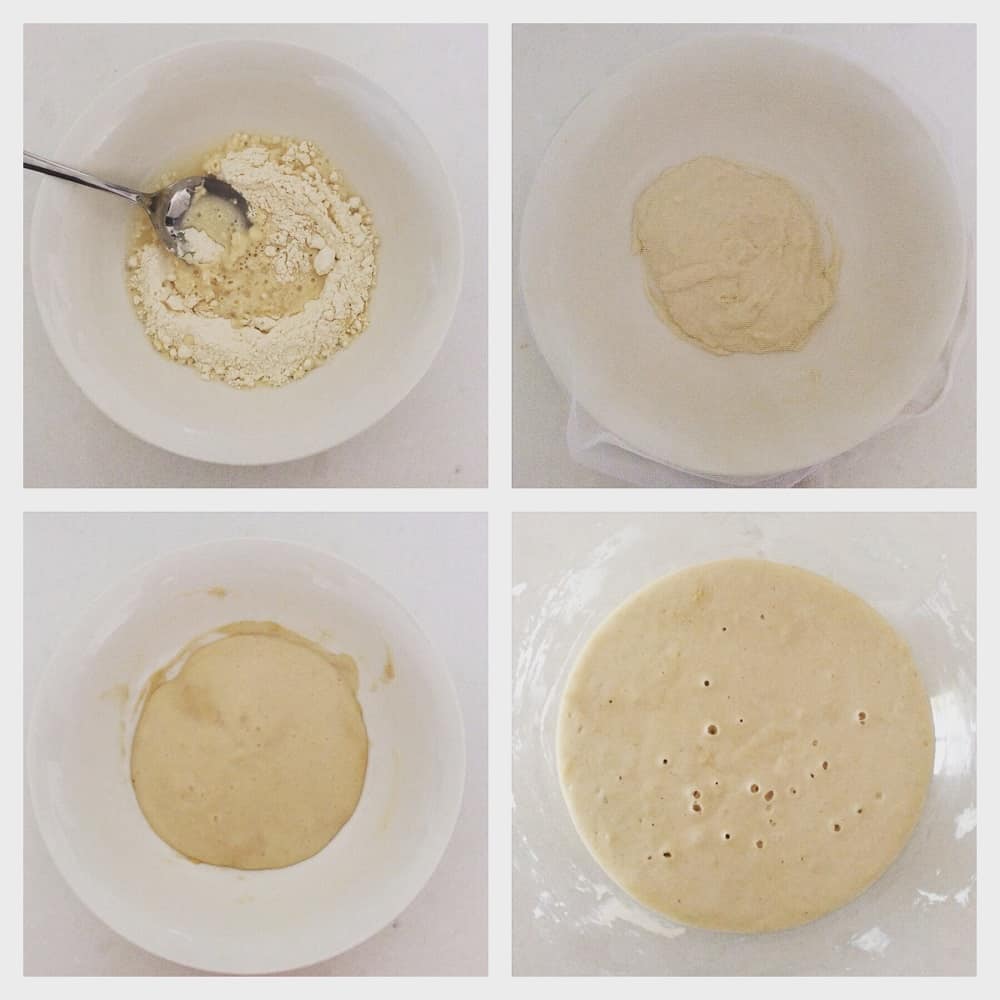
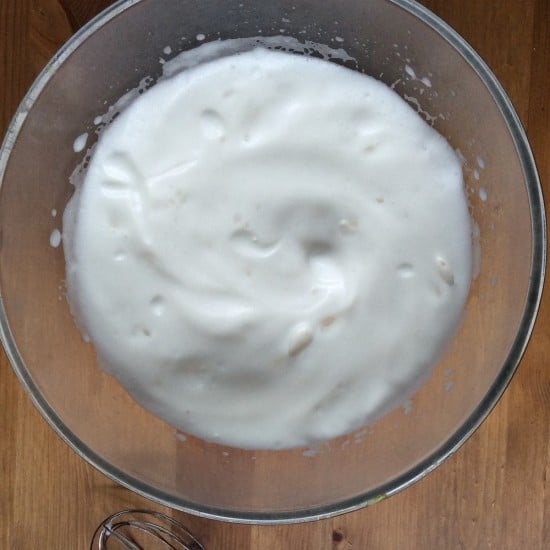
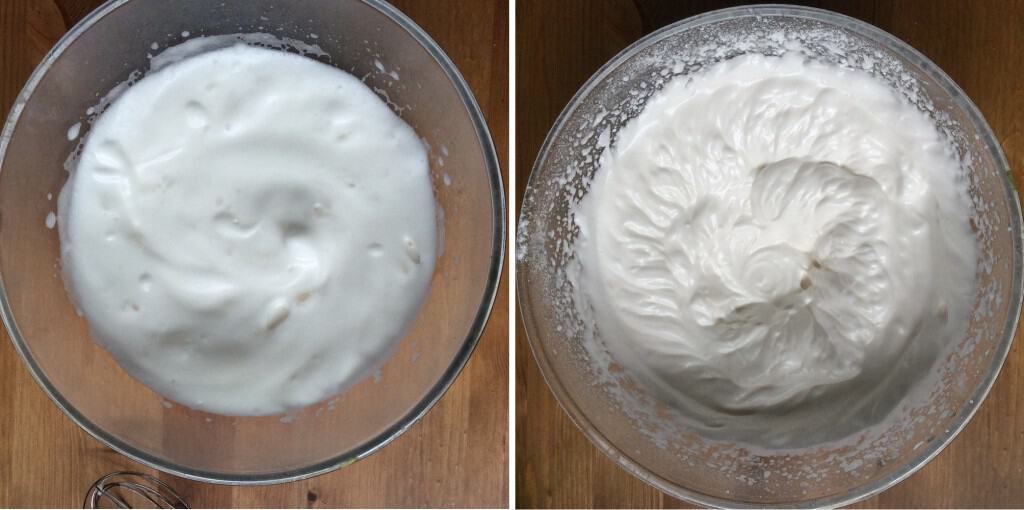
Then they are drained (don’t forget to save the water! This rather murky looking liquid is actually the stuff of magic – aquababa!) and left to cool. After that, I pack the chickpeas into jars and containers. They will keep in the fridge for at least a week, and can be frozen.

Or, I make falafels! Here’s how.

Recipe: DIY Chickpea Falafels

You’ll need a food processor or stick blender with a chopper for this.

Ingredients:

4 cups chickpeas
1/2 cup coarsely ground oats
4 tbsp potato flour or tapioca flour
2 onions, chopped
3-4 garlic cloves, chopped
4 tsp ground cumin
4 tsp ground coriander
1/2 tsp cayenne pepper
1 tsp salt
2 big handfuls fresh coriander, finely chopped
2 big handfuls fresh parsley, finely chopped

Oil, for frying.

Method:

If you don’t already have coarsely ground oats, take regular oats (you’ll need slightly more than 1/2 cup oats, as you get more ground oats in a cup than you do whole oats!) and whizz them in a food processor until they resemble coarse breadcrumbs. Set aside.

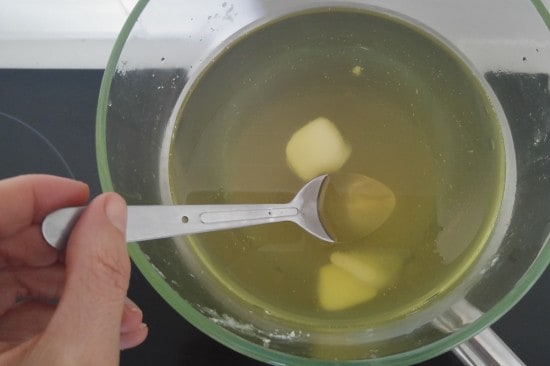
Next, whizz the coriander, garlic and parsley together to make a green paste and set aside.

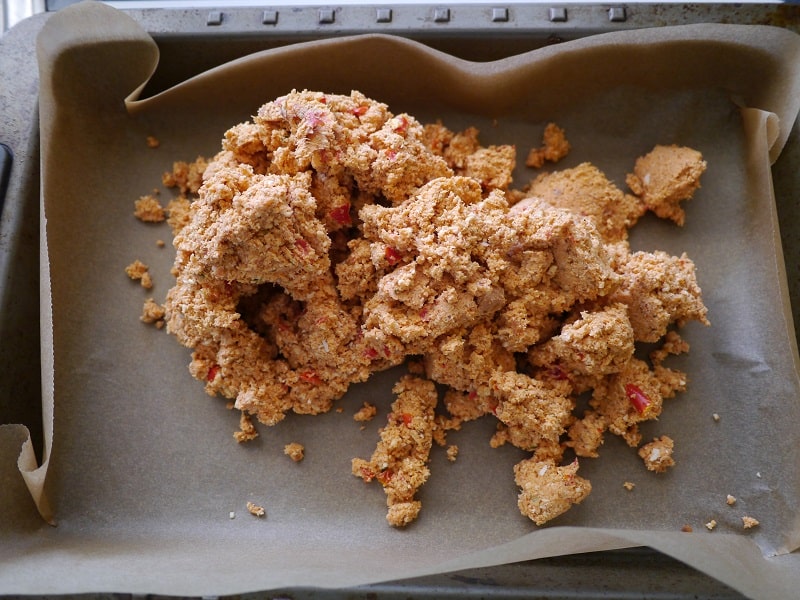
Add the chickpeas to the food processor and grind until coarse. Add the onion and blend again until combined. It’s fine to be a little chunky. You’ll continue to blend as you add other ingredients so it doesn’t need to be super smooth.

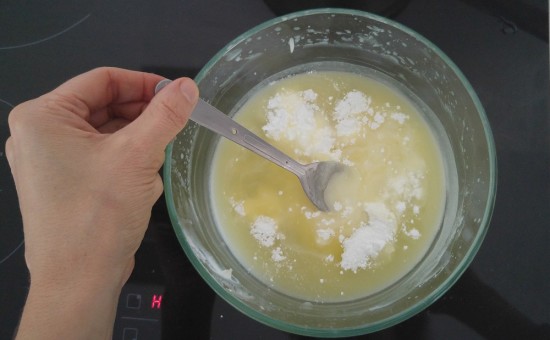
Add the flour, oats and spices, and mix again until combined.

Finally, add the green herb/garlic paste and stir to combine. I do this last as it’s easy to see when it has all combined evenly.

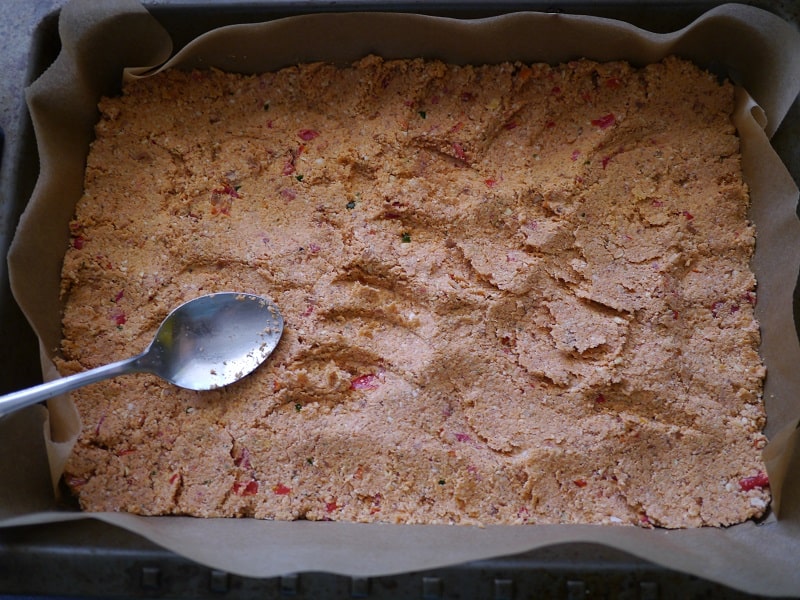
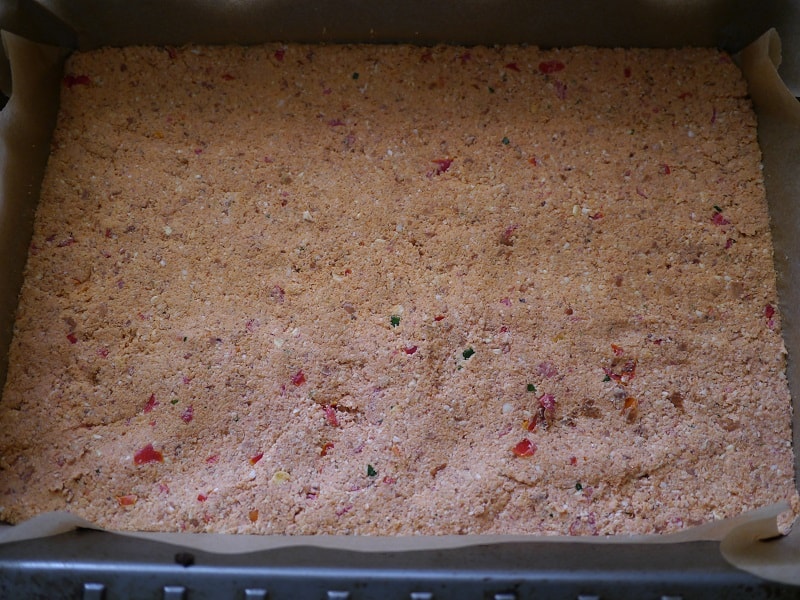
If the mixture feels hot and sticky, pop in the fridge for at least 30 minutes to chill.

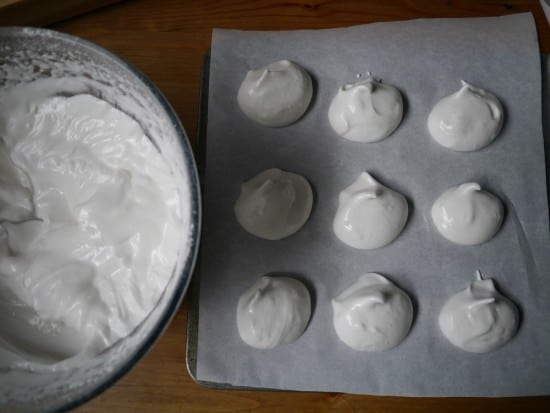
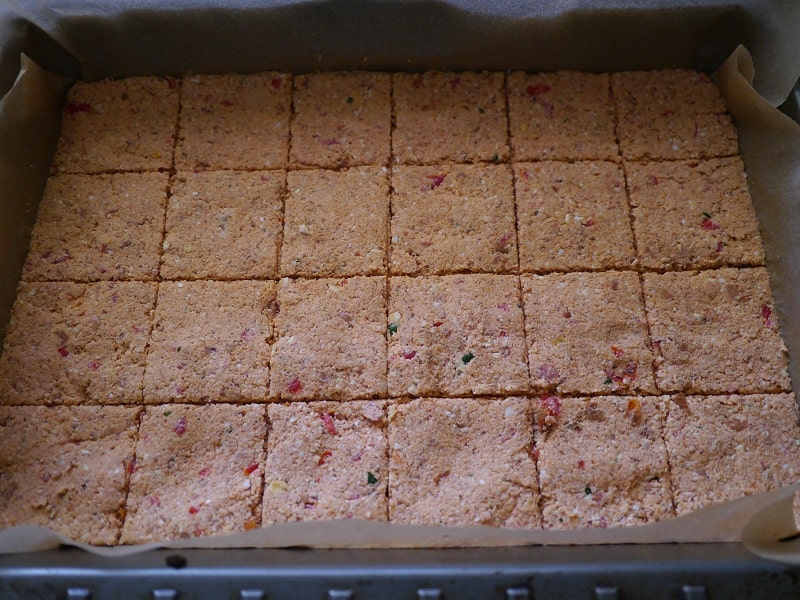
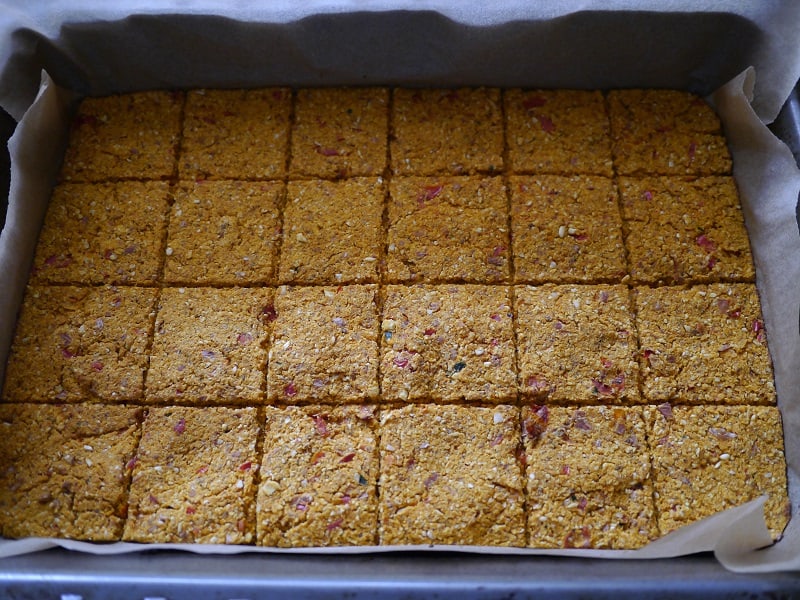
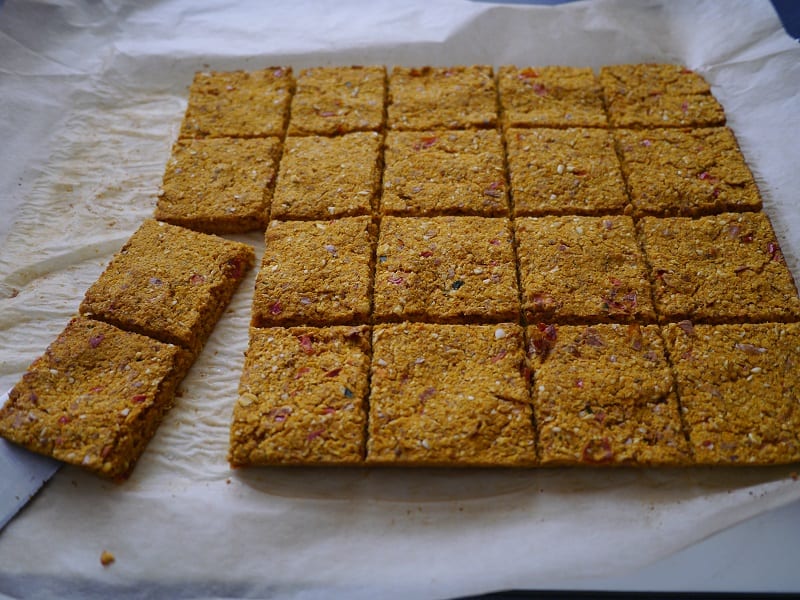
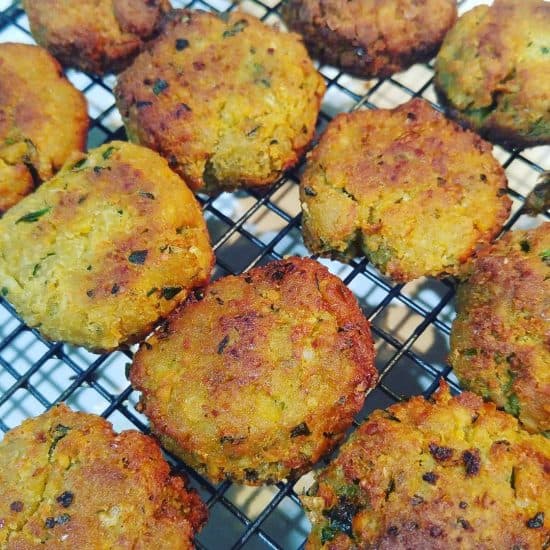
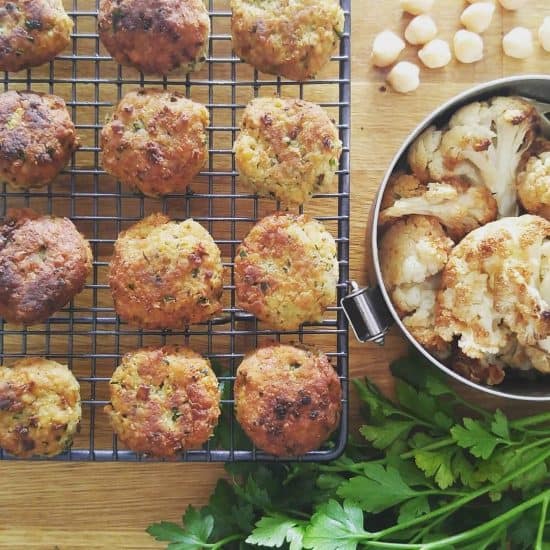
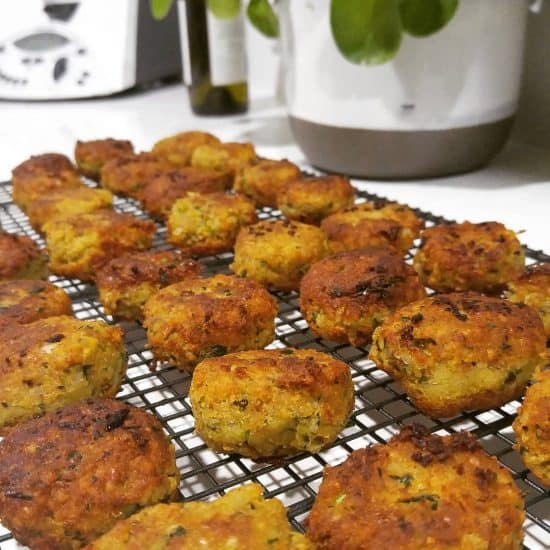
Next, heat up the oil (enough to fill the base about 1/2 inch deep) in a shallow pan.  Take the chickpea mix, and roll into balls, then press down to flatten slightly. Mine tend to be an inch or so across, and a cm or two thick.

The oil needs to be hot or the falafels will disintegrate when they are added to the oil (learned from experience). My hot plate has a range from 1 – 9, and I use setting 7. Put one in the oil to test, it should bubble immediately. If not, wait until it does before adding any more to the oil.

Add the falafels a few at a time, and after a minute or two turn over to cook the other side.I use a fork to flip rather than tongs.

I tend to roll a few, then add them to the oil, roll another few, then turn the first ones over to cook the other side, add the newly rolled ones to the oil, roll a few more then remove the first ones from the oil, turn the second, add the third to keep things moving. If it’s your first time, you might find it easier to have them all rolled in advance – this will take longer.

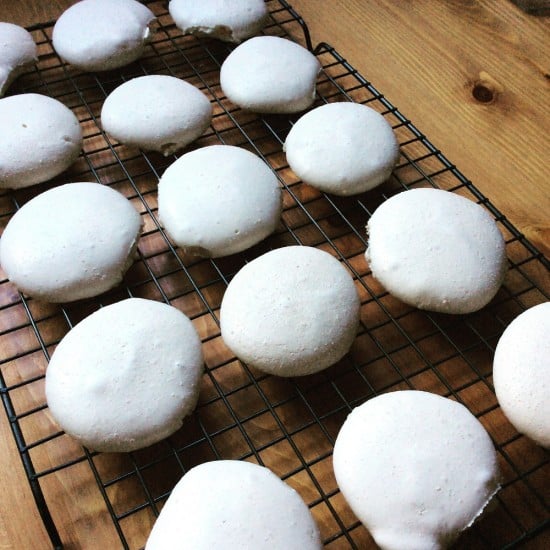
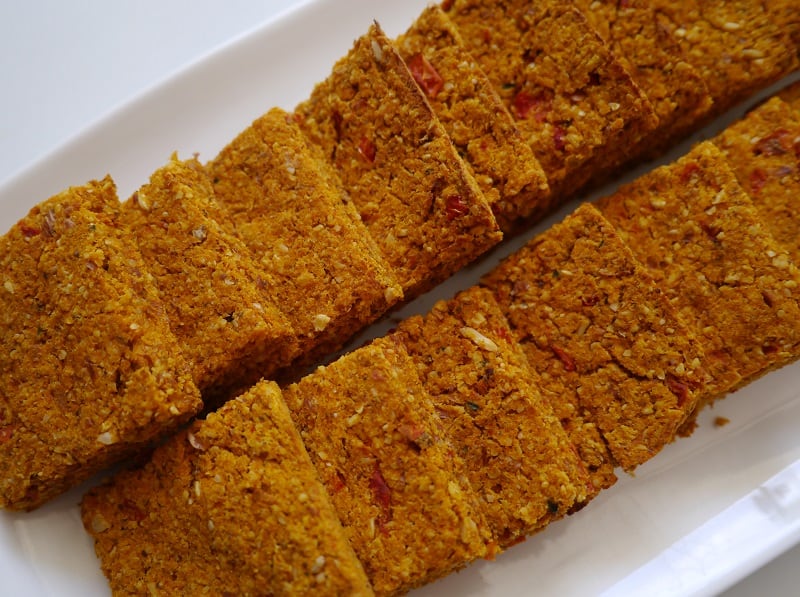
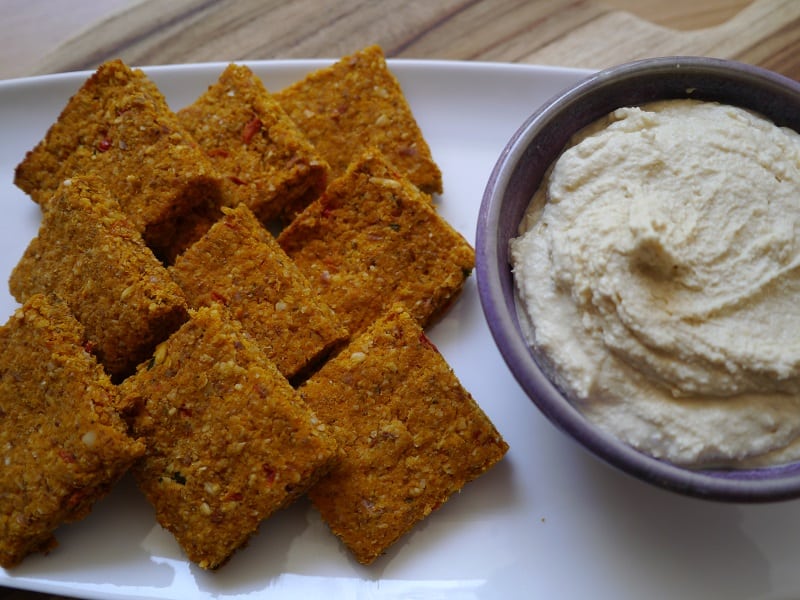
Once they are done, place on a cooling rack to drain the excess oil.

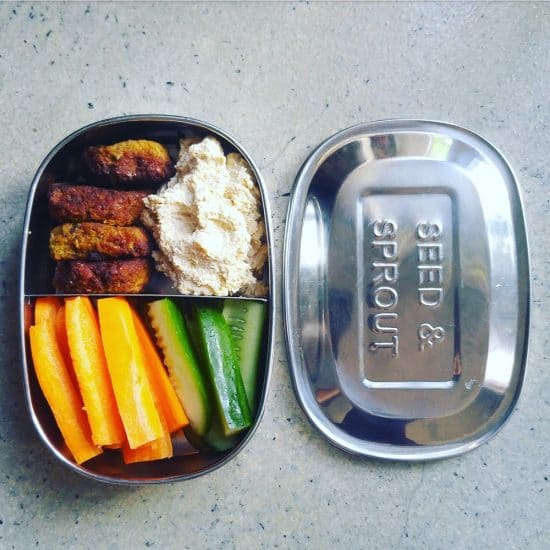
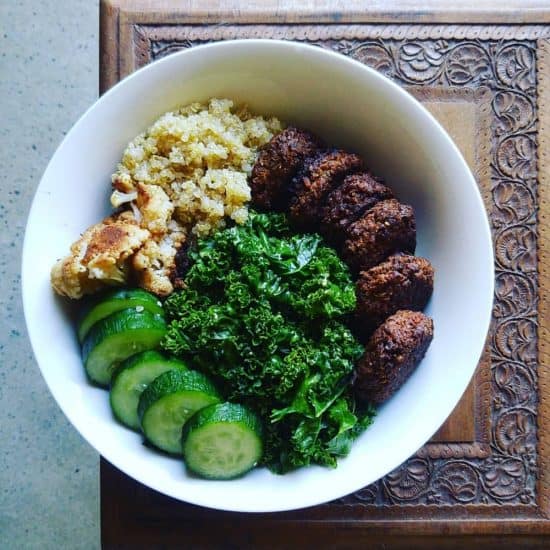
Store in the fridge, or can be frozen.

Troubleshooting:

If they start to disintegrate, stop. Drain the oil into a bowl using a tea strainer to remove all the bits, then put back in the pan and try again. It might have been that the oil wasn’t hot enough first time.

If disintegrating is still a problem, consider baking in the oven. You’ll need to brush with olive oil. They won’t taste exactly the same but they will still taste good.

If they don’t taste completely cooked all the way through, finish them off in the oven for a few minutes on a medium setting.

Note about the Ingredients:

I’m a big believer that recipes are there to be broken. Meaning, try things out but then make them your own! Add extra spices, substitute ingredients you don’t have for those you do and try things out.

This recipe was originally given to me by a friend (a photograph out of a cookery cook she had) but I’ve changed pretty much every ingredient. The original recipe used breadcrumbs and I changed to oats as I always have oats and don’t always have breadcrumbs. The few times I’ve tried breadcrumbs, they tended to disintegrate. Now I stick to oats.

I used potato flour by mistake thinking it was regular flour (I really should label my jars) and it worked so well I stuck to it. Both potato flour and tapioca flour are great at binding, which is why I use them and it keeps them gluten-free.

Fresh herbs are great and I use parsley and coriander as I have both, but I’ve also made with just parsley. If you like other herbs, try those. I’ve heard that dill is also great.

After chatting on Instagram with an Egyptian lady who makes falafels every day, I tried using raw chickpeas (bear in mind I soak them for three days, so they are pre-sprouted). The mixture is much wetter, but actually they seem to cook even better and the resulting falafels are firmer. The taste is a little different but equally good. I make these if I’m a bit behind schedule and don’t have time to cook the chickpeas first.

Next spring I intend to try with fresh broad beans!

Now I’d love to hear from you! Have you made falafels? Are you game to try these? Any tips or “how-not-to-do-it”s that you’d like to share? Any other chickpea recipes that you love? Leave a comment below!

[leadpages_leadbox leadbox_id=1429a0746639c5] [/leadpages_leadbox]

A Beginner’s Guide to Sauerkraut (+ Fermented Vegetables)

Today, I’m talking cabbage. (Stay with me…it gets better, I promise!) Now cabbage and I, we have a bit of a love-hate relationship. I like cabbage, but it arrives in the veg box every week, reminding me that there’s still last week’s cabbage in the fridge refusing to go bad.

(Of course, I can’t put a perfectly good cabbage in the compost. If it happened to accidentally go bad…well, maybe I could justify it, but cabbage is stubborn!)

In fact, cabbage simply refuses to go bad, which actually makes it a rather good zero waste vegetable. (It shrivels a little and the outer leaves go brown, but peel those leaves back and there’s still perfectly good cabbage underneath.) Plus it grows at a time of year when many other more delicious vegetables do not.

If you want to eat seasonal and you live anywhere except the tropics, cabbage is going to feature on your menu. But cabbage week in, week out; it can wear a bit thin.

That, my friends, is why we need to embrace sauerkraut.

Sauerkraut is fermented cabbage. That might not sound delicious, but it’s a tangy, crunchy, super healthy vegetable that’s tastier than the name suggests. Sauerkraut contains millions of good bacteria, so is like taking probiotics, but without the packaging. Sauerkraut also lasts for ages in the fridge.

I’ve kept sauerkraut in the fridge for a year. Fresh cabbage might seem to last forever, but it won’t last a year.

The good news is, whilst fermenting sounds hard, it is actually very easy. Plus you don’t actually need any specialised equipment. Sure, there’s all kinds of fancy gadgets out there, but you can get going with a glass jar and a tea towel. Oh, and some cabbage ;)

That said, you don’t actually have to make sauerkraut with only cabbage. You can mix cabbage with other vegetables like onion, carrot and beetroot.

But let’s not get distracted thinking about all the wonderful potential! Let’s start at the beginning.

Some Fermentation Basics

Fermentation is a process that uses good bacteria and yeast to transform a product. By fermenting, we crowd out the bad bacteria with good bacteria, which changes the flavour and texture, but also helps lengthen the shelf life of the product. For example, yoghurt is fermented milk: whereas fresh milk will last in the fridge for up to a week, yoghurt might last a month.

Fermenting is anaerobic, meaning without oxygen. (Although confusingly, some foods are actually fermented with oxygen, such as vinegar.) In my experience of making sauerkraut, this “without oxygen” rule doesn’t need to be absolute. By removing oxygen we create conditions for the good bacteria to multiply, and these prevent the bad bacteria getting a hold and spoiling the food.

Fermentation has been used for centuries as a way of preserving food, prior to refrigeration. People were fermenting long before air-lock attachments and special fermentation jars were invented. This specialist equipment can help, but isn’t necessary.

I make sauerkraut a few times a year, and I simply don’t see the need to buy specialised equipment when it works without.

Because we are dealing with bacteria, we need to be careful not to be too over-zealous with the cleaning. I’d avoid using an anti-bacterial hand wash or chopping boards, for example. Clean is good, sterile not so much.

How to Make Sauerkraut (No Fancy Equipment Required)

I’m a big believer that you don’t need fancy equipment. I don’t use any, and I’ve been making sauerkraut and other fermented vegetables for over 4 years. If you’re a professional, that’s different, and with certain ferments, it can be crucial. But for sauerkraut, I personally don’t believe that it is.

Ingredients:

Cabbage;
1/100th weight of cabbage in salt.

So if the cabbage weighs 1 kg, use 10g salt. Basically, divide the weight by 100. (It is possible to eyeball it, but when starting out it helps to measure.)

Equipment:

A large bowl;
A glass jar that you can fit your fist into (or if you have large hands or small jars, you’ll also need a wooden rolling pin);
A weight that fits inside the glass jar (I use a smaller glass jar filled with water);
A tea towel.

Method:

I’ve included a lot of photos before to give you a really clear idea of what each stage is meant to look like.

Remove the core of the cabbage (the stalky white bit), and chop the cabbage into strips. Weigh the cabbage, put into a large bowl and sprinkle the salt on top (the amount is calculated based on the weight of the cabbage – 1 kg cabbage equals 10g salt).

Massage the salt into the cabbage with your hands, and the salt will begin to draw the water out of the cabbage. This is what you want to happen. Massage for 10 – 15 minutes until the cabbage looks like it has shrunk.

At this stage I always add a tablespoon of cumin seeds. I love the flavour it gives. You can keep yours plain, add cumin or go crazy with the spices. At the beginning, I’d suggest keeping it plain until you learn what flavours you’re meant to be looking out for.

Notice how the cabbage appears to have shrunk. (If you taste it at this point, it will taste like salty cabbage, not sauerkraut.)

Next you need to start packing the cabbage into the jar. Choose a jar that’s going to have room for the juices to expand because they will. Ideally find one that you can fit your hands into, but if not, a rolling pin will work.

Put a few tablespoons of cabbage into the jar, and press down as hard as you can. You want to squeeze out any remaining liquid. Keep adding the cabbage and pressing, and you’ll start to see the liquid rising above the cabbage.

This is important as the liquid helps keep the oxygen away from the cabbage, and creates the right conditions for fermentation.

Once you’ve put all the cabbage in the jar, add any liquid remaining in the bowl into the jar. Do not add any other liquid.

The cabbage will probably sitting slightly under the water level. To compact it down and thereby raise the liquid level, use a weight. I use a smaller jar that fits inside my large jar, or a bottle (I fill it with water to make it heavier).

If there’s any floating or escaped bits of cabbage, poke them under the liquid. Next, I cover with a tea towel.

The bottle on top is pressing the cabbage below the water line and excluding oxygen, and the bottle restricts the amount of jar entering through the lid. For me, this is enough.

If you’d like to put a lid on the jar (and it fits), this will exclude oxygen better. However, it has its own drawbacks. In the fermentation process, carbon dioxide gas will be released. Unless you remember to open the lid at intervals to allow the gas to escape (called “burping” the jar), your jar could explode. Won’t happen with a tea towel!

(That’s why you can buy fermentation valves that allow carbon dioxide to escape without letting in oxygen. For some things, like cider making, it is very important. For sauerkraut and lactic acid fermentation, it is less critical.)

Every day, check your cabbage. You’ll start to notice bubbles forming. I tend to press the weight down to squeeze out the bubbles, and also check for any floating bits. If there’s cabbage floating on the surface, it is in contact with air (oxygen), so needs to be submerged or removed.

After 1 day (see the bubbles starting to form both on top, and within the cabbage layers):

And after 3 days:

How quickly and how much it bubbles will depend a lot on room temperature. If your jar is narrow or filled to the top it can be helpful to place in a bowl as it might bubble over!

This is a different batch, but shows how much it can bubble (and I’ve seen more than this!):

I tend to keep my sauerkraut on the kitchen counter, covered with a tea towel (to also exclude light) until the bubbling subsides, which takes 1 – 2 weeks.

Some people like to leave their sauerkraut on the counter for several weeks or even months to increase the good bacteria (it will also taste more sour). In my view, it doesn’t really matter, and once in the fridge fermentation won’t stop, it will just continue very very slowly.

When the bubbling subsides, the sauerkraut should be crunchy and taste sour (but delicious). You may see a white film, this is kahm yeast and is harmless. I’ve never had an issue with mold, but if you see anything multi-coloured or blue, that batch might be better in the compost.

When you’re ready to place in the fridge, you can remove the cabbage/sauerkraut from big jar and put into something more practical. The less surface area the better, so choose a smaller jar. At this stage it is fine to place a lid on the jar.

Other Fermentation Ideas

You can ferment most veggies and even fruits, but they have varying levels of difficulty. If you’re a beginner, stick to hard veggies like beetroot and carrot, or use softer vegetables like onion as part of the vegetable mix, but not all of it.

That said, I’ve had success fermenting chillies, and I’m sure capsicums would work well also.

My personal favourites are carrot, onion and white cabbage with cumin seeds – taken from a South American ferment called curtido.

I also like beetroot and purple cabbage together because the colour is fantastic.

I made an amazing turmeric ginger sauerkraut once that tasted like piccalilli, but I’ve never been able to recreate the flavour combination since.

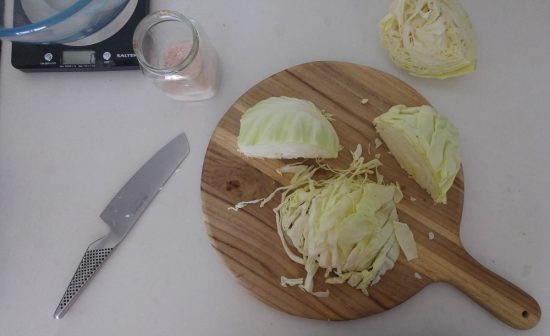
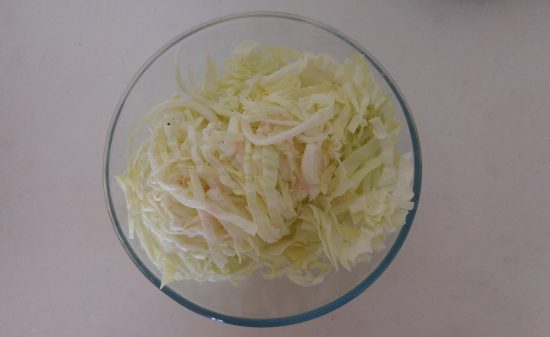
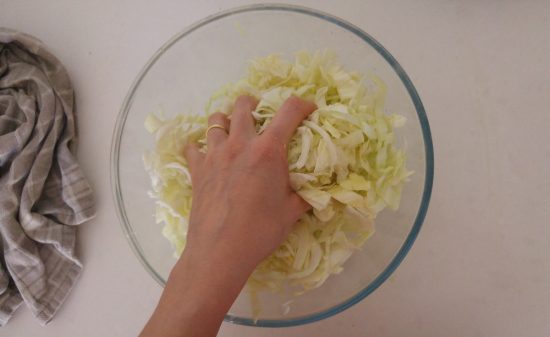
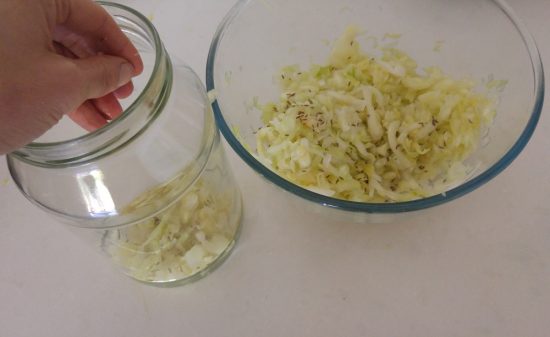
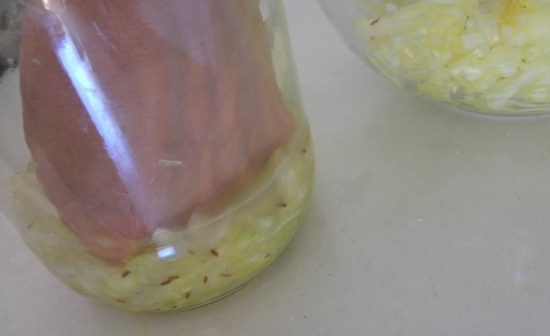
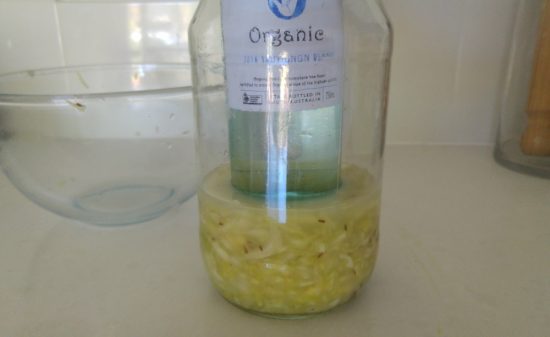
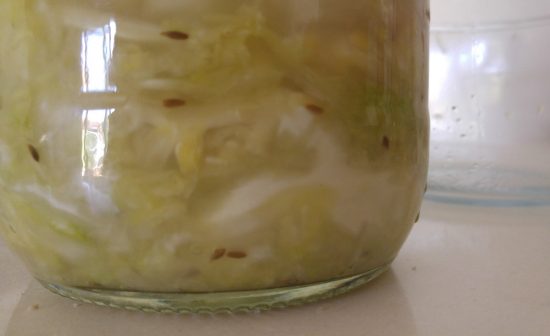
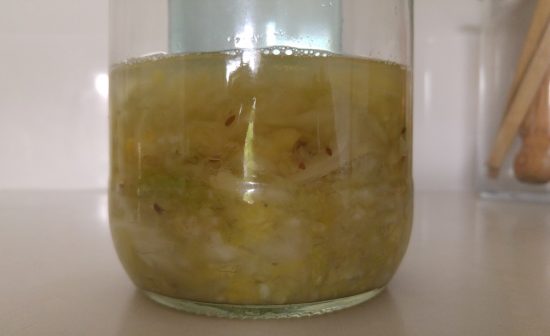
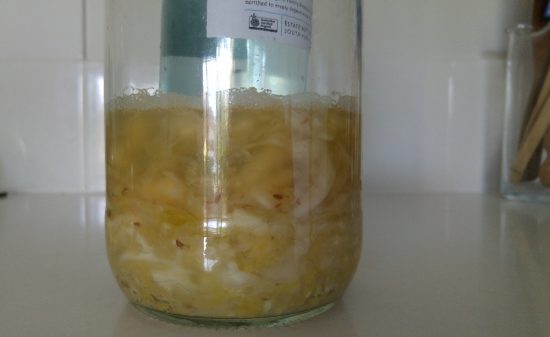
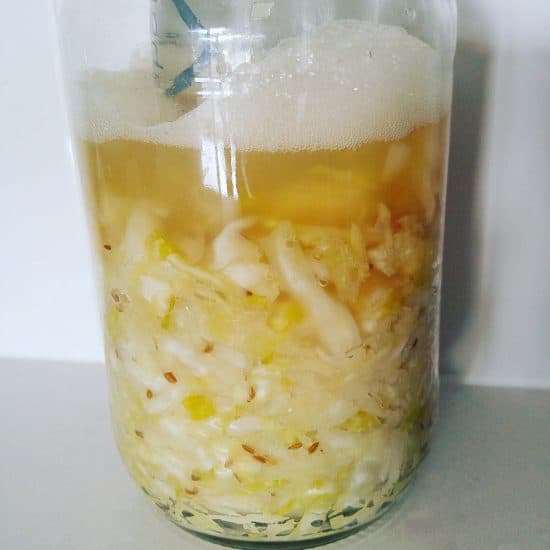
Fermentation is a great way to preserve vegetables, and it a healthier option than pickling: the food is literally “alive” with good bacteria (there’s not heat process to kill them) and there’s no added sugar.

Plus it means I get to keep my cabbage in the fridge for literally months, without feeling the slightest bit guilty about it!

Now I’d like to hear from you! Do you ferment vegetables? What are your favourite flavour combinations? Have you had any disasters? Are there any other tips you’d like to add? Are you tempted to give this a go, or does the idea still scare you a little? Please tell all in the comments below!

[leadpages_leadbox leadbox_id=123a865e9839c5] [/leadpages_leadbox]

3 Zero Waste Recipes: DIY Cashew Milk, Homemade Almond Milk + Almond Pulp Brownies

Nut milk. The name sounds kind of ridiculous. But it looks like milk, has a similar shelf life, can be used in similar ways, and in many cases the nuts do actually have to be “milked”, so it’s easy to see why the name took hold!

milking-almonds-to-make-nut-milk-treading-my-own-path

When I started out on my plastic-free journey, I bought cow’s milk that came in returnable glass bottles. But it wasn’t stocked in many places, so finding it was hard – and a bit of effort. Gathering those glass bottles together to return them meant a heap of clutter and a journey across town with them all (there was no deposit return either, only goodwill). Plus what to do with all those lids?!

I began making nut milk alongside dairy milk, because it was a lot easier to find nuts in bulk, and they have a long shelf life (they will last for months in a jar in the pantry, or even better, the freezer). I found nut milk worked just as well in baking, in porridge and in coffee, and I began to use it more and more.

Eventually I thought more about the impact of the dairy industry on the planet. Cows need a lot of water and land to produce milk, they produce huge amounts of methane, cause soil erosion, and the product has to be transported fresh, meaning a higher carbon footprint. Nuts use less water, the trees are beneficial for the environment, and the products have a long shelf life.

Nut milk seemed like the greener option. I decided to stop buying dairy milk altogether (my husband stopped too, but later).

almond-milk-and-cashew-milk-treading-my-own-path

But of course, I don’t buy nut milk. Some commercial brands of nut milk are little more than bottled water! Alpro’s nut milk contains only 2% almonds, and the second biggest ingredient is sugar. Unnecessary packaging aside, shipping all that water across the globe seems like such a waste when we can ship dry nuts (or even better, use local ones) and make our own.

And I have to tell you, making your own is super easy. It requires no specialised equipment, and takes very little time. You’ll need a blender, but it doesn’t have to be a fancy one.

How To Make Cashew Milk

Cashew milk is my go-to milk because it’s the easiest. Cashews are already quite soft, so they do not need to be soaked for a long time. They also contain very little fibre, so there is no need to strain.

To make:

Soak 1 cup of raw cashews in water for a few hours or overnight. Rinse, and blend with 4 cups water. Done.

I tend to blend my cashews with 1 cup of water at a time, for 30 seconds, before adding the next cup of water. I find that there are less (no) lumps in it this way.

Makes 1.2 litres. Lasts 7 – 10 days in the fridge. It may get thicker over time, in which case add a little more water to it.

cashew-milk-and-cashews-treading-my-own-path

cashew-milk-makes-great-plant-based-coffee-treading-my-own-path

Cashew milk works absolutely amazingly in coffee, too :)

How to Make Almond Milk

Almond milk is the most common nut milk, but it isn’t the easiest or quickest to make. That doesn’t mean it’s hard, mind! It just needs soaking a little longer, and also straining.

To make:

Soak 1 cup of raw almonds in water for at least 12 hours, and even 24 hours (change the water every 8 hours or so). Rinse, and blend with 4 cups of water.Now you need to strain.

I strain my almond milk using cheesecloth as it has a fine weave and is 100% cotton. Spread the cheesecloth over a bowl or jug, pour the milk over and allow the almond milk to drip through. Squeeze to get any remaining drops out.

straining-almond-milk-treading-my-own-path milking-almonds-to-make-nut-milk-treading-my-own-path

I bought my cheesecloth off the roll at a fabric store – it is very inexpensive. (Cheesecloth is not the same thing as muslin. Muslin has a much looser weave and the fibre all gets stuck!)

Alternatively, you could use a clean tea towel or old pair of tights, or even a fine mesh sieve. Before I had the cheesecloth, I used one of my mesh produce bags. There is absolutely no need to buy an expensive plastic nut milk bag!

Makes about 800ml, and leaves a cup of almond pulp. Don’t throw the almond pulp away! It will last in the fridge for a week, or freeze it. And then make chocolate brownies : ) (Recipe below).

fresh-almond-pulp-and-almond-milk-treading-my-own-path

Fresh almond pulp (almond milk on the right). I use cheesecloth the strain, and scrape the excess pulp off with a knife.

How to Make Other Nut Milks

Other nut milks can be made in the same way, and most will require some kind of straining, although they won’t produce as much pulp as almond milk does. I’ve made macadamia milk (no need to strain), brazil nut milk and walnut milk.

Cheaper Nut Milk Alternatives

Nuts can be expensive. Increasing the ratio of nuts to water will make a more cost-effective milk, but will also dilute the milk. I tend to use the ratio 1:4 nuts:water but this could be increased to 1:5 or 1:6.

As well as nuts, you can also make plant-based milk with seeds, oats and peanuts (which are techincally a legume, not a nut).

Pumpkinseedmilk

Homemade pumpkin seed milk :)

These work out much cheaper than nut milks. I’ve tried making sesame seed milk (not recommended – it has a very strong flavour!), pumpkin seed milk (which is absolutely delicious) and sunflower seed milk. Flaxseed milk is also popular, although I’ve never tried this.

As above, the principle is the same. Soak, then blend 1 cup seeds with 4 cups water, and strain.

Now, let’s talk about what to do with the leftover pulp.

What to Do with the Leftover Pulp: Make Almond Pulp Brownies

This recipe has become my go-to almond pulp recipe. I’ve made savoury crackers, and macaroons too, but nothing beats chocolate-y goodness, so I always come back to this one.

vegan-almond-pulp-aquafaba-brownies-treading-my-own-path

Ingredients:

180g sugar (I use rapadura sugar)
1 cup almond pulp, approx (the pulp left over from using 1 cup of almonds to make almond milk)
80g cocoa powder (I’ve used both cocoa powder and raw cacao for this – I prefer cocoa powder but it doesn’t really matter. You might want to add a little more sugar if using cacao, though)
1/2 cup (110g) coconut oil (I use deodorised as I find the coconut oil flavour a little intense in desserts)
9 tbsp aquafaba (chickpea water – effectively a waste product being put to good use. Find out more here!)
1/2 cup (60g) spelt or other flour
1 tbsp vanilla essence
1/2 tsp salt
1 cup macadamias/walnuts/raspberries/chocolate chips/something else delicious
(or you could leave plain. But I consider all good brownies to need some kind of crunch)

Optional: a few tablespoons of cacao nibs and/or chopped nuts to top.

Method:

Line a square baking tin (if you use baking paper) and preheat the oven to 175°C.

Melt the coconut oil in a pan. Turn off the heat, add the almond pulp and stir to combine.

In a separate bowl, combine the sugar, cocoa powder and flour, and mix well. Add to the pan and stir in. It might seem really dry at first, but it will incorporate. Once combined, add the vanilla essence, salt and walnuts (or delicious thing of your choice).

In a tall cylinder, whisk the aquafaba to form stiff peaks. (This will take longer than you think.) I use a stick blender with a whisk attachment and it takes at least 5  minutes of  constant whisking. Add the aquafaba to the brownie mixture in the pan, slowly folding to incorporate with as little stirring as possible.

This yellow liquid is what you get when you cook chickpeas and strain (and keep) the water

aquafaba-and-chocolate-brownie-mix-treading-my-own-path

Once incorporated, pour into the baking tray. Sprinkle the toppings on (if using) and bake in the oven for 20 – 25 minutes until the top is dry.

chocolate-brownie-slab-treading-my-own-path vegan-almond-pulp-aquafaba-brownies-treading-my-own-path plant-based-aquafaba-brownies-treading-my-own-path

Best stored in the fridge if you don’t demolish the whole lot in one sitting.

Now I’d love to hear from you! Have you ever made nut milk (or seed, oat or rice milk)? Which is your favourite? Which is your least favourite? If you’ve never made it before, is there something putting you off? Do you have any other alternatives to suggest? What about aquafaba – have you ever experimented with that? Are you just a little bit tempted to make these chocolate brownies?! Anything else you’d like to add? Please tell me your thoughts and leave a comment below!

Plastic Free {Bicarb Free} DIY Deodorant – for Sensitive Skin

I love my homemade deodorant. I first tried it back in 2012 when I was still a little skeptical about DIY concoctions (if I’m honest, I thought they were just for hippies). What made me convert?

The fact it actually worked.

That’s all we want from a deodorant, really. Sure, we don’t want chemicals and excess packaging – but it has to work, right?! There are plenty of natural deodorants on the market, but most are very expensive, don’t smell great and don’t actually work against body odour very effectively, either.

Plus very few have completely plastic-free packaging.

The deodorant I’ve been using since 2012 is a super simple recipe, and all the ingredients are edible (except the essential oil). There’s no heating or melting involved, just a little mixing, which suits my laziness when it comes to these things.

The ingredients are 1 tbsp bicarb, 4 tbsp cornflour (or arrowroot / tapioca flour) and 2-3 tbsp coconut oil. The coconut oil depends on the ambient temperature – you’ll need less in summer and more in winter. You want a paste. Mix in a jar and add a few drops of your favourite essential oil. To apply, get a small amount on your fingertips and rub in. (You can find the recipe here.)

This recipe has been serving me well for 4 years, but bicarb can be a skin irritant for some. It’s fine for me, but my husband reacts to it. I tried changing the ratio from 1:4 to 1:6 and even 1:8 bicarb:flour (note – the more you dilute it, the less effective it is) but the issue was the same. His skin became red, inflamed and sore and it took a few months for it to settle back down again.

Ever since then I’ve said I’ll experiment with a DIY non-bicarb deodorant. I don’t move very fast it seems!

But the good news is I have finally kept my word and made a bicarb free deodorant. Not only that, but I (and my husband) have tested it and can confirm that a) it works (hurrah!) and b) there have been no adverse skin reactions. Phew! I can also buy all the ingredients completely packaging-free.

For anyone else out there who struggles with super sensitive skin and cannot use bicarb deodorants, this recipe is for you. Give it a go.

It’s not quite as simple as just mixing some ingredients in a jar but it’s really not that much harder, promise. There’s some melting involved. Nothing complex – I like to keep things as simple as I can!

Final product: bicarb free DIY deodorant.

Bicarb free DIY deodorant.

TIP: I would also add: it’s not quite as effective as the bicarb version I use, and it works best applied to clean skin. Whilst the bicarb one can mask smells if reapplied, this one won’t!

Bicarb Free DIY Deodorant: Recipe

Ingredients:

1.5 tbsp grated beeswax
1 tbsp shea butter
4 tbsp coconut oil
4 tsp white kaolin clay
8 drops tea tree essential oil
8 drops cedarwood essential oil
10 drops lemon myrtle essential oil

A note about the ingredients:

Beeswax: beeswax is solid at room temperature (it melts at 62°C) so helps make the mix firmer. I used beeswax as it’s really local (my neighbour who lives 4 doors away produced this). The only other solid subsititue I can think of would be cacao butter so maybe next time I’ll give this a go as it would be a great alternative for vegans.

Shea butter: shea butter melts at 38°C so is more solid than coconut oil. It’s very moisturising and is thought be anti-inflammatory – which is good news for sensitive skin.

Coconut oil: this is a soft oil that melts at 25°C. It helps keep the deodorant soft so it can be rubbed into the skin. Coconut oil is also thought to have anti-bacterial properties.

Kaolin clay: kaolin clay is a white clay (bentonite clay has similar properties) that replaces bicarb and does a similar job. It absorbs liquid and neutralises bad smells. Clumping kitty litter is actually made of bentonite clay! There are other types of clay available but these are more expensive. I’ve heard that green clay is the most absorbant of them all so at some stage I’d like to try this… it’s in the queue ; )

Essential oils: I’m lucky enough to be able to buy refills (packaging free) so I have some flexibility with my choice. I chose tea tree oil as it is anti-bacterial and cedarwood as it is anti-inflammatory. Both also have strong smells and are often used in commercial natural deodorant recipes. I find both scents quite overpowering and not hugely pleasant so I used lemon myrtle (which I love!) to mask them. Lemon myrtle is an Australian bush scent with the most amazing smell! If you have limited choice, go for a single oil and choose one that you can use elsewhere. Tree tree oil is affordable, available in larger sizes (meaning less packaging overall) and great for cleaning too. (When choosing essential oils, it is important to read up on the properties, particularly if you are pregnant.)

Ingredients for making bicarb-free deodorant (for sensitive skin).

Ingredients for making bicarb-free deodorant (for sensitive skin).

Method:

Heat some water in a pan on the stove, and place a glass bowl over the pan. You don’t want to heat the oils directly as you’ll damage them. Add the beeswax to the bowl and stir until melted (I used a metal spoon as it’s easier to clean than wood).

Add the coconut oil and continue to melt, stirring occasionally. Once both are melted, add the shea butter and remove the bowl from the heat.

The shea butter should melt with the heat of the other two ingredients. You can place back on the heat if it needs some help but be careful of overheating shea butter as it can turn grainy. Stir to aid the melting process and to combine.

Add the clay 1 tsp at a time and whisk to incorporate. Once all 4 tsp have been added, leave to cool, whisking occasionally. It will begin to thicken after only a few minutes (less if your room is cold). Once you notice the thickening and there is no head radiating from the mix, add your essential oils to the mix and whisk in. If you add them when it’s still hot, you will lose all their beneficial properties!

Final product: bicarb free DIY deodorant.

Final product: bicarb free DIY deodorant.

Pour into a shallow jar with a wide neck or a tin, and leave to set. It will set into a paste that feels tacky and is easy to scoop with your fingers. (If you live in a very cold climate and find it too hard, you may like to add more coconut oil or less beeswax next time to get the right consistency, but it will soften with the warmth of your skin.)

Store with the lid on in a dark place. To apply, take a small amount with your fingertips and rub into your skin. will keep for ages.

Now tell me…are you going to make it?! If yes, I want to hear what you think! If not, why not? Have you ever tried making DIY deodorant before? What ingredients did you use and what success did you have (or not have)? What about other DIY skincare products – are you a fan or do you tend to put them in the “too-hard” basket? What are your simplest solutions to bathroom essentials? I love hearing your thoughts so please leave me a comment below!

[leadpages_leadbox leadbox_id=1429a0746639c5] [/leadpages_leadbox]

Plastic Free Zero Waste Natural Sun Cream

I’m a fan of sun hats. I’m a fan of long sleeves. I’m a fan of staying in the shade. When it comes to facing the sun, I’d much rather do any (all) of these than apply sunscreen.

I can’t bear the thought of all those chemicals in store-bought sunscreen being absorbed through my skin, and for the longest time, I’ve played Russian roulette with the sun. I didn’t apply sunscreen, and I tried to avoid getting burned. This means all of the above, and trying to dodge the sun between 10am and 4pm.

The truth is, that’s not always possible – when the weather is beautiful, I want to be outside!

Living in Australia with its fierce sun and hole in the ozone layer is very different to living in rainy England… and it means if I do get caught out and I’m not wearing sunscreen, I get burned.

Getting sunburned is not clever. Two in three Australians will be diagnosed with skin cancer by the time they are 70, and skin cancer accounts for 80% of newly diagnosed cancers every year. After being caught out and sunburned one too many times, I realised that I needed to embrace using sunscreen.

I still advocate the hat, the long sleeves and the shade, but in the times when that isn’t enough, sunscreen is better than sunburn. Chemicals aren’t good for us, but sunburn is definitely not either!

I wondered, is there a way to protect ourselves from the sun without all the chemicals… or the packaging?

Chemical Blockers versus Physical Blockers

There is a huge difference between the regular “conventional” sunscreens, which use physical and chemical blockers (and are a cocktail of synthetic chemicals), and the “natural” alternatives, which use only physical blockers.

The physical blockers used in sun cream are zinc oxide and titanium oxide. Zinc oxide blocks both UVA rays (these are the deep-penetrating rays that cause skin cancer) and UVB rays (these are the ones that cause redness and sunburn, and are the ones that SPFs are rated against). Titanium oxide is a good UVB sunblock but is not as effective as zinc oxide in blocking UVA rays.

Conventional sunscreens may also use zinc or titanium oxide as a physical blocker, but use chemical blockers too. Most chemical blockers only protect against UVB rays. These chemicals don’t sound natural or healthy, and in many cases, they’re not. Some chemicals in sunscreen are hormone disruptors, for example.

We’re not just exposing ourselves to these chemicals either – these sunscreens wash off and the chemicals enter our waterways and the ocean.

Treading My Own Path Zero Waste Plastic Free Sunscreen Alex Blajan

Hats are an awesome physical blocker for sun protection – but even the widest brimmed hat can’t cover everything!

Sunscreen and Nano Particles

Traditionally zinc oxide creams were very thick and created a white barrier on the skin, meaning they were hard to apply (and looked a bit silly).  By making the zinc particles smaller, newer creams have come onto the market which absorb more easily and don’t leave white residue. These creams contain smaller zinc nanoparticles (classed as particles smaller than 100nm or 0.1 micron) and microfine particles (usually ranging from 0.1 micron to 2.5microns (100nm – 2500nm).

The concern with these is that they can be absorbed through the skin, and the smaller the particles, the more easily they are absorbed.

Suncreams containing zinc oxide usually state that they are “nano” or “non-nano”. Studies show that zinc oxide particles between 4nm and 20nm have the potential to be absorbed into the skin, and will be absorbed through damaged skin.

Anything smaller than 4nm will definitely be absorbed, and anything bigger than 45nm will not be absorbed. (You can read this study here.)

Conventional sunscreens use nano particles sized between 5 – 20nm – small enough to be absorbed through the skin. Non nano zinc oxide particles are larger than this and fall outside the absorption range, although some nano particles may still be present.

Most eco and natural brands use non-nano particles in their sunscreen.

Can I Buy Zero Waste Sunscreen?

Because sunscreen is heavily regulated and each batch requires testing, most small producers shy away from making their own. This makes it hard to find locally produced sunscreens that avoid the excess packaging. There is an American brand called Avasol who make a natural, non nano sunscreen packaged only in cardboard, with an SPF of 30. This is the best zero waste alternative I’ve come across. I don’t use it myself but I have friends who do.

Avasol Plastic-Free Sunscreen

Avasol sunscreen is an American brand that comes packaged in a cardboard tube.

What About DIY Alternatives (and how do I know the SPF)?

Yes, it is possible to make your own, but there are two things you need to know.

  1. You will not be able to calculate the SPF. SPF stands for Sun Protection Factor: it is a  measure of the effectiveness of sunscreen against UVB rays. The higher the SPF, the more protection against sunburn the sunscreen offers. The number (SPF 20, SPF 30 etc) means how many times longer a person can stay out in the sun without getting burned relative to how long they can stay out with no sunscreen assuming 2mg per cm² is applied. Sunscreen is tested in vivo by volunteers who apply sunscreen to their skin and see how long it takes to burn (ouch). In vitro tests use a spectrometer. It is not a case of adding up the SPFs of various ingredients. The only way to find out how long homemade sunscreen will protect you for is to test it yourself.
  2. You will need to use a physical barrier – either zinc oxide or titanium oxide – for it to work effectively. Many plant oils have low SPFs (coconut oil and olive oil have a natural SPF of up to 7, and other plant oils have SPF properties) and applying these to the skin may help you avoid burning if you have olive skin, don’t burn and only expose skin to sun outside of the 10am – 4pm (and you live outside of Australia). Combining ingredients does not increase the overall SPF, and there is no magical high SPF plant oil. Also, their effectiveness against UVA rays (the ones that cause DNA damage and cancer) are unknown.

Zero Waste Plastic Free Sunscreen: My Recipe

Zero Waste Plastic Free Sun Cream Sunscreen in Jar
My solution to the issues of chemicals, packaging and sourcing products locally was to make my own. I’ve been able to source all of these ingredients without packaging, but I realise that this may not be possible for everyone. If you can’t find ingredients sold without packaging in stores, find out if there are any local skincare producers or soap makers close to you who may be able to sell you some ingredients without packaging (that’s what I do).

You can also try switching up some of the ingredients if you have other options available to you. Whilst some ingredients can be subbed, zinc oxide is a non-negotiable – that’s what makes it sunscreen! If you need to buy ingredients in packaging, look for one that is recyclable, and remember – one container of zinc oxide will create many containers of zero waste sunscreen.

Important: this sunscreen has worked for me, and I am sharing my personal experiences. Do a small patch test when using for the first time. Avoid going in the sun at peak times and wear a hat and long sleeves. Sunscreen is a last resort, not an excuse to lay in the sun for 8 hours!

Zero Waste Plastic Free Sunscreen Ingredients Treading My Own Path Plastic Free July

Ingredients for zero waste plastic free natural DIY sunscreen.

Ingredients:

1/2 cup almond oil (or olive oil)
1/4 cup coconut oil
1/4 cup beeswax
2 tbsp (27g) shea butter
2 tbsp non-nano zinc oxide powder
1 tsp vitamin E oil

OPTIONAL: 20 drops of essential oil (check this list first as some essential oils are phototoxic and can assist burning!)

More info on the ingredients:

Almond oil – I used sweet almond oil as that is what I use as my standard moisturizer. It is a great oil for the skin. However, it’s also far more expensive than olive oil (and according to in vitro tests, has a lower SPF of 4.7 versus the olive oil SPF of 7.5) so next time, I’ll be using olive oil.

Coconut oil – this oil is solid at less than 25°C and helps the lotion hold its form. It is very moisturising and has a natural SPF of around 7 – two properties that make it a great oil to include in sunscreen.

Beeswax – beeswax helps make this into a lotion at room temperature. This means no need to store in the fridge – handy if you want to take your sunscreen with you! It also helps make the sunscreen waterproof. Even if we’re not going in the water,the sun makes us sweat and we don’t want the sunscreen to wash off.

Shea Butter – is highly moisturising and good for dry and aging skin. It is a solid at room temperature but melts on contact with the skin, making it a good base for lotions. Look for shea butter that has been naturally processed rather than refined with hexane (a solvent).

Zinc Oxide Powder – this is the active ingredient. Zinc oxide is a physical blocker that works by reflecting / scattering UV light. It is non-irritating and suitable for sensitive skin. Zinc oxide sunscreens leave a white tinge on the skin – the bigger the zinc particles, the whiter this will be. The zinc oxide powder I used was 0.3 – 0.85 microns.

Vitamin E – this vitamin is often found in skincare products and is believed to have antioxidant and skin-healing properties, although evidence is limited and studies are ongoing. It helps prolong the shelf life of the other oils in the lotion. I used it because I have it, but you could do without.

Method:

Overheating oils can damage their properties, so I tend to melt mine one by one, starting with the most heat-resistant and working down to the least.

  • Place a glass bowl over a pan of boiling water (a double burner) and add the beeswax. Stir until melted, and add the coconut oil. (If your coconut oil is solid, the beeswax may solidify again on contact, but continue to heat and it will melt.)
  • Turn the heat off, and add the almond oil (or olive oil), using a whisk to combine. Once this is mixed in, remove the bowl from the heat.
  • Add the shea butter to the bowl and stir to combine. Once it has melted, whisk the mixture. Continue to whisk until you notice the mix beginning to cool, lose transparency and change to a golden colour.
  • Once the bowl feels cool and the mixture looks golden and opaque, add the zinc oxide powder using a whisk to combine.
  • Add the vitamin E and essential oils, if you are using.
  • Pour into a clean and dry glass jar, and seal with a lid.

Melting beeswax in a double boiler

Melting the beeswax over a double boiler (a glass bowl on top of a saucepan with water in it – the water is heated and that is what warms the oils)

Melting oils in a double boiler

Melting the shea butter. (The beeswax, coconut oil and almond oil have already been added.) The oils look golden and transparent. Once they begin to cool, they lose the transparency and begin to look opaque.

Melted oils before adding zinc oxide powder

Once removed from the heat, the oils will cool and lose their transparency. Keep whisking to keep everything combined.

Zero Waste Plastic Free Sunscreen Mixing Zinc Powder into Oils

Once it’s cloudy and does not feel hot, add the zinc oxide powder. Stir in with a spoon and then whisk to combine. The powder will mix but will not dissolve so there will be some white specks.

Melted oils before after adding zinc oxide powder

Cream after adding the zinc oxide powder and whisking.

Zero waste plastic free sunscreen Whisking ingredients together

Now add the vitamin E and any essential oils, and whisk to distribute thoroughly. Pout into a clean glass jar and leave to cool completely.

Rubbing Non Nano Zinc Oxide Sunscreen into the Skin

When applying to the skin, it appears white. The more it’s rubbed in, the less white it appears. I like the white sheen that remains as it helps me see where I’ve applied the cream and which bits I’ve missed!

Zero Waste Plastic Free Sun Cream Sunscreen in Jar

Zero waste plastic free sunscreen: the finished product.

Zero Waste Plastic Free Sun Cream Sunscreen on a teaspoon Plastic Free July

You can see from the spoon that the consistency is fairly thick. Changing the oil and wax combinations will change the consistency.

If you think this seems a bit complex (and I’d love to simplify it at some stage) then there is an even simpler solution. Simply mix some zinc oxide powder into your regular moisturiser. Job done ; )

Now I’d love to hear from you! Have you made sunscreen? Do you have a recipe you’d recommend, or any great ingredients you think should be included? Have you had any recipe fails, or do have any important “do-nots” to share? Are you unsure about making your own? Have you found any great zero waste or plastic free sunscreens available for purchase that you’d like to share? Have you tried Avasol and what did you think? Anything else that you’d like to add? Please tell me your thoughts in the comments below!

[leadpages_leadbox leadbox_id=1429a0746639c5] [/leadpages_leadbox]

DIY Sourdough Starter + Zero Waste Crackers

Making a sourdough starter from scratch is one of the easiest things you can do, and it doesn’t need any special ingredients. Literally all that is required is flour, water, a bowl, a spoon, and a little bit of patience. Even if you’re not sure you want to start baking sourdough every week (although I assure you, once you start, you won’t want to stop!) the sourdough starter can be used to make sourdough crackers.

Crackers are far quicker and simpler to make than sourdough bread, but equally delicious… plus crackers are one of those things that are impossible to find zero waste or plastic-free in my experience. Homemade, simple, delicious, waste-free… what’s not to love?!

To make a sourdough starter from scratch, we utilize the natural yeasts and lactic acid bacteria present on the flour. Another term for it is wild fermentation – how cool does that sound?! That’s how people made bread and other fermented products for thousands of years, before commercial yeasts were available. They harnessed the power of nature.

If we’re going to use the natural yeasts and bacteria present on the flour, then I recommend buying the best flour that you can find. Once your sourdough culture is established you can relax a little, although I’d always recommend buying the best ingredients that you can afford. If your tap water is chlorinated, fill a bottle and leave at room temperature or in a sunny place for a few hours to let the chlorine gas dissipate – you don’t want to kill the starter before it’s started!

How to Start your Sourdough Starter

Mix together 50g flour with 50g water in a bowl (1 gram of water is the same as 1 ml water). You can use more but don’t use too much less as it will be much harder to work with. However much you use, you want the flour:water ratio to be 1:1.

At this point it will look like a dough, and it will smell like wet flour. Cover the bowl with a tea towel and leave on the side at room temperature (if you’re home is cold or it is winter, a warmer place will help get it going faster). Stir every few hours. If a skin forms on top, simply stir it in.

It may not seem like much is happening at the start, but if you pay attention to the smell you will notice that it starts to smell less like flour and has developed a sour smell. This is a sign that it is working. Hurrah! Look out for bubbles forming in the dough. In the beginning there will only be a couple, but it’s another sign that your starter is beginning to do its thing.

After a couple of days of stirring, you will need to feed your starter. Even if you’re only noticing a couple of bubbles, the starter will dry out over time, and as it sticks to the side of the bowl and hardens the volume tends to decrease, so feeding helps refresh it. Take another bowl, add 10g of your starter to it, and then add 50g flour and 50g water to this (you can use other volumes, but the ratio should be 1:5:5 starter:flour:water). Stir thoroughly, and cover with the tea towel.

Leave the remaining leftover starter in the original bowl, cover with a plate and store in the fridge. This will be used for making the sourdough crackers later.

Keep stirring the new starter every few hours (this doesn’t need to be exact, just whenever you remember). You should notice that the bubbles are becoming more frequent (you may not see a lot, but more than you saw at the start). Depending on how active your starter is getting, you can either feed again in 24 hours, or leave for a couple of days.

To feed, repeat as before. Take 10g of your active starter and add to a new bowl with 50g flour and 50g water, and stir well. Any leftover starter can be poured into that bowl sitting in the fridge with the original starter.

Each time you feed, you should notice your starter getting a little more active. You’ll want to feed it at least 5 times, once a day (timing is not that important) before it’s ready – and by ready, I mean active.

Sourdough Starter from Scratch Treading My Own Path

The four stages of starting your own sourdough starter from scratch. Stage 1: mix flour with water. Stage 2: cover with a tea towel or gauze – you want air to get in, but nothing nasty! You will need to stir every few hours. Stage 3: you will notice bubbles begin to appear. Your starter will begin to dry out a little. Stir the drier parts in, but as it gets drier you’ll need to feed it. That means taking a small part of this and mixing with fresh water and fresh flour (save the discard to make crackers). Step 4: after a week and a few feeds, your starter should be bubbling away quite happily.

Maintaining Your Sourdough Starter

Once your sourdough starter is ready, you can either store on the kitchen counter, or in the fridge. Store in a jar with a loose-fitting lid, or with a fabric circle secured with an elastic band. You want air to get in, but no creepy-crawlies. If you keep it on the kitchen counter you’ll need to feed it every day. If you keep it in the fridge you can feed every 1-3 weeks (once a week is best, but it will be fine if you feed it every three or so). I keep mine in the fridge.

When you want to feed your starter,  allow to return to room temperature if it has been in the fridge. Keep the ratio the same 1:5:5. Keep the discard in the fridge until you are ready to make crackers.

Zero Waste Sourdough Crackers

Sourdough Crackers Treading My Own Path

Homemade sourdough crackers – simple to make, zero waste, plastic-free and no nasty additives. What’s not to love?!

Once you’ve made your sourdough starter you should have a bowl of discarded starter sitting in your fridge, waiting to be made into crackers. I have to thank the Zero Waste Chef for this idea, as previously when I had excess sourdough starter I’d throw it away. It felt so wrong, but that’s what all the recipes tell you to do. Turns out, they are all wrong! Throw nothing away, and make crackers instead. Thanks Anne-Marie!

This recipe is a combination of the one by the Zero Waste Chef, and also some notes I have from a Plastic Free July workshop back in 2012 which has no references except a comment that the writer was called Katie.

Ingredients:

215g discarded sourdough starter
3 tbsp olive oil (30g)
100g plain flour
1/2 tsp salt
1/4 tsp bicarb soda

Extra olive oil and salt to top.

I found that when I made a starter from scratch, feeding every day for 5 days left me with 215g starter. But you change change the quantities of flour to starter, they don’t need to be exact – just remember it’s approximately twice the starter to flour. You want to make a dough, so if it is too sticky add more flour.

The moisture in the starter also varies depending on how fresh it is. If you need to add more flour, do so!

Method:

Mix the olive oil with the starter and stir until combined. Add the dry ingredients to the starter / oil mix and combine first with a spoon, and then with your hands. If it is still sticky, add flour in small quantities until you have a dough. Knead to ensure it is smooth.

Place in a glass bowl, cover with a tea towel or a plate (or both!) and leave to rest at room temperature for 8 hours (or overnight). This allows the dough to sour and develop flavour.

After 8 hours, divide the dough into 4. One at a time, roll the ball out onto a baking sheet lined with baking paper using a rolling pin (yes, my zero waste kitchen contains baking paper. I re-use each piece several times. You can read more here). The reason for the paper? After waiting 8 hours, I don’t want to take the risk that my crackers will stick to the metal tray and burn.

Roll the dough out to between 3 – 5mm thickness, trying to ensure it is even. Trim the edges, and cut into rectangles with  sharp knife.

Brush with olive oil, and then sprinkle salt on the top.

Bake in an oven at 150°C (350°F) for 8 minutes, then turn over and bake for another 8 minutes. You will find that the crackers on the edge cook a lot faster than those in the middle, so if you want to remove those sooner you’ll avoid them over-cooking. You want them to look golden but not too brown.

Cool on a wire rack and store in an airtight container.

TIPS:

  • 8 hours in the ideal, but this recipe is really flexible. You can make the crackers after only leaving the dough for 30 minutes (but longer is better). If you forget and leave them longer, you will still have good crackers.
  • The dough can be frozen or refrigerated if you want to make a big batch of dough and keep some for later.
  • I would guess they would last a week, but I’ve never been able to find out as they all get eaten long before! They don’t lose their crunch after storing so they are definitely something that can be made ahead.

Sourdough Zero Waste Crackers FINAL

Zero Waste Sourdough Crackers

As always, I’d love to hear from you! Do you make your own sourdough, and have I tempted you to give it a go? Do you already make your own crackers? Do you have any recipes and tips you’d like to share? What toppings and flavours do you think would work best? Please tell me your thought in the comments below!

[leadpages_leadbox leadbox_id=123a865e9839c5] [/leadpages_leadbox]

A Beginner’s Guide To Aquafaba

You know when you cook chickpeas (or other beans and pulses) from scratch? You boil them on the stove top for an hour or two, and then you drain off the cooking liquid? You gotta stop throwing that golden cooking liquid down the drain!

I’m serious. Yes, I’m talking about that stinky, kinda slimy, smells-a-bit-like-old-trainers liquid that disappears down the plughole when you strain your freshly cooked chickpeas. Because it is a magical ingredient. I kid you not.

It turns out that chickpea water (chickpea brine), which alternatively and rather more glamorously is also referred to as aquafaba, is a miracle ingredient… something that isn’t waste at all, but is actually very useful! You can whisk it up like egg whites and use it in baking to make cakes, icing, macaroons and meringues.

It’s taking the vegan world by storm because it’s making the impossible possible, but even if you’re not vegan and you eat eggs, the chance to use a waste product to make something edible and delicious can’t be scoffed at!

This yellow liquid is what you get when you cook chickpeas and strain (and keep) the water

I first heard about aquafaba when I posted a picture on Instagram of a big batch of chickpeas I’d cooked, and somebody asked if I was saving the liquid to make meringues. It sounded crazy (and unfortunately I’d just tipped 2 litres of it down the drain) but after seeing some pictures suggesting it could actually be done, and in spectacular style, I was sold.

There might be a lot of beautiful images out there showcasing the miraculous things that can be done with aquafaba, but as a beginner, I had absolutely no idea where to start. Lots of the recipes refer to using the aquafaba from tinned chickpeas, but I cook my own chickpeas, so I wanted to know how to use this kind of aquafaba.

Not being able to find this information on the internet, I spent an entire weekend whisking and testing this chickpea water (and eating far more meringues than I care to remember) and as a result, I think I’ve mastered the basics.

First Up – Cooking Your Chickpeas

If you’re still buying chickpeas (or other pulses) in tins, you are seriously missing a trick. Pulses are super cheap to buy, you can find them in bulk (so packaging free), they take up hardly any space in the pantry and they last forever. You can cook them up in bulk and they freeze really well. Cans are bulky, BPA-lined (meaning chemicals leaching from the plastic into your food), the brine often contain added salt and sugar, plus they are pretty resource-heavy being made from metal, and use a lot more fuel to transport than their dried counterparts. Make your own – it’s easy!

Ingredients: dry chickpeas, water

Soak your chickpeas in water, ensuring they are in a big bowl with enough water covering them as they will expand (depending on the variety, up to three times the original size). Soak for a minimum of 8 hours (overnight). I tend to soak mine for 24 hours or more (changing the water every 8 hours or so) until white bubbles appear in the water. Be sure to throw this water away – it is not the aquafaba!

To cook, place in a large pan and cover with fresh water. Bring to the boil and cook for 1.5 hours. You want to ensure the chickpeas remain covered (you can top up with a little extra water, and keeping a lid on the pan will stop as much evaporation) but try to ensure there isn’t too much extra water. As you cook, white scum will come to the surface. Scoop this off and discard.

After 1.5 hours, drain the chickpeas ensuring you keep the cooking liquid – this is the aquafaba!

I usually cook dry chickpeas 1.5 kg at a time, meaning I end up with about 4 kg cooked chickpeas, and this makes around 2 litres of aquafaba. Chickpeas freeze really well. Decant into glass jars and once completely cool pop into the freezer. Wait until completely frozen until sealing with lids. I use regular glass jars and I have never had one crack.

Aquafaba will keep in the fridge for up to a week so don’t feel like you have to use it straightaway. If you don’t want to use all the aquafaba at once, this freezes really well too. Pour into an ice cube tray and once completely frozen decant into a glass storage container and keep in the freezer.

Aquafaba: How to Turn the Yellow Liquid into White Fluffy Stuff

What you’ll need: a good whisk, and a big bowl…plus a little patience ; )

Pour the yellow chickpea liquid into a big bowl, and start whisking. The bowl needs to be big because as it fluffs up, it will expand to more than 5 times its original volume – so be prepared! You will also need a good whisk. A hand whisk isn’t going to cut it. Neither is a food processor or blender, even a high powered one (I tried). I have a stick blender with a 700W motor, 5 speeds and an additional turbo button, and this just about managed, although the motor did get uncomfortably hot. I would recommend a hand held whisk with two beaters, or a mixmaster or something with a little more power.

Whisking Aquafaba Some More

This is my aquafaba before adding cream of tartar. Because I don’t have a super powerful whisk, I found cream of tartar helped form the stiff peaks you need for meringues.

Chickpea water needs to be whisked for a long time. (Long being relative of course, but in the age of electric gadgets we expect instant results, so be warned!) You will need 10 – 15 minutes of constant whisking to get the aquafaba to full fluffiness and stiff peaks. On the plus side, you don’t seem to be able to overwhisk aquafaba like you can egg whites, and if you need a break from holding the hand whisk (or like me, are worried about burning out a stick blender), it seems fairly forgiving to stop-starting.

Lastly, don’t be too worried about how concentrated your chickpea water is. Remember, egg whites are fairly runny before you whisk them, and aquafaba is the same. If you think your liquid is really watery you can reduce it a little in a pan, but don’t be too worried about this. I reduced 2 cups of aquafaba to 1 cup in a saucepan by simmering, and then whisked, and actually found it fluffed ever so slightly less than the original non-reduced aquafaba. The main thing will be a good whisk, and enough time.

How to Make Aquafaba Meringues

I based my experiments on this basic aqaufaba meringue recipe. Far more meringues than I actually wanted to eat later, I think I’ve mastered the basics. My next challenge is to improve the shape – something I think I will achieve with a slightly better whisk, and probably a little more patience!

Ingredients: 1 cup aquafaba; 1.5 cups granulated sugar, ground into powdered sugar; 1 tsp vanilla essence and 1/2 tsp cream of tartar.

Whisk the aquafaba into stiff peaks. Ideally you want a mixture so stiff that if you turn the bowl upside down, the aquafaba won’t fall out, but my hand whisk isn’t up to beating quite that well. (If yours is, you may not need to cream of tartar.)

Once the peaks are as stiff as you can get them, add the cream of tartar, still whisking. This will help firm up the peaks. Next, add the sugar slowly. This is important… you don’t want to deflate the bubbles you’ve created. Add 1 tbsp powdered sugar at a time, whisking continuously to incorporate. Yes, it takes ages, but rush and you’ll flatten your meringues.

Whisking Aquafaba Before and After Adding Cream of Tartar and Sugar

The bowl on the right is the aquafaba once the cream of tartar and sugar have been added. The sugar gives a shiny gloss to the aquafaba.

When all the sugar is incorporated, add the vanilla essence.

Turn your oven on to the lowest temp. Recipes state the temperature needs to be between 80 – 110°C. My gas oven actually doesn’t go below 120°C but as it never seems to get to temperature anyway, it didn’t matter. Line baking trays with baking paper, and blob the meringue mix onto the paper (I used a soup spoon, and the blobs were about 4cm diameter).

Aquafaba meringues

Aquafaba meringues about to go in the oven. I still haven’t mastered how to keep the shape once they go in the oven…that’s the next challenge!

Pop the meringues into the oven, and leave for 1.5 hours minimum. You aren’t actually trying to cook the meringues but dry them out. If they go brown, your oven is probably on too high.

To test if they are ready, see if you can remove one from the baking paper (ideally without taking the tray out of the oven). If it still sticks, leave in the oven. Keep testing until the meringues can be removed cleanly from the paper. When they are ready, turn the oven off, open the door slightly and leave to cool completely before removing. You’re better off leaving to cool in the oven overnight rather than putting them in a container whilst still slightly warm.

Store in an airtight container if not eating immediately.

Aquafaba Meringues on a Cooling Rack via Instragram

What’s Next – Aquafaba in Baking

If you’re interested in seeing more amazing creations with aquafaba, there is a great Facebook group called Vegan Meringue – Hits and Misses with lots of recipes to try when you’ve mastered the basics. It’s also a great community and a brilliant source of inspiration!

I’m hoping to spend plenty more time in the kitchen experimenting with this stuff! I’ve already attempted making chocolate brownies using aquafaba and was really pleased with the result (especially as it was a first attempt), and with a few more tweaks I’m hoping to perfect this (update! Recipe for aquafaba chocolate brownies has now been added.).

I’m also keen to try macaroons. Playing with aquafaba is so much fun!

Aquafaba chocolate vegan brownie aerial view Aquafaba chocolate brownie slice Chocolate Vegan Brownie

Now it’s your turn to join in! Tell me, have you heard of aquafaba before? Are you tempted to give it a go, or is something holding you back? Have you already experimented with it? Have you created aquafaba masterpieces or struggled with a sticky mess? If you’re a pro, do you have any advice or tips?  Do you have any questions or need any beginners tips…especially in what NOT to do? (I’m no expert, but I’ve had my fair amount of failures in the last couple of weeks!) Or are you totally grossed out by the whole thing?! I’d love to hear your thoughts so please leave a comment below!

[leadpages_leadbox leadbox_id=123a865e9839c5] [/leadpages_leadbox]

Zero Waste Strawberry Recipes (And None of Them Are Jam)

A small miracle happened. I went to the Farmers’ Market…and found plastic-free strawberries! Oh the excitement! The elation! I haven’t bought strawberries in 4 years because I won’t buy them in plastic packaging, and let’s face it, that’s sad, because seasonal freshly picked strawberries are delicious. There was just one catch. They came in the hugest box you’d ever seen. Sold as “jamming strawberries”, there must have been the equivalent of 20 punnets there. I kid you not.

Of course, at the time it seemed like a great idea. I marched home with a massive box of jamming strawberries (which means all those berries that are misshapen, blemished, slightly too ripe, and a couple that were starting to sprout furry bits). It was only then that I realised the enormity of the task ahead: washing, chopping, planning and eating these 20 punnets of strawberries before they expire! As we all know, fresh strawberries do not last long!

Luckily for me I like a challenge, especially one that involves food. After spending a weekend with these strawberries, I have some great ideas for how to use up a glut of strawberries…without making jam.

First Things First: Freezing Strawberries Successfully

Strawberries actually freeze very well. I wouldn’t trust them not to be mushy when defrosted, but they are perfect for adding to smoothies or using in baking. The trick is not to chuck them all together in a bowl, or you’ll be left with a giant frozen mass that can’t be separated. Instead, after washing, chop into quarters and lay out on a baking sheet lined with a tea towel. Pop into the freezer for a few hours. Remove when frozen, pop into a container with a lid (I use a glass Pyrex container but a glass jar would work too) and keep in the freezer until needed.

Preparing Strawberries for the Freezer

How to prepare and freeze strawberries

Strawberry Sorbet (Contains raw egg)

Ingredients:

400g strawberries, chopped and frozen
200g ice
juice of 1/2 lemon
1 egg white
50g icing (superfine) sugar

Method:

You will need a high-powered blender or food processor for best results.

Blend ice, frozen strawberries lemon juice and icing sugar together until smooth. The smoother it is, the less ice crystals will remain – however the longer you blend, the more it will heat up (and melt). If your blender is struggling, pop the jug into the freezer to cool and resume once refrozen.

For best results, use a whisk attachment for this. Add egg white and whisk for 2-3 minutes until fluffy. Eat straightaway. You can freeze leftovers in a glass container however remember that this sorbet contains raw egg, so it’s best not to defrost and refreeze.

Strawberry Sorbet

All light and fluffy!

Strawberry Sorbet in a bowl

Dairy-free strawberry sorbet (contains raw egg)

Strawberry Sorbet (Vegan)

Ingredients:

400g strawberries, chopped and frozen
200g ice
1 cup aquafaba (liquid left over after cooking chickpeas)
50g icing (fine) sugar

Method:

You will need a high-powered blender or food processor for best results. Blend the frozen strawberries and ice until grainy, and add the sugar. Blend to combine. In a separate container whisk the aquafaba for several minutes until soft peaks form. Using a whisk attachment with your blender, add the aquafaba slowly to the mix and beat for 2 minutes until fluffy.

Eat straightaway, and store leftovers in a glass container in the freezer.

Strawberry Aquafaba Vegan strawberry sorbet icecream

Aquafaba (water drained from cooked chickpeas) can make sorbet fluffy too!

Vegan Strawberry Sorbet Aquafaba

Dairy-free vegan sorbet.

Strawberries on Toast

This was conjured up out of desperation, but actually, it was such a hit that I feel it could become a summer regular. It’s not just me that thinks so either; it’s been one of my most popular pictures on Instagram!

Method:

Quarter equal numbers of strawberries and cherry or baby plum (grape) tomatoes. Mash some avocado onto sourdough or other good quality bread or toast, squeeze some lemon juice on the avocado and add chopped fresh herbs if you have them(coriander or parsley would both work well).  Top with strawberries and tomatoes and a dash of balsamic vinegar.

Strawberries on Toast

Strawberries on toast. Trust me, it works!

Strawberry Smoothie

I don’t think smoothies should be dictated, they are more about using what you have on hand. I find almond milk a great base for smoothies, and it’s really simple to make your own.

For the almond milk: soak 1 cup raw almonds overnight. Rinse and blend with 4 cups water in a high powered blender for 2 minutes. Strain using cheesecloth (you can freeze the pulp).

For the smoothie: Blend 1 cup almond milk, 1 cup strawberries, a handful of hemp seeds and a handful of blueberries together until smooth. Add sweetener to taste.

Strawberry Blueberry Hemp Almond Milk Smoothie

Strawberry smoothie. In a jam jar. Just because.

Strawberry Oat Bake

Ingredients:

165g strawberries
35g coconut oil
25g cacao butter (if you don’t have this, substitute for more coconut oil)
2 tbsp macadamia or other vegetable oil
75g honey or other sugar
220g oats
55g almonds
Zest of 1 lemon
1/2 teaspoon vanilla extract

Method:

Blend the strawberries with the vanilla essence until smooth and set aside. Melt the coconut oil and cacao butter in a pan, add the sugar and mix until combined. Stir in oats, ground almonds and lemon zest. Mix until coated.

In a square tin (I used a loaf tin but a square tin would work much better) spread out half the oat mix, and press down with the back of a spoon. Add the strawberry mix and spread over the oats. Top with the final layer of oats. (If you have them, add a handful of chopped nuts into the remaining oats or sprinkle on top. I didn’t do this and wish I had!)

Bake at 200°C for 15 minutes until golden on top. Leave to cool completely, then place in the fridge. Cut into squares or slices once cooled (it will be less crumbly this way).

Strawberry Oat Bake

Half the oat mix spread into a tin, then the strawberry mix spread on top.

Baked Strawberry Oat Slice

Strawberry oat bake.

Strawberry Oat Slice Baked

Strawberry oat bake.

Chia Strawberry Jam

I know, I know. I told you I wouldn’t include jam recipes. But this isn’t jam in the traditional sense. By traditional sense I mean adding 400kg refined white sugar to your strawberries, boiling for half a day and then storing in the pantry for all of eternity. This is fresh, it won’t keep more than a couple of days in the fridge, and it’s got all the goodness of fresh fruit. Think of it more as “strawberries that spread”.

Ingredients:

1 cup strawberries, chopped very small
2 tbsp water
2tbsp chia seeds
1 tbsp maple syrup or other liquid sweetener (or more to taste)
Couple of drops of vanilla essence

Method:

This is so ridiculously simple it doesn’t really warrant a “method”. Stir all the ingredients together in a glass jar, put a lid on and leave in the fridge overnight.

Strawberry Chia Jam

Strawberry “jam”, made with chia seeds and fresh strawberries.

I had so much fun with these strawberries that I’m actually relishing the chance to buy another box and experiment some more! The strawberry season isn’t long, and seasonal produce is far more delicious than its imported cousins, so I think it’s worth indulging in the glut whilst it lasts : )

Recipe: Carrot Pulp Cracker Flatbreads

This super-simple recipe tackles two dilemmas I face when trying to live plastic-free and with zero waste – how to make your own plastic-free crackers, and what to do with leftover carrot pulp (from juicing carrots). I came up with this recipe after realising that if I wanted plastic-free snacks, I was going to have to make my own. I am yet to find crackers in plastic-free packaging.

I went through a phase of drinking carrot juice a couple of times a week, and decided to experiment with using the pulp to make my own crackers. After countless experiments, I am happy with this recipe, but I must point out that they are not crunchy. Making them crunchy just meant I had to drink a gallon of water every time I ate one, because they were so dry. This was my happy spot. They are still soft on the inside, which makes them more of a bread than a cracker – except they are nothing like bread either. I’ve called them cracker flatbreads because I have no idea what else to call them. Crackerbreads? Anyway, if you make them and think of a better name, please let me know!

If you don’t have carrot pulp, you can use grated carrot instead. The mixture will be a lot more watery, so will need longer to cook (still at the same temperatures), but will still work. You could try squeezing the juice out of the grated carrot, but then you’d be wasting delicious carrot juice!

Recipe: Carrot Pulp Cracker Flatbreads

This recipe is for a 33cm x 23cm tin.

Ingredients:

Approx 200g-250g carrot pulp
1/2 cup almonds, soaked overnight, rinsed and drained
1/2 cup oats (for gluten-free, use gluten-free oats; or replace with 1/2 cup almonds for completely grain-free)
2tbsp flaxseeds, ground
2 small tomatoes, chopped
1 tbsp olive oil
Salt and pepper
Optional: 1/2 tbsp fresh rosemary, finely chopped, or other herbs or spices depending on your taste

Method:

Preheat the oven to 170ºC.

Line a baking tin with greaseproof paper.

In a blender, grind the soaked and rinsed almonds until small pieces. Add the oats and grind to a coarse mixture. Add the carrot pulp and blitz to combine. Add the tomatoes, oil and flax seed and blend until combined. Add the salt, pepper and nay herbs or spices that you want to add and blitz again to ensure everything is mixed together.

Tip the mix into the lined baking tray. It will look sticky. Press into the tin with a spoon.

It may seem like there isn’t enough mixture for the tin, but you want a fairly thin layer. Push right up into the edges and corners, and press the edges down firmly. You can use your hand to firmly pack the mix into the tin once it’s all spread evenly.

Mark out the cracker shapes using a knife.

raw carrot pulp mix

Empty the carrot pulp cracker mix from the blender into a tin lined with baking parchment…

raw carrot pulp cracker mix with spoon

Use a spoon to press the raw carrot pulp cracker mix into the edges of the tin…

raw carrot pulp mix squished

Compact the carrot pulp cracker mix down using your hand, and use a spoon to make sure the edges are neat…

raw carrot pulp mix with squares cut

Use a knife to mark out the carrot pulp cracker squares before they go into the oven.

Place in the oven, and leave for 30 minutes.

After 30 minutes, see if you can lift the baking paper lining out of the tin without breaking the crackers. If they are still too soft, pop them back into the oven for another 5 minutes or so, and keep trying until they are firm enough to handle. Lift firmly and quickly.

Lower the oven to 100ºC and put the crackers (still on the baking paper) on a grill tray in for another 15 minutes (do not wait for the oven to drop to temperature; they will be fine).

Remove from the oven, and carefully separate the crackers. You may need to use a knife to cut them. Put each one upside down on a grill tray (to aid air circulation), and return to the oven for 15 minutes to cook the other side.

carrot pulp crackers in baking tin

Golden carrot pulp crackers out of the oven…

carrot pulp crackers baked once

The underside will still be moist, so separate the crackers carefully to avoid breaking them…

Carrot pulp crackers other batch

Pop back into the oven with the damp underside facing up. Use a grill pan or rack to enure the air can get between them and they don’t burn!

Once they are ready they will be a golden colour and be dry to touch.

Remove and enjoy!

carrot pulp crackers on a plate

Carrot pulp crackers and hummus

These carrot pulp cracker flatbreads are perfect with hummus!

Tips:

  • This recipe is extremely forgiving, so feel free to change quantities, cook for longer to make them crunchier or modify however you think best. Just let me know in the comments!
  • Feel free to miss out the middle step. Cook in the oven for 30+ minutes, then take out, separate straightaway and put back in the oven for the last 15 minutes. The crackers will be more moist and harder to separate, but if you’re patient enough it will work fine!
  • If you don’t want to make crackers immediately after juicing carrots, store the pulp in a sealed container in the fridge. It will last for a couple of days.
  • The tomatoes provide the moisture. If you don’t like tomatoes, you could swap with a small courgette.
  • Brazil nuts make a great alternative to almonds. They make a much crunchier cracker. Cashew nuts don’t work as well – the crackers tend to discolour and not look as appealing.

These crackers are delicious with hummus! Follow the link to find my super-simple plastic-free hummus recipe.

[leadpages_leadbox leadbox_id=1429a0746639c5] [/leadpages_leadbox]

And so it begins…Plastic Free July!

Yep, it’s the 1st July, and that means the Plastic Free July challenge is upon us once again. Someone asked me recently how my preparations were going. Thing is, they’re not..because every day is already plastic-free for us. Whilst I still get really excited about Plastic Free July, most of that excitement is directed towards encouraging others to take up the challenge, to spread the word and support plastic-free living with ideas and suggestions  – things that have worked for us.

This will be our third Plastic Free July challenge, so I feel we know a thing or two now about ways to reduce our plastic consumption by now! I thought to celebrate the start of the challenge, I’d trawl through my blog archives and share some of the most popular plastic-free blog posts that I’ve written; things that I learned along the way that have become a way of living.

If you’re new to the challenge, that’s great! Hopefully these posts will provide some ideas to get you started. If you haven’t signed up yet, go for it! There’s no minus points for starting late!

Plastic Free July: 5 “How-To”s for Getting Started

1. How to Line Your Bin with Newspaper

One of the arguments I always hear in favour of plastic bags, is “but what will I use to line my bin with?” The answer for us was the free community paper we receive each week. After we’ve read it, we line the bin. You can find step-by-step instructions by clicking the title above.

2. Make Your Own Deodorant

This recipe is really simple, uses ingredients that you’ll find in your pantry and most importantly, it actually works!

3. Make your Own Toothpaste

I even checked with my dentist that my toothpaste recipe was safe and effective, and she gave it her seal of approval. I use glycerin or coconut oil as a base, sodium bicarbonate as the abrasive, a drop of clove oil for its antimicrobial properties and peppermint oil to make it taste like toothpaste. Sort of. You may find it an acquired taste to start with, but it;s gets better with time!

4.  Make Your Own Nut Milk

cashewmilkfinalWe have found milk in glass bottles, but I also make my own nut milk. It works great on cereal and in smoothies and hot chocolate (yes it does!), and also for baking. If you can’t find milk in glass it’s a great way to reduce the amount you consume. This is the recipe for cashew nut milk, but you can try with all nuts (you may have to strain them) and even seeds!

5. Make Your Own Yoghurt

I started out making yoghurt with cow’s milk – it’s really simple and so much cheaper and tastier than buying it from the shops. Once I found out I had to cut out dairy, I had a go at making coconut yoghurt, which is a little more complicated but equally delicious! I’ve never tried with nut milks, and I still need to master making my own coconut milk for a completely waste-free experience, but I’m on the case and it’s a work in progress!

If you drink cow’s milk, try this recipe for natural yoghurt.

If you’re dairy-free, here’s the recipe for coconut yoghurt.

Are you taking part in Plastic Free July this year? Is there anything you feel stuck with? Or are there any great plastic-free tips and solutions you’d like to share? Join the discussion and leave a comment below!

[leadpages_leadbox leadbox_id=1429a0746639c5] [/leadpages_leadbox]