Tag Archive for: life from scratch

Where I Find My Zero Waste Consumables (Groceries and Food)

This week I headed off on my six-monthly journey up to the Swan Valley, which is the other side of Perth, to stock up on some bulk products that I simply can’t get anywhere else.

It made me think: there’s plenty of places I talk about often, because I use them often (such as my local bulk store, or my local veg box delivery).

But there are other places where I source zero waste items that I talk about less often.

If I’m going to paint a complete picture, I thought it might be helpful to explain where I source ALL the things I use.

Of course, if you live in Perth, these lists will probably be extra useful! If you’re not in Perth, hopefully it will give you some ideas about the kinds of places you might be able to source products in your own area.

At the very least, it might open your mind to new alternatives.

There’s a lot to say, so rather than overwhelm you, I’ve divided it up into sections. Today I’m talking about zero waste consumables (food and grocery items).

I’ll follow up next week with a post about consumable personal and cleaning products, and then with non-consumables (the buy-me-once type items) in the coming weeks, so stay tuned.

Where I Source Zero Waste Consumables

By consumables, I mean things that run out, get used up and need replacing. Things like food, personal care products, and cleaning products.

Whilst I source things from a number of different places, I’m not going to all the places all of the time. Some places I only visit twice a year. Others I visit weekly. Over time I’ve established a routine that works for me.

Zero Waste Grocery Shopping: Dry Goods

This is the one that gets talked about all the time, because food runs out more quickly than anything else (well, it does in my household)!

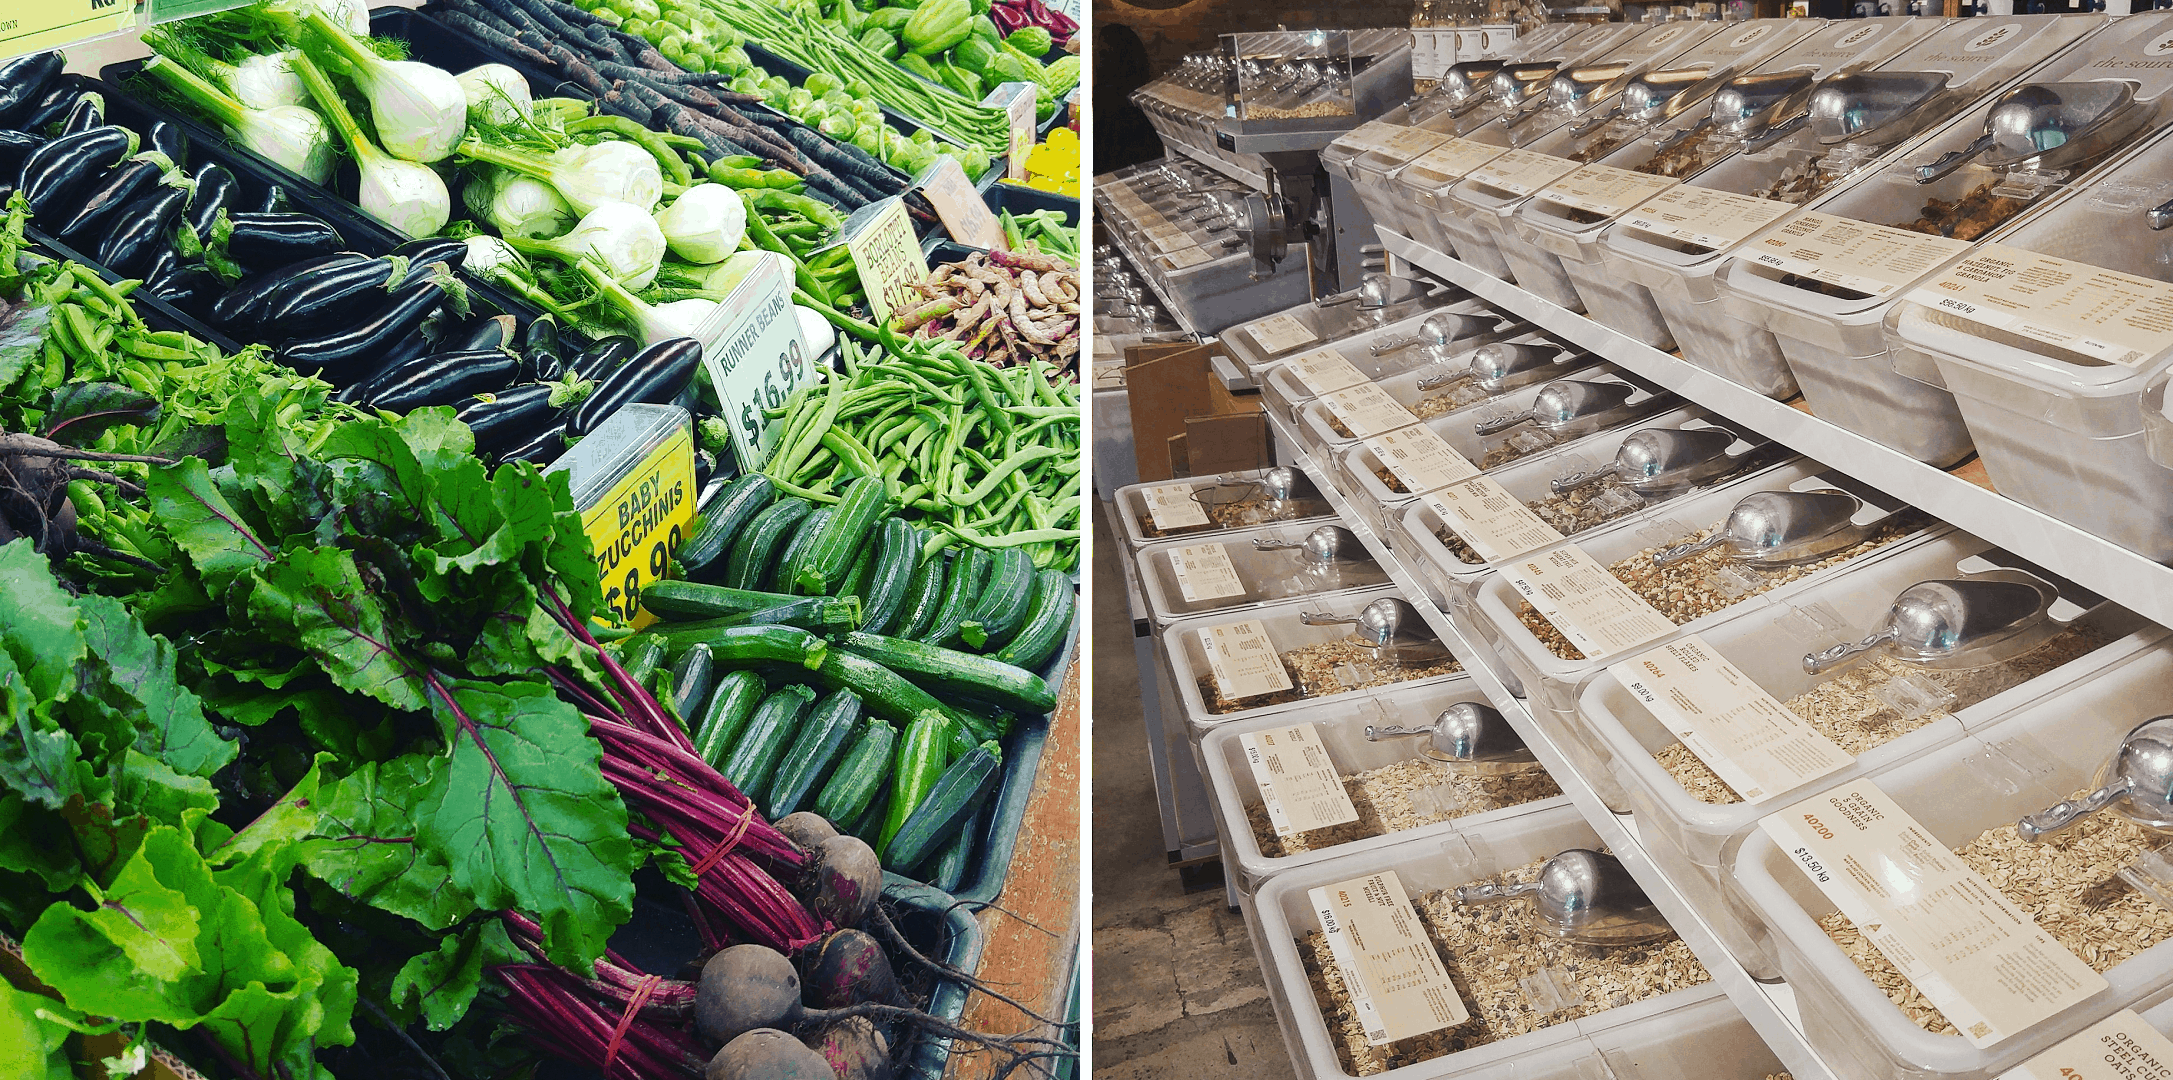
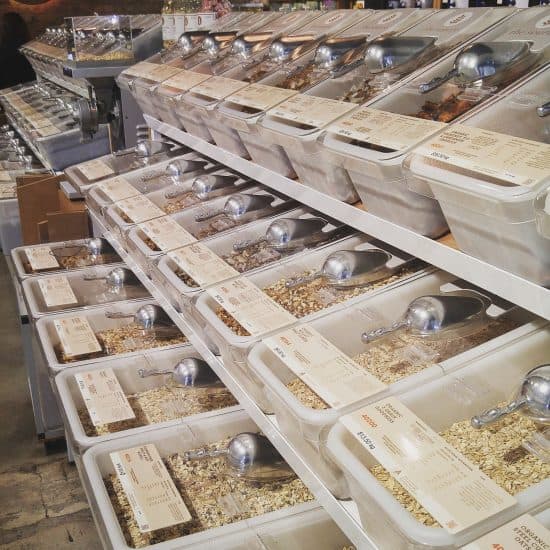
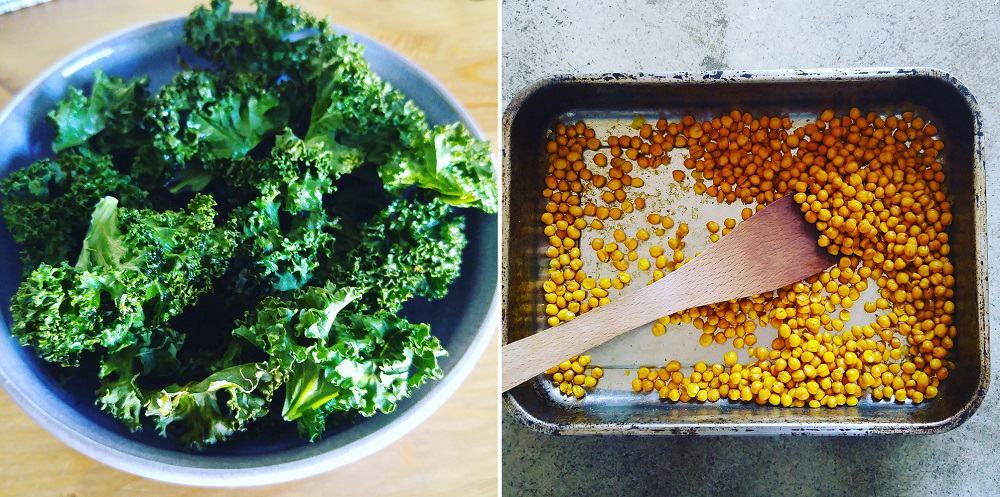
Bulk food stores are where I source all of my dry goods (pantry staples like rice, flour, lentils, pulses) and my liquid products (tahini, soy sauce, macadamia oil).

Specifically, I purchase about 95% of my bulk goods from The Source Bulk Foods (my local store is in Victoria Park, about 5 minutes from my house). They have a great range, the store is spotless and they stock a lot of local produce (I particularly like the Australian-grown nuts and quinoa, but plenty of their products are also home grown).

There are a few groceries I don’t buy from the Source Whole Foods:

I buy vermicelli pasta nests from Swansea Street Markets in East Victoria Park (The Source Bulk Foods don’t stock regular pasta, only the gluten-free kind).

I buy wakame seaweed (a bit of an obscure ingredient) and white vinegar for pickling from Manna Whole Foods in South Fremantle (the only place I’ve ever seen them both).

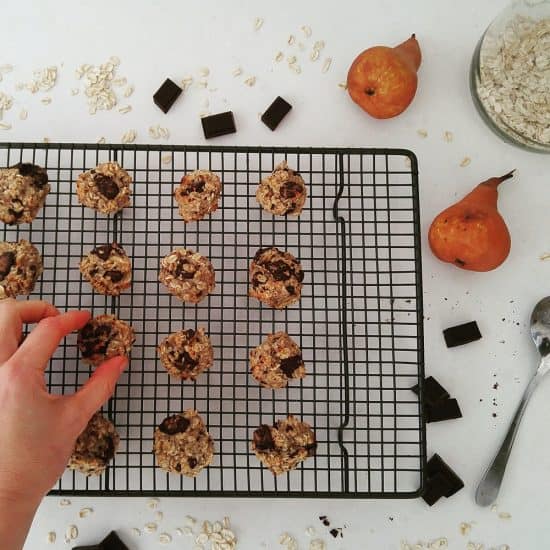
I occasionally have a moment of weakness and buy a bar of good quality dark chocolate wrapped in foil and paper from a local grocer, or even (if I’m desperate! It happens!) from the supermarket.

I buy coffee from local coffee place Antz Inya Pantz in East Victoria Park, who roast their own beans.

I source honey from my neighbour, who keeps bees.

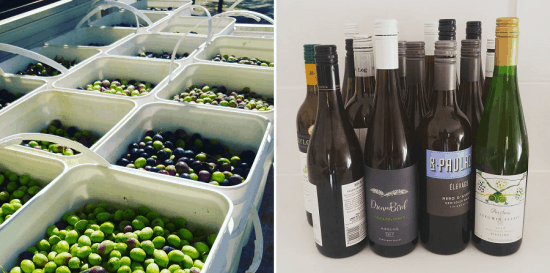
I collect olives from public trees with a group of friends every April, and press them locally to get a year’s supply of olive oil.

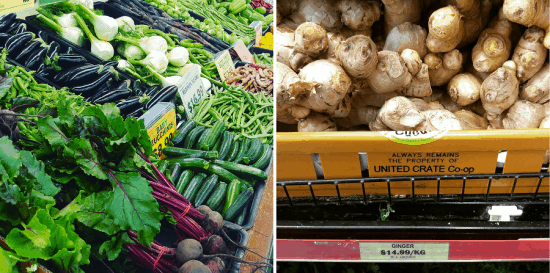
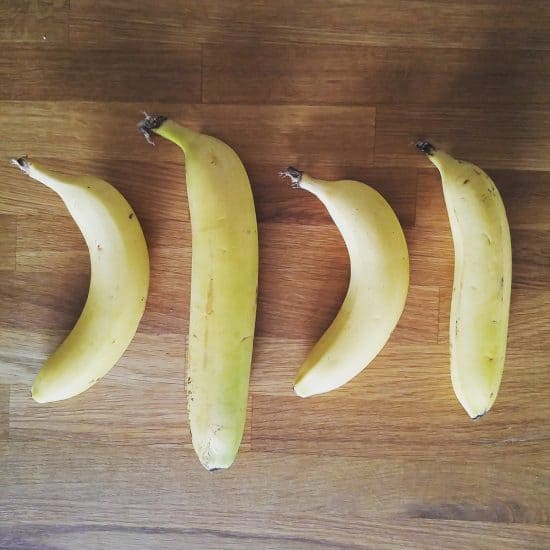
Zero Waste Grocery Shopping: Fresh Produce

The fresh produce that buy is fruit and vegetables, bread, and deli items like olives.

I no longer buy fish, meat or dairy products for my personal consumption. I do buy pet mince, chicken necks and chicken frames for my greyhound from The Butcher Shop in the Park Centre, East Victoria Park. This butcher (like many independently owned businesses) is happy to accept and fill my own containers. I use old yoghurt tubs I sourced from my local Buy Nothing group as I don’t mind if these get lost. I usually drop the containers off and they will call me once they have been able to fill them for me to collect.

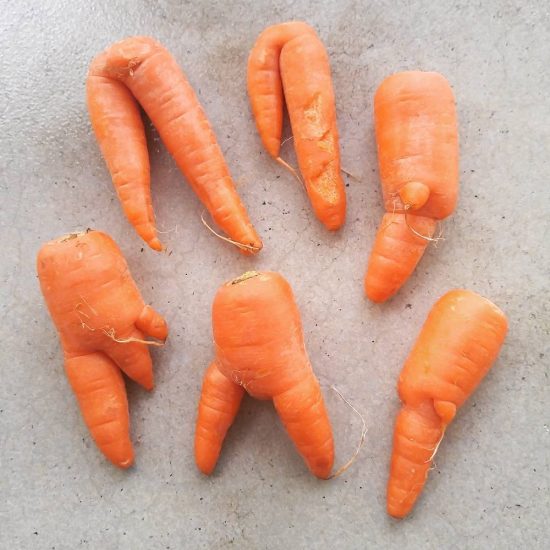
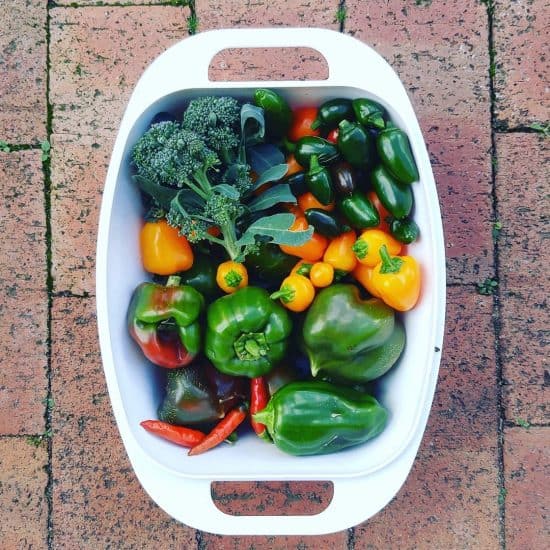
I have a homegrown veggie patch, which provides some of my fruit and veg – dependent on how much time I have and how much I can put into it. I’ve always got herbs (mint, parsley, oregano, thyme, coriander in winter and basil in summer), there’s always some kind of greens, capsicums, chillis and sweet potato.

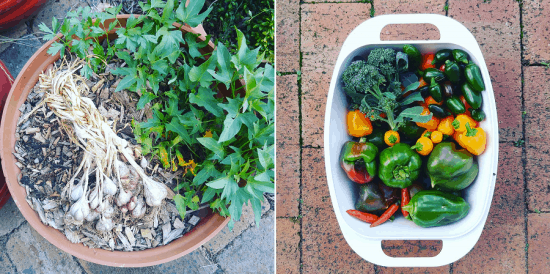
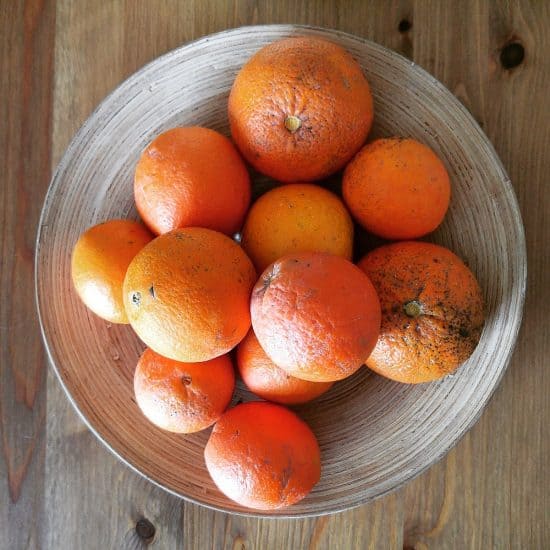
There’s also a few fruit trees. Lemons are available almost all year round, there’s a passion fruit vine and at the moment, guavas and kumquats.

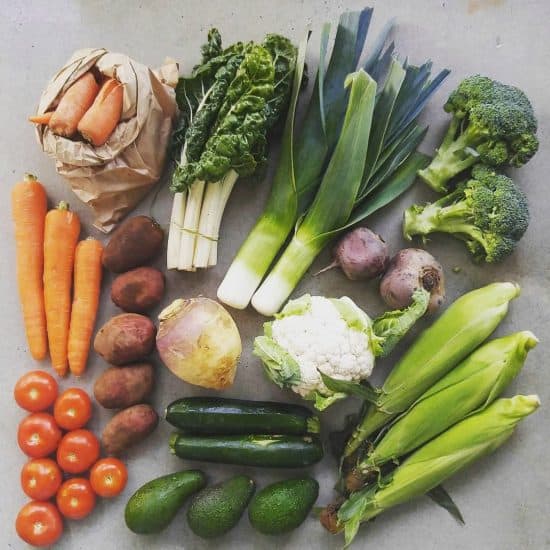
I order a veg box once a fortnight from The Organic Collective, based in Hamilton Hill, which is delivered direct to my doorstep.

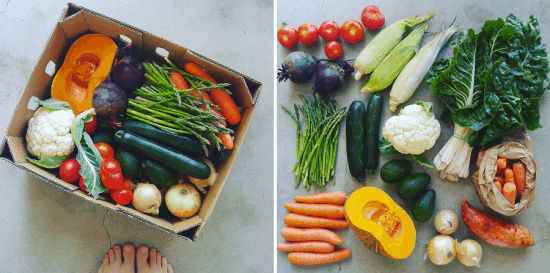
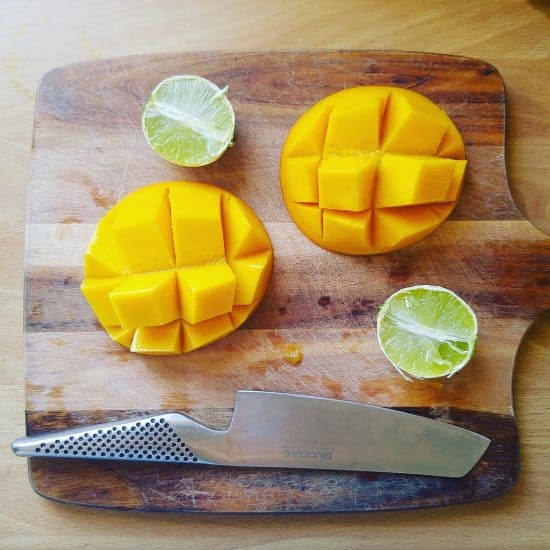
I top my veg box up with fruit and veg shopping at Swansea Street Markets in East Victoria Park, who have an excellent range of loose produce (including fresh herbs, peas and beans, salad leaves and other harder-to-find items).

They also stock a lot of West Australian and Australian produce, and label their Country of Origins properly.

My friends have a market garden and fruit orchard, and run the Guildford Food Hub (in Guildford) on Saturday mornings. I sometimes get fruit from them.

I occasionally pop into the supermarket to top up things like onions, avocados and mushrooms.

Swansea Street Markets also has a great deli counter. I occasionally buy olives and other antipasto type things from here, using my own jars (which they happily weigh before they fill). They also sell cheese and cold cut meats.

If I’m in Fremantle, Kakulas Sister has an excellent deli counter also, and are happy to tare and fill containers.

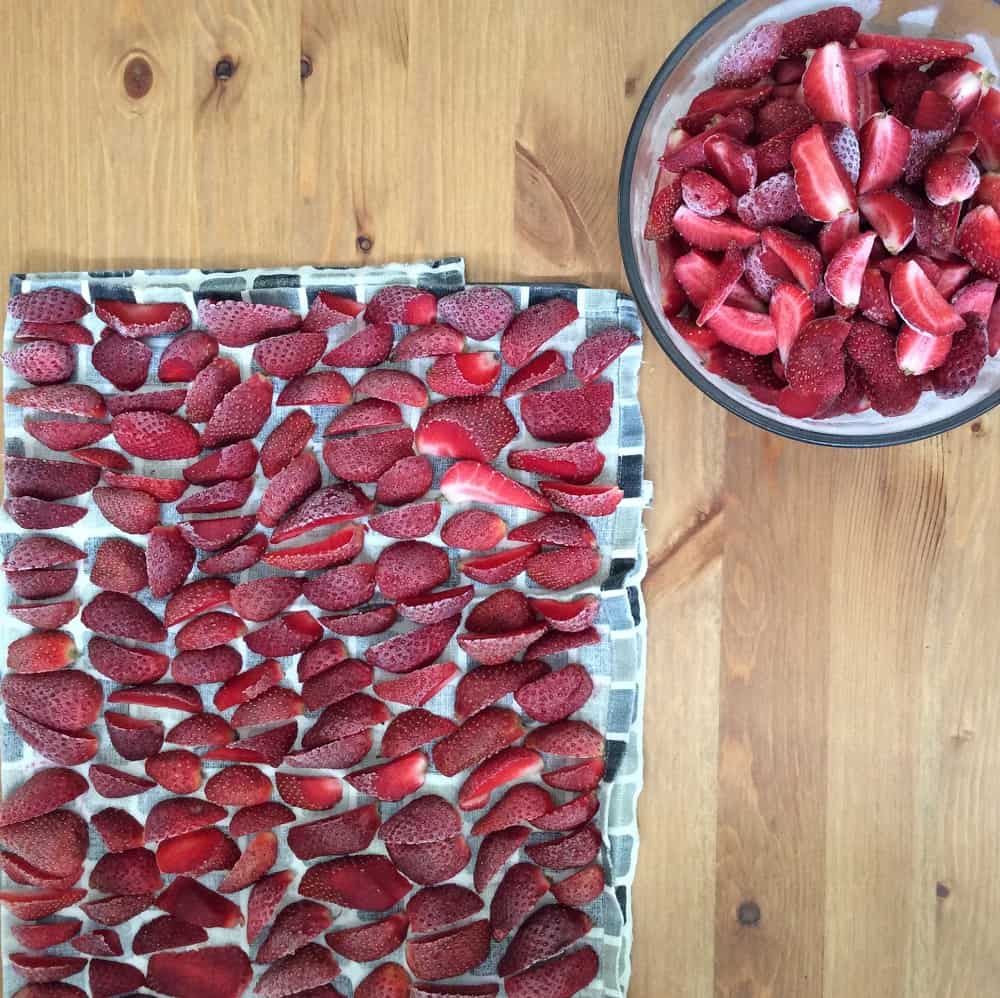
I don’t go to the Farmers Market regularly, but when I do I look out for what’s in season: boxes of strawberries, boxes of tomatoes, loose cherry tomatoes and other hard-to-find-without-packaging items.

My two favourite markets are the Subiaco Farmers Market (open on Saturday mornings) and the Growers Green Farmers Market in Beaconsfield/South Fremantle (open on Sunday mornings.

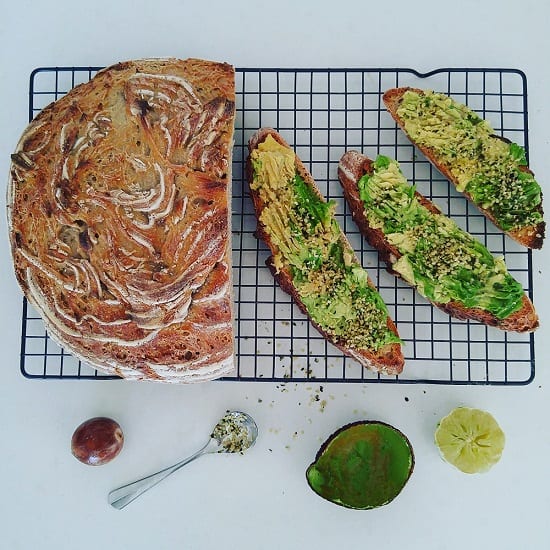
If I’m at the Farmers Market, I always buy bread. My favourite Wild Bakery has a stall at both Subiaco and Growers Green. Otherwise their actual bakery is located in South Fremantle. I pop in when I’m in the area, or ask my friend who lives around the corner to pick up a loaf for me if we are planning to meet.

I also buy bread from my other favourite bakery Bread in Common (in Pakenham Street, Fremantle).

As neither are local to me, I tend to buy two loaves at a time and freeze one. If I run out, I don’t eat bread until I stock up again. There are other bakeries close to me, but I really like good bread, and the others just don’t compare.

I also make my own bread, but that tends to be a little seasonal.

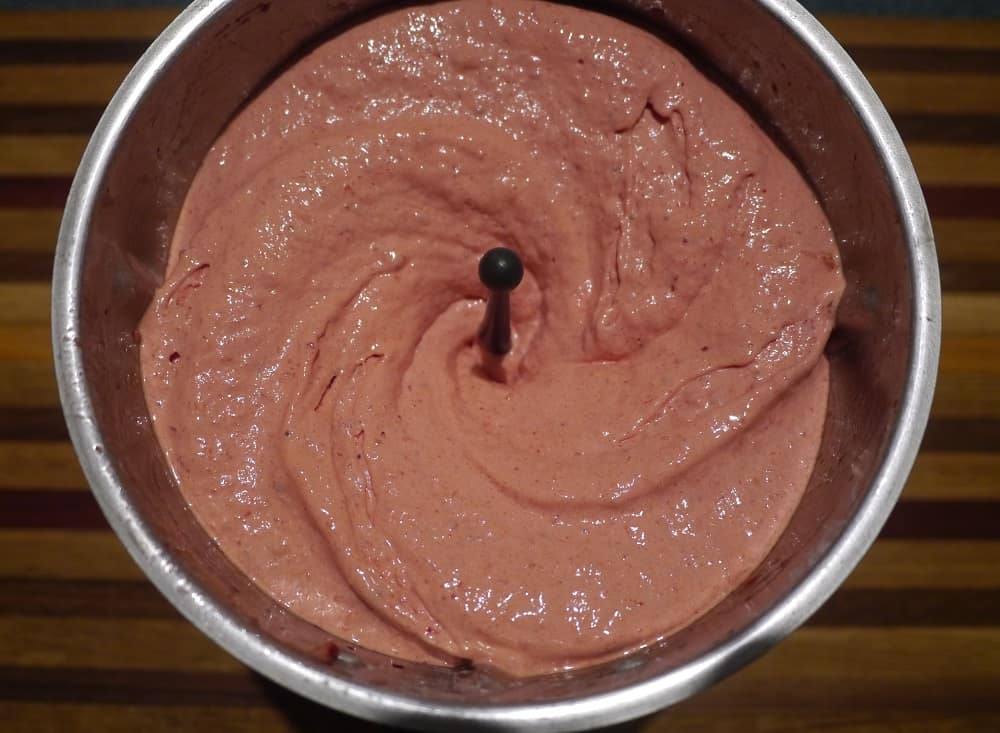
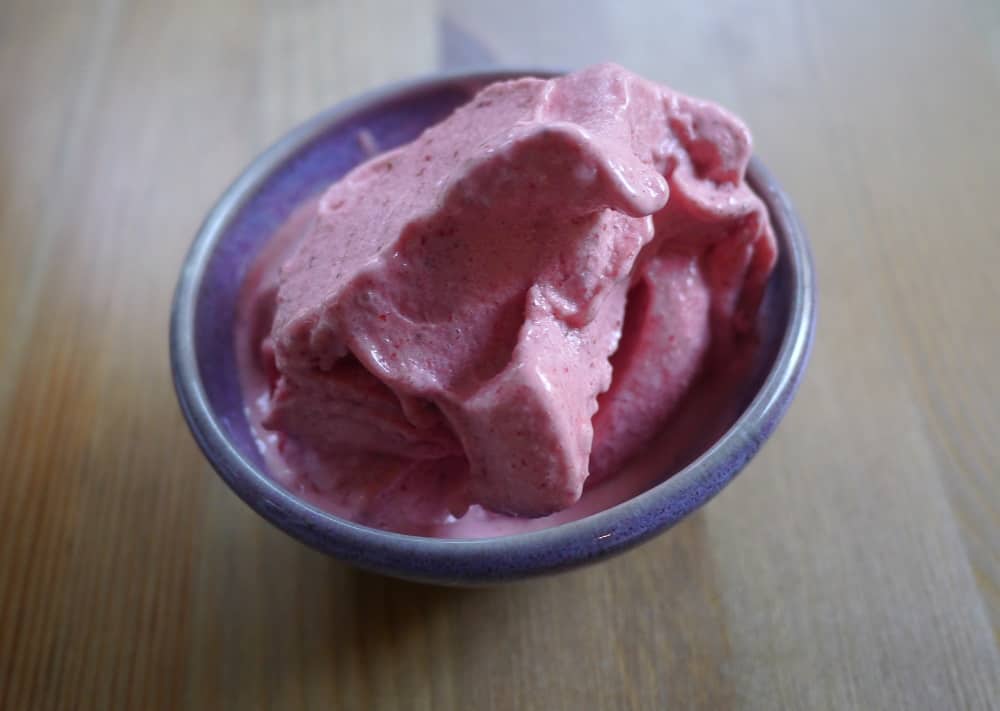
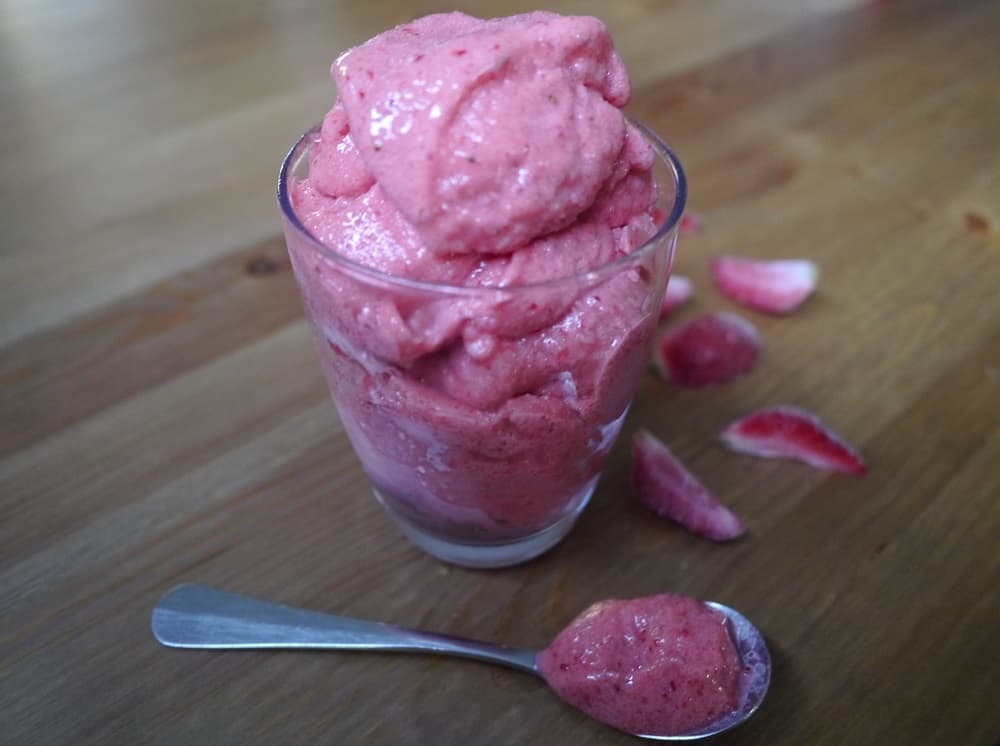
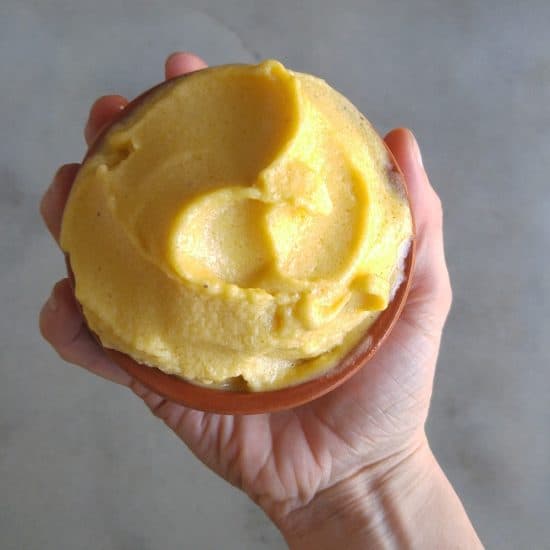
Something that I buy as a treat occasionally is ice-cream. There’s an amazing ice-cream shop in Victoria Park called Pietro Gelateria, with a small-but-mighty vegan ice cream selection (most of their offering is traditional dairy ice cream).

One of my favourite things is the plastic-free ice creams on sticks, mostly for the novelty. I take a Pyrex to the store, they pop two in, and I bring them home for later.

 Zero Waste Groceries: Things I Make

I tend to make things if they are easy, far more delicious when made from scratch, and/or unavailable without plastic or excessive packaging.

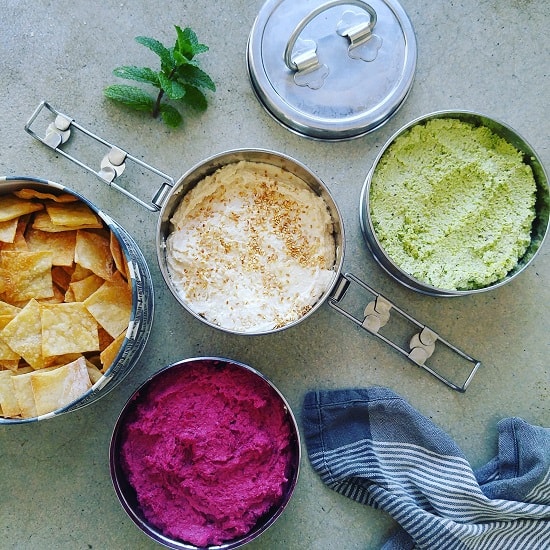
Some of the simplest things I make are apple cider/apple scraps vinegar (literally an apple core, some water, a bit of sugar and some stirring), refrigerator pickles (a 10-minute job), pesto and hummus.

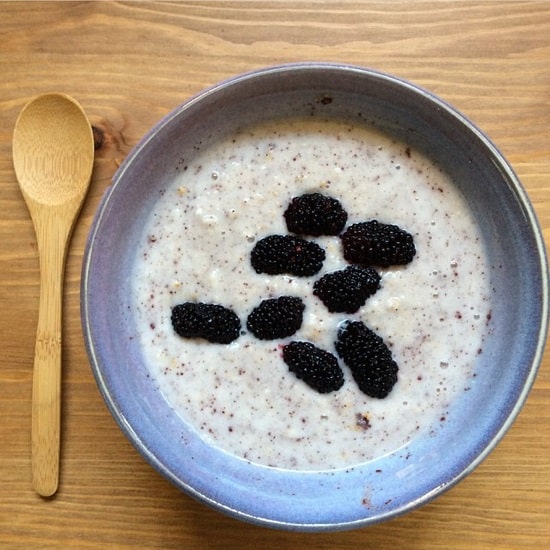
Back when I ate dairy, I’d make my own yoghurt (another ridiculously simple thing to make).

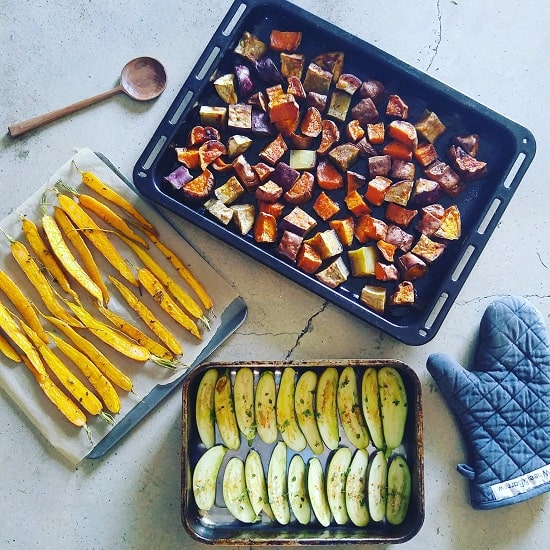
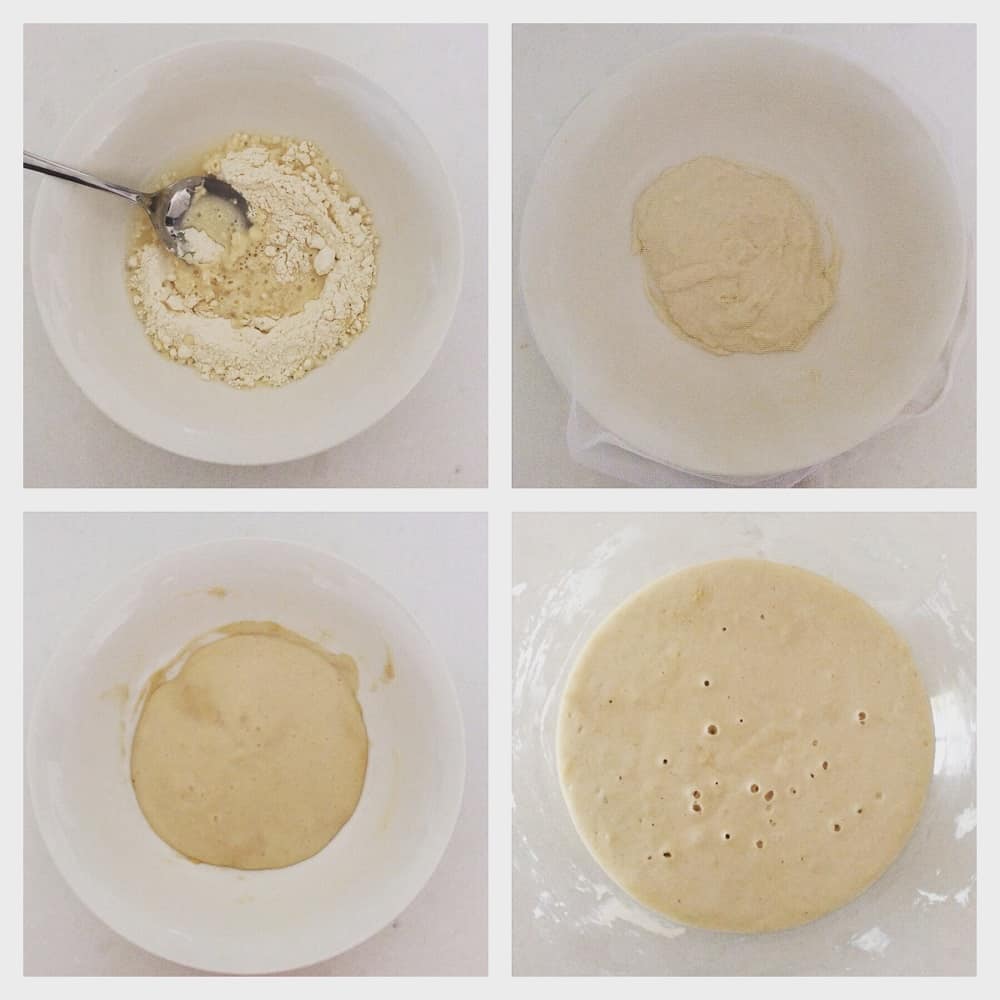
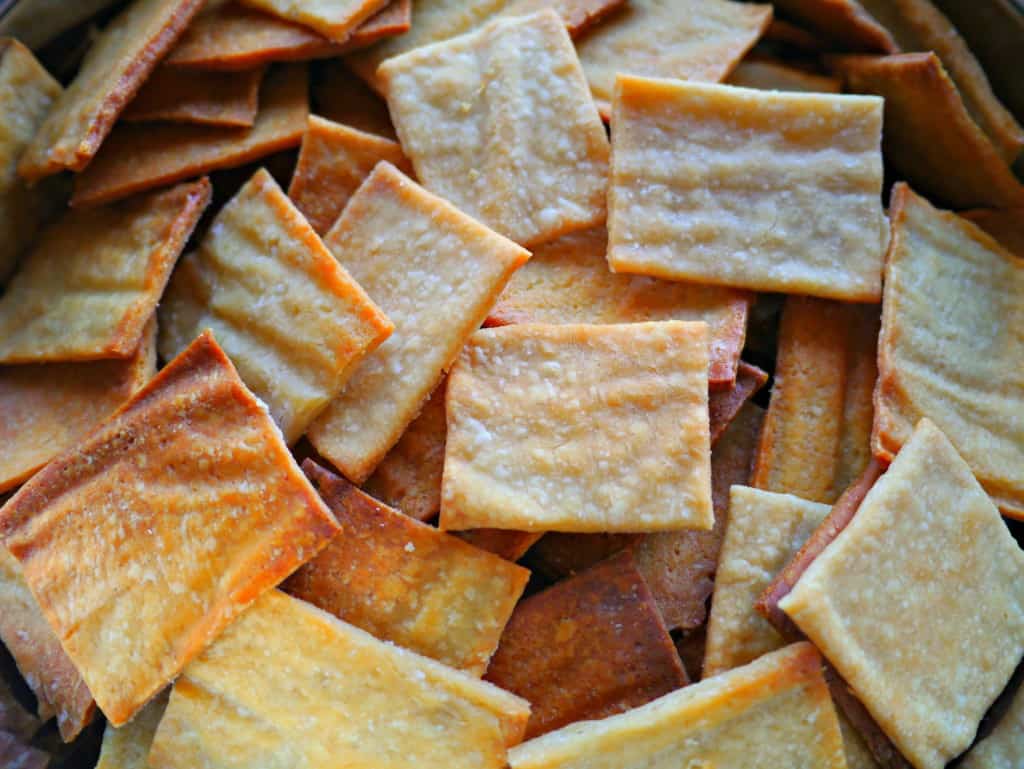
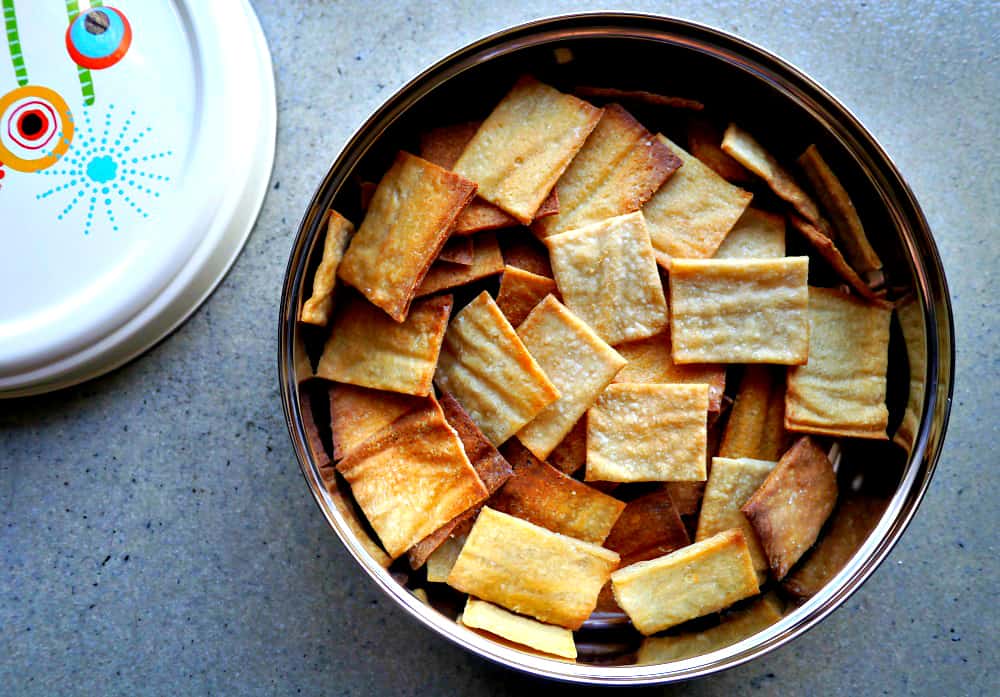
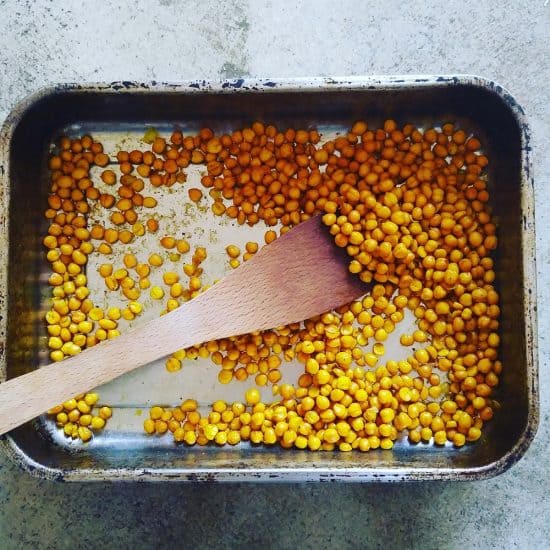
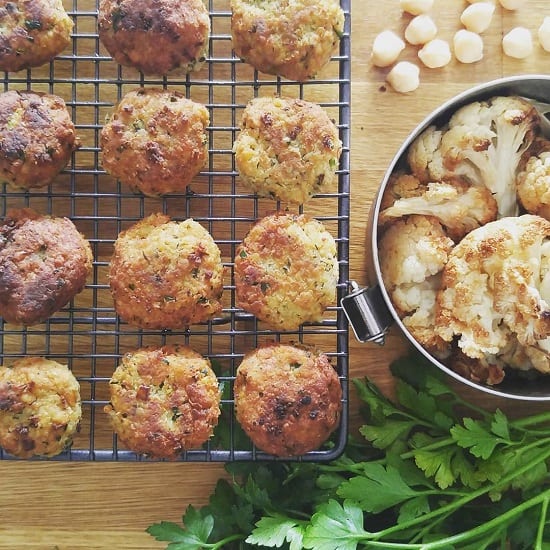
Things that take a little longer (but are oh-so worth it) are sourdough crackers and chickpea falafels. With falafels, I make a huge batch and freeze at least three-quarters. This also stops me eating the entire lot in one day.

Zero Waste Food: Takeaway

I rarely get takeaway. I prefer to eat in, and use real plates and metal reusable cutlery. I’m more likely to take home leftovers than actually order takeaway, and I always pack a reusable container when I head out, just in case.

I hope that’s given you some insight into the kinds of things I buy, and where from, and maybe some ideas for things you could incorporate into your own life. If you’re in Perth you might like to visit some of the places I’ve listed. If you’re not, maybe there’s something similar close to you.

In my experience, when it comes to plastic-free and zero waste living, there’s always a lot more options than we first expect.

Now I’d love to hear from you! Is there anything you’re trying to source that I haven’t covered? Anything you’ve had success with that you’d like to share? Anything that needs more explanation, or any tips you can add? Any other questions? Please share your thoughts in the comments below!

[leadpages_leadbox leadbox_id=140b48fc6639c5] [/leadpages_leadbox]

6+ Zero Waste Plastic-Free Snack Ideas

This week, I’m talking snacks. Specifically, zero waste snacks that you can make at home. If you have access to a bulk store, then you’ll have access to heaps of delicious plastic- and packaging-free snacks. For example, we can buy vegetable crisps, flavoured nuts, rice crackers, protein balls, and chocolate-coated everything (not to mention chocolate itself).

If you don’t have access to a bulk store, then this is not the least bit helpful. I realise that!

Rather than bore you all (or make you jealous) by telling you how wonderful bulk stores are, I’m going to focus on things that you can do and snacks that you can make without access to a bulk store. Level playing fields for all!

Zero Waste Snacks: Fresh Fruit

I know, I know. Boring! But also very good for you. Extremely easy to find without packaging.

Zero Waste Snacks: Fruit with Extras

I get it. You don’t want fruit. You want chocolate. You want something satisfying. I hear you.

But fruit is very versatile, and can easily be jazzed up. One of my favourite things to make fruit a little more filling (and tasty) is to slather it with nut butter. Apple slices spread with almond butter is the best. (If you’re allergic to nuts, or want a cheaper option, consider seed butters.)

Literally, nut and seed butters are just blended nuts or seeds. The natural oils are released with the friction, so there’s no need to add anything else. Generally toasted (and cooled) nuts will blend better than raw ones, so unless you have a super fancy blender, stick to toasted.

Another favourite is chopping bananas into rounds, and filling two rounds with peanut butter to make a sandwich.

Talking of bananas, I’ve also seen them peeled, dipped into chocolate (maybe half the length) and then nuts, seeds, coconut or other sprinkles used as a topping.

Orange segments, strawberries and raspberries can also be dipped in chocolate (assuming you can find berries packaging-free).

Zero Waste Snacks: Nice Cream

“Nice cream” is often used to describe vegan ice cream, but actually it’s not really ice cream – nothing so complicated. It’s actually just blended frozen fruit, which makes a soft-serve sorbet / ice cream that is eaten straightaway..

This one is mango and banana. A spoonful of nut butter or coconut butter adds a bit of creaminess. Literally take frozen fruit out of the freezer, and blend. Then, eat. So refreshing on a hot day!

Another favourite “nice cream” combo of mine is chocolate banana peanut butter : literally 2 frozen bananas, 1/3 cup cocoa powder and 2 tbsp peanut butter, blended. Yum.

Zero Waste Snacks: Vegetables

Yes, vegetables can be a snack. Carrots, capsicum, cucumber, radish, celery can all be chopped into crudites – although I tend to just chomp on carrots as they are. If you’ve got a dip (such as hummus – see my recipe here) all the better, but they can be good on their own. Pesto and even peanut butter (yes, carrots and peanut butter are a “thing”) also make good dips.

Broccoli has to be my favourite vegetable ever. I could eat bowlfuls of it… and I do. I like to fry it on a high heat so it chars a little, then add a big squeeze of lemon juice and a couple of tablespoons of tahini and mix together. Yum.

If you’ve never made kale chips, you are missing a trick. Yes, they look green and a little too healthy, but actually they are oily and salty and very tasty. I add to a roasting pan, drizzle with olive oil, sprinkle a little salt and pepper and bake in the oven on a low temperature (100ºC) for about 30 minutes.

(The low temp dries them out whilst keeping them green. If the oven is too high they will dry out and be ready quicker, but they will also be brown – not nearly so attractive.)

We don’t buy potato chips as they don’t come without packaging. Sometimes as a treat we’ll make a bowl of roast potatoes (chopped into small cubes and roasted to increase the crispy surface area) and snack on them. Probably not the healthiest option, but potato chips aren’t exactly either!

Vegetable peels also make great potato chips / crisps. I don’t tend to peel my veggies often (who can be bothered?!) But sometimes a recipe calls for peeling. If that’s the case I give the veggies a good scrub, peel and then put the veggies in a bowl with a small amount of olive oil. Mix, lay out of a baking sheet and bake in the oven for 10 mins or so, turning half way through.

This works for most veggie peels: potato, carrot and parsnip are my favourite (and the tastiest), but beetroot peels and sweet potato peels also work.

Zero Waste Snacks: Other Crunchy, Salty Things

When I crave snacks, it’s not necessarily that I’m hungry. (Usually I’m procrastinating!) Often I just want something crunchy and salty. For me, my go-to option is popcorn.

Even if you can’t buy popcorn from a bulk store and without packaging, a 500g bag of popping corn will make a LOT of popcorn. If you were to buy that many packets of pre-popped popcorn or even potato chips, the waste would be enormous. Even if it comes in plastic, popcorn is a very low-waste snack.

I always make mine in a saucepan. Heat enough oil in the bottom of the pan to coat the kernels (but not so much it covers them) and heat until the kernels begin to pop. Rather than use a saucepan lid, I use a tea towel to stop the popcorn pinging out of the pan. Whilst popcorn is doing its thing, it releases a lot of steam. I find with a saucepan lid the moisture condenses and drips back onto the popcorn – cue soggy popcorn. The tea towel allows the steam to escape and gives you crispy popcorn. Hurrah!

(As soon as the popping slows down, take the pan off the heat, otherwise the popcorn will burn. You can always save unpopped kernels for next time.)

Roasted chickpeas are another snack I make. I tend to buy chickpeas in bulk and cook them up a couple of kilos at a time, so I’ll often make a batch of these. If you have access to dried chickpeas, either in bulk or in large bags, this is a great option. If you can only buy the tins, I probably wouldn’t bother (you’ll end up with way more packaging than snack). You can find my roasted chickpea recipe here.

Zero Waste Snacks: Really Simple Making & Baking

When I think of snacks, I think of something quick and easy. Baking is great, and I love it, but it often requires a little time. However, there are a few things that you can pull together and bake very quickly, so I’ve included a couple of ideas.

Bliss balls are the first option. All you need is a blender or food processor. They are typically made from nuts and dates blended together and rolled into balls. The less ingredients the better, in my view.

These are macadamias, shredded coconut, rice malt syrup and the juice and rind of a couple of lemons. Macadamias, dates and fresh ginger are also a great combo. And anything chocolate-flavoured, of course. Simply google “bliss balls” and you will find millions of options.

Cookies are another simple, low fuss baking solution, and 84th & 3rd’s 3 ingredient emergency cookies are a great zero waste option, requiring oats (these can be bought in cardboard only if not in bulk), pears and chocolate. You can substitute the pear for banana, switch the chocolate for nuts, add a couple of spoonfuls of nut butter to increase the flavour.

I’m not going to delve into full-on baking in this post, but of course, your imagination is your only limitation. Don’t be afraid to google recipes, or even inspiration for single ingredients and see what the internet has to offer. Or even better, experiment!

Now I’d love to hear from you! What are your favourite zero waste and plastic-free snacks? Any recipes that you’d recommend? Any tips and tricks to share? Any particular struggles that you have? I’d love to know more so please share your thoughts in the comments below!

[leadpages_leadbox leadbox_id=1429a0746639c5] [/leadpages_leadbox]

A Zero Waste Food Diary (Part 1): Mealtimes

I get asked about this a lot and I’ve been intending to write about this for ages: the kinds of things I eat in a typical week. I confess, I tend to get stuck in a rut of eating the same 5-7 meals week in, week out until inspiration strikes again. (Can anyone else relate to that?)

Even though there is a whole plethora of things I love to eat, my brain seems to forget them all save a few. Then I’ll glance on a long-forgotten recipe, and that will become the new staple for a couple of months, and something else will fall off the list.

So what I’ve shared below isn’t a typical week, so much as a collection of the kinds of things we eat.

I don’t tend to meal plan, at least not week by week. We get a veg box delivered once a fortnight (from The Organic Collective) and we never know exactly what we are going to get. We also have a veggie garden that does not ripen according to any meal-planning schedule. Fortunately, I do have a knack for being able to whip up a meal even when my husband assures me that there is simply nothing to eat in the house.

Organic Collective Veg Box

The veg box arrives on a Tuesday, and I’ll open it up to see what we have and make a rough meal plan in my head for the next fortnight. There will be things that I need to buy to supplement what I want to make. I also tend to buy avocados (we eat a LOT of avocados; grateful they grow here in WA), mushrooms, onions, garlic and tomatoes from the store fairly regularly to supplement the box.

In my veggie garden there is always a variety of greens, plenty of herbs, chillis and some seasonal vegetables. (I recorded a garden tour video last week for my Patreon page; you’ll get access to this and additional content if you become a member.)

Garden Pickings

Sometimes I make my own sourdough, but recently we’ve been buying bread from Escape and Rebellion, a local microbakery. My bulk goods come from The Source Bulk Foods (specifically the Vic Park store), which has everything I could ever need… and plenty of things I don’t but that I buy anyway (hello, enormous and delicious chocolatey section.)

A Zero Waste Food Diary: Breakfast

Porridge is one of our staple breakfasts. I cook the oats on a very low temperature with water, and stir through a little cashew milk as soon as I’ve taken it off the heat. I often add hemp seeds, chia seeds or flax seeds. Sometimes I add fruit: chopped banana or mulberries (when in season).

Toast comes and goes as a breakfast item. I don’t think it’s really that healthy; but it’s easy, and since we discovered the new microbakery we have been eating it a little more. We generally top our toast with mashed avocado, a squeeze of lemon juice and a sprinkling of hemp seeds.

Muesli is another breakfast basic. I make my own using this no sugar muesli recipe. Sometimes I’ll use it as a topper for porridge or a smoothie if I want some extra crunch.

Smoothies and smoothie bowls tend to be more a summer thing than a winter one. Smoothie bowls are simply smoothies that are thick enough to eat with a spoon. Adding half an avocado and a few spoonfuls of nut butter helps bulk it out.

It is worth noting that I am a huge fan of leftovers, and will quite often have leftovers for breakfast: salad, rice and vegetables, etc.

A Zero Waste Food Diary: Lunchtime / Light Meals

It is actually quite hard to distinguish between lunch and dinner in our household, as lunch usually consists of last night’s dinner or other leftovers. We don’t tend to eat sandwiches or wraps or other lunchtime-y things.

One of the reasons I don’t love having bread in the house is that it is all too easy to have toast for lunch as well as breakfast. Sometimes we will have bruchetta at the weekends, but not often during the week.

Great things to put on bread / bruschetta (aside from avocado): dips (hummus especially), pesto, fresh tomatoes, fresh mashed broad beans, lots of herbs.

Dips are really easy to make from scratch. I make hummus often (you can find my hummus recipe here). To make beetroot hummus I simply add finely grated beetroot to the regular hummus recipe (both raw and cooked beetroot work). Hummus freezes really well, so make more than you need and freeze the rest.

To eat I either slather on toast, chop up veggies to make crudites or make my own sourdough crackers.

Salads tend to be a side serve rather than a meal in themselves, unless it’s a 40 degree day. Salads do not have to be boring. If they are insipid and without any flavour or substance, it just means you will spend all afternoon eating chocolate.

I’m a big fan of a colourful salad, but I also like making green salads where the only ingredients can be green. This can include: lettuce, kale, pan-fried broccoli, lots of herbs (ideas include coriander, parsley, Thai basil and mint – probably not all at once!), cucumber, green capsicum/pepper, green jalapenos, avocado. I always add some kind of fat (avocado, nuts and/or seeds) and try to include different textures. Capers add a bit of punch.

For salad dressing I add a squeeze of lemon or lime juice, maybe a dash of apple cider vinegar and a drizzle of tahini.

Colourful salads can contain everything! Don’t be afraid to add apple or pear, strawberries (which go amazingly with tomato) or mango to a salad. Roasted vegetables that have cooled are a great addition too (think butternut squash, sweet potato, beetroot). Always add some kind of crunchy topping – nuts or seeds, even croutons.

I often eat salad with a side of quinoa. Generally I mix it all up in the bowl, but here I was being all fancy-like. It’s simply green lettuce, cucumber, avocado, roasted zucchini, quinoa, roasted carrots, olives, chickpeas and sauerkraut (DIY sauerkraut recipe here).

Soup is another lunch option. I tend to like soup that only has one or two vegetables in it (rather than generic chunky veg soup), so it tends to be made if I have a glut of something. I often have a corn cob with soup for lunch, and have been known to use soup as a pasta sauce.

A Zero Waste Food Diary: Dinnertime / Heavier Meals

I take a lot of my inspiration from Yotam Ottolenghi. The man is a vegetable-cooking genius, and he is not even vegetarian! An Israeli-Italian living in London, he knows how to use vegetables, pulses and beans to create filling, tasty, flavourful dishes. I own a couple of his cookbooks (and as a minimalist, that’s saying something!)

Some of his recipes can be a little fiddly but most are easily adaptable. If you’re unsure how to get started with vegetarian cooking, or using chickpeas and other pulses, I’d recommend his books Plenty and Plenty More (check your library).

These falafels are not from Ottolenghi, but it’s the kind of thing you’d find in his books. (I suspect he has a recipe somewhere.) After struggling to make falafels several times, I’ve finally nailed a recipe and these have become a staple in our house.

(Back when I lived in the UK, before I went plastic-free / zero waste, I used to eat a lot of falafels. They came in a hard plastic tub, with a plastic film lid, then with a cardboard outer. You’d get 8 in a pack. I bought them often. Cringe!)

I almost always serve with roasted cauliflower (not tried roasted cauliflower? You’re missing a trick!) and a rice salad which I’ve talked about below.

This rice salad definitely draws inspiration from Ottolenghi: he has a bunch of salads that look like this. I’ve made most of them over the years: these days I follow a general formula rather than a recipe as such. As a minimum I cook white rice, lentils (usually puy lentils) and quinoa. I cook all three separately and combine when cooled). I’ll thinly slice and fry onions until caramelised. Then I add heaps of herbs (coriander, parsley and mint tend to be the ones I have; I don’t necessarily use all but at least two). Finally I add something for sweetness (pomegranate, cape gooseberries, dried cherries) and something for crunch (roasted almonds, occasionally pine nuts).

Sometimes I’ll add wild rice, or use red rice instead of white rice. The puy lentils can be switched for beluga lentils, or green lentils, or even chickpeas. I’ll use spinach or mizuna lettuce instead / as well as herbs. Sometimes I add cumin or lemon zest. I find it pretty flexible.

I also make an enormous bowl and we tend to eat it for lunch and dinner for a few days.

We also eat a lot of stir-fries and one-pot vegetable dishes. This one below was inspired by Ottolenghi – I didn’t have half of the ingredients, but had similar things so I looked at the picture and made my own version. It’s white sweet potato (pre-cooked) fried in a pan with onion, chard and chickpeas, and lots of lemon juice.

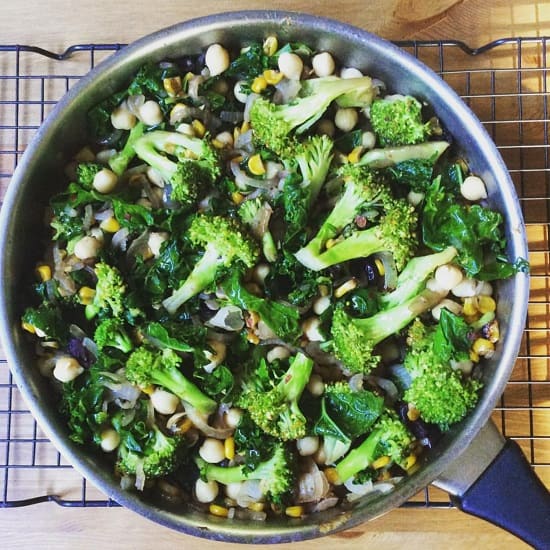
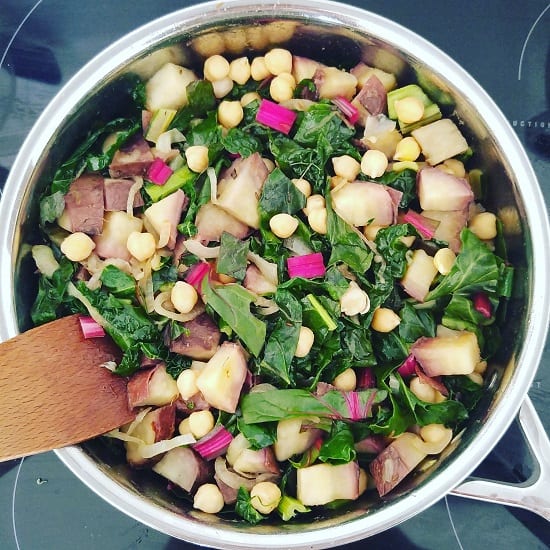
More vegetable one-pot meals: this would be the kind of filling I’d use for baked potatoes or sweet potatoes – topped with avocado and drizzled with tahini.

This is literally a use-up-whats-in-the-fridge meal. I used two pans to try and keep the flavours different and make it a bit more interesting.

We eat pasta occasionally, usually with a tomato-based sauce (we chop up fresh tomatoes), or with pesto (made with herbs from the garden) or a creamy sauce made with avocado. This is chopped greens (kale, spinach and parsley), fried in garlic, drizzled in lemon juice and mixed with some pesto.

We also eat a lot of dahl (which is basically Indian spiced cooked lentils). I tend to use yellow lentils for this. I first made dahl using Nigel Slater’s recipe way back when. I still use it as a base recipe, but mess around with the spices, or add coconut milk (probably not a very dahl thing to do) or add lots of kale.

Usually I don’t mix dahl with rice, but this was a case of reheating leftovers and only wanting to wash one saucepan.

Roast vegetables are a winter staple in our house. I roast a lot of butternut squash and other pumpkins, sweet potato, beetroot, carrots. Once roasted I use in salads, as a side, or with puy lentils to make a more filling dish. Alternatively I used leftover roast veggies to make soup, or add to hummus.

I have a guilty pleasure of roasting actual potatoes and then eating out of a bowl as a snack.

As I mentioned at the beginning, this isn’t a complete food diary of what I eat in a week – rather I’ve tried to show you as many ideas as possible. There’s plenty more I could talk about. Plant foods are so versatile, it is truly impossible to run out of inspiration!

In part 2 I’m going to be talking about zero waste snacks: in particular, snacks to eat when you don’t have access to a bulk store. Until then, I’d love to hear from you! What are your go-to zero waste meals? Any quick and easy ones you recommend? Or anything that takes a bit of effort but is totally worth it? Any flavour or ingredient combos you love? Anything else to add? Please share your thoughts in the comments below!

[leadpages_leadbox leadbox_id=1429a0746639c5] [/leadpages_leadbox]

DIY Sourdough Starter + Zero Waste Crackers

Making a sourdough starter from scratch is one of the easiest things you can do, and it doesn’t need any special ingredients. Literally all that is required is flour, water, a bowl, a spoon, and a little bit of patience. Even if you’re not sure you want to start baking sourdough every week (although I assure you, once you start, you won’t want to stop!) the sourdough starter can be used to make sourdough crackers.

Crackers are far quicker and simpler to make than sourdough bread, but equally delicious… plus crackers are one of those things that are impossible to find zero waste or plastic-free in my experience. Homemade, simple, delicious, waste-free… what’s not to love?!

To make a sourdough starter from scratch, we utilize the natural yeasts and lactic acid bacteria present on the flour. Another term for it is wild fermentation – how cool does that sound?! That’s how people made bread and other fermented products for thousands of years, before commercial yeasts were available. They harnessed the power of nature.

If we’re going to use the natural yeasts and bacteria present on the flour, then I recommend buying the best flour that you can find. Once your sourdough culture is established you can relax a little, although I’d always recommend buying the best ingredients that you can afford. If your tap water is chlorinated, fill a bottle and leave at room temperature or in a sunny place for a few hours to let the chlorine gas dissipate – you don’t want to kill the starter before it’s started!

How to Start your Sourdough Starter

Mix together 50g flour with 50g water in a bowl (1 gram of water is the same as 1 ml water). You can use more but don’t use too much less as it will be much harder to work with. However much you use, you want the flour:water ratio to be 1:1.

At this point it will look like a dough, and it will smell like wet flour. Cover the bowl with a tea towel and leave on the side at room temperature (if you’re home is cold or it is winter, a warmer place will help get it going faster). Stir every few hours. If a skin forms on top, simply stir it in.

It may not seem like much is happening at the start, but if you pay attention to the smell you will notice that it starts to smell less like flour and has developed a sour smell. This is a sign that it is working. Hurrah! Look out for bubbles forming in the dough. In the beginning there will only be a couple, but it’s another sign that your starter is beginning to do its thing.

After a couple of days of stirring, you will need to feed your starter. Even if you’re only noticing a couple of bubbles, the starter will dry out over time, and as it sticks to the side of the bowl and hardens the volume tends to decrease, so feeding helps refresh it. Take another bowl, add 10g of your starter to it, and then add 50g flour and 50g water to this (you can use other volumes, but the ratio should be 1:5:5 starter:flour:water). Stir thoroughly, and cover with the tea towel.

Leave the remaining leftover starter in the original bowl, cover with a plate and store in the fridge. This will be used for making the sourdough crackers later.

Keep stirring the new starter every few hours (this doesn’t need to be exact, just whenever you remember). You should notice that the bubbles are becoming more frequent (you may not see a lot, but more than you saw at the start). Depending on how active your starter is getting, you can either feed again in 24 hours, or leave for a couple of days.

To feed, repeat as before. Take 10g of your active starter and add to a new bowl with 50g flour and 50g water, and stir well. Any leftover starter can be poured into that bowl sitting in the fridge with the original starter.

Each time you feed, you should notice your starter getting a little more active. You’ll want to feed it at least 5 times, once a day (timing is not that important) before it’s ready – and by ready, I mean active.

Sourdough Starter from Scratch Treading My Own Path

The four stages of starting your own sourdough starter from scratch. Stage 1: mix flour with water. Stage 2: cover with a tea towel or gauze – you want air to get in, but nothing nasty! You will need to stir every few hours. Stage 3: you will notice bubbles begin to appear. Your starter will begin to dry out a little. Stir the drier parts in, but as it gets drier you’ll need to feed it. That means taking a small part of this and mixing with fresh water and fresh flour (save the discard to make crackers). Step 4: after a week and a few feeds, your starter should be bubbling away quite happily.

Maintaining Your Sourdough Starter

Once your sourdough starter is ready, you can either store on the kitchen counter, or in the fridge. Store in a jar with a loose-fitting lid, or with a fabric circle secured with an elastic band. You want air to get in, but no creepy-crawlies. If you keep it on the kitchen counter you’ll need to feed it every day. If you keep it in the fridge you can feed every 1-3 weeks (once a week is best, but it will be fine if you feed it every three or so). I keep mine in the fridge.

When you want to feed your starter,  allow to return to room temperature if it has been in the fridge. Keep the ratio the same 1:5:5. Keep the discard in the fridge until you are ready to make crackers.

Zero Waste Sourdough Crackers

Sourdough Crackers Treading My Own Path

Homemade sourdough crackers – simple to make, zero waste, plastic-free and no nasty additives. What’s not to love?!

Once you’ve made your sourdough starter you should have a bowl of discarded starter sitting in your fridge, waiting to be made into crackers. I have to thank the Zero Waste Chef for this idea, as previously when I had excess sourdough starter I’d throw it away. It felt so wrong, but that’s what all the recipes tell you to do. Turns out, they are all wrong! Throw nothing away, and make crackers instead. Thanks Anne-Marie!

This recipe is a combination of the one by the Zero Waste Chef, and also some notes I have from a Plastic Free July workshop back in 2012 which has no references except a comment that the writer was called Katie.

Ingredients:

215g discarded sourdough starter
3 tbsp olive oil (30g)
100g plain flour
1/2 tsp salt
1/4 tsp bicarb soda

Extra olive oil and salt to top.

I found that when I made a starter from scratch, feeding every day for 5 days left me with 215g starter. But you change change the quantities of flour to starter, they don’t need to be exact – just remember it’s approximately twice the starter to flour. You want to make a dough, so if it is too sticky add more flour.

The moisture in the starter also varies depending on how fresh it is. If you need to add more flour, do so!

Method:

Mix the olive oil with the starter and stir until combined. Add the dry ingredients to the starter / oil mix and combine first with a spoon, and then with your hands. If it is still sticky, add flour in small quantities until you have a dough. Knead to ensure it is smooth.

Place in a glass bowl, cover with a tea towel or a plate (or both!) and leave to rest at room temperature for 8 hours (or overnight). This allows the dough to sour and develop flavour.

After 8 hours, divide the dough into 4. One at a time, roll the ball out onto a baking sheet lined with baking paper using a rolling pin (yes, my zero waste kitchen contains baking paper. I re-use each piece several times. You can read more here). The reason for the paper? After waiting 8 hours, I don’t want to take the risk that my crackers will stick to the metal tray and burn.

Roll the dough out to between 3 – 5mm thickness, trying to ensure it is even. Trim the edges, and cut into rectangles with  sharp knife.

Brush with olive oil, and then sprinkle salt on the top.

Bake in an oven at 150°C (350°F) for 8 minutes, then turn over and bake for another 8 minutes. You will find that the crackers on the edge cook a lot faster than those in the middle, so if you want to remove those sooner you’ll avoid them over-cooking. You want them to look golden but not too brown.

Cool on a wire rack and store in an airtight container.

TIPS:

  • 8 hours in the ideal, but this recipe is really flexible. You can make the crackers after only leaving the dough for 30 minutes (but longer is better). If you forget and leave them longer, you will still have good crackers.
  • The dough can be frozen or refrigerated if you want to make a big batch of dough and keep some for later.
  • I would guess they would last a week, but I’ve never been able to find out as they all get eaten long before! They don’t lose their crunch after storing so they are definitely something that can be made ahead.
Sourdough Zero Waste Crackers FINAL

Zero Waste Sourdough Crackers

As always, I’d love to hear from you! Do you make your own sourdough, and have I tempted you to give it a go? Do you already make your own crackers? Do you have any recipes and tips you’d like to share? What toppings and flavours do you think would work best? Please tell me your thought in the comments below!

[leadpages_leadbox leadbox_id=123a865e9839c5] [/leadpages_leadbox]

Zero Waste Strawberry Recipes (And None of Them Are Jam)

A small miracle happened. I went to the Farmers’ Market…and found plastic-free strawberries! Oh the excitement! The elation! I haven’t bought strawberries in 4 years because I won’t buy them in plastic packaging, and let’s face it, that’s sad, because seasonal freshly picked strawberries are delicious. There was just one catch. They came in the hugest box you’d ever seen. Sold as “jamming strawberries”, there must have been the equivalent of 20 punnets there. I kid you not.

Of course, at the time it seemed like a great idea. I marched home with a massive box of jamming strawberries (which means all those berries that are misshapen, blemished, slightly too ripe, and a couple that were starting to sprout furry bits). It was only then that I realised the enormity of the task ahead: washing, chopping, planning and eating these 20 punnets of strawberries before they expire! As we all know, fresh strawberries do not last long!

Luckily for me I like a challenge, especially one that involves food. After spending a weekend with these strawberries, I have some great ideas for how to use up a glut of strawberries…without making jam.

First Things First: Freezing Strawberries Successfully

Strawberries actually freeze very well. I wouldn’t trust them not to be mushy when defrosted, but they are perfect for adding to smoothies or using in baking. The trick is not to chuck them all together in a bowl, or you’ll be left with a giant frozen mass that can’t be separated. Instead, after washing, chop into quarters and lay out on a baking sheet lined with a tea towel. Pop into the freezer for a few hours. Remove when frozen, pop into a container with a lid (I use a glass Pyrex container but a glass jar would work too) and keep in the freezer until needed.

Preparing Strawberries for the Freezer

How to prepare and freeze strawberries

Strawberry Sorbet (Contains raw egg)

Ingredients:

400g strawberries, chopped and frozen
200g ice
juice of 1/2 lemon
1 egg white
50g icing (superfine) sugar

Method:

You will need a high-powered blender or food processor for best results.

Blend ice, frozen strawberries lemon juice and icing sugar together until smooth. The smoother it is, the less ice crystals will remain – however the longer you blend, the more it will heat up (and melt). If your blender is struggling, pop the jug into the freezer to cool and resume once refrozen.

For best results, use a whisk attachment for this. Add egg white and whisk for 2-3 minutes until fluffy. Eat straightaway. You can freeze leftovers in a glass container however remember that this sorbet contains raw egg, so it’s best not to defrost and refreeze.

Strawberry Sorbet

All light and fluffy!

Strawberry Sorbet in a bowl

Dairy-free strawberry sorbet (contains raw egg)

Strawberry Sorbet (Vegan)

Ingredients:

400g strawberries, chopped and frozen
200g ice
1 cup aquafaba (liquid left over after cooking chickpeas)
50g icing (fine) sugar

Method:

You will need a high-powered blender or food processor for best results. Blend the frozen strawberries and ice until grainy, and add the sugar. Blend to combine. In a separate container whisk the aquafaba for several minutes until soft peaks form. Using a whisk attachment with your blender, add the aquafaba slowly to the mix and beat for 2 minutes until fluffy.

Eat straightaway, and store leftovers in a glass container in the freezer.

Strawberry Aquafaba Vegan strawberry sorbet icecream

Aquafaba (water drained from cooked chickpeas) can make sorbet fluffy too!

Vegan Strawberry Sorbet Aquafaba

Dairy-free vegan sorbet.

Strawberries on Toast

This was conjured up out of desperation, but actually, it was such a hit that I feel it could become a summer regular. It’s not just me that thinks so either; it’s been one of my most popular pictures on Instagram!

Method:

Quarter equal numbers of strawberries and cherry or baby plum (grape) tomatoes. Mash some avocado onto sourdough or other good quality bread or toast, squeeze some lemon juice on the avocado and add chopped fresh herbs if you have them(coriander or parsley would both work well).  Top with strawberries and tomatoes and a dash of balsamic vinegar.

Strawberries on Toast

Strawberries on toast. Trust me, it works!

Strawberry Smoothie

I don’t think smoothies should be dictated, they are more about using what you have on hand. I find almond milk a great base for smoothies, and it’s really simple to make your own.

For the almond milk: soak 1 cup raw almonds overnight. Rinse and blend with 4 cups water in a high powered blender for 2 minutes. Strain using cheesecloth (you can freeze the pulp).

For the smoothie: Blend 1 cup almond milk, 1 cup strawberries, a handful of hemp seeds and a handful of blueberries together until smooth. Add sweetener to taste.

Strawberry Blueberry Hemp Almond Milk Smoothie

Strawberry smoothie. In a jam jar. Just because.

Strawberry Oat Bake

Ingredients:

165g strawberries
35g coconut oil
25g cacao butter (if you don’t have this, substitute for more coconut oil)
2 tbsp macadamia or other vegetable oil
75g honey or other sugar
220g oats
55g almonds
Zest of 1 lemon
1/2 teaspoon vanilla extract

Method:

Blend the strawberries with the vanilla essence until smooth and set aside. Melt the coconut oil and cacao butter in a pan, add the sugar and mix until combined. Stir in oats, ground almonds and lemon zest. Mix until coated.

In a square tin (I used a loaf tin but a square tin would work much better) spread out half the oat mix, and press down with the back of a spoon. Add the strawberry mix and spread over the oats. Top with the final layer of oats. (If you have them, add a handful of chopped nuts into the remaining oats or sprinkle on top. I didn’t do this and wish I had!)

Bake at 200°C for 15 minutes until golden on top. Leave to cool completely, then place in the fridge. Cut into squares or slices once cooled (it will be less crumbly this way).

Strawberry Oat Bake

Half the oat mix spread into a tin, then the strawberry mix spread on top.

Baked Strawberry Oat Slice

Strawberry oat bake.

Strawberry Oat Slice Baked

Strawberry oat bake.

Chia Strawberry Jam

I know, I know. I told you I wouldn’t include jam recipes. But this isn’t jam in the traditional sense. By traditional sense I mean adding 400kg refined white sugar to your strawberries, boiling for half a day and then storing in the pantry for all of eternity. This is fresh, it won’t keep more than a couple of days in the fridge, and it’s got all the goodness of fresh fruit. Think of it more as “strawberries that spread”.

Ingredients:

1 cup strawberries, chopped very small
2 tbsp water
2tbsp chia seeds
1 tbsp maple syrup or other liquid sweetener (or more to taste)
Couple of drops of vanilla essence

Method:

This is so ridiculously simple it doesn’t really warrant a “method”. Stir all the ingredients together in a glass jar, put a lid on and leave in the fridge overnight.

Strawberry Chia Jam

Strawberry “jam”, made with chia seeds and fresh strawberries.

I had so much fun with these strawberries that I’m actually relishing the chance to buy another box and experiment some more! The strawberry season isn’t long, and seasonal produce is far more delicious than its imported cousins, so I think it’s worth indulging in the glut whilst it lasts : )